This article is written by Ahmed Bouchefra
Nowadays, when you log into your favorite movie streaming app, instead of endlessly scrolling through hundreds of movies and looking for one that you might enjoy, you’re instantly greeted with movies that feel handpicked just for you. That’s the power of AI-powered recommendations!
In this tutorial, we’ll explore how to build a simple movie recommendation system (that you can later extend to a more powerful recommendation system) using Django and MongoDB Atlas—a stack that blends Python’s most popular and robust web framework with a scalable NoSQL database. We’ll work with MongoDB’s sample movies database, so you don’t have to start from scratch.
Here’s what we’ll cover:
- User authentication: Enable users to sign up and log in.
- Movie search and details: Browse movies and get more information about each movie.
- AI-driven recommendations: Let the system suggest movies that you might like based on what you are currently watching.
By the end, you’ll have a fully functional Django app that not only serves movies but also recommends what the user might enjoy next.
Why use MongoDB Atlas for movie search & recommendations?
To build a scalable, AI-driven recommendation system, we need a database that can handle large datasets, fast queries, and semantic search. MongoDB Atlas provides the perfect solution:
- Scalability: MongoDB Atlas handles massive datasets effortlessly, making it perfect for scaling applications.
- Atlas full-text search: Users can search for movies using keywords, thanks to MongoDB’s built-in full-text search engine.
- Atlas Vector Search: Here’s where the real AI magic happens! By converting movie plots into vector embeddings (which is already done in the sample movies database), we can use AI-driven similarity searches to recommend movies with similar themes and storylines.
- Seamless Django integration: With Django MongoDB Backend, we can connect Django to MongoDB Atlas smoothly, ensuring fast queries and structured data retrieval.
Project overview: MovieMatch AI
We’ll start by setting up Django and connecting it to MongoDB Atlas. Then, we’ll implement user authentication, movie search, and AI-powered recommendations!
Core features
- User authentication: Sign up and log in.
- Movie listings: Display all movies with pagination.
- Movie details page: Show a movie's full plot, release data, poster, etc.
- Search functionality: Allow users to find movies via full-text search.
Tech stack
- Back end: Django
- Database: MongoDB Atlas (NoSQL)
- Search and recommendations: MongoDB Atlas full-text search and Vector Search
- Frontend: Django templates (HTML, CSS, Tailwind)
- Authentication: Django’s built-in authentication system
Implementing the core features
Let's now start by implementing the core features of our demo application.
In this section, we'll see how to:
- Install the required project's dependencies.
- Configure MongoDB as the database.
Before starting, there are a few prerequisites:
- VS Code installed, but feel free to use any preferred IDE.
- Python 3.12+ installed.
- A MongoDB Atlas cluster. Create a free cluster with the
sample_mflixsample.
Create and then activate your virtual environment:
python3.12 -m venv venv
source venv/bin/activate
Once your virtual environment is activated, create the following requirements.txt file:
Django==5.1.6
django-mongodb-backend==5.1.0b1
pymongo==4.11.1
Then, install Django, pymongo, and django-mongodb-backend using the following command:
pip install -r requirements.txtNext, create a Django project using the django-mongodb-project template:
django-admin startproject moviematchproject --template https://github.com/mongodb-labs/django-mongodb-project/archive/refs/heads/5.0.x.zipFor more details, see the Django MongoDB Backend quickstart.
Since we are using the latest Django version (5.1.6), make sure you are using version 5.0.x of the project’s template that runs on Django 5.1.*.
Navigate to your project, open the settings.py file, and head over to the DATABASES setting. Replace the
DATABASES = {
  "default": django_mongodb_backend.parse_uri(""),
}
That's it—you are now ready to use the power of Django and MongoDB Atlas to build your application.
User authentication
In this section, we'll learn how to:
- Implement a robust authentication system with Django's built-in auth system.
- Use a custom user model and integrate it with the Django auth system, allowing us to mirror the users table in the sample movies database without reinventing the wheel.
We are going to create a usersapp application that encapsulates any functionality about user authentication. Head into the root directory of your project and run this command to create an application based on the MongoDB custom template:
python manage.py startapp usersapp --template https://github.com/mongodb-labs/django-mongodb-app/archive/refs/heads/5.0.x.zipGo to the project's level settings.py file and add the usersapp to the list of installed apps:
INSTALLED_APPS = [
    # [...]
    'usersapp'
]
After adding the app, the first thing that we need to do is add a custom user model and manager. In the models.py file of the application, start by adding the following imports:
from django.contrib.auth.models import AbstractBaseUser, PermissionsMixin
from django.contrib.auth.base_user import BaseUserManager
Next, add a user manager:
class UserManager(BaseUserManager):

    def create_user(self, email, password, **extra_fields):
        """
        Create and save a user with the given email and password.
        """
        if not email:
            raise ValueError("Email shouldn't be empty")
        if not password:
            raise ValueError("Password shouldn't be empty")
        email = self.normalize_email(email)
        user = self.model(email=email, **extra_fields)
        user.set_password(password)
        user.save(using=self._db)
        return user


    def create_superuser(self, email, password, **extra_fields):
        """
        Create and save a superuser with the given email and password.
        """
        if not email:
            raise ValueError("Email shouldn't be empty")
        if not password:
            raise ValueError("Password shouldn't be empty")


        if extra_fields.get("is_staff") is not True:
            raise ValueError("Superuser must have is_staff=True.")
        if extra_fields.get("is_superuser") is not True:
            raise ValueError("Superuser must have is_superuser=True.")
        if extra_fields.get("is_active") is not True:
            raise ValueError("Superuser must have is_active=True.")

        email = self.normalize_email(email)
        extra_fields.setdefault("is_staff", True)
        extra_fields.setdefault("is_superuser", True)
        extra_fields.setdefault("is_active", True)
        user = self.create_user(email, password, **extra_fields)
        return user
Our UserManager inherits from BaseUserManager, a built-in Django class that provides basic methods and helpers for user creation.
We use a custom manager so we can use an email to log in users instead of usernames supported by default in Django's auth system.
Next, add the user model:
class User(AbstractBaseUser, PermissionsMixin):
    name = models.CharField(max_length=100)
    email = models.CharField(unique=True, max_length=200)
    is_staff = models.BooleanField(default=False)
    is_active = models.BooleanField(default=True)
    is_superuser = models.BooleanField(default=False)

    USERNAME_FIELD = "email"
    REQUIRED_FIELDS = ["name"]
    objects = UserManager()

    def __str__(self):
        return self.name
    class Meta:
        db_table = "users"
        managed = False
This is a custom implementation designed for our authentication purposes. It inherits from two Django classes: AbstractBaseUser and PermissionsMixin. By inheriting from AbstractBaseUser, we can customize user authentication and use email as the login identifier, rather than Django’s default username. The PermissionsMixin provides built-in support for handling user permissions and groups.
We defined two main fields: name, which stores the user's full name, and email, which acts as a unique identifier for logging in users.
We use the attribute USERNAME_FIELD = "email" to tell Django to use the user's email address as the primary identifier for authentication, replacing the default username. The REQUIRED_FIELDS attribute list specifies additional fields that Django will prompt for when creating a user.
The objects = UserManager() line connects this model to our custom UserManager, which provides methods for creating and managing user accounts.
Lastly, the inner Meta class defines additional configurations: db_table = "users" specifies the database table's name.
We set managed to False to instruct Django not to create the corresponding table in the database since we already have one in the sample database.
Next, set this custom User model as the auth model that Django will use to authenticate users. In the settings.py file, add the following line:
AUTH_USER_MODEL = "usersapp.User"Also, make sure to add “login required middleware” as follows:
MIDDLEWARE = [
# [...]
"django.contrib.auth.middleware.LoginRequiredMiddleware",
]
We need this to protect all views of our application from non-logged in users.
Next, we need to create some views for authentication. Django already provides built-in views for most authentication functionalities, except for the registration.
First, create a usersapp/forms.py and add a custom form for registration:
from django.contrib.auth.forms import UserCreationForm
from .models import User


class CustomUserCreationForm(UserCreationForm):

    class Meta(UserCreationForm.Meta):
        model = User
        fields = ['name','email']
We extend Django’s built-in UserCreationForm to create a custom user signup form designed for our custom user model. By subclassing UserCreationForm, we inherit useful default behavior, including password validation and confirmation fields.
Inside the inner Meta class, we specify that our form is connected explicitly to our custom User model. Setting model = User ensures Django generates a form compatible with our custom authentication setup.
The line fields = ['name', 'email'] determines which fields are shown to users during registration. Here, we specifically request a user's name and email address during signup.
Next, in the usersapp/views.py file, add the following code:
from django.views import generic
from django.urls import reverse_lazy
from .forms import CustomUserCreationForm

from django.contrib.auth.decorators import login_not_required
from django.utils.decorators import method_decorator

@method_decorator(
    login_not_required,
    name="dispatch",
)
class RegisterView(generic.CreateView):
  template_name = 'registration/register.html'
  success_url = reverse_lazy('login')
  form_class = CustomUserCreationForm
We create a Django view designed to handle user registration. It inherits from Django's built-in CreateView, allowing us to quickly implement a form-based page to create new user accounts.
We apply the decorator login_not_required specifically to the view's dispatch method using @method_decorator. This decorator ensures that this registration page can be accessed without requiring users to be logged in, which makes sense since it's used to register new accounts.
The view specifies a custom template at registration/register.html, where the registration form (CustomUserCreationForm) will be rendered. When a user successfully completes registration, Django redirects them automatically to the login page, as defined by success_url = reverse_lazy('login').
Finally, form_class = CustomUserCreationForm explicitly links the previously defined custom user creation form to this view, ensuring that the correct form fields (name, email, and password fields) are presented to users when they sign up.
Next, in the usersapp/urls.py file (if it doesn't exist, create it), add the following code:
from django.urls import path, include
from .views import RegisterView

urlpatterns = [
    path("", include('django.contrib.auth.urls')),
    path("register/", RegisterView.as_view(), name="register"),
]
We also need to include these URLs in the project's level urls.py file:
from django.urls import path, include

urlpatterns = [
    path("users/", include('usersapp.urls')),
]
Add the following settings to the settings.py file:
LOGIN_REDIRECT_URL = "/"
LOGIN_URL = "users/login"
This is required so Django knows where to redirect users after logging in or trying to access a protected page.
We need to create the templates. First, create the usersapp/templates/usersapp/base.html file with the following contents:
</span>
lang="en">
charset="UTF-8">
name="viewport" content="width=device-width, initial-scale=1.0">
MovieMatchAi
<span class="na">src="https://unpkg.com/@tailwindcss/browser@4">
class="bg-black">
{% block body %} {% endblock %}
Enter fullscreen mode
Exit fullscreen mode
This is the base template for user authentication templates that will be extended by these templates next.It defines basic HTML structure, including the import of Tailwind CSS from a CDN. This makes Tailwind’s utility classes immediately available without additional setup, providing convenient styling for our application.Inside this body, there's a Django template block defined using {% block body %}{% endblock %}. This allows other templates extending this base template to inject their own custom content into this specific placeholder.Create the usersapp/templates/registration/register.html file and the following template for registration:
{% extends "usersapp/base.html" %}
{% block body %}
class="container text-white mx-auto flex items-center justify-center min-h-screen">
method="post" class="border-1 p-5 rounded grid grid-cols-2 grid-rows-6 gap-2">
{% csrf_token %}
class="col-span-2 text-center border-b-1">Please, sign up!
for="id_name">Name:
class="border border-white bg-white p-1 rounded text-black" type="text" name="name" maxlength="100"
required="" id="id_name">
for="id_email">Email:
class="border border-white bg-white p-1 rounded text-black" type="text" name="email" maxlength="200"
autofocus="" required="" id="id_email">
for="id_password1">Password:
class="border border-white bg-white p-1 rounded text-black" type="password" name="password1"
autocomplete="new-password" required="" aria-describedby="id_password1_helptext" id="id_password1">
for="id_password2">Password confirmation:
class="border border-white bg-white p-1 rounded text-black" type="password" name="password2"
autocomplete="new-password" required="" aria-describedby="id_password2_helptext" id="id_password2">
class="col-span-2 border-1 cursor-pointer" type="submit">Sign up
If you already have an account, class="underline" href="{% url 'login' %}">login here!
{% endblock %}
Enter fullscreen mode
Exit fullscreen mode
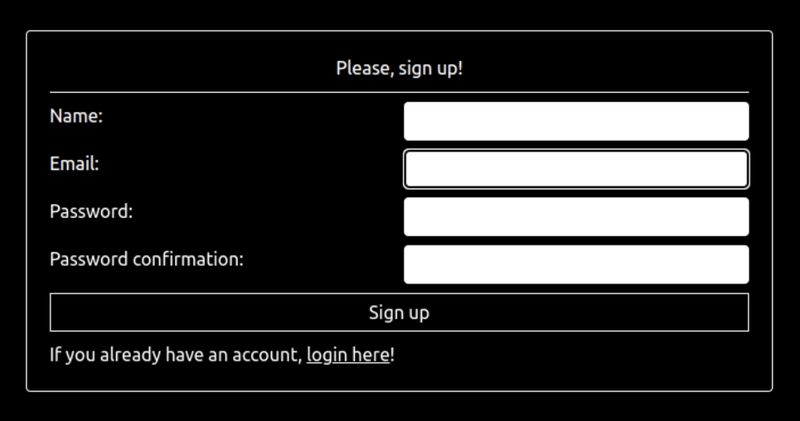
This Django template extends the base layout defined in usersapp/base.html to provide a user registration form. The content is wrapped inside the template block {% block body %}, replacing the placeholder defined in the base template.The registration form is centrally positioned on the page using Tailwind CSS classes like container, mx-auto, and flexbox utilities (flex, items-center, justify-center). It ensures the form is vertically and horizontally centered within a dark-themed background.We use the POST method and include Django's built-in security mechanism with {% csrf_token %} to protect against cross-site request forgery attacks. Form fields include inputs for the user's name, email, password, and password confirmation, each labeled and styled using Tailwind CSS classes like border, bg-white, rounded, and text-black.The template includes a link to the login page for existing users.Here is a screenshot of the register interface:In the same way, create the usersapp/templates/registration/login.html file and add the login template:
{% extends "usersapp/base.html" %}
{% block body %}
class="container text-white mx-auto flex items-center justify-center min-h-screen">
method="post" class="border-1 p-5 rounded text-white grid grid-cols-2 grid-rows-4 gap-2">
{% csrf_token %}
class="col-span-2 text-center border-b-1">
Please, log in!
for="id_username">Email:
class="border border-white p-1 bg-white rounded text-black" type="text" name="username" autofocus=""
autocapitalize="none" autocomplete="username" maxlength="200" required="" id="id_username">
for="id_password">Password:
class="border border-white bg-white p-1 rounded text-black" type="password" name="password"
autocomplete="current-password" required="" id="id_password">
class="col-span-2 border-1 cursor-pointer" type="submit">Log In
If you don't have an account, class="underline" href="{% url 'register' %}">register first!
{% endblock %}
Enter fullscreen mode
Exit fullscreen mode
Here is a screenshot of the log-in interface:Now, we have a functioning auth system. If we look at the MongoDB Atlas dashboard, we'll see that our user is created with an encrypted password after we register.
Displaying movie listings
Next, we are going to create a moviematchapp application. Head into the root directory of your project and run this command to create an application based on the MongoDB custom template:
python manage.py startapp moviematchapp --template https://github.com/mongodb-labs/django-mongodb-app/archive/refs/heads/5.0.x.zip
Enter fullscreen mode
Exit fullscreen mode
Add the app to the settings.py file:
INSTALLED_APPS = [
# [...]
'moviematchapp'
]
Enter fullscreen mode
Exit fullscreen mode
Create the necessary model for movies in the moviematchapp/models.py file:
from django.db import models
from django_mongodb_backend.fields import ArrayField
from django_mongodb_backend.managers import MongoManager
class Movie(models.Model):
title = models.CharField(max_length=200)
plot = models.TextField(blank=True)
fullplot = models.TextField(blank=True)
plot_embedding = ArrayField(models.FloatField())
poster = models.URLField()
runtime = models.IntegerField(default=0)
released = models.DateTimeField("release date", null=True, blank=True)
cast = ArrayField(models.CharField(max_length=200))
genres = ArrayField(models.CharField(max_length=100), null=True, blank=True)
objects = MongoManager()
class Meta:
db_table = "embedded_movies"
managed = False
def __str__(self):
return self.title
Enter fullscreen mode
Exit fullscreen mode
This is a typical Django model that maps to the embedded movies table, except that we use a custom manager imported from the Django MongoDB Backend.We need to create two views for displaying the list of movies and movie details. In the moviematchapp/views.py file, add the following code:
from django.views.generic import ListView
from django.views.generic.detail import DetailView
from .models import Movie
class MoviesHomeView(ListView):
model = Movie
context_object_name = 'movies'
paginate_by = 4
class MoviesDetailView(DetailView):
model = Movie
context_object_name = 'movie'
Enter fullscreen mode
Exit fullscreen mode
The MoviesHomeView class uses Django’s built-in ListView to display a paginated list of movie objects. We specify model = Movie to tell Django which database model to use when fetching data. Setting the context_object_name as 'movies' allows us to access this list in our template using the variable {{ movies }}. Additionally, by defining paginate_by = 4, we enable pagination—this will display four movies per page, allowing users to navigate through multiple pages of movies.The MoviesDetailView class inherits from Django’s built-in DetailView, making it easy to display detailed information about a single movie instance. By setting model = Movie, Django knows which model instance to fetch based on its primary key. We set context_object_name = 'movie', so the single movie instance is accessible in the template as {{ movie }}. Create the moviematchapp/templates/moviematchapp/base.html file and add the base template:
</span>
lang="en">
charset="UTF-8">
name="viewport" content="width=device-width, initial-scale=1.0">
MovieMatchAi
<span class="na">src="https://unpkg.com/@tailwindcss/browser@4">
class="bg-black">
class="container">
href="/" class="px-3 py-2 text-sm font-medium text-white bg-gray-900 rounded-md">Home
href="/movies"
class="px-3 py-2 text-sm font-medium text-gray-300 rounded-md hover:bg-gray-700 hover:text-white">Movies
{% block body %} {% endblock %}
Enter fullscreen mode
Exit fullscreen mode
Create the moviematchapp/templates/moviematchapp/movie_list.html file for the movies view:
{% extends "moviematchapp/base.html" %}
{% block body %}
class="container mx-auto text-white">
class="mx-20 mt-20 text-5xl">Our Movies
class="relative">
{% include "moviematchapp/movies.partial.html" %}
{% include "moviematchapp/pagination.partial.html" %}
{% endblock %}
Enter fullscreen mode
Exit fullscreen mode
Create the moviematchapp/templates/moviematchapp/movies.partial.html file and the following template:
class="mt-30 mx-20 grid grid-cols-[repeat(auto-fit,230px)] grid-flow-col gap-6 overflow-hidden overflow-x-hidden relative z-10 scroll-smooth transition-all scrolbar-none">
{% for movie in movies %}
href="{% url 'movie' movie.id %}"
class="w-full min-w-[230px] h-90 overflow-hidden block rounded relative hover:scale-105 transition-all">
{% if movie.poster %}
class="w-full" src="{{movie.poster}}" />
{% else %}
No poster available!
{% endif %}
class="absolute bottom-0 h-30 bg-black/60 p-2 w-full text-white">
class="text-ellipsis text-lg font-semibold">
{{ movie.title }}
class="flex justify-between bottom-0">
{{ movie.released | date }}
{% empty %}
No movies found.
{% endfor %}
Enter fullscreen mode
Exit fullscreen mode
This template partial loops through movies and displays each movie using a card styled with Tailwind CSS. It's responsive, interactive, and gracefully handles missing data.Next, create the moviematchapp/templates/moviematchapp/pagination.partial.html file and the following template:
class="mt-10 mx-20">
{% if page_obj.has_previous %}
href="?page={{ page_obj.previous_page_number }}">« Previous
{% endif %}
{% if page_obj.has_next %}
href="?page={{ page_obj.next_page_number }}">Next »
{% endif %}
Enter fullscreen mode
Exit fullscreen mode
This template partial is used to display pagination links.Create the moviematchapp/templates/moviematchapp/movie_detail.html file and add the following template:
{% extends "moviematchapp/base.html" %}
{% block body %}
class="relative h-full">
{% if movie.poster %}
class="text-white">
class="w-full h-60">
class="w-full h-full object-cover" class="object-cover w-full h-full" src="{{movie.poster}}"
alt="{{ movie.title }}" />
class="container mx-auto flex flex-row">
class="-mt-20 mx-5">
class="w-[900px] h-70 object-cover" src="{{movie.poster}}" alt="{{ movie.title }}" />
class="border border-solid border-white my-5 bg-slate-50 text-black w-full p-3 rounded font-bold">
Play Now
class="p-3 flex flex-col gap-7">
class="text-ellipsis text-2xl border-b font-semibold">
{{ movie.title }}
class="border-b">{{ movie.fullplot }}
class="border-b">
Release Date:
{{ movie.released | date }}
Cast:
{% for actor in movie.cast %}
{{actor}} |
{% endfor %}
{% endif %}
{% endblock %}
Enter fullscreen mode
Exit fullscreen mode
This Django template extends the base layout called moviematchapp/base.html, inheriting the overall structure and styling defined there. Within the body block, it displays detailed information about a single movie.The page leverages Tailwind CSS utility classes, resulting in a visually appealing and responsive layout for movie details.Next, add the URLs for the previous views in the moviematchapp/urls.py file after you create it:
from django.urls import path
from .views import MoviesHomeView
from .views import MoviesDetailView
urlpatterns = [
path("movies/", MoviesHomeView.as_view(), name="movies"),
path("movies/", MoviesDetailView.as_view(), name="movie"),
]
Enter fullscreen mode
Exit fullscreen mode
Add these URLs in the project’s level urls.py file:
urlpatterns = [
path("", include('moviematchapp.urls')),
]
Enter fullscreen mode
Exit fullscreen mode
You should be able to see a paginated list of movies and the details of each movie by visiting the /movies and /movies/ URLs.Here is a screenshot of a list of movies:Here is a screenshot of a movie details page:
Implementing full-text search
Let’s now proceed to implement the full-text search. First, we need to create an Atlas Search index (name it default) that covers the fields you want to query in the embedded_movies collection—in our case, the fullplot, cast, and title fields with the following configuration:
{
"mappings": {
"dynamic": false,
"fields": {
"cast": {
"analyzer": "lucene.standard",
"type": "string"
},
"fullplot": {
"analyzer": "lucene.english",
"type": "string"
},
"title": {
"analyzer": "lucene.standard",
"type": "string"
}
}
}
}
Enter fullscreen mode
Exit fullscreen mode
This tells Atlas Search how to analyze each field. We're using:
lucene.english for fullplot (enables stemming and fuzziness).
lucene.standard for the other fields (good for exact matches).
Next, go back to the moviematchapp/views.py file, and add the following view:
class SearchResultsView(ListView):
template_name = 'moviematchapp/search_results.html'
context_object_name = 'movies'
model = Movie
def get_queryset(self):
query = self.request.GET.get('q', '').strip()
title = self.request.GET.get('title', '').strip()
actor = self.request.GET.get('actor', '').strip()
print(f'Query: {query}, Title: {title}, Actor: {actor}')
# If no search parameters are provided, return empty queryset
if not any([query, title, actor]):
return self.model.objects.none()
# Construct pipeline with search conditions
pipeline = [
{
"$search": {
"index": "default",
"compound": {
"should": []
}
}
},
{"$limit": 20},
{
"$project": {
"_id": 1
}
},
{"$sort": {"score": -1}}
]
# Dynamically add search conditions
search_conditions = []
if title and len(title) > 0:
search_conditions.append({
"phrase": {
"query": title,
"path": "title",
"score": {"boost": {"value": 3}}
}
})
if actor and len(actor) > 0:
search_conditions.append({
"phrase": {
"query": actor,
"path": "cast",
"score": {"boost": {"value": 1}}
}
})
if query and len(query) > 0:
search_conditions.append({
"text": {
"query": query,
"path": ["fullplot"],
"fuzzy": {"maxEdits": 1},
"score": {"boost": {"value": 4}}
}
})
# Only add conditions if they exist
if search_conditions:
pipeline[0]["$search"]["compound"]["should"] = search_conditions
else:
return self.model.objects.none()
# Execute aggregation
try:
object_list = list(Movie.objects.raw_aggregate(pipeline))
print("Search Results:", object_list)
return object_list
except Exception as e:
print(f"Search Error: {e}")
return self.model.objects.none()
Enter fullscreen mode
Exit fullscreen mode
This view performs a full-text search using MongoDB Atlas Search on the Movie model.It dynamically builds a MongoDB $search pipeline based on the user’s input (query, title, actor) and returns a list of matched movies.We override the get_queryset method to customize the query set based on the search results. Within this method, we first extract search parameters (q, title, and actor) from the URL query parameters. Each parameter is stripped of whitespace to clean user input.If no search parameters are provided, we simply return an empty queryset using the self.model.objects.none() method. However, when at least one search parameter exists, we build a MongoDB aggregation pipeline dynamically tailored to the user's input. The pipeline initially specifies a $search stage targeting our Atlas Search index named fullplot_index, combined with a $limit of 20 results. Finally, results are sorted in descending order based on relevance using the score field.If the user provides a title, we add a phrase search condition boosting matches found in the movie title. Similarly, if an actor name is provided, we include another phrase condition targeting the cast field. Finally, the general query (q) adds a text search condition, which uses fuzzy matching (allowing minor typos) against the full plot description, also boosted to give it higher relevance.We ensure these dynamically created search conditions are included in the MongoDB $search query only when they're actually provided. If the aggregation executes successfully, we convert the returned cursor of movie results into a Python list, and then return them to the template context. If an error occurs, the exception is caught and handled by returning an empty queryset.In the aggregation pipeline:
We use Atlas Search with a compound should clause (i.e., any of the conditions can match).
We limit results to 20.
We sort the results by their relevance score.
We use raw_aggregate() to execute the pipeline directly on the collection and return the result as a list.Next, create the moviematchapp/templates/moviematchapp/search_results.html file and the template to display search results:
{% extends "moviematchapp/base.html" %}
{% block body %}
class="container mx-auto text-white">
class="mx-20 mt-20 text-5xl"> Movies corresponding to your search:
class="relative">
{% include "moviematchapp/movies.partial.html" %}
{% include "moviematchapp/pagination.partial.html" %}
{% endblock %}
Enter fullscreen mode
Exit fullscreen mode
Here is a screenshot of the search results:Create the moviematchapp/templates/moviematchapp/home.html file which displays the form for searching, and add the following template:
{% extends "moviematchapp/base.html" %}
{% block body %}
class="relative min-h-screen bg-black overflow-hidden">
class="absolute inset-0 bg-cover z-0"
style="background-image: url('https://m.media-amazon.com/images/M/MV5BMjE5MjkwODI3Nl5BMl5BanBnXkFtZTcwNjcwMDk4NA@@._V1_SY1000_SX677_AL_.jpg');">
class="absolute inset-0 bg-black opacity-60">
class="relative z-10 min-h-screen flex items-center justify-center px-4 py-8">
id="searchForm" method="GET" action="{% url 'search' %}"
class="w-full max-w-sm bg-black/70 backdrop-blur-sm rounded-xl shadow-2xl px-6 py-6">
class="space-y-3">
class="w-full px-3 py-2 bg-gray-900/70 text-white placeholder-gray-400 rounded-md focus:outline-none focus:ring-1 focus:ring-gray-600 transition duration-300"
type="text" name="title" placeholder="Movie Title">
class="w-full px-3 py-2 bg-gray-900/70 text-white placeholder-gray-400 rounded-md focus:outline-none focus:ring-1 focus:ring-gray-600 transition duration-300"
type="text" name="actor" placeholder="Actor Name">
class="w-full px-3 py-2 bg-gray-900/70 text-white placeholder-gray-400 rounded-md focus:outline-none focus:ring-1 focus:ring-gray-600 transition duration-300"
type="text" name="q" placeholder="Any Query">
class="mt-4 text-center relative">
id="searchButton"
class="bg-gray-800/80 text-white px-5 py-2 rounded-full hover:bg-gray-700 focus:outline-none focus:ring-1 focus:ring-gray-600 transition duration-300 relative"
type="submit">
id="buttonText">Search
id="loadingSpinner" class="hidden absolute inset-0 flex items-center justify-center">
class="animate-spin h-5 w-5 text-white" xmlns="http://www.w3.org/2000/svg" fill="none"
viewBox="0 0 24 24">
class="opacity-25" cx="12" cy="12" r="10" stroke="currentColor" stroke-width="4">
class="opacity-75" fill="currentColor"
d="M4 12a8 8 0 018-8V0C5.373 0 0 5.373 0 12h4zm2 5.291A7.962 7.962 0 014 12H0c0 3.042 1.135 5.824 3 7.938l3-2.647z">
class="mt-4 text-center text-gray-300 text-xs">
class="mb-2">
Search by movie title, actor or any query
class="italic text-gray-400">
Examples:
The Black Pirate
Pirates of the Caribbean
Johnny Depp
Leonardo DiCaprio
document.addEventListener('DOMContentLoaded', () => {
const loadingSpinner = document.getElementById('loadingSpinner');
const searchButton = document.getElementById('searchButton');
const buttonText = document.getElementById('buttonText');
buttonText.classList.remove('invisible');
loadingSpinner.classList.add('hidden');
window.addEventListener('pageshow', function (event) {
// Check if page is loaded from cache (back button)
if (event.persisted) {
buttonText.classList.remove('invisible');
loadingSpinner.classList.add('hidden');
}
});
document.getElementById('searchForm').addEventListener('submit', function () {
buttonText.classList.add('invisible');
loadingSpinner.classList.remove('hidden');
});
});
{% endblock %}
Enter fullscreen mode
Exit fullscreen mode
This view simply creates a form for searching movies. The JavaScript code removes the loading spinner if the user presses the back button to return to the home page from the results page.Here is a screenshot of the search form:Go back to the moviematchapp/urls.py file, and add two URLs for displaying the home page and search results:
from .views import SearchResultsView
from django.views.generic.base import TemplateView
urlpatterns = [
path("search", SearchResultsView.as_view(), name="search"),
path("", TemplateView.as_view(template_name="moviematchapp/home.html"), name="home")
]
Enter fullscreen mode
Exit fullscreen mode
Now, you should be able to search for movies from the home page.
AI-powered recommendations with vector search
After adding full-text search, let’s now add recommendations using vector search. We’ll use MongoDB Atlas Vector Search to suggest similar movies based on when the user visits the movie details page.First, create a vector search index named "vector_index" in the sample_mflix.embedded_movies collection with the following configuration:
{
"fields": [
{
"type": "vector",
"path": "plot_embedding",
"numDimensions": 1536,
"similarity": "dotProduct"
}
]
}
Enter fullscreen mode
Exit fullscreen mode
Next, go back to the moviematchapp/models.py file, and add the following method to the Movie model:
class Movie(models.Model):
# Other fields
def get_similar_movies(self):
"""Finds the most similar movies using vector search on plot embeddings."""
if not self.plot_embedding:
return [] # Return empty list if there's no embedding to prevent query errors
pipeline = [
{
"$vectorSearch": {
"index": "vector_index",
"path": "plot_embedding",
"queryVector": self.plot_embedding,
"numCandidates": 100,
"limit": 5 # Return top 5 most similar movies
}
},
{
"$project": {
"_id": 1,
"title": 1,
"poster": 1,
"score": { "$meta": "vectorSearchScore" } # Include similarity score
}
},
{ "$sort": { "score": -1 } } # Sort results by similarity score
]
try:
return list(Movie.objects.raw_aggregate(pipeline)) # Ensure results are returned as a list
except:
return []
Enter fullscreen mode
Exit fullscreen mode
We first check if the current movie instance has a plot_embedding field. If no embedding exists, we simply return an empty list to prevent any potential errors.If a plot embedding is available, we build an aggregation pipeline designed for MongoDB's vector search. In the first stage ($vectorSearch), we tell MongoDB to search the plot_embedding field using the current movie’s embedding vector. We specify our index vector_index, ask MongoDB to consider up to 100 candidate matches, and finally, limit the results to the top five most similar movies.In the second pipeline stage ($project), we choose exactly which fields we want to retrieve from the database. We select the movie’s _id, title, and poster. Additionally, we include a special field called score, which MongoDB generates automatically to indicate how closely each retrieved movie matches our original query embedding.Then, we add a sorting stage ($sort) to arrange these movies by similarity score in descending order, ensuring the most relevant recommendations appear first.Finally, we execute this pipeline using the raw_aggregate method, converting the resulting cursor into a Python list. If any exceptions or errors occur during the query, we safely handle them by returning an empty list.Go back to the moviematchapp/views.py file and call the previous method as follows:
class MoviesDetailView(DetailView):
model = Movie
context_object_name = 'movie'
def get_context_data(self, **kwargs):
context=super().get_context_data(**kwargs)
print("Getting similar movies")
context["movies"]= self.get_object().get_similar_movies()
return context
Enter fullscreen mode
Exit fullscreen mode
We override the method get_context_data() to add extra information into the context before it's passed to the template. We first call super().get_context_data(**kwargs) to ensure we get the original context data provided by Django. Then, we call the get_similar_movies() method on the current movie object (retrieved by self.get_object()), obtaining a list of movies that share similar plots. We add this list of similar movies into the template context under the key movies. This allows us to easily loop over and display these similar movies in the template.Finally, we return the updated context dictionary, ensuring that both the primary movie details and its related recommendations (similar movies) are available to our template.Now, we simply need to iterate over the movies array and display it in the template. Go back to the moviematchapp/templates/moviematchapp/movie_detail.html file and add the following code:
{% if movies %}
class="relative">
class="mt-5 mx-20 text-white">
class="text-5xl">You may also like to watch:
{% include "moviematchapp/movies.partial.html" %}
{% endif %}
Enter fullscreen mode
Exit fullscreen mode
Here is a screenshot of a similar movies list:
Conclusion
Gone are the days of aimlessly scrolling through endless movie options. With AI-powered recommendations, your favorite streaming platform now feels like it knows you personally, offering movies that seem handpicked just for you. That’s the magic of AI!If you're curious to dive into this technology, building a basic movie recommendation system is a great start. Using Django and MongoDB Atlas, you can combine the power of Python's leading web framework with a scalable NoSQL database. This tutorial guided you through building your own app, leveraging MongoDB’s Atlas Search and Vector Search and the sample movies database to skip the hassle of creating one from scratch. It's a perfect way to explore AI's potential while laying the foundation for an even more robust recommendation engine.You can view the full code by visiting the project’s repo in GitHub.