I made a mistake! I was tasked to do a discovery on how we can sync some data from a monolith to a new micro-service and I came up with 3 main solutions and a fallback:
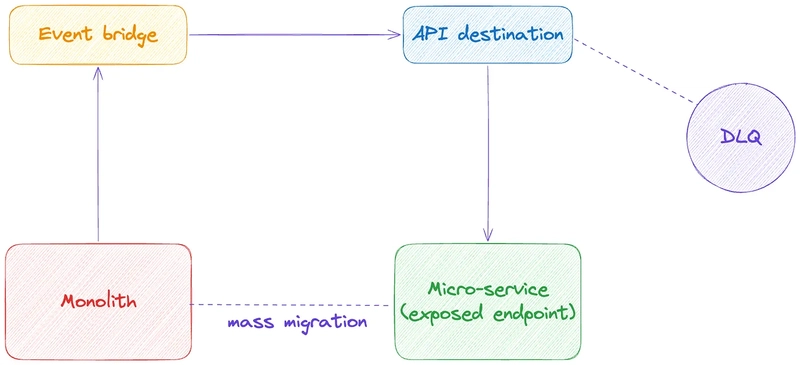
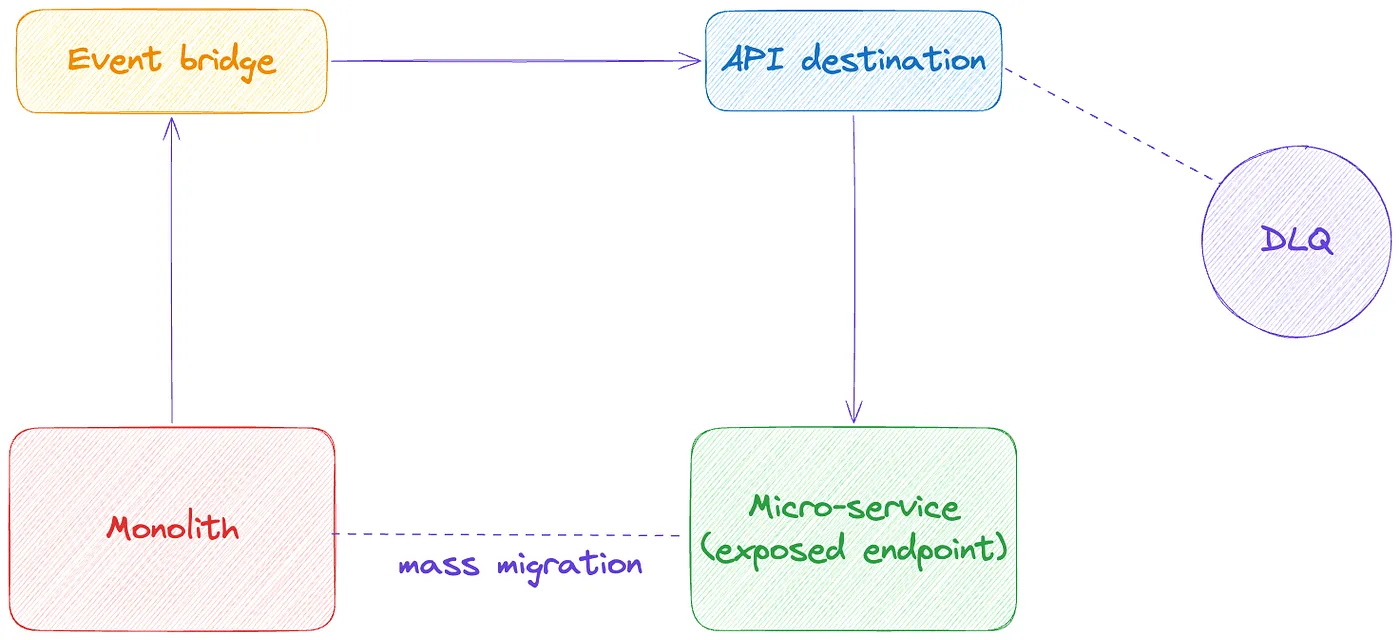
- Monolith → Event Bridge → API Destination → Exposed endpoint in the microservice
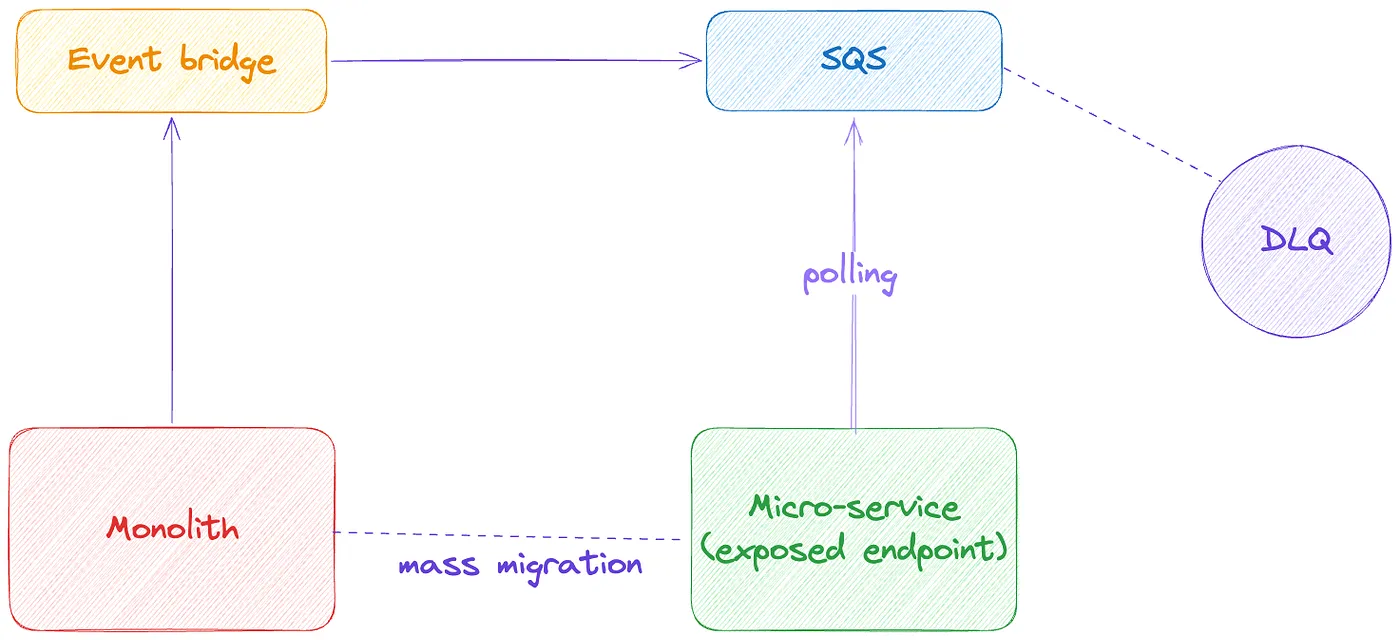
- Monolith → Event Bridge → SQS ← Polling from microservice
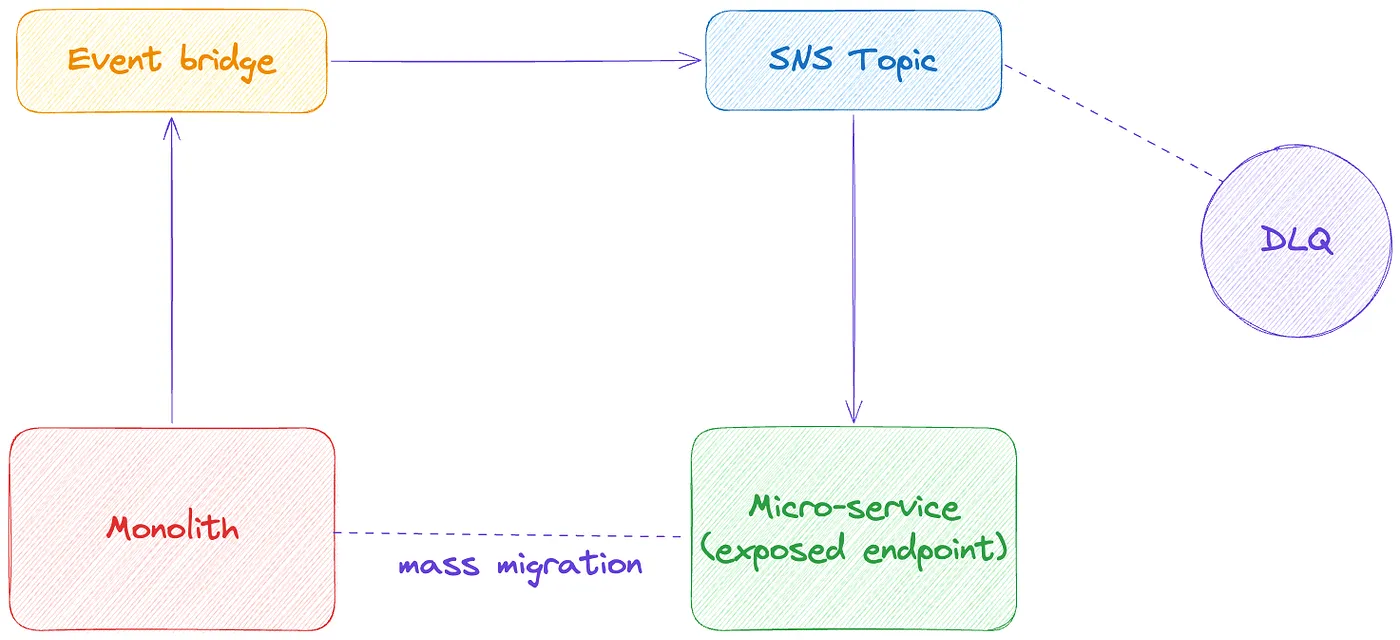
- Monolith → Event Bridge → SNS Topic → Exposed endpoint in the microservice
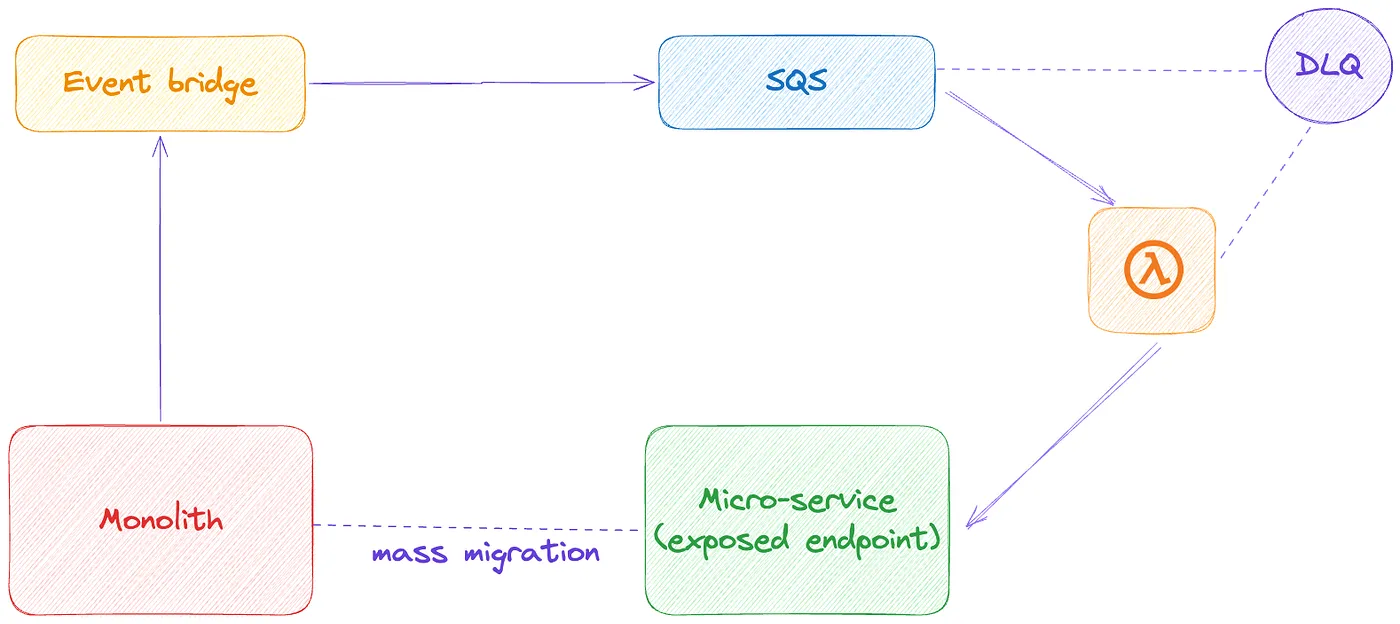
- (Fallback) Microservice → Event Bridge → SQS → Lambda → Exposed Endpoint in the service or directly update the database
Justification and Rationale
Now I have 2 main reasons on how and why I came up with these solutions:
- The monolith was already configured to send events to an event bridge
- One of the requirements was to keep the monolith and microservice loosely coupled
Now if you look at the options, the choice is obvious, API Destination!! But let’s still dig a bit deeper as to why?
- With API Destination, all I need to do is deploy some IaaS, expose an endpoint in the service and done!
- With SQS, even easier, but polling means the service is always looking for an event. The data to be synced was not something that was changed frequently, but when it did, it was important to reflect the change and the service behaviour quickly. Furthermore even though the setup was easy, it had the complexity of batch processing, deleting messages after they were processed (yes, you need to do that manually with SQS), and the risk of the same message being delivered more than once, so service needs to be idempotent. This was all just too much for a little sync, 😕 .
- With SNS topics, confirming message subscription was tricky! Furthermore, event structure was not JSON but plain text and that also meant that we get tightly coupled with AWS message structure, if that changed, we will have to adjust on our end too.
I know what you are thinking, why did I keep SQS + Lambda as a fallback? To be honest, I regret it too, I came to a point where we half-implemented this with tears in my eyes. The fact that I need to maintain another lambda, just to pass on some event payload to a service that already has an exposed endpoint was a major deterrent. The infrastructure, the code — seemed just to much effort for a little sync task. Besides, how many Lambda functions do you have sitting around, forgotten and unmaintained? We often spin up Lambdas for various tasks because they’re so easy to create — but that also means many of them linger, unused and unmanaged.
And don’t forget, because I didn’t, we also needed a dead letter queue (DLQ) in this — just in case the service is unavailable to process the data. With lambda, the re-drive solution would have become even more painful!
And hence, with all these considerations, API destination looked the most viable option!
The Pratfall
With discovery done, solution finalised, initiative created and stories refined, we went into implementation phase in the next quarter and had a, guess what??
A pratfall!!
I made a mistake, I forgot my service was internal and API destinations back then didn’t support private endpoints. This was a disaster, as it meant we couldn’t use API Destinations and mid-quarter we had to pivot, putting the initiative at risk. The advice was to use SQS + Lambda, something I really didn’t want to do, but finally had to.
And then suddenly, with a flash of lightning and a rumble of thunder, the team at AWS:ReInvent 2024 unveiled an exciting new feature for EventBridge — private API integrations! This announcement brought the whole initiative back on track, and we lived happily ever after…😁 Let’s learn more about how this feature saved the day!
How did API destinations for private endpoints save the day?
If you look at this now, you’d feel overwhelmed, but trust me even though it looks a lot, you literally just create a couple of infra resources once and you’ll be sorted for the lifetime!
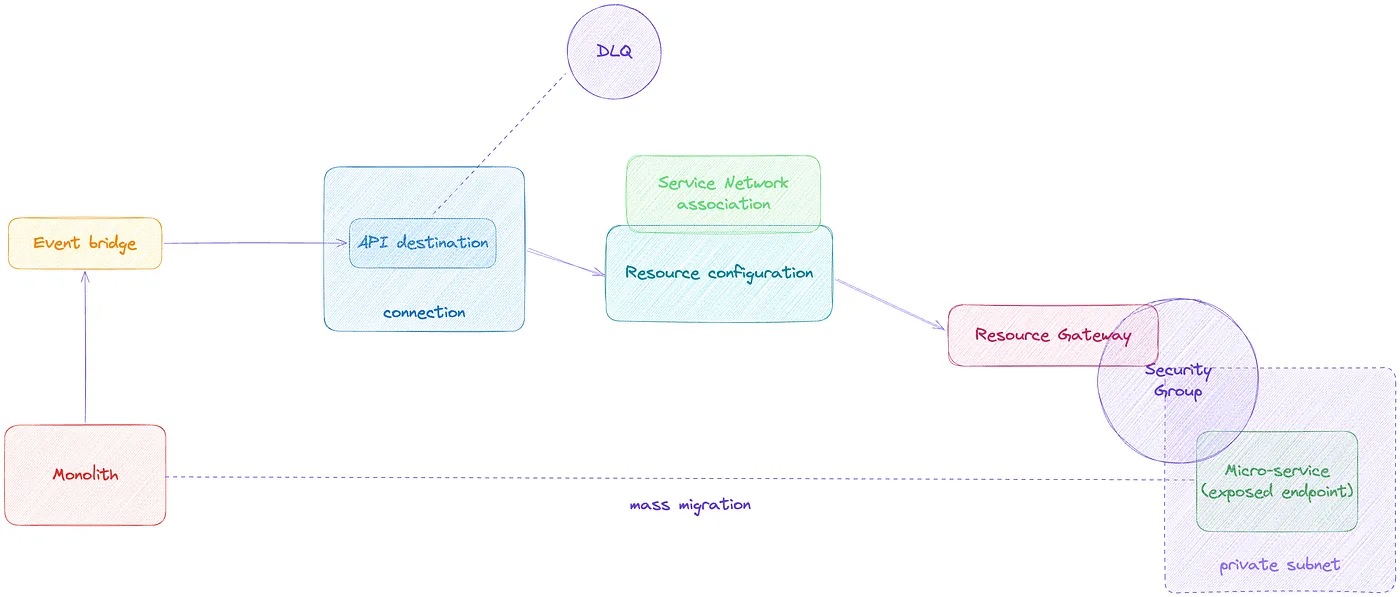
Let’s understand each of these resources in detail.
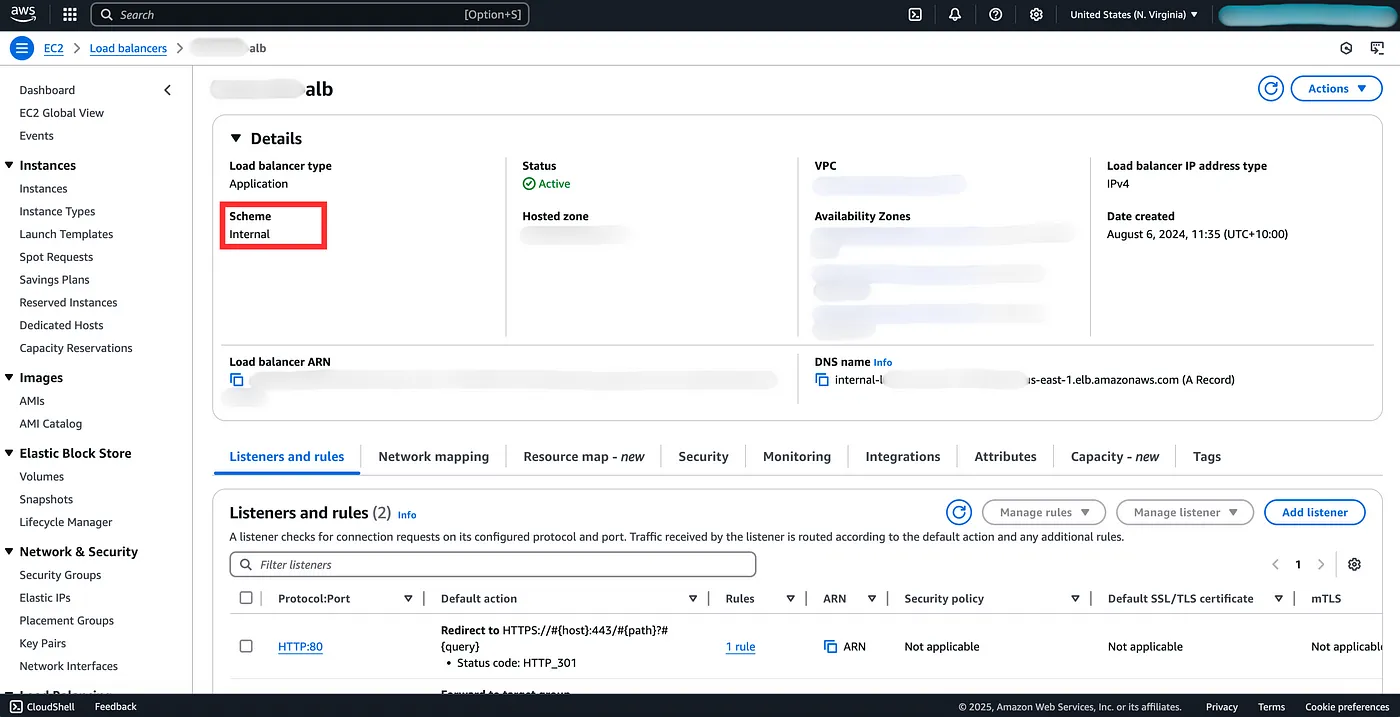
Internal service and security group: We know that our internal service could be in a private subnet and not accessible to the public. But it should always have a security group attached to its load balancer. Now we need to make sure that the security group ingress allows traffic from within the VPC or the VPC in which the API destination will exist. Once we open that route, we need to create a resource gateway.
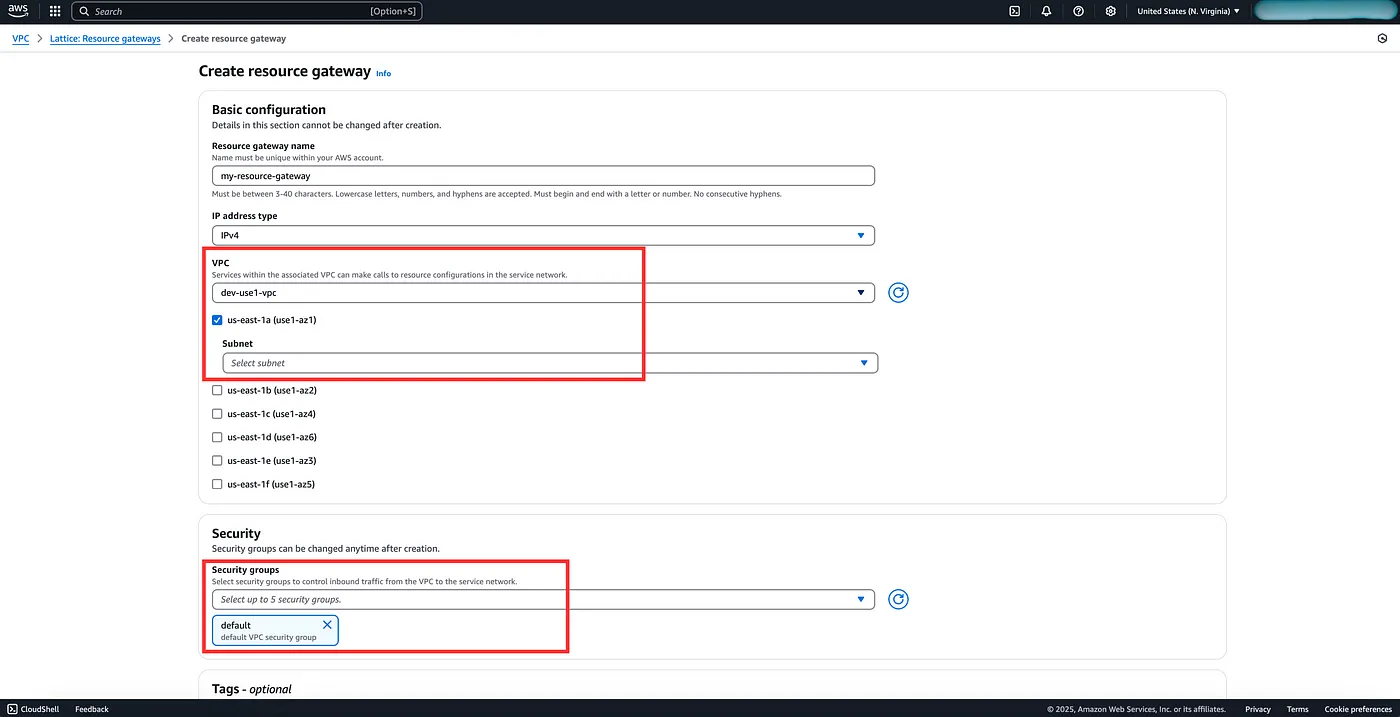
Resource Gateway: The resource gateway provides a point of ingress into a VPC (and subnets) so that clients can access resources in that VPC. The resources that will become accessible are actually defined in a Resource Configuration that is associated with the gateway. One Resource Gateway can make multiple resources available.
Resource Configuration: This is where you provide the set of resources which will be accessible through a particular resource gateway. Now your resource could either be referenced by an IP Address, or DNS Name or an AWS ARN.
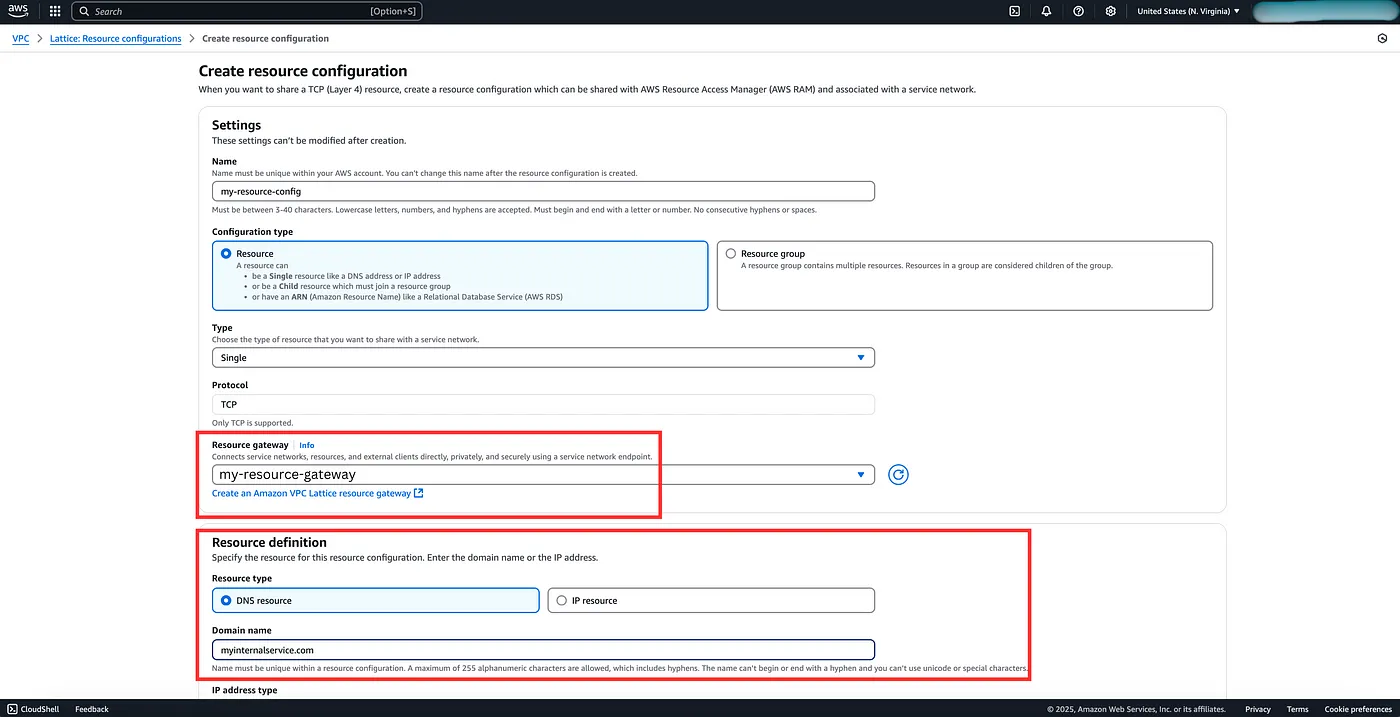
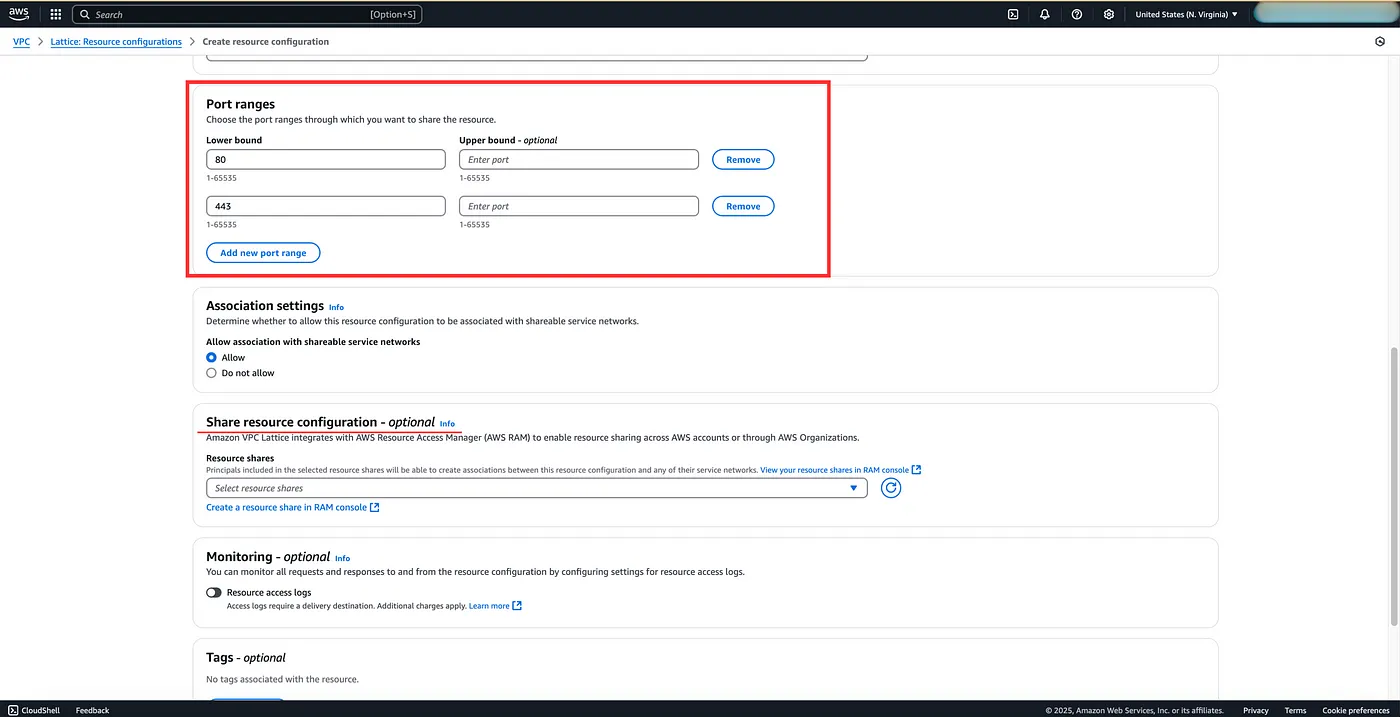
In our case, let’s say the internal service has a domain name, then we can provide that domain name in the configuration. We can also provide port ranges, port 80 for HTTP and port 443 for HTTPS. There is also an optional Share resource configuration setting that you can create to share resources across AWS accounts or through AWS organisations. You can read more about it here.
API Destination and connection: Like any other AWS services, there’s a connection wrapper around the actual resource which is API destination. And if you look at the console, you’ll find Connections have updated! Yes, because that is where we will now configure connection to our private API.
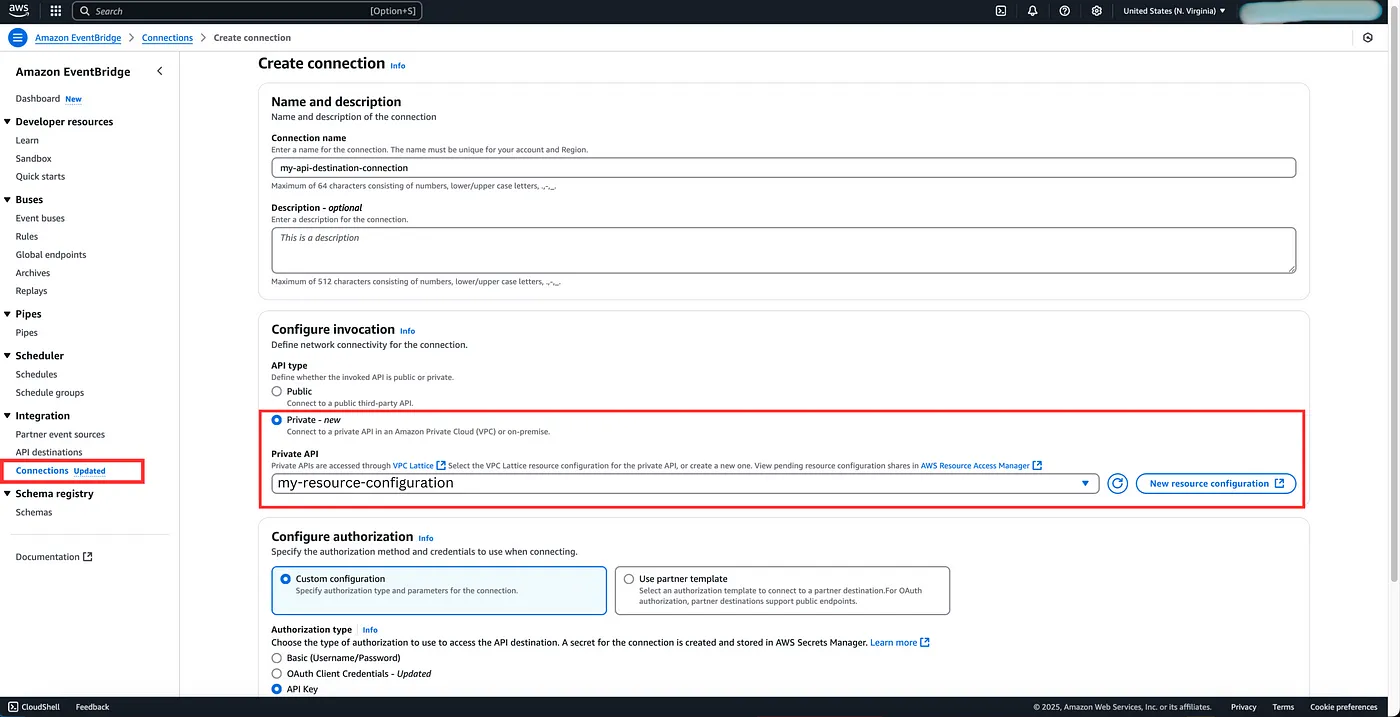
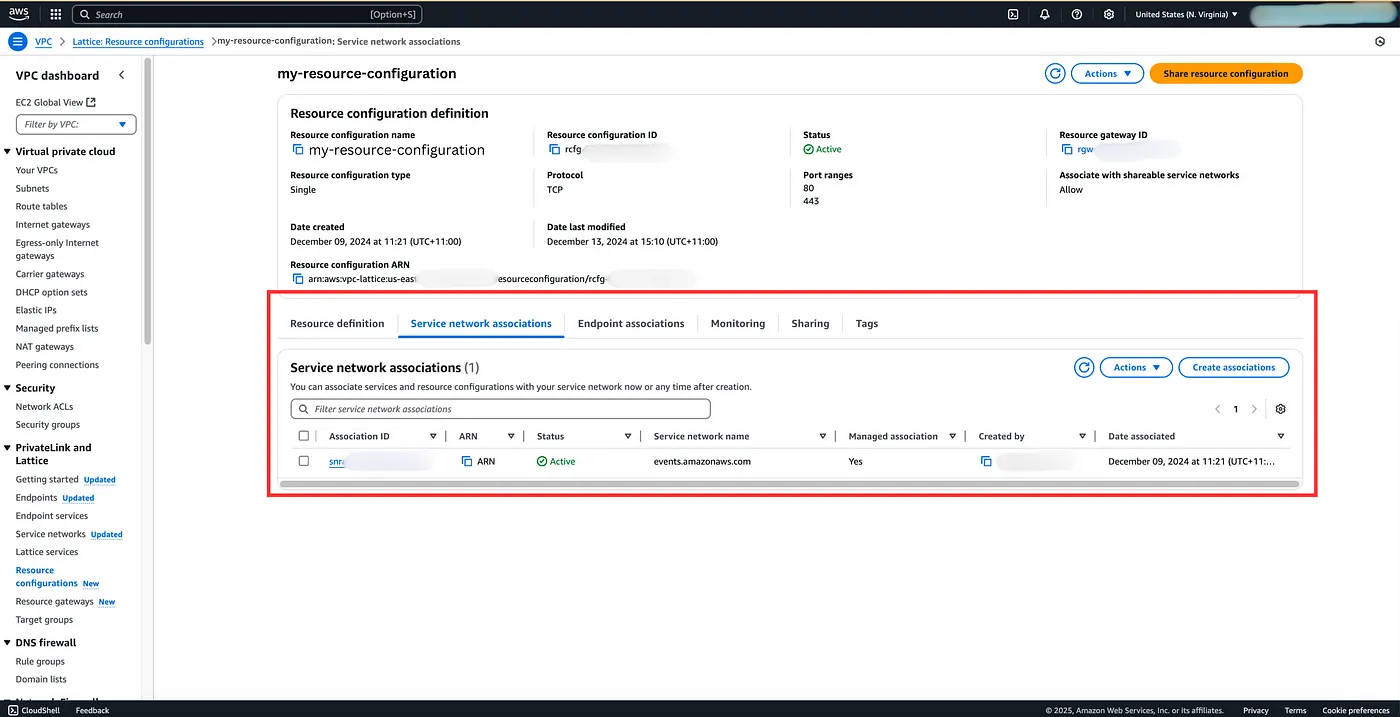
We configure the invocation type as Private and attach the above resource configuration. Next we specify the authorisation type and that’s it! ✅. Once created, this will also establish a Service Network Association.
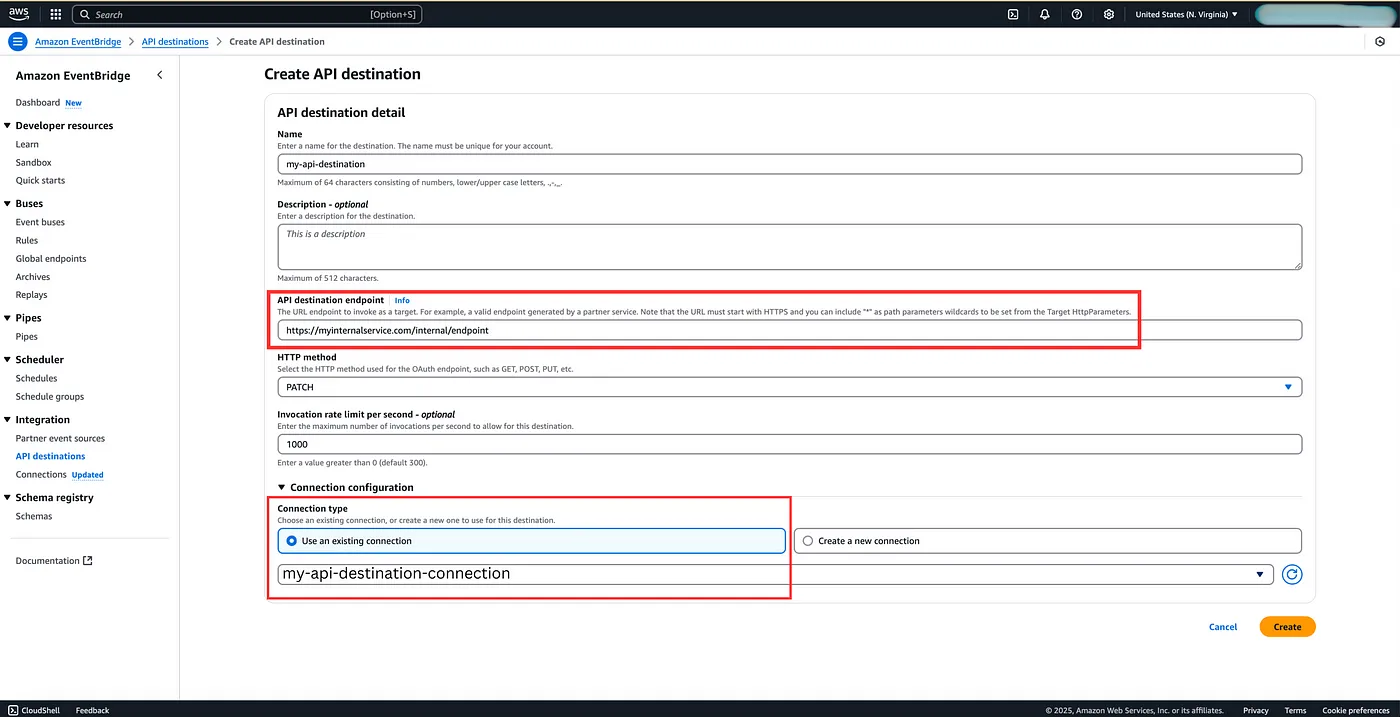
Next, we create the API destination, specify the destination endpoint and method, configure any rate limiting and use the above existing connection.
Service Network Association: Now, a service network is a logical grouping of services that can communicate with each other securely and efficiently without requiring complex networking setups. However, when you configure your API Destination connection for a Private API and specify the resource configuration, it automatically creates a service network association for the event bridge service in your resource configuration. This Service Network Association is created and managed by AWS, so there’s no extra effort required on your part!
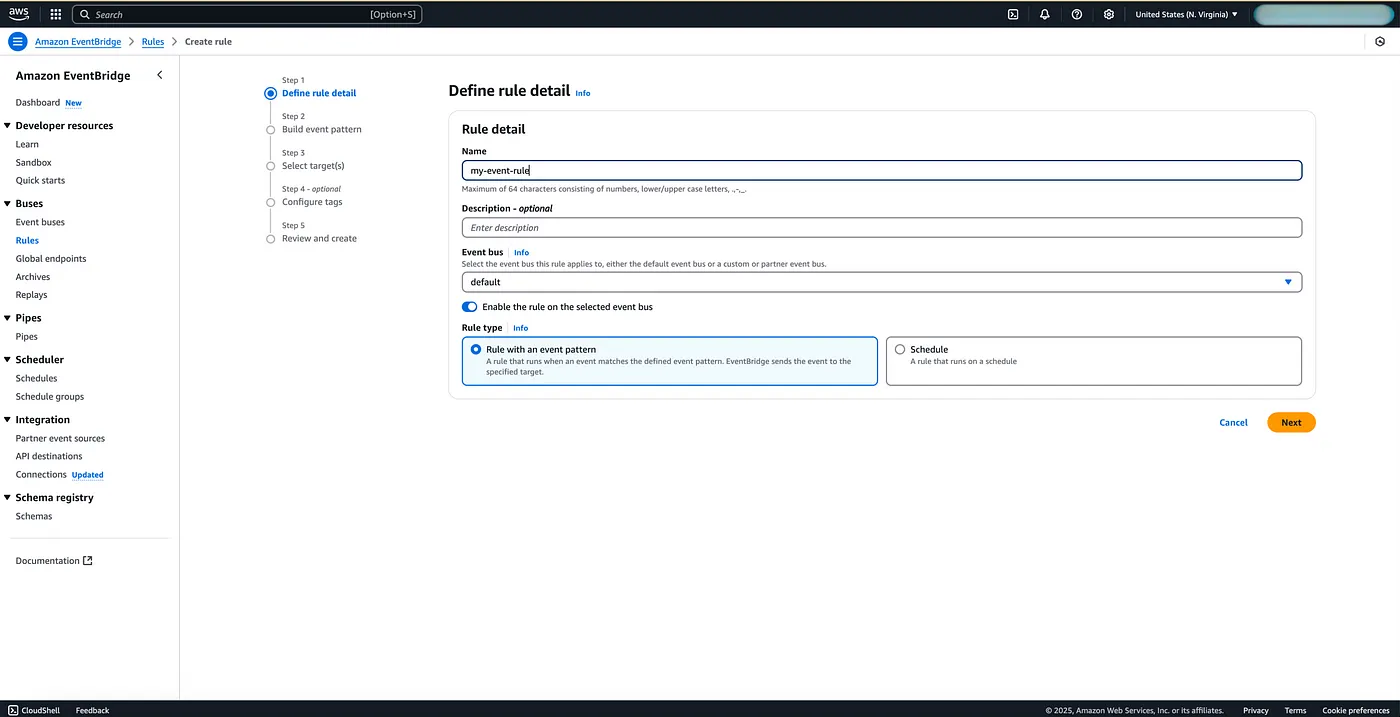
Event Rule: Now I am assuming you already have an event bus setup, so we are going to skip that part and focus on creating the event rule that will publish events to your API destination.
So let’s define the event rule detail, we first specify the name, description and the event bus. Next if you specify the rule type as a Rule with an event pattern, then, this rule will be triggered when an event matching the pattern occurs.
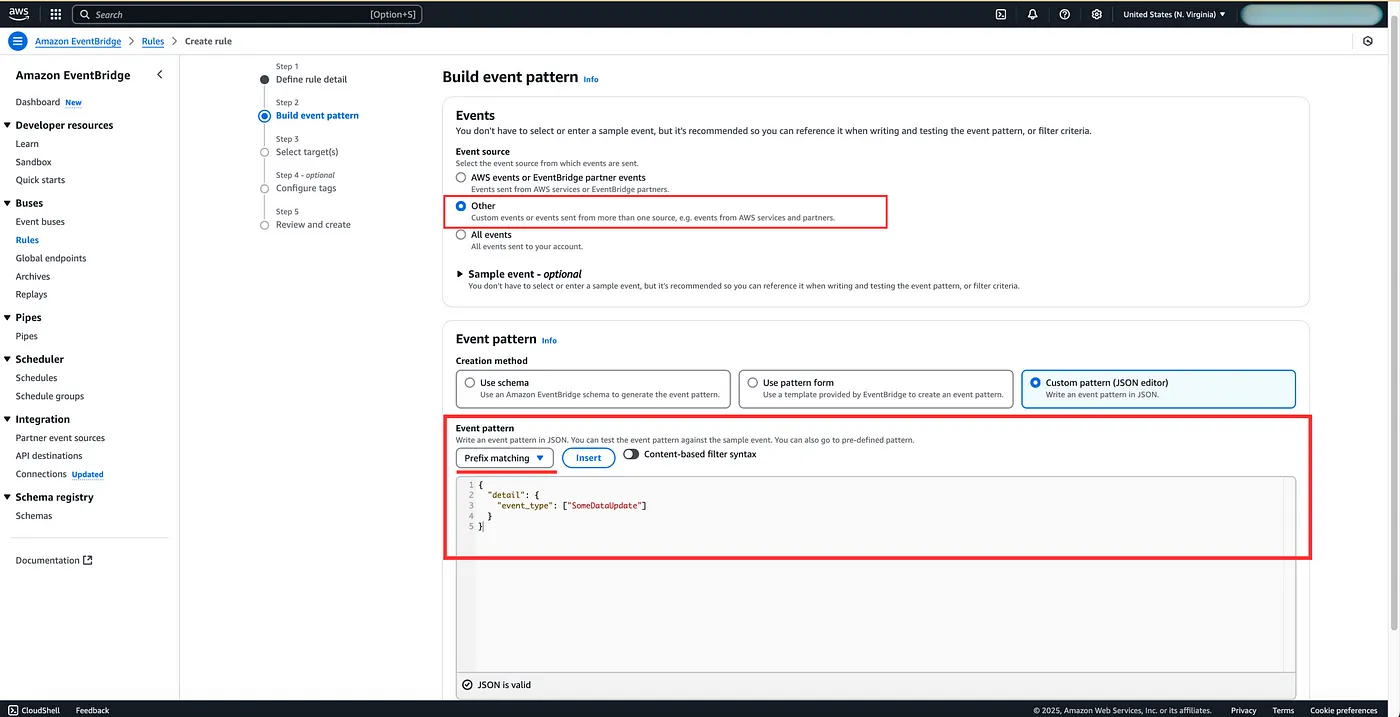
Next, we need to define the pattern. We can either choose a predefined pattern that matches a certain type of event from a certain service, or you can create a custom pattern that is suited to your service. When creating a pattern only specify the fields that you are using for matching. You can read more about Event Patterns in the AWS EvenBridge Patterns User Guide. But here’s a sample event for your reference:
{
  "detail": {
    "event_type": ["SomeDataUpdate"]
  }
}
Furthermore, there are multiple comparison operators that you can choose from to compare your event pattern, we can simply use Prefix matching for our example.
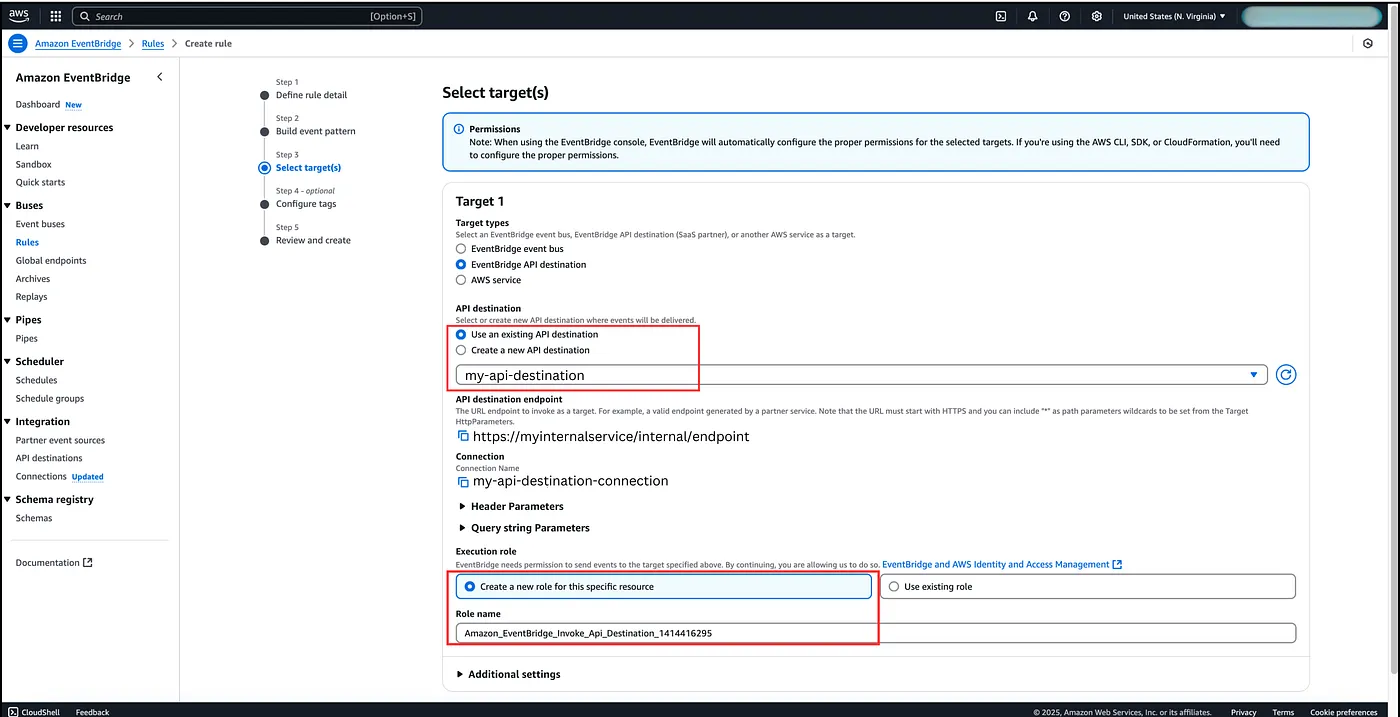
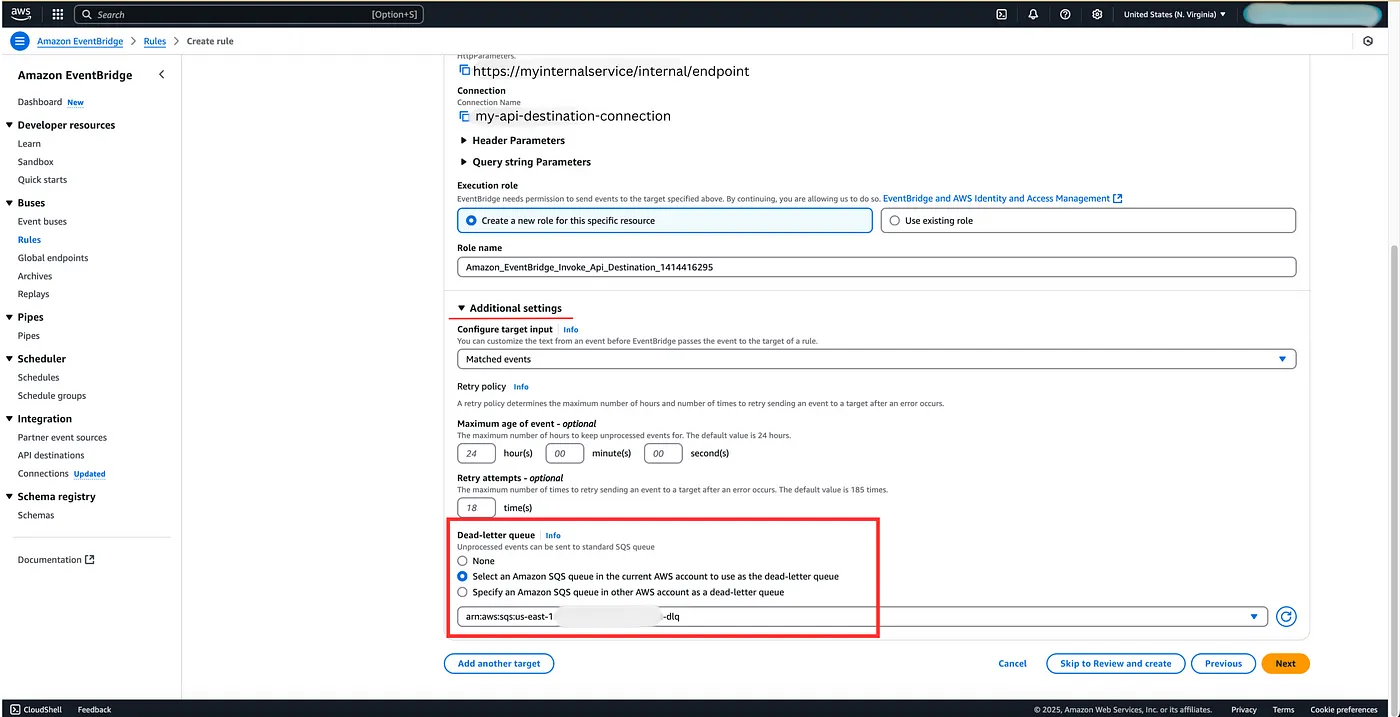
Once happy with the event pattern, we can then configure the target as our API destination and specify the existing API destination that we created above. You can also pass additional headers or query parameters to your target. And finally just like any other resource, you also need to create an IAM role that will allow EventBridge to send events to your target, in this case the API Destination.
Although it is optional, it is highly recommended that you add a DLQ to your event rule so that if your service is unavailable to consume events they can be later on replayed or re-drived to your service when it is back online.
Review the rule and hit Save!
Now is the time to sit back and relax, your sync from the monolith to your internal micro-service is now active!
Extra Nugget:
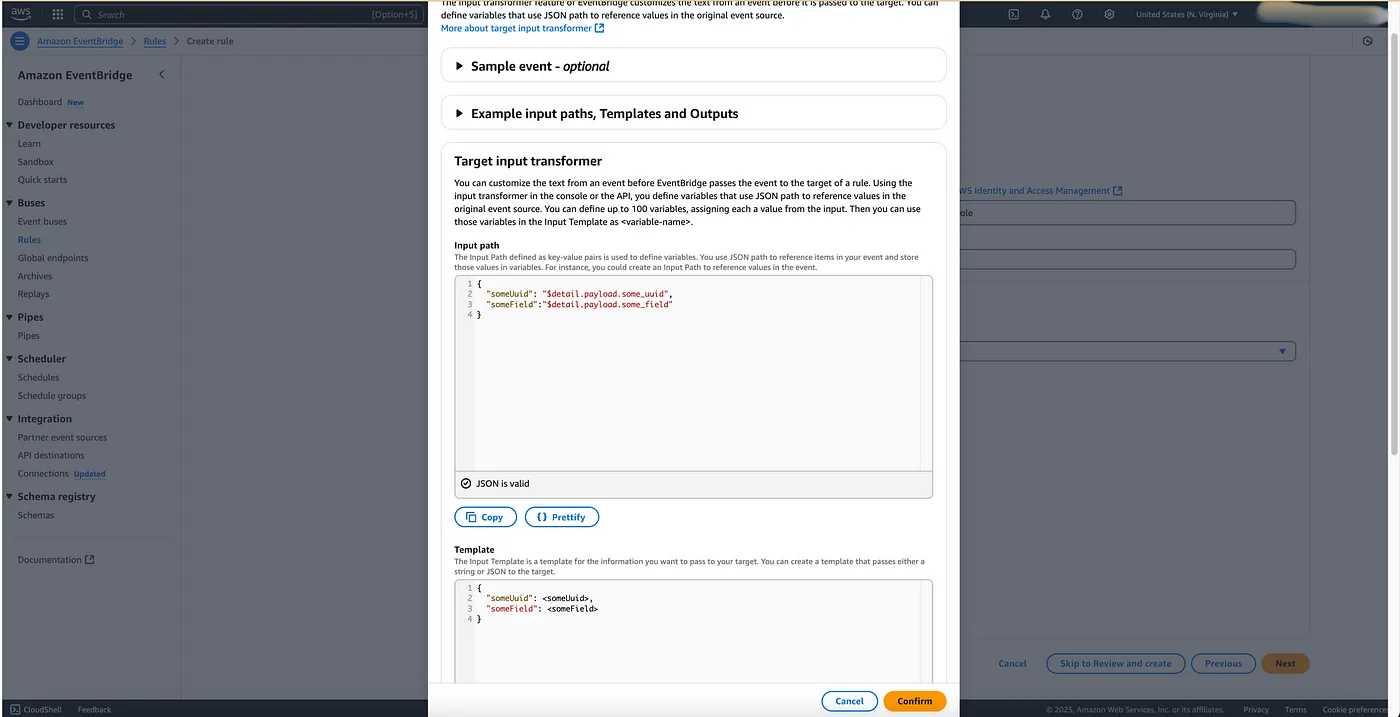
If you want to make this experience even better, you can leverage an Input Transformer at the Event Bridge. Input transformers can help transform the input event from the event bridge before it gets to the target so that it is received in a certain expected format! Pretty easy to set up, and AWS provides a comprehensive guide to using them: Amazon EventBridge input transformation.

Final Treat:
Here’s the final treat for you that might save you some time! Github Repo to CloudFormation Templates for deploying API Destination resources for private endpoints.