1. Clone GitHub Repository:
git clone https://github.com/Naveen3251/AWS_3Tier.git
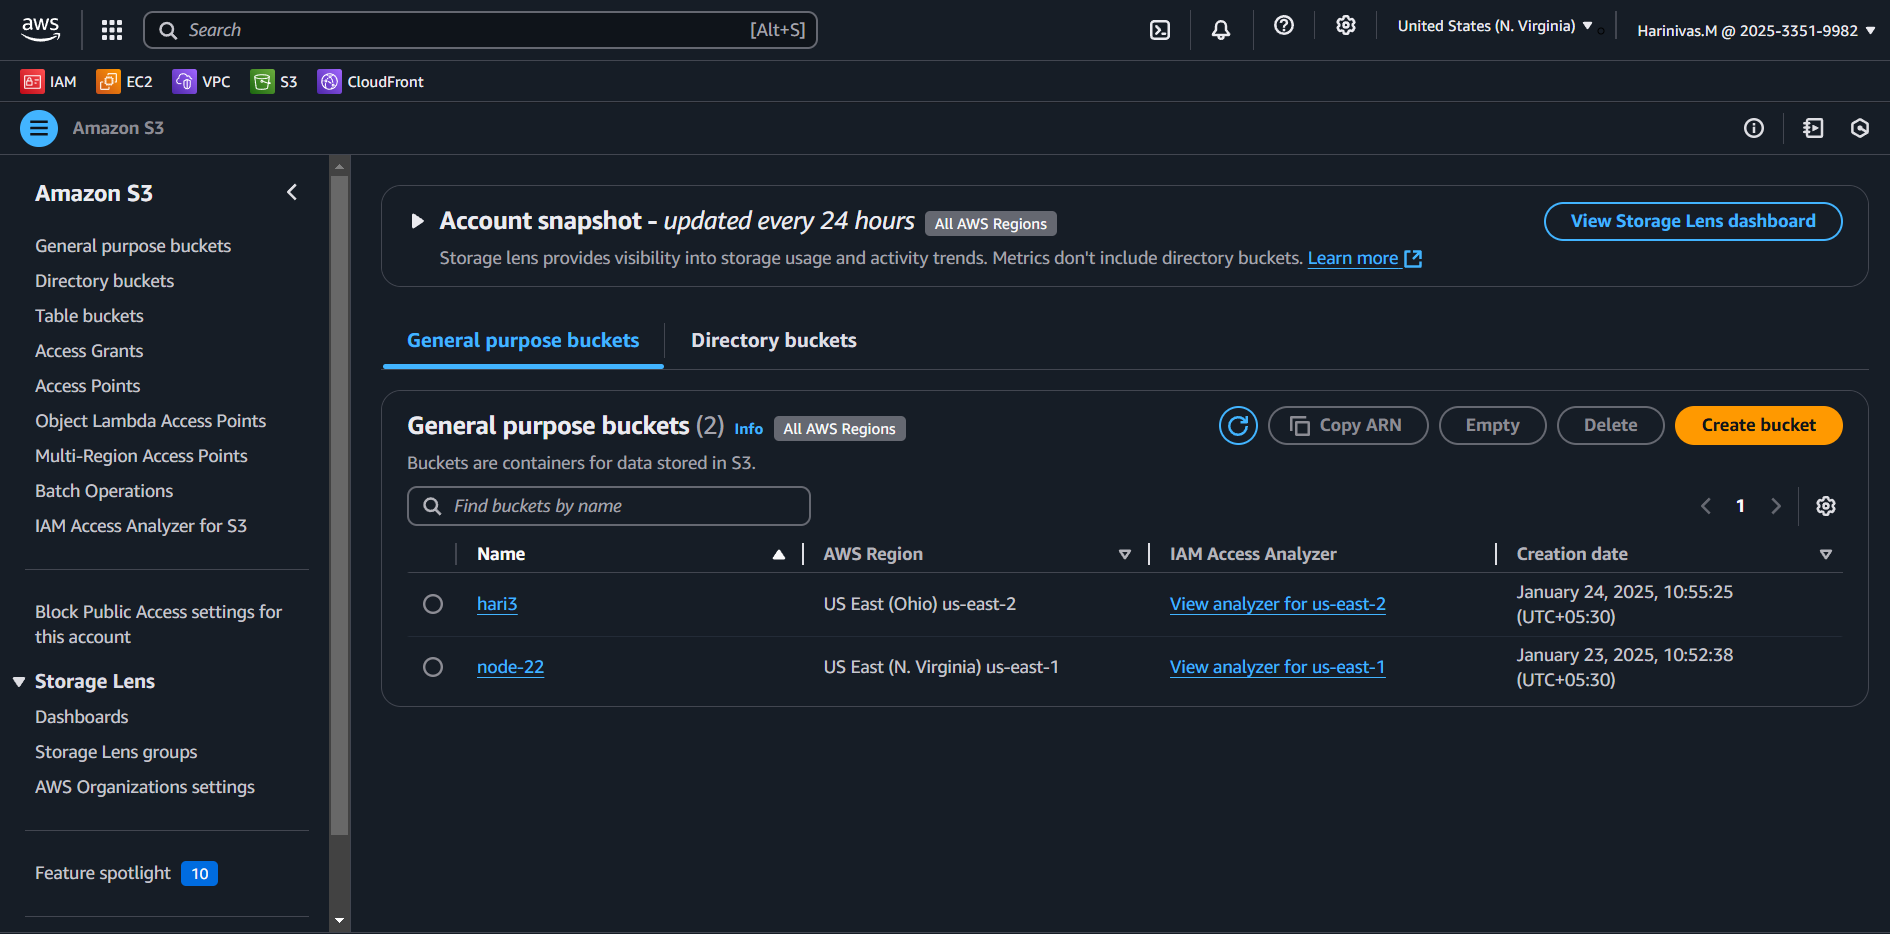
2. Create an S3 Bucket:
- Go to the AWS Console → S3 → Create Bucket.
- Provide a unique name and choose a region.
3. Create an IAM Role:
- AWS Console → IAM → Roles → Create Role.
- Select EC2 as the trusted entity.
- Add policies:
AmazonSSMManagedInstanceCore,AmazonS3ReadOnlyAccess.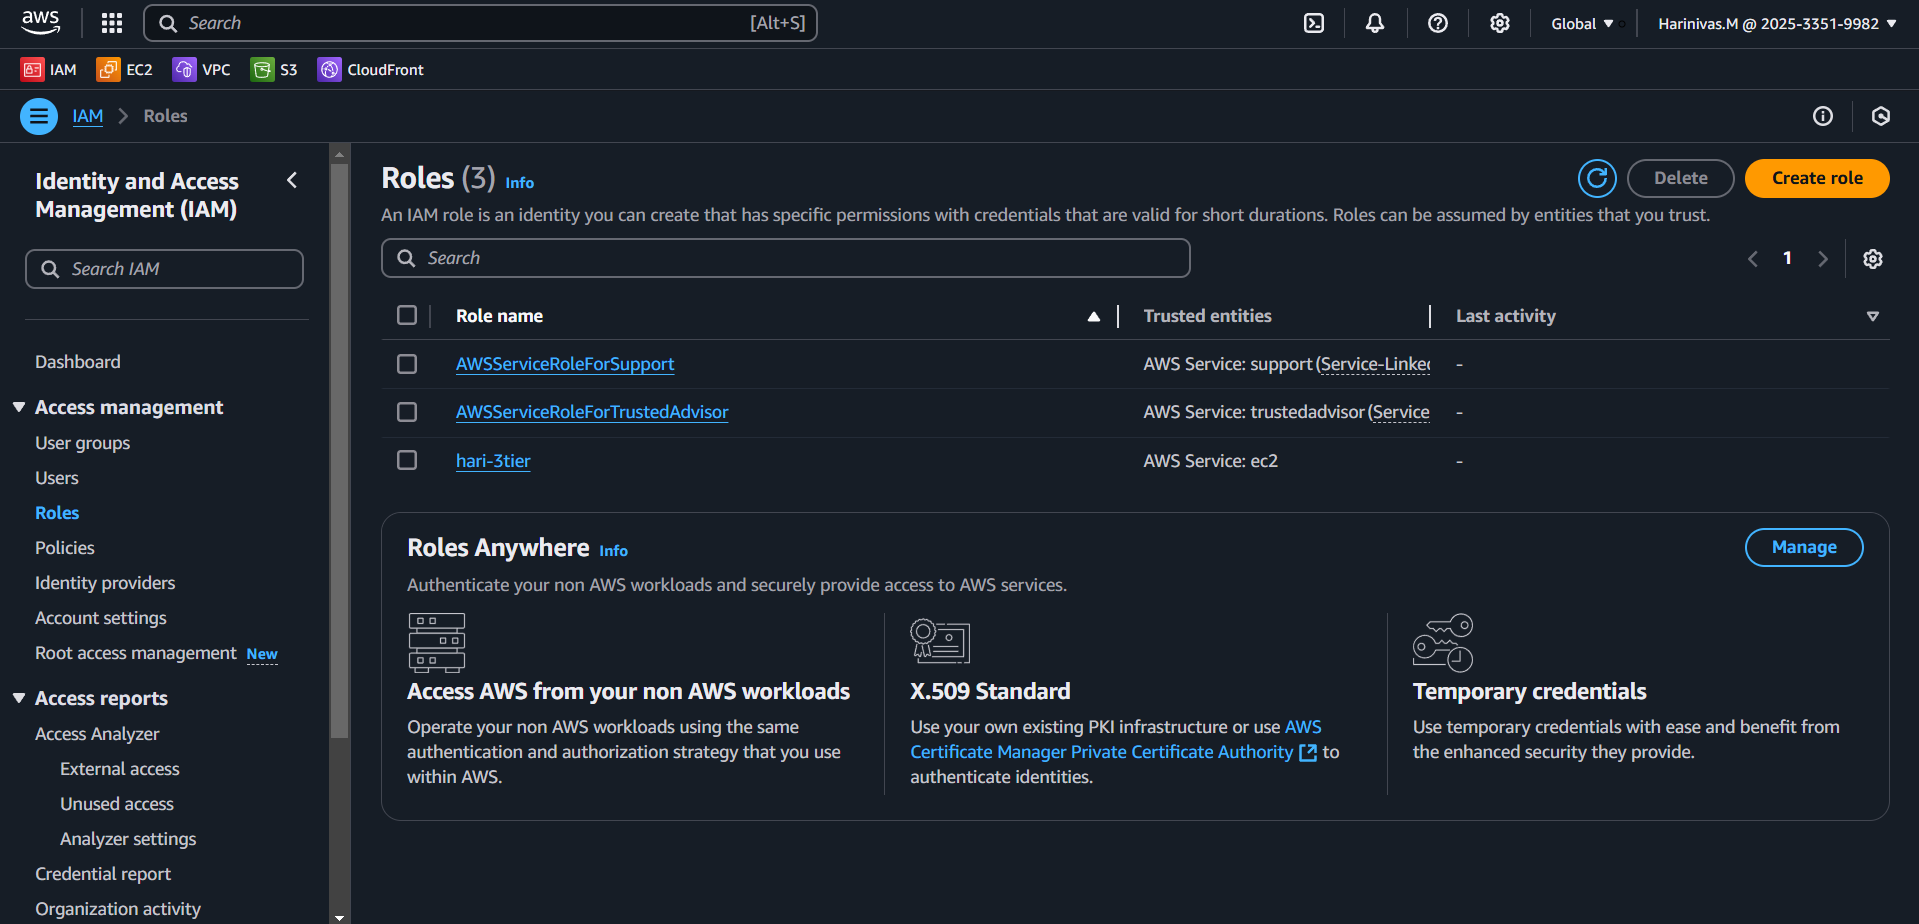
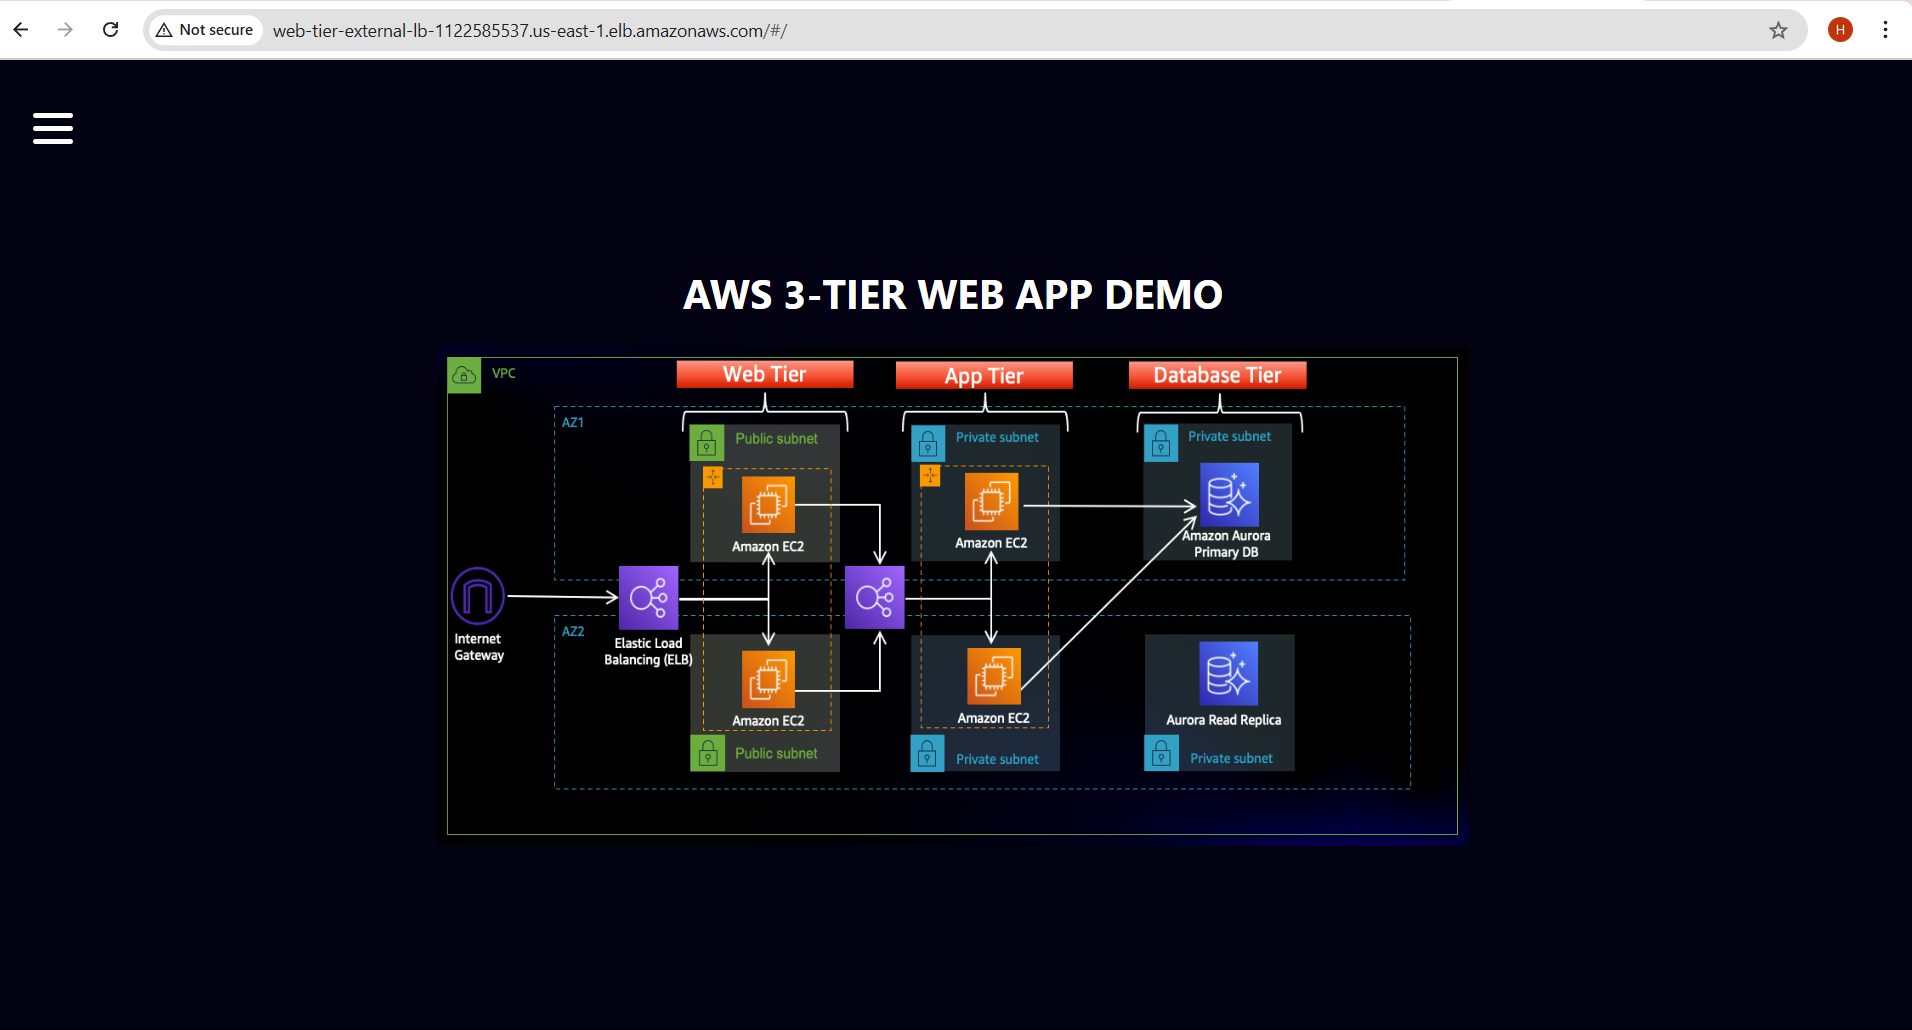
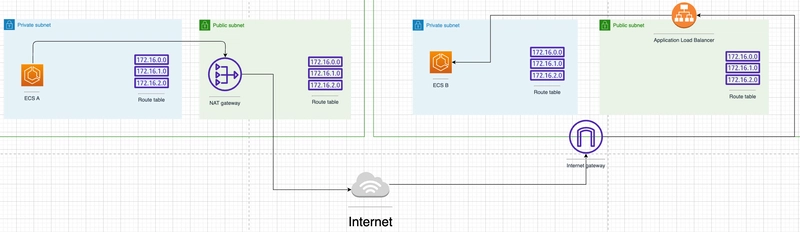
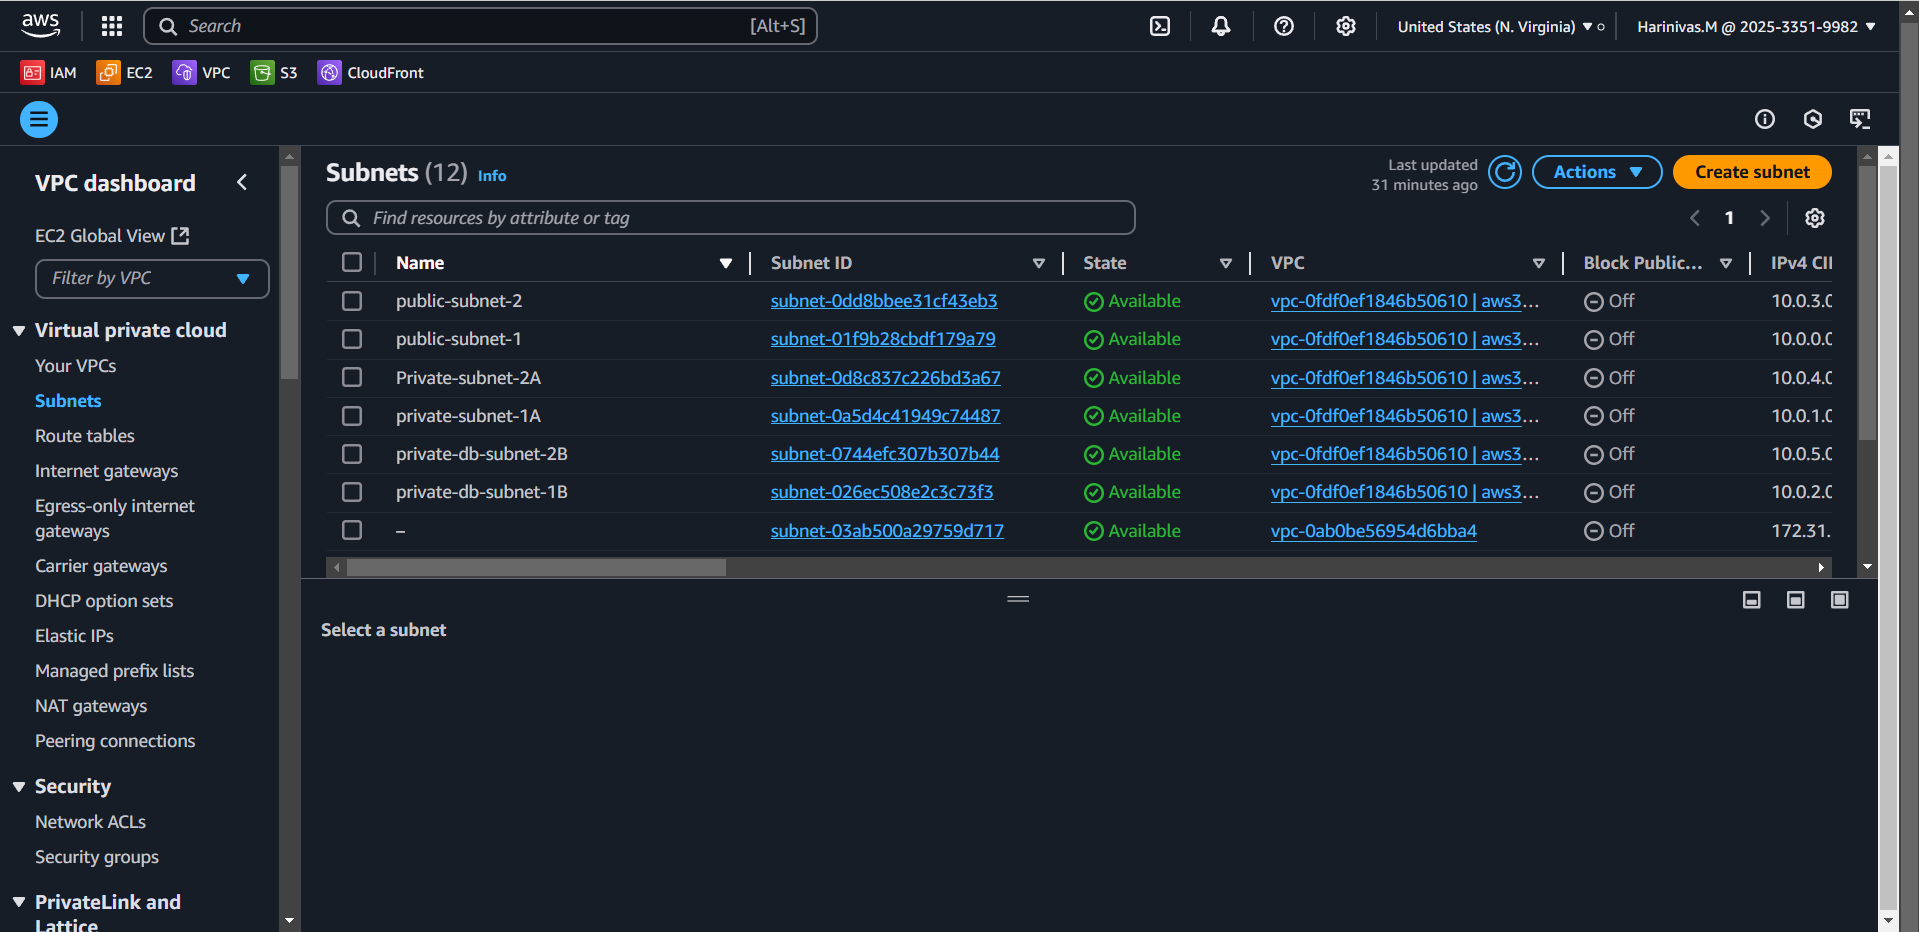
4. Create a VPC and Subnets:
- AWS Console → VPC → Your VPCs → Create VPC.
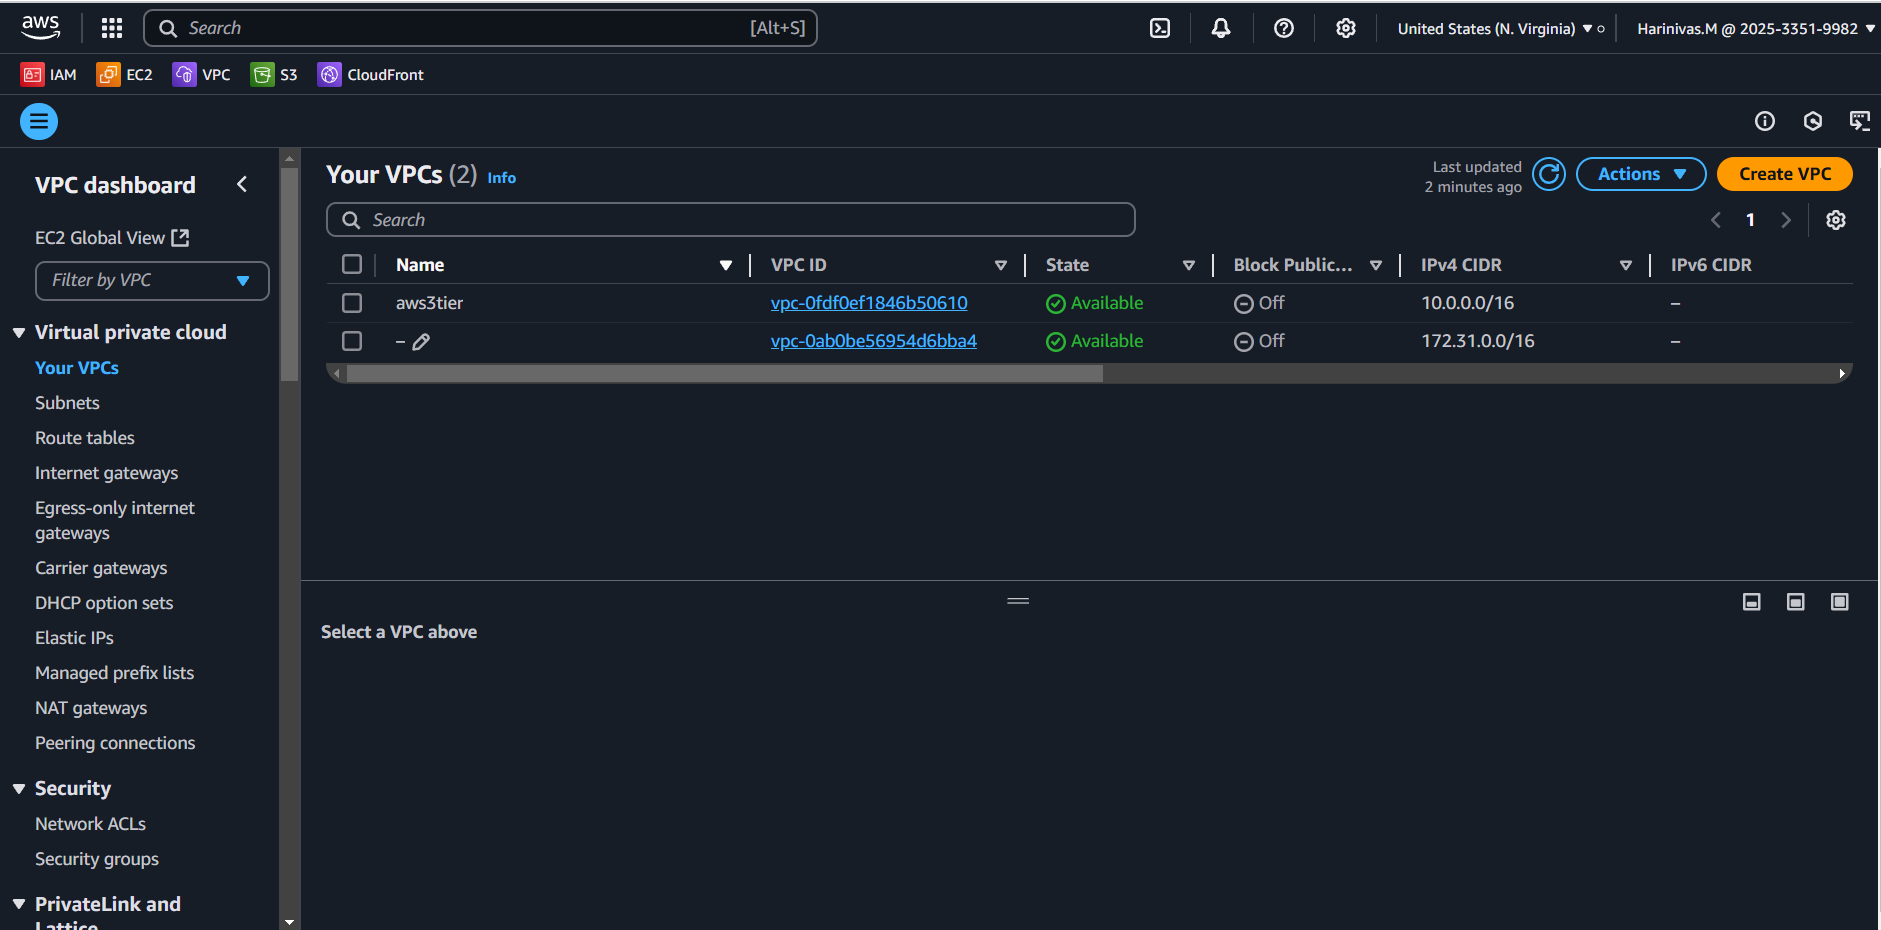
- Create 6 subnets (2 public, 2 app layer private, 2 database private) across different availability zones.
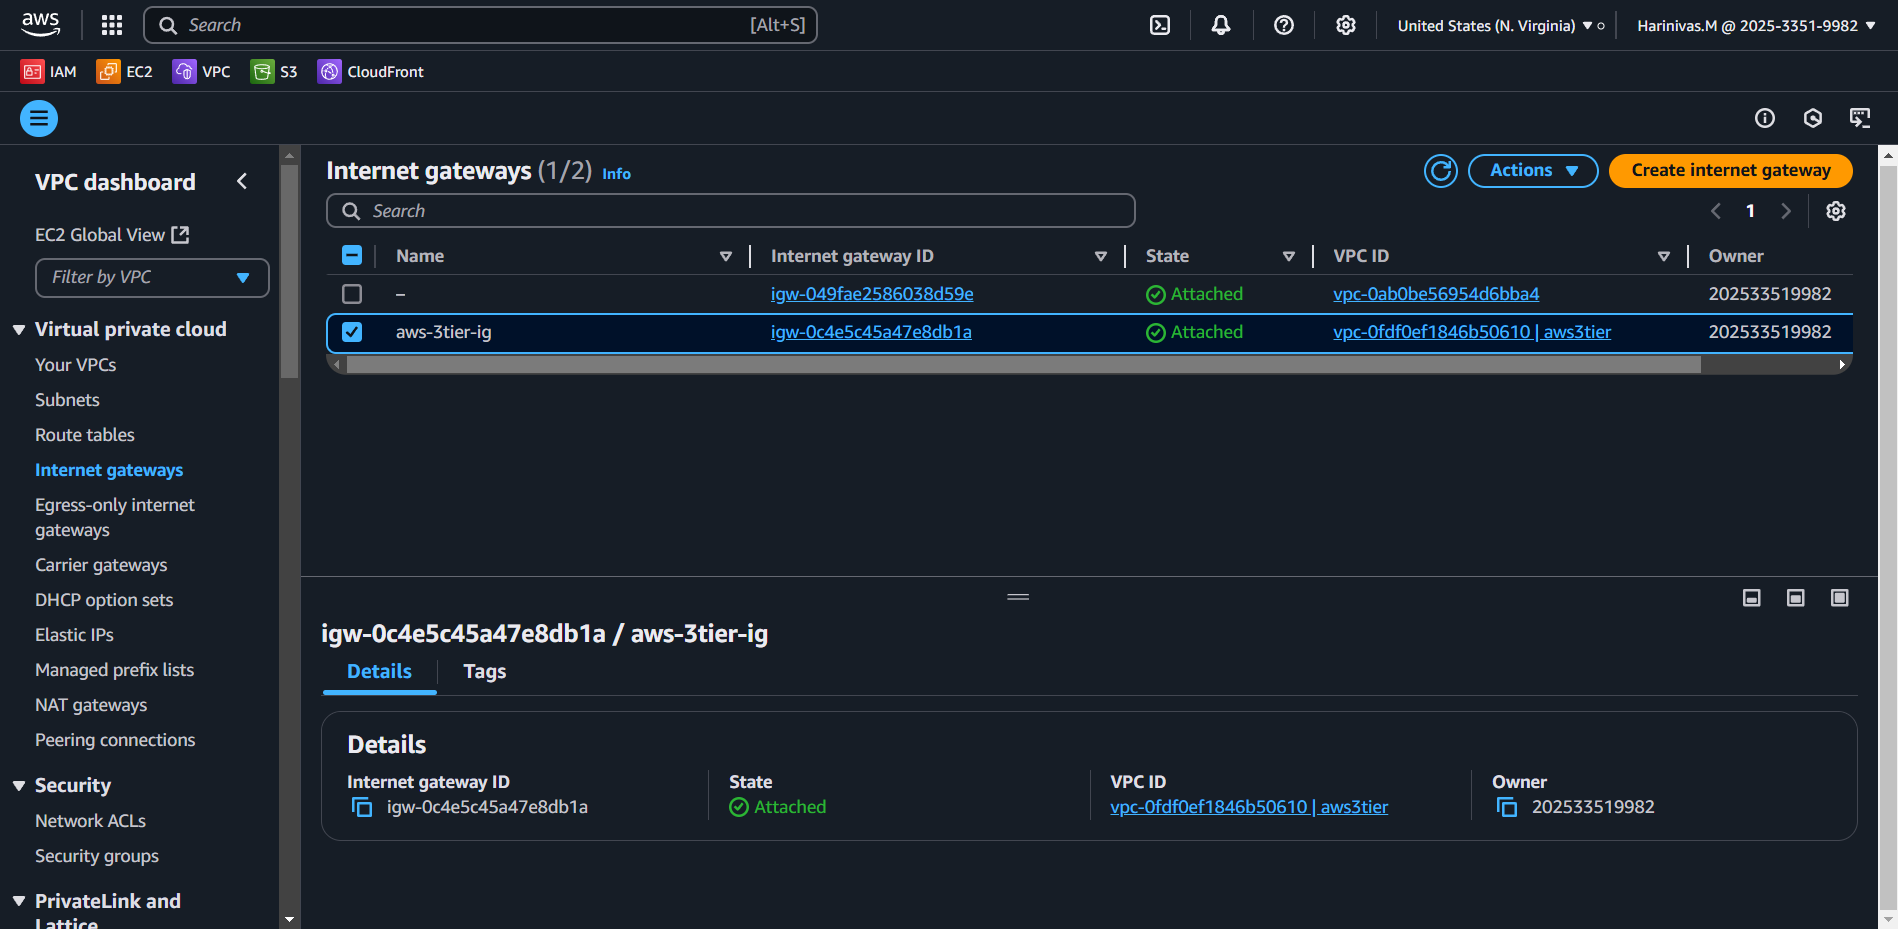
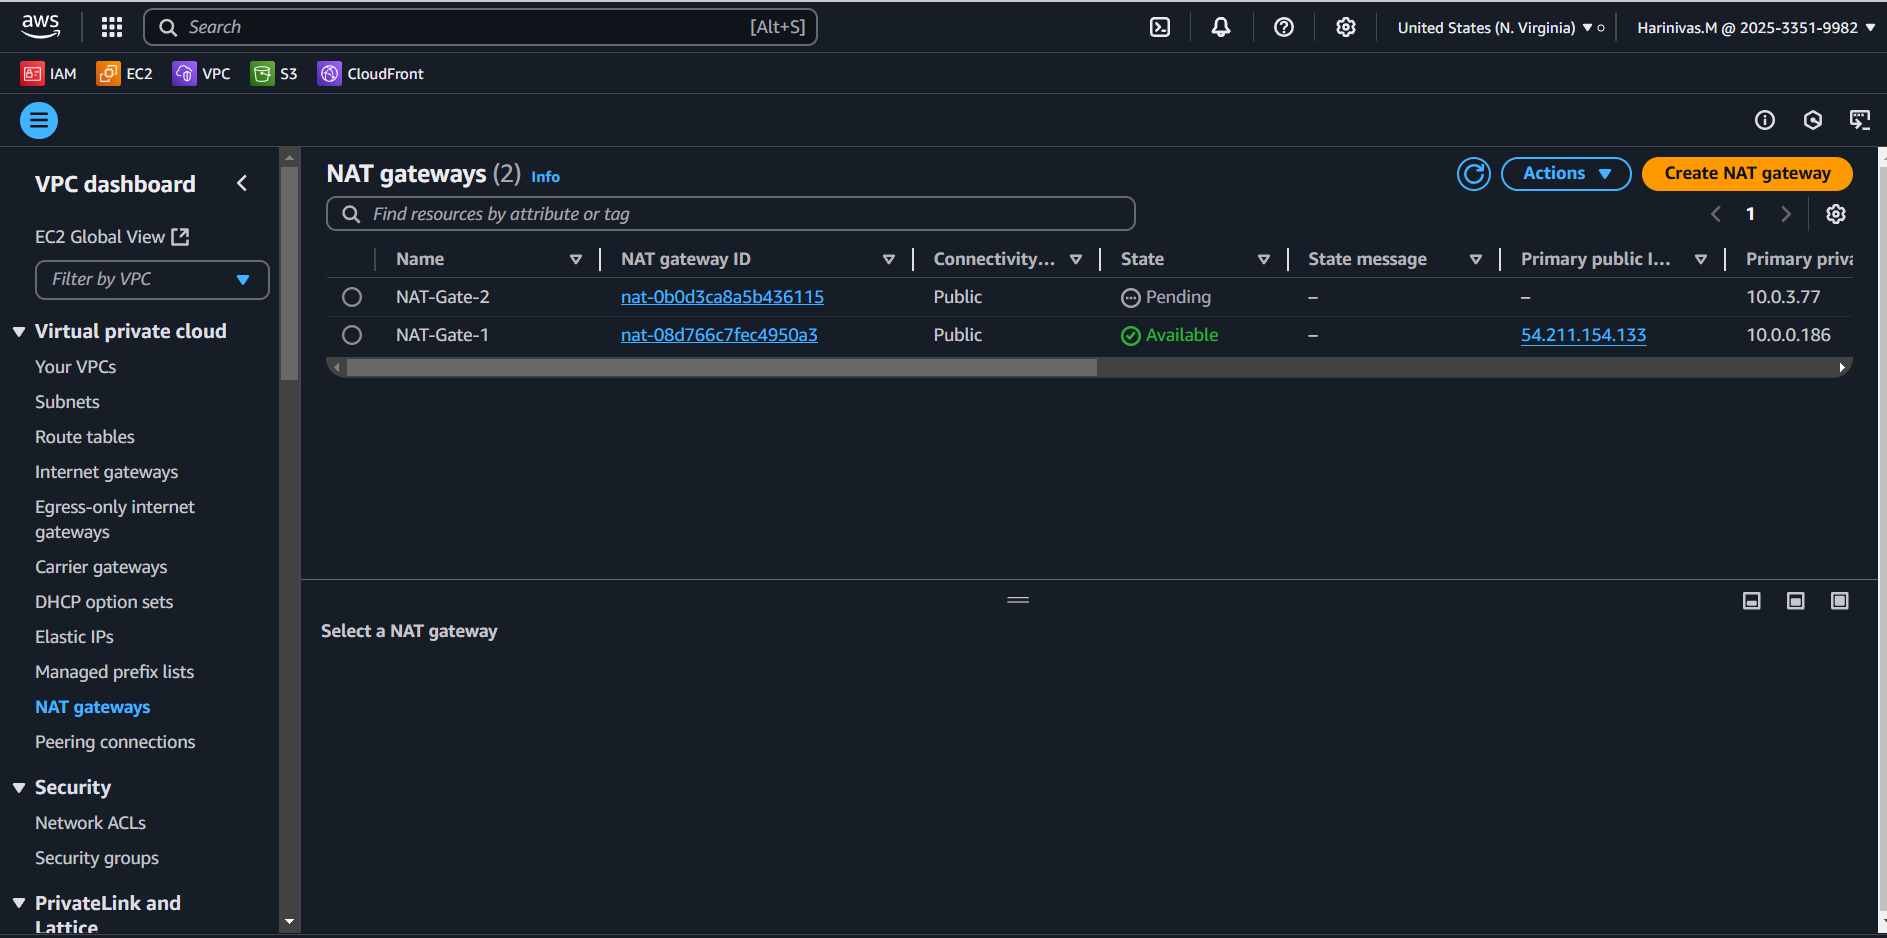
5. Set Up Networking:
-
Internet Gateway: Create and attach to the VPC for public access.
-
NAT Gateway: Deploy in each public subnet for private subnet access.
- Route Tables: Configure routes to link subnets to the appropriate gateways.
6. Configure Security Groups:
- Public Load Balancer: Allow HTTP from your IP.
- Web Tier Instances: Allow HTTP from the load balancer and your IP.
- Internal Load Balancer: Allow HTTP from web tier instances.
- App Layer: Allow TCP on port 4000 from the internal load balancer.
- Database: Allow MySQL traffic (port 3306) from app layer instances.
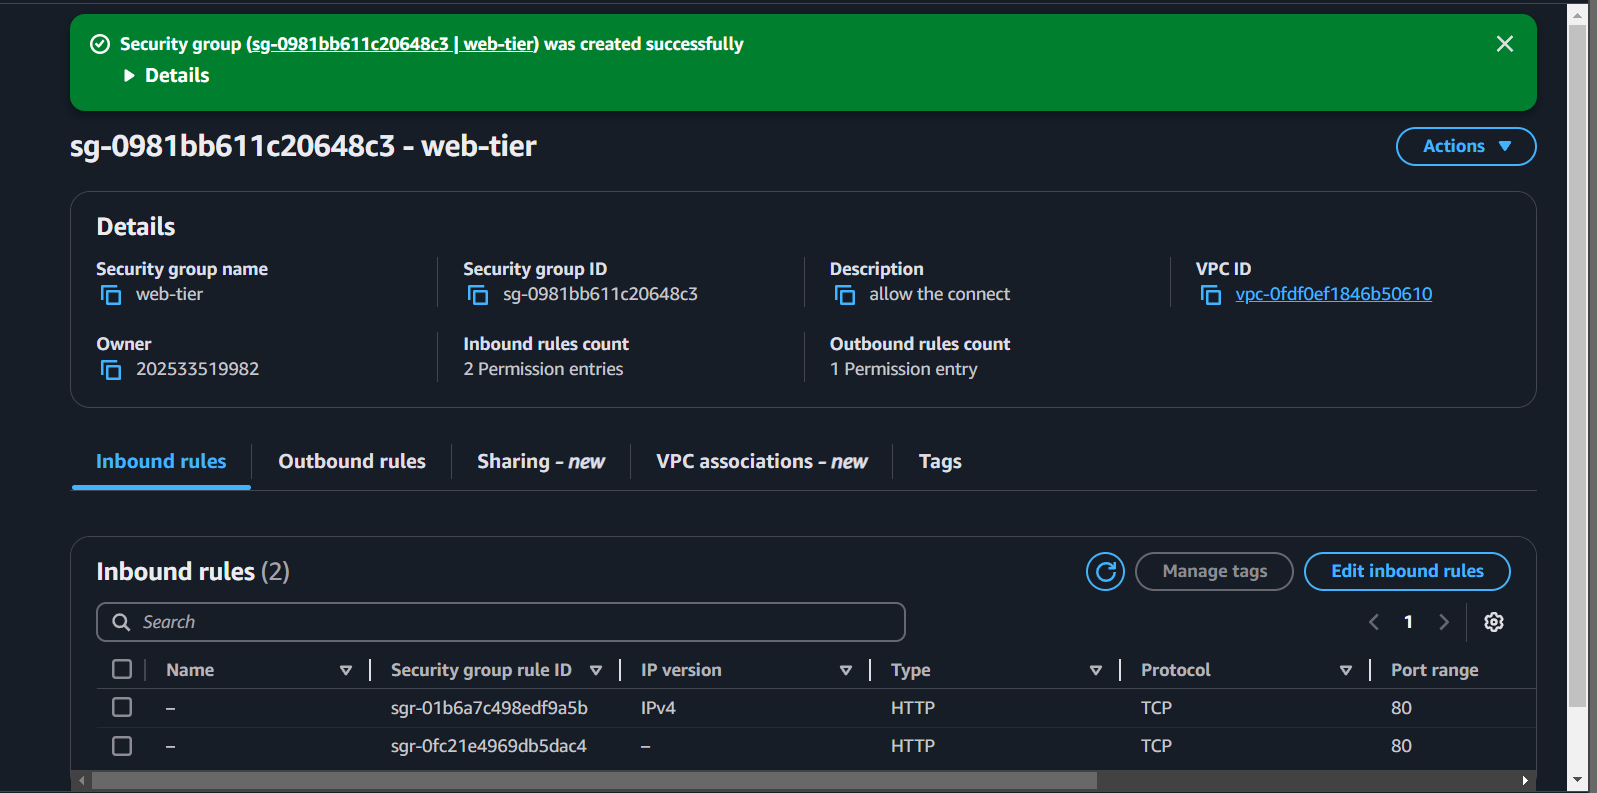
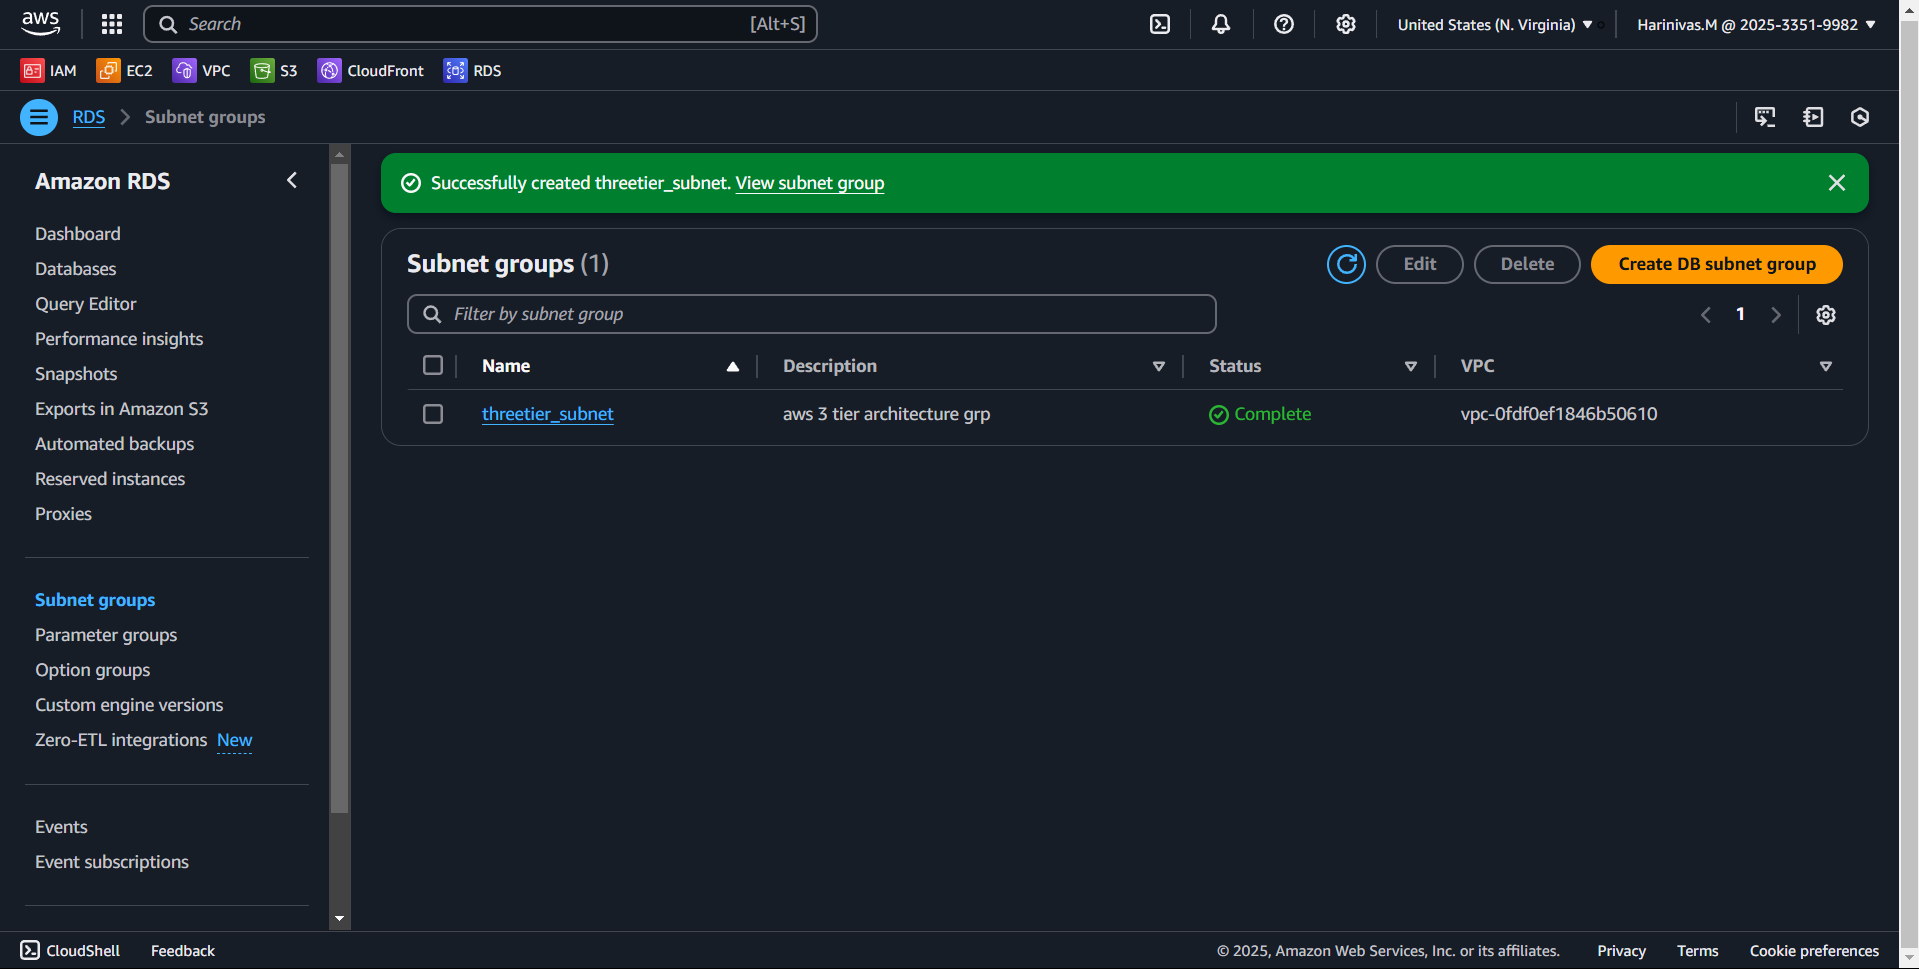
7. Create a Subnet Group for RDS:
- AWS Console → RDS → Subnet Groups → Create.
- Add the database subnets.
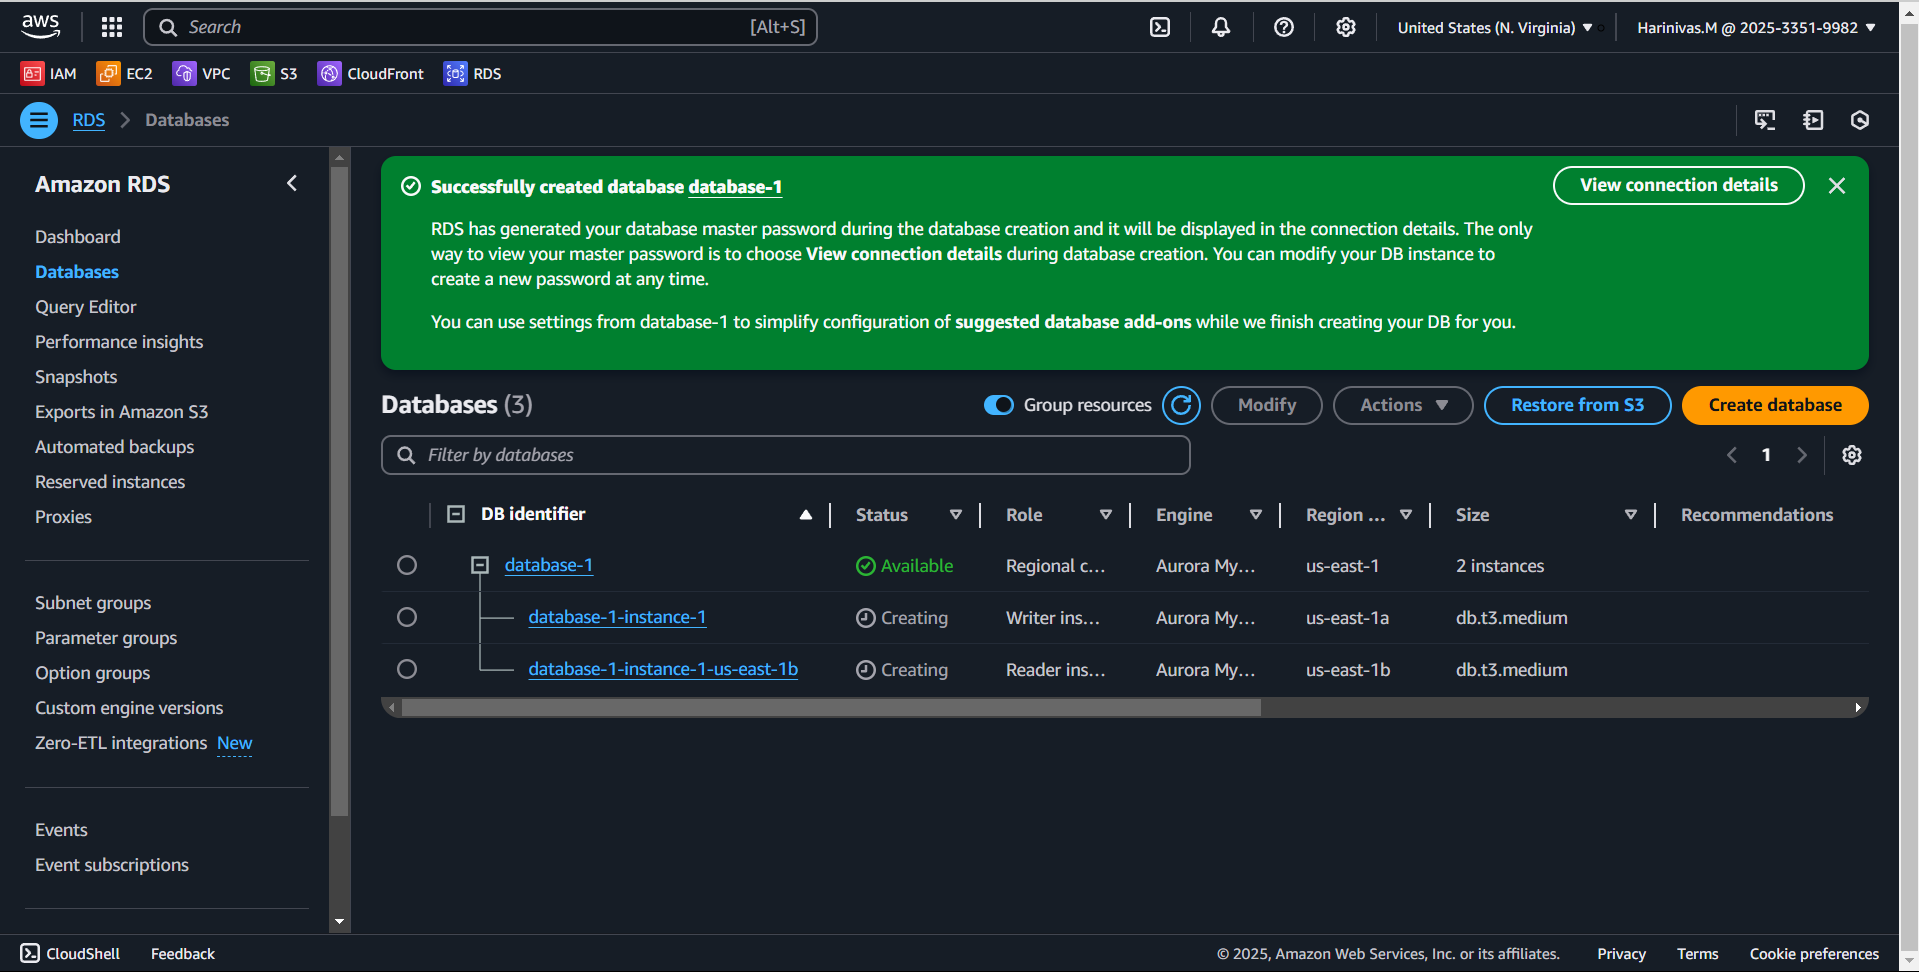
8. Deploy RDS:
- AWS Console → RDS → Databases → Create Database.
- Choose Amazon Aurora (MySQL-Compatible) → Dev/Test.
- Select the VPC, subnet group, and database security group.
- Enable Multi-AZ for high availability.
- Save the writer endpoint for database connection.
9. Deploy App Instance:
- Navigate to AWS Console → EC2 → Instances → Launch Instances.
- Choose Amazon Linux 2 AMI and select the t2.micro instance type.
- Configure instance details:
- Select the appropriate VPC and private subnet for the app layer.
- Assign the IAM role created earlier.
- Attach the security group designated for the app layer.
- Launch the instance without a key pair, as EC2 Instance Connect will be used.
10. Connect to the Instance:
- In the EC2 dashboard, select the running instance.
- Click 'Connect' and choose the 'Session Manager' tab to initiate a session.

- Switch to the
ec2-user:
sudo -su ec2-user- Verify internet connectivity through the NAT gateway:
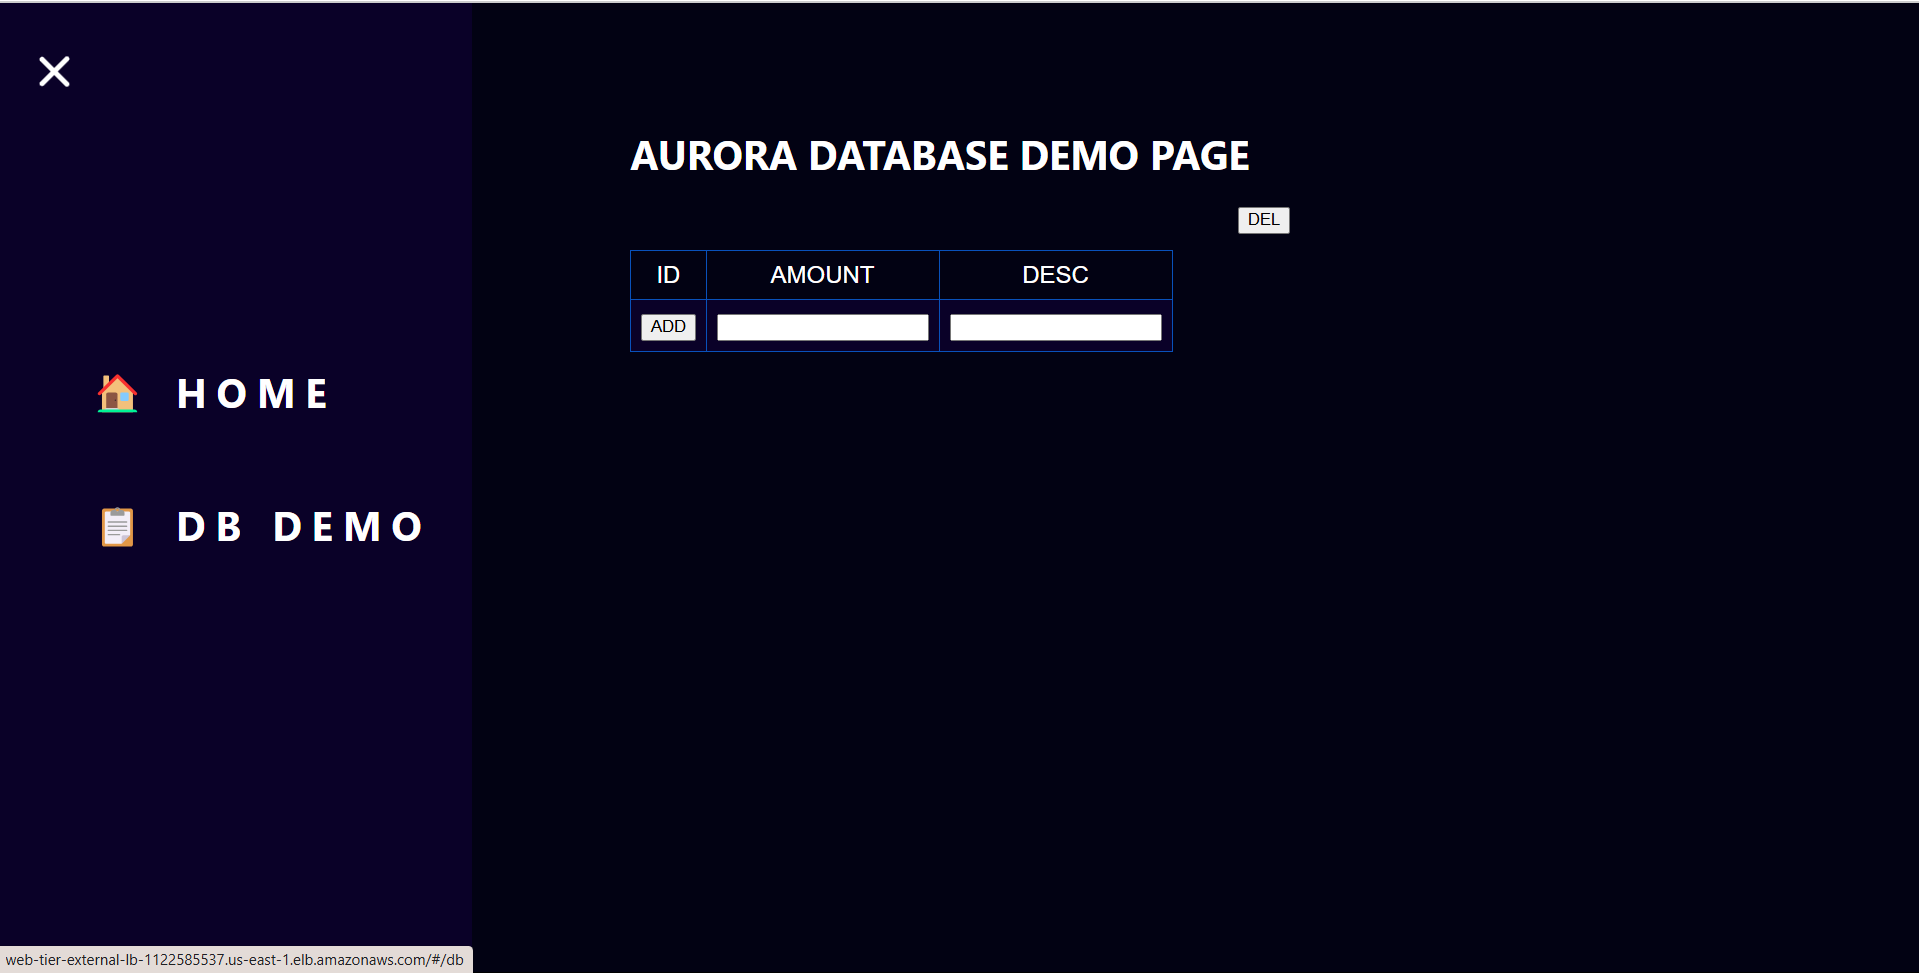
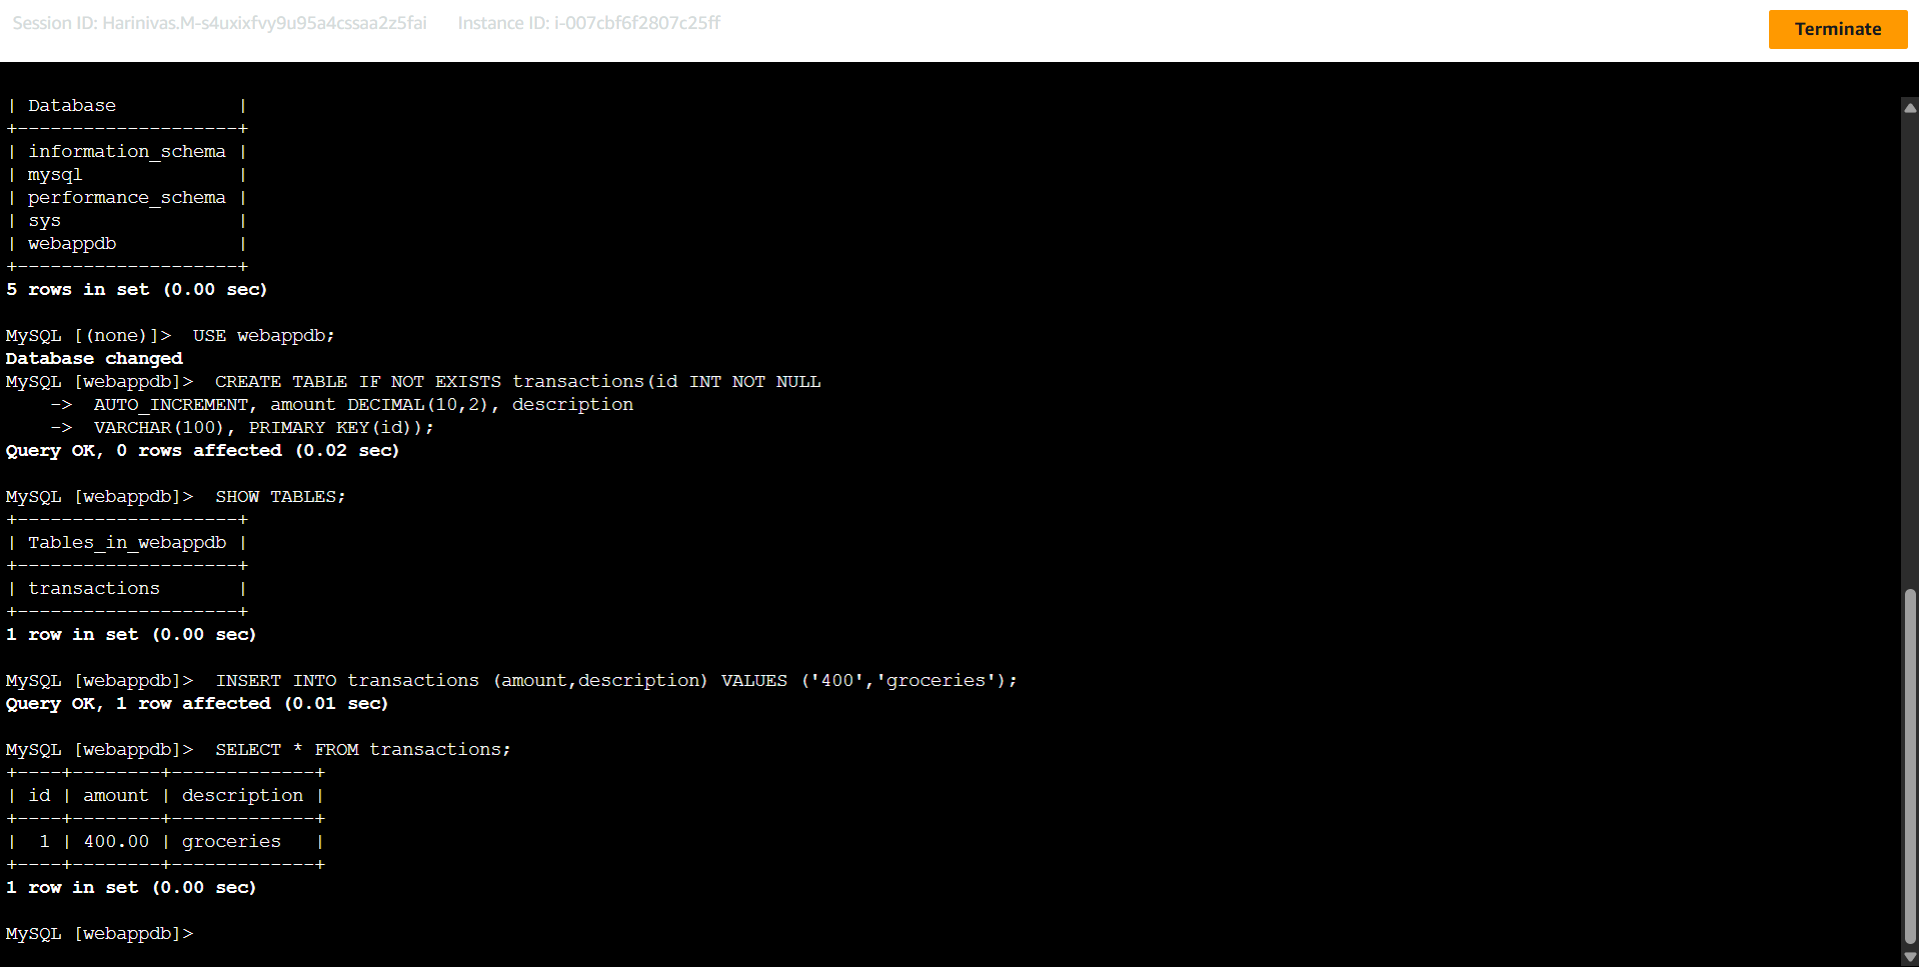
ping 8.8.8.811. Configure the Database:
- Install the MySQL client:
sudo yum install mysql -yIf issues arise, refer to alternative installation commands in the source article.
- Connect to the Aurora RDS writer endpoint:
mysql -h [RDS_ENDPOINT] -u [USERNAME] -p- Create the
webappdbdatabase andtransactionstable:
CREATE DATABASE webappdb;
  USE webappdb;
  CREATE TABLE IF NOT EXISTS transactions(
      id INT NOT NULL AUTO_INCREMENT,
      amount DECIMAL(10,2),
      description VARCHAR(100),
      PRIMARY KEY(id)
  );
  INSERT INTO transactions (amount, description) VALUES ('400', 'groceries');
SELECT * FROM transactions;- Exit the MySQL client:
exit12. Configure the App Instance:
- Update the
DbConfig.jsfile in theapp-tierdirectory with database credentials. - Upload the
app-tierfolder to the previously created S3 bucket. - Install Node Version Manager (NVM):
curl -o- https://raw.githubusercontent.com/nvm-sh/nvm/v0.38.0/install.sh | bash
source ~/.bashrc- Install Node.js and set it as the active version:
nvm install 16
nvm use 16- Install PM2 globally:
npm install -g pm2- Download the application code from S3:
aws s3 cp s3://[BUCKET_NAME]/app-tier/ ~/app-tier --recursive- Navigate to the application directory, install dependencies, and start the application:
cd ~/app-tier
  npm install
pm2 start index.js- Configure PM2 to start on system boot:
pm2 startup
  # Execute the command output by the above command
  pm2 save
13.Create an App Tier AMI:
- AWS Console → EC2 → Instances.
- Select the configured app instance → Actions → Image and templates → Create Image.
- Provide a name and description, then create the image.
14.Set Up a Target Group:
- AWS Console → EC2 → Target Groups → Create Target Group.
- Select "Instances" as the target type, name the group, set protocol to HTTP and port to 4000.
- Choose the appropriate VPC and set the health check path to
/health.
15.Deploy an Internal Load Balancer:
- AWS Console → EC2 → Load Balancers → Create Load Balancer.
- Choose "Application Load Balancer," name it, and select "Internal."
- Configure the network settings, assign the appropriate security group, and link it to the previously created target group.
16.Create a Launch Template:
- AWS Console → EC2 → Launch Templates → Create Launch Template.
- Name the template and select the App Tier AMI.
- Choose the instance type, assign the appropriate security group, and specify the IAM instance profile.

17.Configure Auto Scaling:
- AWS Console → EC2 → Auto Scaling Groups → Create Auto Scaling group.
- Name the group, select the launch template, and configure the VPC and subnets.
- Attach the Auto Scaling group to the internal load balancer's target group.
- Set the desired, minimum, and maximum capacities, then create the Auto Scaling group.

18.Update NGINX Configuration:
- Edit the
nginx.conffile from theapplication-codedirectory. - Replace
[INTERNAL-LOADBALANCER-DNS]with your internal load balancer's DNS name. - Upload the updated
nginx.confand theweb-tierfolder to your S3 bucket.

19.Deploy Web Instances:
- Launch a new EC2 instance using the Amazon Linux 2 AMI.
- Assign it to the appropriate VPC and public subnet, enabling auto-assign public IP.
- Attach the previously created IAM role and security group for the web tier.
20.Configure the Web Instance:
- Connect to the instance via the AWS Console's Session Manager.
- Install Node Version Manager (NVM) and Node.js:
curl -o- https://raw.githubusercontent.com/nvm-sh/nvm/v0.38.0/install.sh | bash
  source ~/.bashrc
  nvm install 16
nvm use 16- Download the web-tier code from your S3 bucket:
aws s3 cp s3://YOUR_BUCKET_NAME/web-tier/ ~/web-tier --recursive- Navigate to the
web-tierdirectory, install dependencies, and build the React app:
cd ~/web-tier
  npm install
npm run build- Install and configure NGINX:
sudo amazon-linux-extras install nginx1 -y
  sudo rm /etc/nginx/nginx.conf
  sudo aws s3 cp s3://YOUR_BUCKET_NAME/nginx.conf /etc/nginx/
  sudo service nginx restart
  chmod -R 755 /home/ec2-user
  sudo chkconfig nginx on
21.Create a Web Tier AMI:
- Navigate to EC2 Dashboard → Instances.
- Select your web tier instance, then Actions → Image and templates → Create Image
- Provide a name and description, then click Create image. Monitor the creation status under AMIs.
22.Set Up a Target Group:
- Go to EC2 Dashboard → Target Groups under Load Balancing. Click Create Target Group.
- Choose Instances as the target type, assign a name, set the protocol to HTTP and port to 80.
- Select your VPC and set the health check path to
/health. Click Next, then Create target group without registering any targets.
23.Deploy an Internet-Facing Load Balancer:
- Navigate to EC2 Dashboard → Load Balancers. Click Create Load Balancer.
- Select Application Load Balancer, provide a name, and choose Internet-facing.
- Configure the network settings with your VPC and public subnets.
- Assign the appropriate security group.
- Set the listener to HTTP on port 80, forward to the previously created target group, and click Create load balancer.
24.Create a Launch Template:
- Go to EC2 Dashboard → Launch Templates. Click Create Launch Template.
- Name the template, select the web tier AMI, and choose the instance type (e.g.,
t2.micro). - Assign the web tier security group and specify the IAM instance profile used for EC2 instances.
25.Configure Auto Scaling:
- Navigate to EC2 Dashboard → Auto Scaling Groups. Click Create Auto Scaling group.
- Name the group, select the launch template, and configure the VPC and public subnets for the web tier.
- Attach the Auto Scaling group to the previously created target group.
- Set the desired, minimum, and maximum capacity to 2.
- Review and create the Auto Scaling group.
Final Conclusion
AWS 3-tier architecture ensures a scalable, secure, and efficient application deployment using S3, EC2, and RDS. It enhances security with proper VPC segmentation, NAT, and Internet Gateways. Load balancers and Auto Scaling provide high availability and fault tolerance. IAM roles and security groups ensure controlled access. This setup is ideal for managing applications with dynamic workloads.
Final Output