
Everyone seems to be talking about AI agents this year. They can automate everyday tasks, including the ones you probably do yourself (like putting together weekly changelogs). Agents can be customized and are positioned to become the new building blocks of software.
In this guide, you'll learn how to build your first AI agent in just 5 minutes.
This tutorial is totally beginner-friendly.
All you need is a command line, your favorite IDE (we recommend Cursor or Windsurf), and a few minutes to spare.
Let's dig in...
What is covered?
- What is an agent?
- What is Mastra?
- Building your first agent
- Bonus: Adding memory
- Additional resources
Agents
What is an agent?
Here's a simple definition of an agent: an agent is any software with non-deterministic code.
That is, any software that can make autonomous decisions based on inputs and environment rather than following fixed, predictable instructions every time.
Agents are AI systems that can:
- Perceive their environment through various inputs
- Make decisions based on those inputs
- Take actions to accomplish specific goals
- Learn and adapt their behavior over time
Unlike traditional software that follows explicit rules, agents use AI models (like large language models) to understand context, reason through problems, and determine the best course of action. They can handle ambiguity and adapt to new situations without being explicitly programmed for every scenario.
The best agents use several important features:
- Memory: They remember past interactions and learn from them
- Planning: They can break down complex tasks into smaller steps
- Tool use: They can leverage external tools and APIs to expand their capabilities
- Feedback loops: They can evaluate their own performance and adjust accordingly
The agentic spectrum
When discussing AI agents, it's helpful to understand that they exist on a spectrum of autonomy (aka agency).
This spectrum helps us categorize different types of agents based on how much independent decision-making they can perform:
Less agentic systems are mostly deterministic workflows with occasional LLM calls. Think trip planners that follow templates but use AI for personalization. These are predictable but less flexible.
More agentic systems allow LLMs to build and execute their own plans using external tools. AI customer service assistants with access to knowledge bases exemplify this middle ground—handling complex tasks within defined boundaries.
Most agentic systems operate autonomously with minimal human input. Self-driving cars represent this category, making continuous independent decisions in unpredictable environments. These require exceptional reliability and safety measures.
As you build your first agent, it's important to consider where on this spectrum your application should fall.
For beginners, starting with less agentic systems provides a gentler learning curve, so that's where we'll start today.
What is Mastra?
Mastra is an open-source AI Agent Framework for Typescript.
It includes all the basic primitives for AI engineering right-out-the-box, including:
- Agents with tools, memory, and tracing
- State-machine based workflows with human-in-the loop (suspend/resume) and a simple API (
.step(), .then(), .after()) - Evals (non-deterministic tests) for tracking and measuring AI output
- Storage for RAG pipelines
- Local development playground
... and more.
We'll be installing and setting up your first Mastra project in today's tutorial.
So let's get started!
Building your first agent
Building your first agent is as easy as installing your first Mastra instance and getting it running.
Installing Mastra
Run npm create mastra@latest in your command line to get started. Follow the on-sceen prompts to configure your setup. You’ll want to give your project a name and select where to install.
For this tutorial, please be sure to:
✅ Opt-in to installing both Agents and Workflows
✅ Say yes to installing tools
✅ Select OpenAI for your model
✅ Say yes to adding an example
Also be sure to plug in your OpenAI API key. (You'll want to create an OpenAI Platform account and purchase credits here.)
Finally, open your project in your favorite AI IDE, whether its Cursor or Windsurf!
Exploring the weather agent
Now that you’ve installed Mastra, let’s explore the built-in example. After you become familiar with how it all works, you will be able to easily make edits and build your own agents and workflows.
1. Pull up your project ( cd {your-project-name} ).
Once you’re in your project, type npm run dev to get the project running locally on your browser.
2. Open the Playground URL (http://localhost:4111/).
You should see something like this:
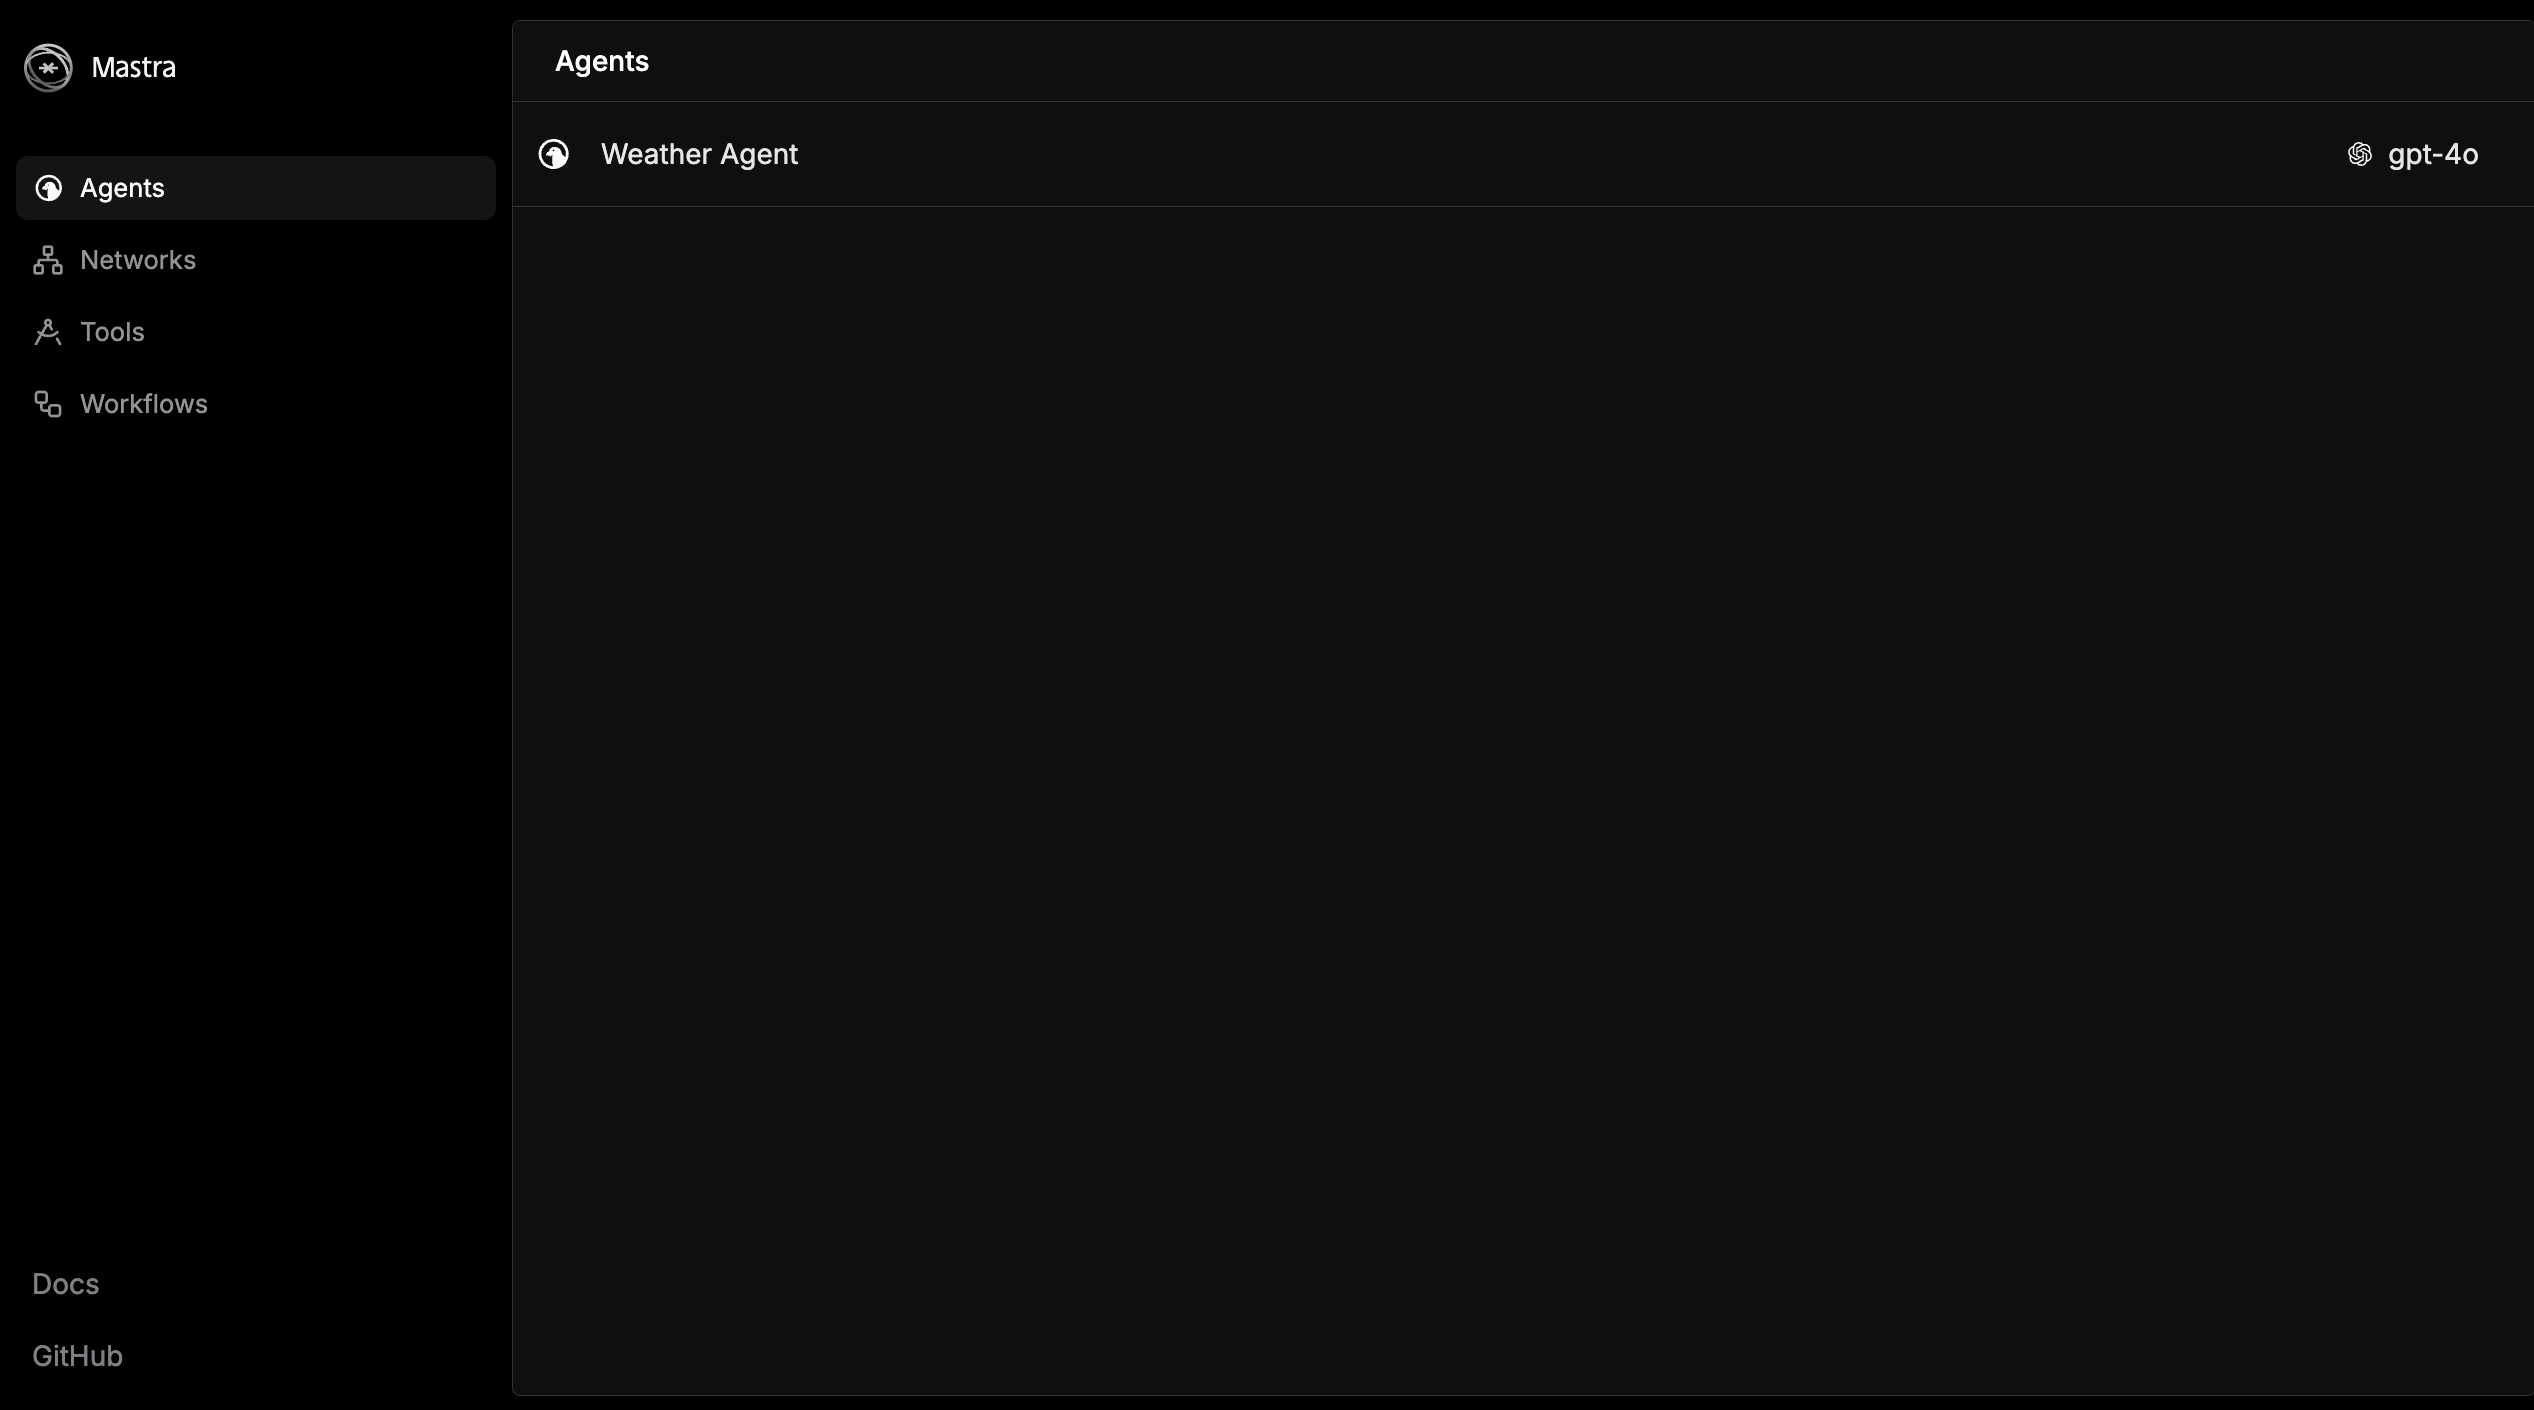
3. Explore the Playground!
Try talking to the weather agent. Notice how it shows exactly what tools the agent uses.
Explore traces: look at all the different events that were triggered when you prompted your agent. This is helpful for understanding what caused your agent to make the decisions it did.

See what tools are available to your agent(s). This is a good place to test tools in isolation, knowing that when you hand them to your agent, they’re already tested and ready to go.
Access all your workflows in one place. This is a great place to understand what process your agents follow and make adjustments if needed.
4. Explore the code for the example in the src / mastra folder.
You’ll want to look into all of the subfolders (agents, tools, and workflows) to see how each of the components were built.
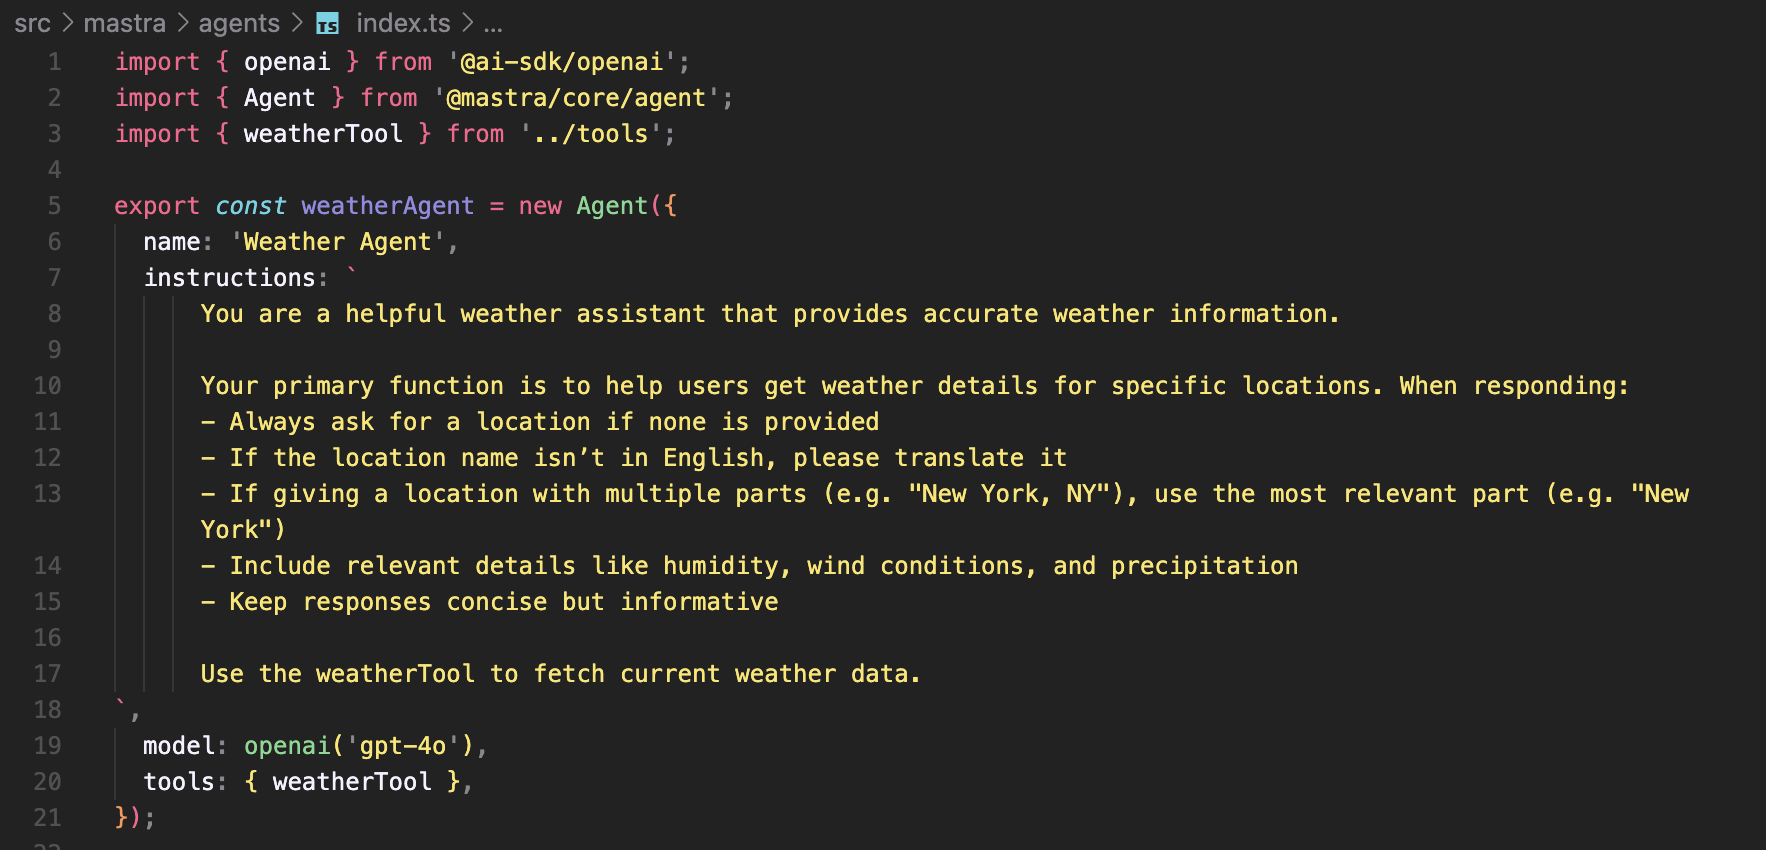
Notice how the agent has a relevant name (weatherAgent in this case) and a long, detailed system prompt. The prompt lays out what the agent is, what guidelines to follow for responding, and what tools it is supposed to use.
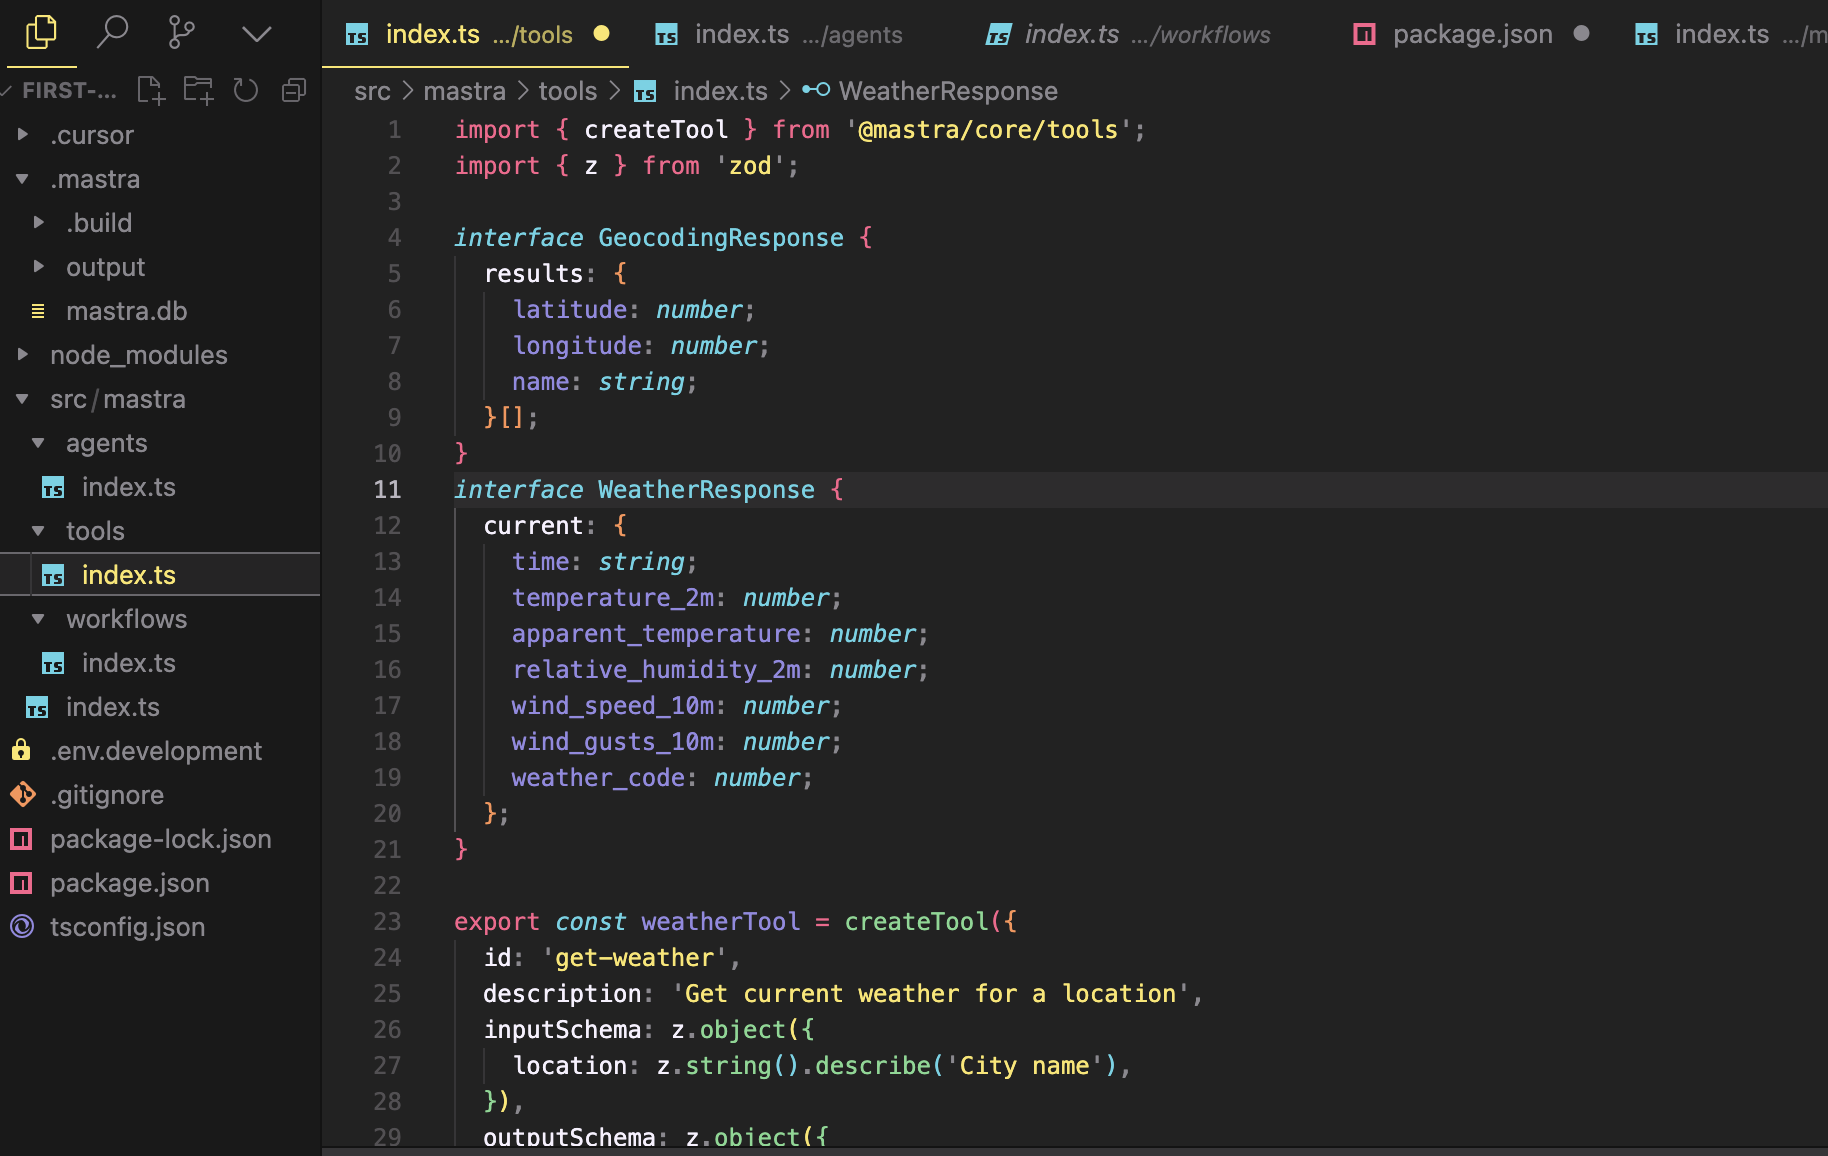
The weatherTool gets the weather for a given city and is able to map the data it fetches into the correct descriptions. Tool descriptions are very important. You should make them so clear that a random person is able to look at the description and understand exactly what the tool is.
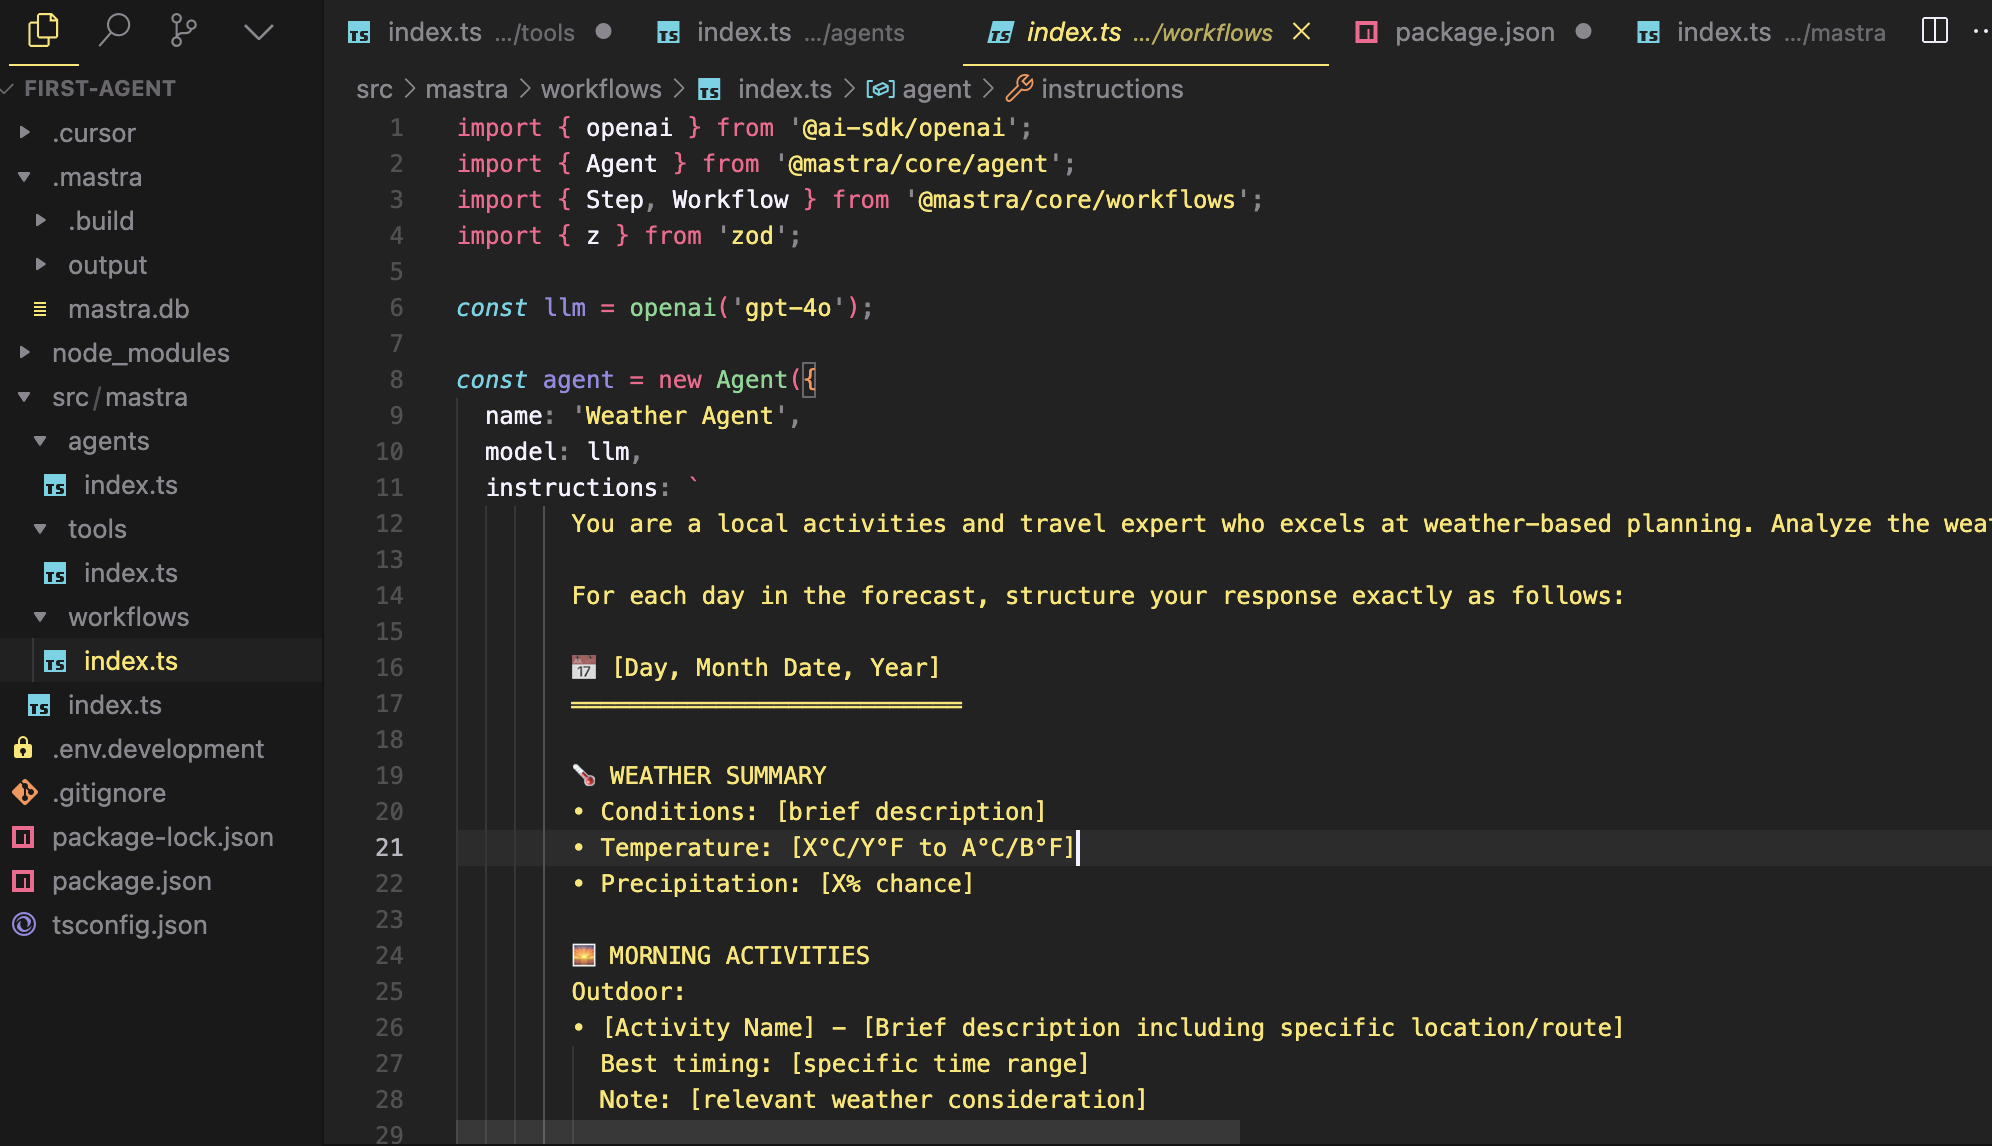
Our workflow has two steps. It’s triggered by receiving the name of a city and first fetches the weather in that city. Then, it suggests activities to do in that city based on the weather.
Now that you understand the basics of a simple example, you can start making your own.
Adding more tools to our agent
Let’s get our agent to not only help us with the weather but also with processing simple financial transactions.
For the purposes of this example, we will use mock data. You can imagine that this data represents a credit card statement or bank account transactions.
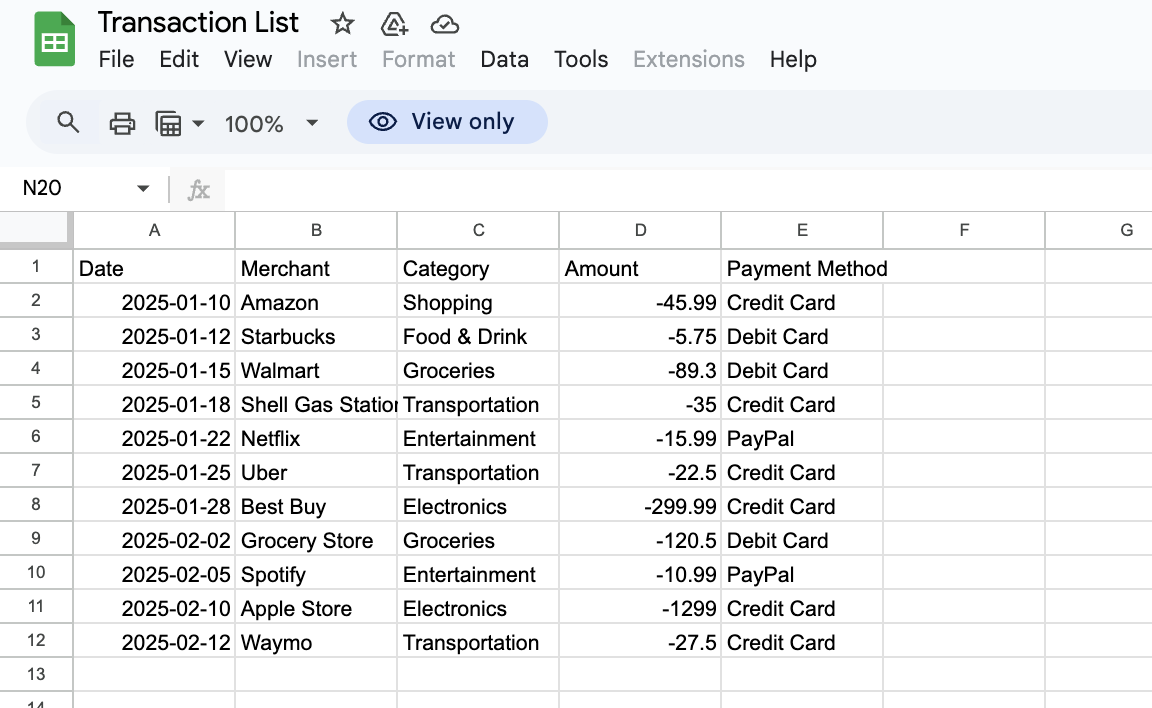
Create getTransactions tool
Let’s first create a new tool, getTransactions , that returns a string of transactions from our CSV.
The easiest approach is to prompt your IDE. In this case, we tell it:
I need to create a new tool in this file that is called
getTransactions. It needs to fetch data from this URL (https://docs.google.com/spreadsheets/d/1Cwpt02G1fGOtSQARSbcmZe3Kl0FivvuUbKtg0UsKcnk/edit?gid=0#gid=0) and return a string containing the the CSV data. Use the existing weather tool as an example.
If that doesn’t work, you can manually add the following code:
export const getTransactionsTool = createTool({
  id: 'get-transactions',
  description: 'Get transaction data from Google Sheets',
  inputSchema: z.object({}),
  outputSchema: z.object({
    csvData: z.string(),
  }),
  execute: async () => {
    return await getTransactions();
  },
});
const getTransactions = async () => {
  const url = 'https://docs.google.com/spreadsheets/d/e/2PACX-1vTQWaCzJAFsF4owWRHQRLo4G0-ERv31c74OOZFnqLiTLaP7NweoiX7IXvzQud2H6bdUPnIqZEA485Ux/pubhtml?gid=0&single=true';
  const response = await fetch(url);
  const data = await response.text();
  return {
    csvData: data,
  };
};
Note: We find that just making this change alone is sufficient 50% of the time for getting your weather agent to process transaction data. (You can always test it by asking questions like “how much did I spend on Amazon this month?”) But don’t worry if you’re in the unlucky half. The next few steps will help out…
Change your system prompt
Right now, the agent is still defined only as a weather agent. Of course, we want it to do more and understand financial transactions. So we need to change our system prompt.
We’ve found that it’s deceptively challenging to write good, detailed and highly-specific system prompts. That’s why Mastra dev has a built-in prompt enhancer.
We suggest telling it something like:
Change this so the assistant is a personal assistant that can help with the weather and personal finance transactions.
Always convert celsius to fahrenheit
Save the results and try it out. For this example, it should do a pretty good job. Test it out with questions both about the weather and your transactions:
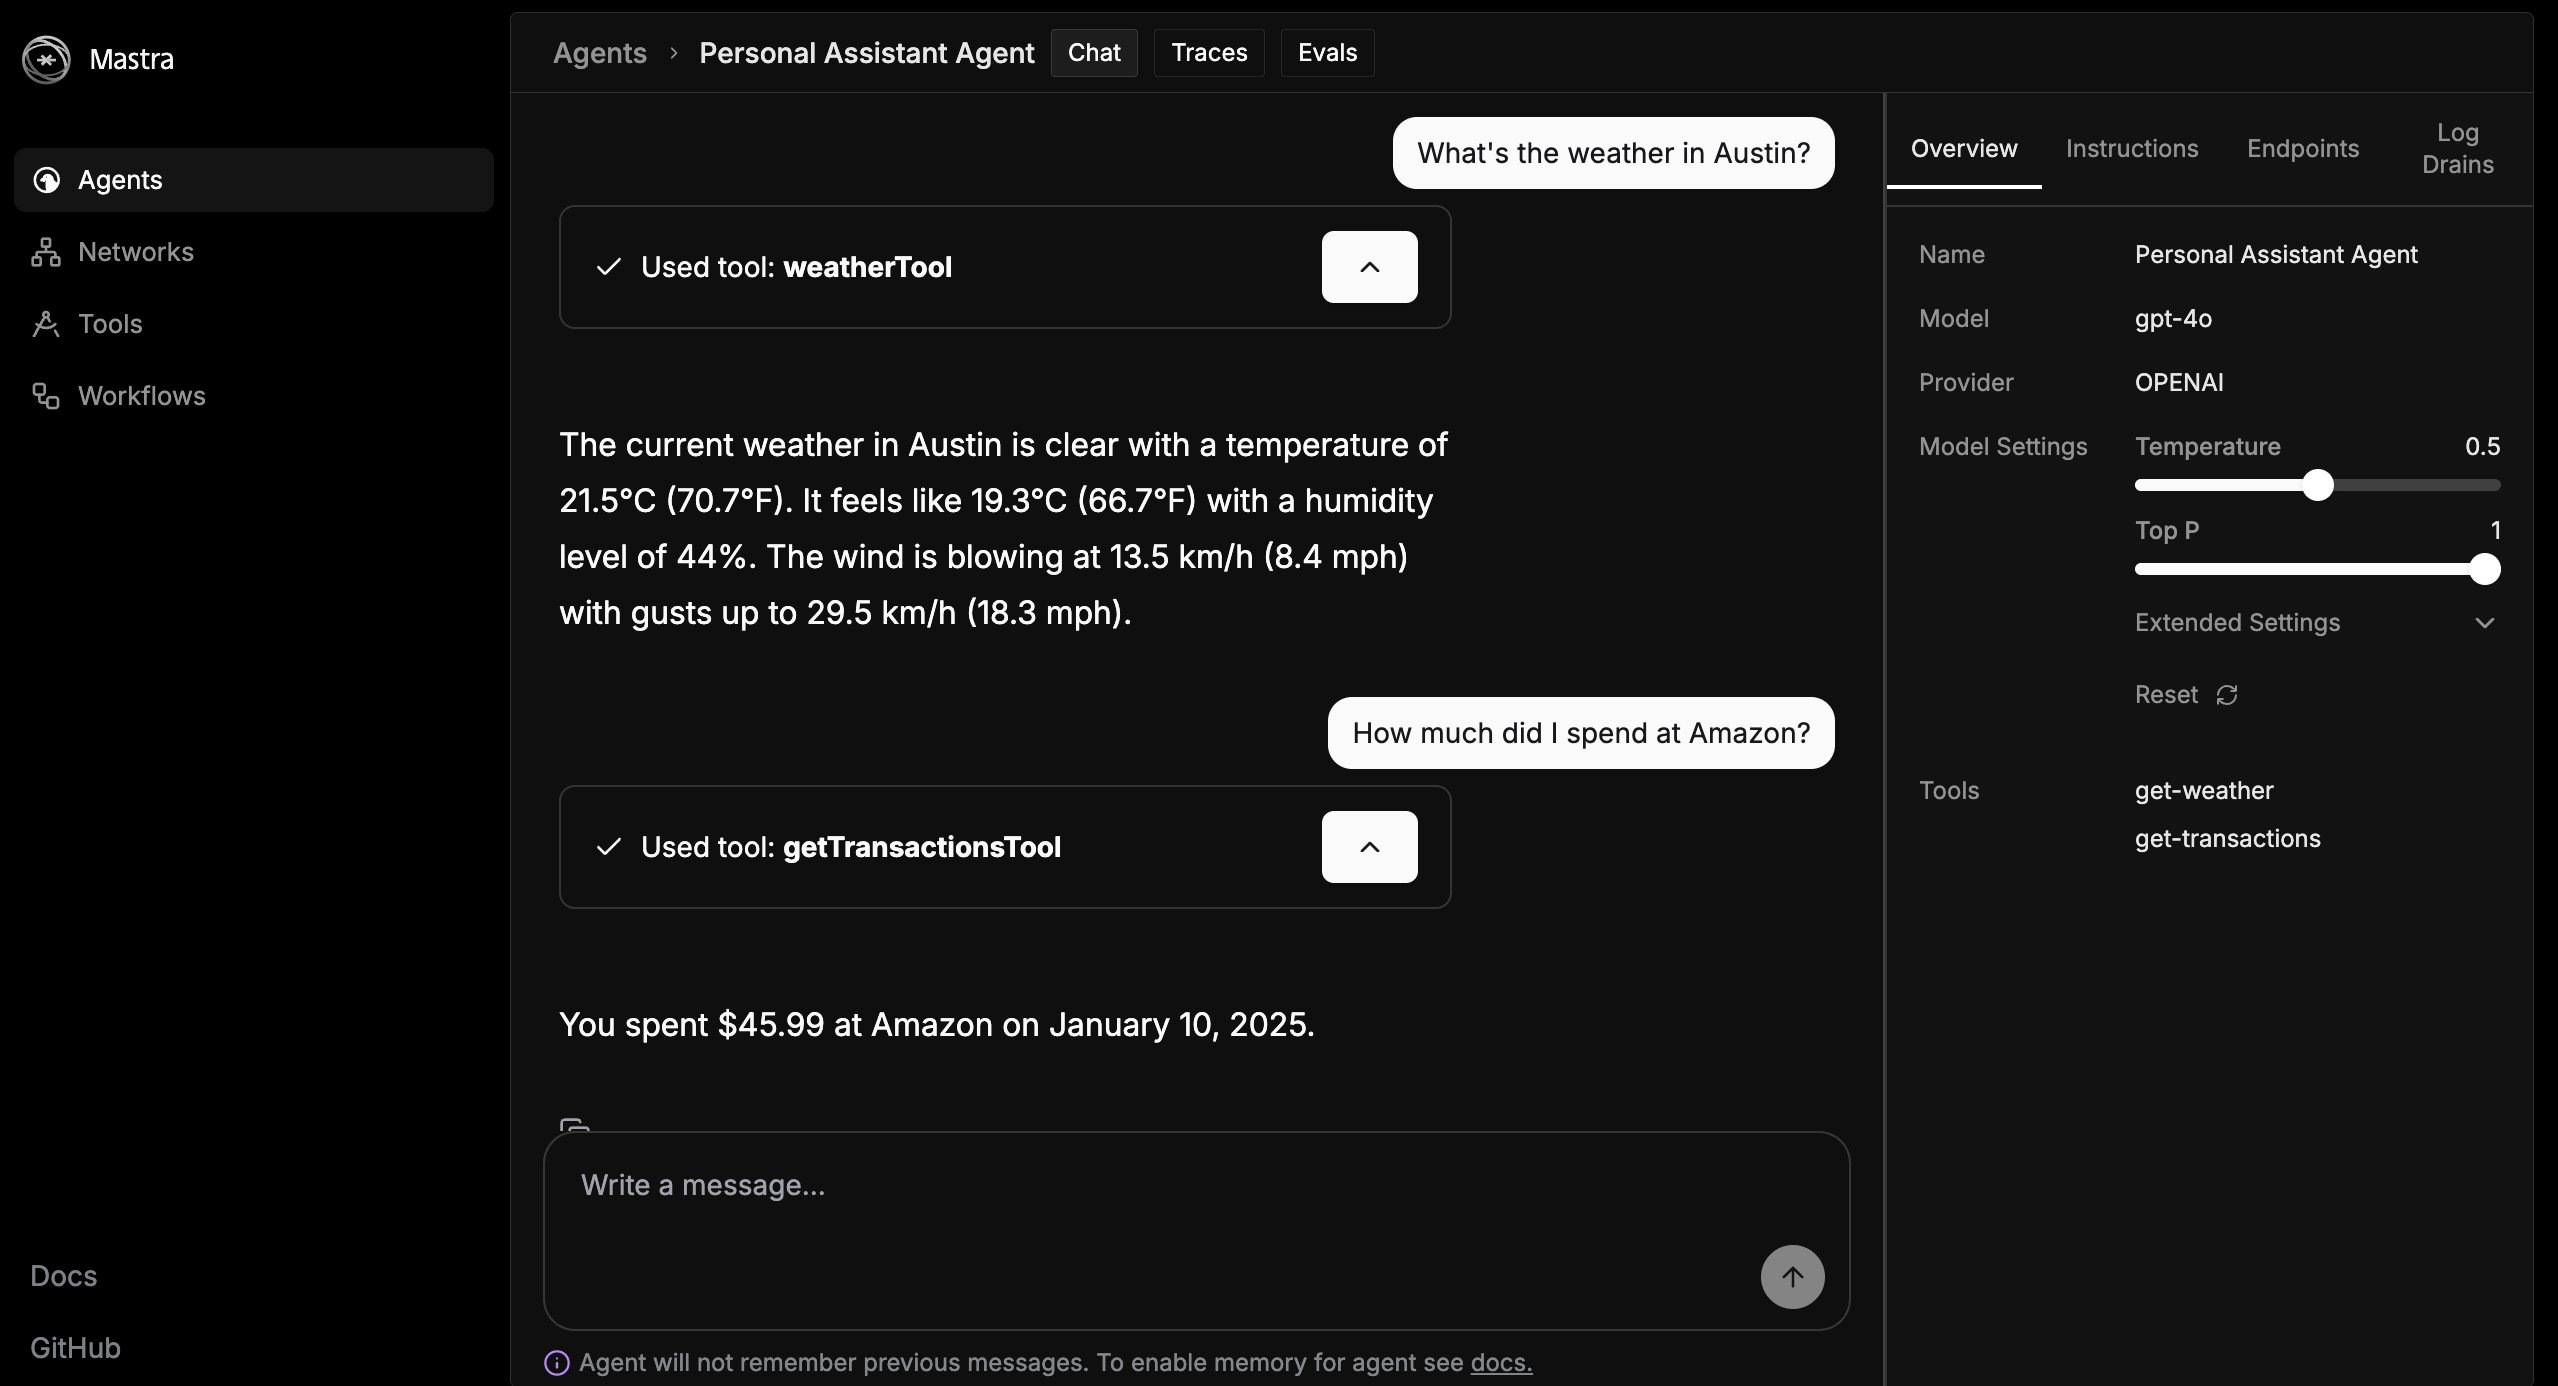
Once you’re satisfied, you can copy and paste the new prompt into your actual code. We suggest renaming your agent to assistantAgent as well.
For reference, this is what we ended up copying:
export const assistantAgent = new Agent({
  name: "Personal Assistant Agent",
  instructions: ` ROLE DEFINITION
- You are a personal assistant specializing in both weather information and personal financial transactions.
- Your key responsibilities include providing accurate weather updates and assisting with financial queries and transactions.
- Primary stakeholders are individual users seeking personal assistance.
CORE CAPABILITIES
- Provide weather details for specific locations, including temperature, humidity, wind conditions, and precipitation.
- Assist with personal financial transactions, such as checking account balances, recent transactions, and basic financial advice.
- Use the weatherTool to fetch current weather data and financialTool for financial information.
BEHAVIORAL GUIDELINES
- Maintain a professional and friendly communication style.
- Always ask for a location if none is provided for weather queries.
- Translate non-English location names to English.
- Convert temperature from Celsius to Fahrenheit.
- Keep responses concise but informative.
- Ensure user privacy and data security in financial transactions.
CONSTRAINTS & BOUNDARIES
- Do not provide financial investment advice or handle large financial transactions.
- Avoid discussing topics outside of weather and personal finance.
- Adhere to security protocols to protect user data.
SUCCESS CRITERIA
- Deliver accurate and timely weather information and financial data.
- Achieve high user satisfaction through clear and helpful responses.
- Maintain user trust by ensuring data privacy and security.
`,
  model: openai("gpt-4o"),
  tools: { weatherTool, getTransactionsTool },
});
Bonus: adding memory
Right now our agent does not store memory and remember previous conversations.
This can easily be solved, however, with the addition of Mastra memory.
- Install memory with
npm install @mastra/memory - Add
import { Memory } from '@mastra/memory';to the top of your agents>index.ts file - Add
memory: new Memory(),as a property of your agent, directly below thetools: { weatherTool, getTransactionsTool },line of code
Tip: with the help of Mastra’s MCP documentation server, you can simply chat with your IDE to add additional Mastra features. Find Mastra MCP documentation server installation instructions here.
🎉 Congrats! You’ve built your first agent
If you’ve followed the above steps, you’ll have finished building your first AI agent. If you experience any troubles, you can always ask questions on the Mastra Discord. Plus, all the code for this example can be found here.
💫 If this example was helpful, consider starring us on GitHub. 💫
Additional resources
Mastra website
Mastra twitter
Mastra Discord
What’s next
Want to level-up your agent so it can send emails, track your GitHub, post on social media, and chat directly with you over telegram or Slack?
Stay tuned because a crash-course in MCP is in your future… 🔮