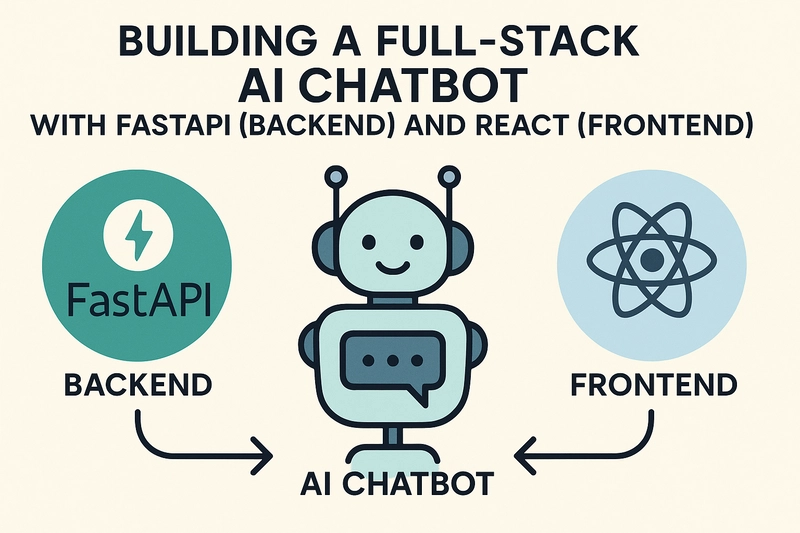
AI-powered chatbots are becoming increasingly prevalent and are transforming the way we interact with technology. From providing customer support to offering information retrieval and even acting as personal assistants, the applications of chatbots are vast and ever-expanding. This article serves as a comprehensive guide for building a simple, yet functional, AI-powered chatbot. This project will showcase the core principles of full-stack AI development. We'll dive into the backend using FastAPI, a modern Python framework known for its speed and ease of use, and build the frontend interface using React, a popular JavaScript library for constructing user interfaces. Through this step-by-step guide, we'll demonstrate how to connect a chatbot model to a user-friendly frontend, highlighting the full workflow, from user input to AI-generated response. This guide is designed for those keen on understanding the fundamentals of full-stack AI application development, offering a clear path to bridge the gap between the model, the backend, and the user experience.
I. Key Concepts: The Building Blocks of a Full-Stack AI Chatbot
Before diving into implementation, let's establish the essential concepts that form the foundation of our chatbot. Understanding these concepts is crucial for building and expanding on the core functionality.
A. Backend with FastAPI:
The backend serves as the brains of our chatbot, responsible for handling user requests, interacting with the AI model, and returning responses. We'll leverage FastAPI, a modern, fast (high-performance), web framework for building APIs with Python 3.7+ based on standard Python type hints.
Why FastAPI? FastAPI offers several benefits for AI projects:
- High Performance: Built on ASGI (Asynchronous Server Gateway Interface) for asynchronous operations, leading to faster response times.
- Automatic Data Validation: Utilizes Python type hints for automatic data validation and serialization, reducing errors.
- Easy-to-Use APIs: Simple and intuitive to learn and implement, making it suitable for both beginners and experts.
- Automatic Documentation: Generates interactive API documentation using OpenAPI and Swagger UI/Redoc, simplifying API testing and understanding.
B. Frontend with React:
The frontend, built with React, is the user-facing interface. It's what users will interact with, providing the means to input messages and view the chatbot's responses.
Why React? React provides advantages for creating the user interface (UI):
- Component-Based Architecture: Easy to create reusable components, promoting code organization and reusability.
- Virtual DOM: Improves efficiency by only updating the necessary parts of the DOM.
- Large Community and Ecosystem: A large and active community provides ample resources, libraries, and support.
- Declarative Approach: Developers describe the desired UI state and let React handle the actual DOM manipulations.
C. API Communication:
The cornerstone of our full-stack approach is seamless communication between the frontend (React) and the backend (FastAPI) through API calls. This involves:
-
API Endpoints: The backend exposes specific API endpoints (e.g.,
/chat) to receive and process requests. - Request Methods (e.g., POST): The frontend makes requests (using methods such as POST) to the backend endpoints.
- Data Format (JSON): The frontend and backend exchange data in JSON (JavaScript Object Notation) format, a standard format for data transmission on the web. The frontend serializes the user's message into JSON, and the backend also returns its response in JSON format.
- HTTP Status Codes: Understanding and handling HTTP status codes (e.g., 200 OK, 400 Bad Request, 500 Internal Server Error) to manage API responses.
- Asynchronous Operations: Asynchronous operations are essential to prevent the user interface from becoming unresponsive. This means that the frontend can make API calls without blocking the main thread of the application.
D. Integrating a Language Model (LLM):
The intelligence of our chatbot is derived from a Language Model (LLM). This is the core of the system that will generate text.
-
LLMs and APIs: Utilizing an LLM often means interacting with it via an API. These APIs allow us to send prompts (user input) and receive generated responses. Popular options include:
- OpenAI's GPT Models: Powerful and versatile, capable of generating human-like text. https://openai.com/
- Hugging Face's Transformers: A comprehensive library with access to many open-source LLMs. https://huggingface.co/
- Custom-Trained Models: Depending on the project, one might fine-tune an existing LLM or train one from scratch.
- API Keys & Security: Using an API key is typically required for authentication. The API key should be managed securely (e.g., using environment variables) and should not be hardcoded into the source code. This is very important for security.
II. Implementation Details: Building the Chatbot Step-by-Step
Now, let's dive into the practical aspects of building our chatbot. The next parts will guide you through the code and setup.
A. Backend Setup (FastAPI)
Let's create the backend that will receive the message from the frontend, send it to the LLM, and respond:
1. Project Setup:
Create a new project directory:
mkdir chatbot-backend
 cd chatbot-backend
Create a virtual environment and activate it.
python3 -m venv .venv
 source .venv/bin/activate # Linux/macOS or
.venv\Scripts\activate  # Windows
Install FastAPI and Uvicorn (an ASGI server):
pip install fastapi uvicorn python-dotenv openai2. Create main.py:
# main.py
from fastapi import FastAPI, HTTPException
from pydantic import BaseModel
import os
from openai import OpenAI
from dotenv import load_dotenv

load_dotenv()  # Load environment variables from .env file
client = OpenAI(api_key=os.getenv("OPENAI_API_KEY"))

app = FastAPI()

# Define the request body
class ChatInput(BaseModel):
    user_message: str

@app.get("/") # for a health check
async def health_check():
    return {"status": "ok"}

@app.post("/chat")
async def chat_endpoint(input_data: ChatInput):
    try:
        # Using OpenAI's ChatCompletion API
        completion = client.chat.completions.create(
            model="gpt-3.5-turbo",  # or another available model
            messages=[
                {"role": "system", "content": "You are a helpful assistant."},
                {"role": "user", "content": input_data.user_message},
            ],
        )
        # Extract the response from the API
        bot_response = completion.choices[0].message.content
        return {"bot_response": bot_response}

    except Exception as e:
        raise HTTPException(status_code=500, detail=str(e))
Explanation:
- The code imports the necessary libraries including
FastAPI,HTTPException,BaseModel,osandopenai - It also uses the
python-dotenvto load the API key from a .env file. Create a.envfile with the following content:OPENAI_API_KEY=YOUR_OPENAI_API_KEY - Sets up the OpenAI API client.
- Defines the
ChatInputmodel usingBaseModelto validate incoming data. - Creates a
/chatendpoint that receives user messages and uses the OpenAIchat.completions.createAPI. - Includes error handling using
HTTPException.
3. Running the FastAPI backend:
uvicorn main:app --reload
-
uvicorn main:appruns the FastAPI application.mainrefers to themain.pyfile, andappis the FastAPI instance. -
--reloadenables automatic reloading whenever the code is changed during development.
4. Testing the FastAPI endpoint:
You can test the endpoint using tools such as curl, or a tool such as Postman or Insomnia.
- Example using curl:
curl -X POST http://127.0.0.1:8000/chat -H "Content-Type: application/json" -d "{\"user_message\": \"Hello, chatbot!\"}"- Expected Output: The output should be a JSON response similar to: {"bot_response": "Hello there! How can I help you today?"} (The actual response will depend on the LLM and the system prompt).
B. Frontend Setup (React)
Let's build the user interface.
1. Project Setup:
Create a new React app using create-react-app or Vite:
npx create-react-app chatbot-frontend
# or with Vite
# npm create vite@latest chatbot-frontend --template react
cd chatbot-frontend
If using Vite, follow the instructions for setup using npm install and npm run dev.
2. Install axios (optional but recommended for API calls):
npm install axios3. Modify App.js:
Replace the contents of your src/App.js file with the following code:
// App.js
import React, { useState, useEffect } from 'react';
import './App.css'; // Import the CSS file

function App() {
    const [userInput, setUserInput] = useState('');
    const [chatLog, setChatLog] = useState([]);
    const [loading, setLoading] = useState(false);

    // Load chat history from local storage on component mount
    useEffect(() => {
        const storedChatLog = localStorage.getItem('chatLog');
        if (storedChatLog) {
            setChatLog(JSON.parse(storedChatLog));
        }
    }, []);

    const handleInputChange = (event) => {
        setUserInput(event.target.value);
    };

    const handleSubmit = async (event) => {
        event.preventDefault();
        if (!userInput.trim()) return;  // Prevent submitting empty messages
        const userMessage = { type: 'user', text: userInput };
        setChatLog(prevChatLog => [...prevChatLog, userMessage]);
        setUserInput(''); // Clear input immediately
        setLoading(true);

        try {
            const response = await fetch('http://localhost:8000/chat', { // Replace with your backend URL
                method: 'POST',
                headers: {
                    'Content-Type': 'application/json',
                },
                body: JSON.stringify({ user_message: userInput }),
            });

            if (!response.ok) {
                throw new Error(`HTTP error! status: ${response.status}`);
            }

            const data = await response.json();
            const botMessage = { type: 'bot', text: data.bot_response };
            setChatLog(prevChatLog => [...prevChatLog, botMessage]);
            // Save chat log to local storage
            localStorage.setItem('chatLog', JSON.stringify([...chatLog, userMessage, botMessage]));
        } catch (error) {
            console.error('Error:', error);
            const errorMessage = { type: 'error', text: 'An error occurred. Please try again.' };
            setChatLog(prevChatLog => [...prevChatLog, errorMessage]);
        } finally {
            setLoading(false);
        }
    };

    return (

            Simple AI Chatbot

                {chatLog.map((message, index) => (

                        {message.text}

                ))}
                {loading && Loading...}


                Send


    );
}

export default App;
Explanation:
-
Import necessary modules: Imports
React,useState,useEffect -
State Variables: Uses
useStatehooks to manage:-
userInput: the text the user is currently typing. -
chatLog: an array that stores the chat history. -
loading: A boolean to indicate whether the chatbot is processing a response.
-
-
useEffectfor Chat History: Loads the chat history from local storage whenever the component is mounted. -
handleInputChange: Updates theuserInputstate as the user types in the input field. -
handleSubmit: This is where the magic happens:- Prevents submitting empty messages.
- Updates
chatLogwith the user's message, clears input, and setsloadingtotrue. - Makes a
fetchrequest to the/chatendpoint of your backend (replace'http://localhost:8000/chat'with the correct URL if your backend runs elsewhere). - If the request is successful, the response is handled and the chatLog is updated with the bot's response.
- If an error occurs during the
fetchrequest, an error message is displayed in the chat window. - Finally, sets
loadingtofalseafter the operation completes.
-
Rendering the UI:
- Displays the chat history using
chatLog.map(). Each message is rendered within a div with a class name based on its type (user,bot, orerror) for styling. - Shows a "Loading..." message while the bot is generating a response.
- A form with an input field for typing messages and a submit button.
- Displays the chat history using
-
CSS Styling:
- Create a file named
src/App.cssto style the frontend (you can adapt this to your taste):
- Create a file named
/* App.css */
.App {
    font-family: sans-serif;
    display: flex;
    flex-direction: column;
    align-items: center;
    padding: 20px;
}

.chat-window {
    width: 400px;
    height: 400px;
    border: 1px solid #ccc;
    overflow-y: scroll;
    padding: 10px;
    margin-bottom: 10px;
}

.message {
    padding: 5px 10px;
    margin-bottom: 5px;
    border-radius: 5px;
    word-wrap: break-word; /* Allows long words to break and wrap */
}

.user {
    background-color: #e0f7fa;
    align-self: flex-end;
}

.bot {
    background-color: #f0f0f0;
    align-self: flex-start;
}

input[type="text"] {
    width: 300px;
    padding: 8px;
    margin-right: 10px;
    border: 1px solid #ccc;
    border-radius: 4px;
}

button {
    padding: 8px 15px;
    border: none;
    border-radius: 4px;
    background-color: #4CAF50;
    color: white;
    cursor: pointer;
}

button:disabled {
    background-color: #cccccc;
    cursor: not-allowed;
}
4. Running the React Frontend:
npm startThis will start the React development server and open the application in your default web browser.
C. Connecting Frontend and Backend
The backend is configured to receive user input, and generate a response, and now it's time to ensure that the backend and frontend are connected.
-
API Calls in React: In the frontend code, the
handleSubmitfunction uses thefetchAPI to make a POST request to the FastAPI/chatendpoint. This call includes the user's message in the request body. - Data Exchange: The frontend sends the user's message as a JSON payload. The backend receives this, processes it, and then sends a JSON response, which is then displayed in the chat window.
-
CORS considerations: If the frontend and backend are on different domains or ports, you might encounter CORS (Cross-Origin Resource Sharing) issues. This can be resolved by enabling CORS in FastAPI.
- Enabling CORS in FastAPI: Install the fastapi-cors package and add it to
main.py:
- Enabling CORS in FastAPI: Install the fastapi-cors package and add it to
pip install fastapi-corsAdd the following in main.py:
from fastapi.middleware.cors import CORSMiddleware
# ... (other imports)

app = FastAPI()

# Configure CORS
origins = [
    "http://localhost:3000",  # Replace with your frontend URL if different
    # You can also add more origins here, like your deployed frontend URL
]

app.add_middleware(
    CORSMiddleware,
    allow_origins=origins,
    allow_credentials=True,
    allow_methods=["*"],
    allow_headers=["*"],
)-
Run both and test:
- Ensure the FastAPI backend is running using
uvicorn main:app --reload. - Make sure the React frontend is running using
npm start. - Open your browser at
http://localhost:3000(or whatever port the React app is running on). - Enter a message and see if the chatbot responds.
- Ensure the FastAPI backend is running using
III. Conclusion
Building a chatbot demonstrates a full-stack AI application. We have covered the key stages of development. By combining FastAPI and React, you can create scalable, user-friendly AI-powered applications. This is just the beginning. * Recap: We have built the backend using FastAPI and the frontend with React. We have connected them through an API to make requests from the frontend and receive responses from the backend. * Next Steps: Explore advanced features, integrating more sophisticated AI models, and deploying your application.
References
- FastAPI Documentation: https://fastapi.tiangolo.com/
- React Documentation: https://react.dev/
- OpenAI API Documentation: https://platform.openai.com/docs/api-reference
- Hugging Face Documentation: https://huggingface.co/docs/transformers/index
- MDN Web Docs: https://developer.mozilla.org/en-US/docs/Web/API/Fetch_API (for Fetch API)
