
Live streaming has become a massive part of how we connect online—think of platforms like Twitch, YouTube Live, or even live shopping apps. If you’re a developer wanting to create your own live streaming app, the ZEGOCLOUD Live Streaming SDK is a fantastic tool to make it happen. It’s powerful, flexible, and works seamlessly with React JS, a popular library for building interactive web apps.
In this guide, I’ll take you through every step of integrating the ZEGOCLOUD Live Streaming SDK into a React JS project. We’ll:
- Set up the SDK
- Initialize a live stream
- Publish your video
- Play streams from others
All with detailed explanations and code snippets. I’ll keep it simple, practical, and easy to follow, so it feels like a real developer wrote it—not some AI spitting out generic stuff.
Let’s dive in!
Why ZEGOCLOUD Live Streaming SDK?
The ZEGOCLOUD Live Streaming SDK is built for developers who need a robust solution for real-time video streaming. It handles the heavy lifting—like:
- Connecting users
- Managing streams
- Ensuring low latency
So you can focus on building a great app.
With React JS, you get a clean way to manage your UI, making this combo perfect for a modern web-based live streaming app.
Prerequisites
Before we start, here’s what you’ll need:
- Node.js: Installed on your system (get it from nodejs.org).
-
React Knowledge: Basics of components, hooks (
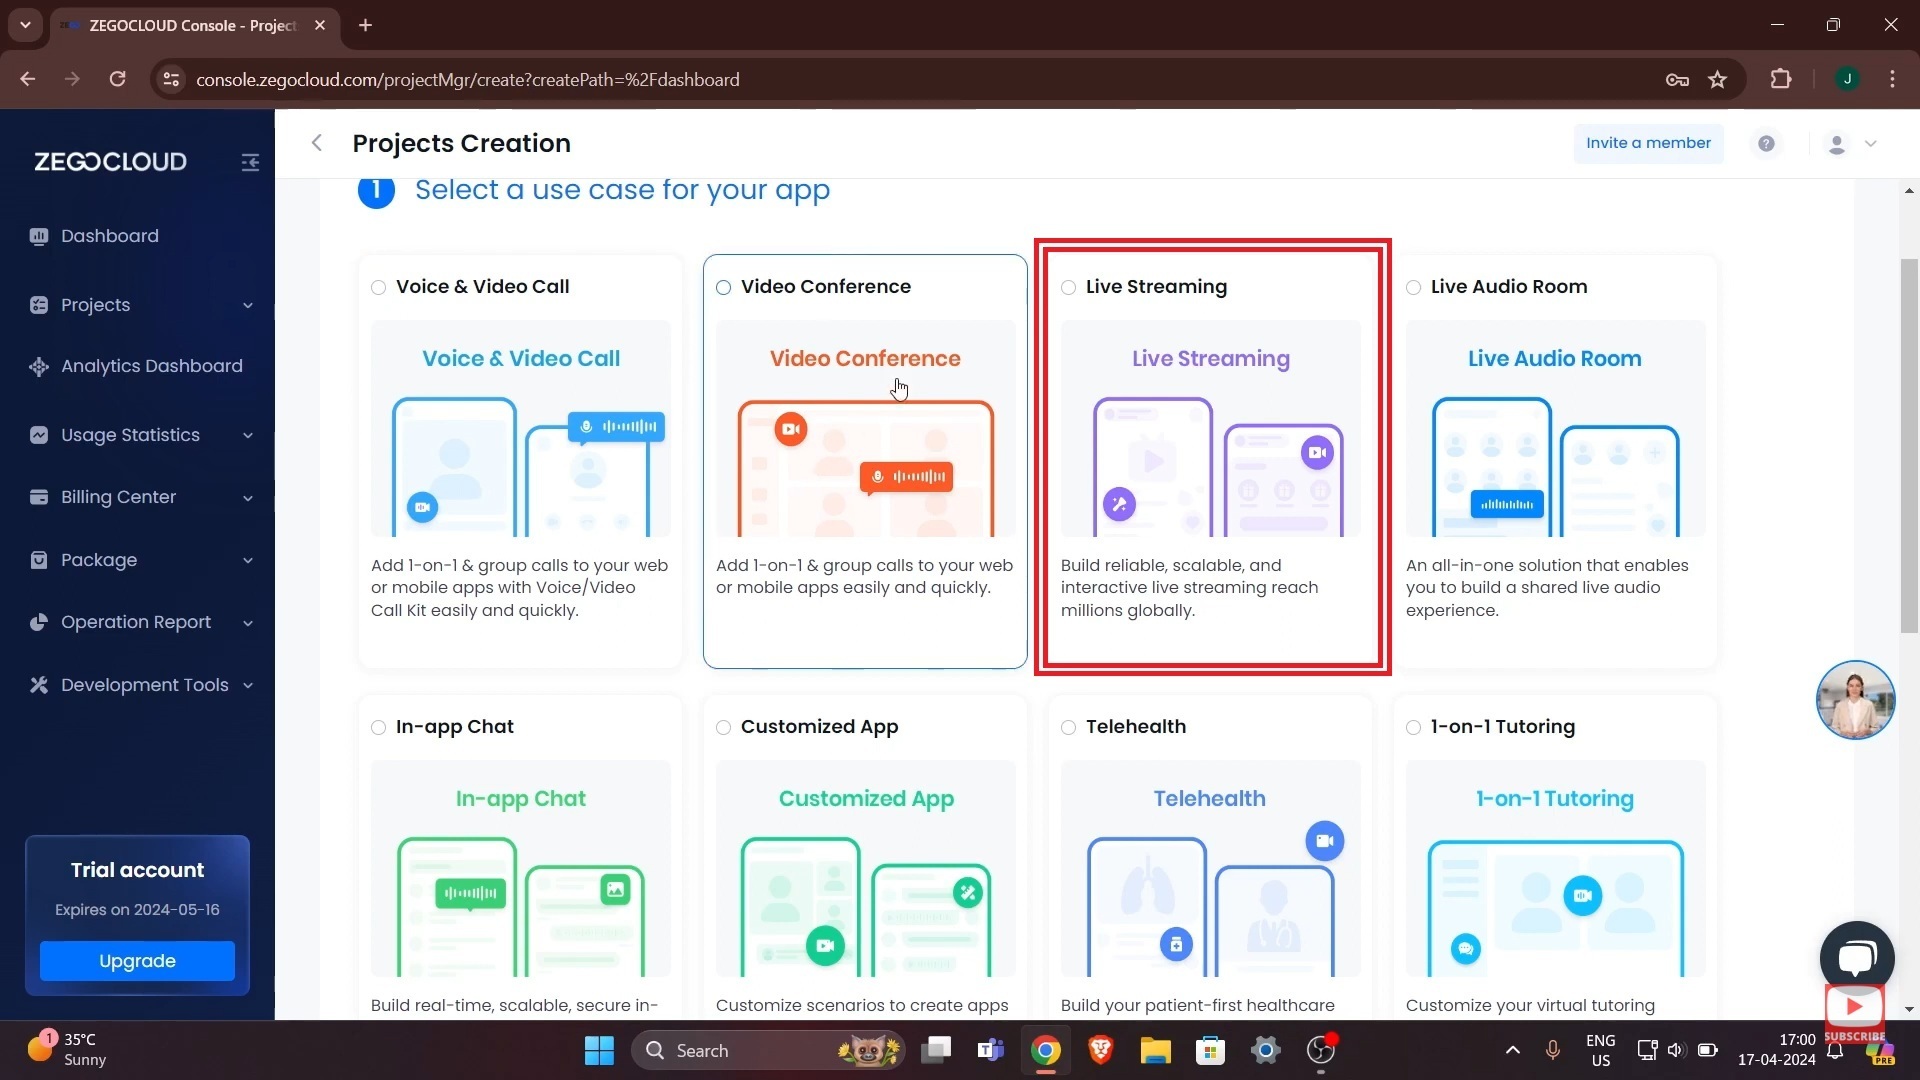
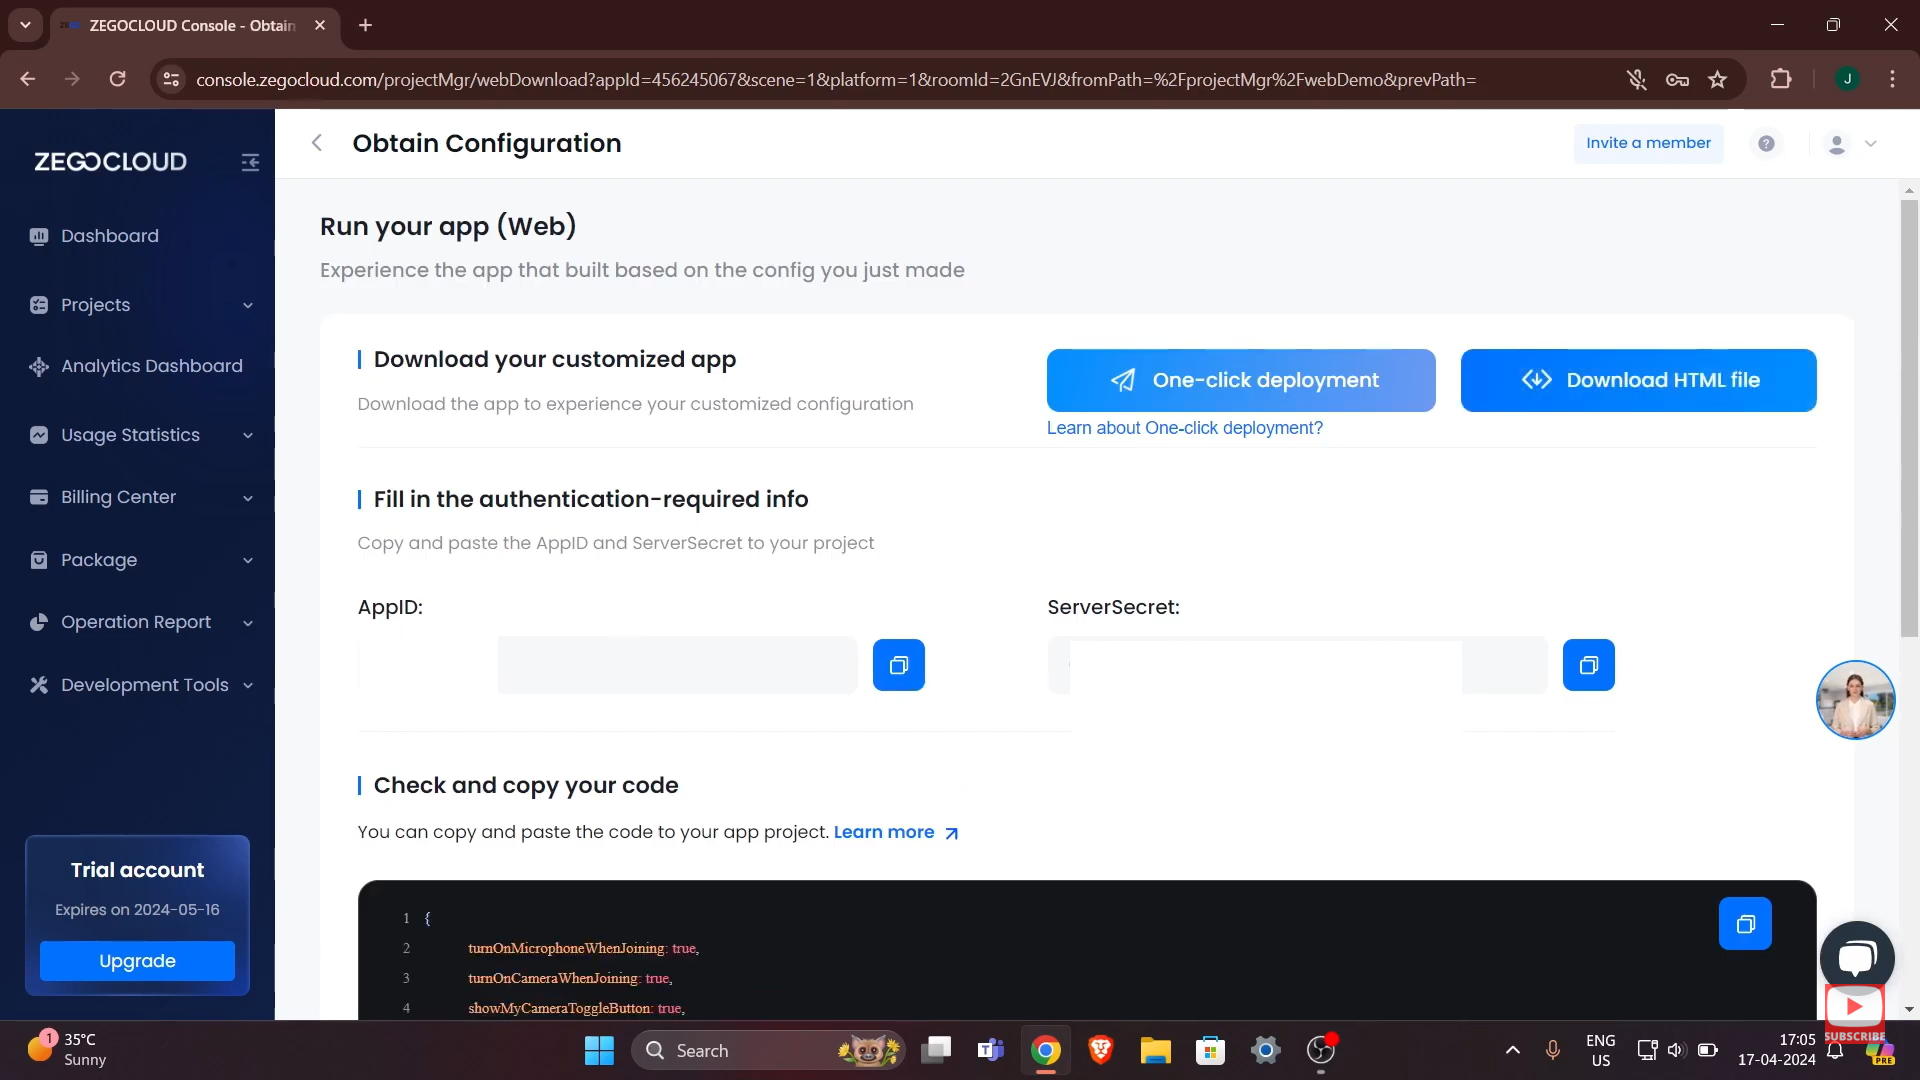
useState,useEffect), and JSX. - ZEGOCLOUD Account: Sign up at ZEGOCLOUD’s website and grab your App ID and Server Secret from the Admin Console.
- Text Editor: VS Code or any editor you like.
Step 1: Setting Up Your React Project
First, let’s create a fresh React project. I’m using Vite because it’s fast and lightweight, but you can use Create React App if that’s your preference.
Open your terminal and run:
npm create vite@latest live-streaming-app --template reactMove into the project folder:
cd live-streaming-appInstall dependencies and start the development server:
npm install
npm run dev
Visit http://localhost:5173 in your browser—you should see a basic React app. Perfect! We’ve got our base setup.
Step 2: Installing the ZEGOCLOUD Live Streaming SDK
The ZEGOCLOUD SDK for web apps uses WebRTC, so we’ll install the zego-express-engine-webrtc package.
In your terminal, run:
npm install zego-express-engine-webrtcThis adds the SDK to your project. You’ll see it listed in package.json once it’s installed.
Step 3: Initializing the SDK
Now, let’s set up the SDK in our React app.Open src/App.jsx and replace its contents with this:
import React, { useEffect } from 'react';
import { ZegoExpressEngine } from 'zego-express-engine-webrtc';

function App() {
  useEffect(() => {
    const appID = import.meta.env.VITE_ZEGO_APP_ID; // Your App ID
    const serverSecret = import.meta.env.VITE_ZEGO_SERVER_SECRET; // Your Server Secret
    const zg = new ZegoExpressEngine(appID, serverSecret);
    console.log('ZEGOCLOUD SDK Initialized!');

    return () => {
      zg.destroyEngine(); // Cleanup when component unmounts
    };
  }, []);

  return (

      My Live Streaming App


  );
}

export default App;
What’s Going On?
-
Imports: We bring in
useEffectfor lifecycle management andZegoExpressEnginefrom the SDK. -
Initialization: Inside
useEffect, we create a new instance ofZegoExpressEnginewith our App ID and Server Secret. -
Cleanup: The
returnstatement ensures the engine is destroyed when the component unmounts, avoiding memory leaks. -
UI: Two
divs with IDslocal-streamandremote-streamswill hold our video feeds.
Environment Variables
We’re using VITE_ZEGO_APP_ID and VITE_ZEGO_SERVER_SECRET.
Create a .env file in your project root and add:
VITE_ZEGO_APP_ID=your_app_id_here
VITE_ZEGO_SERVER_SECRET=your_server_secret_here
Replace the placeholders with your actual values from the ZEGOCLOUD Admin Console.
Step 4: Logging into a Room
In ZEGOCLOUD, a “room” is where users connect for live streaming. Let’s log in.Update the useEffect block:
useEffect(() => {
  const appID = import.meta.env.VITE_ZEGO_APP_ID;
  const serverSecret = import.meta.env.VITE_ZEGO_SERVER_SECRET;
  const zg = new ZegoExpressEngine(appID, serverSecret);

  const roomID = 'live-room-001'; // Unique room name
  const userID = `user_${Math.floor(Math.random() * 10000)}`; // Random user ID
  const userName = 'Streamer';
  const token = 'your_token_here'; // Replace with a real token

  zg.loginRoom(roomID, token, { userID, userName }, { userUpdate: true })
    .then(() => {
      console.log('Logged into the room!');
    })
    .catch(error => {
      console.error('Login failed:', error);
    });

  return () => {
    zg.logoutRoom(roomID);
    zg.destroyEngine();
  };
}, []);
Explanation
-
Variables:
roomIDis the room’s identifier,userIDis unique for each user (randomized here for simplicity), anduserNameis a display name. - Token: The token is for authentication. For testing, you can generate a temporary token in the ZEGOCLOUD Admin Console. In production, create it securely on your server.
-
loginRoom: This connects us to the room. The
{ userUpdate: true }option lets us track other users joining or leaving.
Step 5: Publishing Your Live Stream
To start streaming your video, we need to capture your camera and microphone feed and publish it.Add this inside the .then() block:
zg.loginRoom(roomID, token, { userID, userName }, { userUpdate: true })
  .then(() => {
    console.log('Logged into the room!');
    return zg.createStream({ camera: { audio: true, video: true } });
  })
  .then(localStream => {
    const streamID = `${userID}_stream`; // Unique stream ID
    zg.startPublishingStream(streamID, localStream);

    const localVideo = document.getElementById('local-stream');
    const videoElement = document.createElement('video');
    videoElement.autoplay = true;
    videoElement.muted = true; // Mute local audio to avoid feedback
    videoElement.srcObject = localStream;
    localVideo.appendChild(videoElement);
  })
  .catch(error => {
    console.error('Error:', error);
  });
What’s Happening?
- createStream: Captures audio and video from your device. You’ll need to grant browser permissions for this.
-
startPublishingStream: Sends your stream to the room with a unique
streamID. -
Display Local Stream: We create a
element, attach thelocalStream, and add it to thelocal-streamdiv.
Step 6: Playing Remote Streams
To watch other users’ streams, we need to listen for stream updates.Add this event listener after initializing zg:
useEffect(() => {
  const appID = import.meta.env.VITE_ZEGO_APP_ID;
  const serverSecret = import.meta.env.VITE_ZEGO_SERVER_SECRET;
  const zg = new ZegoExpressEngine(appID, serverSecret);

  zg.on('roomStreamUpdate', async (roomID, updateType, streamList) => {
    const remoteContainer = document.getElementById('remote-streams');
    if (updateType === 'ADD') {
      streamList.forEach(async stream => {
        const remoteStream = await zg.startPlayingStream(stream.streamID, { audio: true, video: true });
        const videoElement = document.createElement('video');
        videoElement.id = stream.streamID;
        videoElement.autoplay = true;
        videoElement.playsInline = true;
        videoElement.muted = false;
        videoElement.srcObject = remoteStream;
        remoteContainer.appendChild(videoElement);
      });
    } else if (updateType === 'DELETE') {
      streamList.forEach(stream => {
        const videoElement = document.getElementById(stream.streamID);
        if (videoElement) {
          videoElement.remove();
        }
      });
    }
  });

  const roomID = 'live-room-001';
  const userID = `user_${Math.floor(Math.random() * 10000)}`;
  const userName = 'Streamer';
  const token = 'your_token_here';

  zg.loginRoom(roomID, token, { userID, userName }, { userUpdate: true })
    .then(() => {
      console.log('Logged into the room!');
      return zg.createStream({ camera: { audio: true, video: true } });
    })
    .then(localStream => {
      const streamID = `${userID}_stream`;
      zg.startPublishingStream(streamID, localStream);

      const localVideo = document.getElementById('local-stream');
      const videoElement = document.createElement('video');
      videoElement.autoplay = true;
      videoElement.muted = true;
      videoElement.srcObject = localStream;
      localVideo.appendChild(videoElement);
    })
    .catch(error => {
      console.error('Error:', error);
    });

  return () => {
    zg.logoutRoom(roomID);
    zg.destroyEngine();
  };
}, []);
Breakdown
-
roomStreamUpdate: This event triggers when streams are added (
ADD) or removed (DELETE). -
ADD: For each new stream, we use
startPlayingStreamto fetch it, create aelement, and display it inremote-streams. - DELETE: Removes the video element when a stream ends.
Step 7: Adding Basic Controls (Optional)
Let’s add a button to stop publishing your stream.Update App.jsx with state and a button:
import React, { useEffect, useState } from 'react';
import { ZegoExpressEngine } from 'zego-express-engine-webrtc';

function App() {
  const [zg, setZg] = useState(null);
  const [streamID, setStreamID] = useState(null);

  useEffect(() => {
    const appID = import.meta.env.VITE_ZEGO_APP_ID;
    const serverSecret = import.meta.env.VITE_ZEGO_SERVER_SECRET;
    const engine = new ZegoExpressEngine(appID, serverSecret);
    setZg(engine);

    engine.on('roomStreamUpdate', async (roomID, updateType, streamList) => {
      const remoteContainer = document.getElementById('remote-streams');
      if (updateType === 'ADD') {
        streamList.forEach(async stream => {
          const remoteStream = await engine.startPlayingStream(stream.streamID, { audio: true, video: true });
          const videoElement = document.createElement('video');
          videoElement.id = stream.streamID;
          videoElement.autoplay = true;
          videoElement.playsInline = true;
          videoElement.muted = false;
          videoElement.srcObject = remoteStream;
          remoteContainer.appendChild(videoElement);
        });
      } else if (updateType === 'DELETE') {
        streamList.forEach(stream => {
          const videoElement = document.getElementById(stream.streamID);
          if (videoElement) {
            videoElement.remove();
          }
        });
      }
    });

    const roomID = 'live-room-001';
    const userID = `user_${Math.floor(Math.random() * 10000)}`;
    const userName = 'Streamer';
    const token = 'your_token_here';

    engine.loginRoom(roomID, token, { userID, userName }, { userUpdate: true })
      .then(() => {
        console.log('Logged into the room!');
        return engine.createStream({ camera: { audio: true, video: true } });
      })
      .then(localStream => {
        const sid = `${userID}_stream`;
        setStreamID(sid);
        engine.startPublishingStream(sid, localStream);

        const localVideo = document.getElementById('local-stream');
        const videoElement = document.createElement('video');
        videoElement.autoplay = true;
        videoElement.muted = true;
        videoElement.srcObject = localStream;
        localVideo.appendChild(videoElement);
      })
      .catch(error => {
        console.error('Error:', error);
      });

    return () => {
      engine.logoutRoom(roomID);
      engine.destroyEngine();
    };
  }, []);

  const stopStreaming = () => {
    if (zg && streamID) {
      zg.stopPublishingStream(streamID);
      const localVideo = document.getElementById('local-stream');
      localVideo.innerHTML = ''; // Clear the local video
      setStreamID(null);
    }
  };

  return (

      My Live Streaming App


      {streamID && Stop Streaming}

  );
}

export default App;
Explanation
-
State:
zgstores the engine instance, andstreamIDtracks the active stream. - stopStreaming: Stops the stream and clears the local video.
The Full Code
Here’s everything together:
import React, { useEffect, useState } from 'react';
import { ZegoExpressEngine } from 'zego-express-engine-webrtc';

function App() {
  const [zg, setZg] = useState(null);
  const [streamID, setStreamID] = useState(null);

  useEffect(() => {
    const appID = import.meta.env.VITE_ZEGO_APP_ID;
    const serverSecret = import.meta.env.VITE_ZEGO_SERVER_SECRET;
    const engine = new ZegoExpressEngine(appID, serverSecret);
    setZg(engine);

    engine.on('roomStreamUpdate', async (roomID, updateType, streamList) => {
      const remoteContainer = document.getElementById('remote-streams');
      if (updateType === 'ADD') {
        streamList.forEach(async stream => {
          const remoteStream = await engine.startPlayingStream(stream.streamID, { audio: true, video: true });
          const videoElement = document.createElement('video');
          videoElement.id = stream.streamID;
          videoElement.autoplay = true;
          videoElement.playsInline = true;
          videoElement.muted = false;
          videoElement.srcObject = remoteStream;
          remoteContainer.appendChild(videoElement);
        });
      } else if (updateType === 'DELETE') {
        streamList.forEach(stream => {
          const videoElement = document.getElementById(stream.streamID);
          if (videoElement) {
            videoElement.remove();
          }
        });
      }
    });

    const roomID = 'live-room-001';
    const userID = `user_${Math.floor(Math.random() * 10000)}`;
    const userName = 'Streamer';
    const token = 'your_token_here';

    engine.loginRoom(roomID, token, { userID, userName }, { userUpdate: true })
      .then(() => {
        console.log('Logged into the room!');
        return engine.createStream({ camera: { audio: true, video: true } });
      })
      .then(localStream => {
        const sid = `${userID}_stream`;
        setStreamID(sid);
        engine.startPublishingStream(sid, localStream);

        const localVideo = document.getElementById('local-stream');
        const videoElement = document.createElement('video');
        videoElement.autoplay = true;
        videoElement.muted = true;
        videoElement.srcObject = localStream;
        localVideo.appendChild(videoElement);
      })
      .catch(error => {
        console.error('Error:', error);
      });

    return () => {
      engine.logoutRoom(roomID);
      engine.destroyEngine();
    };
  }, []);

  const stopStreaming = () => {
    if (zg && streamID) {
      zg.stopPublishingStream(streamID);
      const localVideo = document.getElementById('local-stream');
      localVideo.innerHTML = '';
      setStreamID(null);
    }
  };

  return (

      My Live Streaming App


      {streamID && Stop Streaming}

  );
}

export default App;
Testing the App
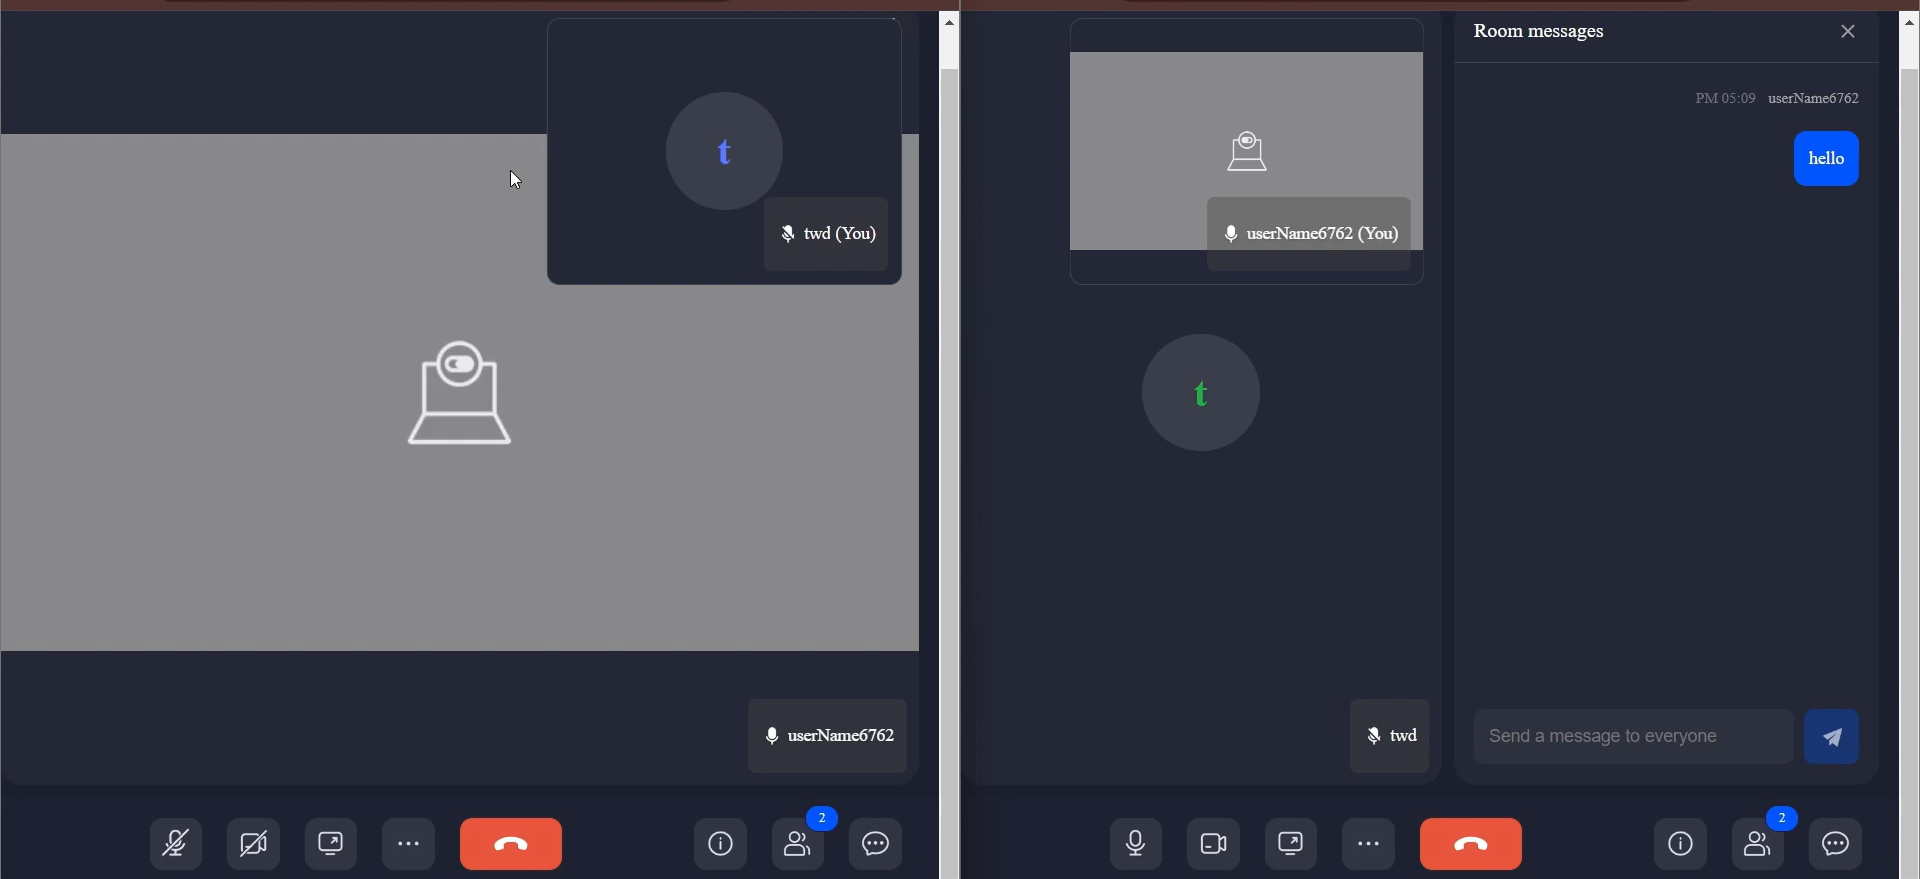
Run npm run dev and open http://localhost:5173.
You should see your video in the local-stream div.
To test remote streams, open another tab with the same roomID but a different userID. The second user’s stream should appear in remote-streams.
Conclusion
There you go—you’ve built a live streaming app with the ZEGOCLOUD Live Streaming SDK and React JS!
We’ve covered setting up the project, initializing the SDK, joining a room, publishing your stream, and playing others’ streams.
It’s a basic app, but ZEGOCLOUD offers tons more—like co-hosting, low-latency modes, or stream recording—that you can explore in their docs.
For a production app:
- Generate tokens securely on a server
- Add error handling
- Style it up a bit
But for now, you’ve got a solid foundation.
Have fun streaming, and let me know how it goes!
Happy coding, and enjoy your new video call app!
written by shubham Pandey
for video tutorial watch this :-
