Caching is an essential technique to improve the performance of applications by reducing database load and response time. In this post, we will explore how to integrate Redis as a caching layer in a Spring Boot application, running Redis inside a Docker container.
Why Use Redis for Caching?
Redis (Remote Dictionary Server) is an in-memory key-value store known for its high performance and scalability. It supports various data structures, persistence, and high availability, making it a great choice for caching in Spring Boot applications.
Setting Up Redis with Docker Compose
Update our docker-compose.yaml file with:
redis:
    image: redis:latest
    ports:
      - "6379:6379"
    volumes:
      - example-redis-data:/var/lib/redis/data
volumes:
  example-redis-data:
Adding Redis Cache to a Spring Boot Application
Step 1: Add Dependencies
In your pom.xml, add the necessary dependencies for Spring Boot caching and Redis:
org.springframework.boot
        spring-boot-starter-cache


        org.springframework.boot
        spring-boot-starter-data-redis
Step 2: Create a cache configuration with Redis
Annotate your class configuration with @EnableCaching:
@Configuration
@EnableCaching
public class RedisCacheConfig {

    @Bean
    public CacheManager cacheManager(RedisConnectionFactory redisConnectionFactory) {
        RedisCacheConfiguration cacheConfiguration = RedisCacheConfiguration.defaultCacheConfig()
                .entryTtl(Duration.ofMinutes(10))
                .serializeValuesWith(RedisSerializationContext.SerializationPair
                        .fromSerializer(new GenericJackson2JsonRedisSerializer()));

        return RedisCacheManager.builder(redisConnectionFactory)
                .cacheDefaults(cacheConfiguration)
                .build();
    }

    @Bean
    public SimpleKeyGenerator keyGenerator() {
        return new SimpleKeyGenerator();
    }

}
Explanation of the parameters:
- entryTtl(Duration.ofMinutes(10)) → Defines that every entry of the cache expires after 10 minutes.
- GenericJackson2JsonRedisSerializer() → Serializes the objects in a JSON format, granting the compatibility and readability of the data.
- SimpleKeyGenerator → Use the key automatically generated by Spring to identify the objects on cache.
Step 3: Configure Redis Connection
Add the following properties to your application.properties or application.yml file:
spring.redis.host=localhost
spring.redis.port=6379
Step 4: Implement Caching in a Service
Create a service class that caches data using the @Cacheable annotation:
import org.springframework.cache.annotation.Cacheable;
import org.springframework.stereotype.Service;

@Service
public class UserService {

    private final UserRepository userRepository;

    public UserService(UserRepository userRepository) {
        this.userRepository = userRepository;
    }


    @Cacheable(value = "users", key = "#id")
    public UserResponseDto findById(UUID id) {
        var user = userRepository.findById(id).orElseThrow();
        return new UserResponseDto(user.getId(), user.getName());
    }
}
With caching enabled, the first request for a product ID will take time to process, but subsequent requests will return the cached value almost instantly.
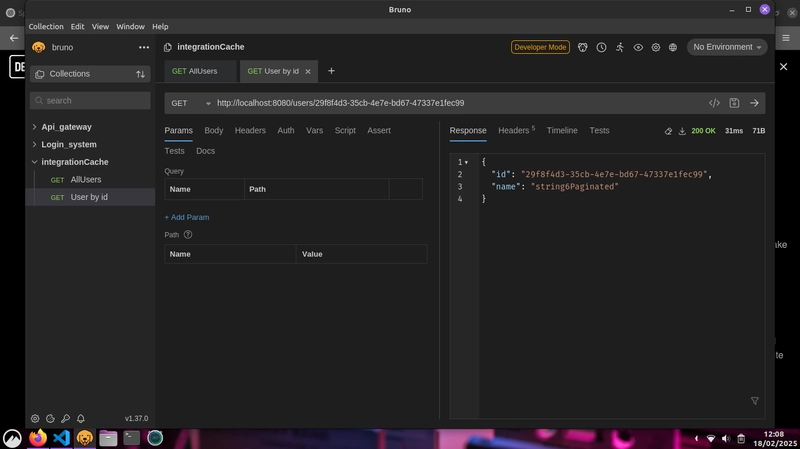
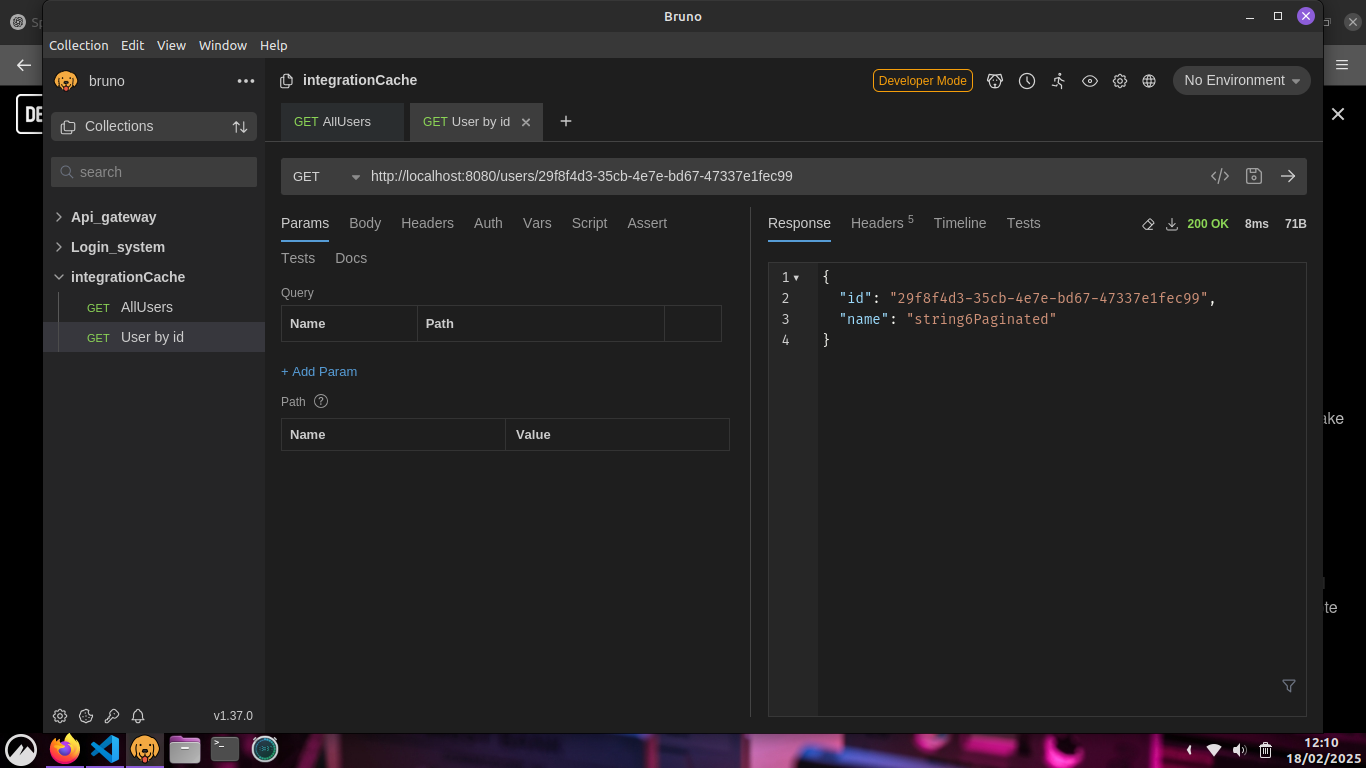
Step 5: Test the Caching
- Grab a id from a user you stored in the database.
- With that id, you call the endpoint
users/{id from user}. - In my tests using Bruno, the call to the database, without the cache is responding in 31ms

- With the cache the response comes in 8ms.
Step 6: Remove Cache
If a user was deleted, we need to remove him from the cache to avoid outdated data.
import org.springframework.cache.annotation.Cacheable;
import org.springframework.stereotype.Service;

@Service
public class UserService {

    private final UserRepository userRepository;

    public UserService(UserRepository userRepository) {
        this.userRepository = userRepository;
    }


    @Cacheable(value = "users", key = "#id")
    public UserResponseDto findById(UUID id) {
        var user = userRepository.findById(id).orElseThrow();
        return new UserResponseDto(user.getId(), user.getName());
    }

    @Transactional
    @CacheEvict(value = "users", key = "#id")
    public void deleteById(UUID id) {
        userRepository.deleteById(id);
    }
}
Step 7: Refreshing Cache
If you want to guarantee that the cach will always be updated, even we a new user is created, you can use @CachePut.
import org.springframework.cache.annotation.Cacheable;
import org.springframework.stereotype.Service;

@Service
public class UserService {

    private final UserRepository userRepository;

    public UserService(UserRepository userRepository) {
        this.userRepository = userRepository;
    }


    @Cacheable(value = "users", key = "#id")
    public UserResponseDto findById(UUID id) {
        var user = userRepository.findById(id).orElseThrow();
        return new UserResponseDto(user.getId(), user.getName());
    }

    @Transactional
    @CacheEvict(value = "users", key = "#id")
    public void deleteById(UUID id) {
        userRepository.deleteById(id);
    }

    @Transactional
    @CachePut(value = "users", key = "#result.id")
    public UserResponseDto save(CreateUserDto user) {
        var newUser = new UserModel(user.name());

        var userCreated = userRepository.save(newUser);

        return new UserResponseDto(userCreated.getId(), userCreated.getName());
    }
}
Conclusion
Integrating Redis as a caching layer in Spring Boot significantly improves application performance by reducing database calls. Running Redis in a Docker container makes it easy to set up and maintain. By using Spring Boot’s caching abstraction, we can seamlessly cache frequently accessed data and enhance the user experience.