
Playwright, an open-source automation library developed by Microsoft, has seen a rapid rise in popularity which is attributed to its modern features and capabilities that address the limitations of traditional testing frameworks like Selenium.

We will utilize Visual Studio 2022 along with C# and NUnit to develop a straightforward example that showcases the fundamental features of Playwright.
Step 1: Prerequisites
Install Visual Studio:
Ensure you have Visual Studio 2022 (or later) installed.Install Node.js:
Download and install Node.js
Verify the installation by running:
node -v- Install Playwright Browsers: By default, Playwright installs the following three browsers: Chromium, Firefox, and Webkit.
Open a CMD or PowerShell window from a working directory.
Execute the following command to install Playwright browsers and their dependencies.
npx playwright installStep 2: Create a New NUnit Project
- Open Visual Studio and create a new project:
- Select the NUnit Test Project template.
- Name the project, e.g., PlaywrightSample
- Confirm that the project contains a default test file, e.g., UnitTest1.cs
Step 3: Install Playwright NuGet Packages
Right-click on your project in Solution Explorer and select Manage NuGet Packages.
Search for and install the following packages:
Microsoft.Playwright
Microsoft.Playwright.NUnit
Microsoft.Playwright.TestAdapter
Step 4: Record Tests using Codegen
Playwright offers a GUI called Codegen to record user actions from start to finish. It also includes various types of assertions such as assert visibility, assert text, and assert value. Codegen is a great tool as it allows users to interact with a web page while Playwright records these actions in real-time. After recording, Codegen generates code snippets in various programming languages such as TypeScript, JavaScript, Python, and C#. This allows users to select the language they are most comfortable with.
To record tests in Playwright, we execute the following command in PowerShell window.
npx playwright codegen https://www.automationexercise.comThis command starts the recorder and opens 2 windows, (1) a Playwright Inspector window as in Figure 1, and (2) a browser window showing the home page of the site, as shown in Figure 2.
Make sure to select the option NUnit from the Target dropdown as we are writing NUnit test with C#.
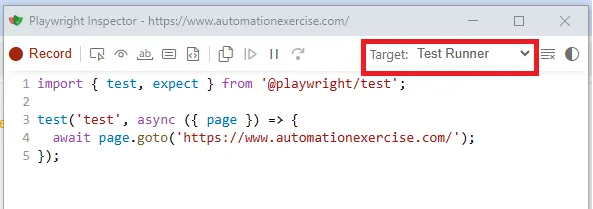
Figure 1- Playwright Inspector window
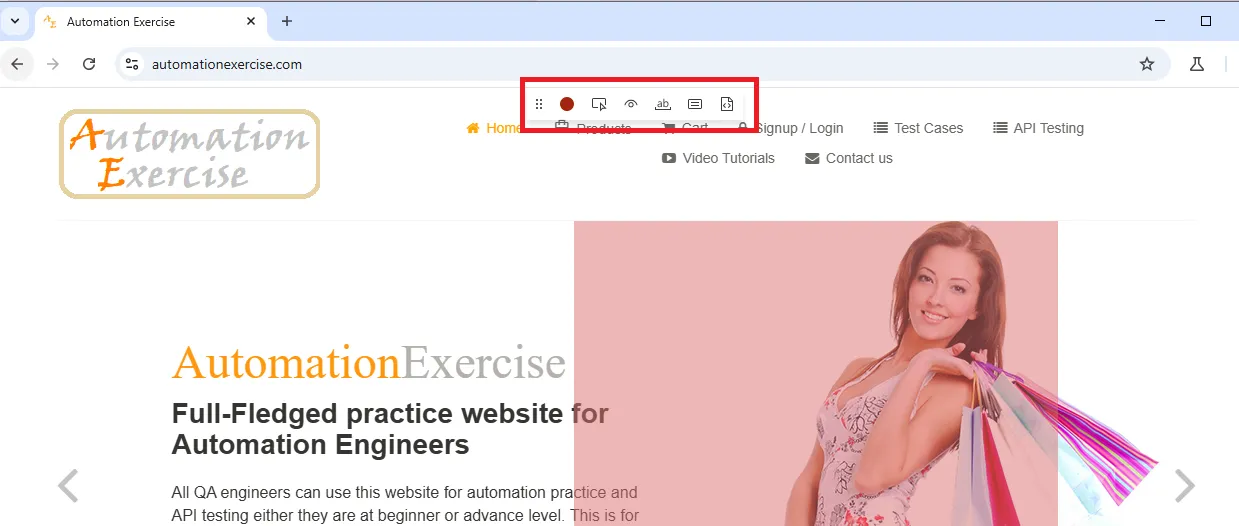
Figure 2- Site Home Page
Now perform the below actions on browser:
- Adding an assertion to make sure that the home page loads successfully
- Navigating to Products link
- Scrolling down to first product and click on view product
- Click on Add to cart on the product details page
- Adding assertion to make sure the product is added to cart
- Click on Cart to view the cart details
- Adding assertion to see if the added product is listed in the cart
Here is the code generated for the test case above:
using Microsoft.Playwright.NUnit;
using Microsoft.Playwright;
[Parallelizable(ParallelScope.Self)]
[TestFixture]
public class Tests : PageTest
{
[Test]
public async Task MyTest()
{
await Page.GotoAsync("https://www.automationexercise.com/");
await Expect(Page.Locator("#header")).ToContainTextAsync("Home");
await Page.GetByRole(AriaRole.Link, new() { Name = " Products" }).ClickAsync();
await Page.Locator(".choose > .nav > li > a").First.ClickAsync();
await Page.GetByRole(AriaRole.Button, new() { Name = " Add to cart" }).ClickAsync();
await Expect(Page.Locator("#cartModal")).ToContainTextAsync("Added!");
await Page.GetByRole(AriaRole.Button, new() { Name = "Continue Shopping" }).ClickAsync();
await Page.GetByRole(AriaRole.Link, new() { Name = " Cart" }).ClickAsync();
await Expect(Page.Locator("#product-1")).ToContainTextAsync("Blue Top");
}
}Step 5: Execute the test
Once the code is generated, simply copy and paste it into your project’s test class, and run the test. By default, the test runs in headless mode using the Chromium browser. In order to see the browser and use Firefox instead, we created a file called application.runsettings.
- Right-click on the Visual Studio project name
- Select Add -> New Item
- Select XMLFile.xml and rename it to application.runsettings)
firefox

false- From the Test menu in Visual Studio, select: Test -> Configure Run Setting -> Select Solution Wide runsettings File, then select the XML file we just created application.runsettings.
Voilaa!! You are all set.
Build the solution and run your test.
