Deploying a Next.js application on AWS EC2 can be an efficient way to host a scalable web application. This guide will provide a detailed step-by-step approach to setting up and deploying a Next.js application on an EC2 instance, managing the process using PM2, configuring Nginx as a reverse proxy, and optimizing the domain with Cloudflare CDN.
Prerequisites
- AWS EC2 instance running Ubuntu (20.04 or later)
- A Next.js application ready for deployment
- Domain registered on Namecheap
- A Cloudflare account
- Basic knowledge of Linux commands
1. Setting Up an AWS EC2 Instance
Step 1: Launch an EC2 Instance
- Log in to your AWS Console and navigate to EC2.
- Click on Launch Instance.
- Choose Ubuntu 22.04 LTS as the OS.
- Select an instance type:
- t2.micro (Free-tier eligible for testing/small apps)
- t3.medium or higher for production apps
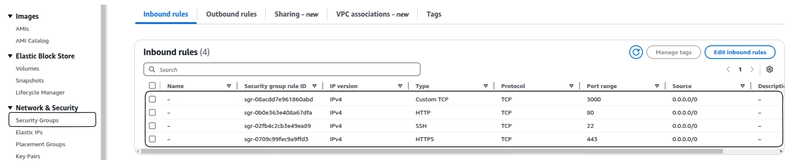
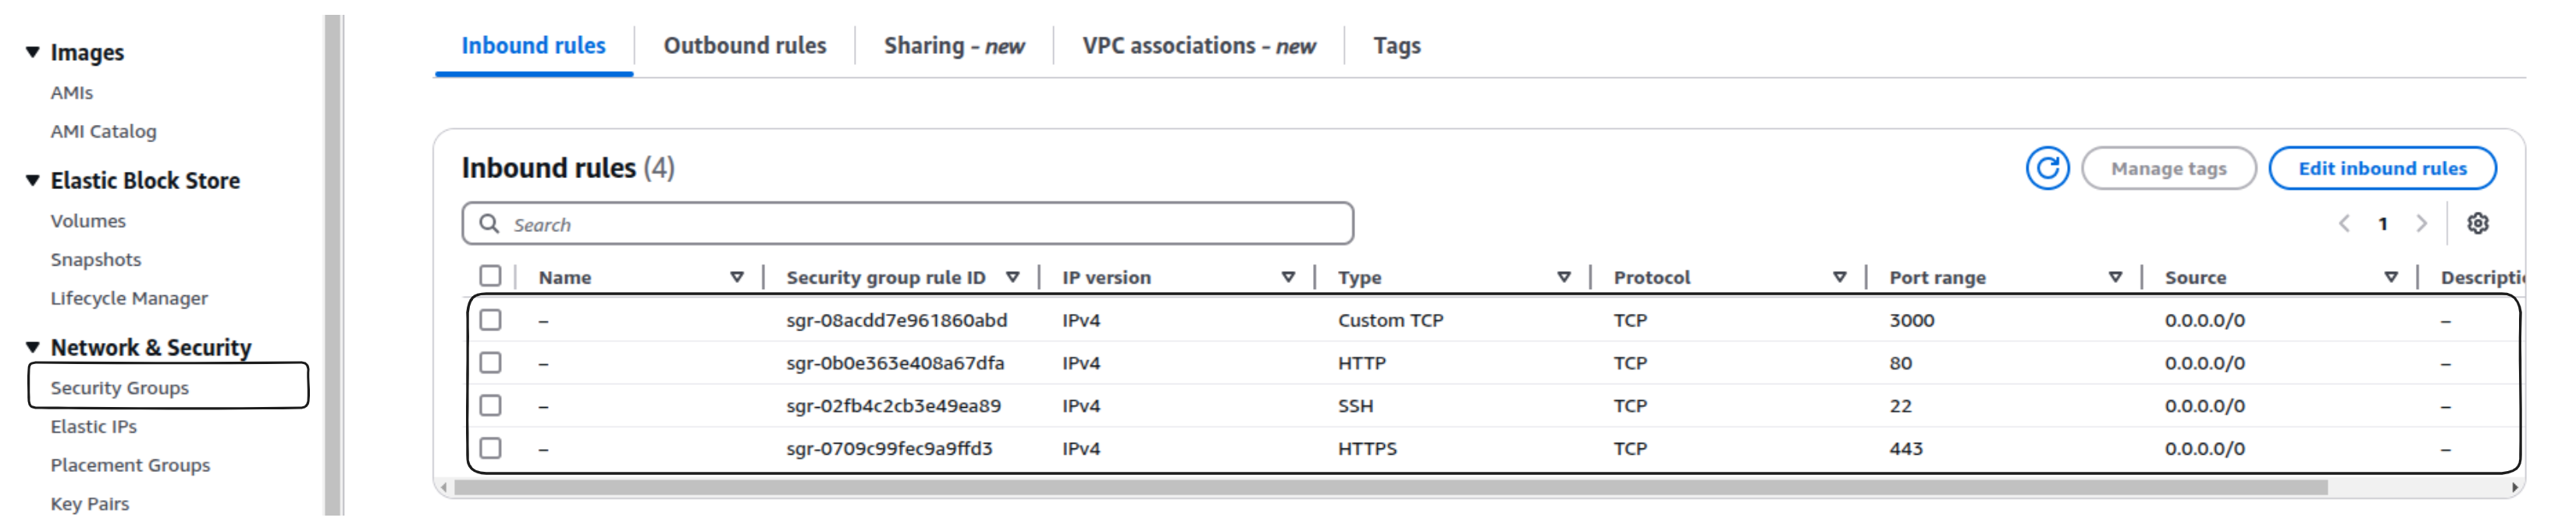
- Configure security groups:
- SSH (port 22): Allow only your IP for security.
- HTTP (port 80): Allow public access.
- HTTPS (port 443): Allow public access.
- Custom TCP (port 3000): Allow only if testing Next.js directly.
- Launch the instance and download the key pair for SSH access.
Step 2: Connect to the Instance
Use SSH to connect:
ssh -i your-key.pem ubuntu@your-ec2-public-ipIf got permission error, please run this before:
chmod 400 your-key.pem2. Install Node.js and PM2
Step 1: Install Node.js and npm
Update and install Node.js:
sudo apt update && sudo apt upgrade -y
curl -fsSL https://deb.nodesource.com/setup_20.x | sudo -E bash -
sudo apt install -y nodejs
Verify installation:
node -v
npm -v
Step 2: Install PM2 for Process Management
npm install -g pm2
pm2 startup
3. Deploy the Next.js Application
Step 1: Clone Your Repository
Navigate to the home directory and clone your Next.js project:
cd ~
git clone https://github.com/yourusername/your-nextjs-app.git
cd your-nextjs-app
Step 2: Install Dependencies
npm installStep 3: Build the Next.js Application
npm run buildStep 4: Start the App with PM2
pm2 start npm --name "nextjs-app" -- start
pm2 save
Check status:
pm2 list4. Setting Up Nginx as a Reverse Proxy
Step 1: Install Nginx
sudo apt install nginx -yStep 2: Configure Nginx
Open the Nginx configuration file:
sudo nano /etc/nginx/sites-available/defaultReplace its contents with:
server {
    listen 80;
    server_name yourdomain.com www.yourdomain.com;

    location / {
        proxy_pass http://localhost:3000;
        proxy_http_version 1.1;
        proxy_set_header Upgrade $http_upgrade;
        proxy_set_header Connection 'upgrade';
        proxy_set_header Host $host;
        proxy_cache_bypass $http_upgrade;
    }
}
Save and exit (CTRL+X, then Y, then ENTER).
Step 3: Restart Nginx
sudo systemctl restart nginxCheck status:
sudo systemctl status nginx5. Configure Namecheap DNS Settings
- Log in to your Namecheap account.
- Go to Domain List > Select your domain > Click Manage.
- Under the Advanced DNS tab, add an
A Record:-
Host:
@ - Value: Your EC2 public IP address
- TTL: Automatic
-
Host:
- Add a
CNAME Record:-
Host:
www -
Value:
yourdomain.com - TTL: Automatic
-
Host:
- Save changes and wait for propagation (~30 minutes to a few hours).
6. Optimize with Cloudflare CDN
Step 1: Add Your Site to Cloudflare
- Sign up/log in to Cloudflare.
- Click Add a Site and enter your domain.
- Cloudflare will scan your DNS records.
- Choose Free Plan and continue.
- Update your Namecheap nameservers with the ones provided by Cloudflare.
- Wait for DNS propagation.
Step 2: Enable CDN and Security Features
- Enable Automatic HTTPS Rewrites.
- Enable Always Use HTTPS.
- Turn on CDN caching for improved performance.
- Enable DDoS protection and security features.
7. Secure Your Site with SSL
Once Cloudflare is active:
- Go to Cloudflare dashboard > SSL/TLS.
- Set SSL mode to Full (Strict).
- Restart Nginx to apply changes:
sudo systemctl restart nginx8. Deploying Updates
To deploy updates, SSH into the instance and run:
cd ~/your-nextjs-app
git pull origin main
npm install
npm run build
pm2 restart nextjs-app
9. Common Errors and Solutions
Error 1: PM2 Not Restarting on Reboot
Run:
pm2 startup
pm2 save
Error 2: Nginx 502 Bad Gateway
Check if the Next.js app is running:
pm2 listIf not running, restart:
pm2 restart nextjs-appError 3: DNS Propagation Delay
Check DNS propagation:
www.whatsmydns.net
Conclusion
Congratulations! Your Next.js application is now live on AWS EC2 with PM2 for process management, Nginx as a reverse proxy, and a custom domain from Namecheap optimized with Cloudflare CDN. This setup ensures high availability, security, and performance for your web application.
In the next post, I'll show you how to add a GitHub Action to automate CI/CD for your application.
