This is a submission for the Pulumi Deploy and Document Challenge: Fast Static Website Deployment
🌍 What I Built
I'm a frontend developer, and the following project is inspired by the game Flexbox Froggy.
In this version, designed for coffee and code lovers, the challenge is to correctly position the coffee cups on the saucers spread across the table, following the positioning rules of the original game.
The game was developed using:
This combination brought an extra challenge for me as a frontend developer.
To organize the levels, I used HTML includes, ensuring cleaner and more structured code.
Since the game has 24 levels, this approach prevents code dispersion and allows it to work perfectly on Google Cloud Storage within a bucket.
Now, it's time to share this work. After receiving a newsletter email about the challenge, I became curious about Pulumi and decided to use it for the project's deployment.
This is an opportunity to learn more about infrastructure and how to automate cloud deployment. I'm excited to deepen my understanding of these concepts and improve my skills. 🚀
☕ Live Demo Link
https://storage.googleapis.com/my-bucket-28399d3/index.html
📌 Project Repo
The source code for CSS Coffee is available on GitHub! Feel free to check it out, explore the code, and even contribute.
🔗 CSS Coffee - GitHub Repository
🚀 My Journey
At first, I really thought I would struggle with command lines, SDKs, and cloud storage, especially since I'm not used to this kind of work.
My expertise has always been more focused on design, marketing, and frontend development. However, I was incredibly happy to see the project come to life and become a reality, moving from my machine to the world.
This process made me realize how rewarding it is to expand my knowledge and take on new challenges.
⚙️Using Pulumi
Before creating the infrastructure with Pulumi, I installed the Google Cloud SDK (gcloud) and ran the gcloud init command to configure credentials and the project. Then, I installed Pulumi and logged in using pulumi login. With the tools set up, we are ready to build the infrastructure for the static website.
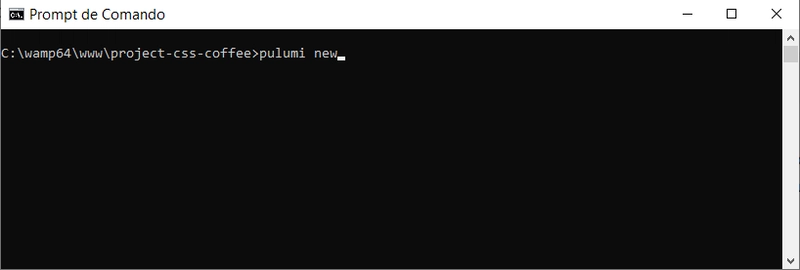
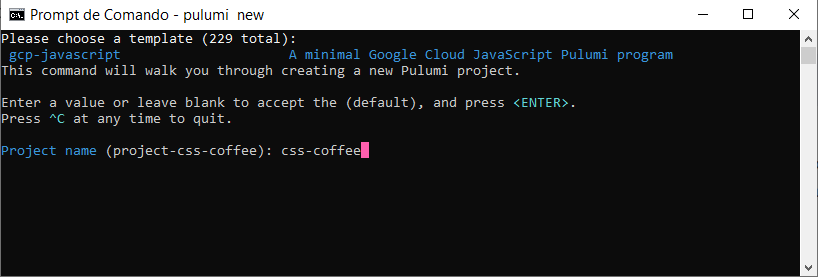
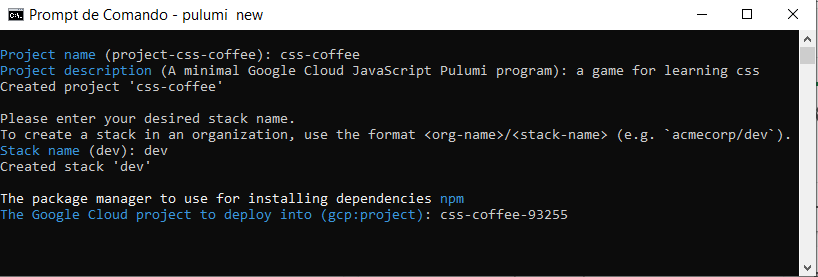
To start the project, I began by creating a folder named project-css-coffee.
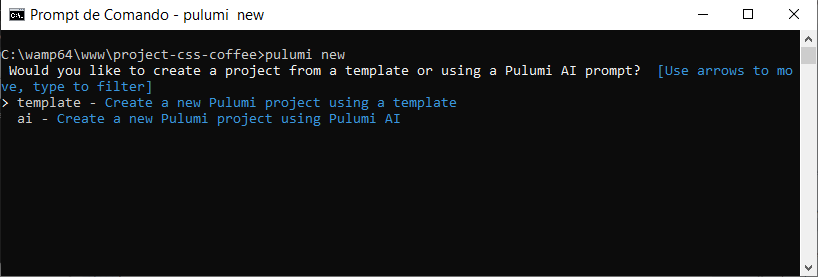
Inside this folder, I opened the terminal and typed pulumi new.
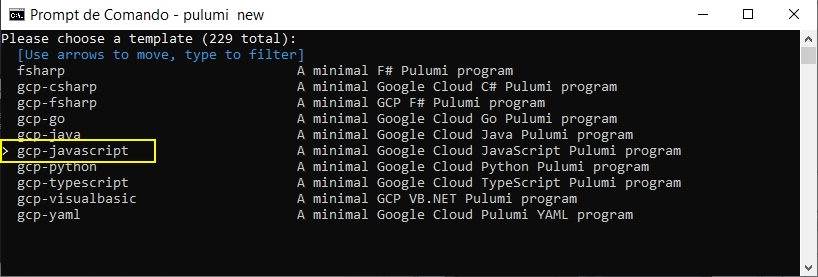
Next, I chose a template to get started.
Next, I chose the gcp-javascript option.
The next step is to name our project. In my case, I chose css-coffee.
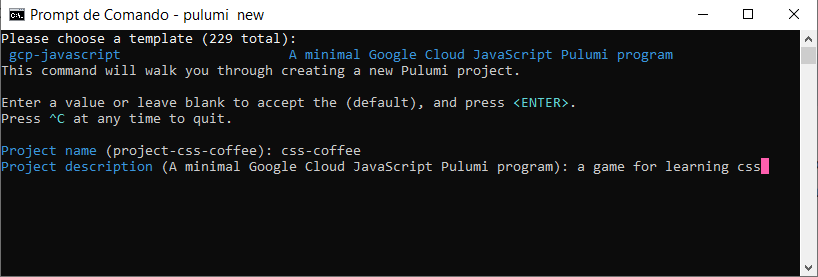
Next, we add a short description of what our project is about.
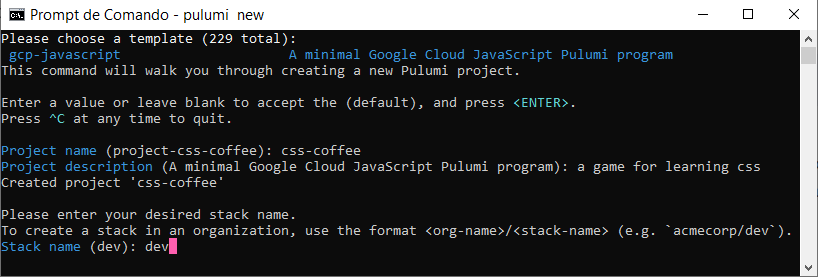
The next step is to choose the stack name. You can leave it as dev if you prefer.
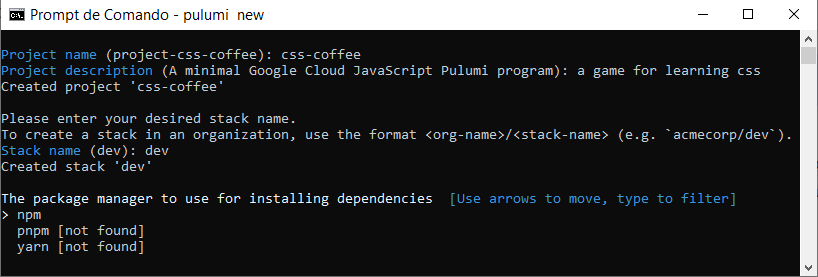
Before proceeding with the installation, it's important to ensure that a package manager is installed on your machine. You can choose between NPM, PNPM, or Yarn, depending on your preference. In this example, we will use npm.
To check if npm is already installed, run the following command in the terminal:
npm -v
If a version number is displayed, it means that npm is ready to use. Otherwise, you will need to install it before continuing.
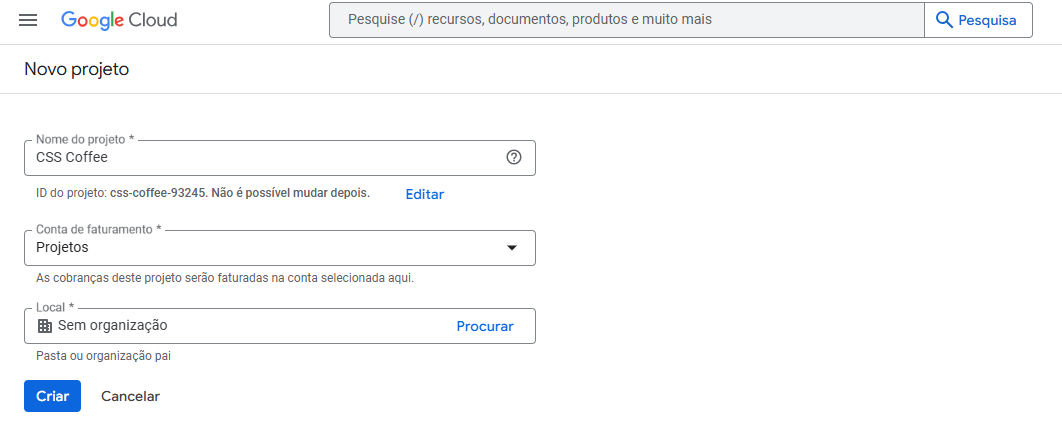
It's time to choose your project on Google Cloud. You will need to provide the project ID. If you don't have one yet, simply create it following the example below:
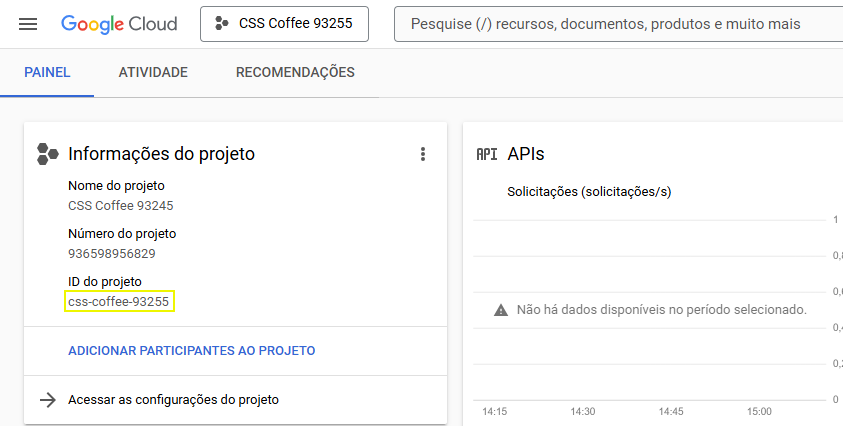
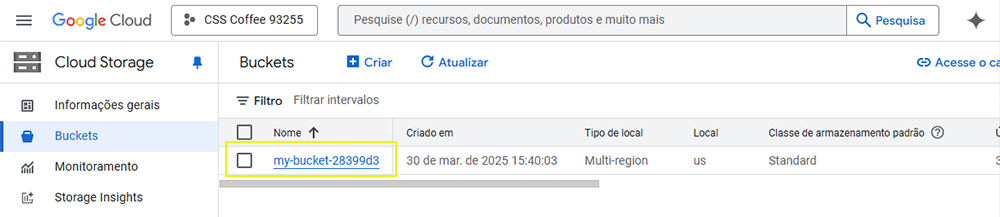
If you already have a project, you can easily find the ID as shown in the figure.
Now, you should go back to the terminal and enter the project ID to configure Pulumi.
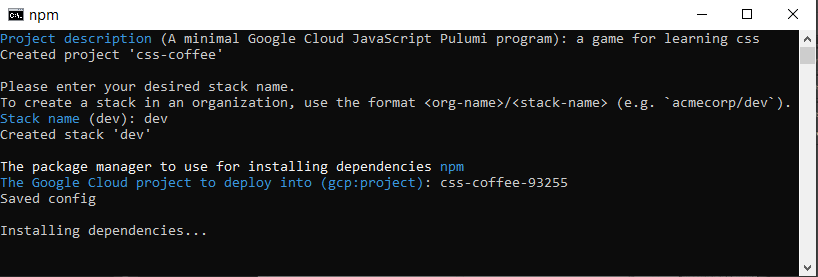
If everything works correctly, you will see the dependencies starting to install.
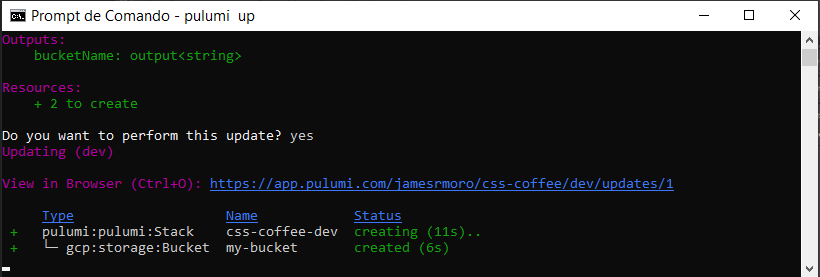
After the installation is complete, you'll run the coolest command of all: pulumi up 🎉

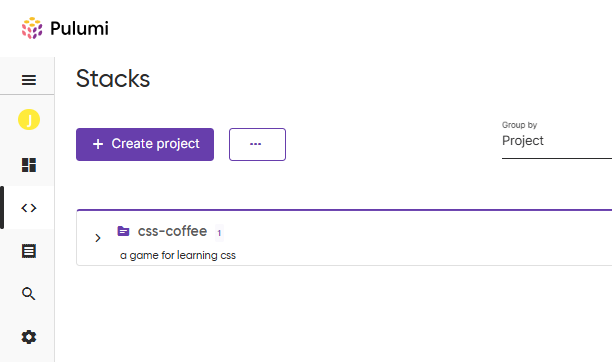
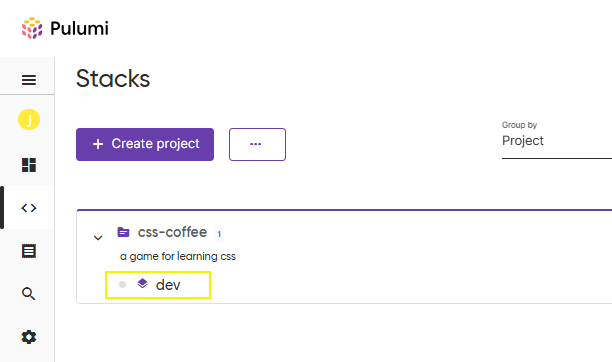
You will be able to see your stack created in the Pulumi dashboard.
When Pulumi is working its magic, you will see everything happening in the terminal.
If you want details on what might happen in case of failures during the process, you can run pulumi up --debug.
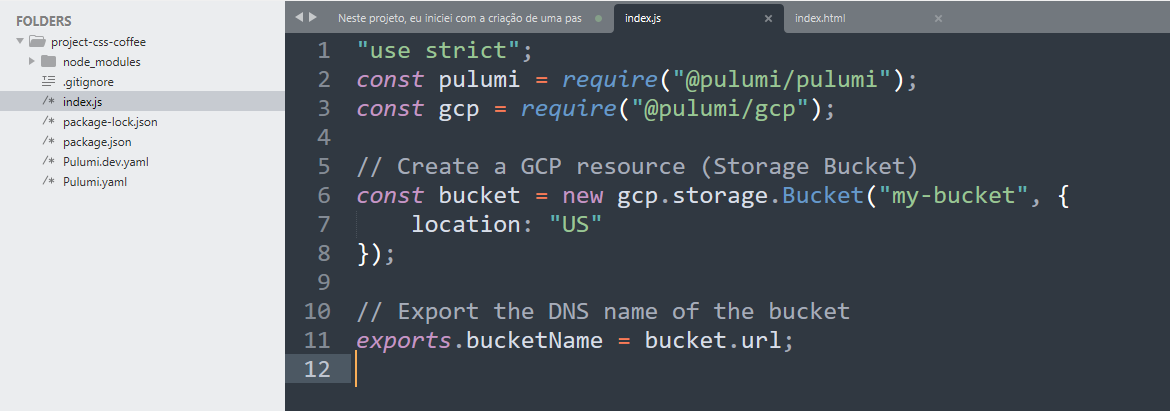
Below, you can see the code from the template I chose, which is gcp-javascript, along with its folder structure.
Now, I will create a folder for my game project inside project-css-coffee. The folder will be named "site-css-coffee".
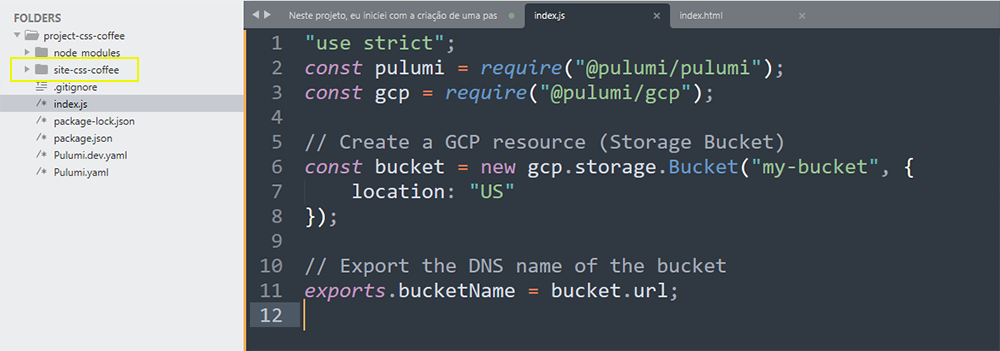
In this process, I have already organized and added all the necessary files, such as CSS files, images, and other essential resources for the CSS Coffee game. With this, everything is structured in an organized way and ready for the next step.
Next, I ran the pulumi up command to update the files in the environment, ensuring that all changes were applied correctly and that the necessary resources were provisioned or updated according to the project.
The first time I uploaded the files, I didn't know I had to change the bucket permission in Google Cloud to public. The following code in index.js helped me set the URL for public exposure.
const bucketIAMBinding = new gcp.storage.BucketIAMBinding("bucket-public-access", {
    bucket: bucket.name,
    role: "roles/storage.objectViewer",
    members: ["allUsers"],
});
The snippet below configures the index and the required 404 page in the Google Cloud bucket.
To ensure proper access, a permission-setting code was added to index.js, allowing the bucket to be publicly accessible and ensuring the pages are served correctly.
const bucket = new gcp.storage.Bucket(bucketName, {
    location: "US",
    uniformBucketLevelAccess: true,
    website: {
        mainPageSuffix: "index.html",
        notFoundPage: "404.html",
    },
    deleteBeforeReplace: true,
});
With the help of Copilot, I was able to start the file upload code without needing to upload a zip file to the folders and then extract it in Google Cloud.
My initial command was as follows:
give me the code to insert in index.js that makes all my files in a folder upload html, css, js files and folders to Google Cloud Storage
and remove the .git and node_modules repositories
// Function to read files from a directory
function readFilesSync(dir) {
    const files = [];
    fs.readdirSync(dir).forEach(file => {
        const absolutePath = path.join(dir, file);
        if (fs.statSync(absolutePath).isDirectory()) {
            if (file !== ".git" && file !== "node_modules") {
                files.push(...readFilesSync(absolutePath));
            }
        } else {
            files.push(absolutePath);
        }
    });
    return files;
}

// Path to the local folder
const siteDir = "./site-css-coffee";

// Read all files from the local folder
const files = readFilesSync(siteDir);

// Upload files to the GCS bucket
const bucketObjects = files.map(filePath => {
    const relativeFilePath = path.relative(siteDir, filePath);
    return new gcp.storage.BucketObject(relativeFilePath, {
        bucket: bucket.name,
        source: new pulumi.asset.FileAsset(filePath),
    });
});

module.exports = {
    bucketName: bucket.name,
    fileNames: bucketObjects.map(obj => obj.name),
};
At the beginning of the index.js file, I added three essential dependencies to efficiently configure the project. They are:
const mime = require("mime-types");
const fs = require("fs");
const path = require("path");
These dependencies are used to ensure proper handling of MIME types, interactions with the file system, and path manipulation, respectively, making it easier to configure the bucket on Google Cloud.
The mime package helps identify file types, fs facilitates reading and writing local files, and path assists in handling paths in a way that is independent of the operating system.
The final result of my index.js template file after edits turned out like this:
const pulumi = require("@pulumi/pulumi");
const gcp = require("@pulumi/gcp");
const mime = require("mime-types");
const fs = require("fs");
const path = require("path");

const bucketName = "my-bucket";

const bucket = new gcp.storage.Bucket(bucketName, {
    location: "US",
    uniformBucketLevelAccess: true,
    website: {
        mainPageSuffix: "index.html",
        notFoundPage: "404.html",
    },
    deleteBeforeReplace: true,
});

const bucketIAMBinding = new gcp.storage.BucketIAMBinding("bucket-public-access", {
    bucket: bucket.name,
    role: "roles/storage.objectViewer",
    members: ["allUsers"],
});

const siteDir = "./site-css-coffee";

function uploadFiles(dir, relativePath = '') {
    const files = fs.readdirSync(dir).filter(file => file !== ".git" && file !== "node_modules");

    console.log(`Files in the directory ${dir}:`, files);

    return files.map(file => {
        const filePath = path.join(dir, file);
        const contentType = mime.lookup(filePath) || undefined;

        const fileName = path.join(relativePath, file).replace(/\\/g, '/');

        console.log(`Processing file: ${fileName}`);

        if (fs.statSync(filePath).isDirectory()) {
            return uploadFiles(filePath, fileName);
        }

        return new gcp.storage.BucketObject(fileName, {
            bucket: bucket.name,
            source: new pulumi.asset.FileAsset(filePath),
            name: fileName,
            contentType: contentType,
        });
    }).flat();
}

const uploadedFiles = uploadFiles(siteDir);

exports.bucketName = bucket.url;

exports.websiteUrl = pulumi.interpolate`https://storage.googleapis.com/${bucket.name}/index.html`;
You can already celebrate because your site is now live on Google Cloud with the bucket created, as shown in the figure.
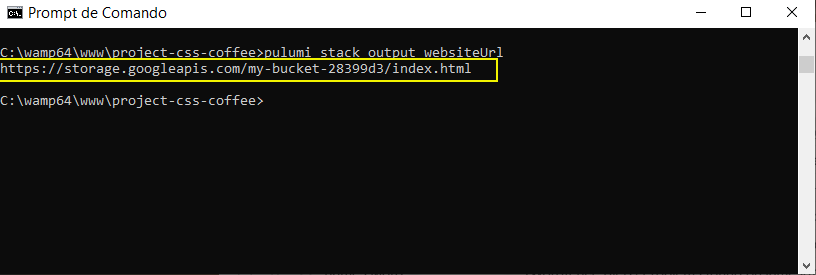
To view your static project online, you can get the bucket link from the Google Cloud dashboard or directly from the terminal using the command below:
pulumi stack output websiteUrlThe result will be the Google Cloud bucket URL, as shown in the figure.
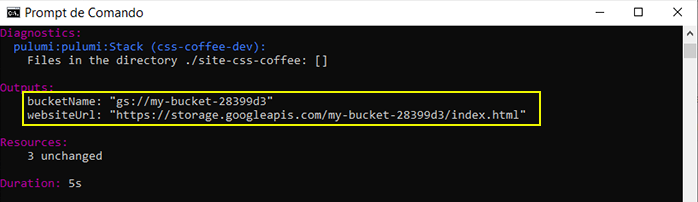
If you wish, you can obtain the bucket URL as soon as pulumi up is completed. Simply add the following code to your project:
exports.bucketName = bucket.url;
exports.websiteUrl = pulumi.interpolate`https://storage.googleapis.com/${bucket.name}/index.html`;
The result will be displayed in the terminal, as shown below:
If you need to interrupt the file upload during the execution of pulumi up, simply open a new terminal tab and run the following command:
pulumi cancel
This command cancels the ongoing operation, reverting any partial changes that may have been applied. It is useful in situations where the deployment takes longer than expected or when an error is detected before the process is completed.
🌟 Conclusion
With this process, I was able to host a static project on Google Cloud in a simple and efficient way, ensuring an accessible link to share or integrate with other services.
This approach makes file distribution easier and can be applied to various scenarios.
I hope this article was helpful and that you can apply this technique to your own projects! I'm excited for new challenges and to continue exploring innovative cloud solutions!
