🔐 GitGuard – Just-in-Time GitHub Access Control
Submission for the Permit.io Authorization Challenge: Permissions Redefined
What I Built
I built GitGuard - a full-stack, production-grade access control and auditing system for secure, temporary, and role-based GitHub access management that leverages Permit.io for dynamic authorization.
In traditional GitHub environments, access control follows a static model: either you have access to a repository, or you don't. This creates security risks as teams often grant excessive permissions to ensure work isn't blocked. GitGuard solves this by implementing Just-in-Time access - granting temporary, scoped permissions only when needed, verified through biometric authorization.
Think of GitGuard as a "Just-in-Time IAM layer" tailored for GitHub. Perfect for fast-moving teams that need security without sacrificing agility.
Demo Screenshots
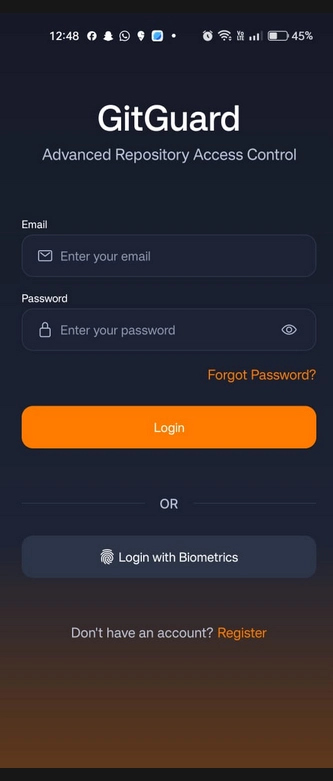
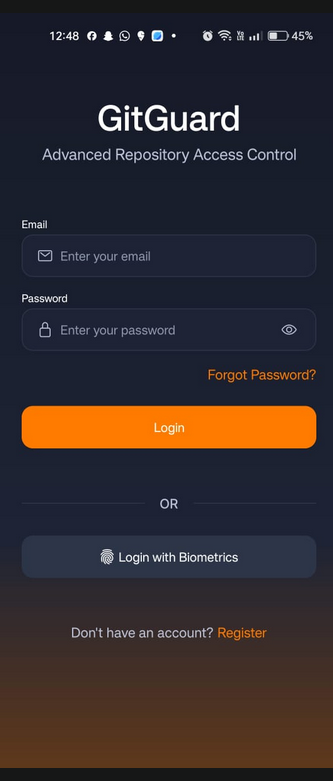
🔐 Login Screen
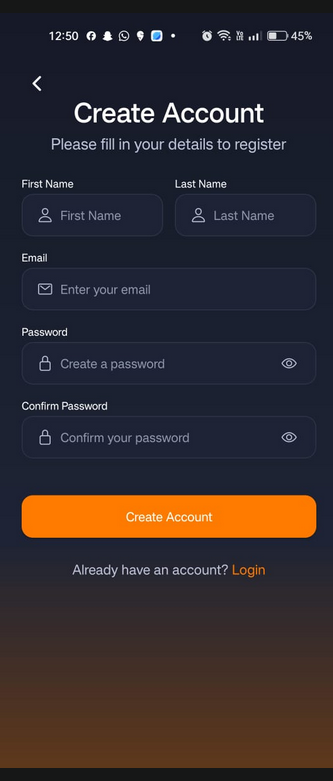
📝 Register Screen
🏠 Home Page

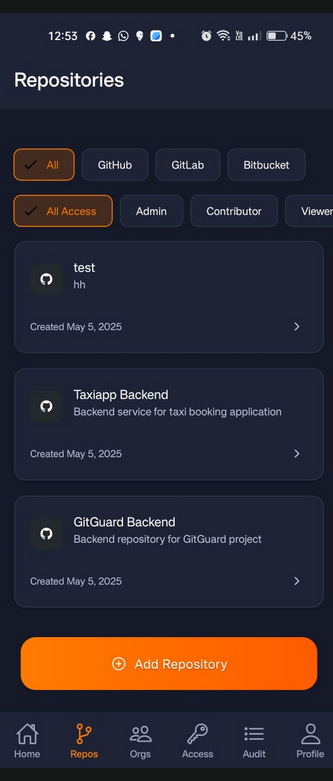
📁 Repository Screen
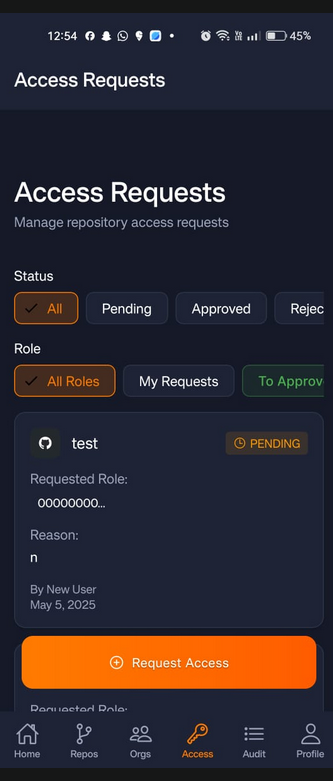
🗂️ Access Request Manager
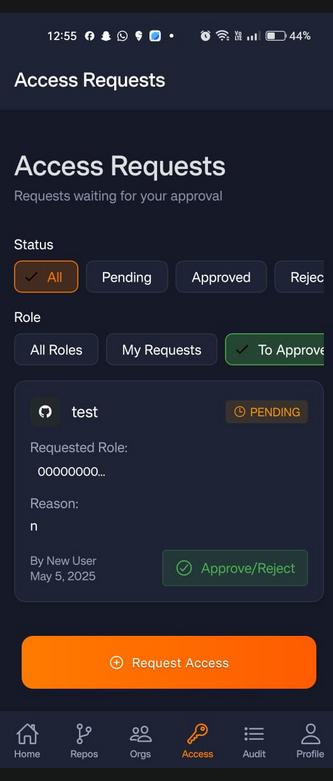
✅ Approval/Reject Filter
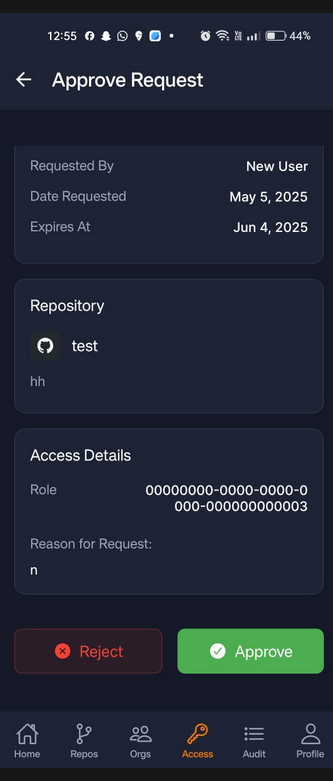
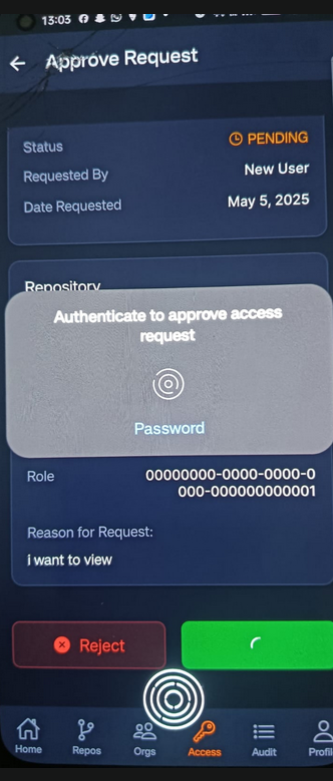
✔️ Approve Request Flow
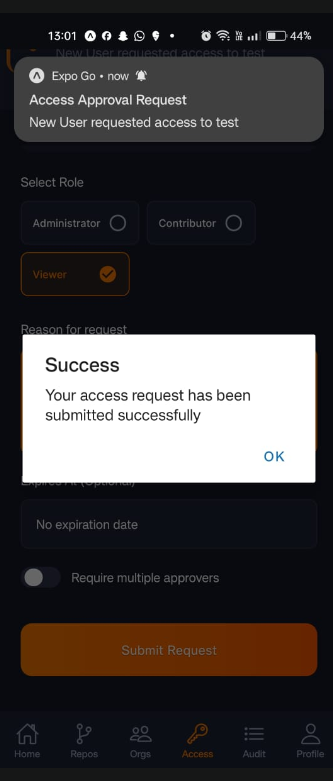
📥 Access Request Form
🧬 Biometric Approval (Simulated)
Biometrics cannot be captured in screenshots; simulated via mobile preview.
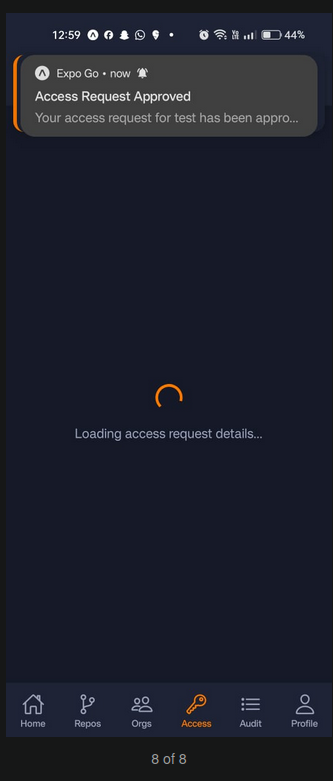
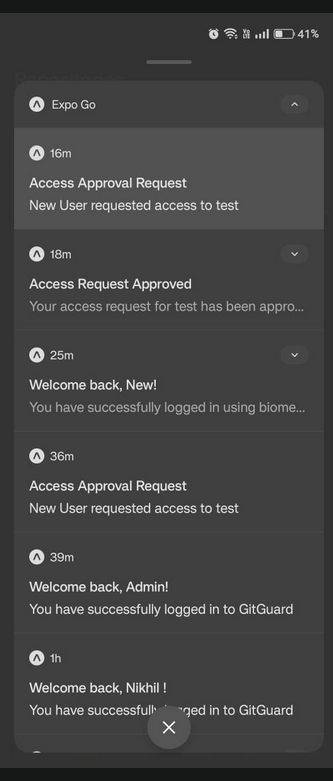
🔔 Push Notification for Approvals
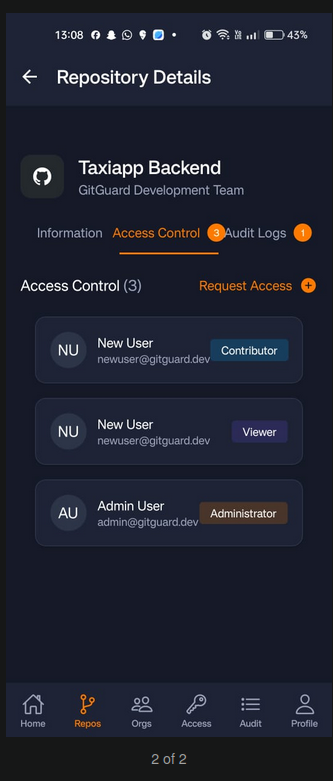
📂 Repository Details
🔔 Push Notifications List
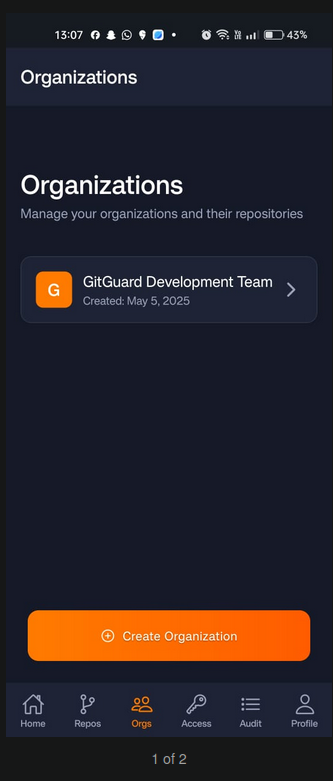
🏢 Organisation List and Create
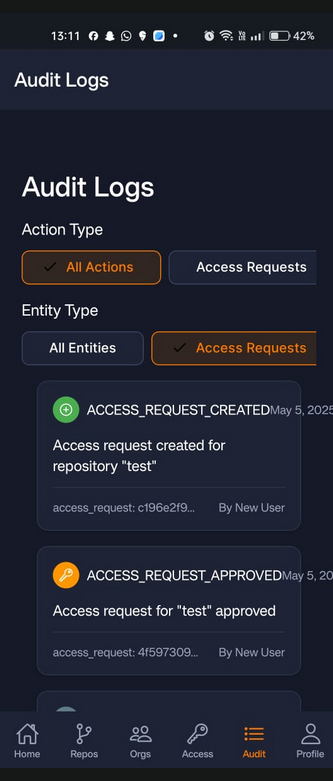
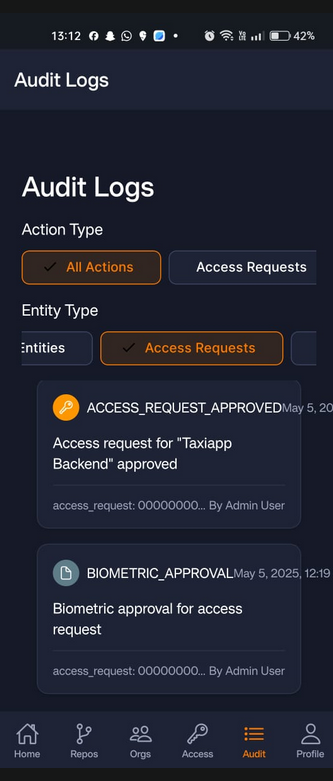
📜 Audit Logs
(Local preview only)
Key Features
| Feature | Description |
|---|---|
| 🔐 Biometric Authentication | Approve access requests using fingerprint/face ID |
| ⏱️ Just-in-Time Access | Time-bound repository access with automatic expiration |
| 👥 Role-Based Access | Multiple repository roles with different permission sets |
| 📊 Audit Logging | Comprehensive activity tracking for compliance |
| 🔔 Push Notifications | Instant alerts for access requests and approvals |
| 🔄 Multi-Approver Flow | Quorum requirements for sensitive repositories |
| 🚨 Emergency Access | Expedited access for critical situations |
| 🌙 Auto-Expiration | Automatic revocation after defined timeframes |
| 🏦 Organization Grouping | Manage access across multiple organizations |
Role-Based Capabilities
| Feature | Viewer | Contributor | Admin |
|---|---|---|---|
| View Repository | ✅ | ✅ | ✅ |
| Clone Repository | ✅ | ✅ | ✅ |
| Push Changes | ❌ | ✅ | ✅ |
| Approve Access | ❌ | ❌ | ✅ |
| Repository Settings | ❌ | ❌ | ✅ |
| Delete Repository | ❌ | ❌ | ✅ |
| Create Repository | ❌ | ❌ | ✅ |
| View Audit Logs | ❌ | ❌ | ✅ |
Project Repositories
| Component | Link |
|---|---|
| 🧠 Backend | GitGuard Backend |
| 📱 Mobile App | GitGuard Mobile |
Permissions Redefined with Permit.io
GitGuard implements a true Permissions Redefined model using Permit.io's policy-as-code approach, completely separating the business logic from the authorization layer.
Core Authorization Flow
- User initiates an access request for a repository
- Admin receives notification and authenticates with biometrics
- Backend verifies biometric token and processes approval
- Permit.io is used to check, assign, and enforce permissions
- Time-bound role is assigned to the user
- Access is automatically revoked after expiration
┌──────────┐    ┌──────────────┐    ┌────────────┐    ┌──────────────┐
│  Mobile  │───▶│ GitGuard API │───▶│ permitUtils│───▶│  Permit.io   │
│   App    │◀───│              │◀───│  middleware│◀───│  Cloud PDP   │
└──────────┘    └──────────────┘    └────────────┘    └──────────────┘
     │                                                      ▲
     │                                                      │
     └──────────────────────────────────────────────────────┘
        Policies defined in Permit.io dashboard
Implementation
GitGuard implements authorization with a modular, clean approach through a dedicated permitUtils.ts layer:
// Backend initialization (src/index.ts)
export const permit = new Permit({
  token: process.env.PERMIT_API_KEY || "",
  pdp: process.env.PERMIT_PDP_URL || "http://localhost:7766",
});// Permission check implementation (src/utils/permitUtils.ts)
export const checkPermission = async (
userId: string,
action: string,
resource: string,
resourceInstance?: string
) => {
let resourceObj: string | { type: string; id: string } = resource;
// If resource instance is provided, create resource object
if (resourceInstance) {
resourceObj = {
type: resource,
id: resourceInstance,
};
}
// Try to check permission with Permit.io first
try {
const permitted = await permit.check(userId, action, resourceObj);
if (permitted) return true;
} catch (permitError) {
console.warn(
`Permit check failed for user ${userId} on ${resource}:${resourceInstance} - ${permitError}`
);
// Continue to fallback check
}
// If Permit.io check fails or returns false, fall back to database check
if (resource === "repository" && resourceInstance) {
const { prisma } = await import("../index");
// Check if user is the repository owner
const repo = await prisma.repository.findUnique({
where: { id: resourceInstance },
select: { ownerId: true },
});
if (repo && repo.ownerId === userId) {
return true; // Repository owners have all permissions
}
// Check role assignments
const roleAssignment = await prisma.roleAssignment.findFirst({
where: {
userId,
repositoryId: resourceInstance,
},
include: {
role: {
include: {
permissions: true,
},
},
},
});
if (roleAssignment) {
// Check if the assigned role has the required permission
const hasPermission = roleAssignment.role.permissions.some(
(permission) =>
permission.action === action || permission.action === "admin"
);
if (hasPermission) {
return true;
}
}
}
return false;
};// Role assignment (src/utils/permitUtils.ts)
export const assignRoleInPermit = async (
userId: string,
roleKey: string,
resourceType: string,
resourceInstanceKey: string
) => {
try {
// First ensure the user exists in Permit.io
try {
await syncUserWithPermit(userId);
} catch (userError) {
console.warn(`Could not sync user with Permit.io: ${userError}`);
// Continue anyway - we'll try to assign the role
}
await permit.api.roleAssignments.assign({
user: userId,
role: roleKey,
tenant: "default",
resource_instance: `${resourceType}:${resourceInstanceKey}`,
});
console.log(
`Successfully assigned role ${roleKey} to user ${userId} for ${resourceType}:${resourceInstanceKey}`
);
return true;
} catch (error: any) {
// If it's a 409 conflict (role already assigned), treat as success
if (error.response && error.response.status === 409) {
console.log(
`Role ${roleKey} already assigned to user ${userId}, skipping`
);
return true;
}
console.error("Failed to assign role in Permit.io:", error);
// Don't throw the error, just log it and continue - this makes the app more resilient
// We'll fall back to database checks for permissions
return false;
}
};// Usage in API endpoints (src/routes/repository.ts)
router.get("/:id", authenticateJWT, async (req, res, next) => {
try {
const { id } = req.params;
const userId = req.user.id;
// Check permission with Permit.io
const hasViewPermission = await checkPermission(
userId,
"view",
"repository",
id
);
if (!hasViewPermission) {
throw new ApiError(
403,
"You don't have permission to view this repository"
);
}
// Proceed with repository retrieval...
} catch (error) {
next(error);
}
});Dashboard Configuration
For GitGuard to work correctly, you must configure the following in the Permit.io dashboard:
- Define Resources:
- Create
repositoryresource type with actions:-
view: View repository contents -
clone: Clone repository -
push: Push changes to repository -
admin: Administer repository settings -
delete: Delete repository -
create: Create new repository
-
- Define Roles:
-
viewer: Can view and clone repositories -
contributor: Can view, clone, and push to repositories -
admin: Has full access to all repository actions
Configure User-to-Role assignments in the Roles tab
-
Set up Resource Relations for ownership model:
- Relation:
ownerbetweenuserandrepository
- Relation:
Setup Guide
Step 1: Clone the repository
git clone https://github.com/nikhilsahni7/GitGuard.git
cd GitGuard
Step 2: Set up Permit.io
- Create a free account at Permit.io
- Create a new project
- Set up:
- Resource type: repository
- Actions: view, clone, push, admin, delete, create
- Roles: viewer, contributor, admin
- Configure role permissions as described above
- Generate an Environment API key from the dashboard
Step 3: Configure environment variables
Create a .env file in the backend directory:
# Permit.io
PERMIT_API_KEY=your_permit_api_key
PERMIT_PDP_URL=http://localhost:7766 # Or cloud PDP URL

# Database
DATABASE_URL=postgresql://user:password@localhost:5432/gitguard

# JWT Authentication
JWT_SECRET=your_jwt_secret
JWT_EXPIRES_IN=7d

# GitHub Integration
GITHUB_CLIENT_ID=your_github_client_id
GITHUB_CLIENT_SECRET=your_github_client_secret

# Push Notifications
EXPO_ACCESS_TOKEN=your_expo_token
Step 4: Install dependencies and run
# Backend setup
cd backend
bun install
bun run db:migrate
bun run permit:setup
bun run dev

# Mobile setup (in a separate terminal)
cd ../mobile
yarn install
yarn start
Step 5: Initialize Permit.io
GitGuard includes a setup script that configures all necessary resources and permissions:
cd backend
bun run permit:setup
This sets up:
- Repository resource with all actions
- User resource
- Standard roles (viewer, contributor, admin)
- Resource relations for ownership model
Step 6: Verify Permit.io Setup
To verify your Permit.io configuration:
bun run permit:verifyThis will:
- Check if resources and roles exist
- Create a test user
- Assign roles and test permissions
- Create and test resource relationships
Challenges and Solutions
Challenge 1: Resource Instance Permissions
Initially, I struggled with implementing resource-instance level permissions in Permit.io to grant access to specific repositories rather than all repositories.
Solution: I implemented a robust resource relations system using Permit.io's API:
// Setup owner relation (setup-permit.ts)
const relationData = {
  key: "owner",
  name: "Owner",
  subject_resource: "user",
};

await permit.api.resourceRelations.create("repository", relationData);

// Create relationship tuples for specific repositories
await permit.api.relationshipTuples.create({
  subject: `user:${userId}`,
  relation: "owner",
  object: `repository:${repositoryId}`,
  tenant: "default",
});
Challenge 2: Fallback Mechanism
What if Permit.io is temporarily unavailable? GitGuard needed resilience.
Solution: I implemented a dual-check system that falls back to database checks:
export const checkPermission = async (
  userId,
  action,
  resource,
  resourceInstance
) => {
  // Try Permit.io first
  try {
    const permitted = await permit.check(userId, action, resourceObj);
    if (permitted) return true;
  } catch (permitError) {
    // Log and continue to fallback
  }

  // Fallback to database check
  // [Database permission check logic omitted for brevity]
};
Challenge 3: Time-bound Access
Implementing automatic role expiration was critical for the Just-in-Time model.
Solution: Combined Permit.io role assignments with a database TTL mechanism:
// When approving access requests (routes/accessRequest.ts)
await prisma.roleAssignment.create({
  data: {
    userId: requestData.userId,
    repositoryId: requestData.repositoryId,
    roleId: requestData.roleId,
    expiresAt: new Date(Date.now() + duration), // Time-bound access
    approvedBy: adminId,
    approvedAt: new Date(),
  },
});

// Also register in Permit.io
await assignRoleInPermit(
  requestData.userId,
  role.key,
  "repository",
  requestData.repositoryId
);

// Background job runs to revoke expired access
// [Scheduled job implementation omitted for brevity]
Challenge 4: Biometric Verification Flow
Securing the approval process with biometrics while maintaining a smooth user experience was challenging.
Solution: Implemented a secure token-based verification system:
// Mobile app generates a biometric token (mobile code)
const biometricAuth = async () => {
  const compatible = await LocalAuthentication.hasHardwareAsync();

  if (!compatible) {
    throw new Error("Biometric authentication not available");
  }

  const result = await LocalAuthentication.authenticateAsync({
    promptMessage: "Authenticate to approve access request",
    fallbackLabel: "Use passcode",
  });

  if (result.success) {
    // Generate token only after successful biometric auth
    return generateBiometricToken();
  }

  throw new Error("Authentication failed");
};

// Backend verifies token before approving (routes/accessRequest.ts)
router.post("/:id/approve", authenticateJWT, async (req, res, next) => {
  try {
    const { biometricToken } = req.body;
    const adminId = req.user.id;

    // Verify biometric token
    const validToken = await verifyBiometricToken(adminId, biometricToken);

    if (!validToken) {
      throw new ApiError(401, "Invalid biometric verification");
    }

    // Process approval with Permit.io
    // [Approval logic omitted for brevity]
  } catch (error) {
    next(error);
  }
});
What I Learned
Building GitGuard with Permit.io provided several key insights:
Technical Benefits
- Separation of Concerns: Clean separation between business logic and authorization decisions
- Flexible Policy Management: Ability to update access policies without code changes
- Resource-Based Model: Modeling GitHub repositories as protected resources with granular permissions
Business Benefits
- Enhanced Security: Just-in-Time access model vastly reduces the attack surface
- Centralized Control: Administrators can manage all permissions from one dashboard
- Audit Compliance: Comprehensive logging of all access decisions
- Reduced Overhead: Automating approval workflows saves significant administrative time
Developer Experience
- Cleaner Codebase: Authorization logic centralized in one place rather than scattered throughout
- Reduced Boilerplate: Fewer permission checks needed in business logic
- Easier Testing: Simpler mocking of authorization decisions for unit tests
Why Permit.io Works for Just-in-Time Access
Permit.io is particularly well-suited for Just-in-Time access control because:
- External Policy Management: Policies can be updated in real-time without deploying code
- Resource Instance Granularity: Permissions can be scoped to specific repositories
- Relationship Modeling: Owner/member relationships easily modeled in permissions
- Flexible Role System: Easy to create and assign temporary roles for specific durations
- Audit Trail: Built-in logging for compliance and security reviews
Future Improvements
With more time, I would enhance GitGuard with:
- Local PDP: Set up a local Policy Decision Point for improved performance and reliability
- Attribute-Based Policies: Extend beyond role-based to include context like time of day, IP range, etc.
- Multi-Tenant Support: Enhanced organization isolation for enterprise environments
- Custom Policy Editor: Allow admins to create custom policies beyond predefined roles
- Integration with CI/CD: Automated access for deployment pipelines with temporary credentials
Built with ❤️ using:
Bun • Prisma • PostgreSQL • Expo • React Native • TypeScript • Permit.io