🔗 Step 1: Go to Your Virtual Machine
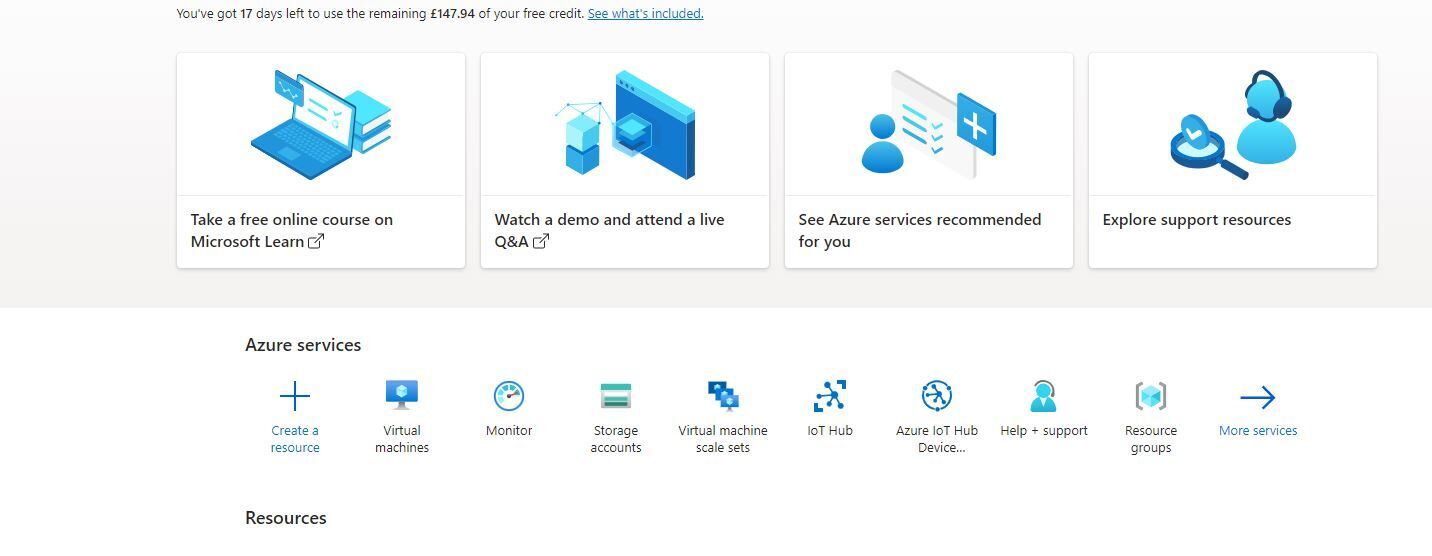
Log in to the Azure Portal
Navigate to Virtual Machines
Click on your Windows VM
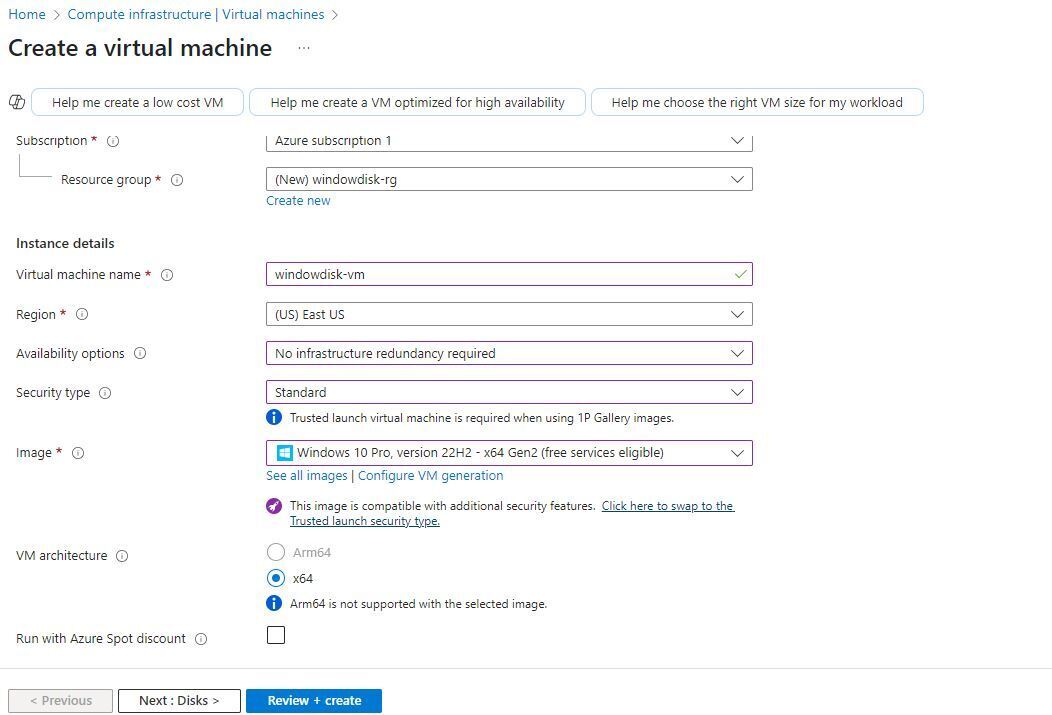
🔗 Step 2:Create resource group, Virtual machine,location, and size
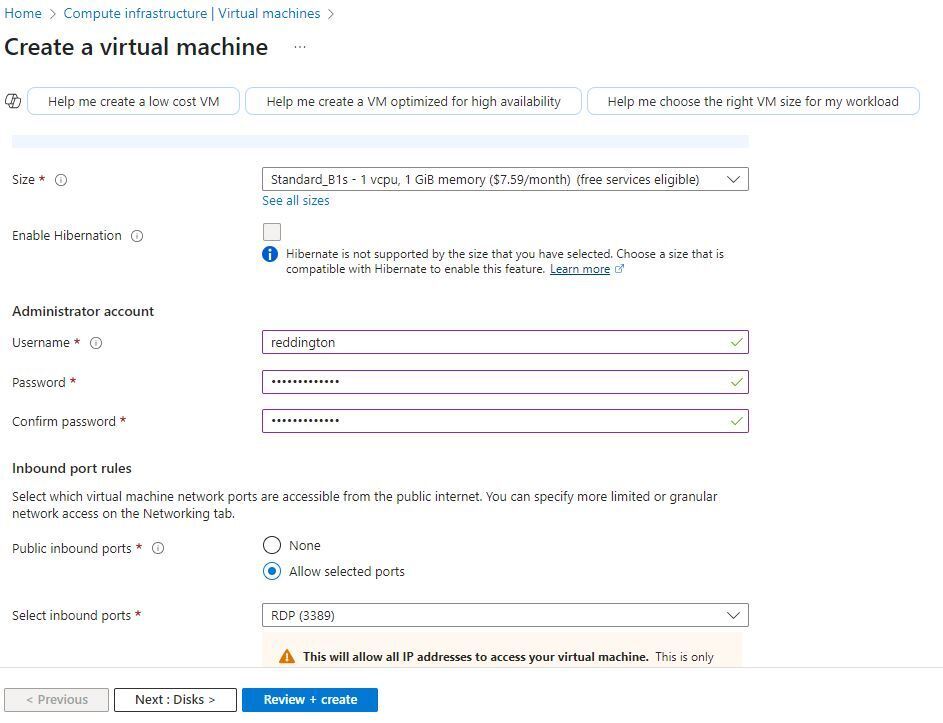
🔗 Step 3:Click create and apply
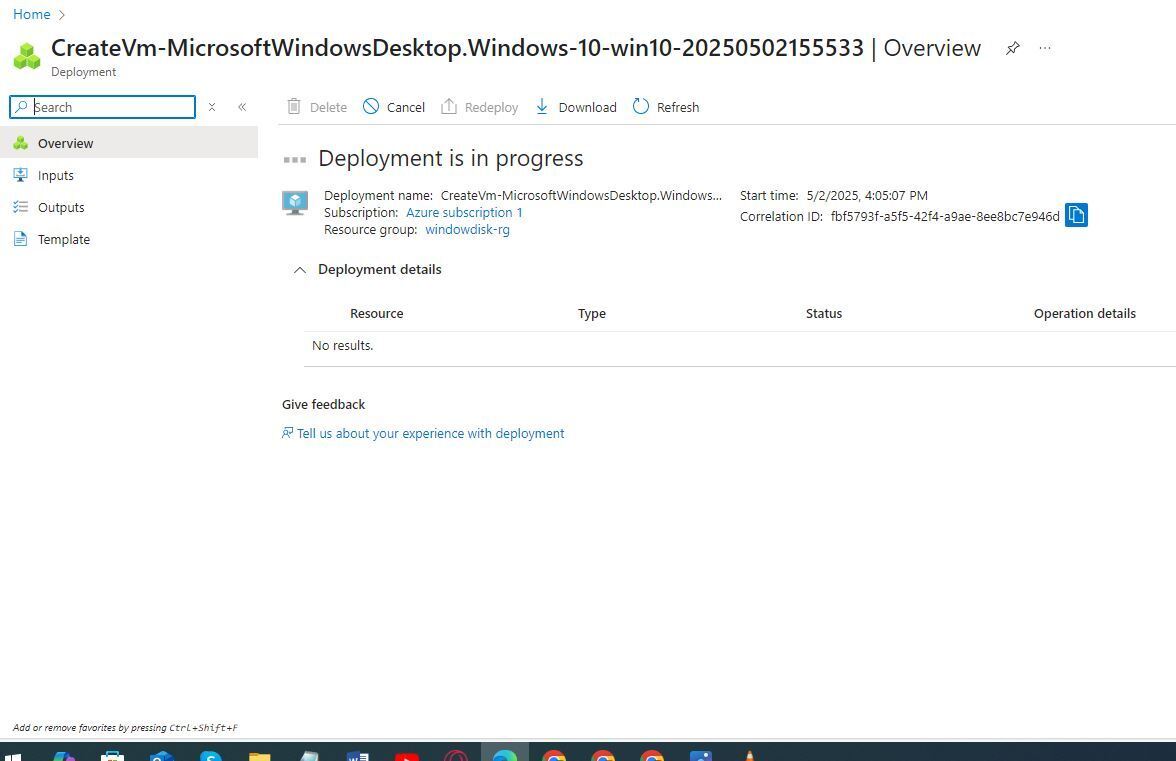
🔗 Step 4:Deployment in progress
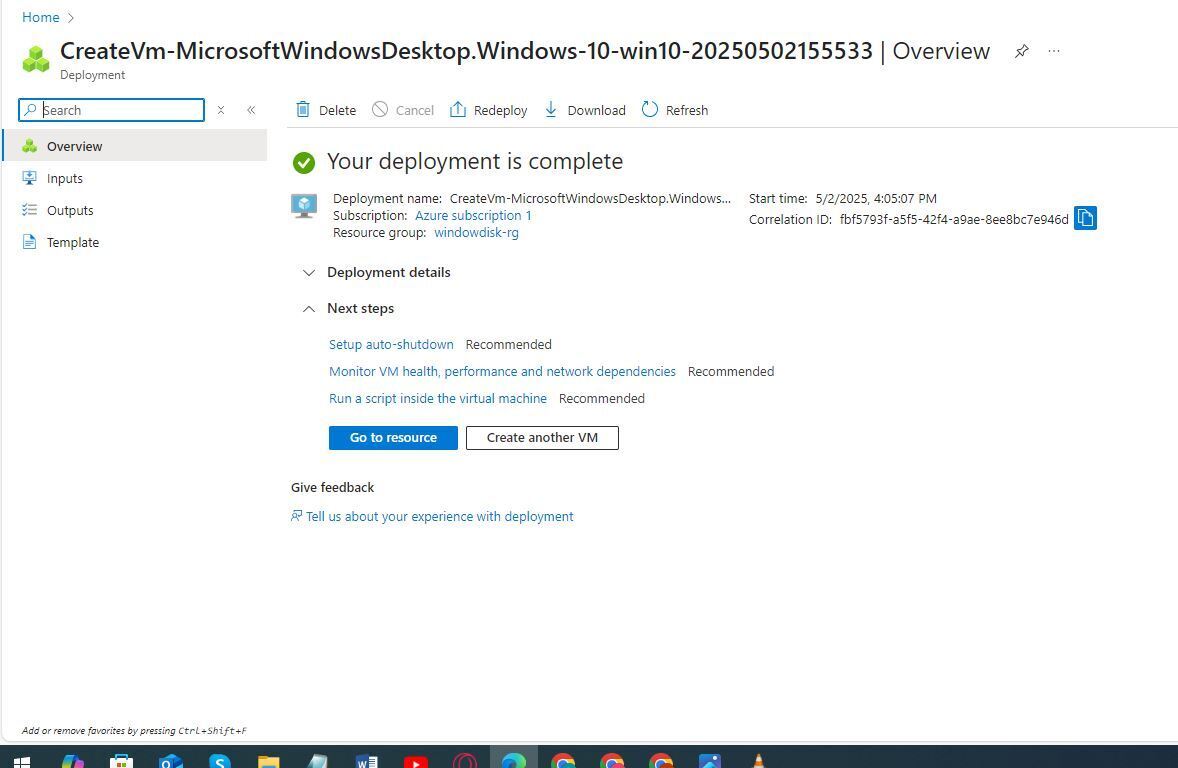
🔗 Step 5:Click resources
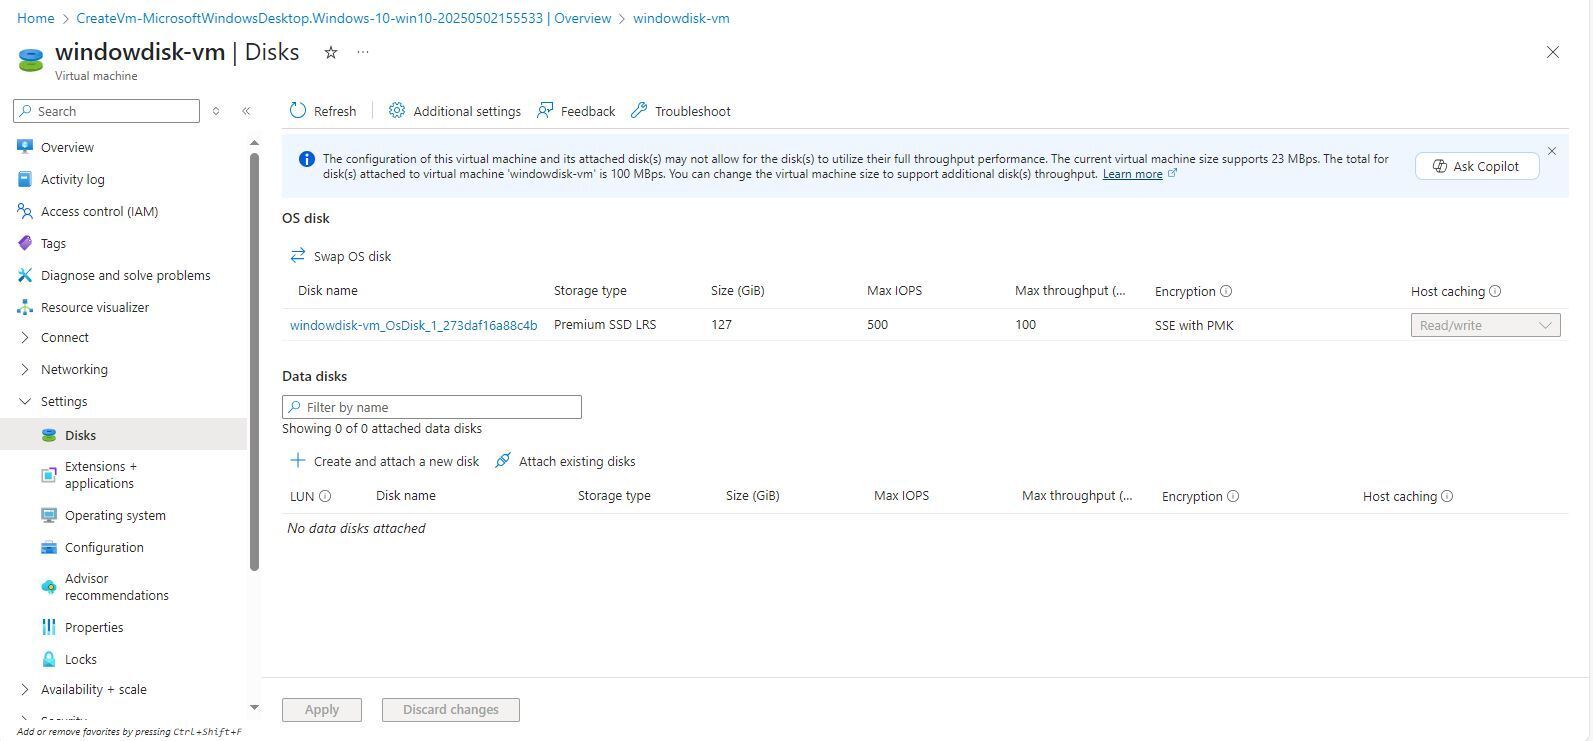
🔗 Step 6: On the left tray click on settings then disk and create a disk
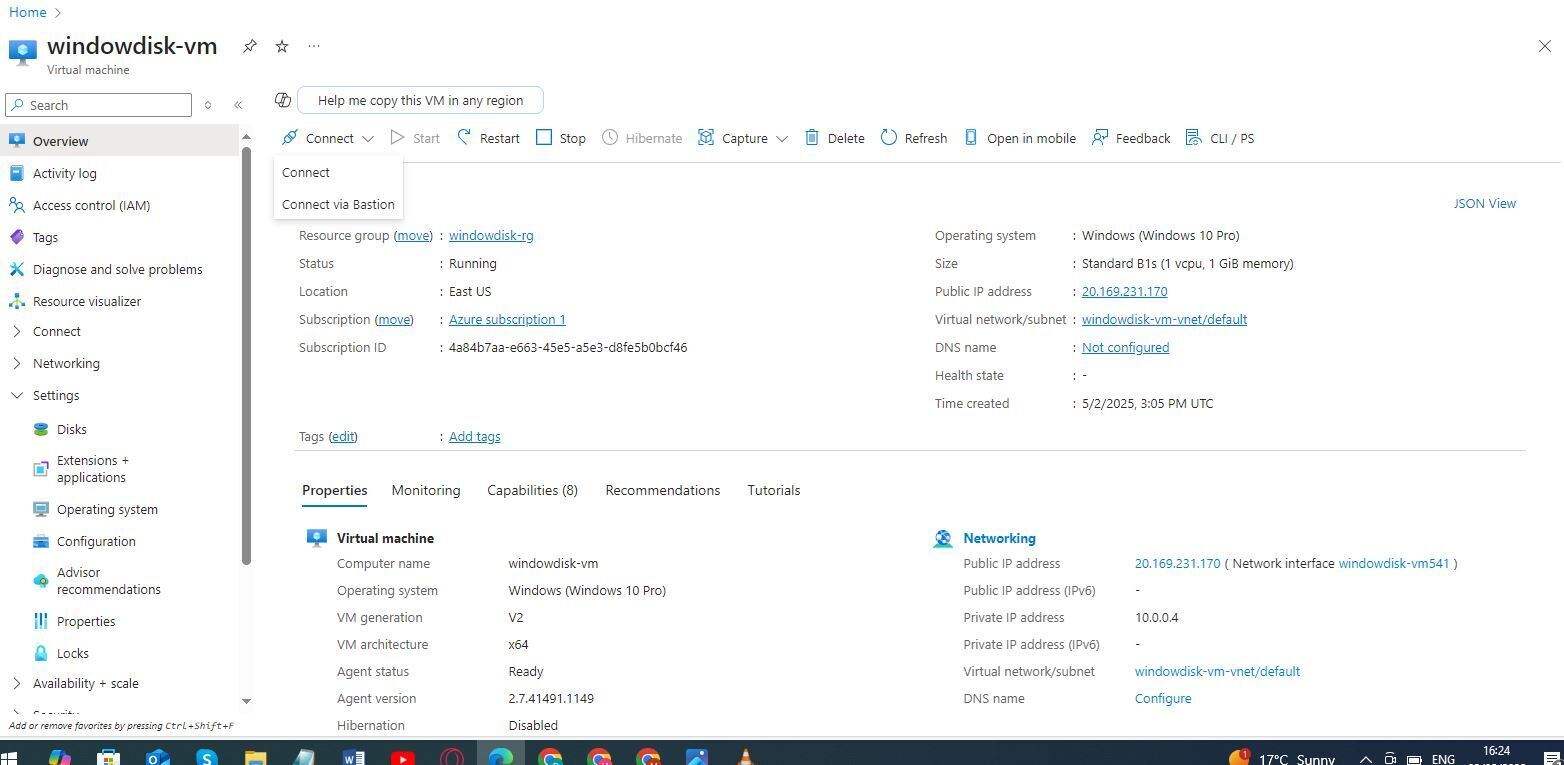
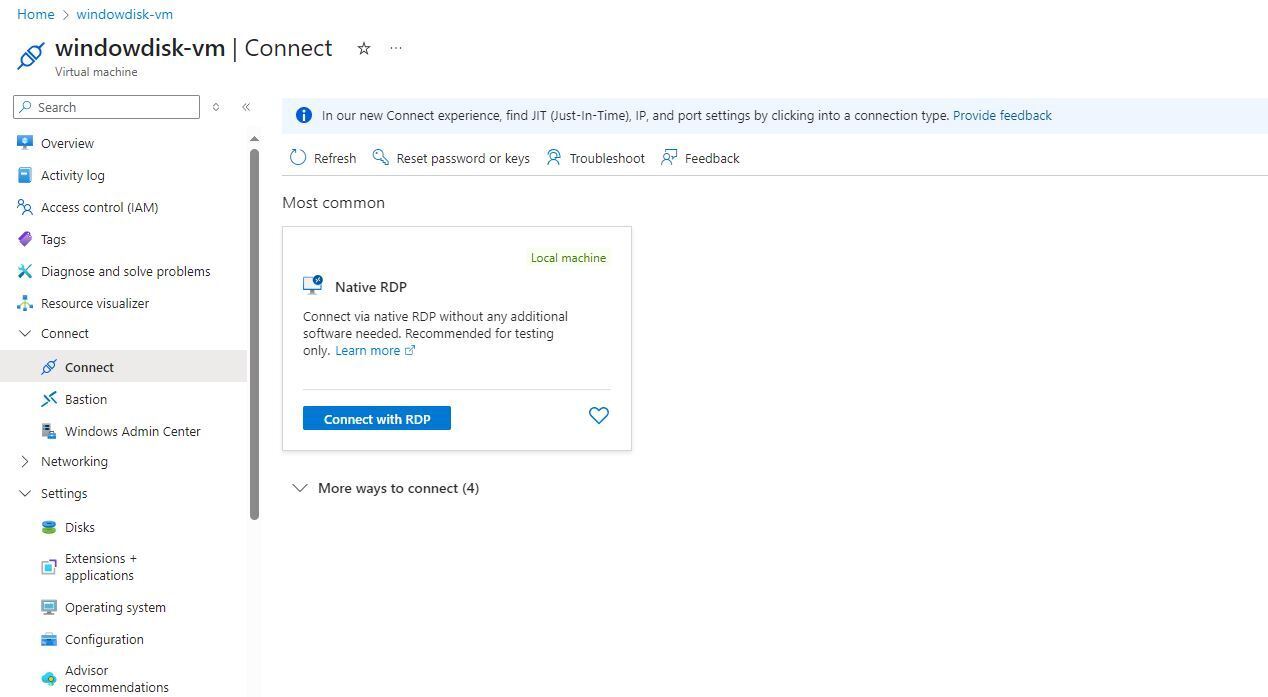
🔗 Step 7: Use Remote Desktop (RDP) to access your Windows VM:
From Azure Portal, click Connect > RDP
Download the .rdp file and log in
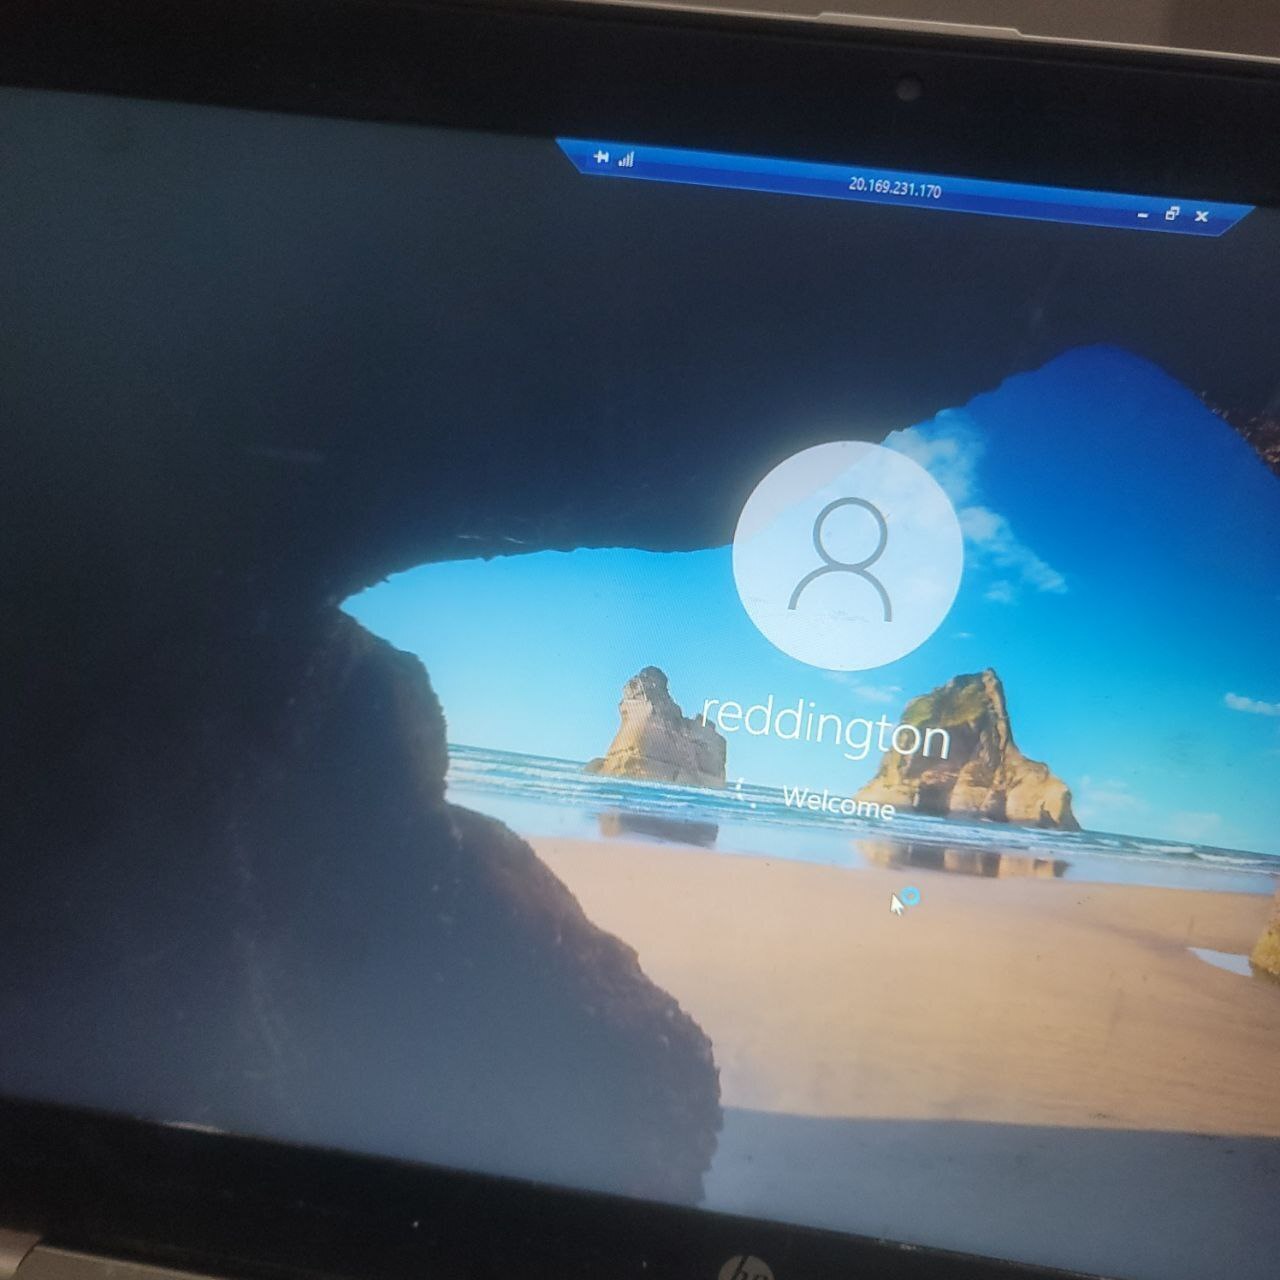
🔗 Step 8: Log into the .rdp page with the username and password already created
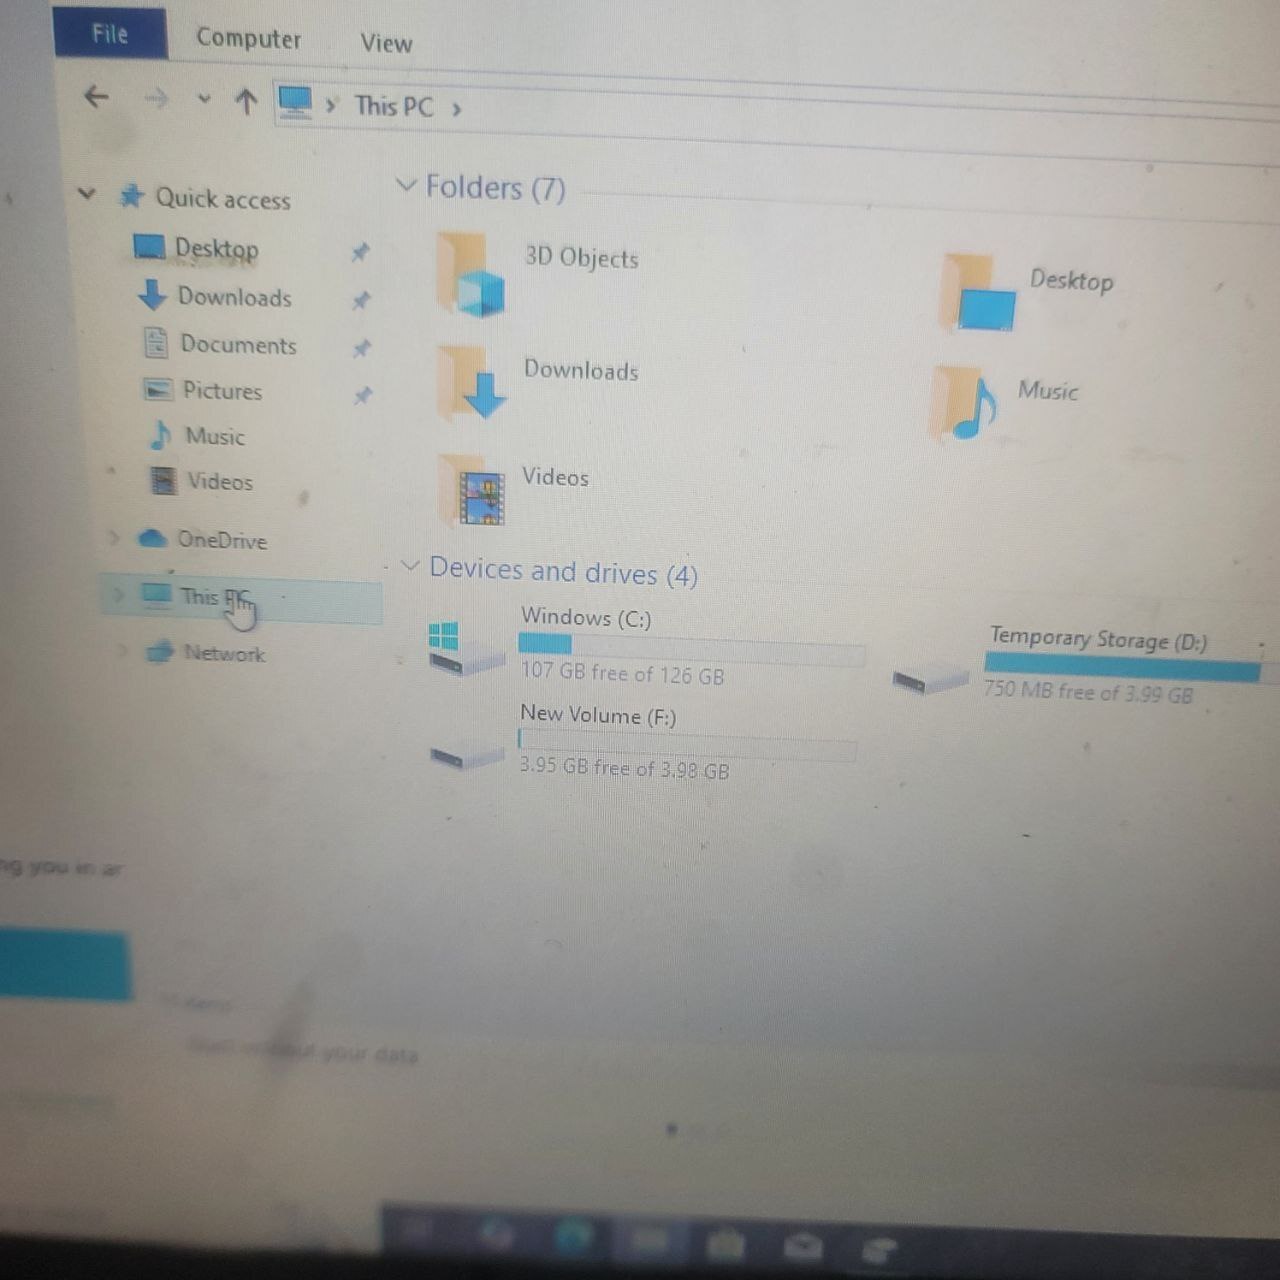
🔗 Step 9: Right-click on the window
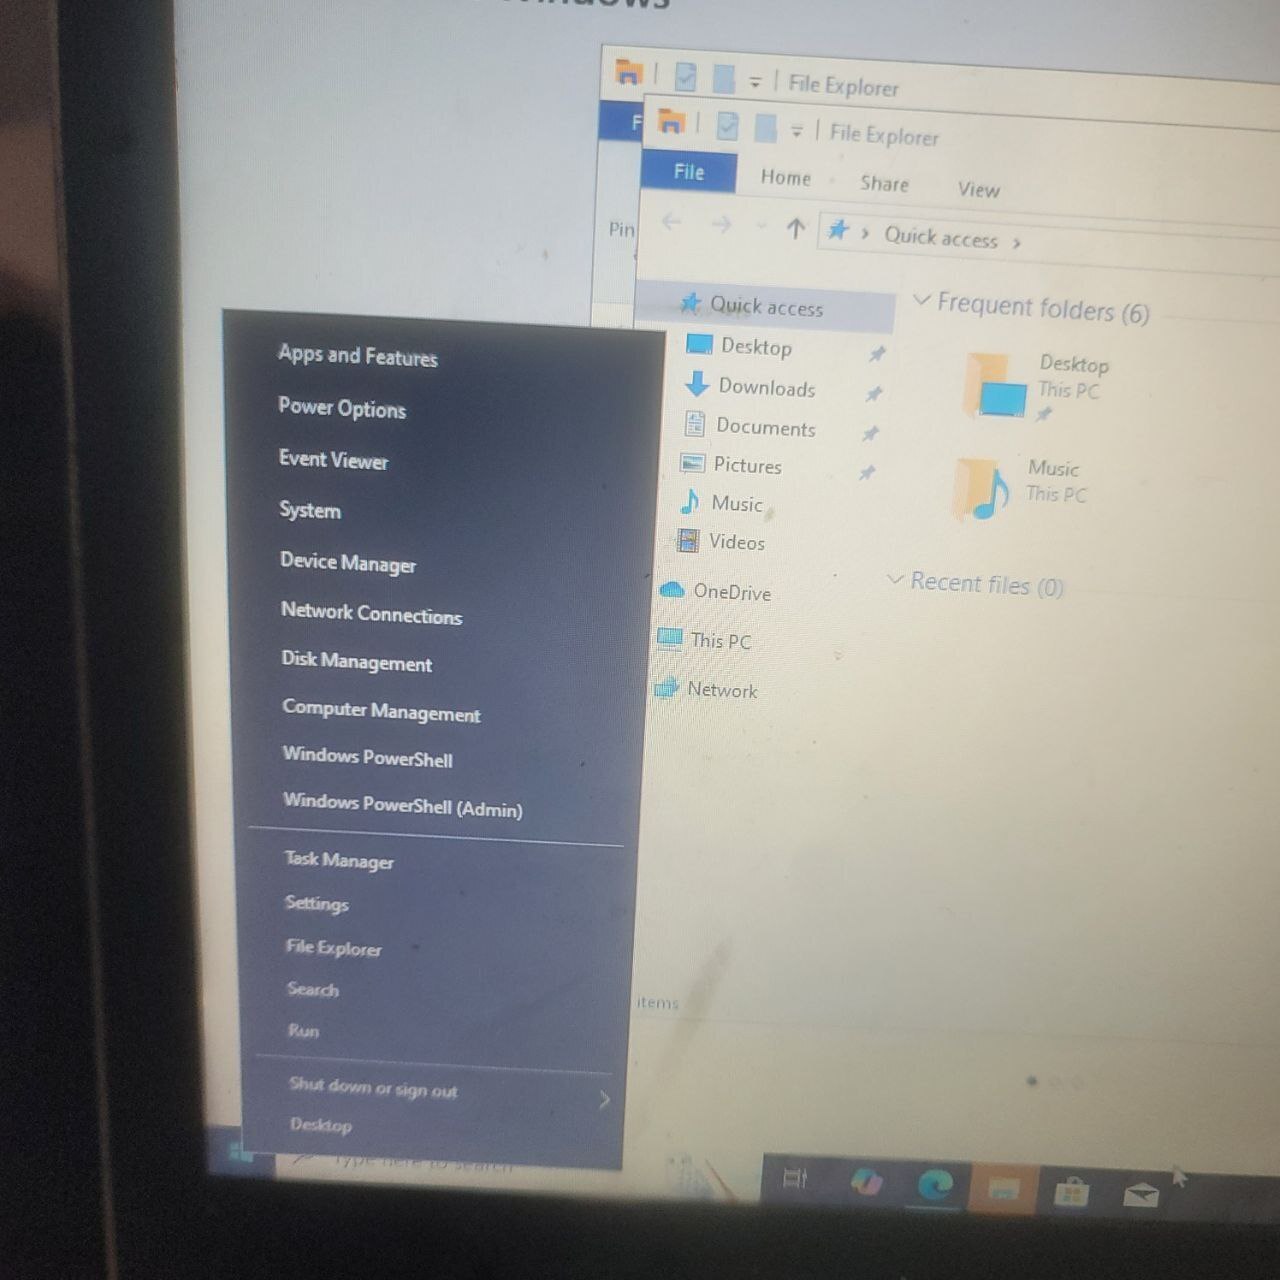
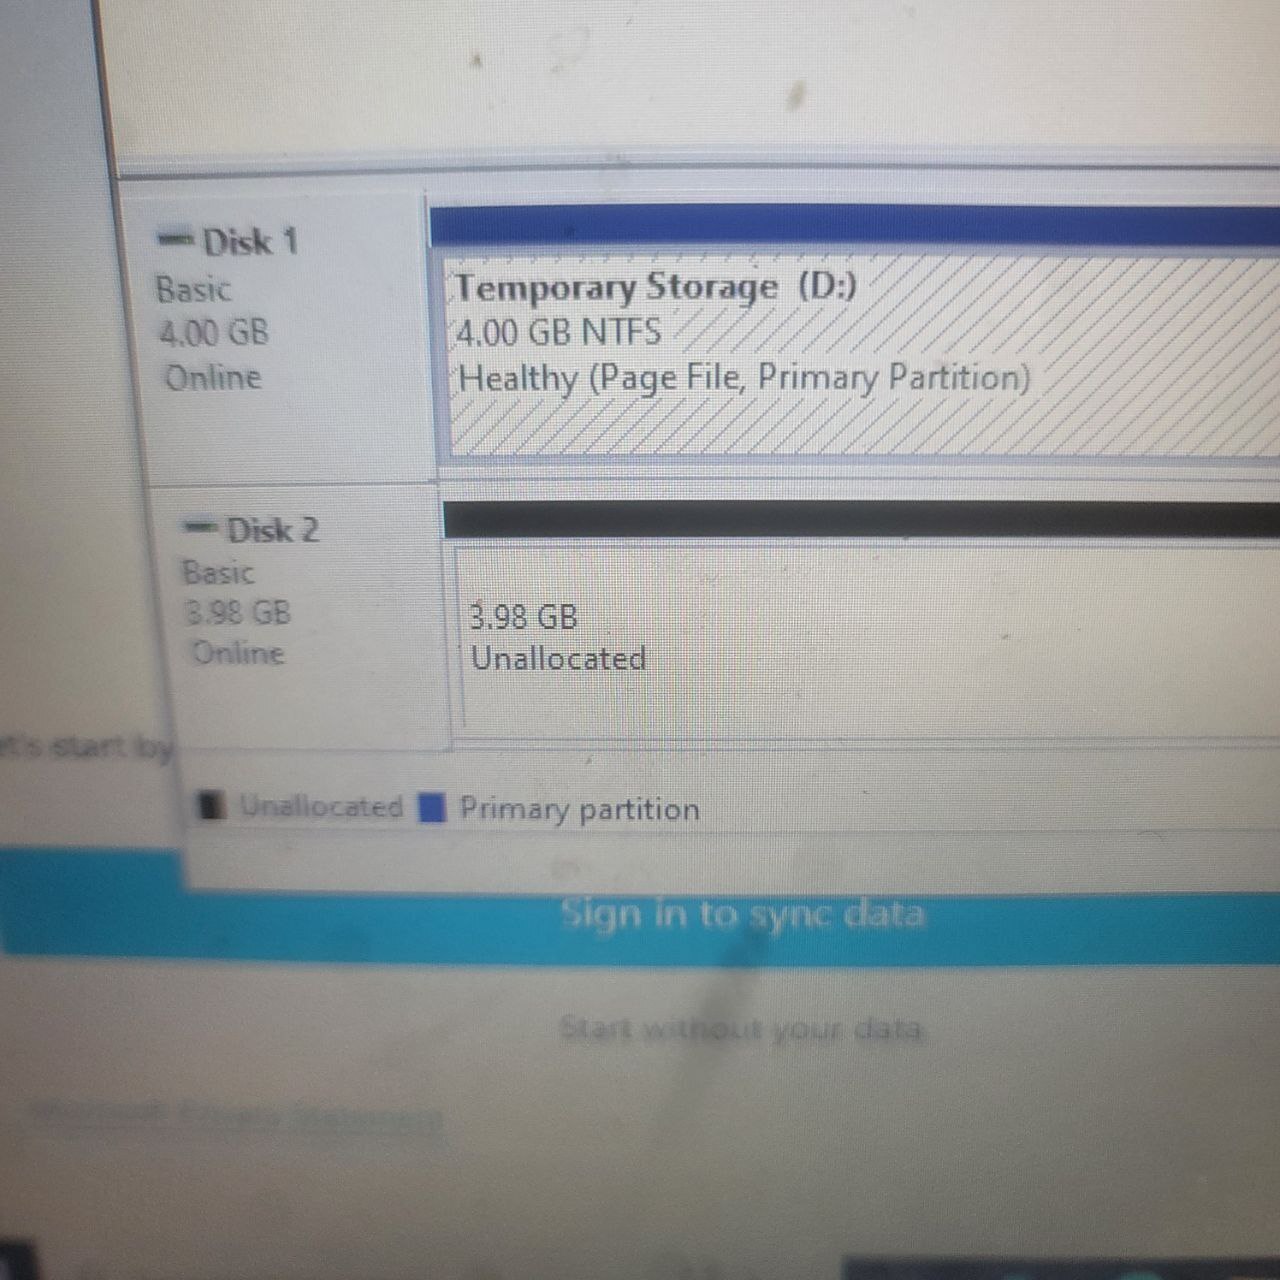
🔗 Step 10: Click on the Disk management
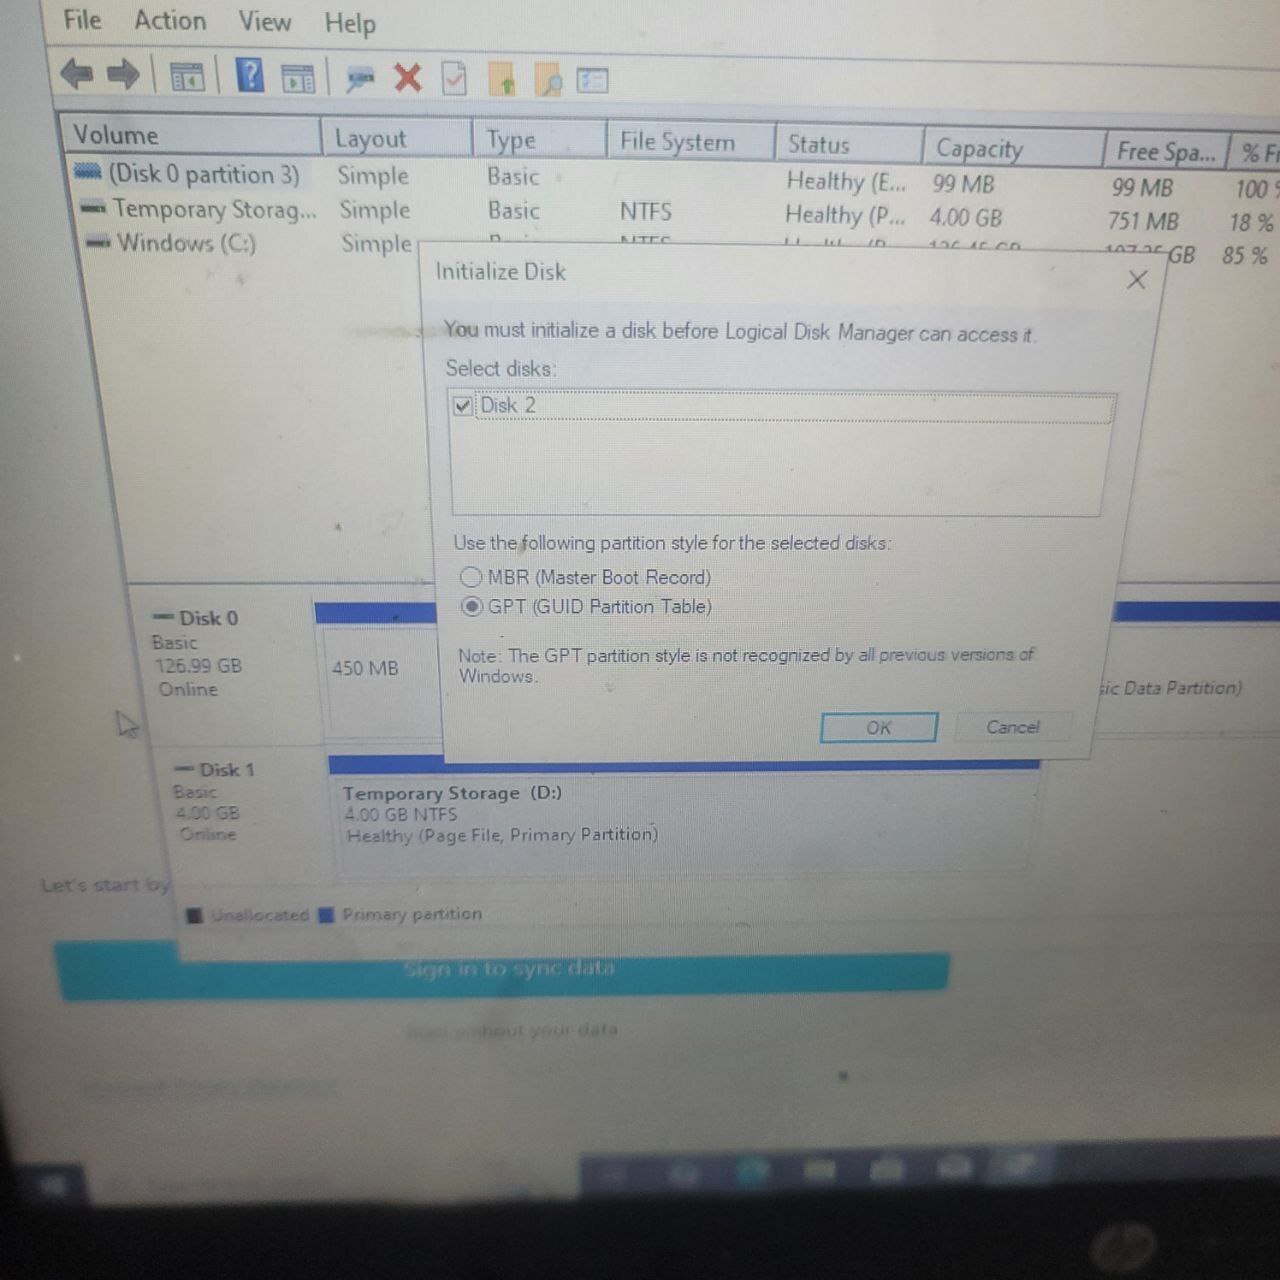
🔗 Step 11: Click ok and scroll down to Unallocated disk
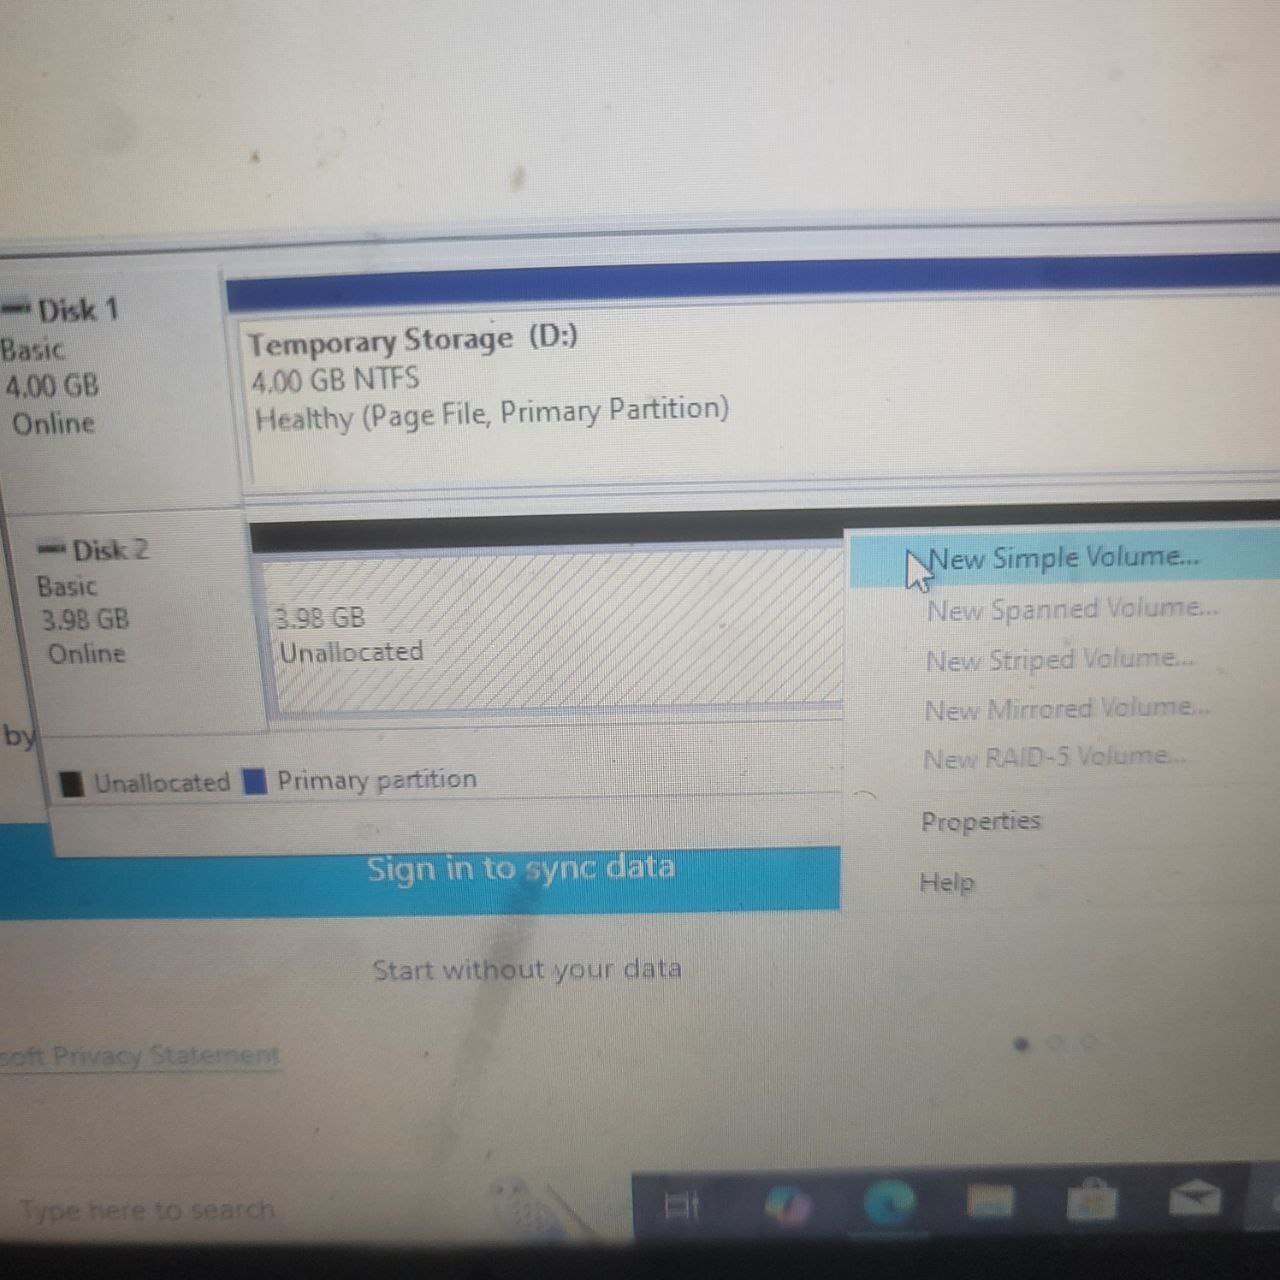
🔗 Step 12: Right-click on the black magin
keep clicking on the 'next'prompt till the 'finish' prompt
🔗 Step 13: The new mounted disk is New Volume F. The name and the Alphabet can be changed in the last step