INTRODUCTION
In this write-up, I am going to show you how to create a Virtual Networks in Microsoft Azure.
Before we start building our virtual networks in the Azure portal, let’s understand what an Azure virtual network is all about
What is Azure Virtual Network?
Azure virtual networks and virtual subnets enable Azure resources, such as VMs, web apps, and databases, to communicate with each other, with users on the internet, and with your on-premises client computers. You can think of an Azure network as an extension of your on-premises network with resources that link other Azure resources.
Azure virtual networks or also known as Azure VNETs are the basic building block of your private network on the Azure Cloud. These virtual networks are the logical constructs that in the underlay utilize the physical infrastructure in Microsoft datacenters across different regions thus reaping the benefits i.e., scale, and high availability. It is the representation of your private network in Azure that is logically isolated from other virtual networks in Azure and is dedicated to your subscription.
A virtual network is a group of IP addresses linked together, which is an essential factor to contemplate when devising solutions in the cloud. To ensure that every layer of the application architecture is safeguarded within a reliable network, it is wise to form various subnets for the different levels of the application and attach each subnet to a network security group with limited inbound and outbound rules for security.
Scenario:
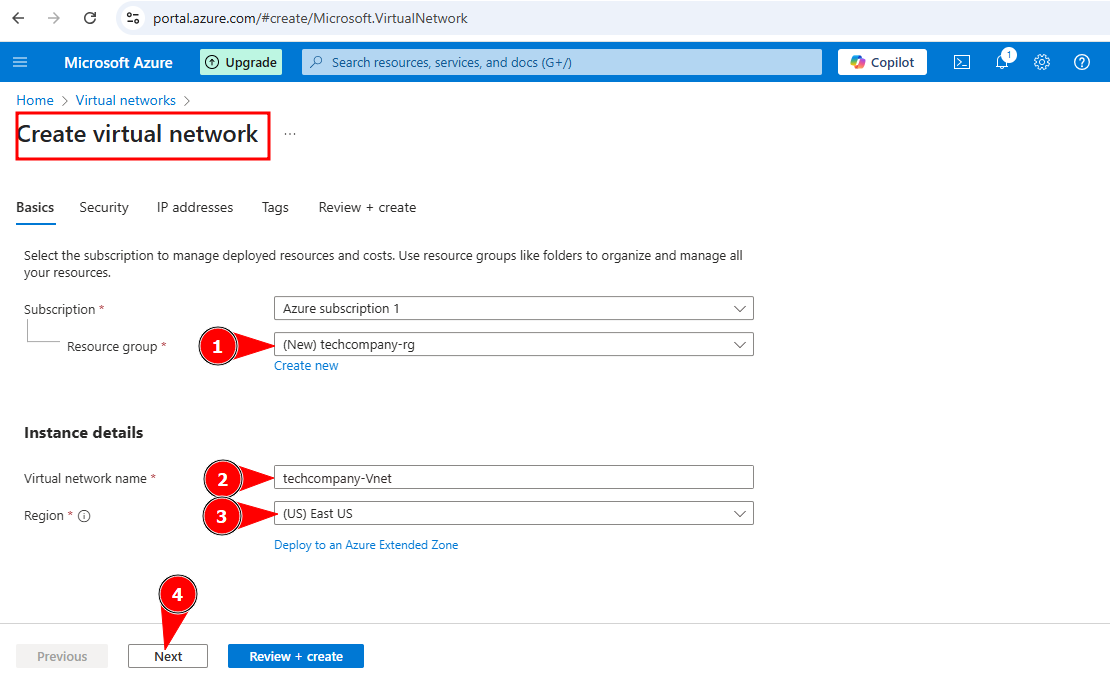
As a cloud and DevOps Engineer, I'm creating an Azure Virtual Network (Vnet) for a Tech Company using the address space 197.152.50.0/24. The network will be segmented into four subnets, each with a subnet size of /28 to ensure proper resource isolation and IP management.
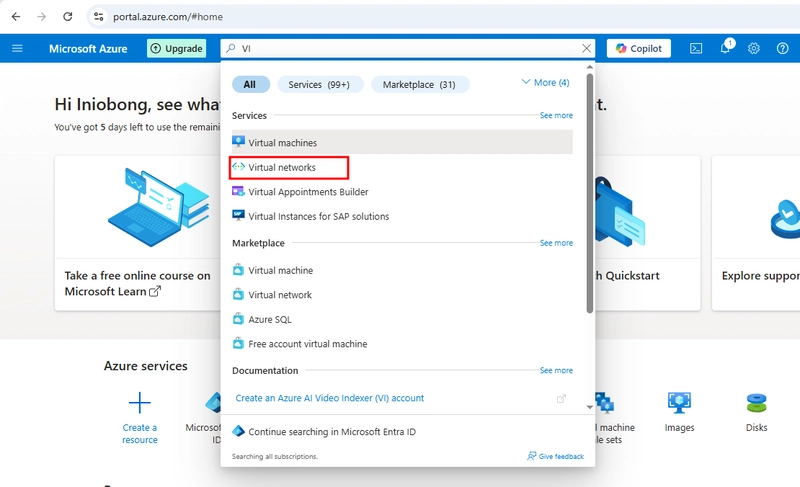
STEP 1: Go to portal.azure.com
-search for 'Virtual network'
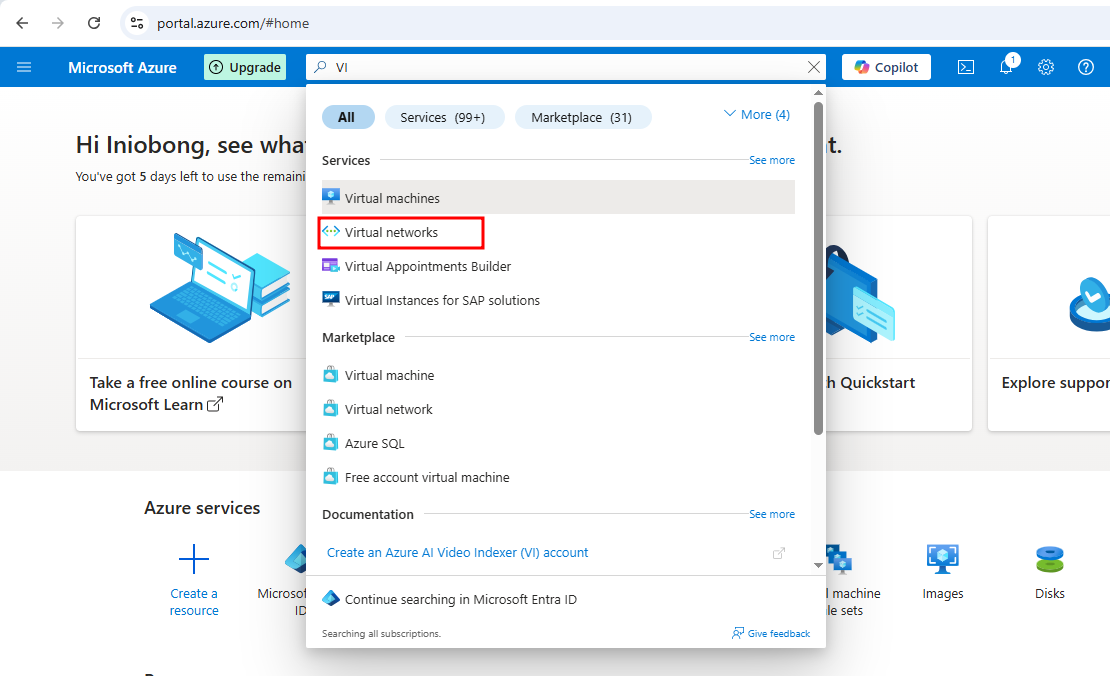
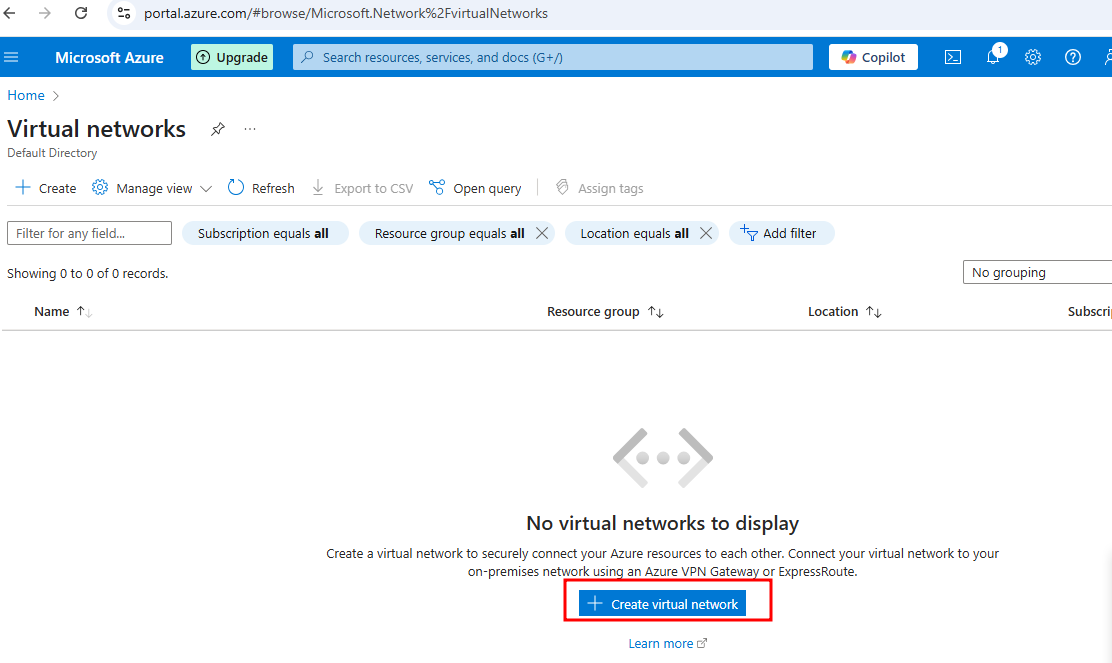
Click on 'create a virtual network'
STEP 2: On the Basics under Create virtual network tab
- create a resource group
- Give the Vnet a name
- Indicate the region
- Click on next to continue
STEP 3: Allow the default settings in the security tab
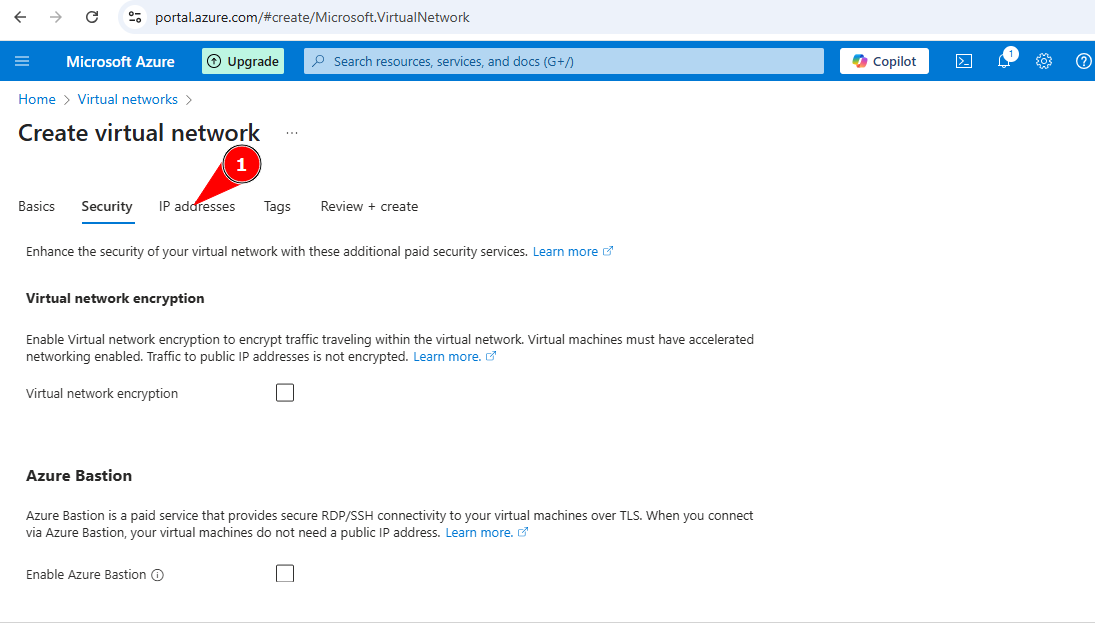
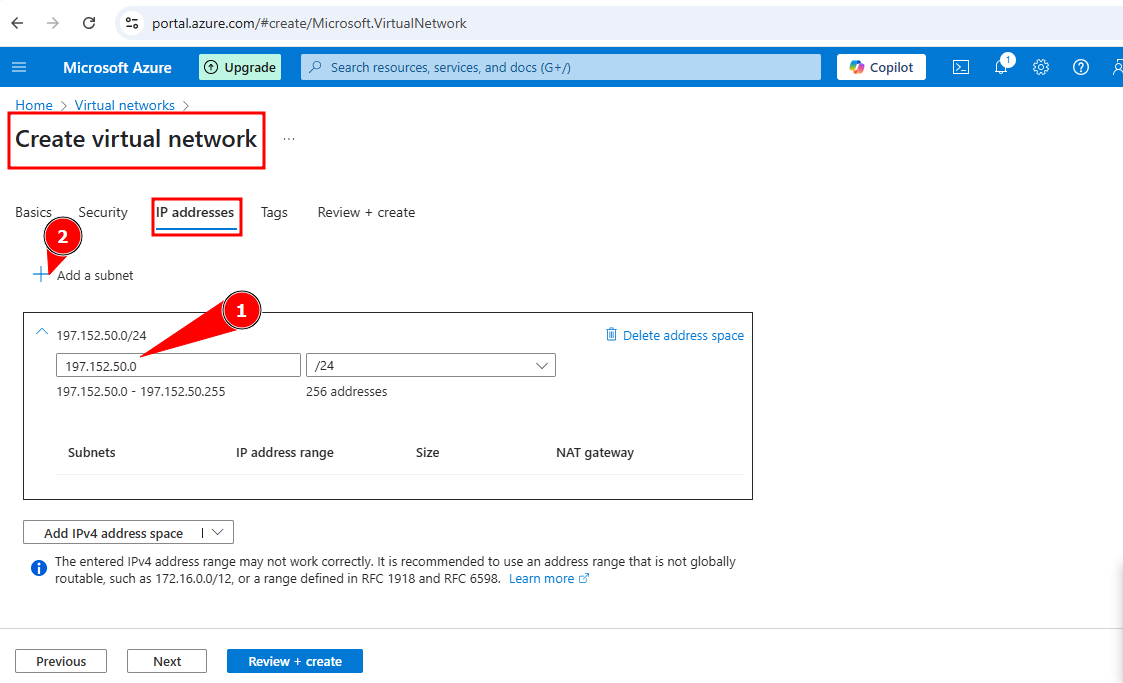
STEP 4: Click on IP Address tab
- Type in the IP address
- Click on the 'add a subnet button'
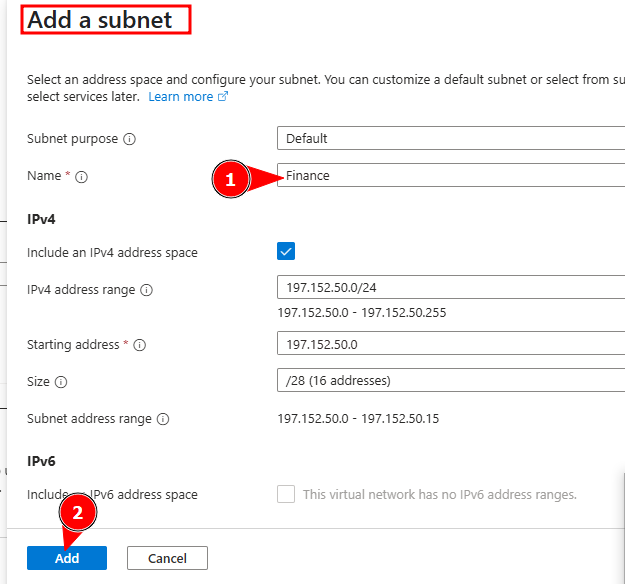
On the 'add subnet button'
- Leave the subnet purpose at default
- Give the subnet a name 'Finance'
- Allow other settings at default Click on 'add' button
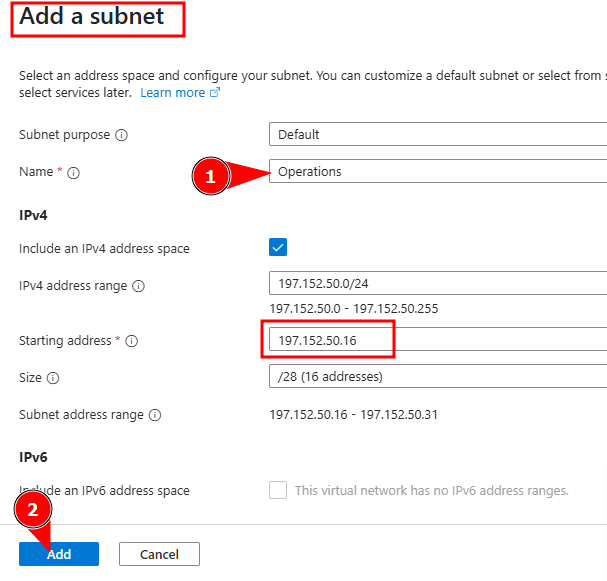
Click on the 'add subnet button' again
- Give the subnet a name 'Operations'
- Change the size to /28 The starting address will automatically change
- Allow other settings at default
- Then click on the 'Add' button
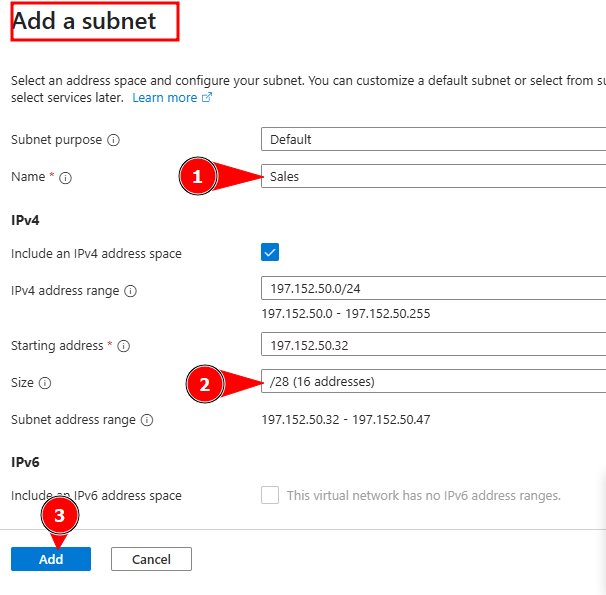
Click on the 'add subnet button' again
- Give the subnet a name 'Sales'
- Change the size to /28 The starting address will automatically change
- Allow other settings at default
- Then click on the 'Add' button
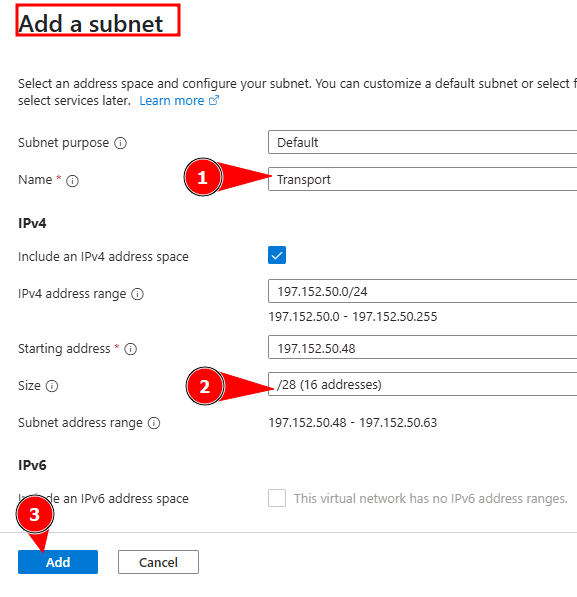
Click on the 'add subnet button' again
- Give the subnet a name 'Transport'
- Change the size to /28 The starting address will automatically change
- Allow other settings at default
- Then click on the 'Add' button
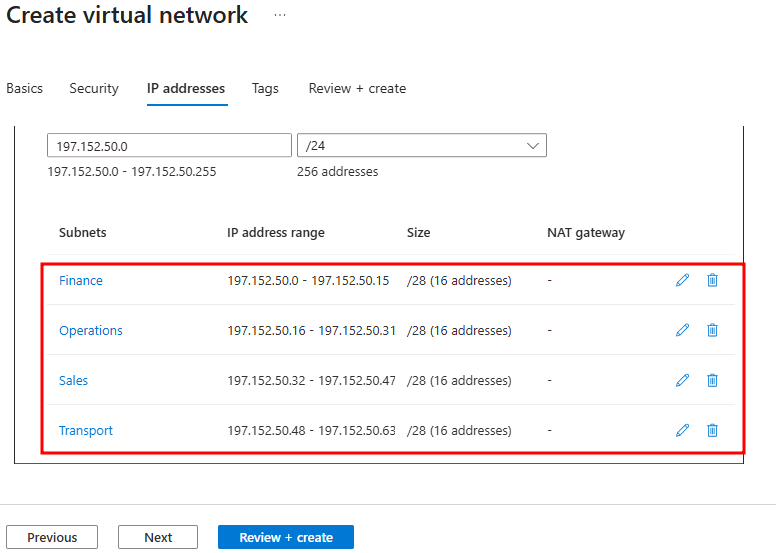
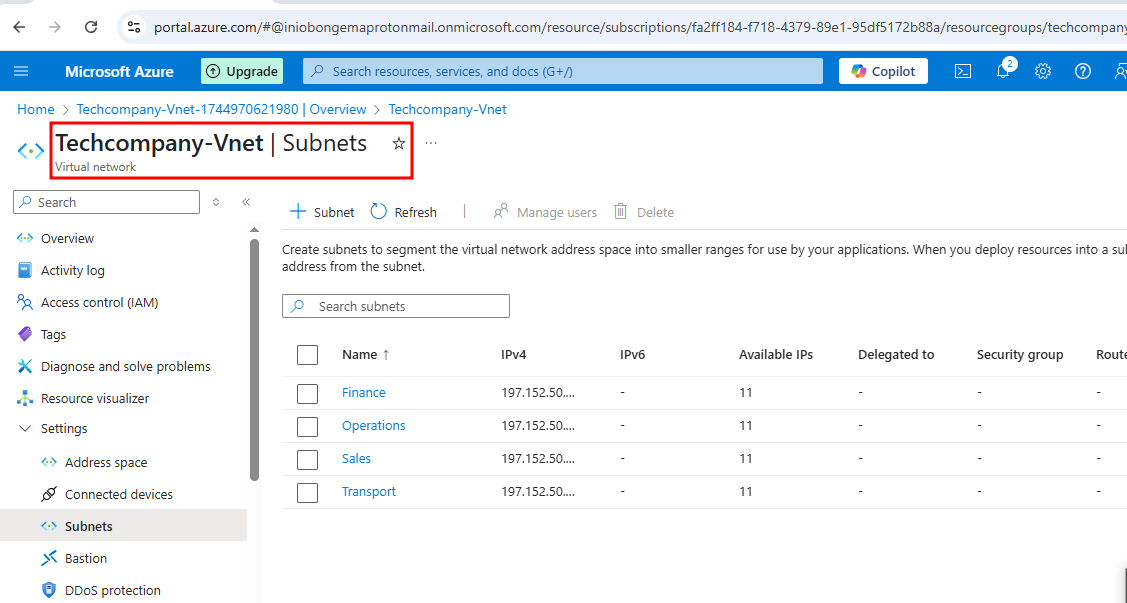
The four added subnets created were successfully added as shown below
Then click on 'Review and Create'
Then click on 'create'

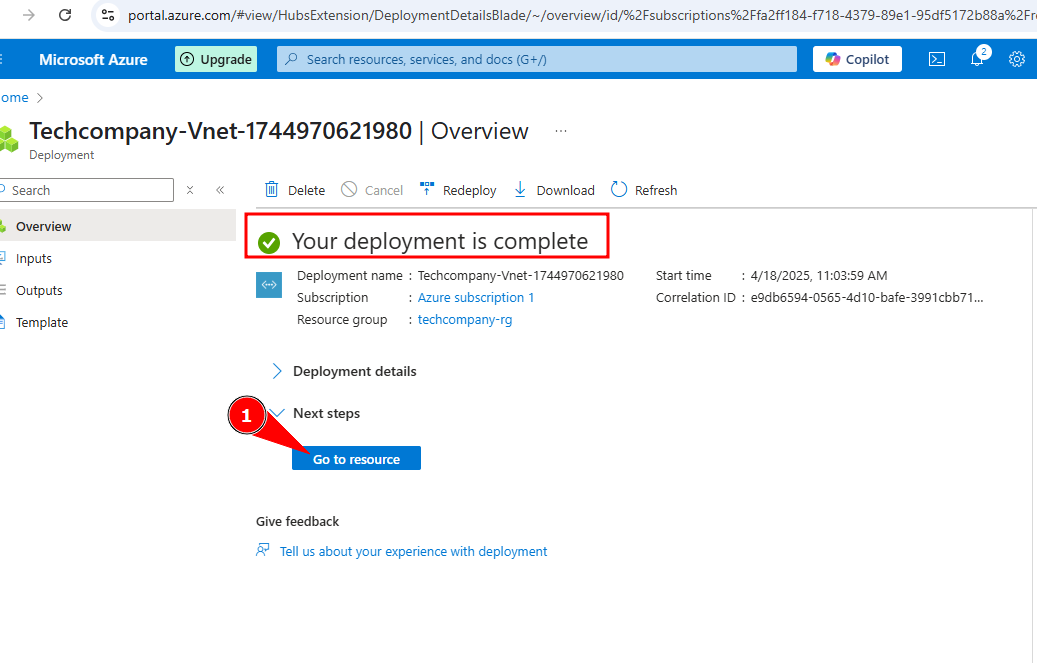
Deployment id complete
- Click on 'Go to resource'
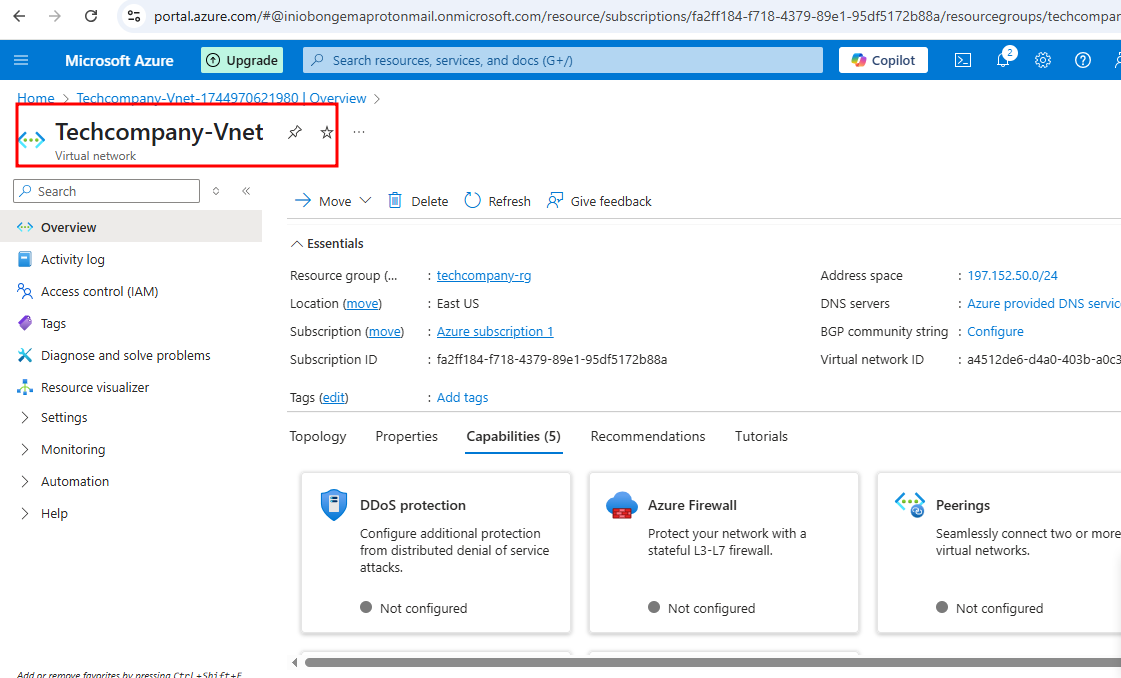
My network overview page is displayed below
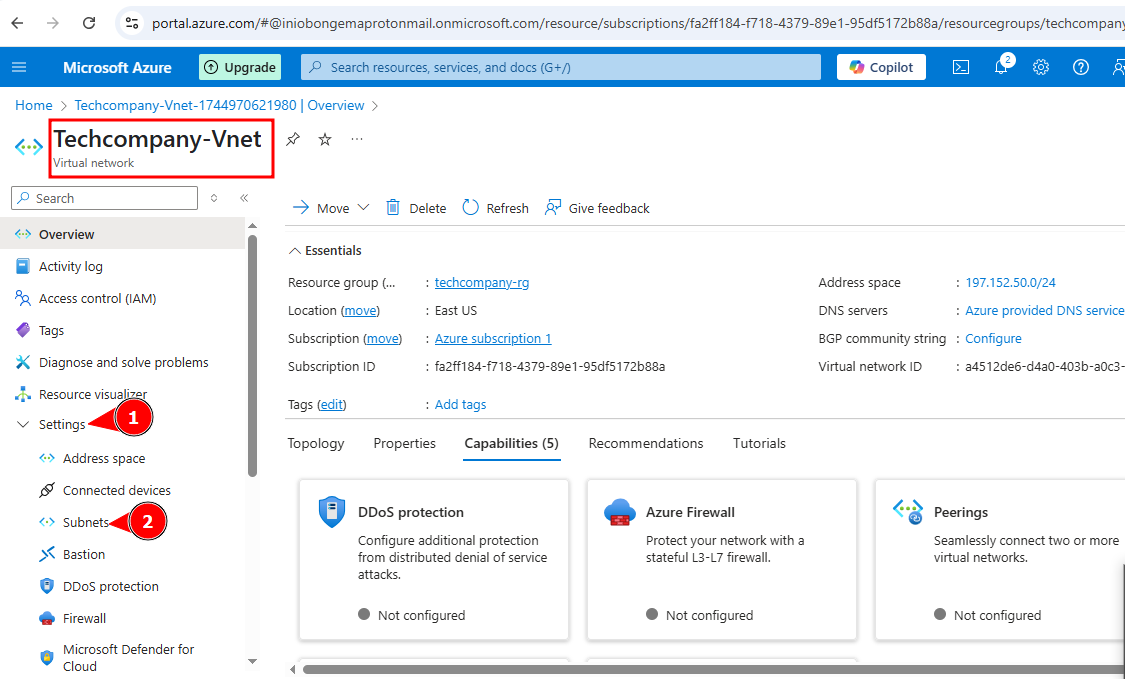
Go to setting on the left pane
- click on 'subnet'
The available IPs that are available are shown below, azure reserves 5 IPs for other resources
*My Azure Virtual Network for a Tech Company using the address space 197.152.50.0/24 was successfully created.
*