Introduction
If you're just getting started with Microsoft Azure, there's one foundational concept you will run into early: Virtual Networks, or VNets.
Think of a VNet as your own private network in the cloud — a space where your resources (like virtual machines, databases, and web apps) can securely talk to each other. In this guide, i will walk through how to create and configure one using the Azure Portal, no command-line knowledge required.
Let’s dive in.
💡 Why Virtual Networks Matter
When you spin up resources in Azure, you don’t want them floating around the internet without guardrails. A VNet gives you:
- Isolation and segmentation of services
- Control over IP address ranges, subnets, and routing
- Integration with on-premises networks
- The ability to set firewall rules using Network Security Groups (NSGs)
Basically, if you're building anything beyond a demo app, you will likely need a VNet.
🛠️ What You will Need
Before we get started, make sure you have:
- A Microsoft Azure account
- Access to the Azure Portal
🚧 Step 1: Create a Virtual Network
Let’s start by creating the VNet itself.
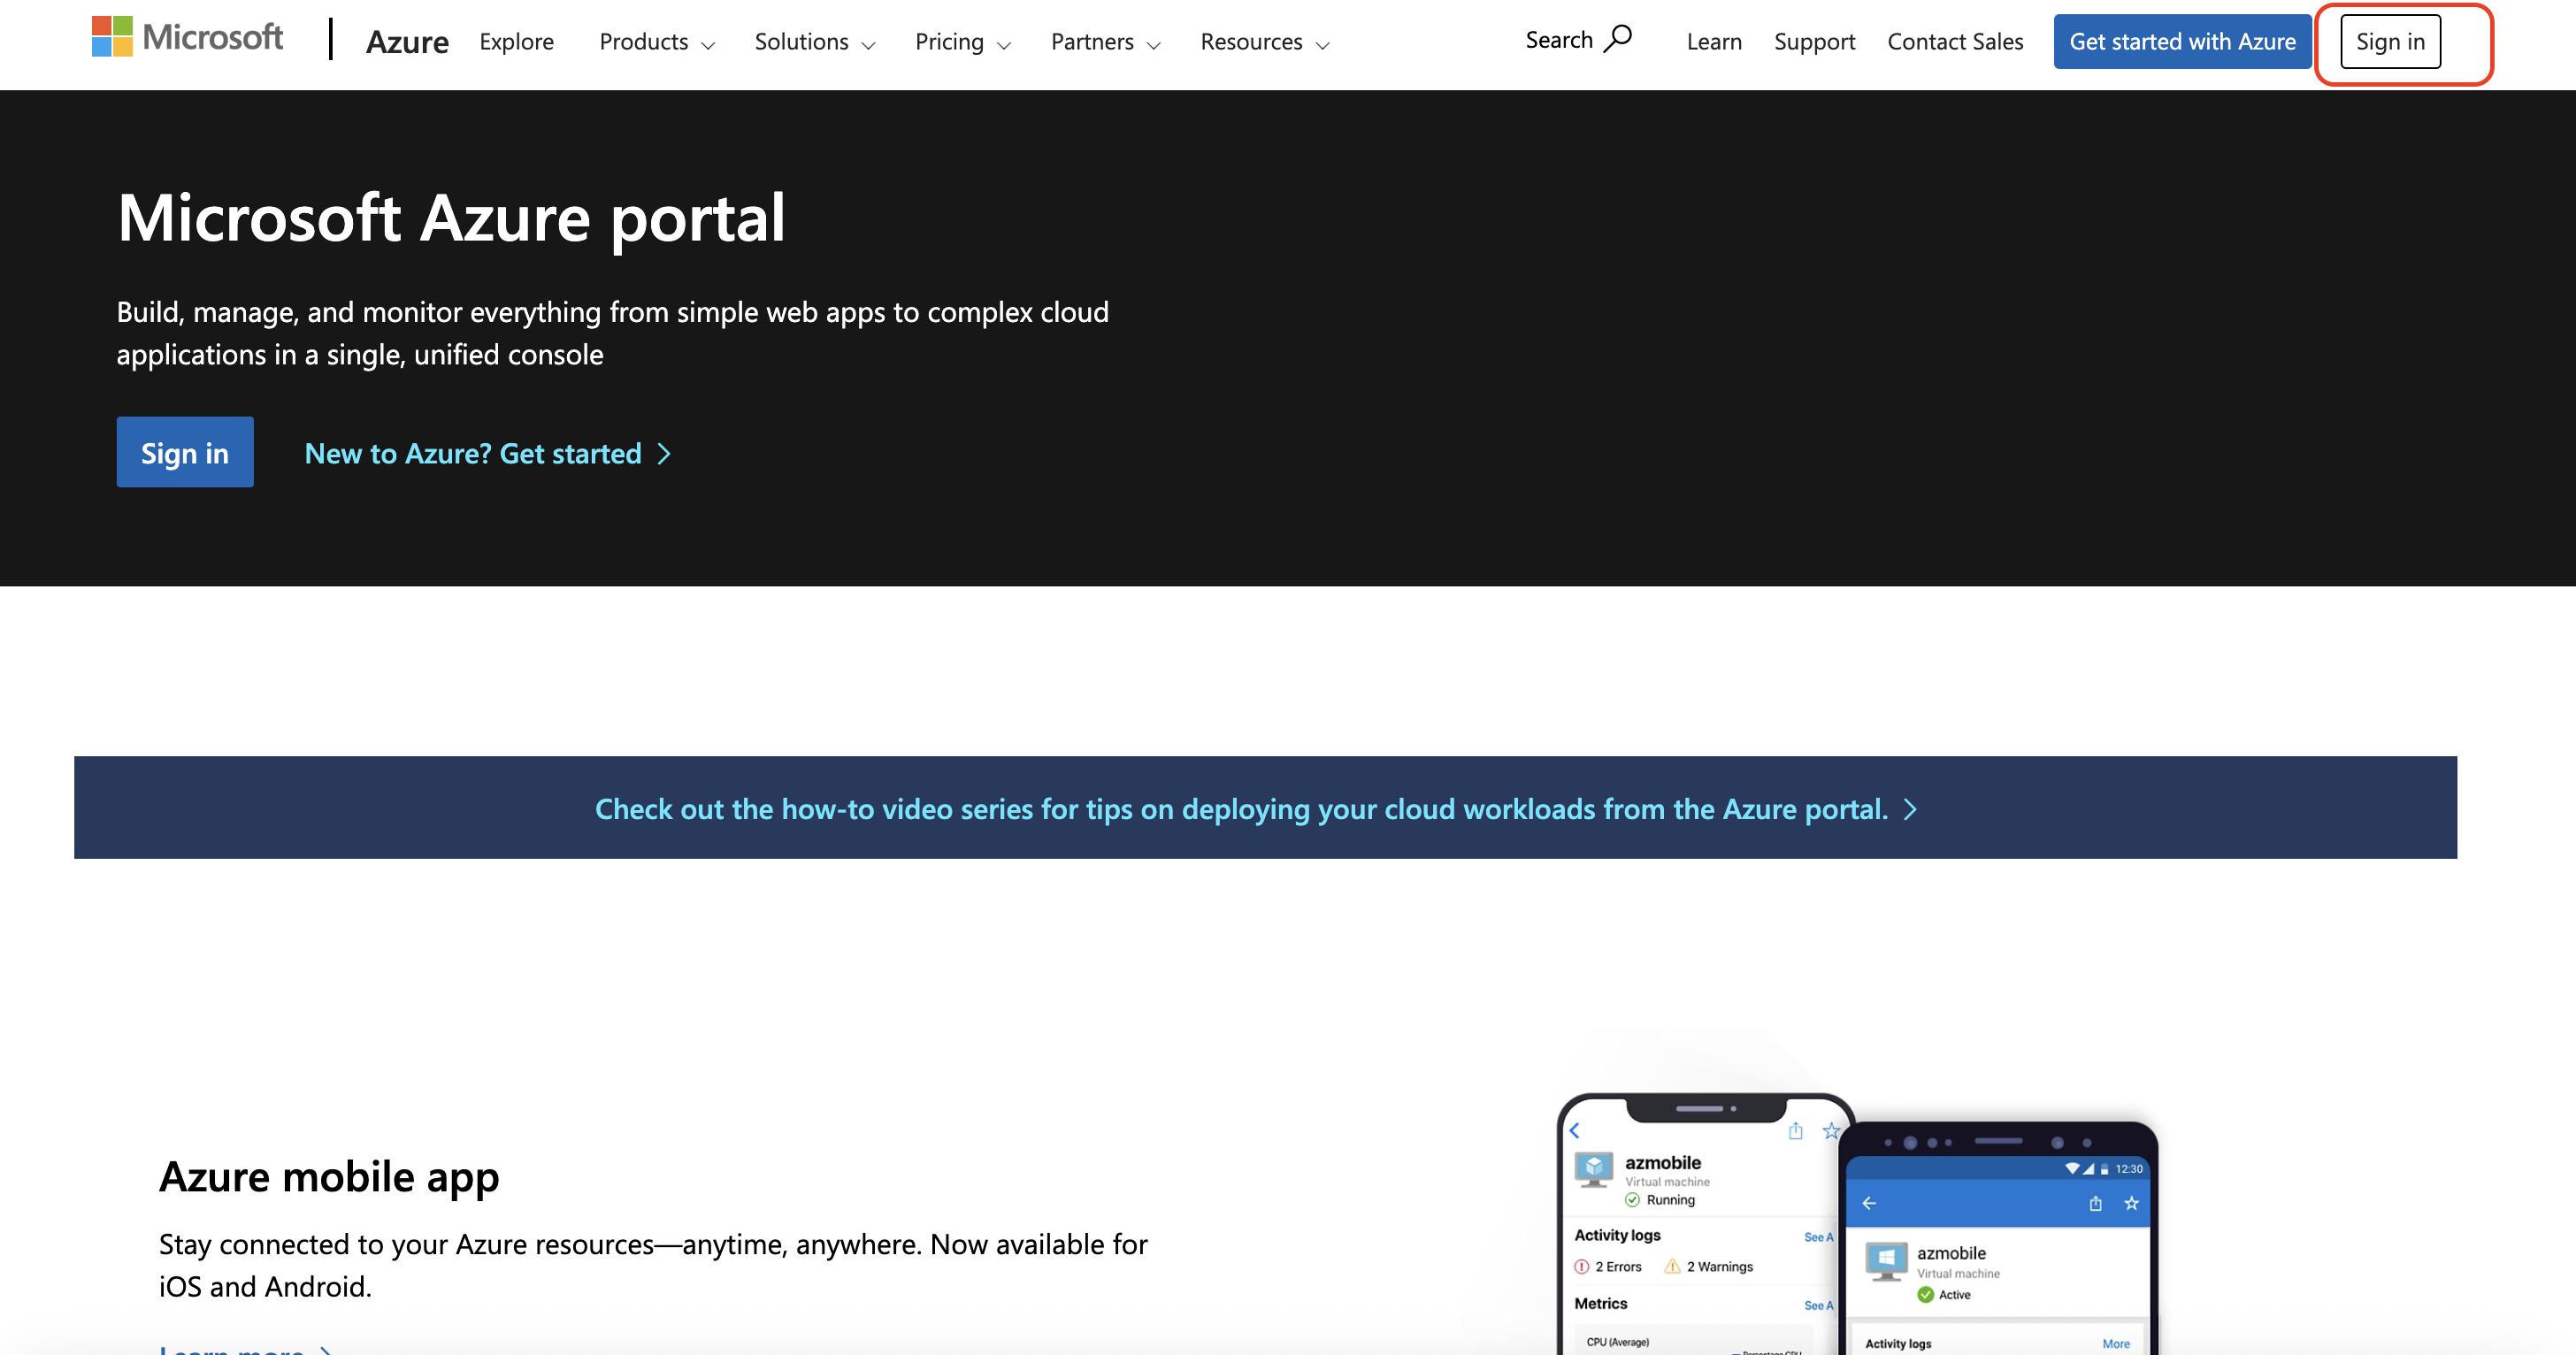
- Log in to the Azure Portal Head over to https://portal.azure.com and sign in.
-
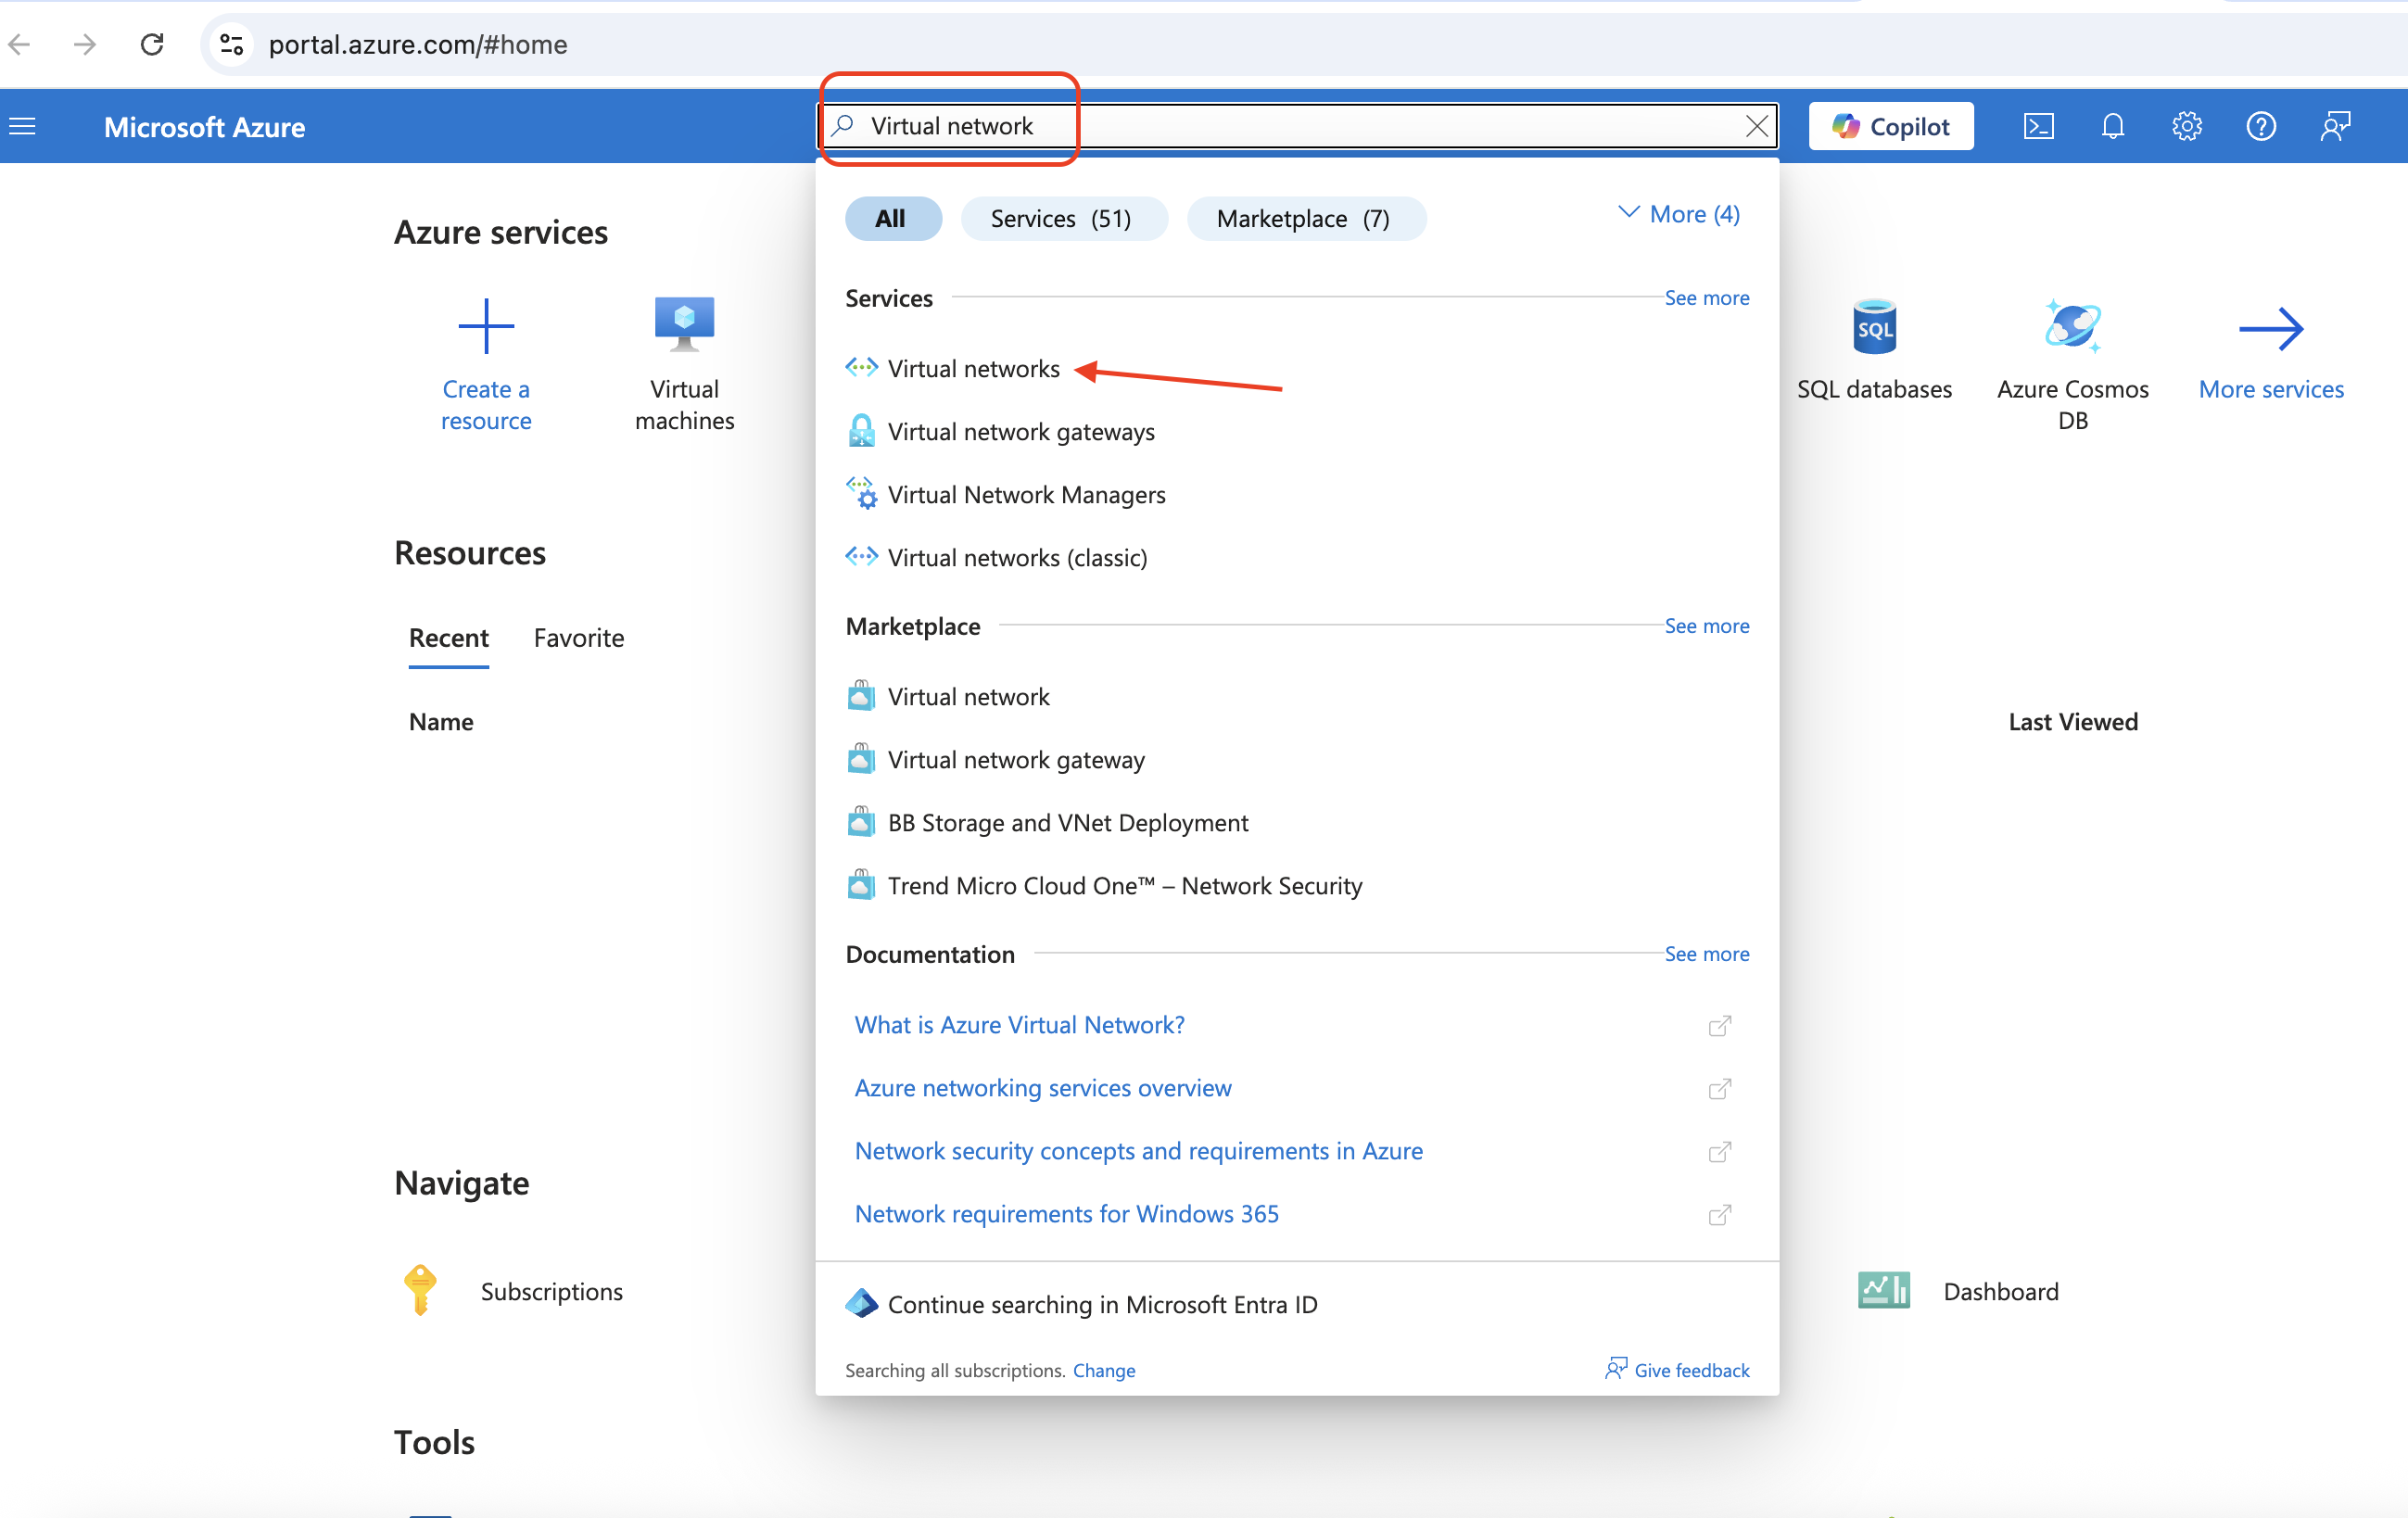
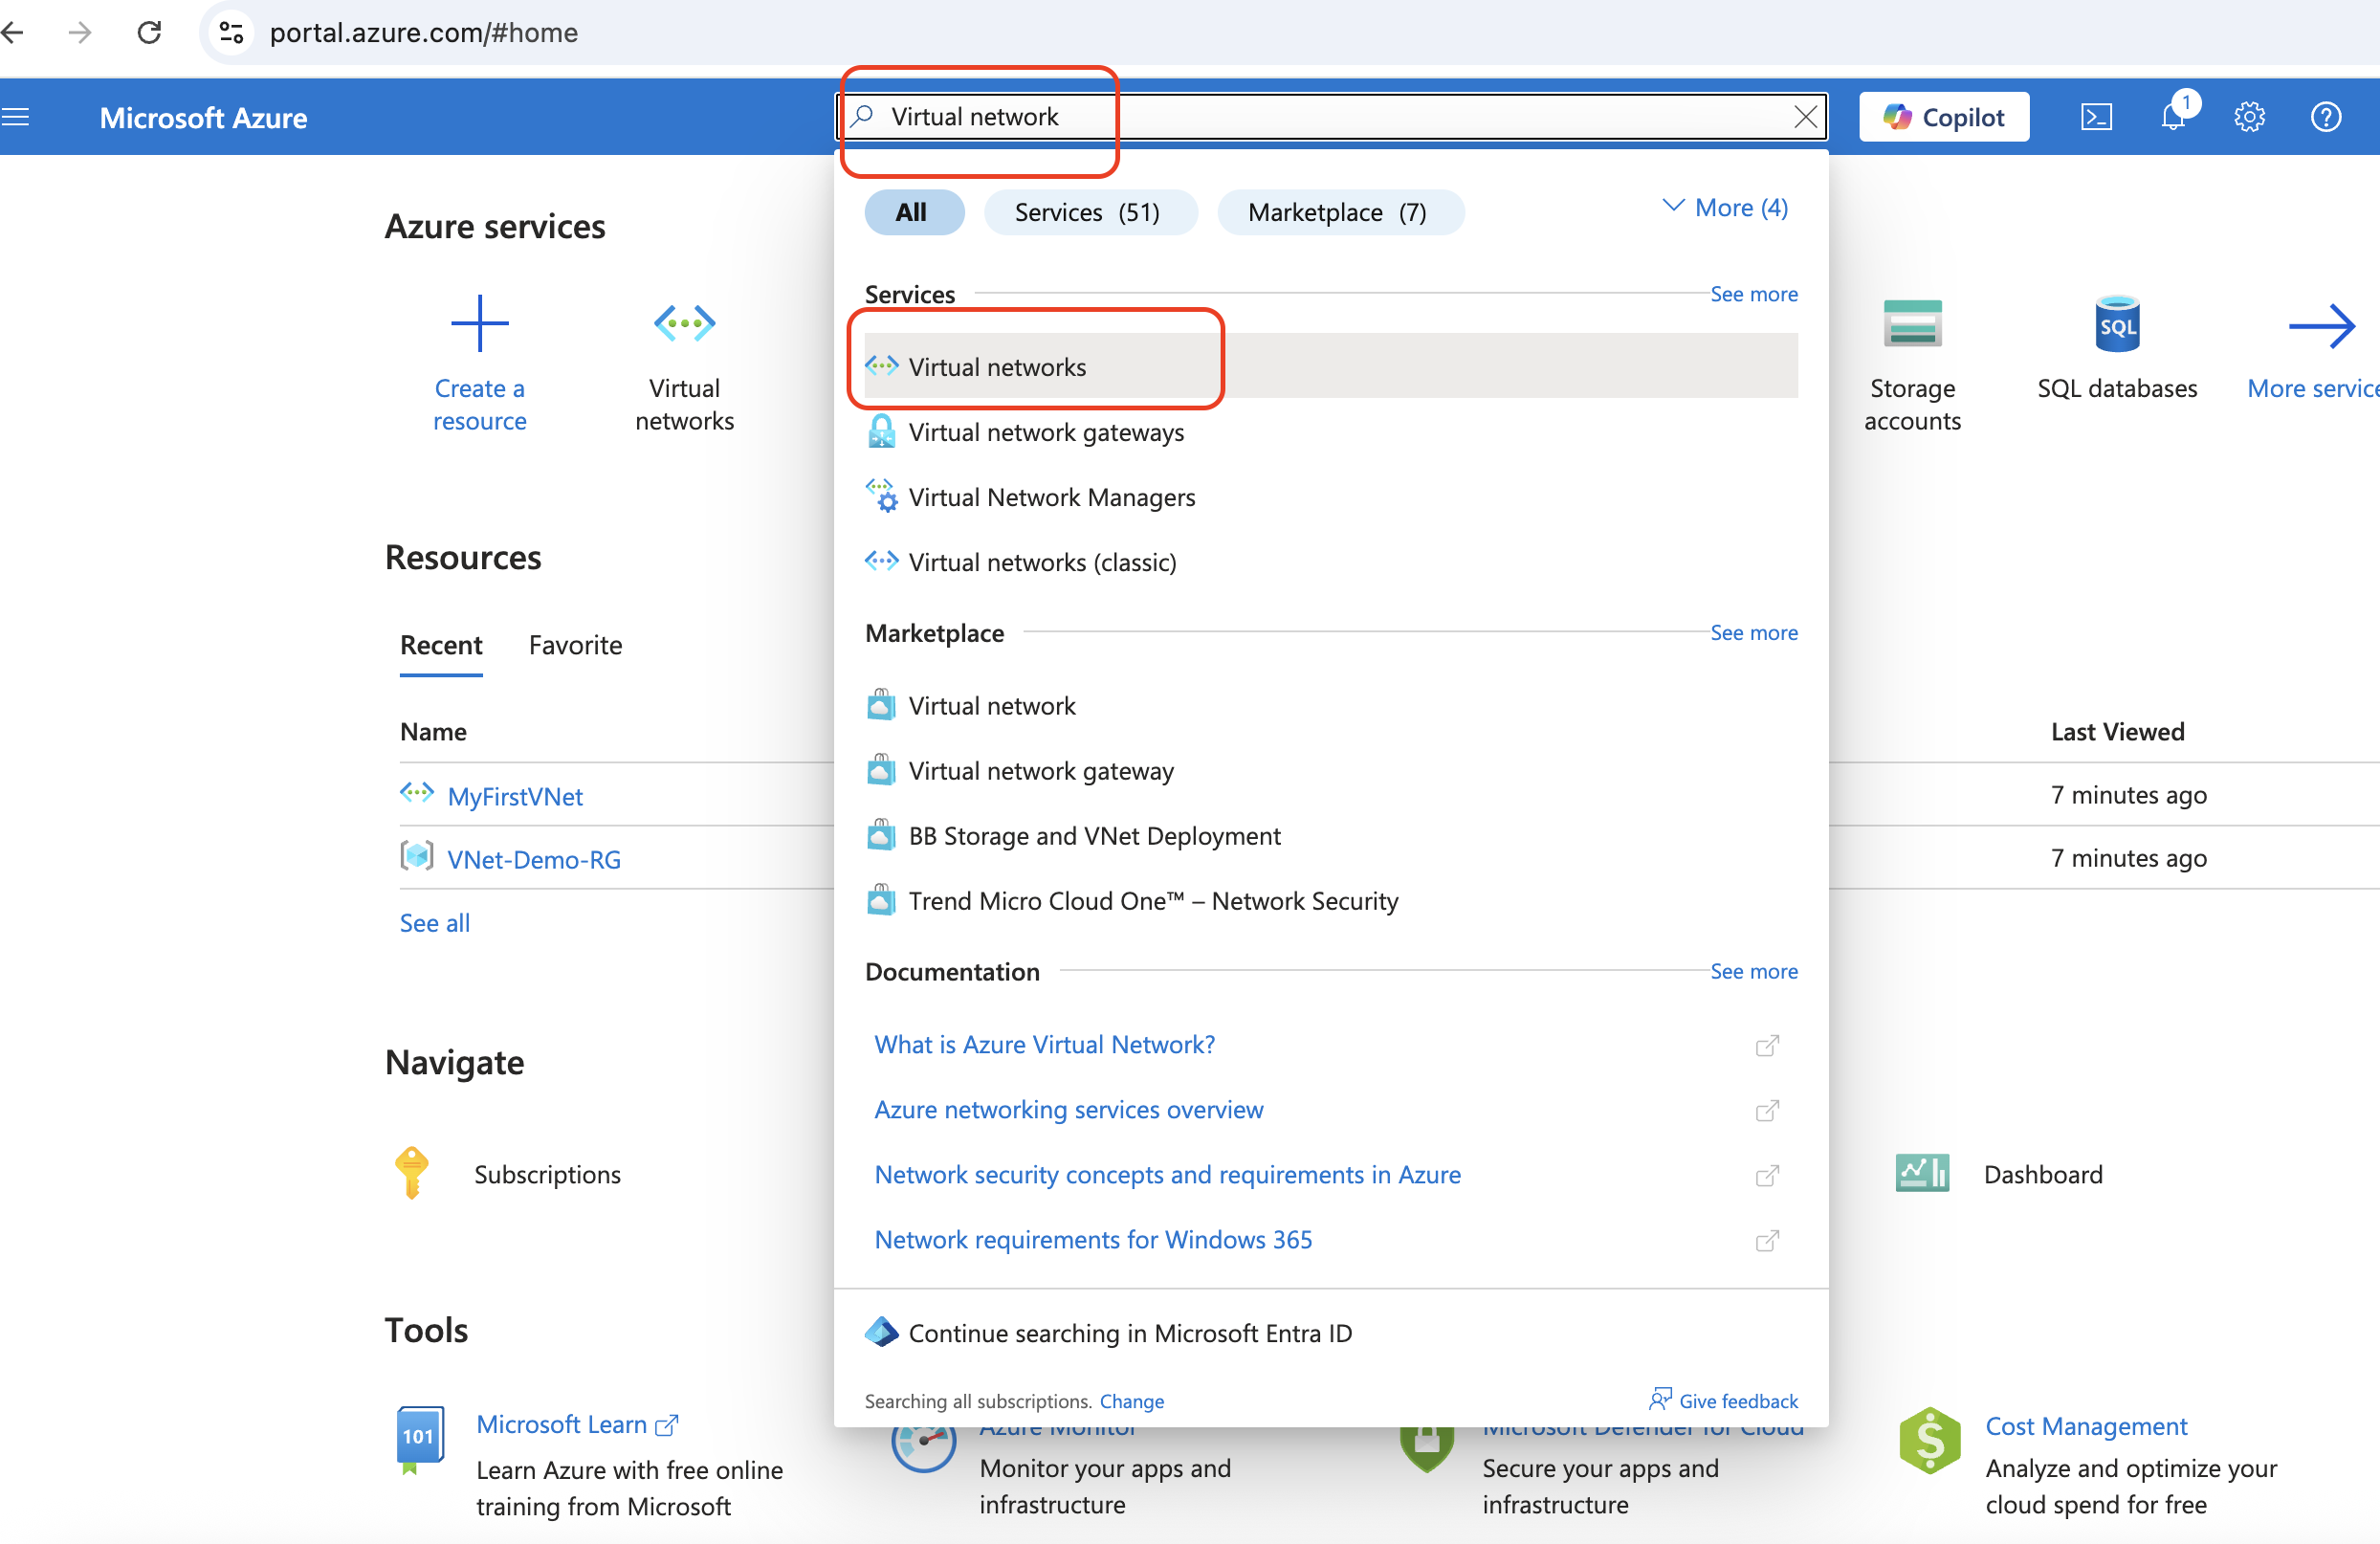
Search for “Virtual Networks”
Use the search bar at the top of the portal, type
Virtual Networks, and select the service from the dropdown.
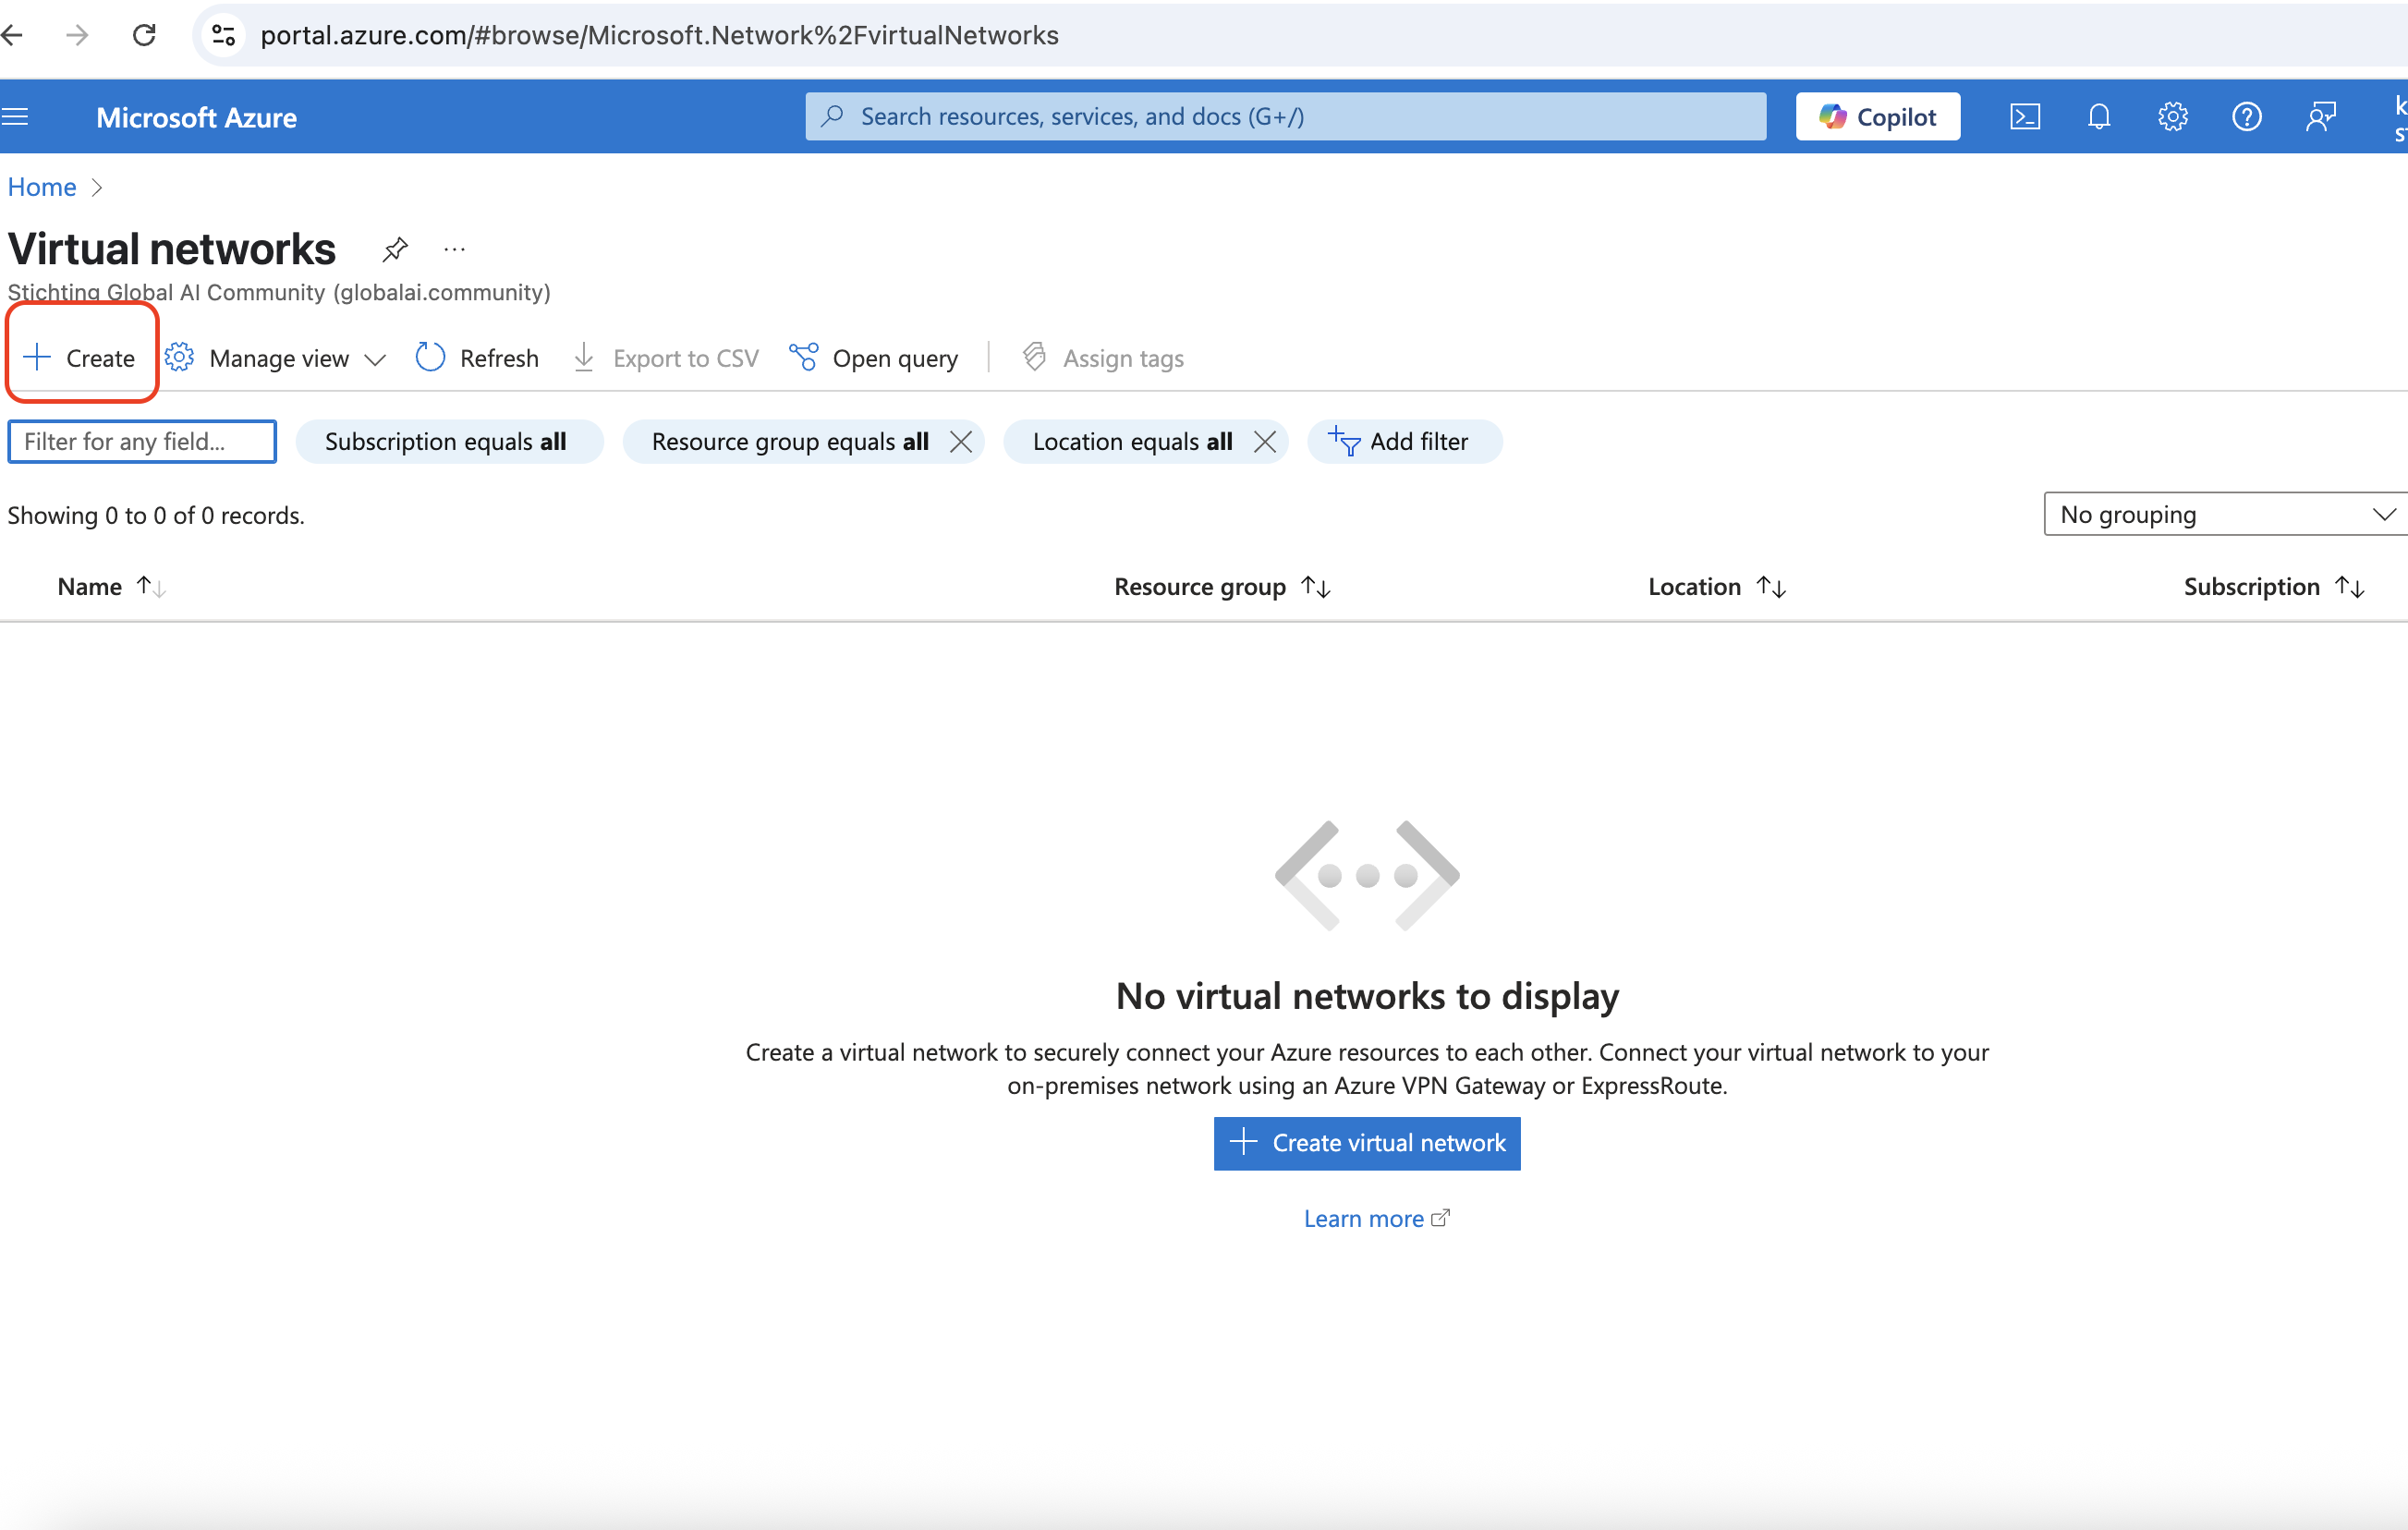
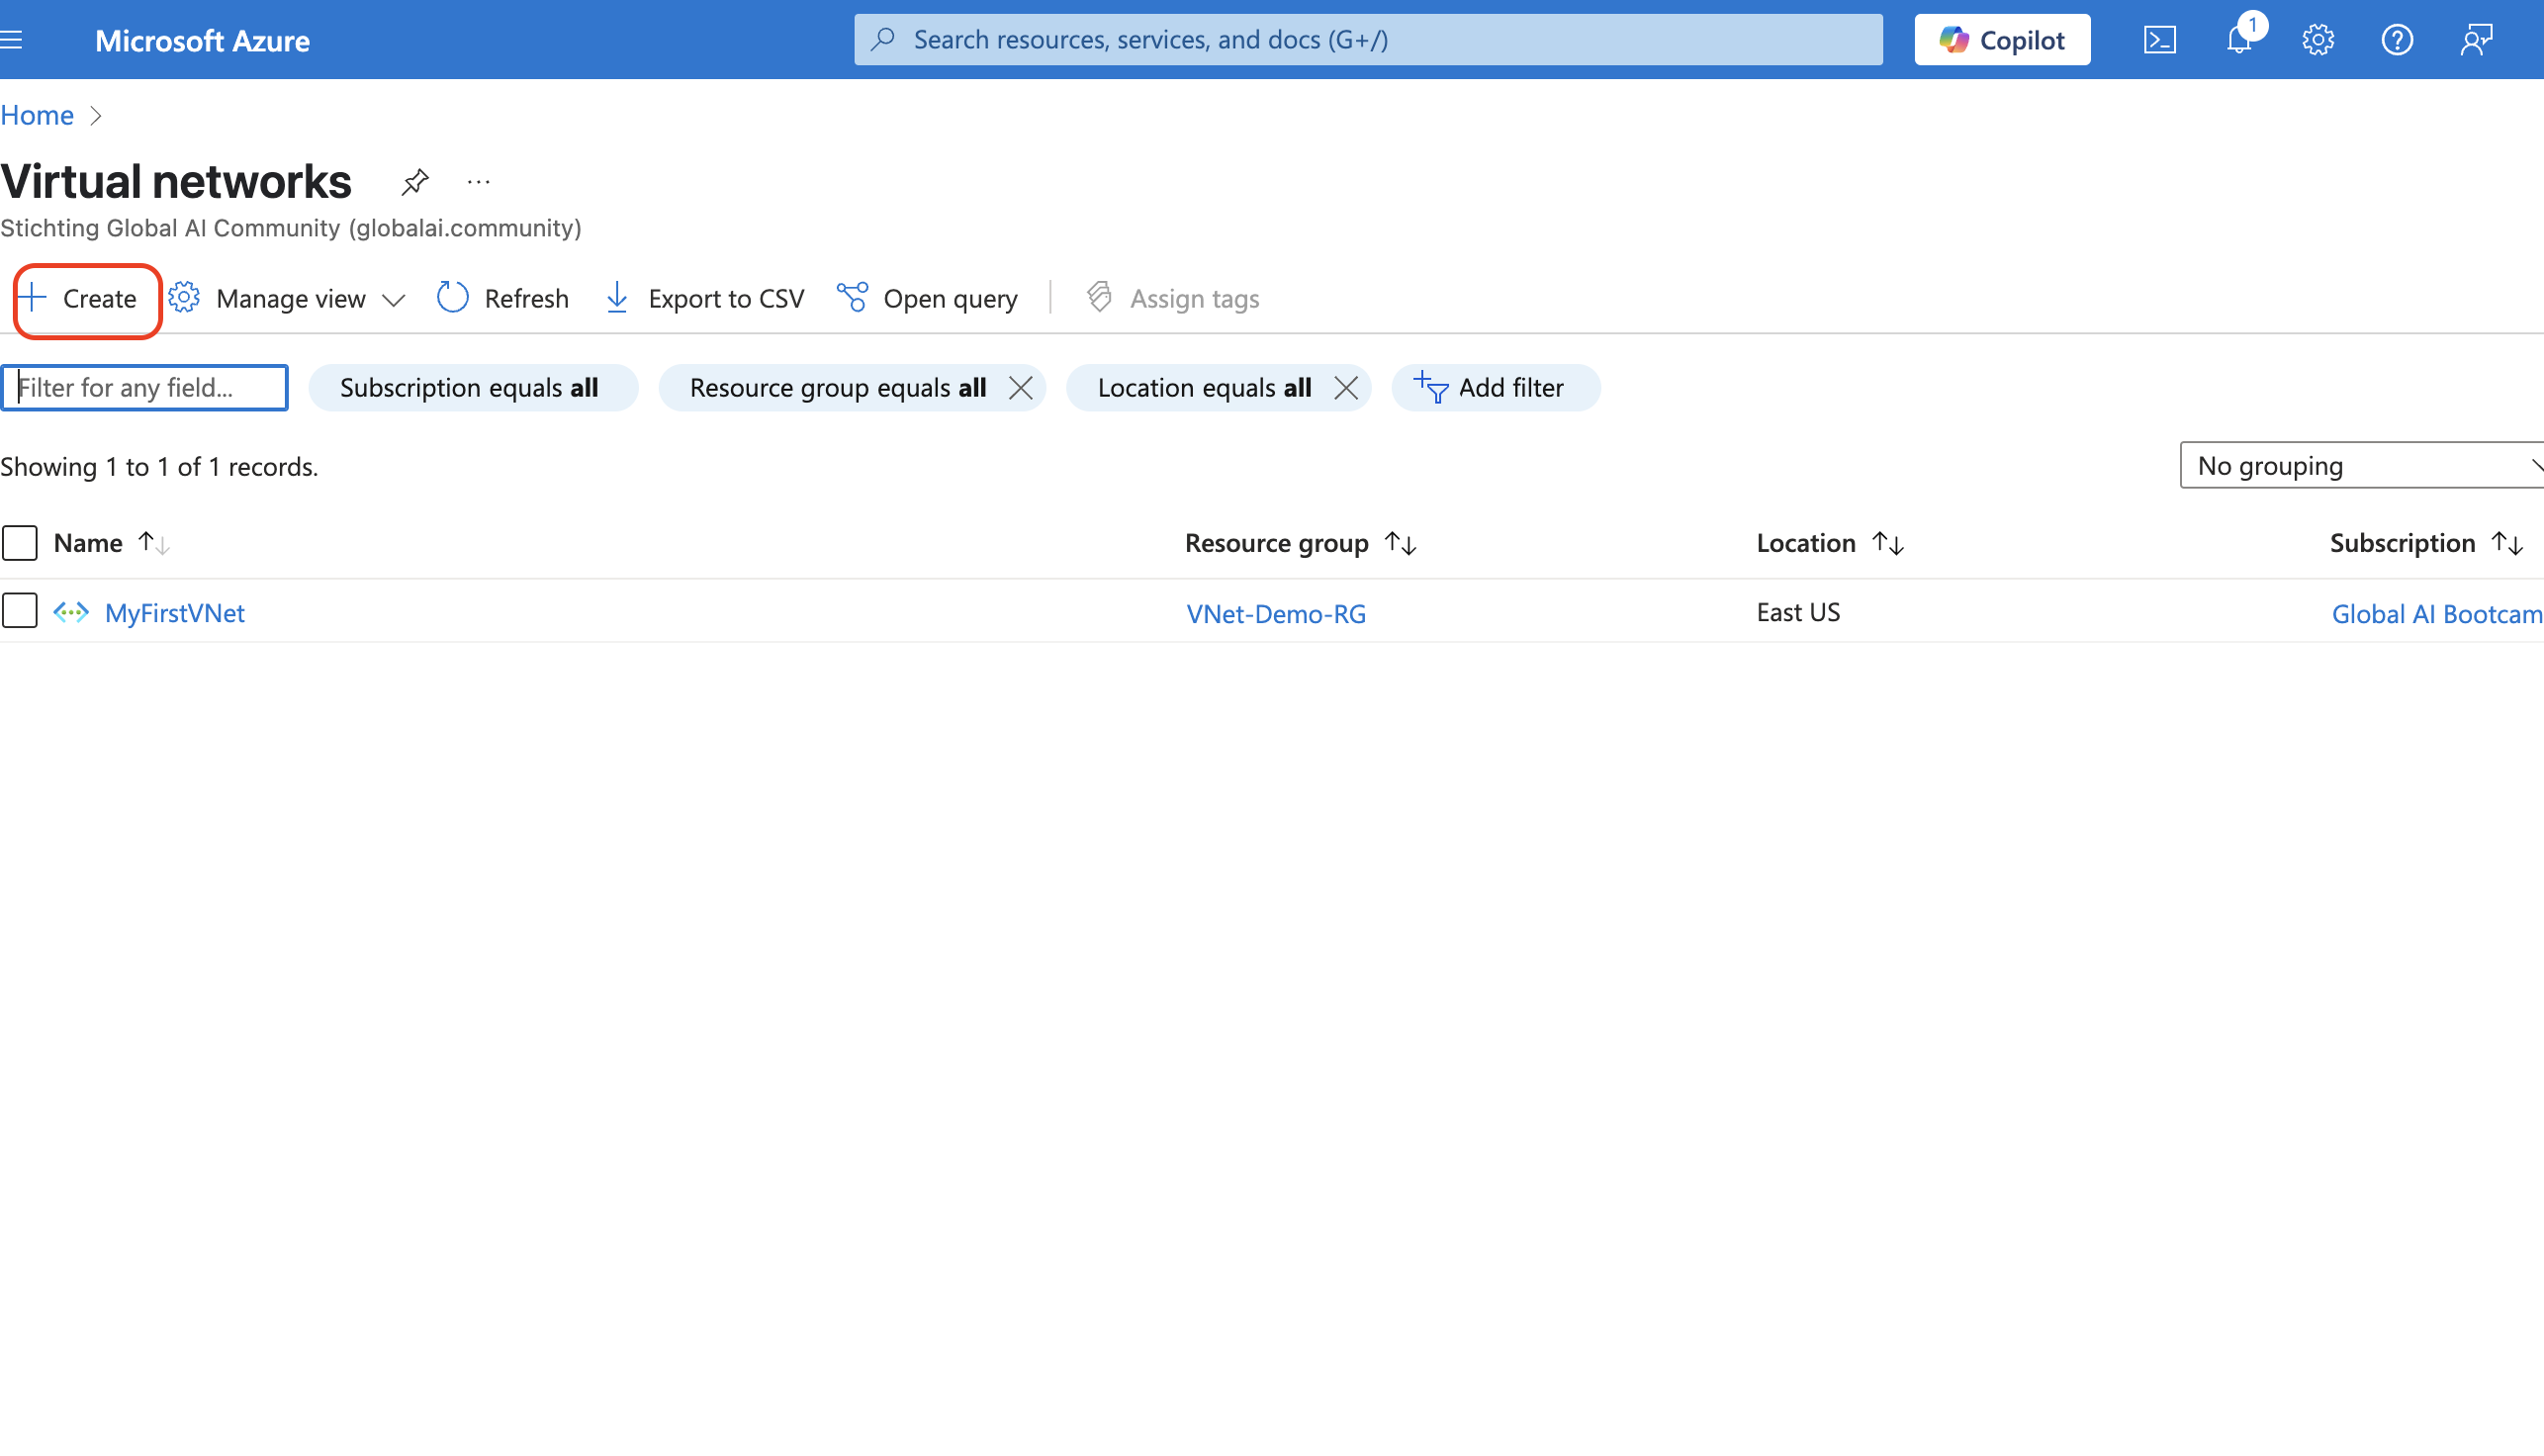
- Click “+ Create” to Start a New VNet
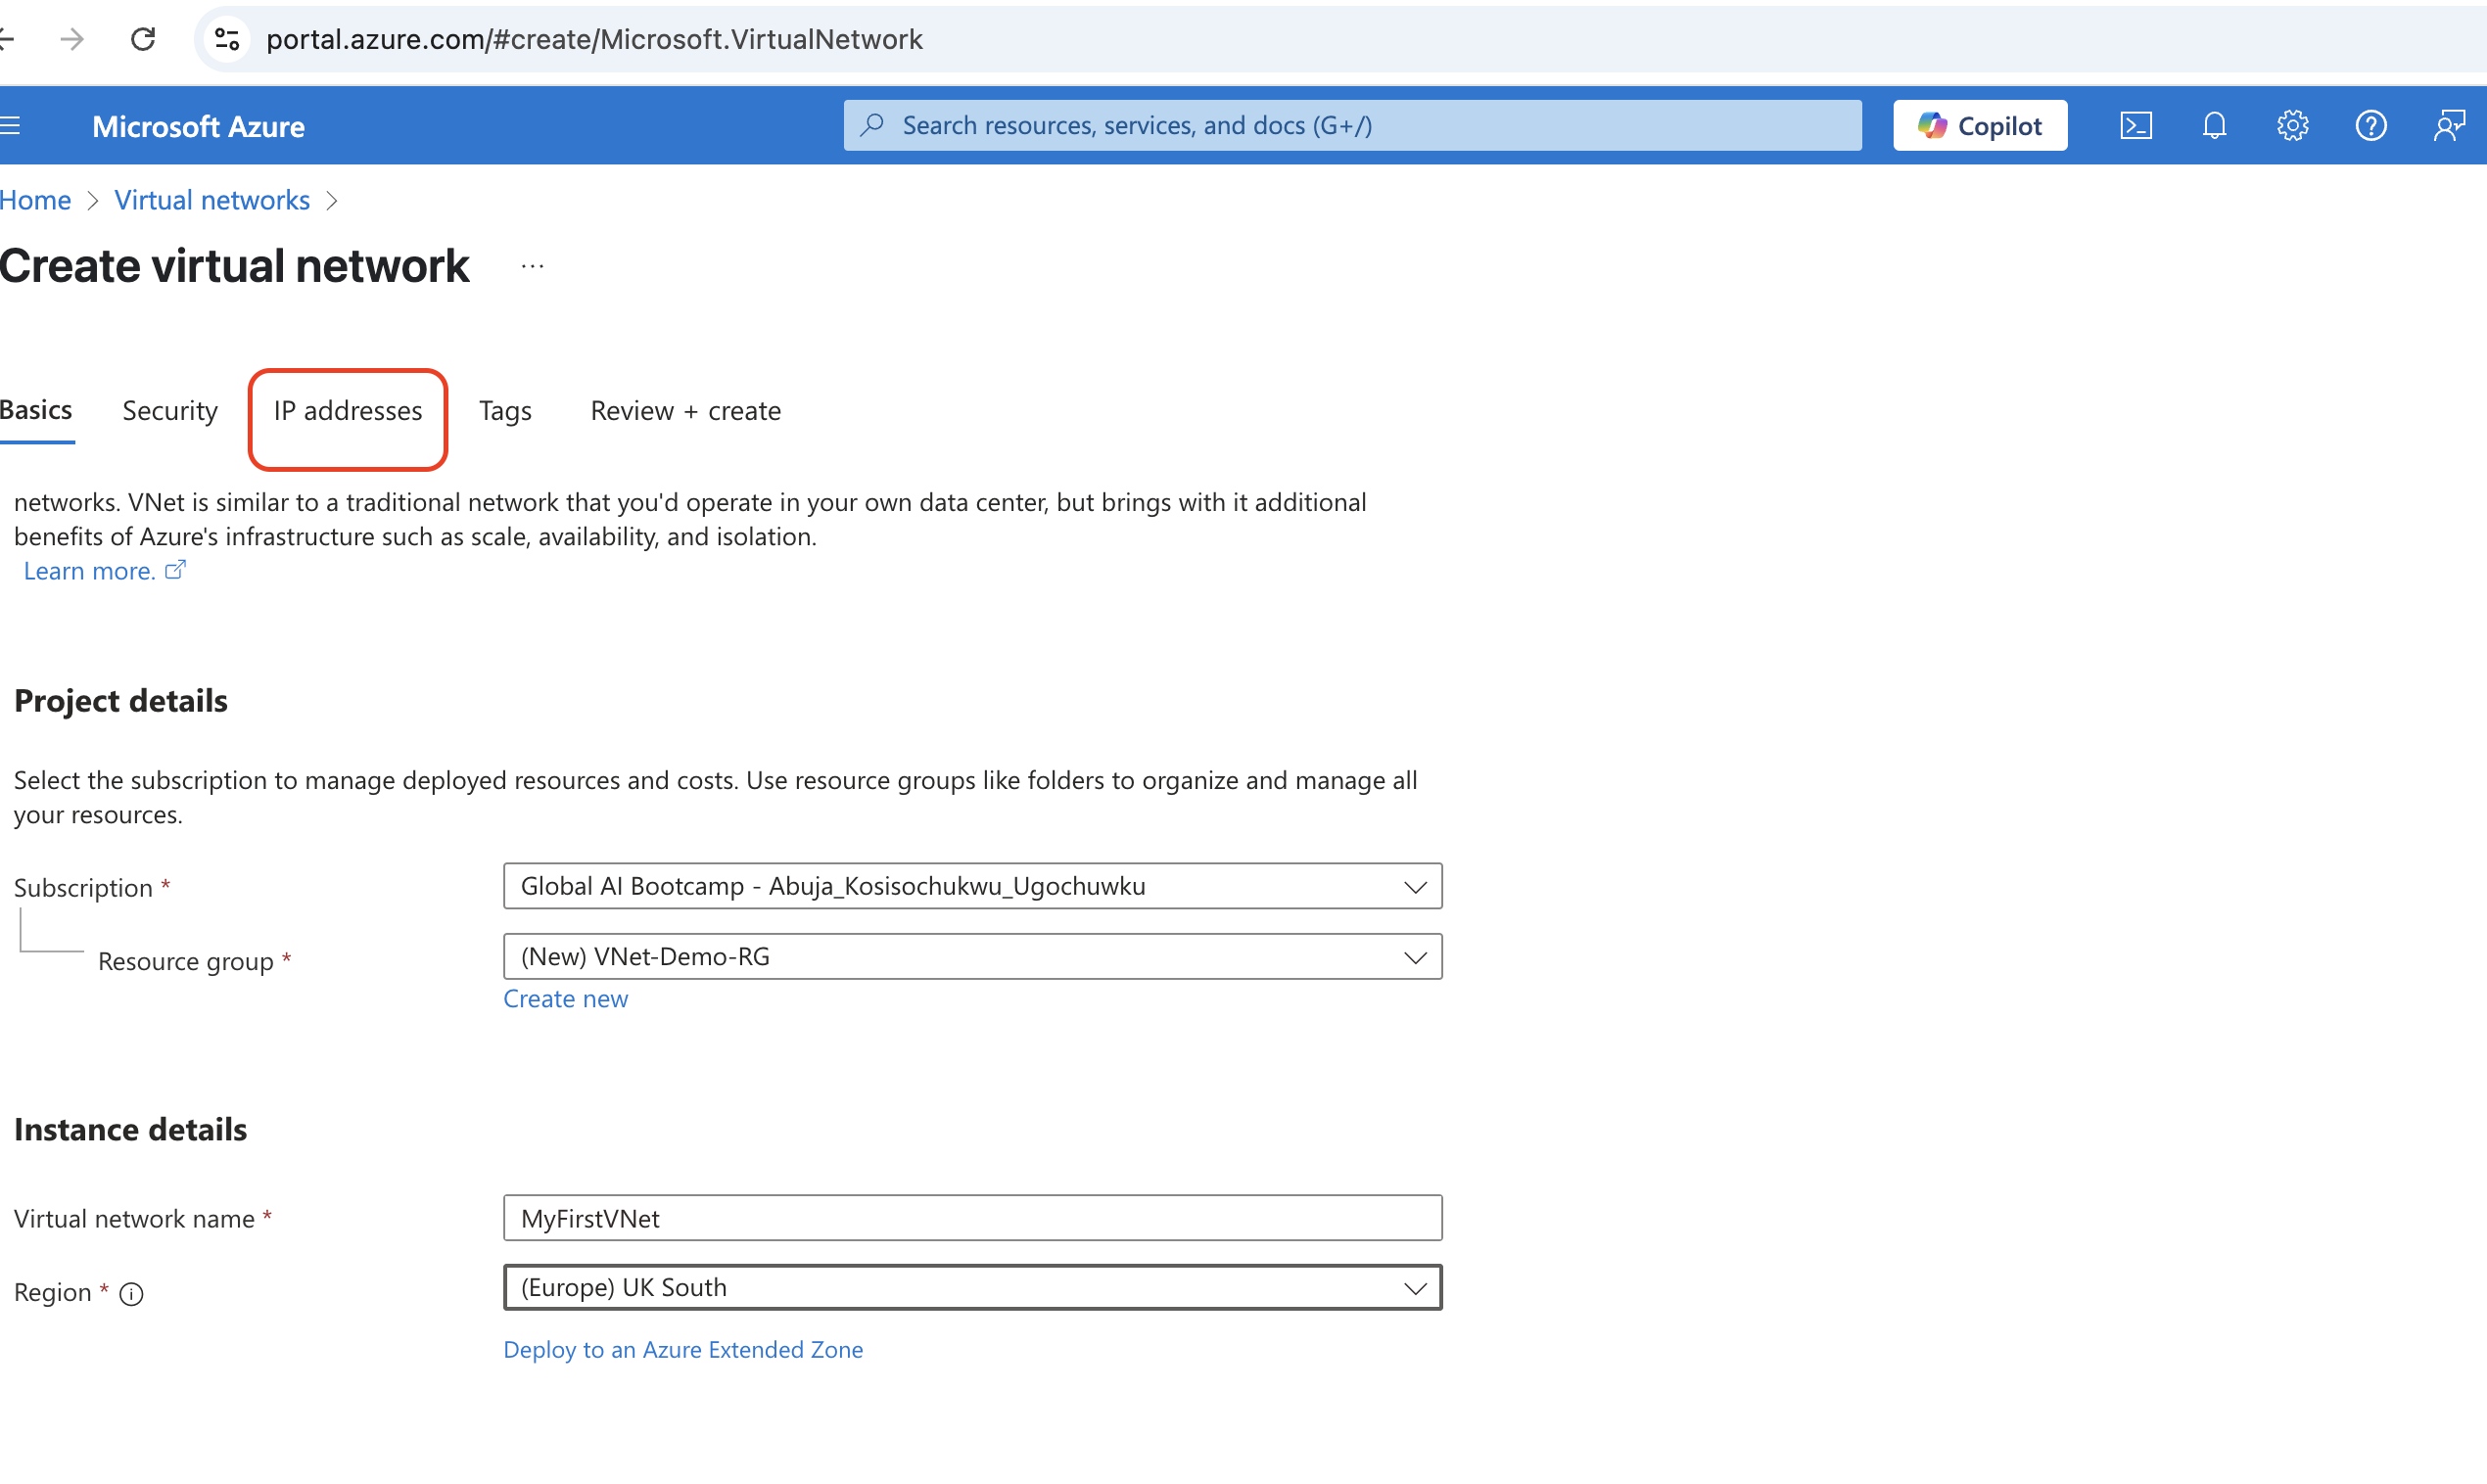
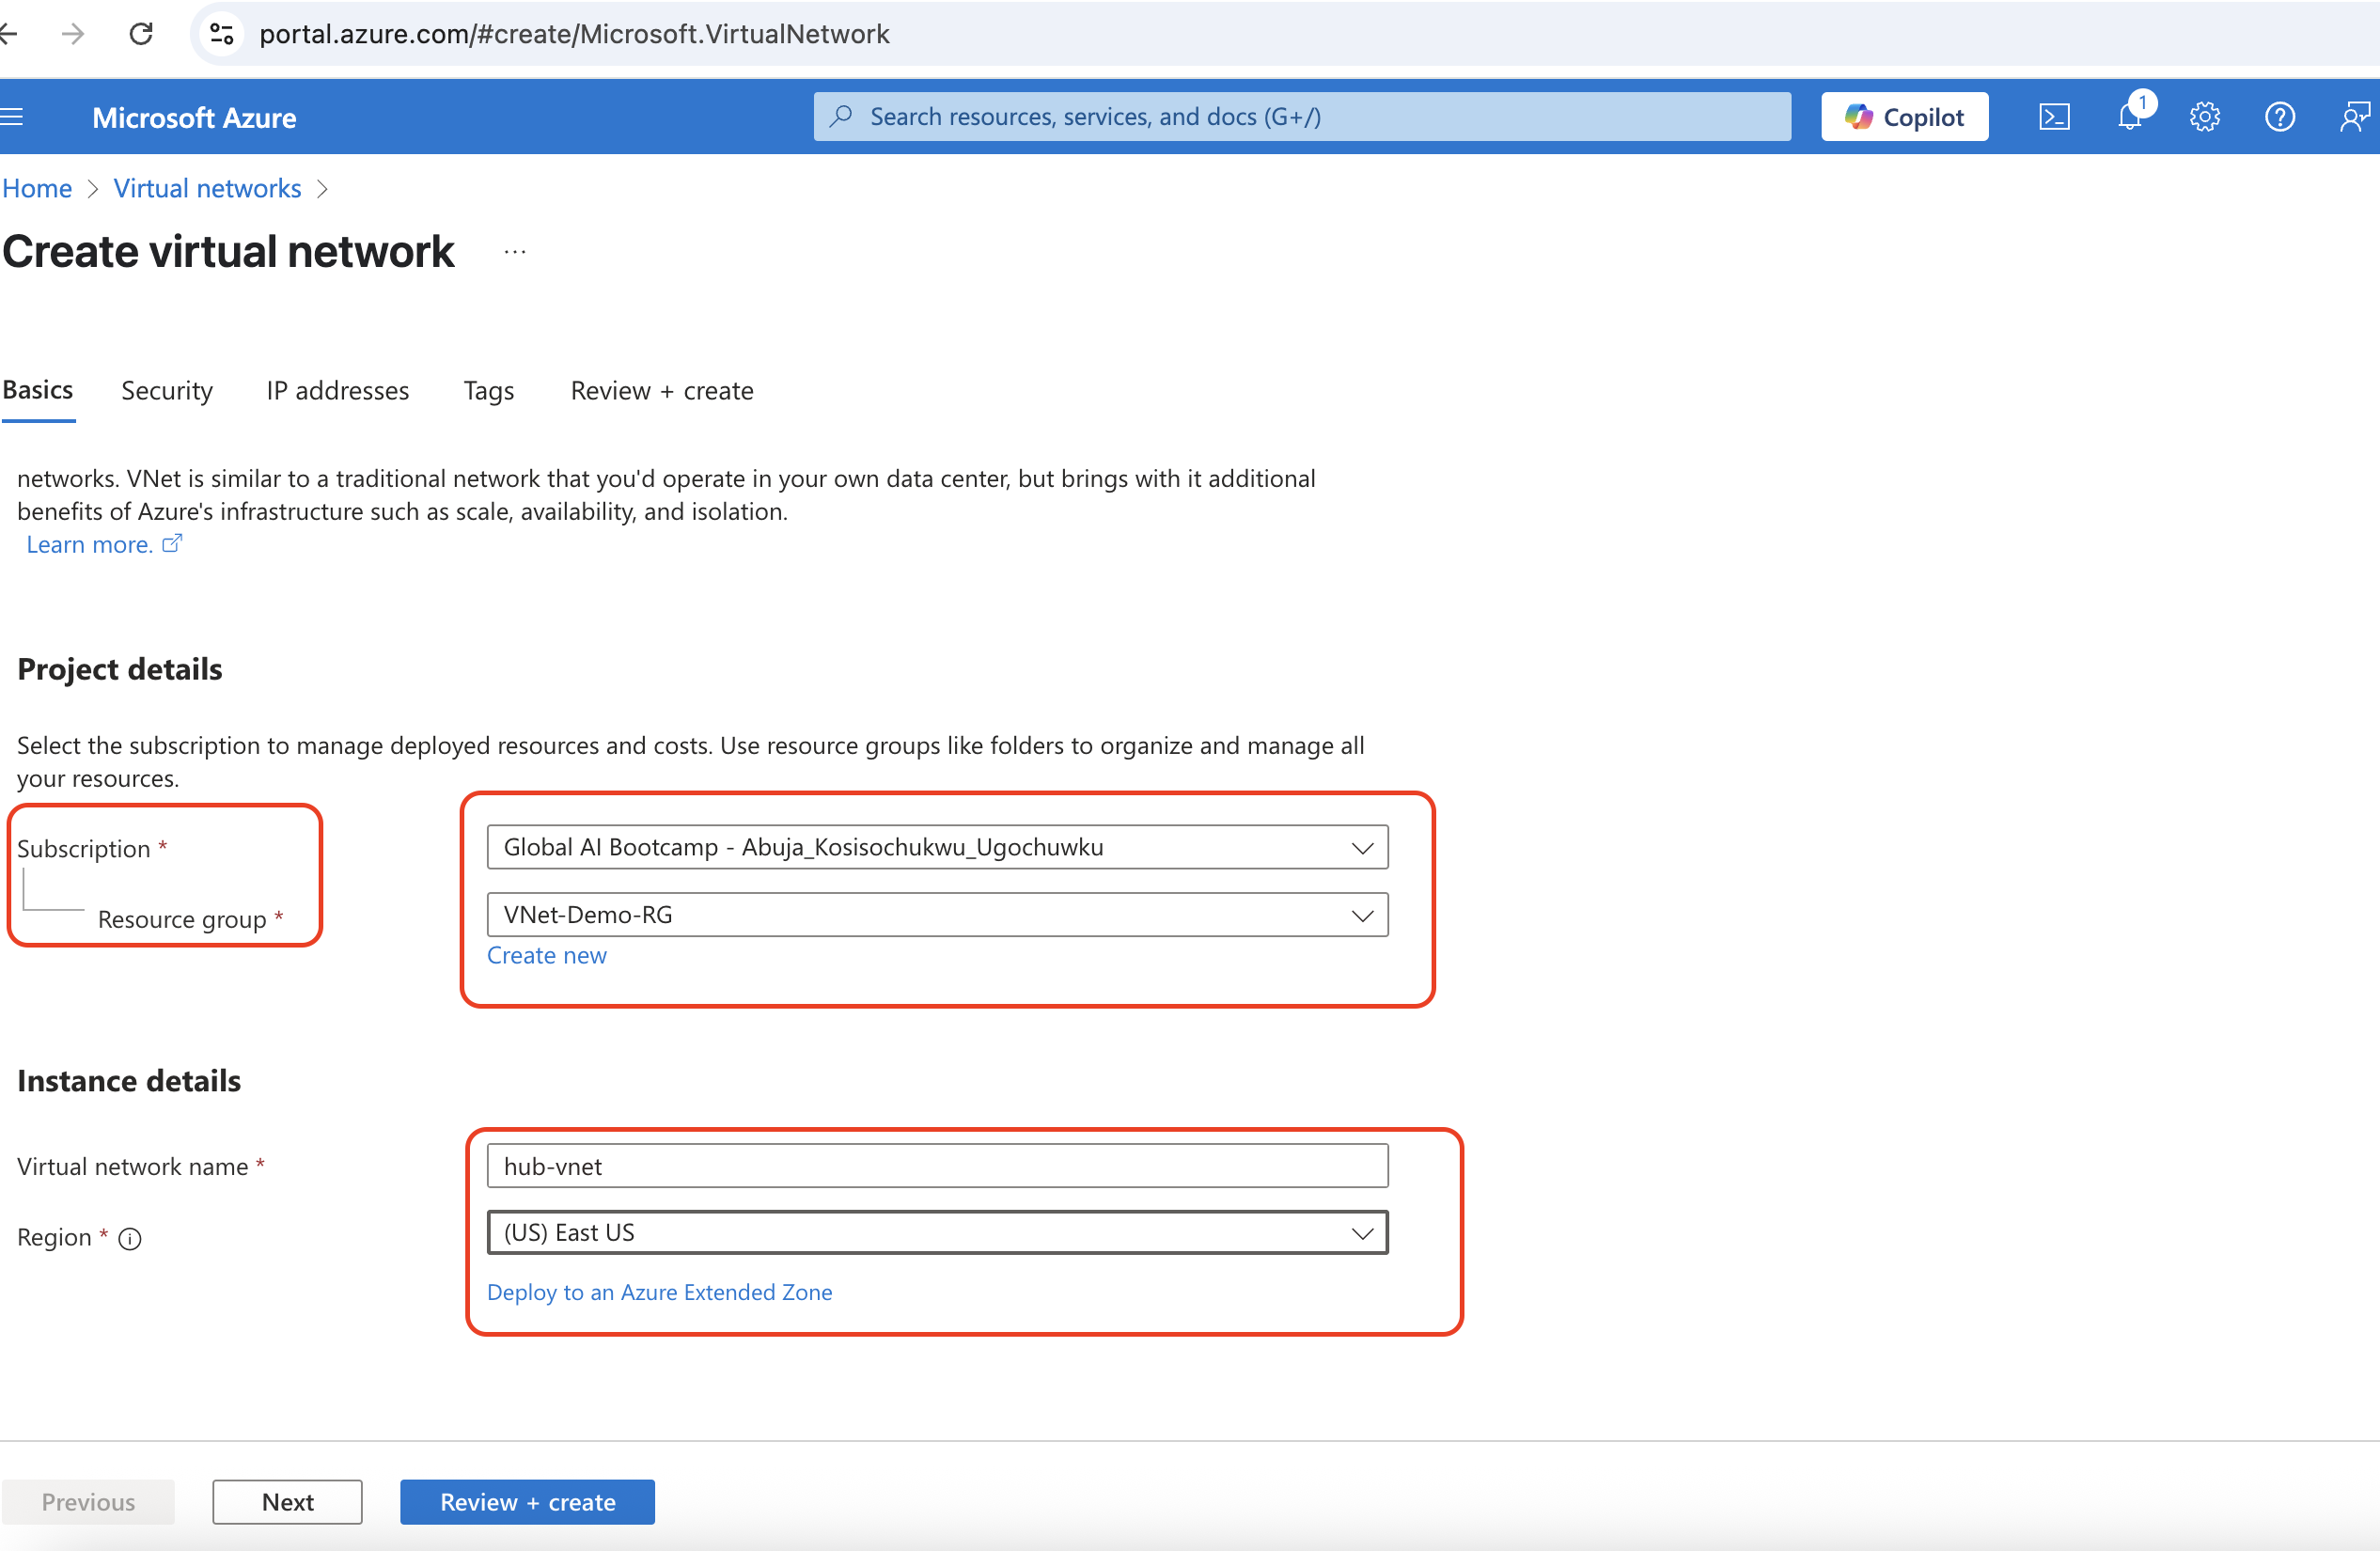
- Fill in the Basics
- Subscription: Choose the correct subscription
-
Resource Group: Create a new one (e.g.,
VNet-Demo-RG) and press ok or use an existing resource group
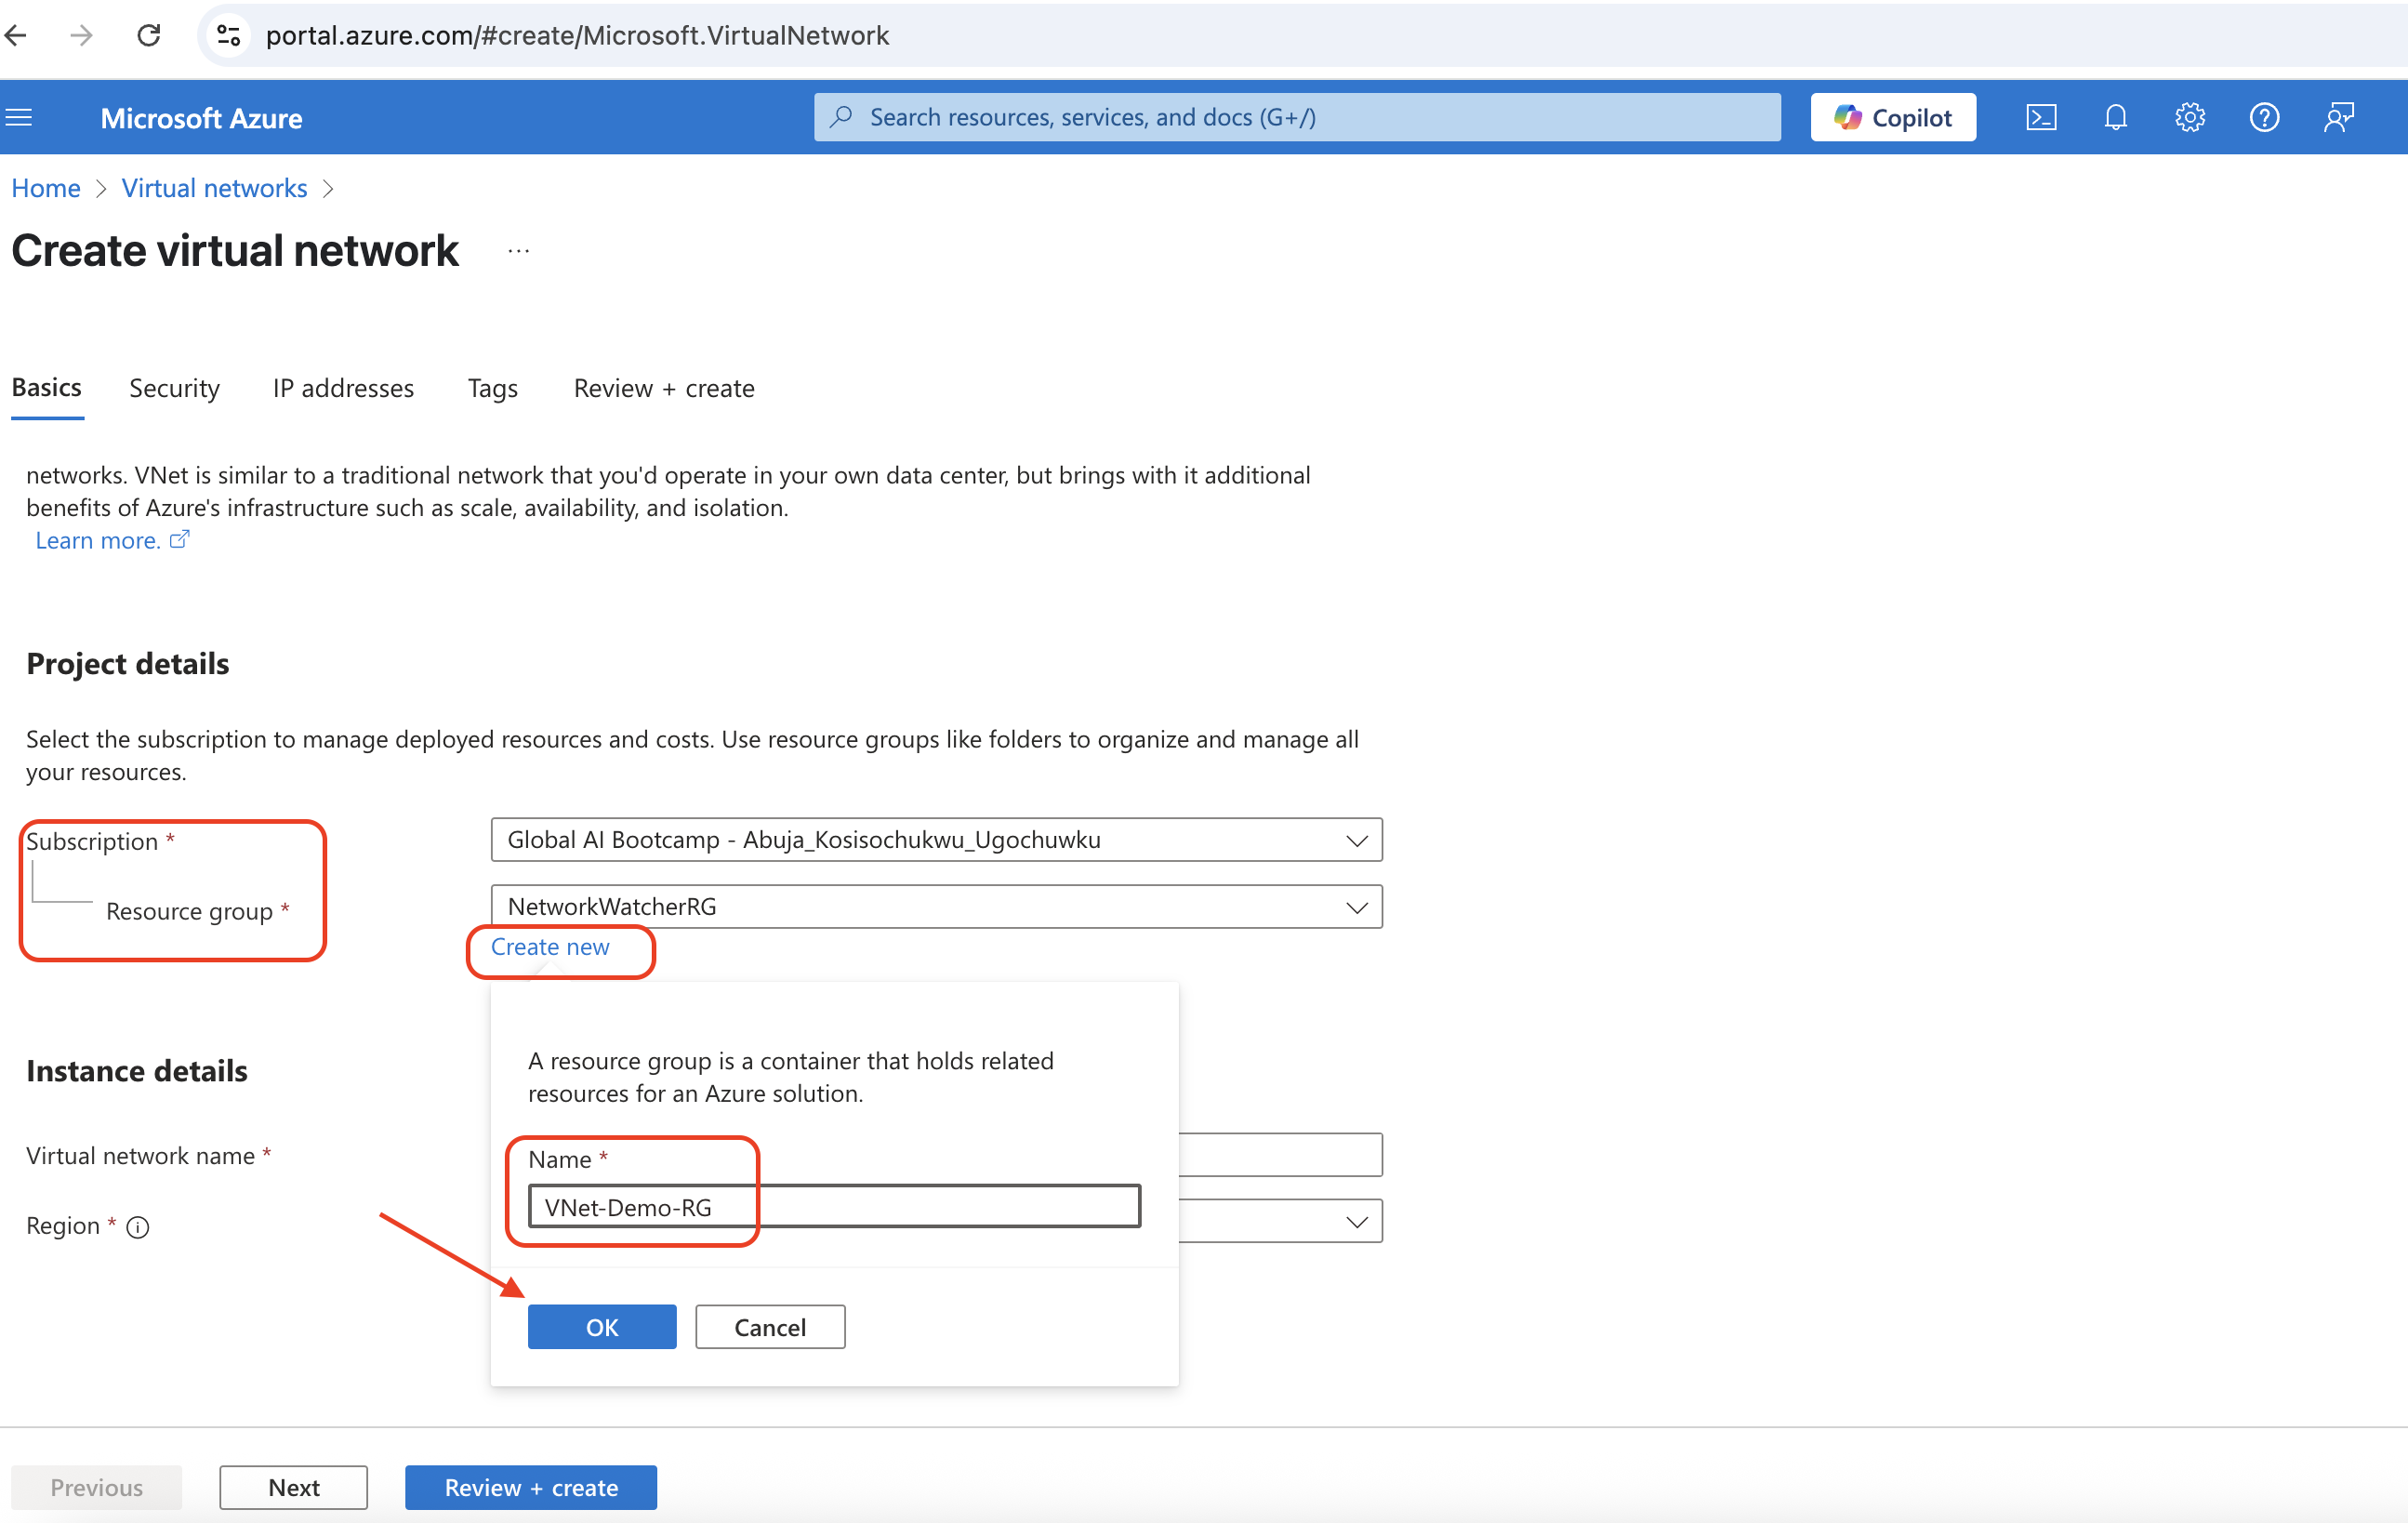
-
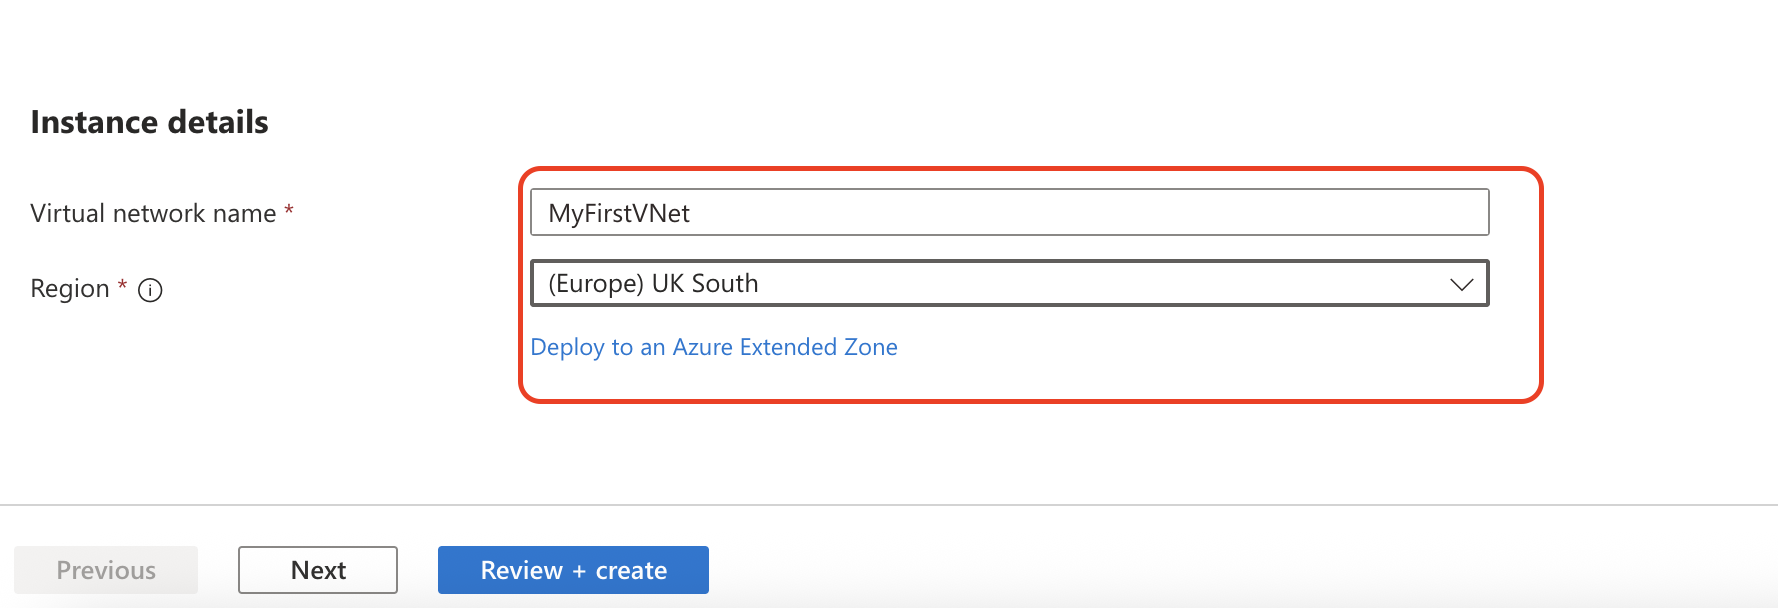
Name: Something like
MyFirstVNet - Region: Pick the region closest to you
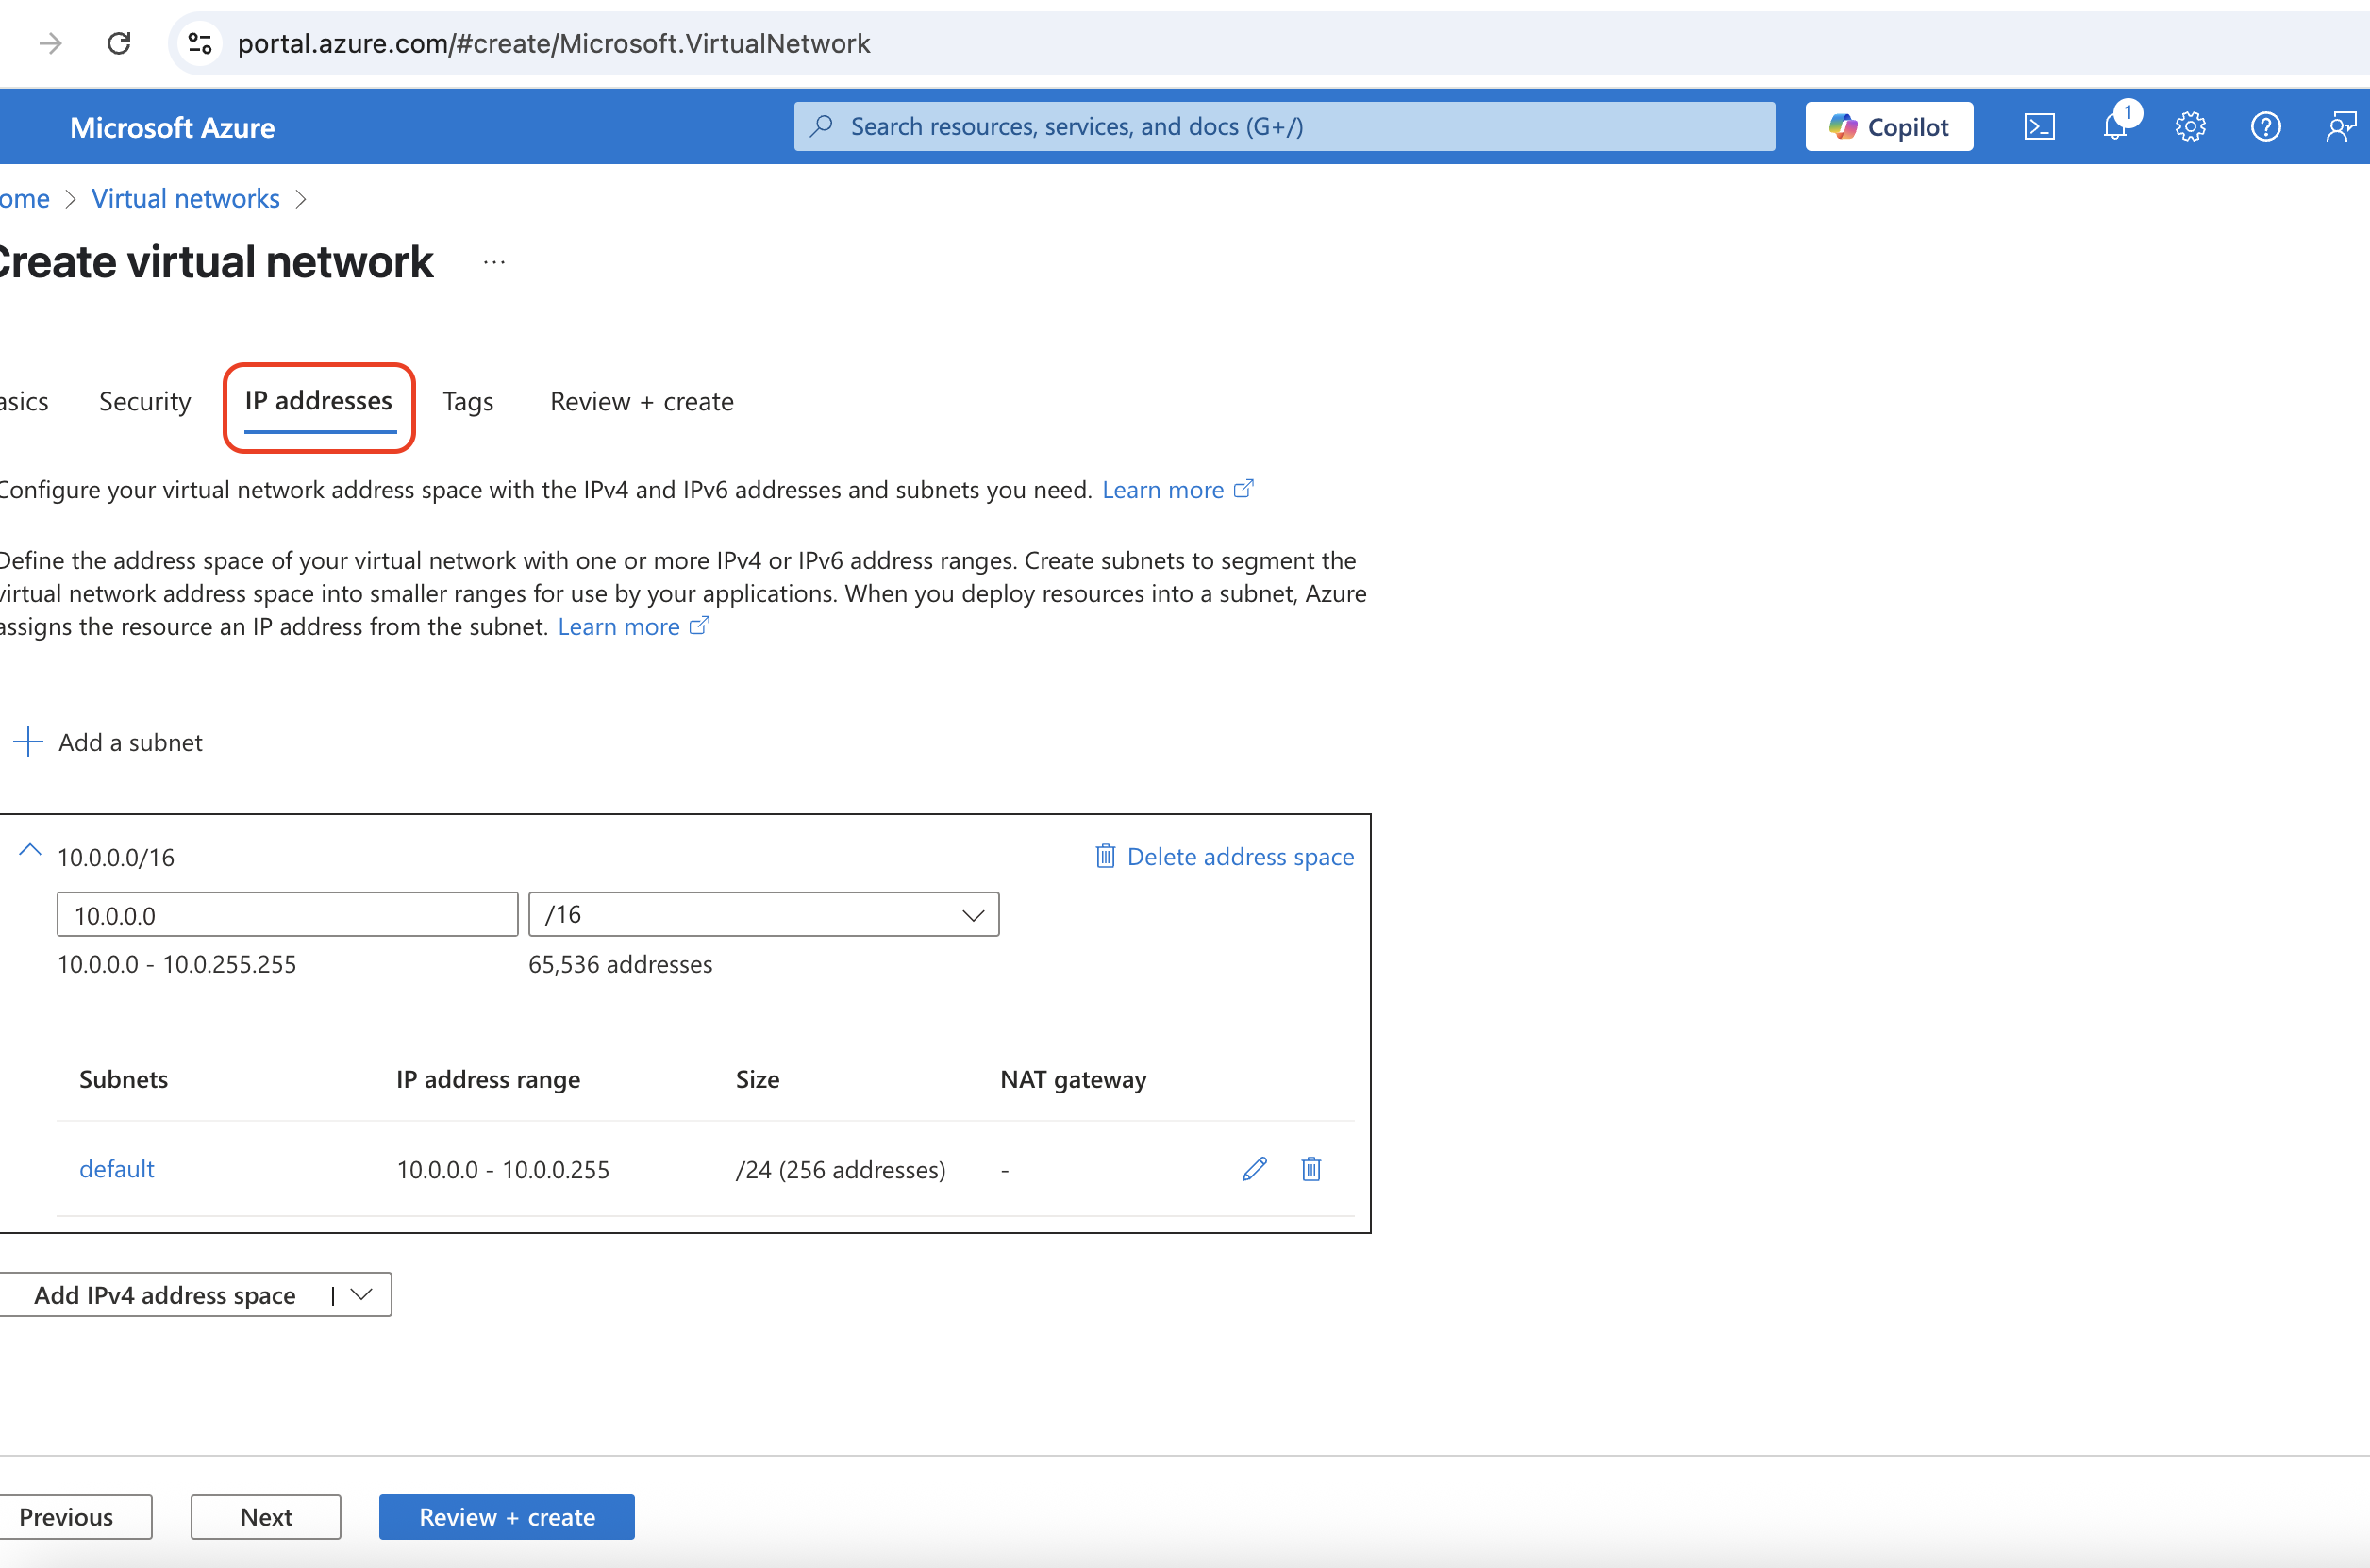
Set the IP Address Space
- Click on IP addresses
- The default should be something like
10.0.0.0/16, which is fine for now
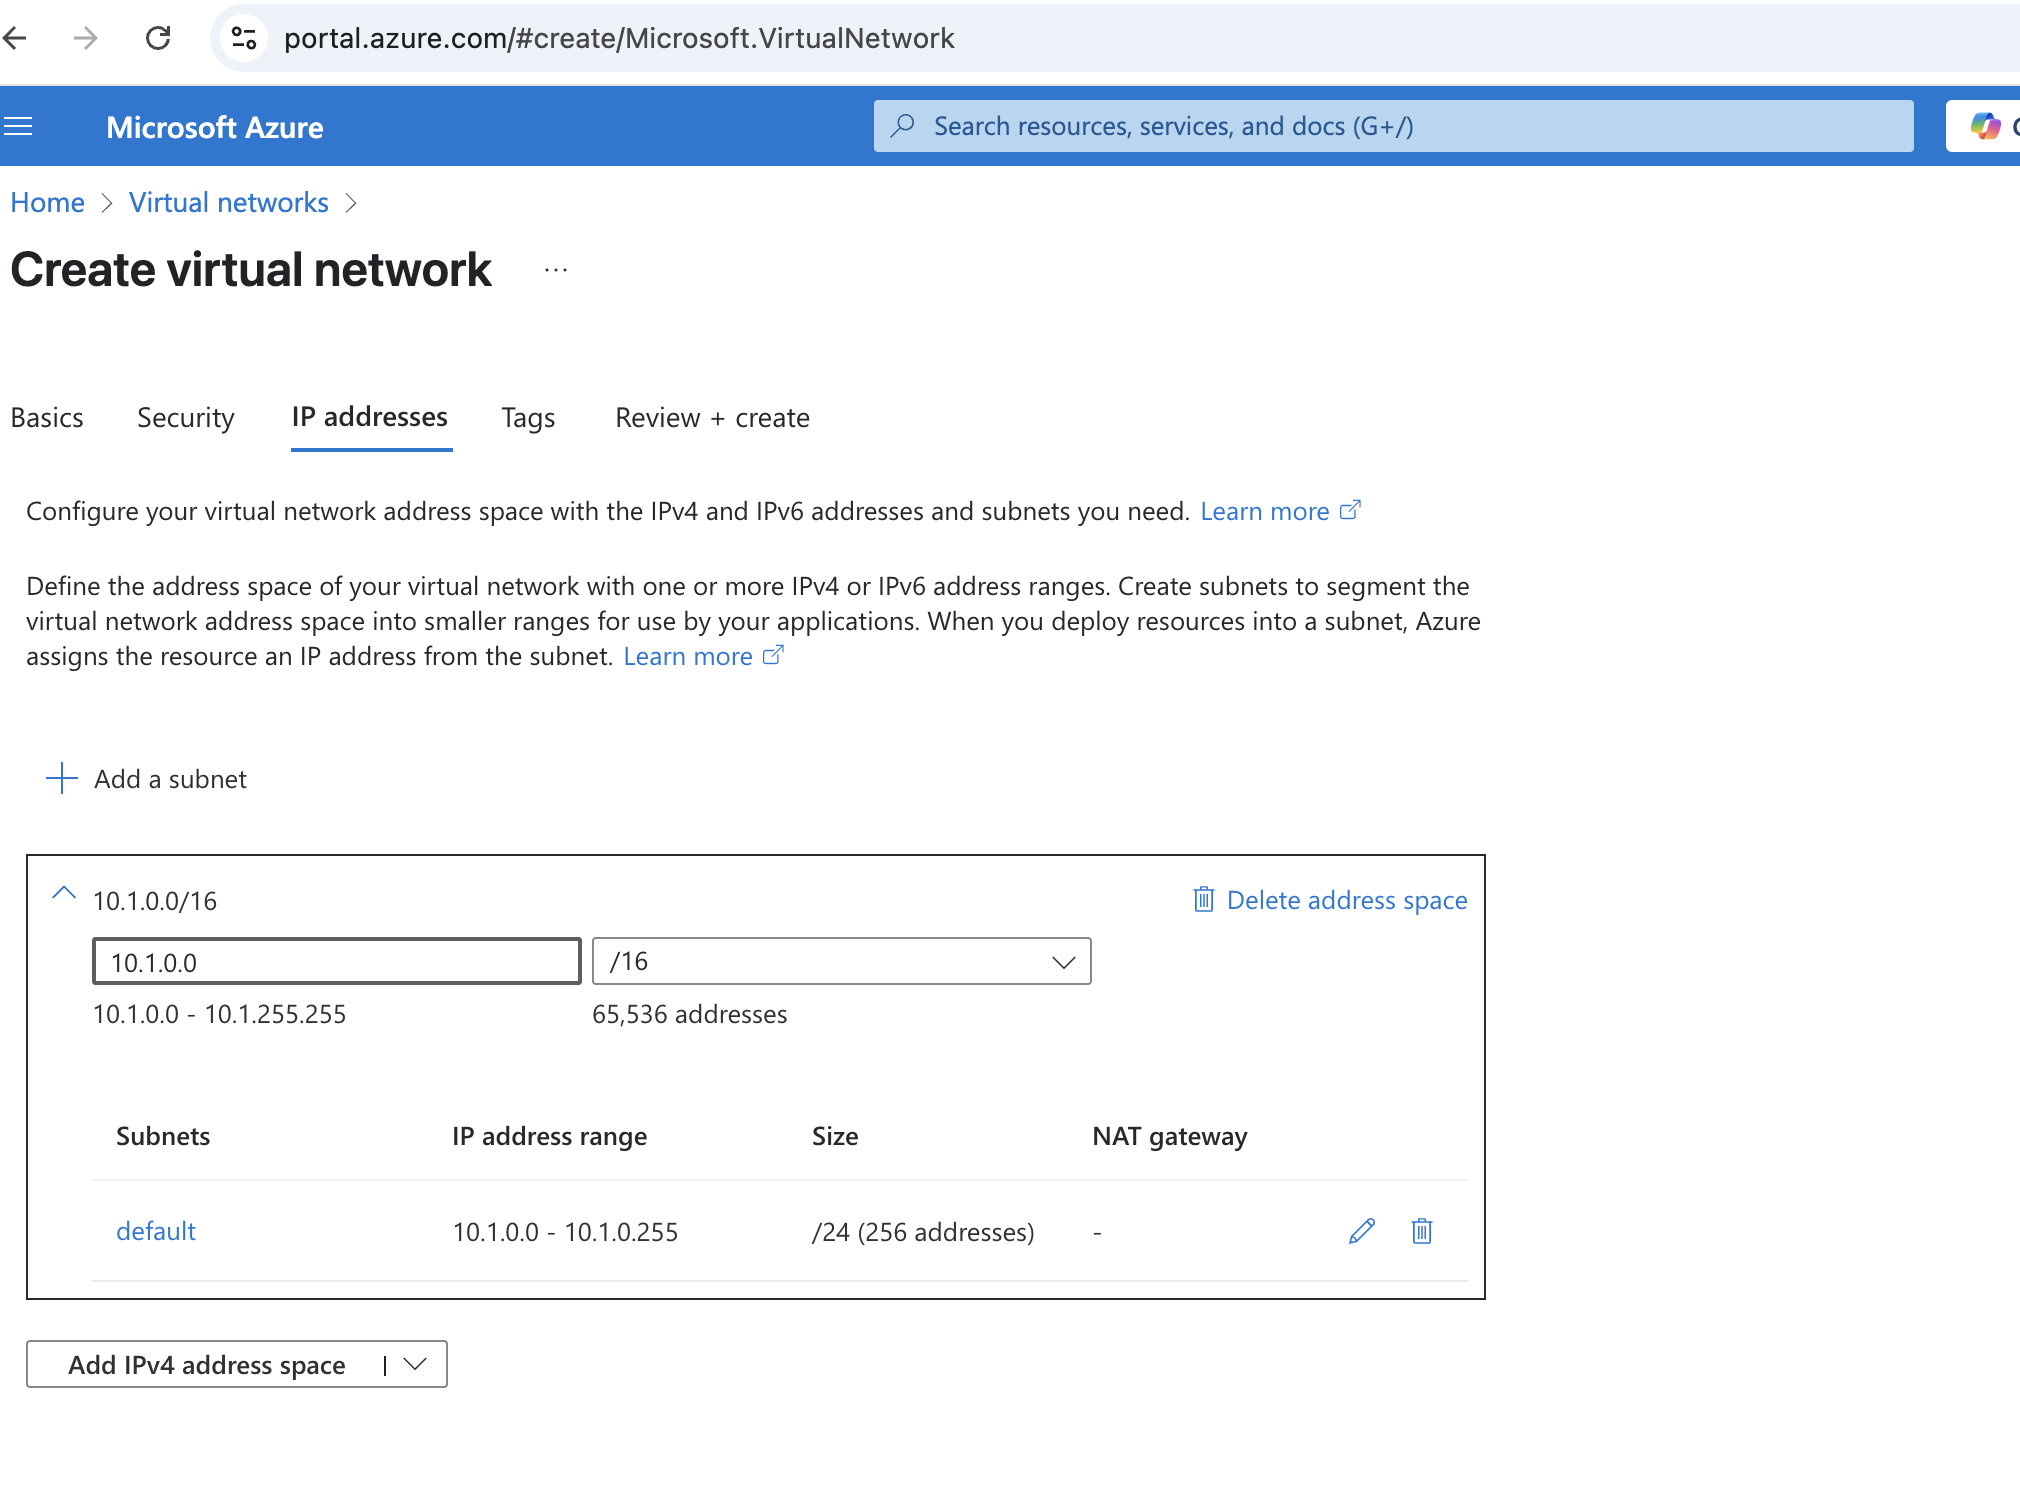
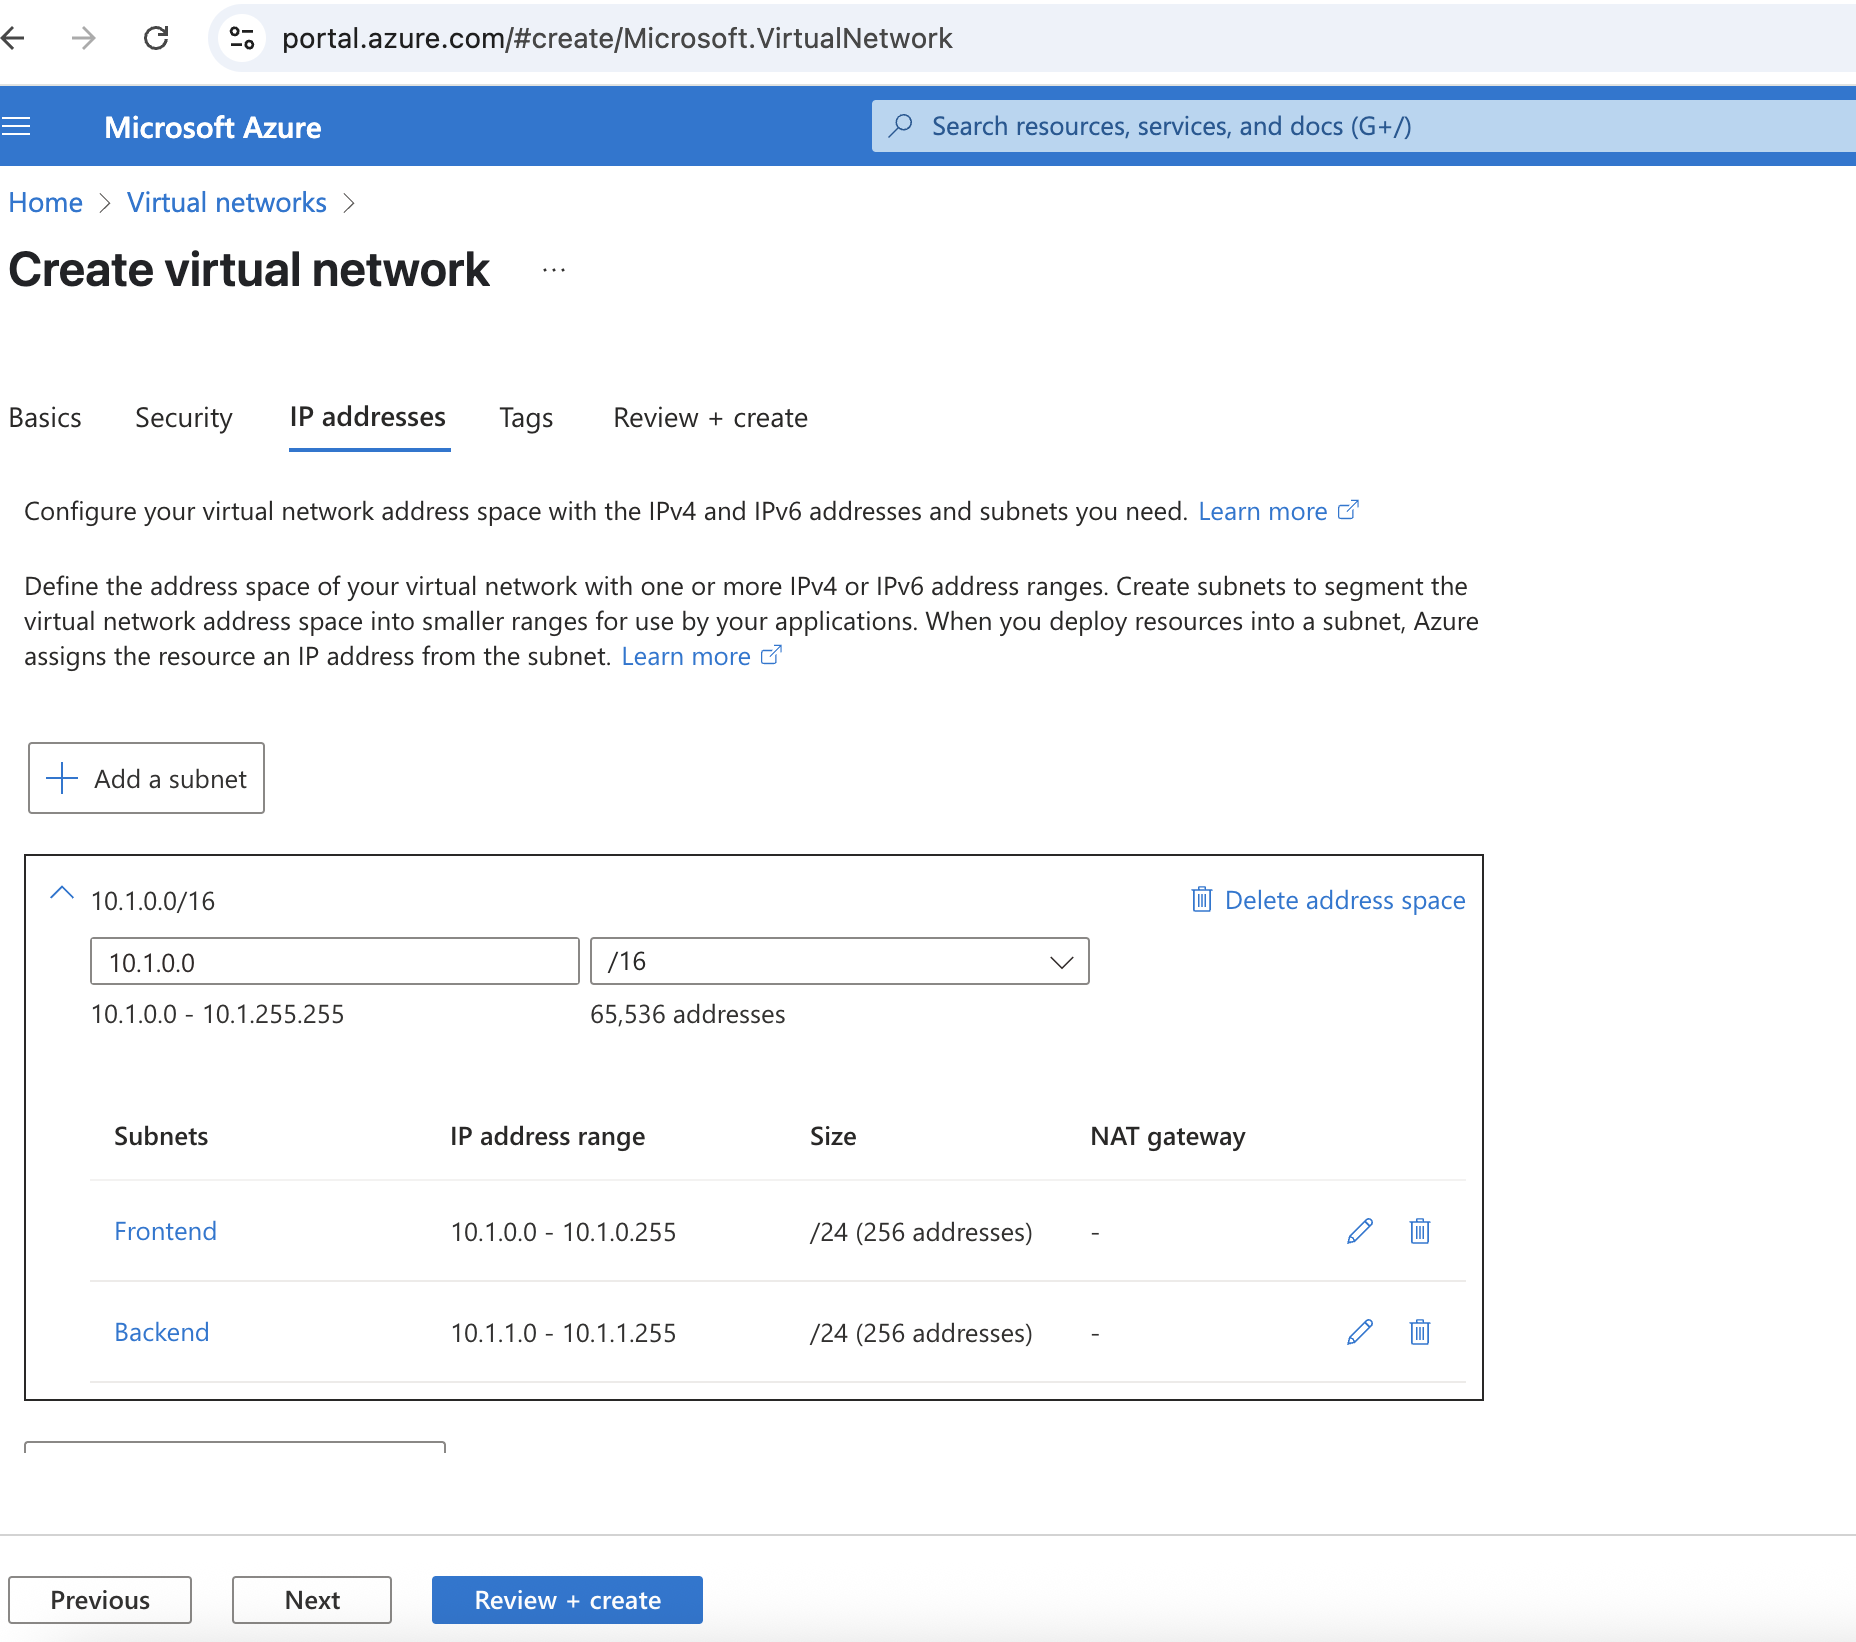
- Add your first subnet, e.g.,
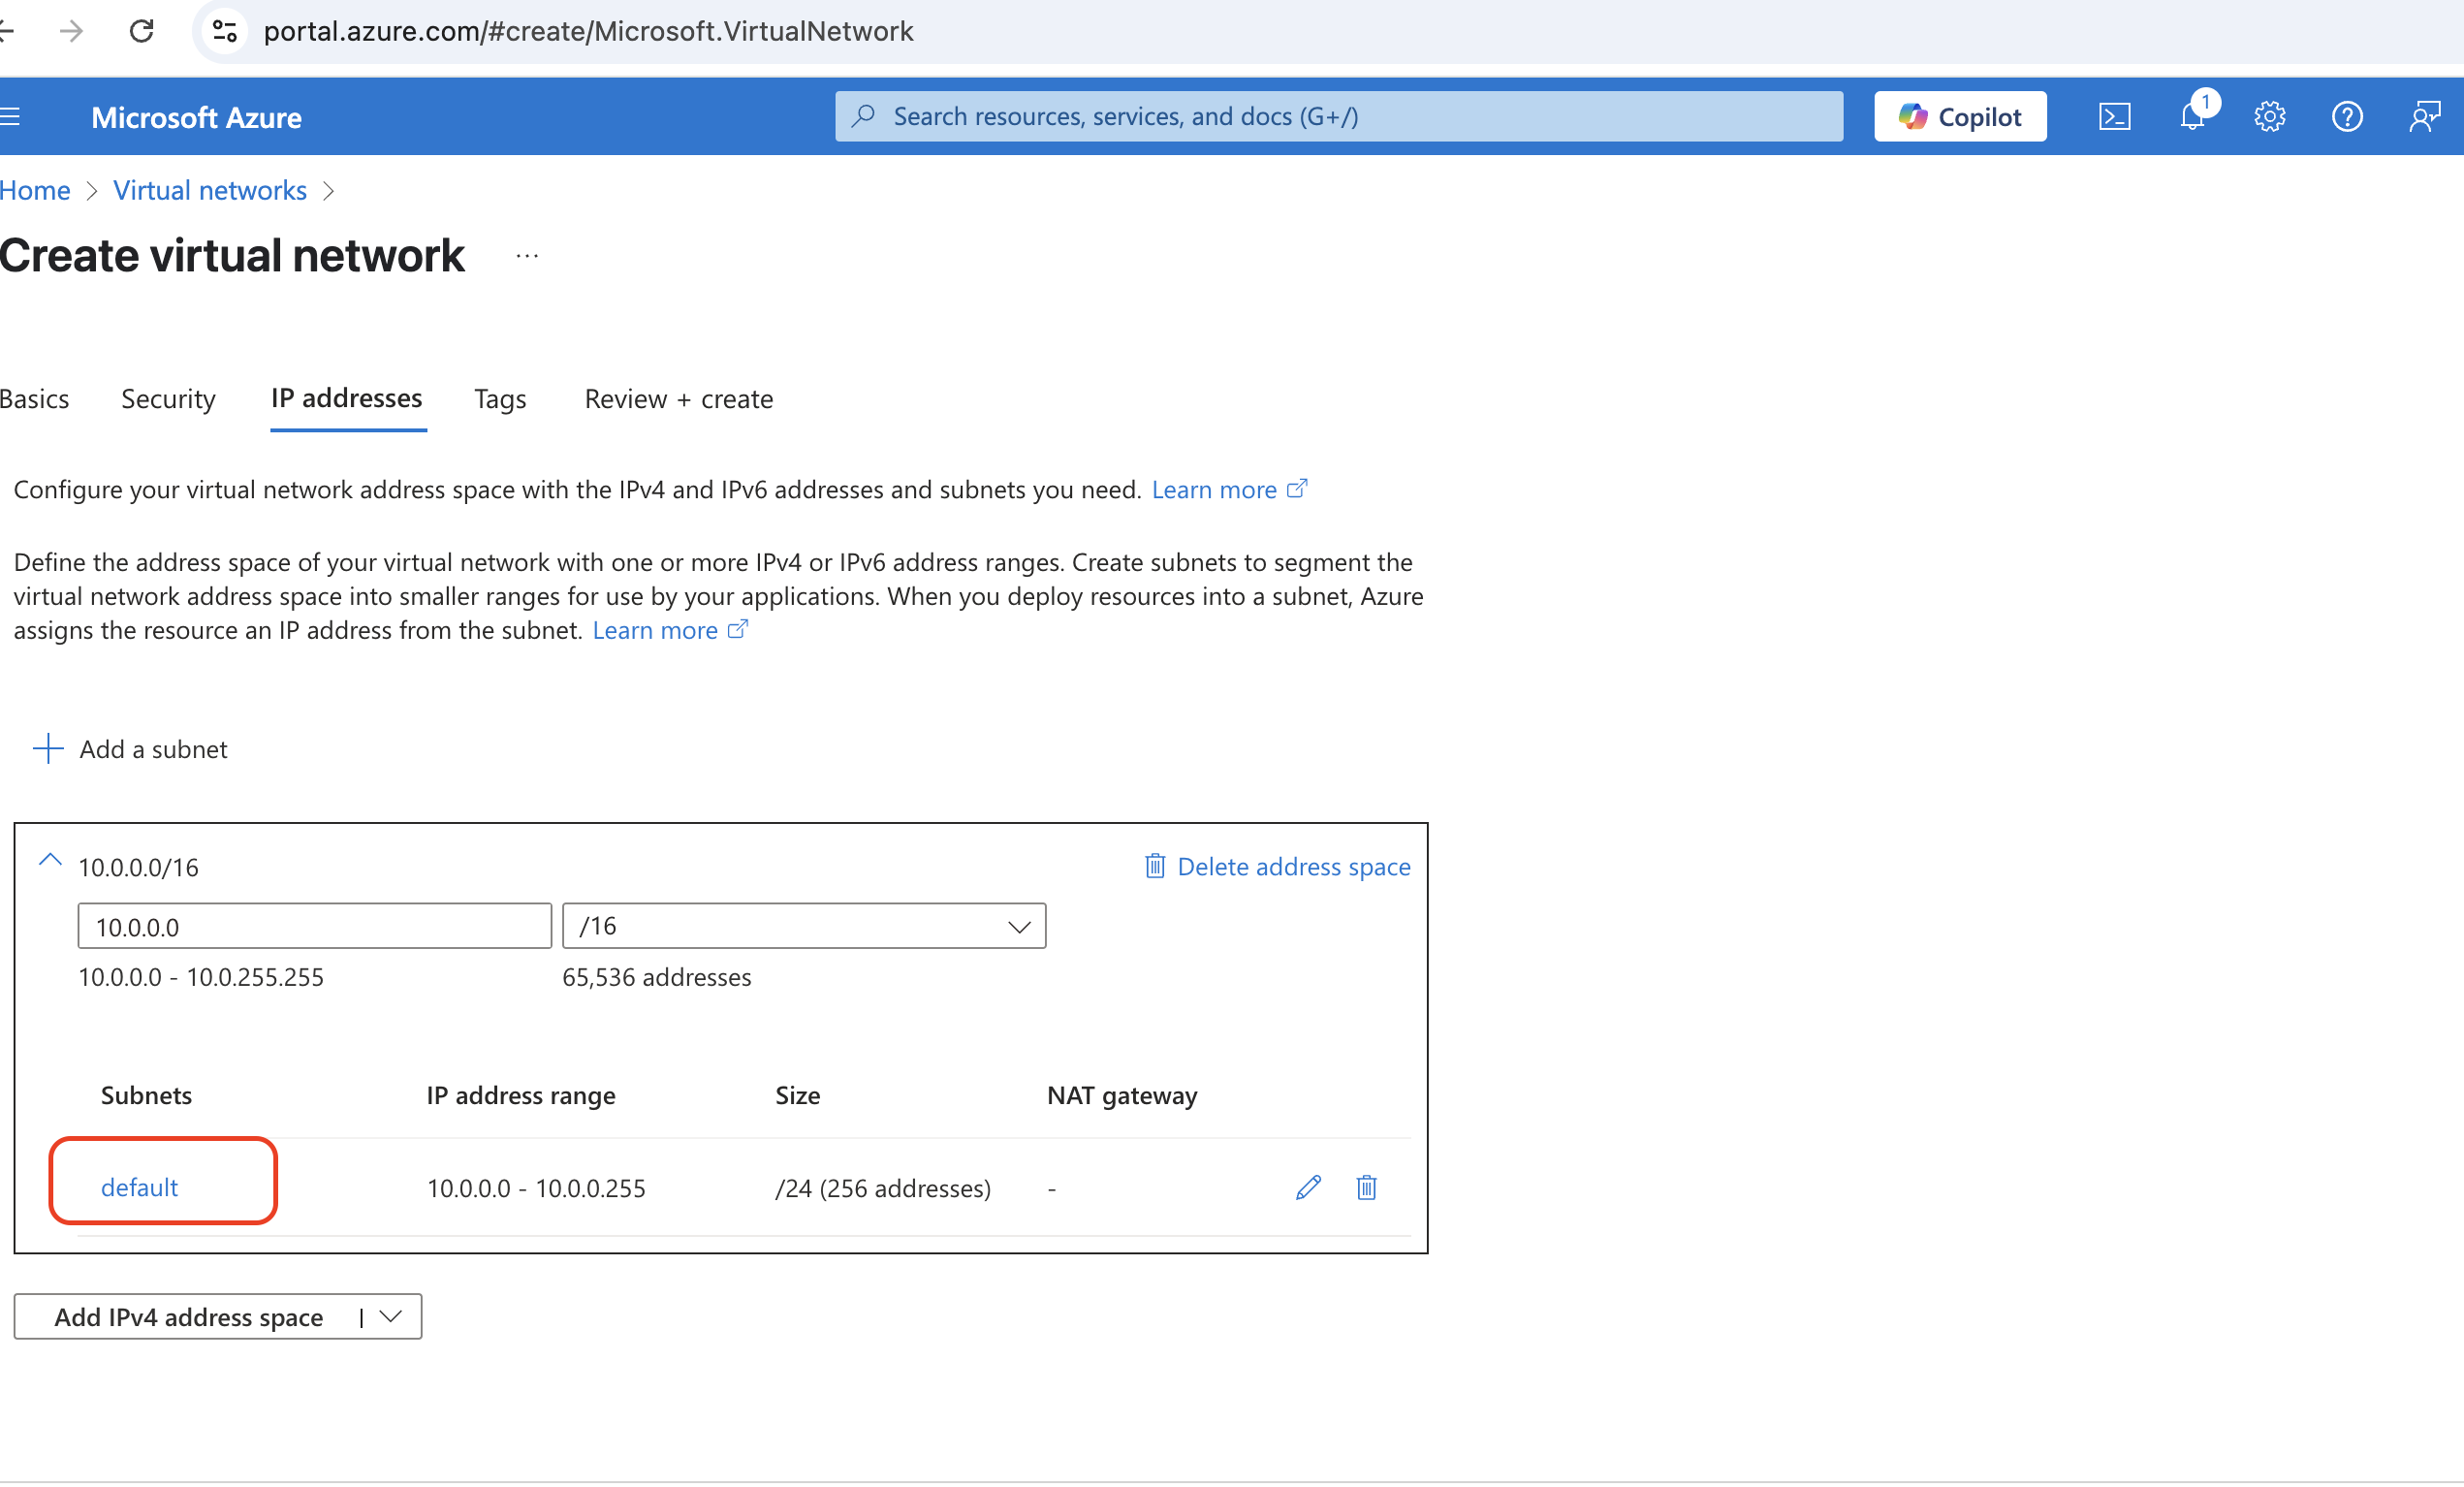
Frontendwith address range10.0.0.0/24 - Click on the pensil sign on default
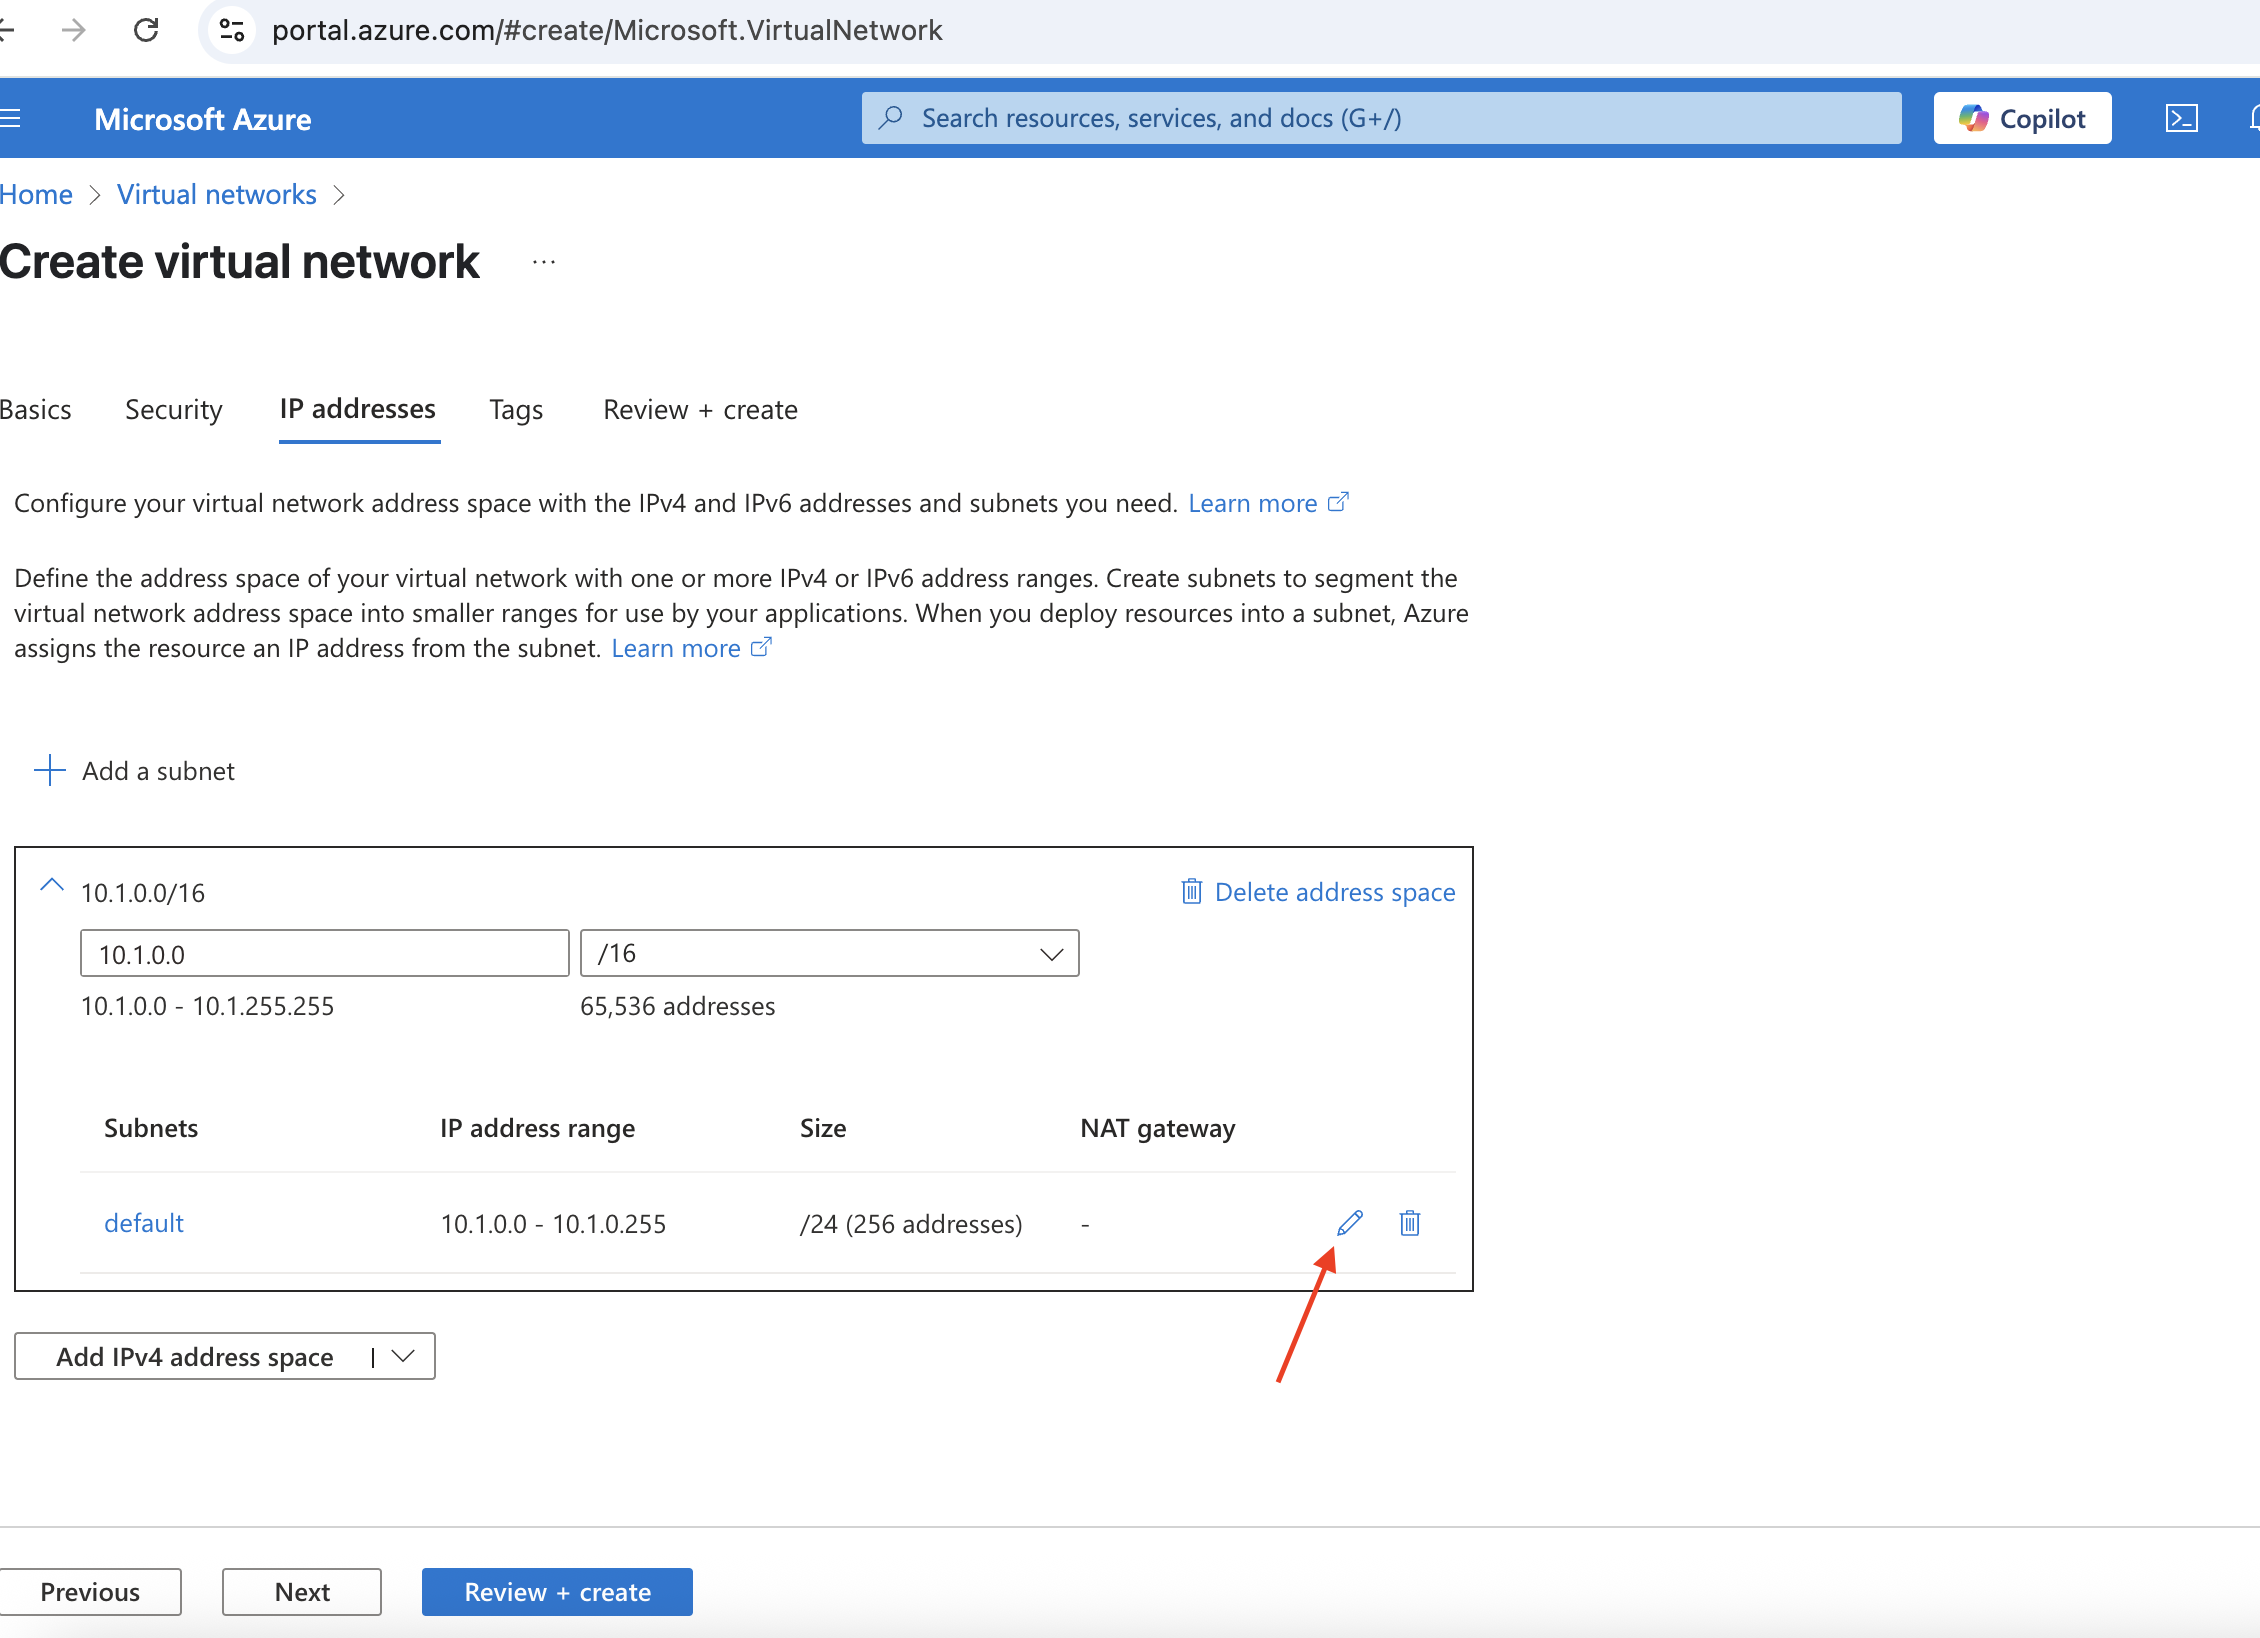
- change the name to Frontend. Explore the other default settings including the starting address, size and subnet address range and click on Save

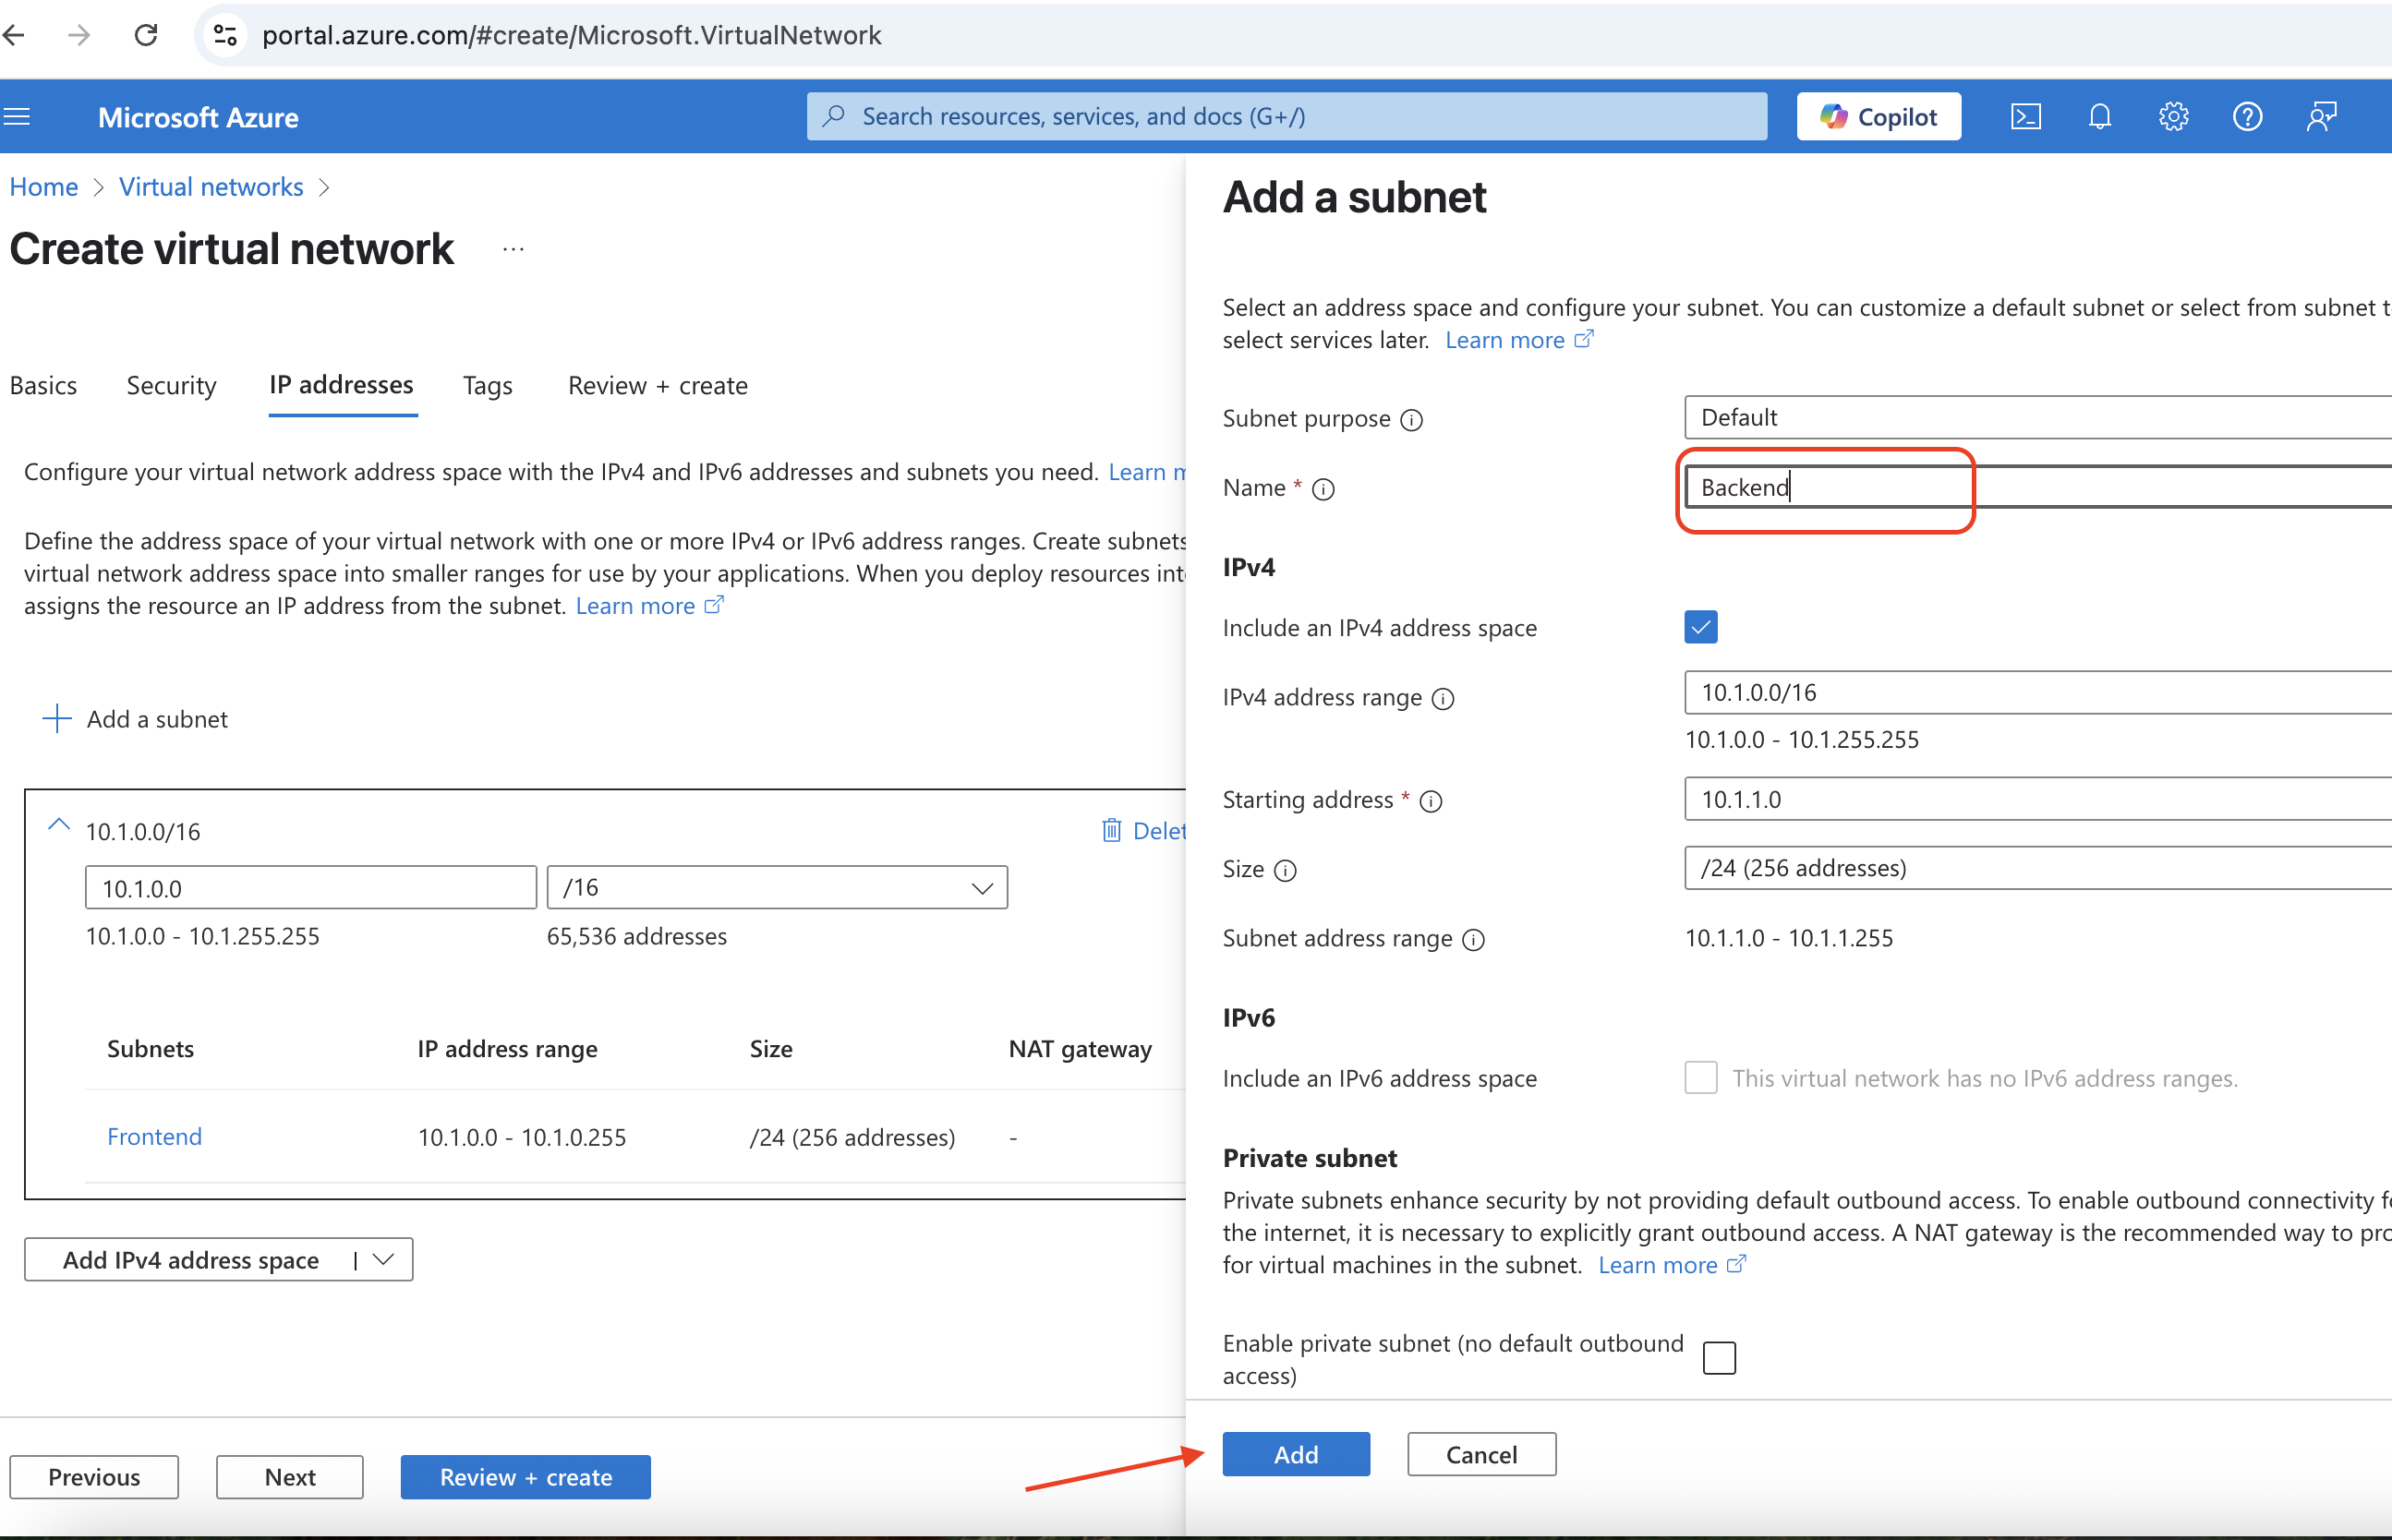
Add your second subnet, e.g.,
Backendwith address range10.0.0.0/24Click on the +Add a Subnet

- Change the name to Backend. Explore the default settings and click on Add
Click through the Remaining Tabs
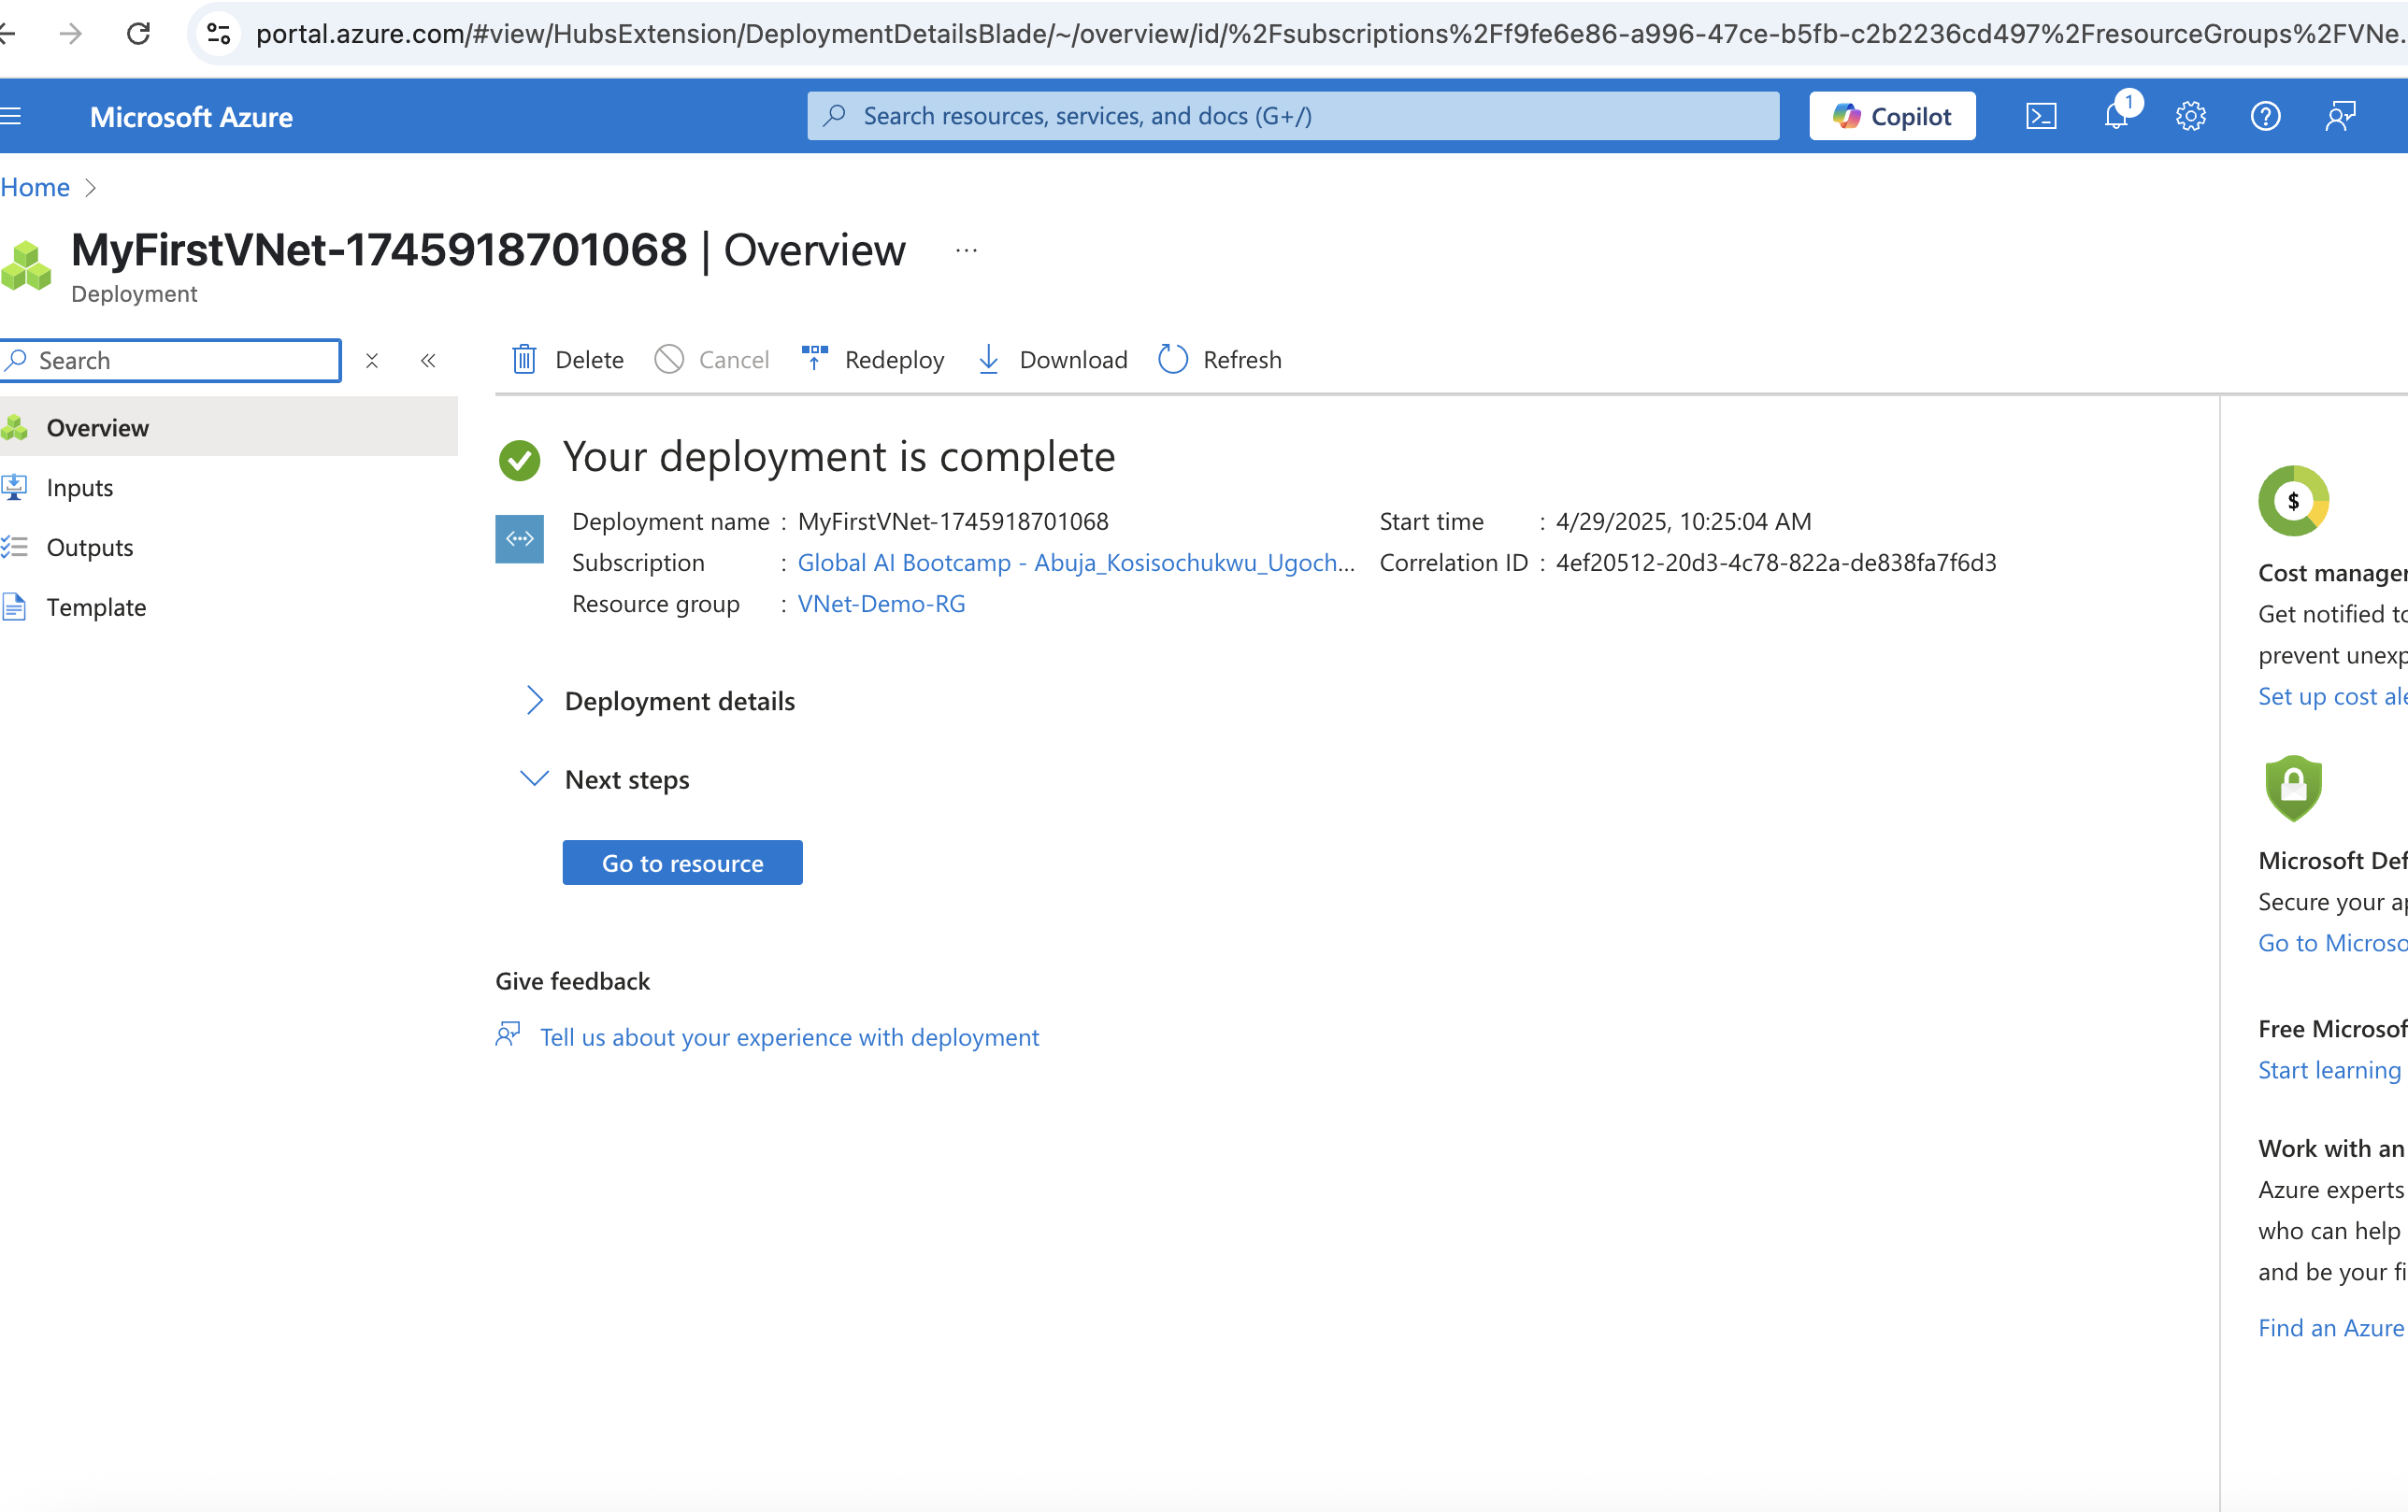
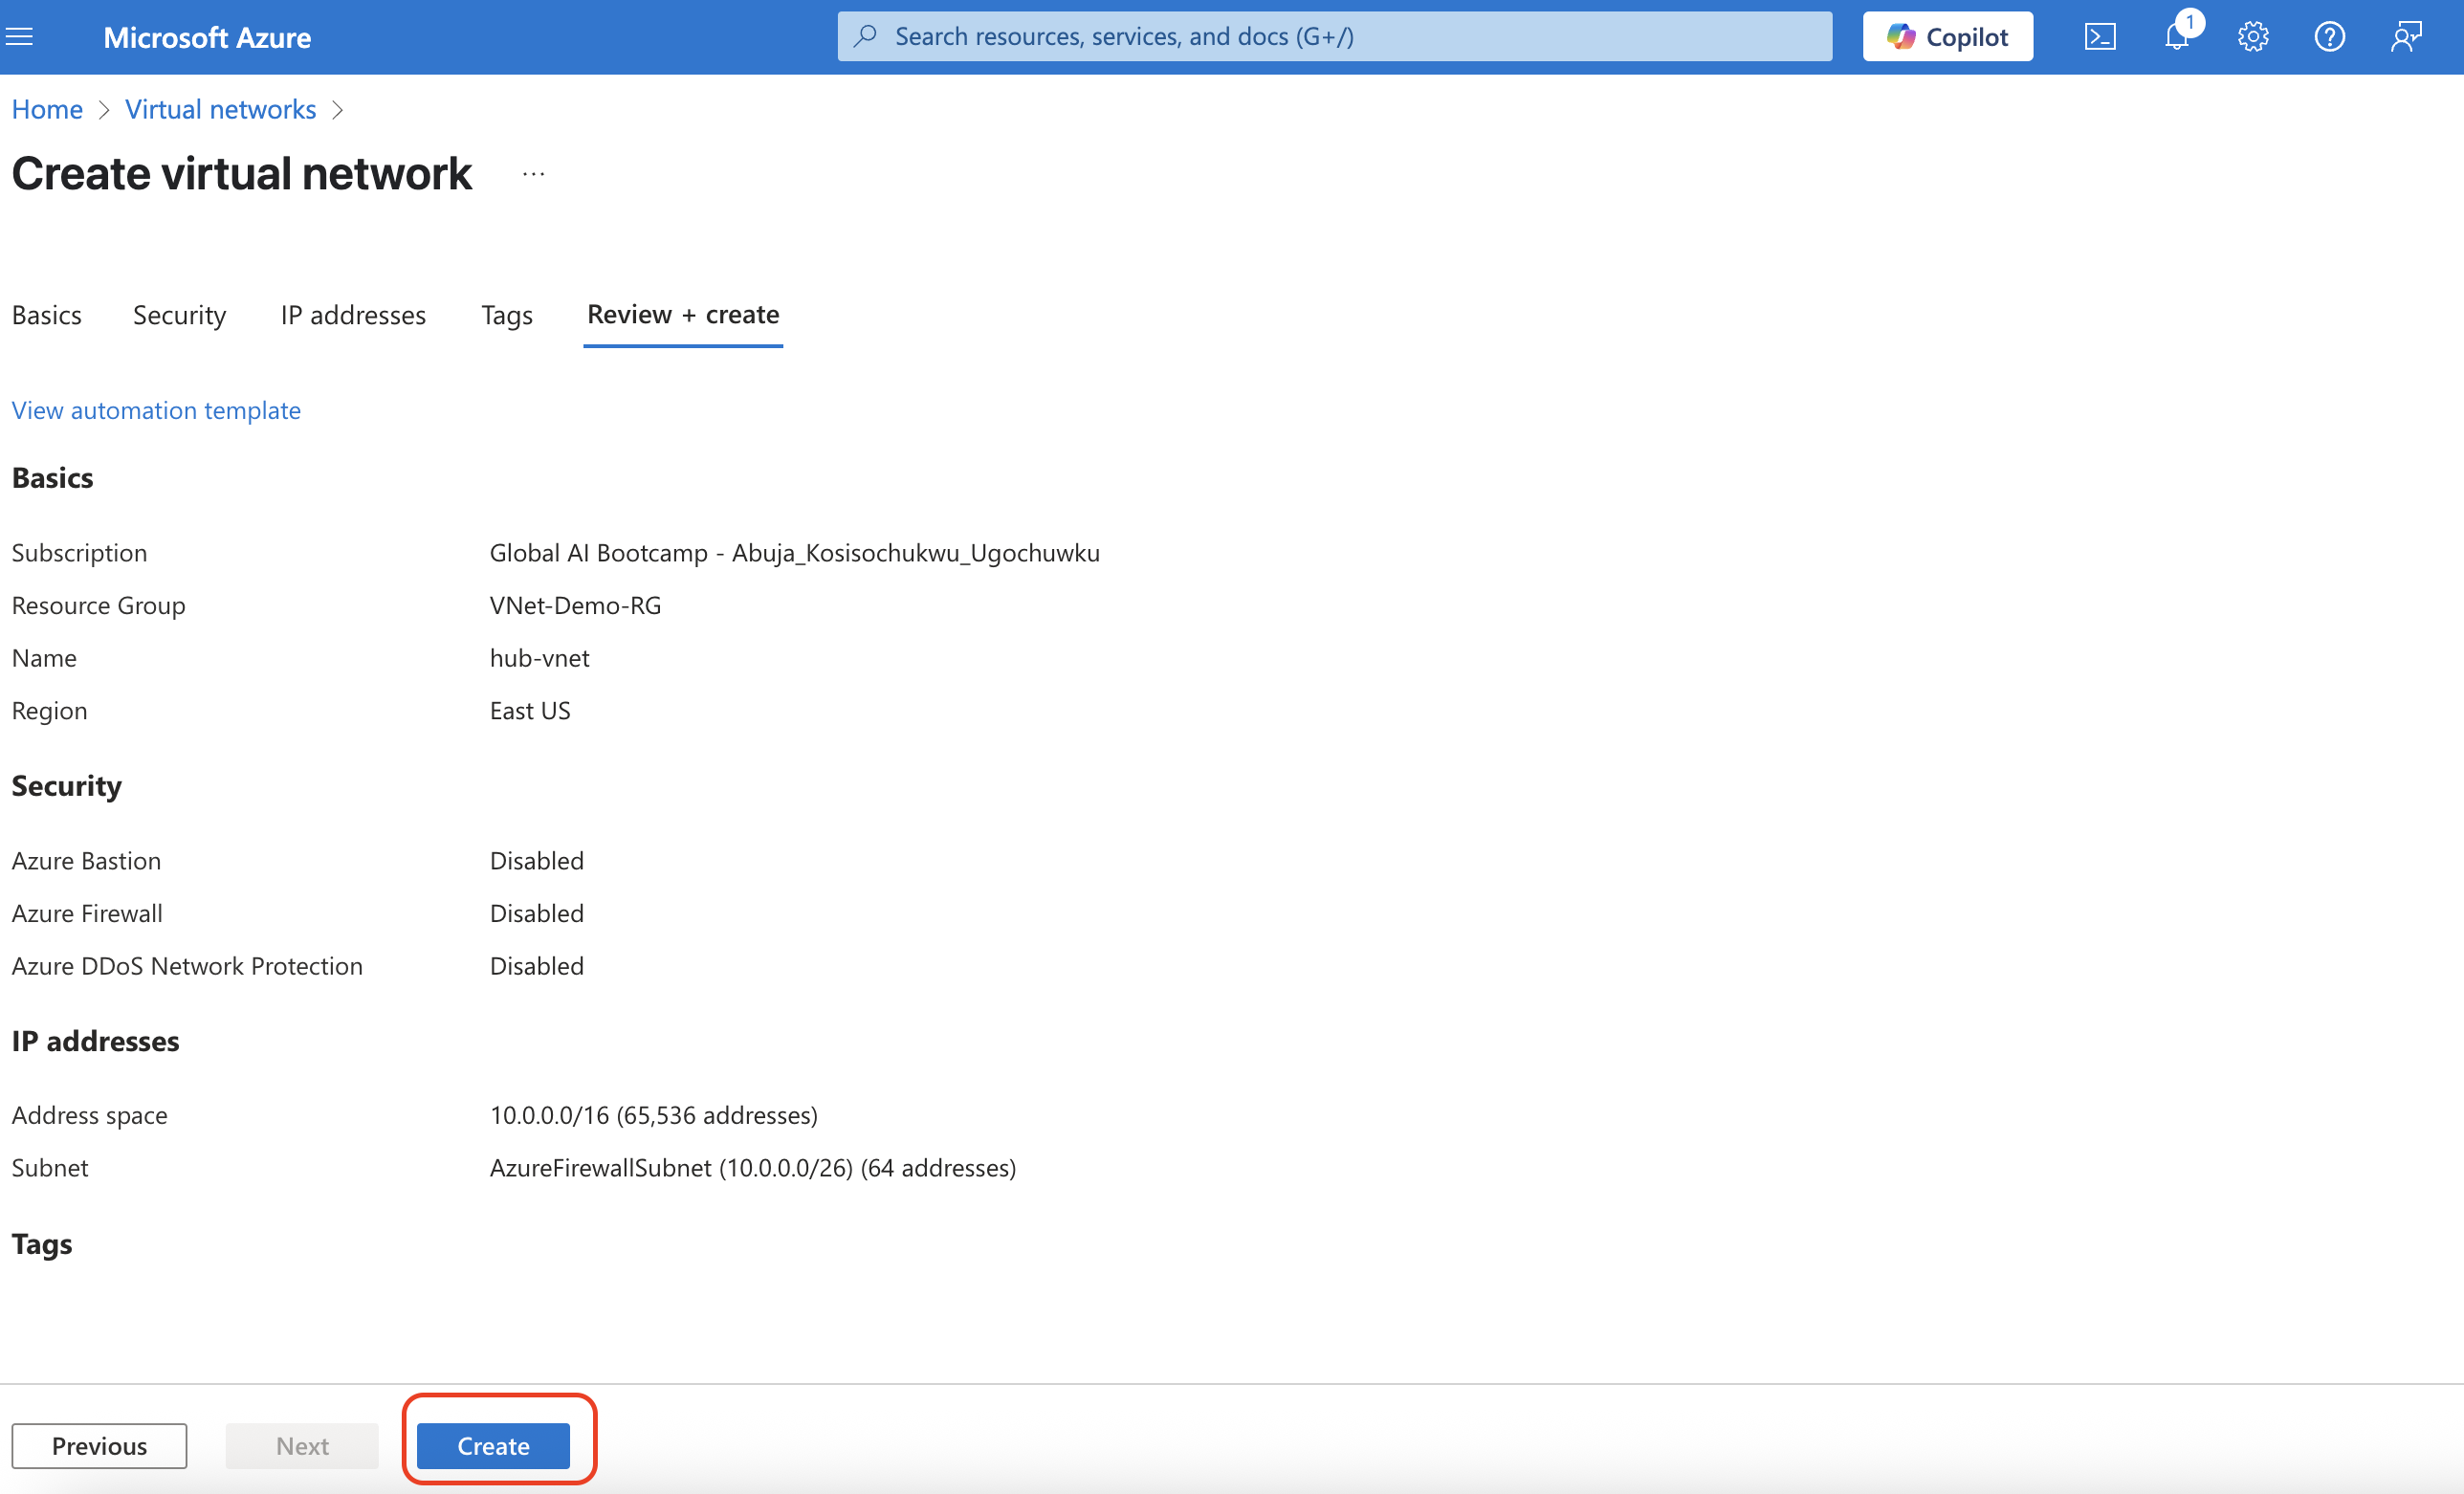
For now, you can skip advanced features like security and DNS unless you're familiar with them.Click “Review + Create”, then Create

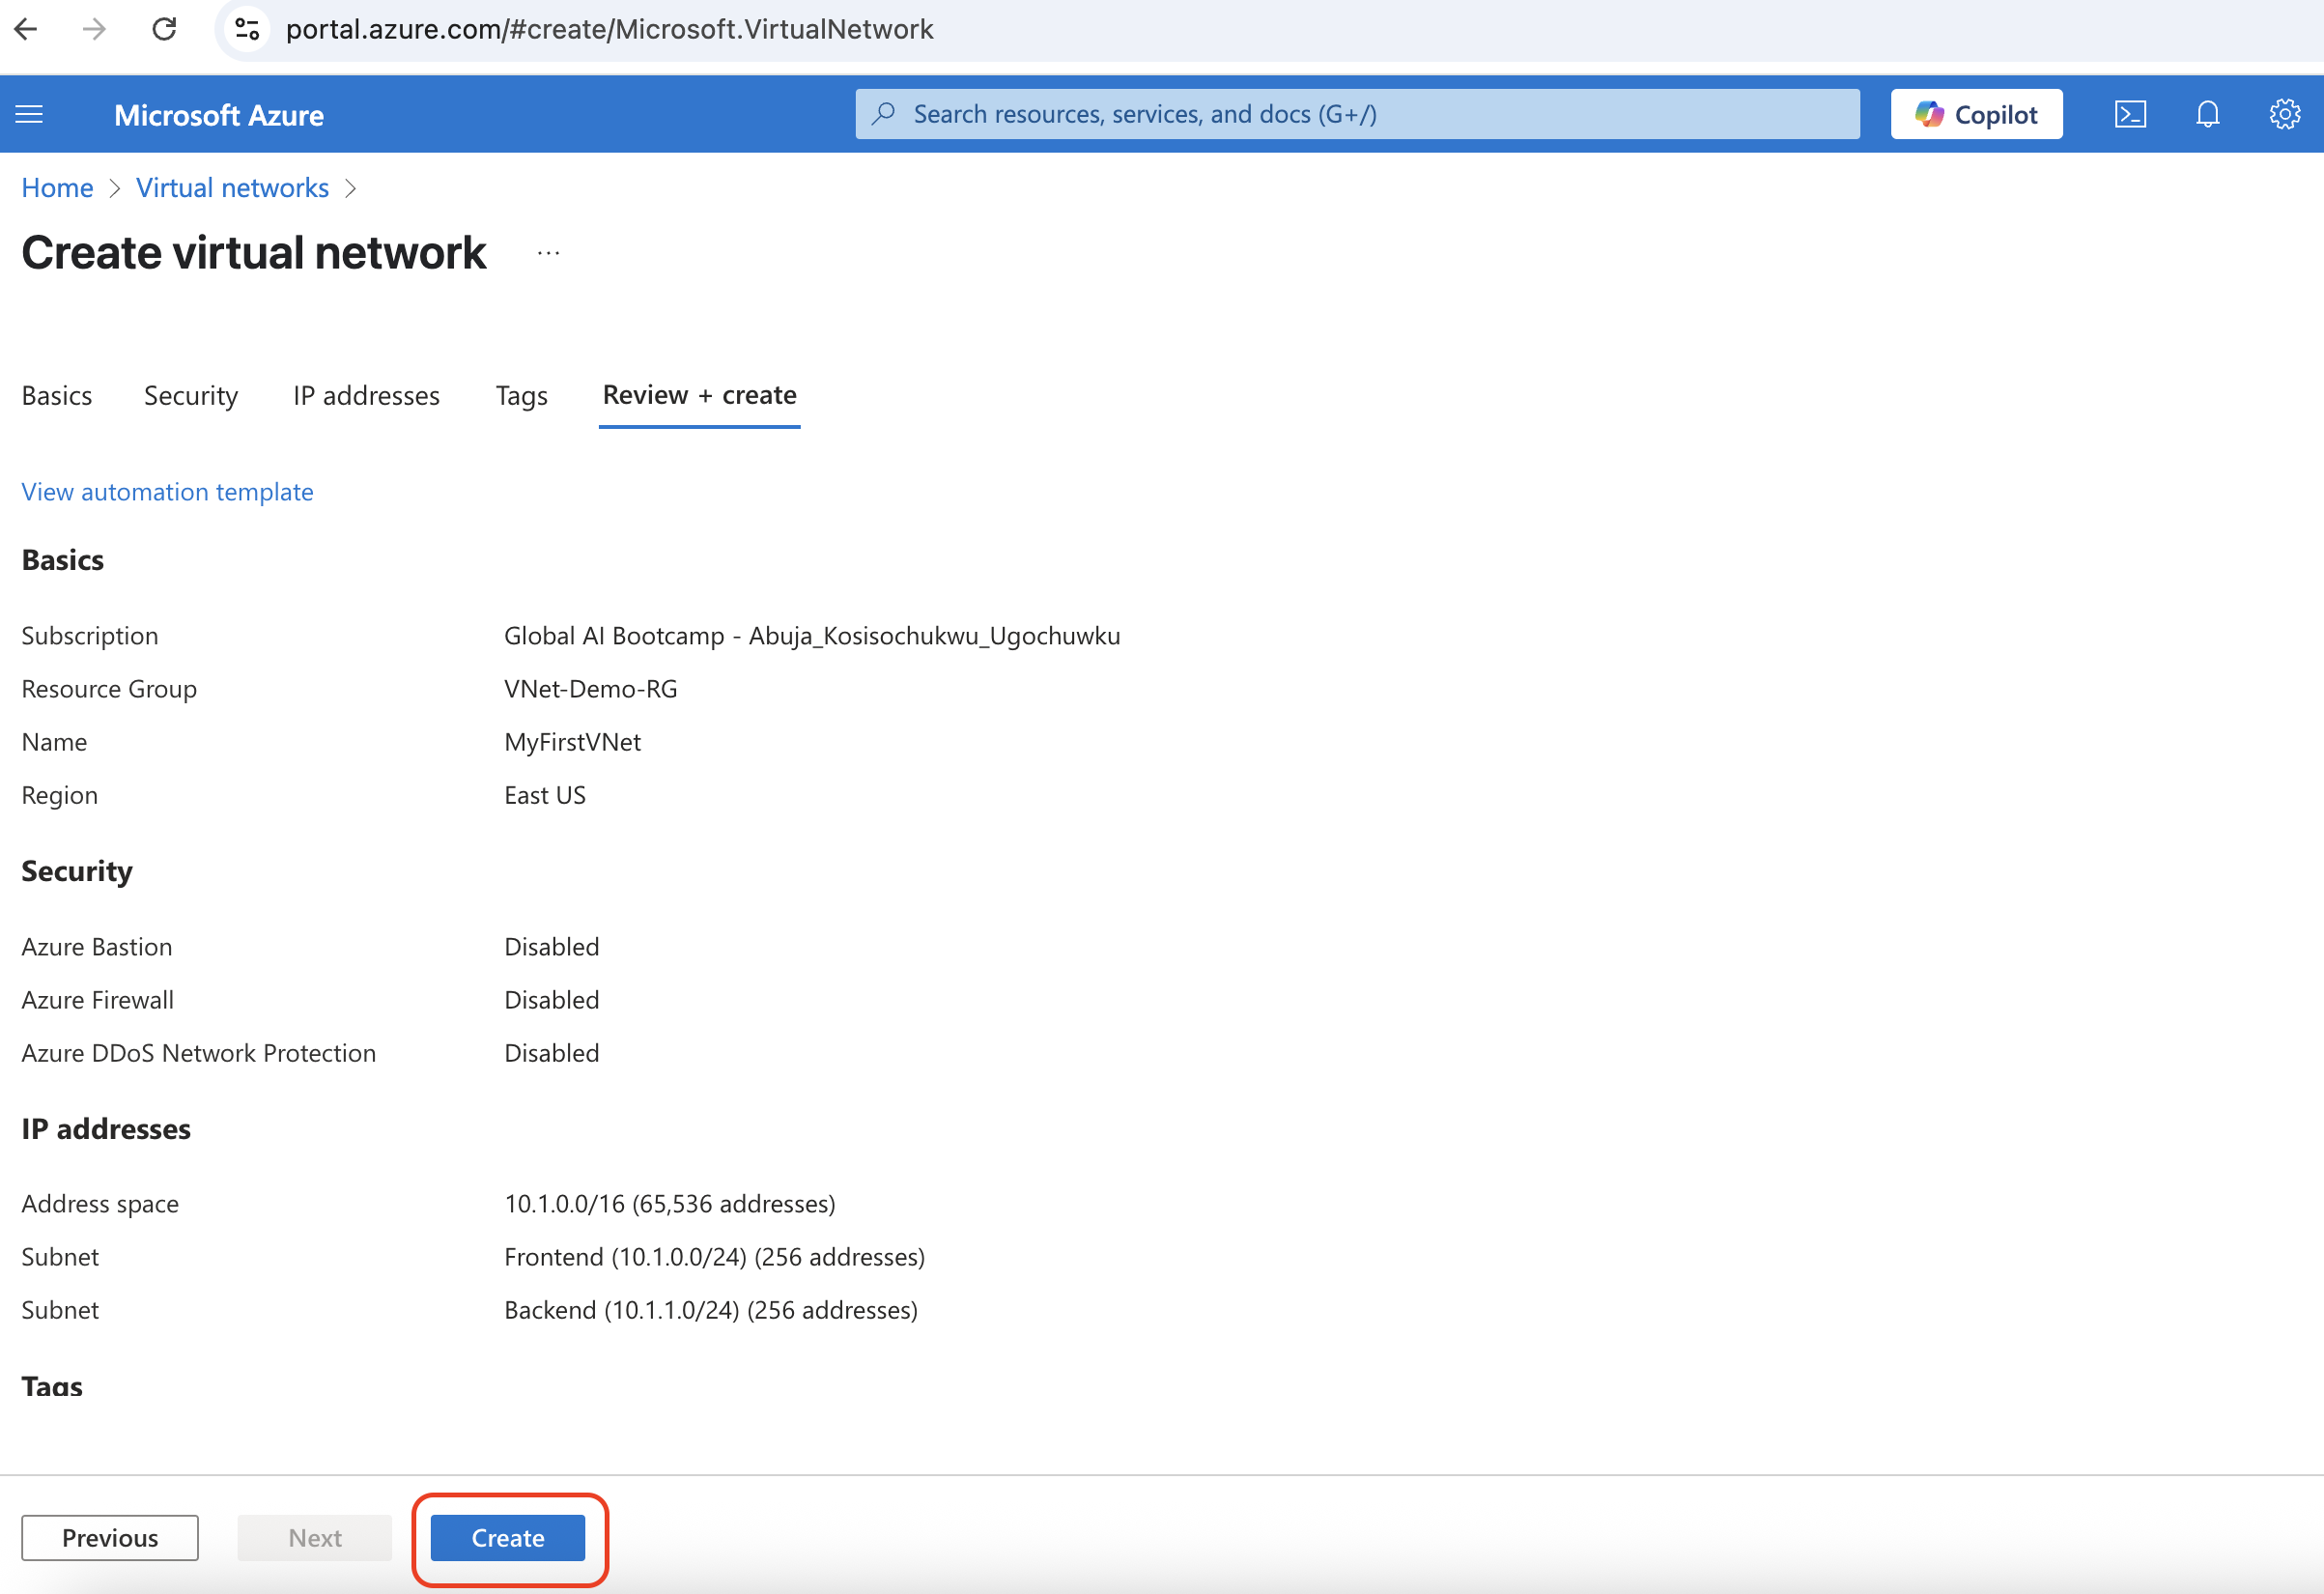
- Deployment is complete
🔧 Step 2: Configure the VNet to use firewall
Now that your network exists, let’s do a little customization.
+Add More Subnets
- Create a new Virtual Network: Go to the search box and type virtual network, on the dropdwon click on virtual network
- Click on +Create
- Use your active subcription, select
- Resource group
- Choose a name, and a region (prefferable same with the previous region used)
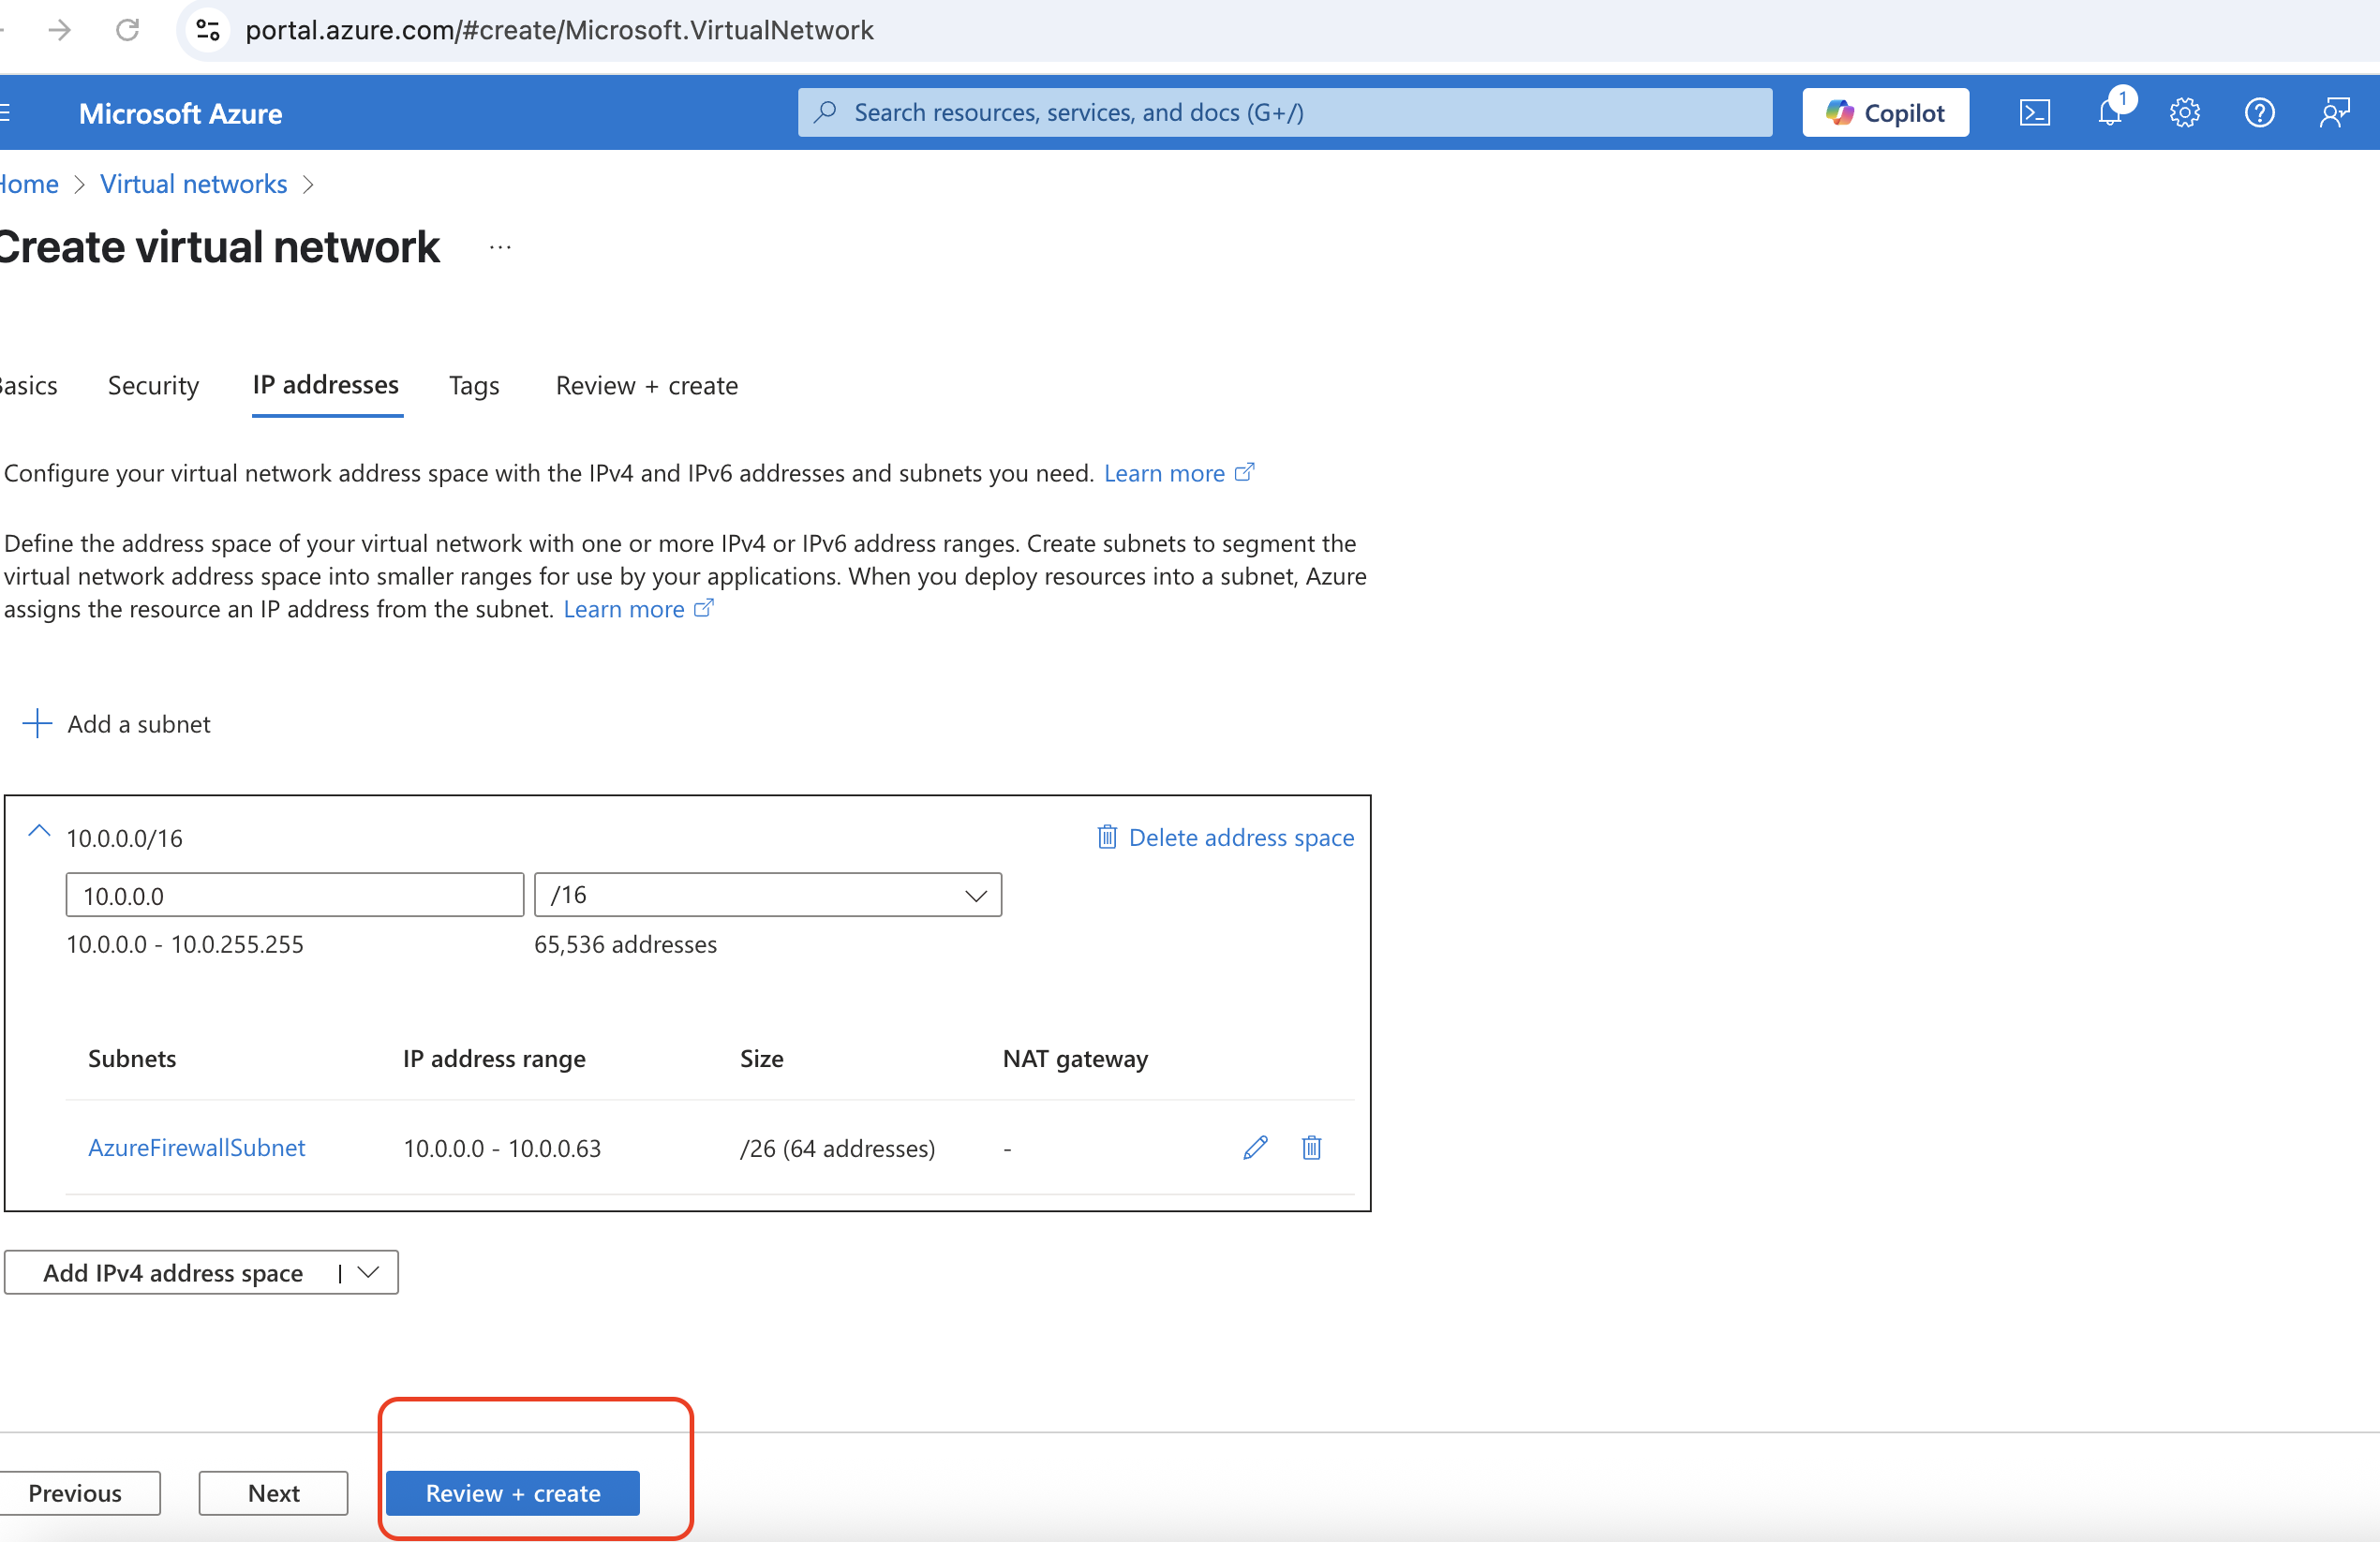
- Click on IP addresses
- Click on default
- On the subnet purpose, click on the dropdown and click on Azure Firewall
- Then click on save

Click “Review + Create”, then Create
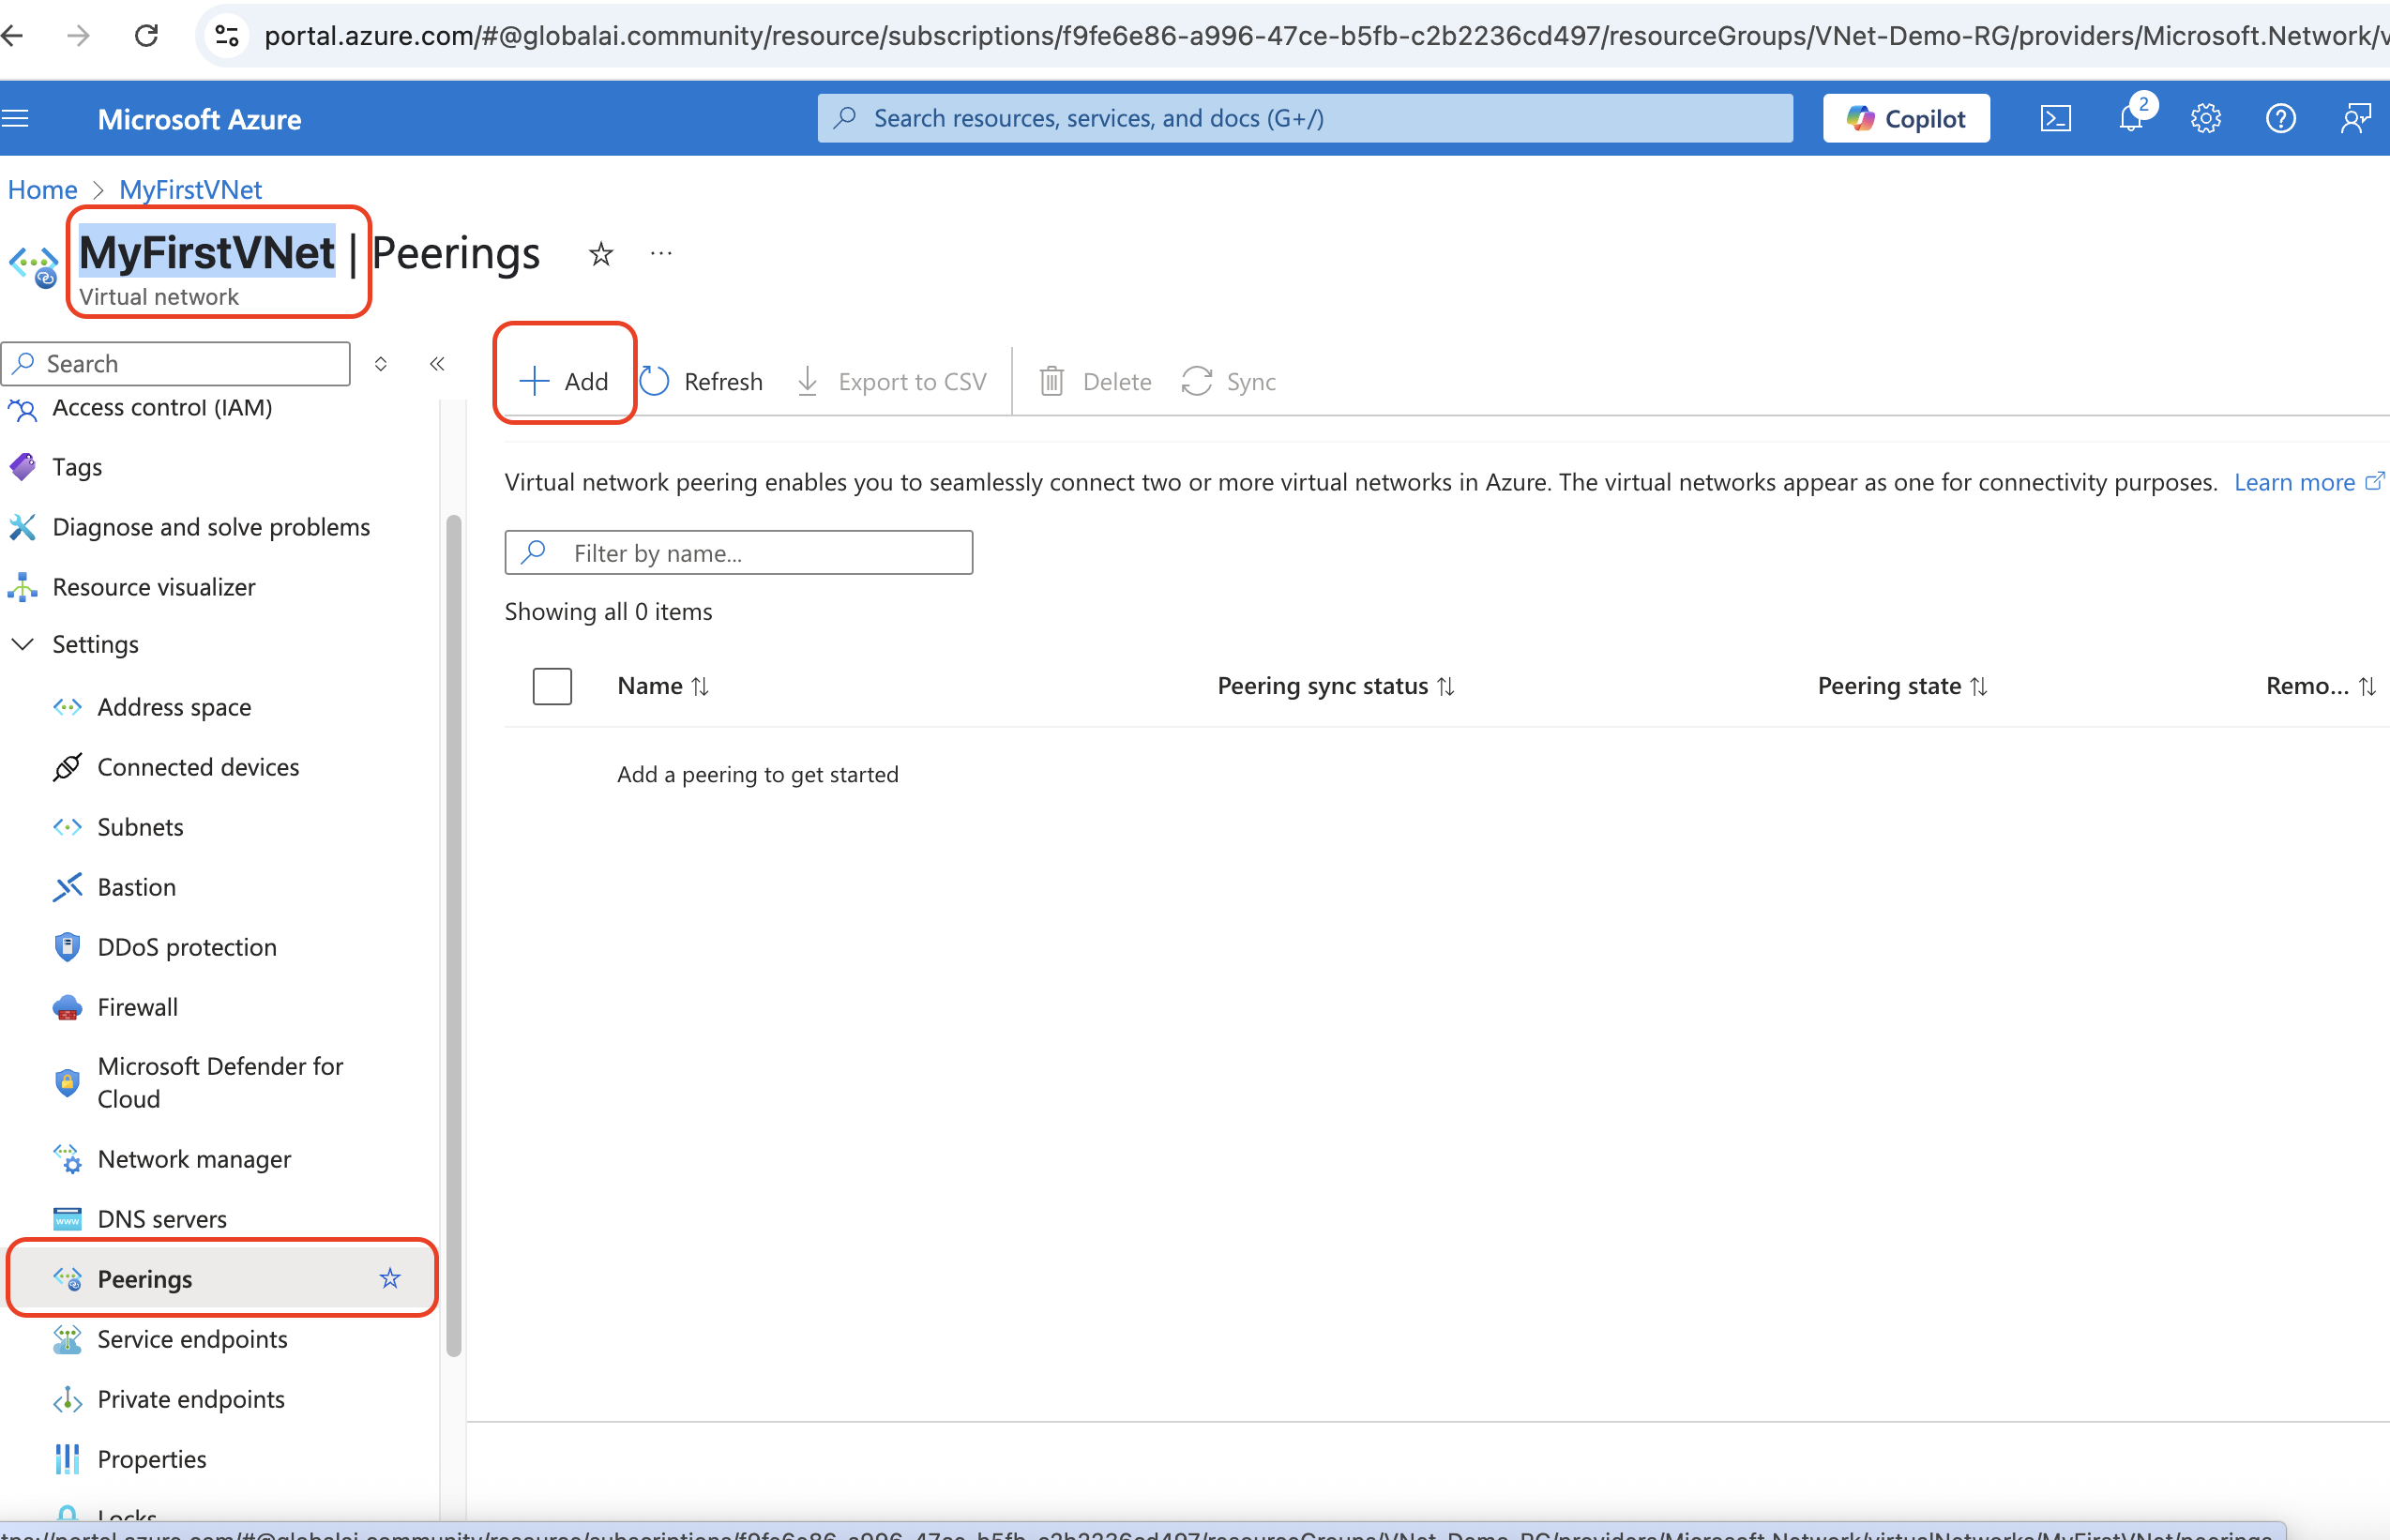
Set Up VNet Peering
If you're working across multiple VNets (e.g., for isolation or region-based separation), peering connects them securely.
Just go to the Peerings section of your MyFirstVNet settings
Click +Add, and set up a peer with another VNet in your subscription.
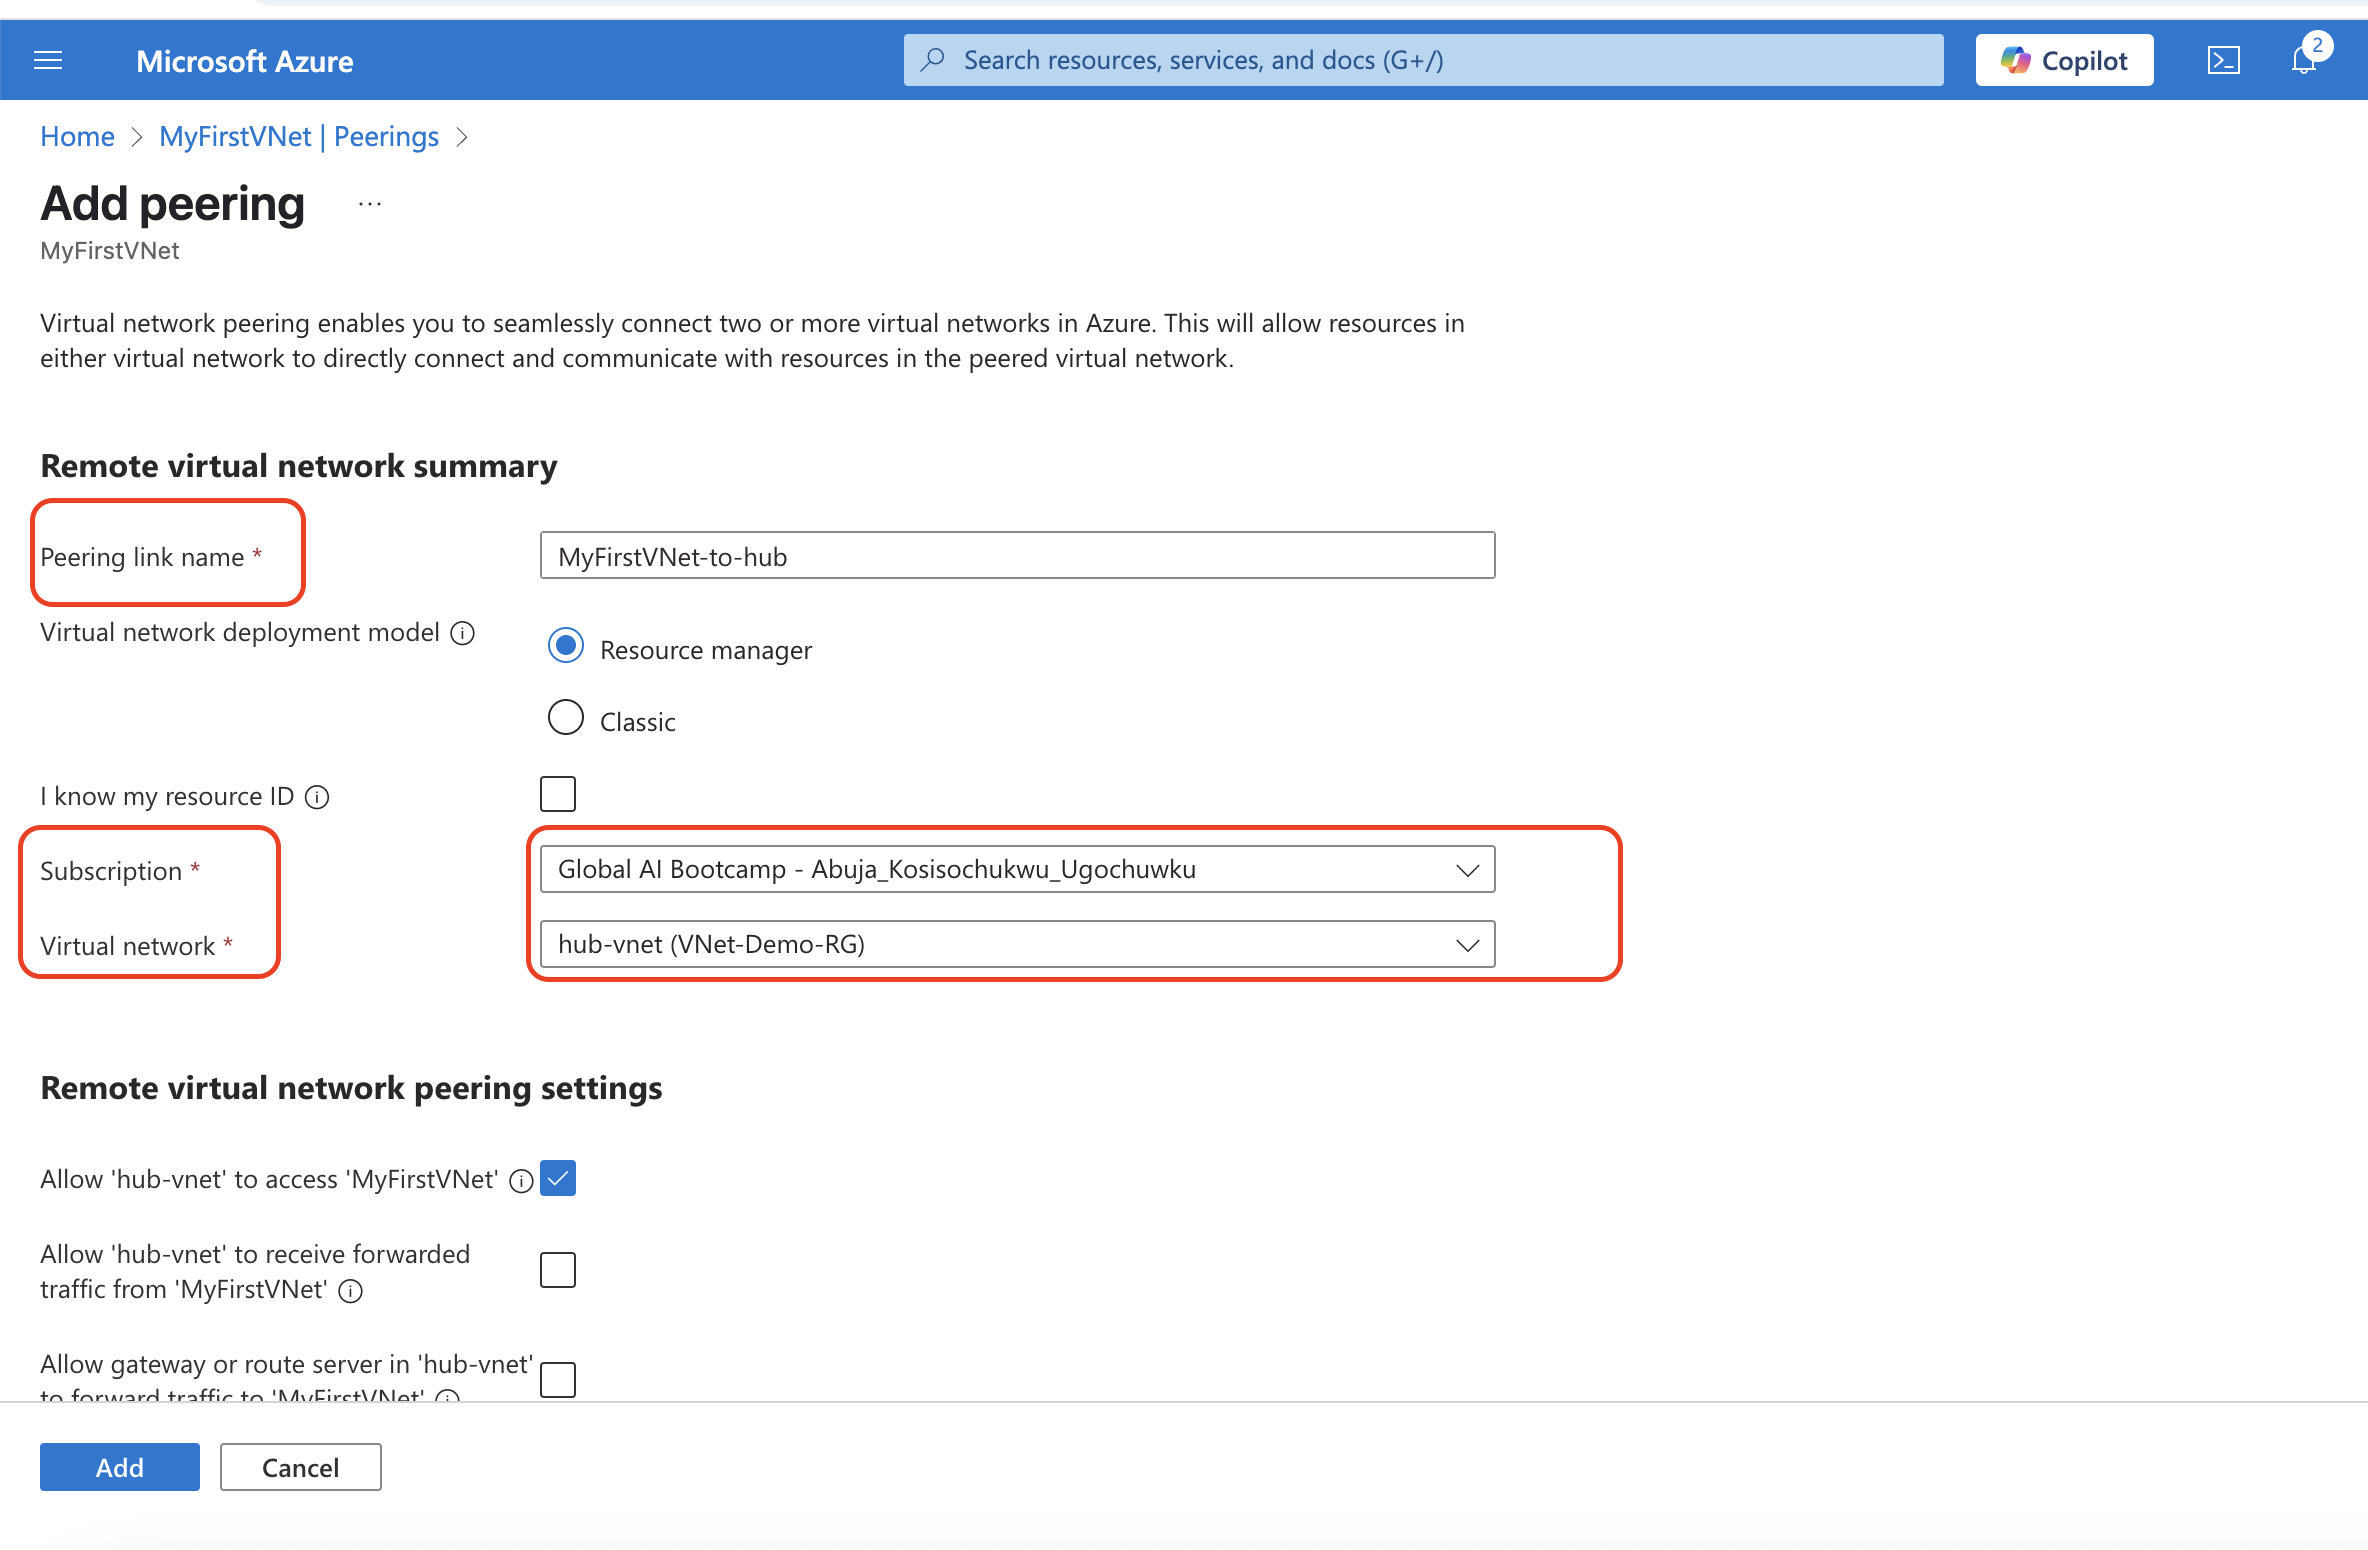
- On the remote virual network , peering link name should be MyFirstVbet-to-hub
- On the virtual Network choose hub-vnet
- Check the resource manager and also check the Allow 'hub-vnet to access MyFirstVNet'
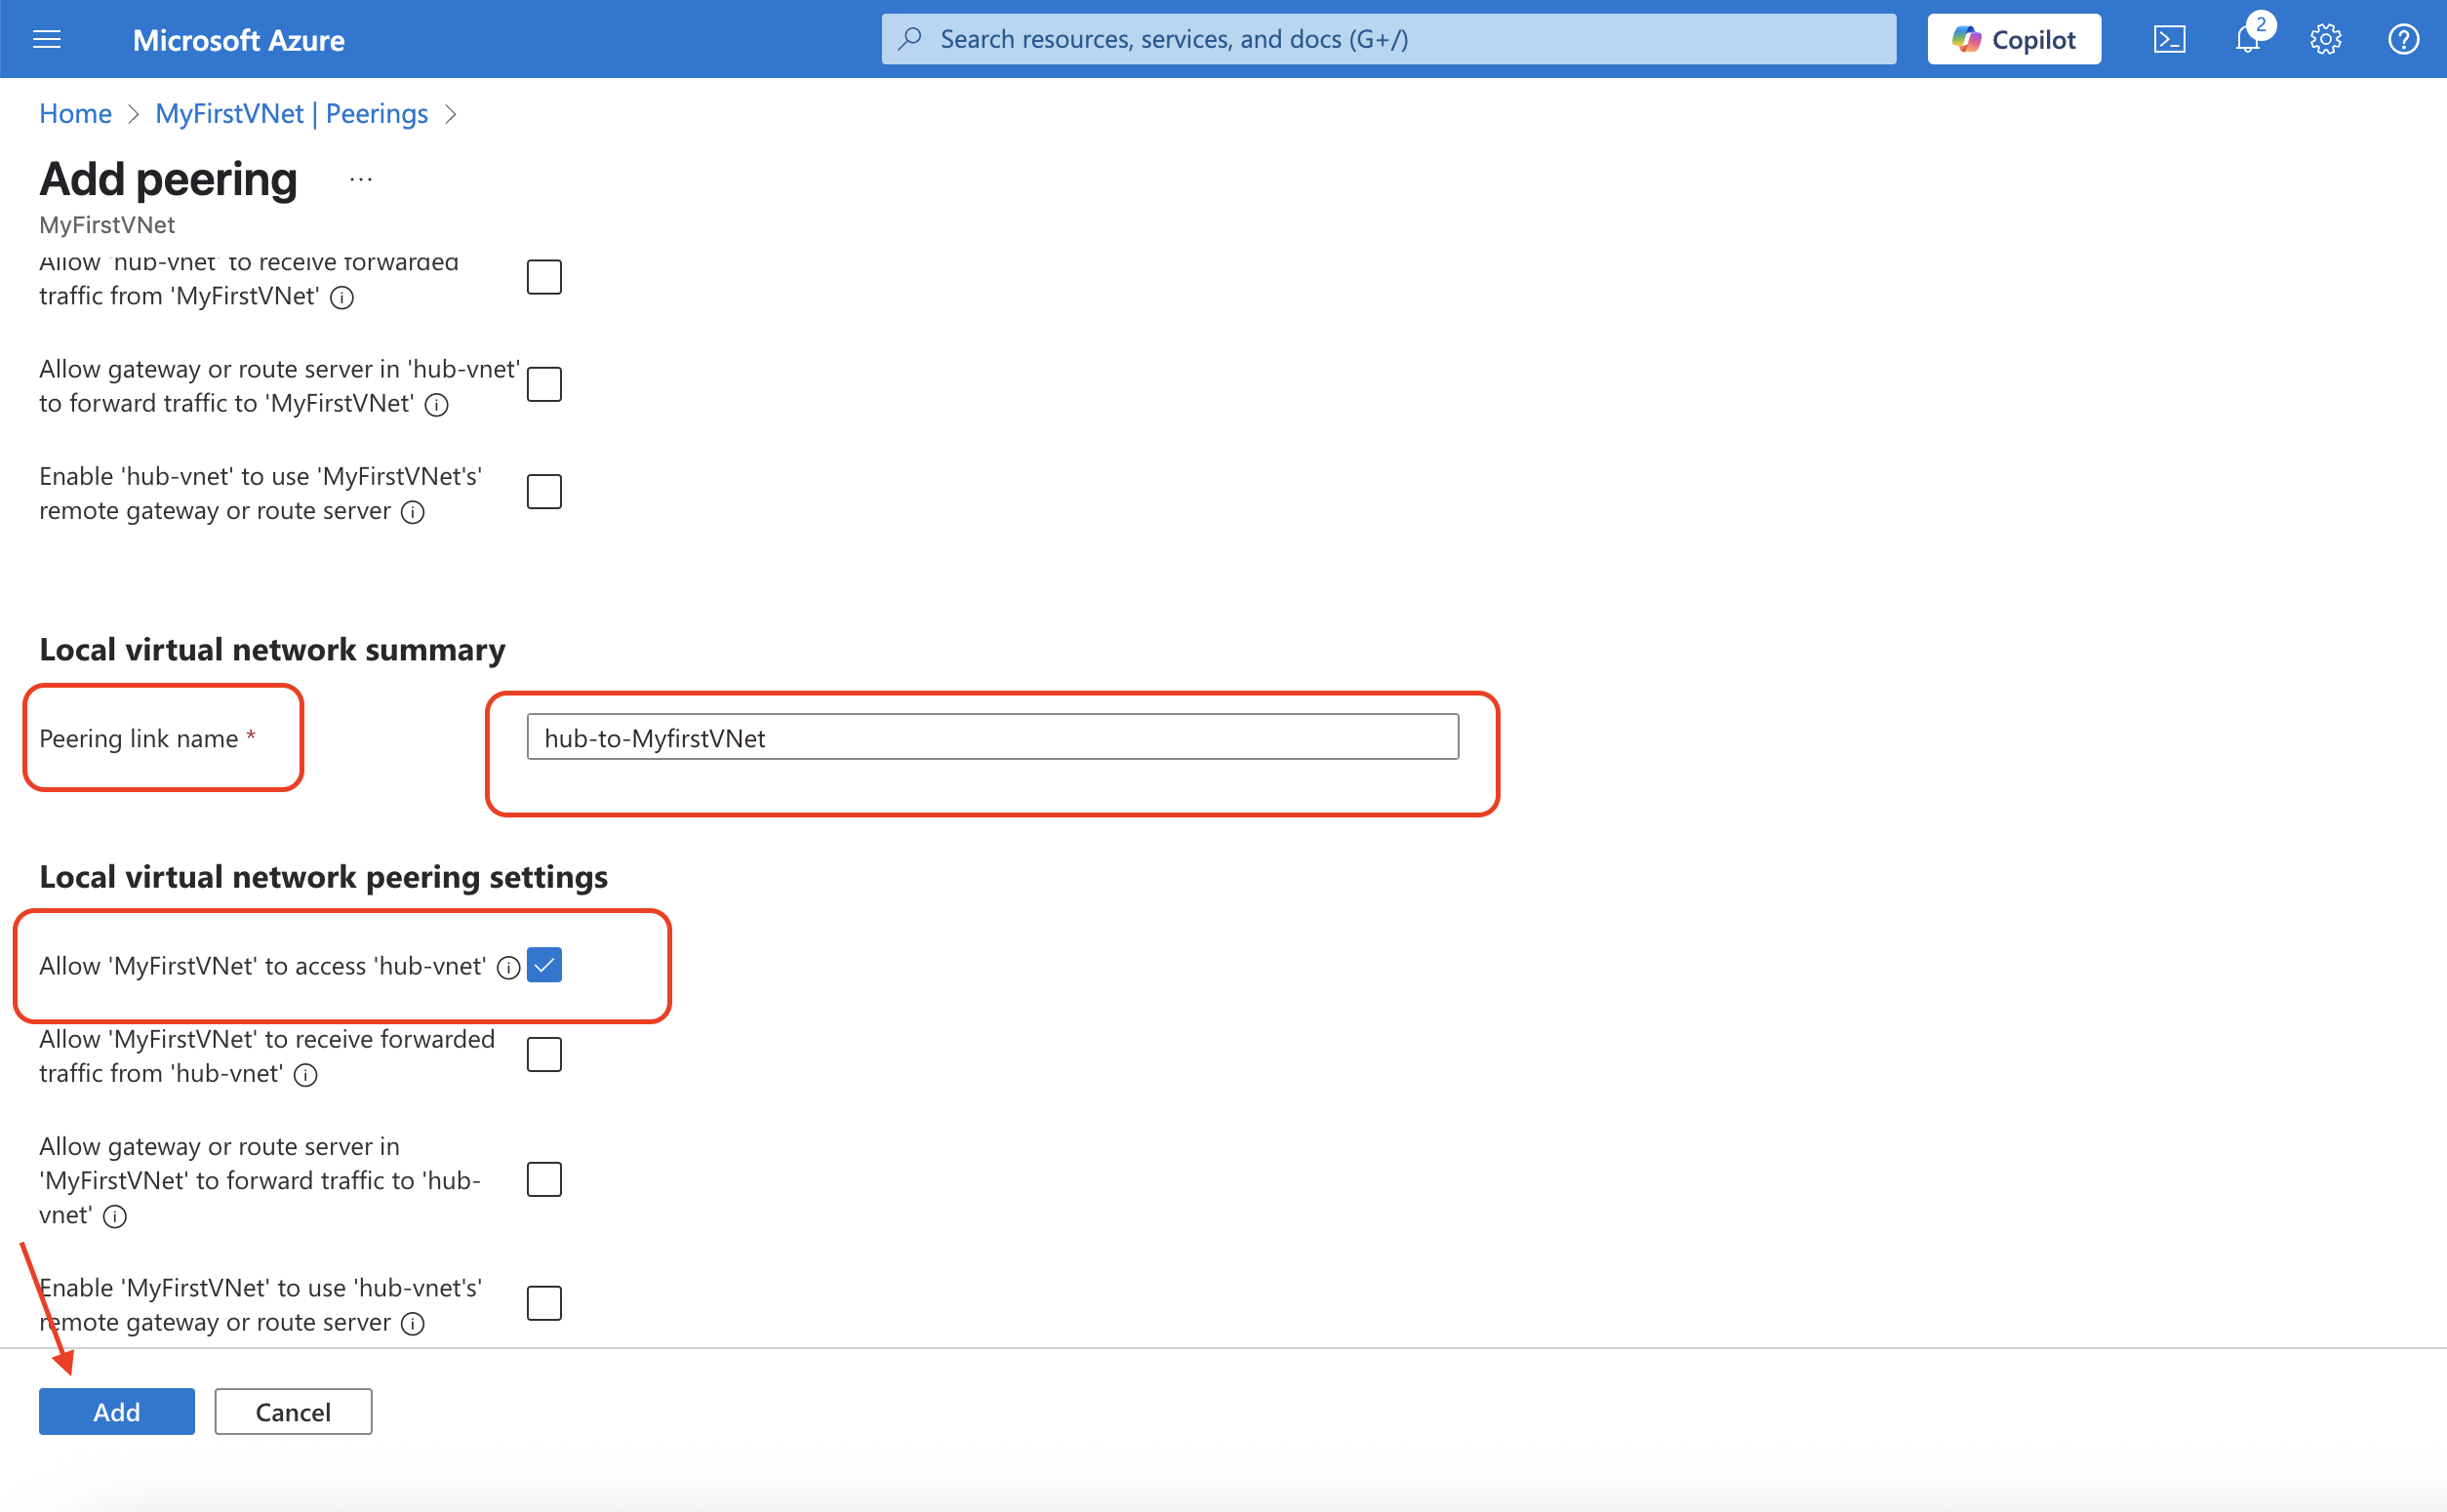
- On the local virual network , peering link name should be hub-to-MyFirstVNet
- Check the resource manager and also check the Allow 'MyFirstVNet to access hub-vnet'
- Then click on Add
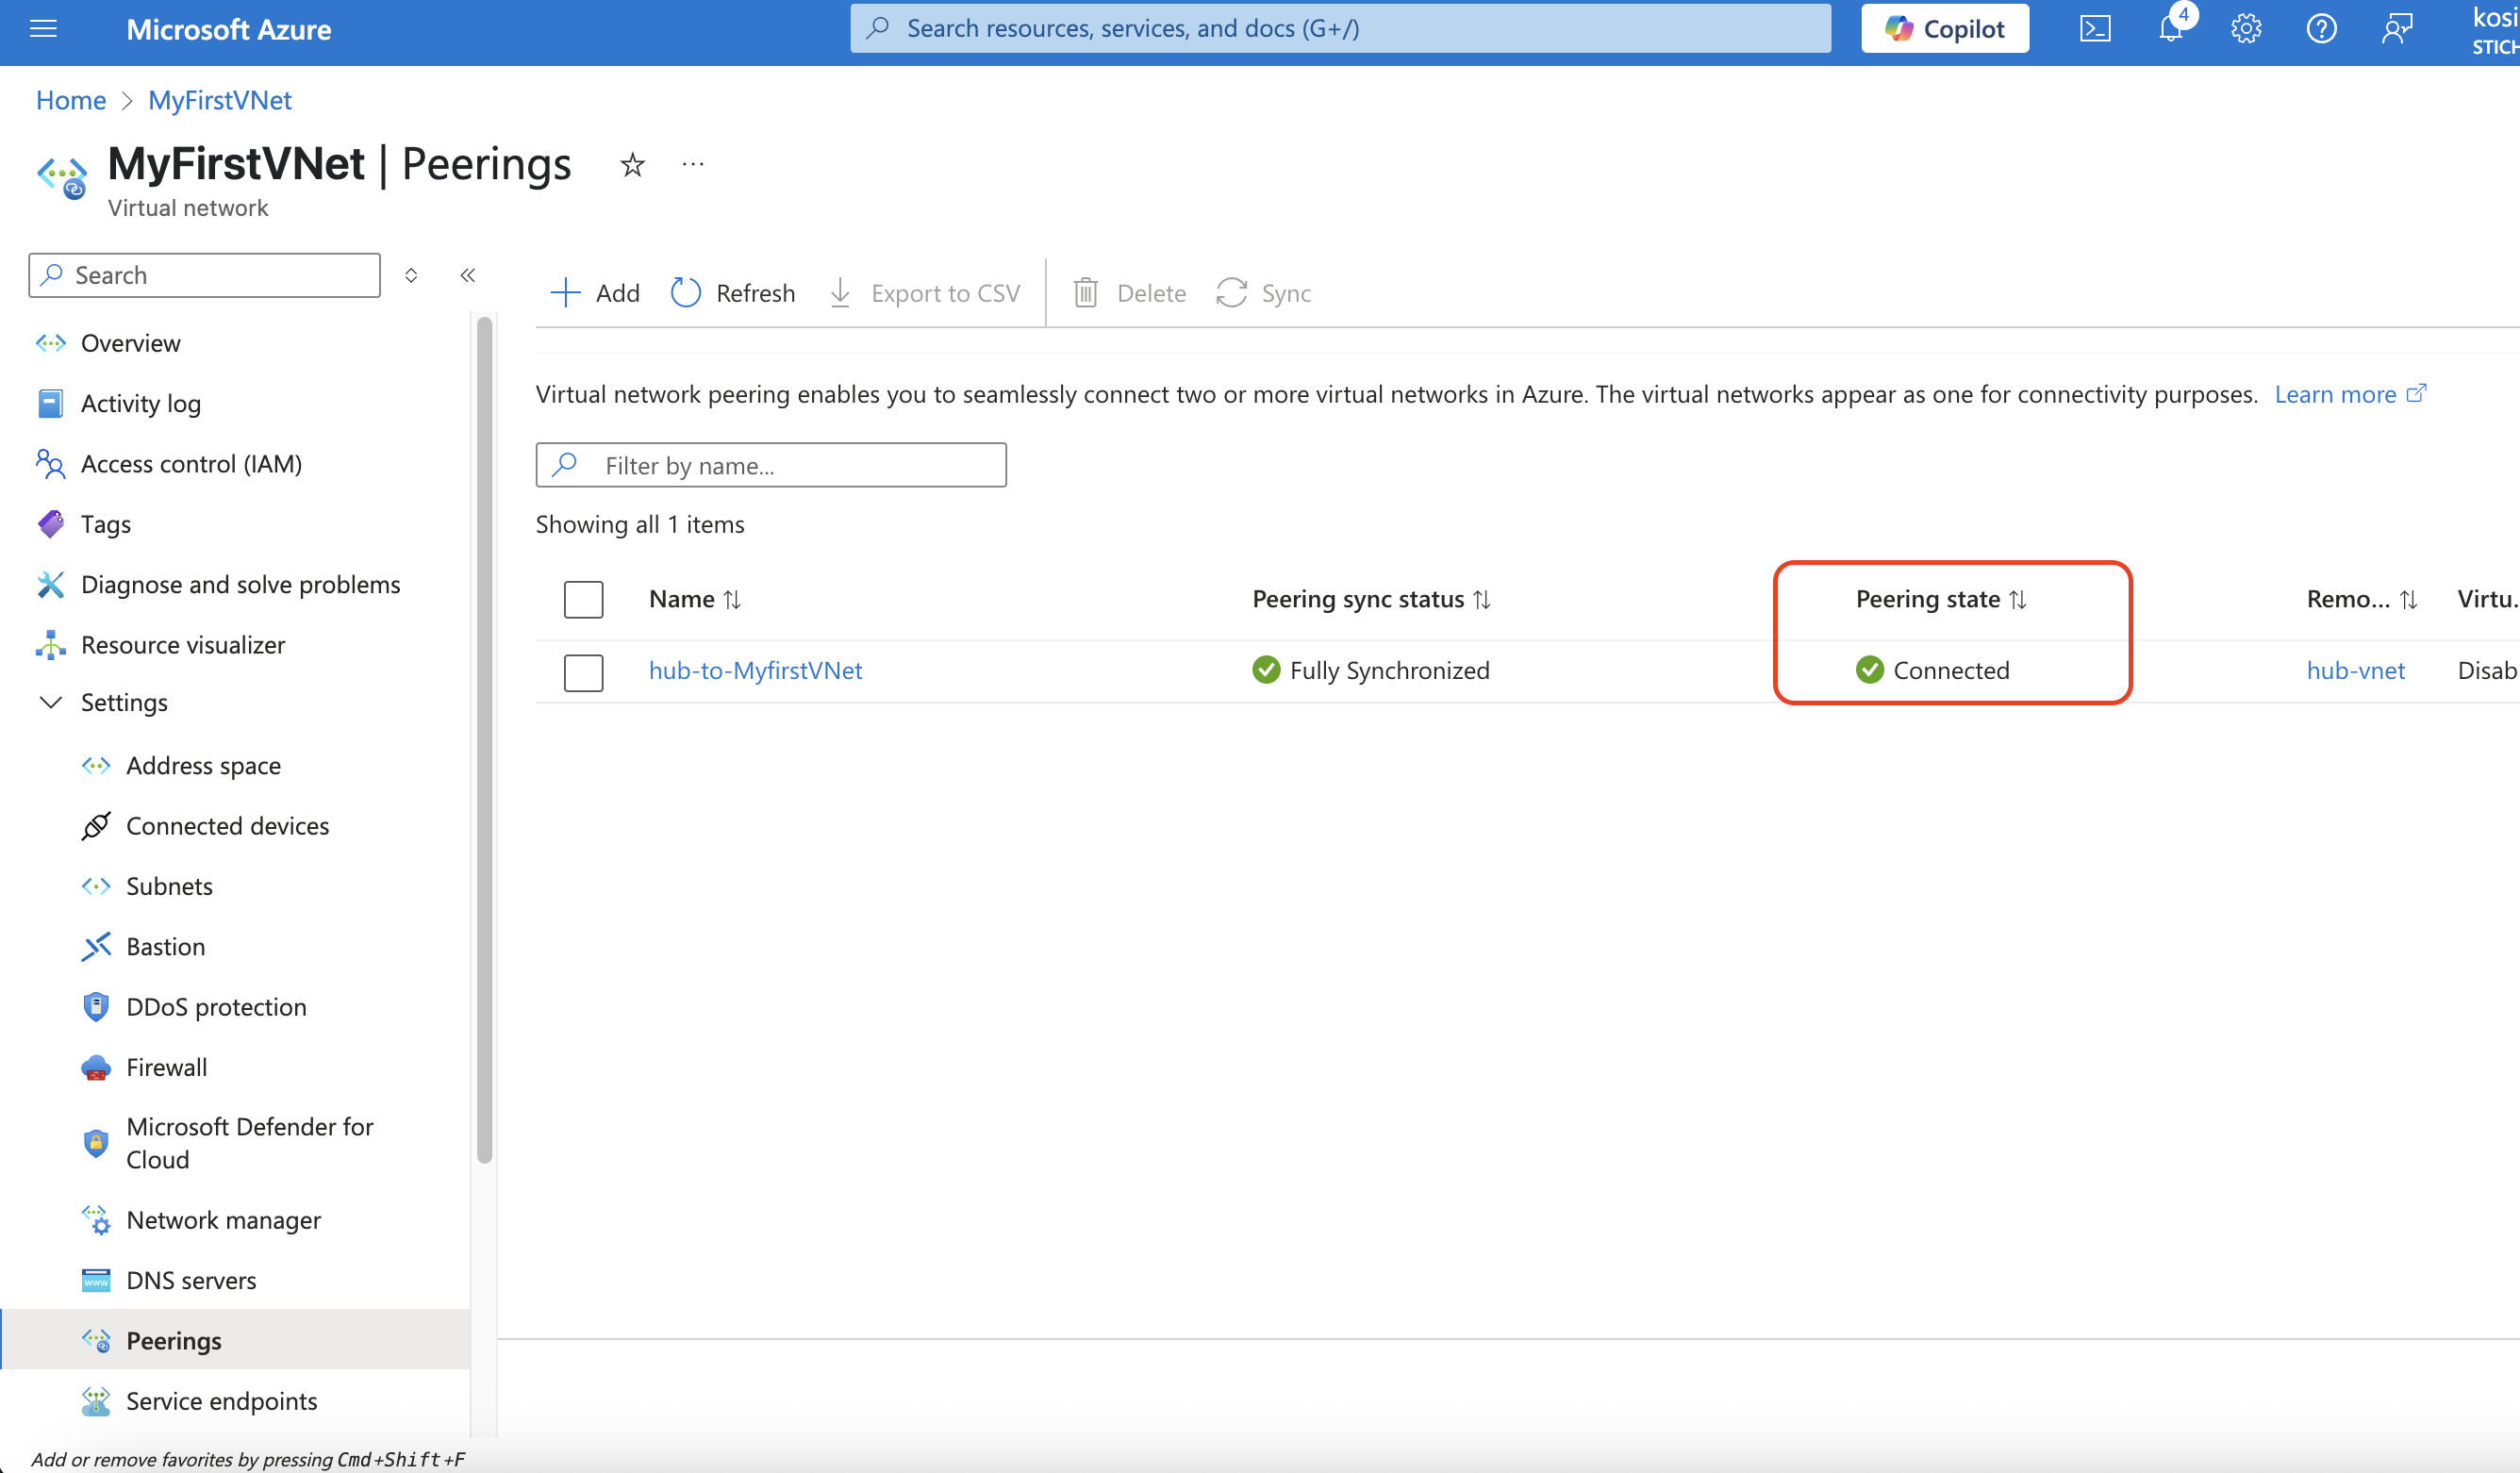
To confirm the peering of the remote VNet and Local VNet was successfull, the peering state of the two VNet will show connected
🧭 Where to Go From Here
Now that your VNet is in place, here are a few things you might want to explore next:
- Deploy a Virtual Machine into one of your subnets
- Experiment with NSG rules to control traffic
- Try connecting two VNets using peering
- Set up a VPN Gateway to connect your VNet to an on-prem network
🔄 A Quick Word on VNet Peering
In the steps we went through, I mentioned something called Virtual Network Peering, but what does that actually mean?
Think of each Virtual Network (VNet) in Azure like a private neighborhood. By default, one neighborhood can’t talk to another even if you own both. VNet Peering is like building a secure road between two of your own neighborhoods, so that resources (like virtual machines or apps) in one can easily and privately communicate with those in the other.
It’s super useful when:
You want to organize resources into separate VNets (maybe for security or scaling reasons)
You have VNets in different regions but need them to work together
You’re building a hub-and-spoke network model
And the best part? The traffic between VNets stays private, it doesn’t go over the public internet.
So when you add a peering connection in Azure, you’re basically telling two of your networks, “Hey, you’re family now go ahead and talk to each other securely.”
💬 Final Thoughts
Getting hands-on with Azure networking doesn’t have to be intimidating. The Azure Portal makes it surprisingly straightforward to set up and customize a Virtual Network.
If this was helpful or if you want a follow-up guide on deploying VMs or setting up hybrid networks, let me know in the comments. Happy building!
🧵 Follow me for more beginner-friendly Azure and cloud development tutorials!