Edit: While this tutorial focuses on macOS with terminal-notifier, Linux users can achieve a similar result by replacing it with notify-send.
How many times have you run a long process on your Mac, constantly peeking at the terminal to see if it’s done?
Sure, you can do:
echo $'\a' # beep!…but if you walk away or have your volume muted, that won’t help you. Wouldn’t it be nicer to get a real macOS notification that appears in your Notification Center? And guess what: that works even when you’re running commands over SSH from a remote machine!

This post shows you how, using the terminal-notifier tool and a neat SSH trick.
1. Meet terminal-notifier
terminal-notifier is a command-line utility that lets you create macOS notification banners from any script or terminal command. You can include messages, custom icons, sounds, and even open a URL when clicked.
Installation
brew install terminal-notifier(If you don’t have Homebrew, install from brew.sh)
Usage
Once installed, try:
terminal-notifier -message "Build finished!" -sound BlowYou’ll see a native macOS notification in the corner of your screen. No more missed beep!
2. Using terminal-notifier Locally
If you’re on your Mac and running a long command:
my-long-command; terminal-notifier -message "Command Done"Or if you want to notify on both success and failure:
my-long-command
EXIT_CODE=$?
if [ $EXIT_CODE -eq 0 ]; then
  terminal-notifier -message "✅ All good!"
else
  terminal-notifier -message "❌ Failed with code $EXIT_CODE"
fi
That’s easy enough. But what if your command runs on a remote machine accessed via SSH?
3. Getting Notifications from Remote Commands
When you SSH into a remote server, that server can’t directly call terminal-notifier on your Mac. The solution: send a message back to your Mac (via SSH port forwarding) and let your local Mac run terminal-notifier.
One simple approach:
-
On your Mac: open a reverse SSH tunnel and listen with
netcat(nc). -
On the remote: send the message
"Beep"or"OK"to the tunnel, which arrives at your Mac. -
Your Mac: reads the message and triggers
terminal-notifier.
Example Script on Your Mac
#!/bin/bash
REMOTE_USER="user"        # your username on remote
REMOTE_HOST="remote"      # remote host, e.g. myserver.com
LOCAL_PORT=5050
REMOTE_PORT=4000

# 1) Create a reverse SSH tunnel, so remote:4000 => mac:5050
ssh -f -N -R ${REMOTE_PORT}:127.0.0.1:${LOCAL_PORT} ${REMOTE_USER}@${REMOTE_HOST}

# 2) Listen on port 5050 locally
while true; do
  nc -l ${LOCAL_PORT} | {
    read line
    # Trigger terminal-notifier when we get input
    terminal-notifier -message "Received from remote: $line" -sound Blow
  }
done-
ssh -f -N -R: opens a reverse tunnel but doesn’t start an interactive shell. -
nc -l ${LOCAL_PORT}: listens for connections on your Mac.
Remote Side
On the remote server, once you’re inside an SSH session (or in tmux):
printf "OK\n" | nc 127.0.0.1 4000Now the text OK is forwarded through the SSH tunnel to your Mac’s port 5050, your Mac sees it, and terminal-notifier pops up!
4. Quick Aliases
If you want to make it even simpler:
Remote server (e.g., in your ~/.bashrc or ~/.zshrc):
# Create a quick notify alias for sending a beep message
alias notify='echo "Beep" | nc 127.0.0.1 4000 > /dev/null 2>&1 &'
Local Mac:
# Use terminal-notifier with a default message + sound
alias notify='terminal-notifier -message "Beep!" -sound Blow'
So any time you want to trigger the Mac notification:
time-consuming-process; notifyFor example:
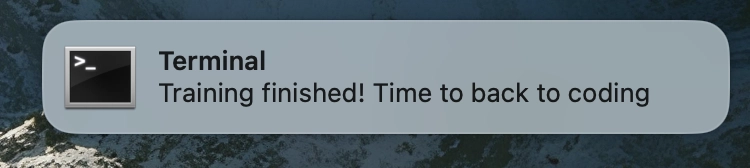
python train.py; notify5. Wrap-Up
Long-running tasks are no longer a “check every 5 minutes” chore. Let your Mac’s built-in notification system do the heavy lifting!
-
Install
terminal-notifier - Set up an SSH reverse tunnel
-
Use
notifyalias after long commands - Done: You’ll get a nice macOS banner when your remote job finishes.
Happy building!
Credits
- terminal-notifier by @julienXX
- ChatGPT!
Additional Notes
Advanced: Auto-run Your Local Listener Script via LocalCommand
Let’s say you want the listener to automatically run every time you connect to a particular host, without manually starting the script. You can leverage an SSH config trick called LocalCommand:
-
Edit
~/.ssh/configon your Mac (or create if it doesn’t exist) and add something like:
Host myremote
  HostName remote.example.org
  User yourusername
  RemoteForward 4000 127.0.0.1:5050
  PermitLocalCommand yes
LocalCommand /Users/youruser/bin/notify_tunnel_listener.sh &-
notify_tunnel_listener.sh(on your Mac) can be:
#!/bin/bash
# If already running, do nothing:
pgrep -f "nc -l 5050" && exit 0

while true; do
  nc -l 5050 | {
    read line
    terminal-notifier -message "Remote says: $line"
  }
done
Make it executable with:
chmod +x /Users/youruser/bin/notify_tunnel_listener.sh- Now, whenever you
ssh myremote, it sets up the reverse tunnel (RemoteForward), and runs your local listener script automatically (LocalCommand). Thepgrepline prevents multiple listeners from stacking up.
A Note on Foreground vs Background
By default, LocalCommand might block your SSH session if you run a while true script. You can put an ampersand (&) to run it in the background:
LocalCommand /Users/youruser/bin/notify_tunnel_listener.sh &You’ll need to handle stopping it yourself or let it run in the background indefinitely. One strategy is using the pgrep check above.
Docker or Apptainer
If you're running Docker or Apptainer inside a remote machine, keep in mind that the container's localhost may not be the same as the host's localhost. Thus, printf "OK\n" | nc 127.0.0.1 4000 might fail. The simplest fix is to run your container with host networking:
- Docker:
docker run --network=host ...- Apptainer:
apptainer shell --net=host image.sifAlso ensure that nc (netcat) is installed inside the container, because that's what actually sends the message back to the remote host. Once the container shares the host network and has nc available, everything works just as described above.
