Hey there, developer! 🚀
Want to take your Node.js app live? This hands-on guide shows how to deploy a simple URL shortener app built with Express.js on a free AWS EC2 instance, using NGINX as a reverse proxy
Table of contents
- What is AWS EC2?
- What is NGINX?
- Step 1: Launching an EC2 Instance
- Step 2: Connect to Your EC2 Instance via SSH
- Step 3: Install NGINX and Deploy App
- Step 4: Configure NGINX to Reverse Proxy to Node.js
- Test the URL Shortener
- Wrapping Up
What is AWS EC2 (in simple terms):
Amazon EC2 (Elastic Compute Cloud)** is a service from AWS that lets you run virtual computers in the cloud. Instead of buying and managing physical servers, you can use EC2 to quickly set up and run a server whenever you need it. You can choose the size, operating system, and location of your server, and you only pay for what you use. It’s great for hosting websites, apps, or testing software without needing your own hardware.
What is nginx
Nginx (pronounced "engine-x") is a free, open-source web server that is used to serve websites and web apps. It’s known for being fast, reliable, and able to handle a lot of traffic. Nginx can also be used as a reverse proxy, which means it can sit in front of your application (like a Node.js app) and forward requests to it, helping with things like load balancing, security, and caching. It’s a popular tool for making websites faster and more secure.
Sign in to your AWS account. If you’re new to AWS, you can sign up for the free tier to get started without any upfront cost.
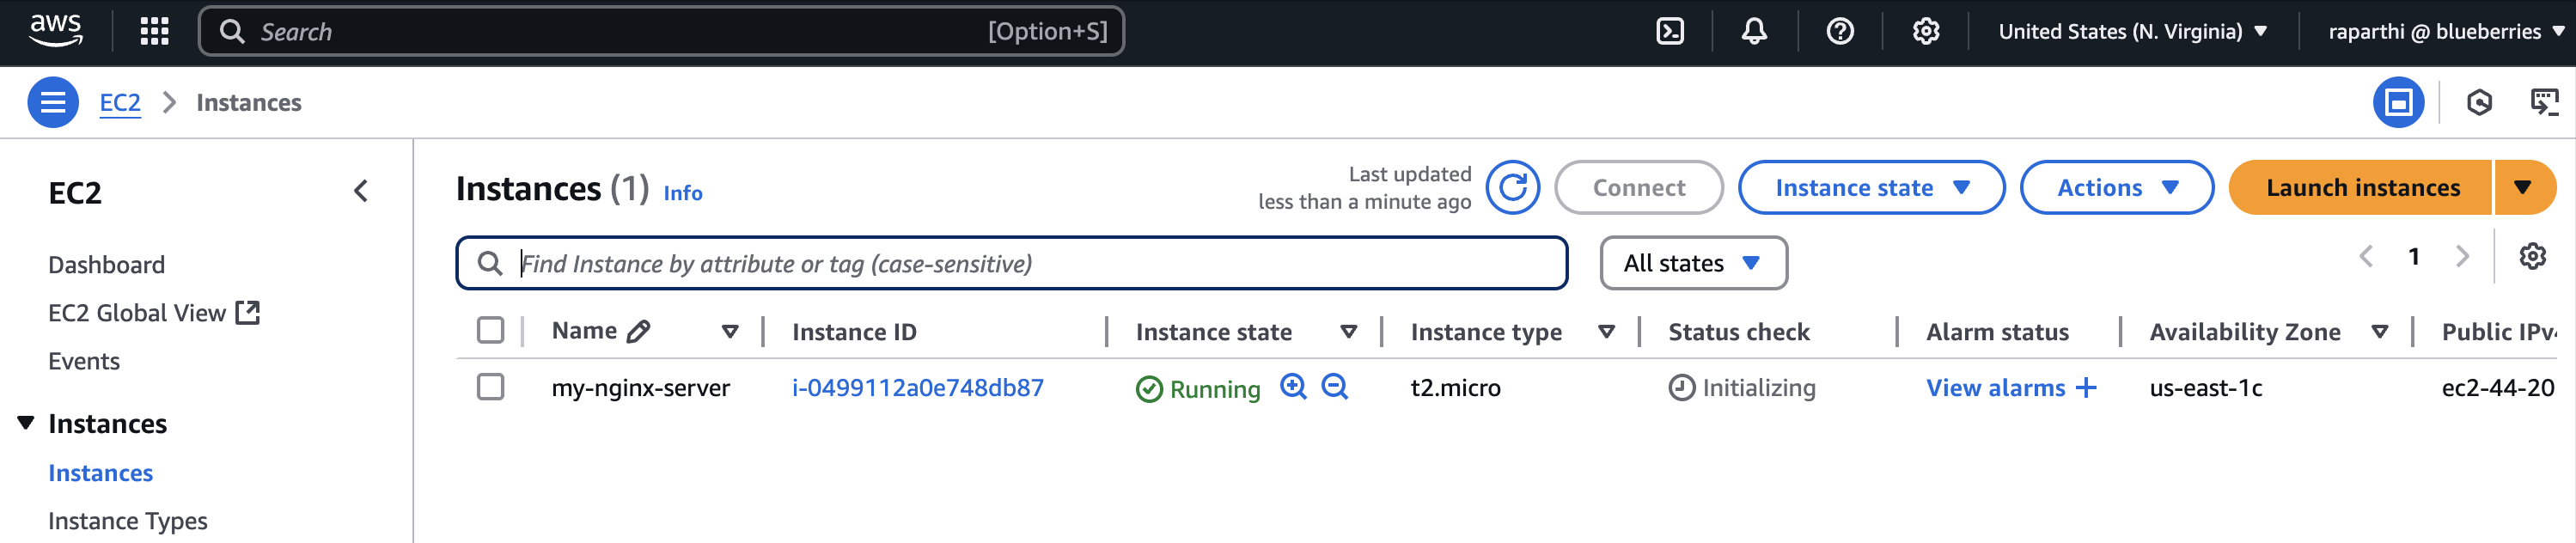
🚀 Launching an EC2 Instance on AWS (Step-by-Step)
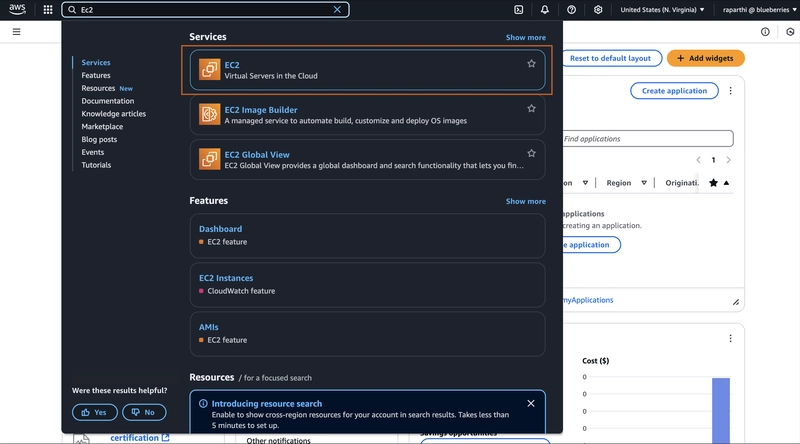
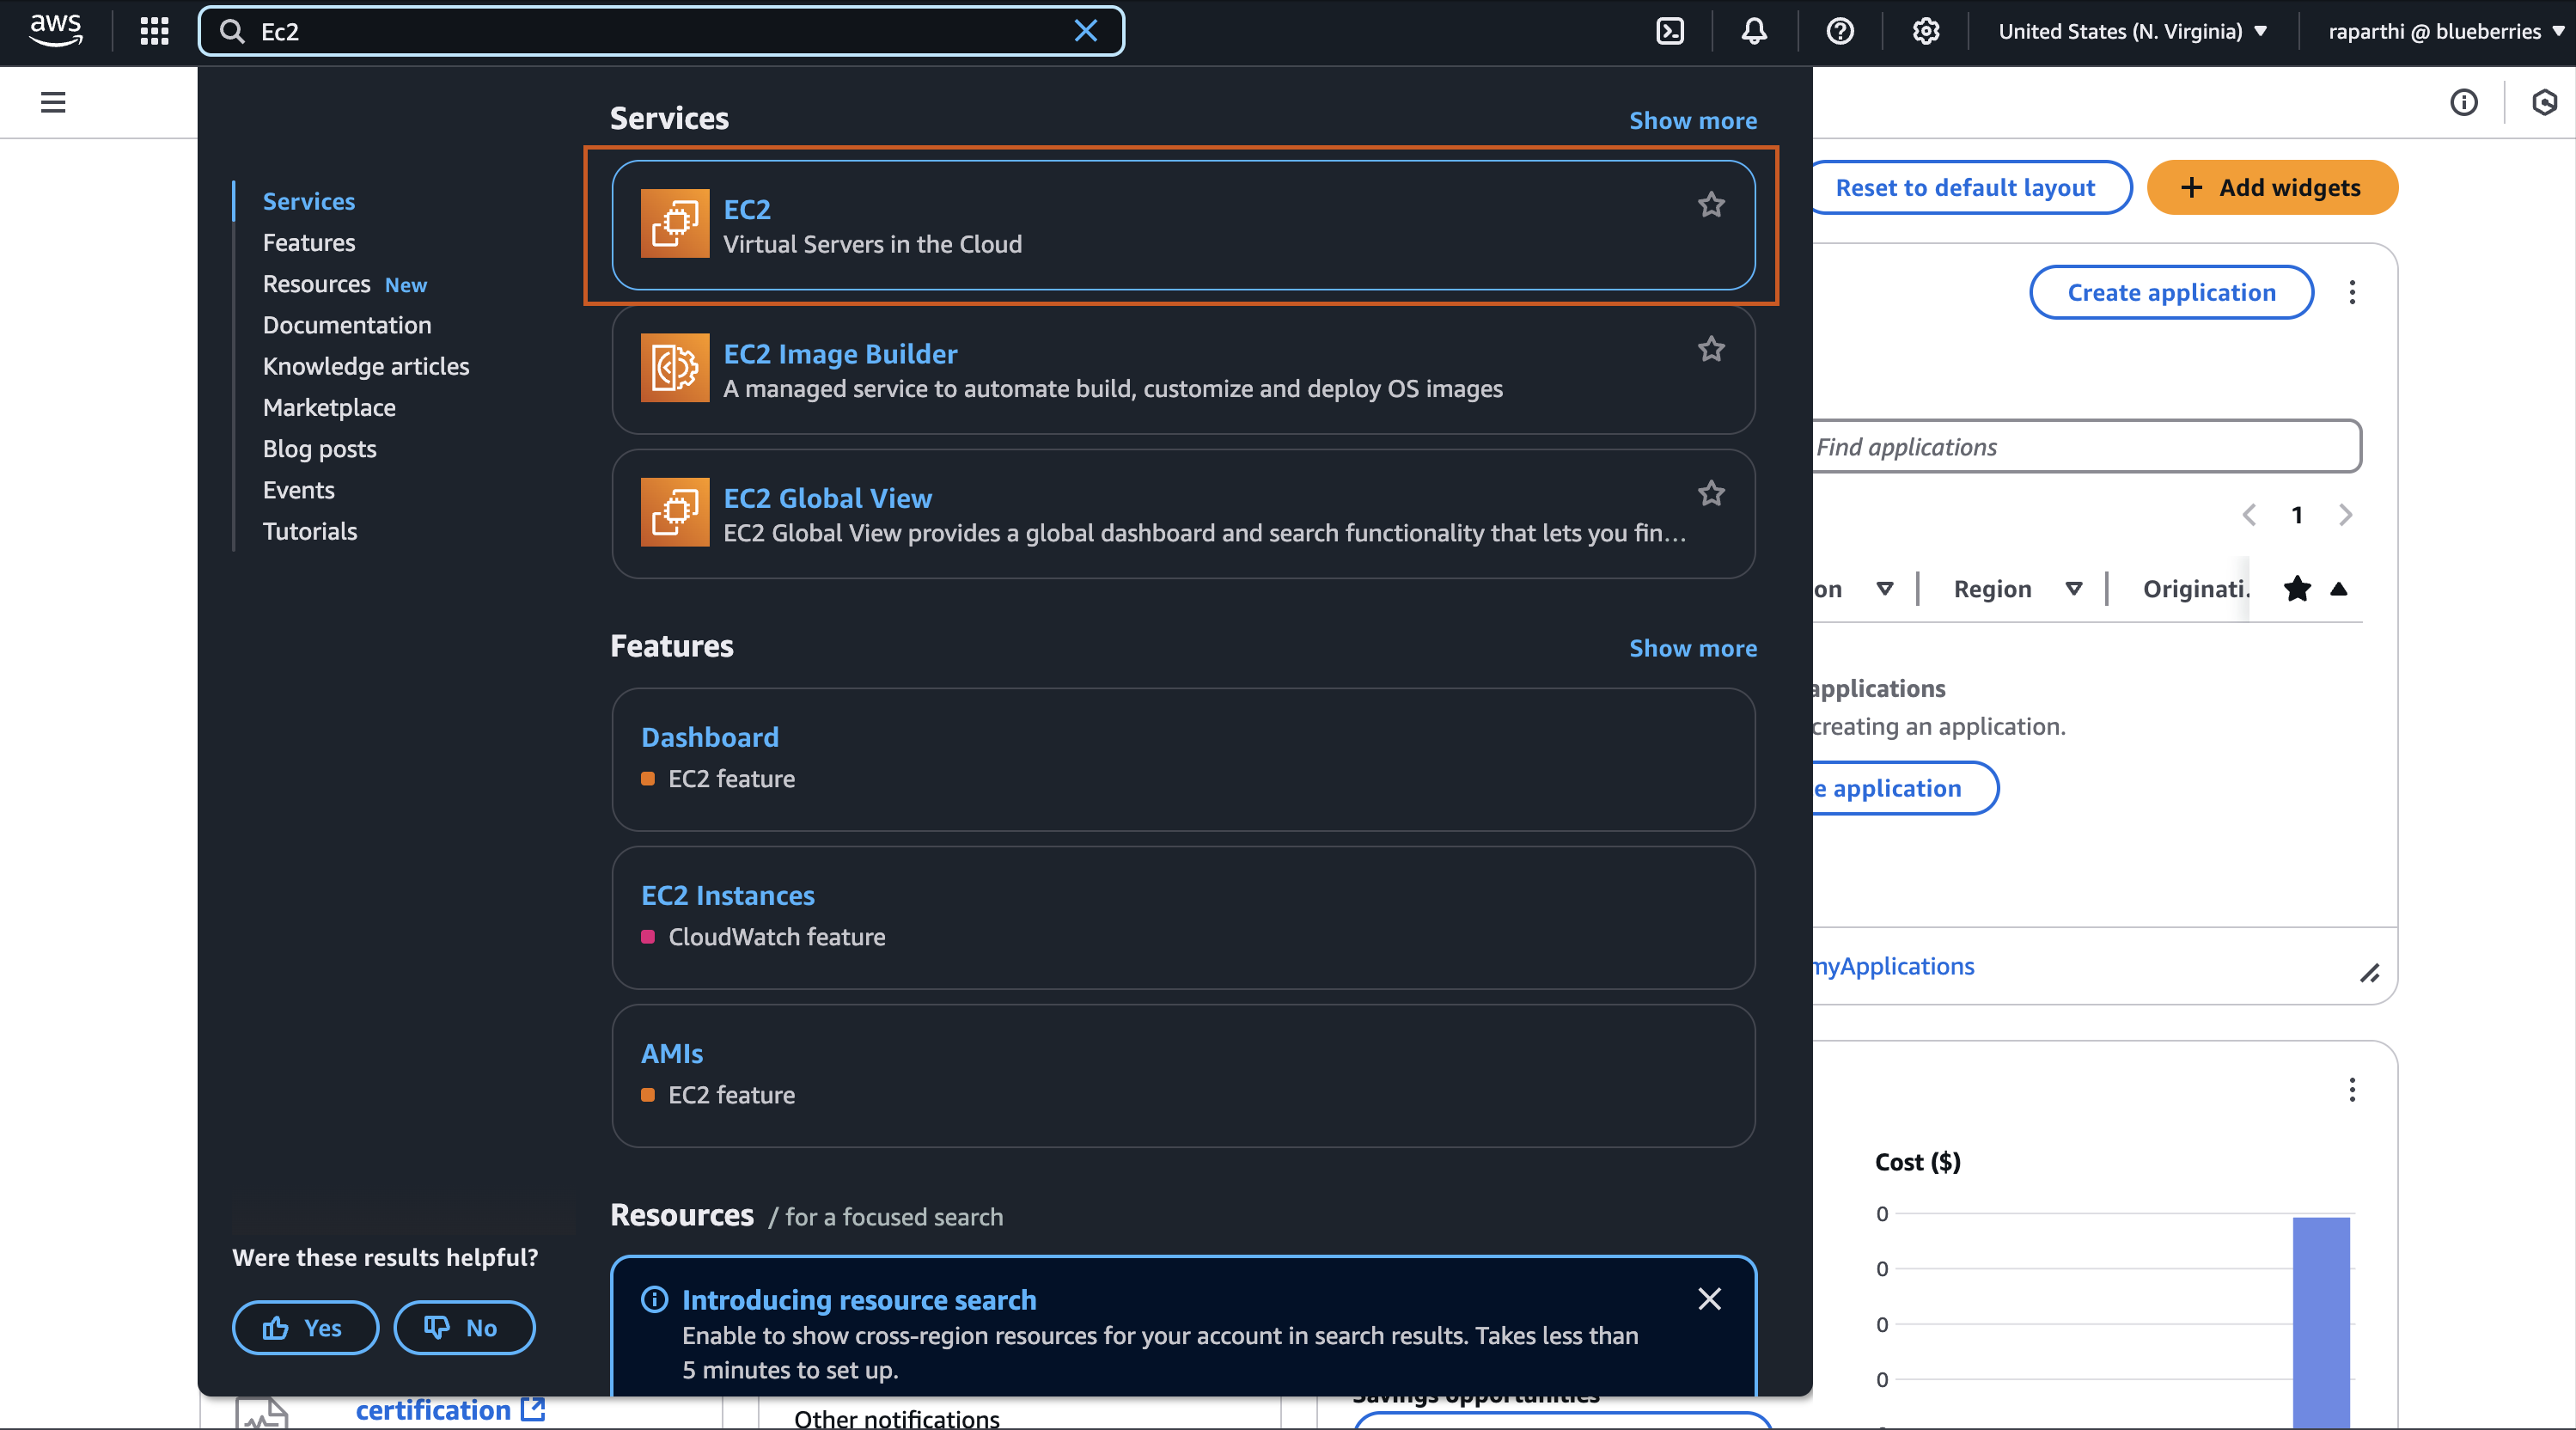
Once you're logged into your AWS Console, type EC2 in the search bar at the top and click on the EC2 option that appears.
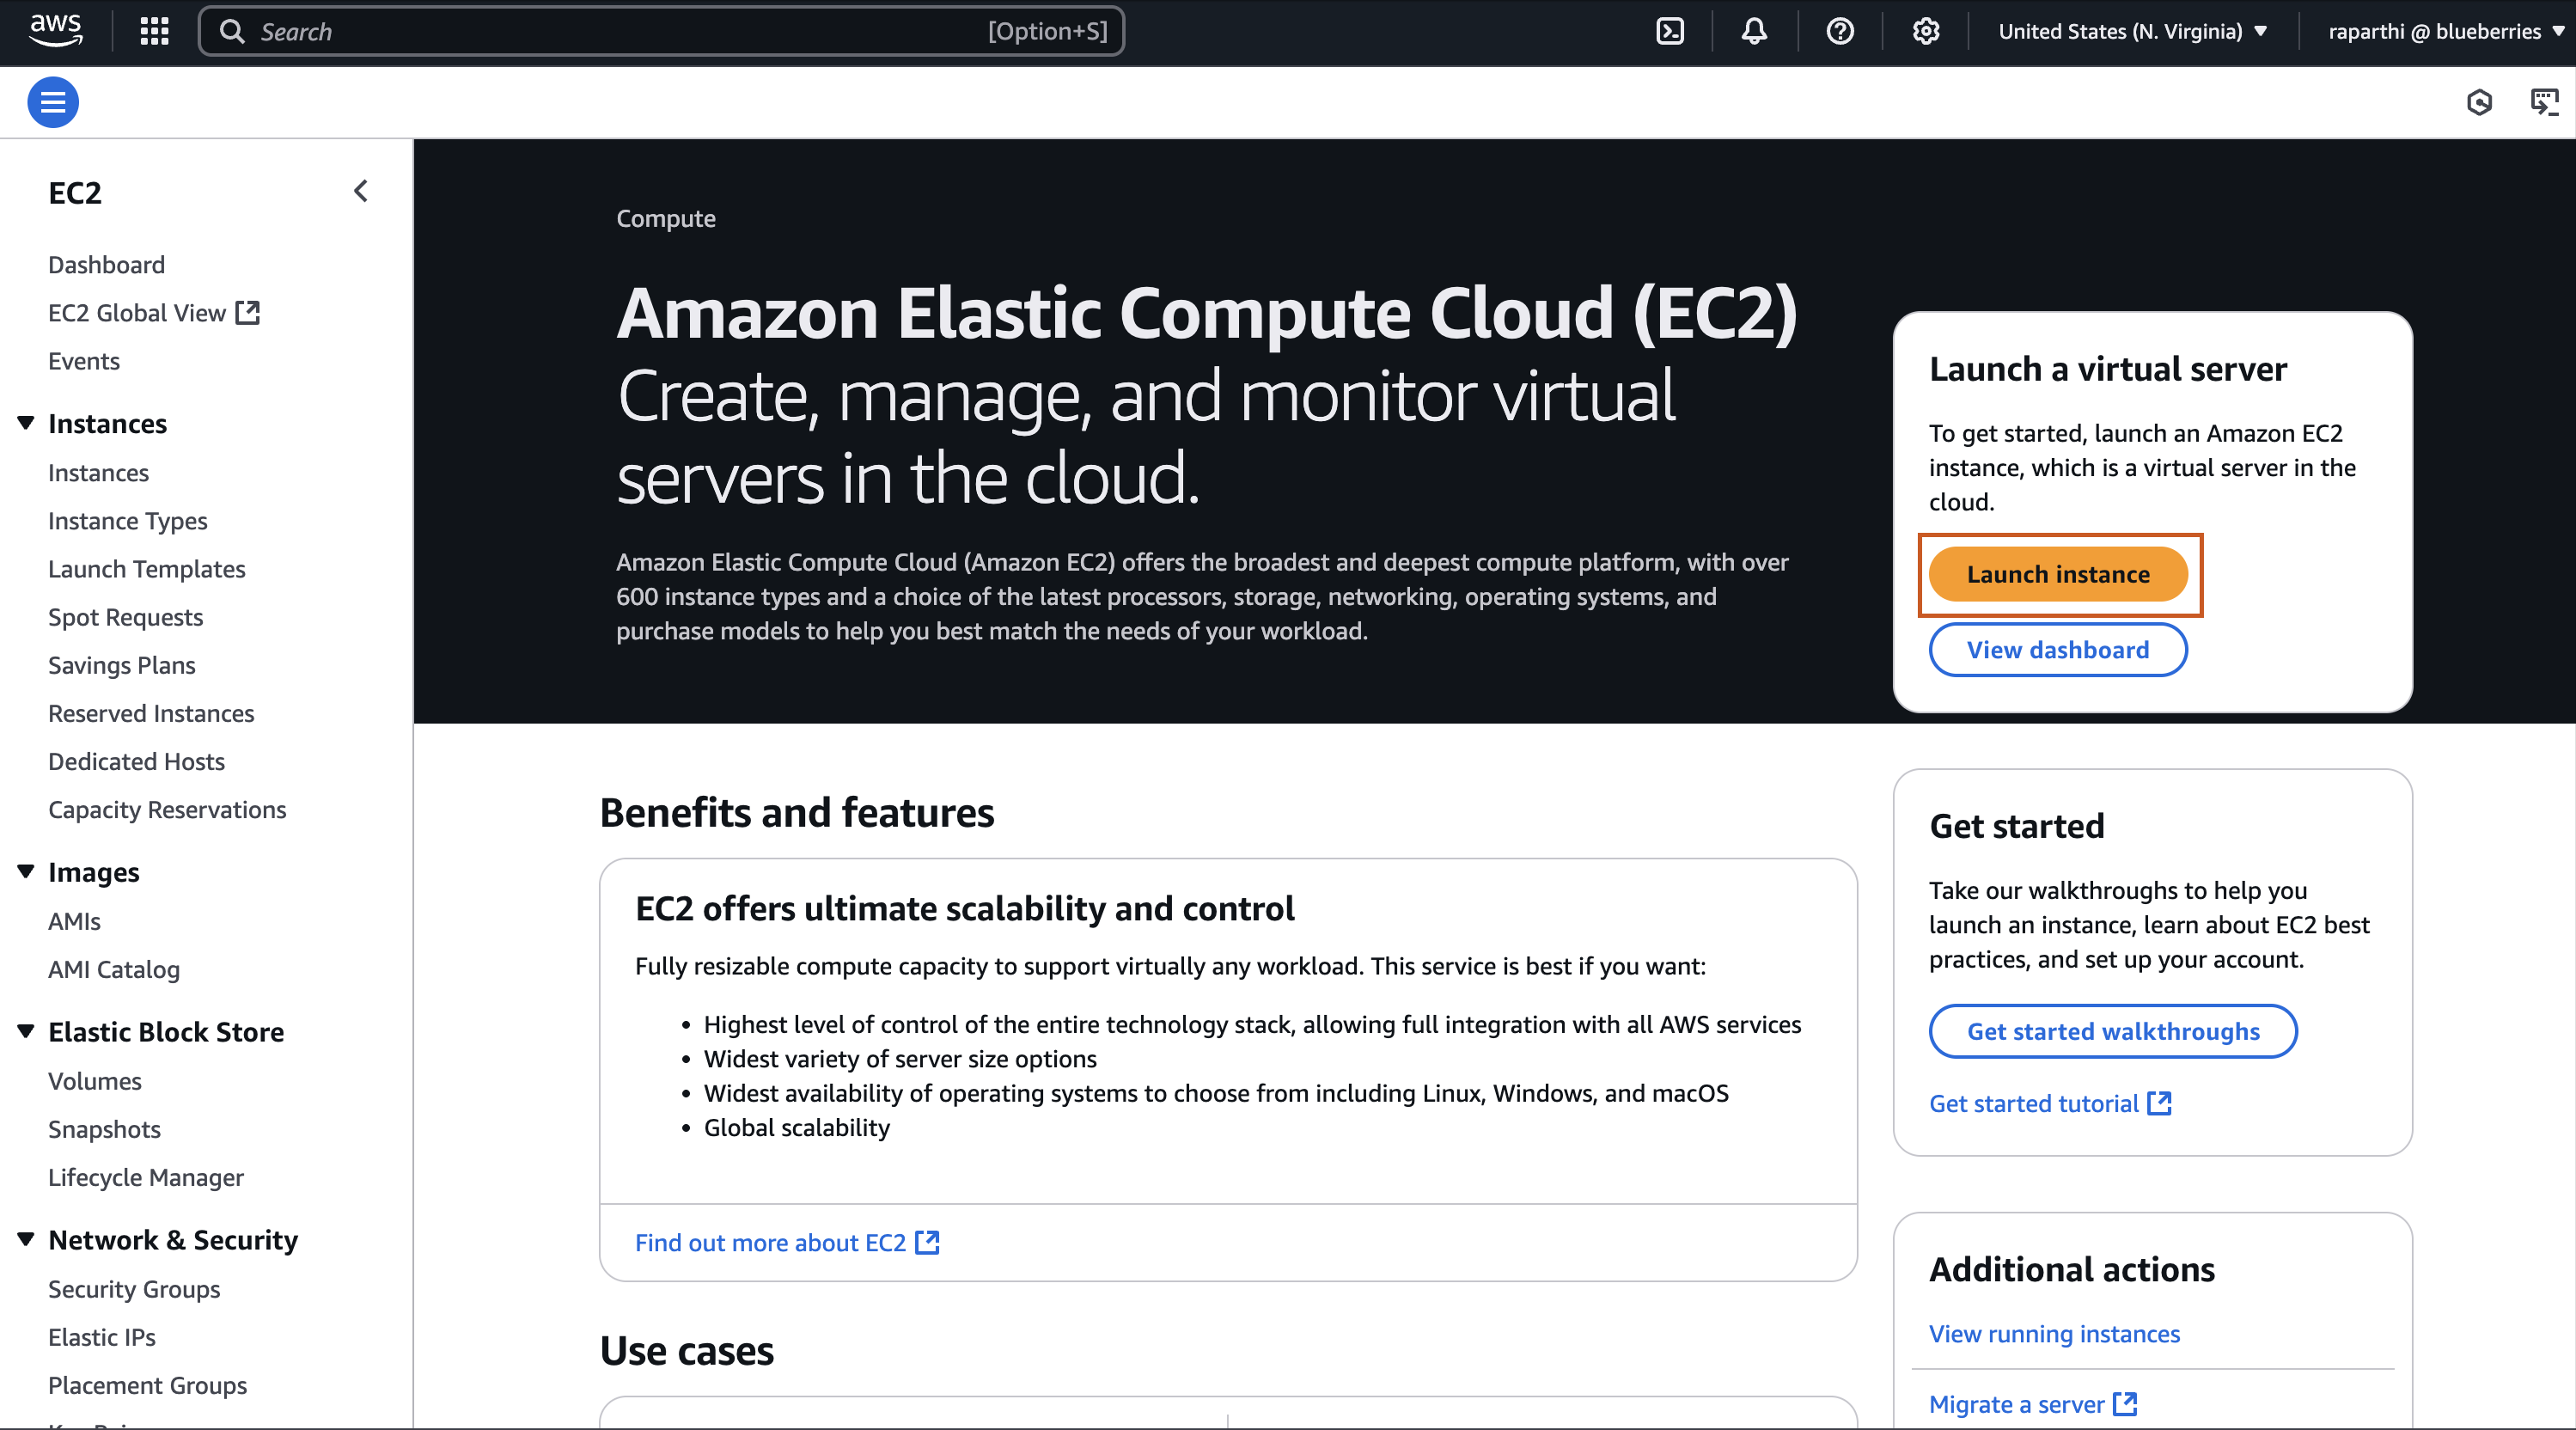
Next, click on the Launch instance button to start the setup process.
Step 1: Launching an EC2 Instance
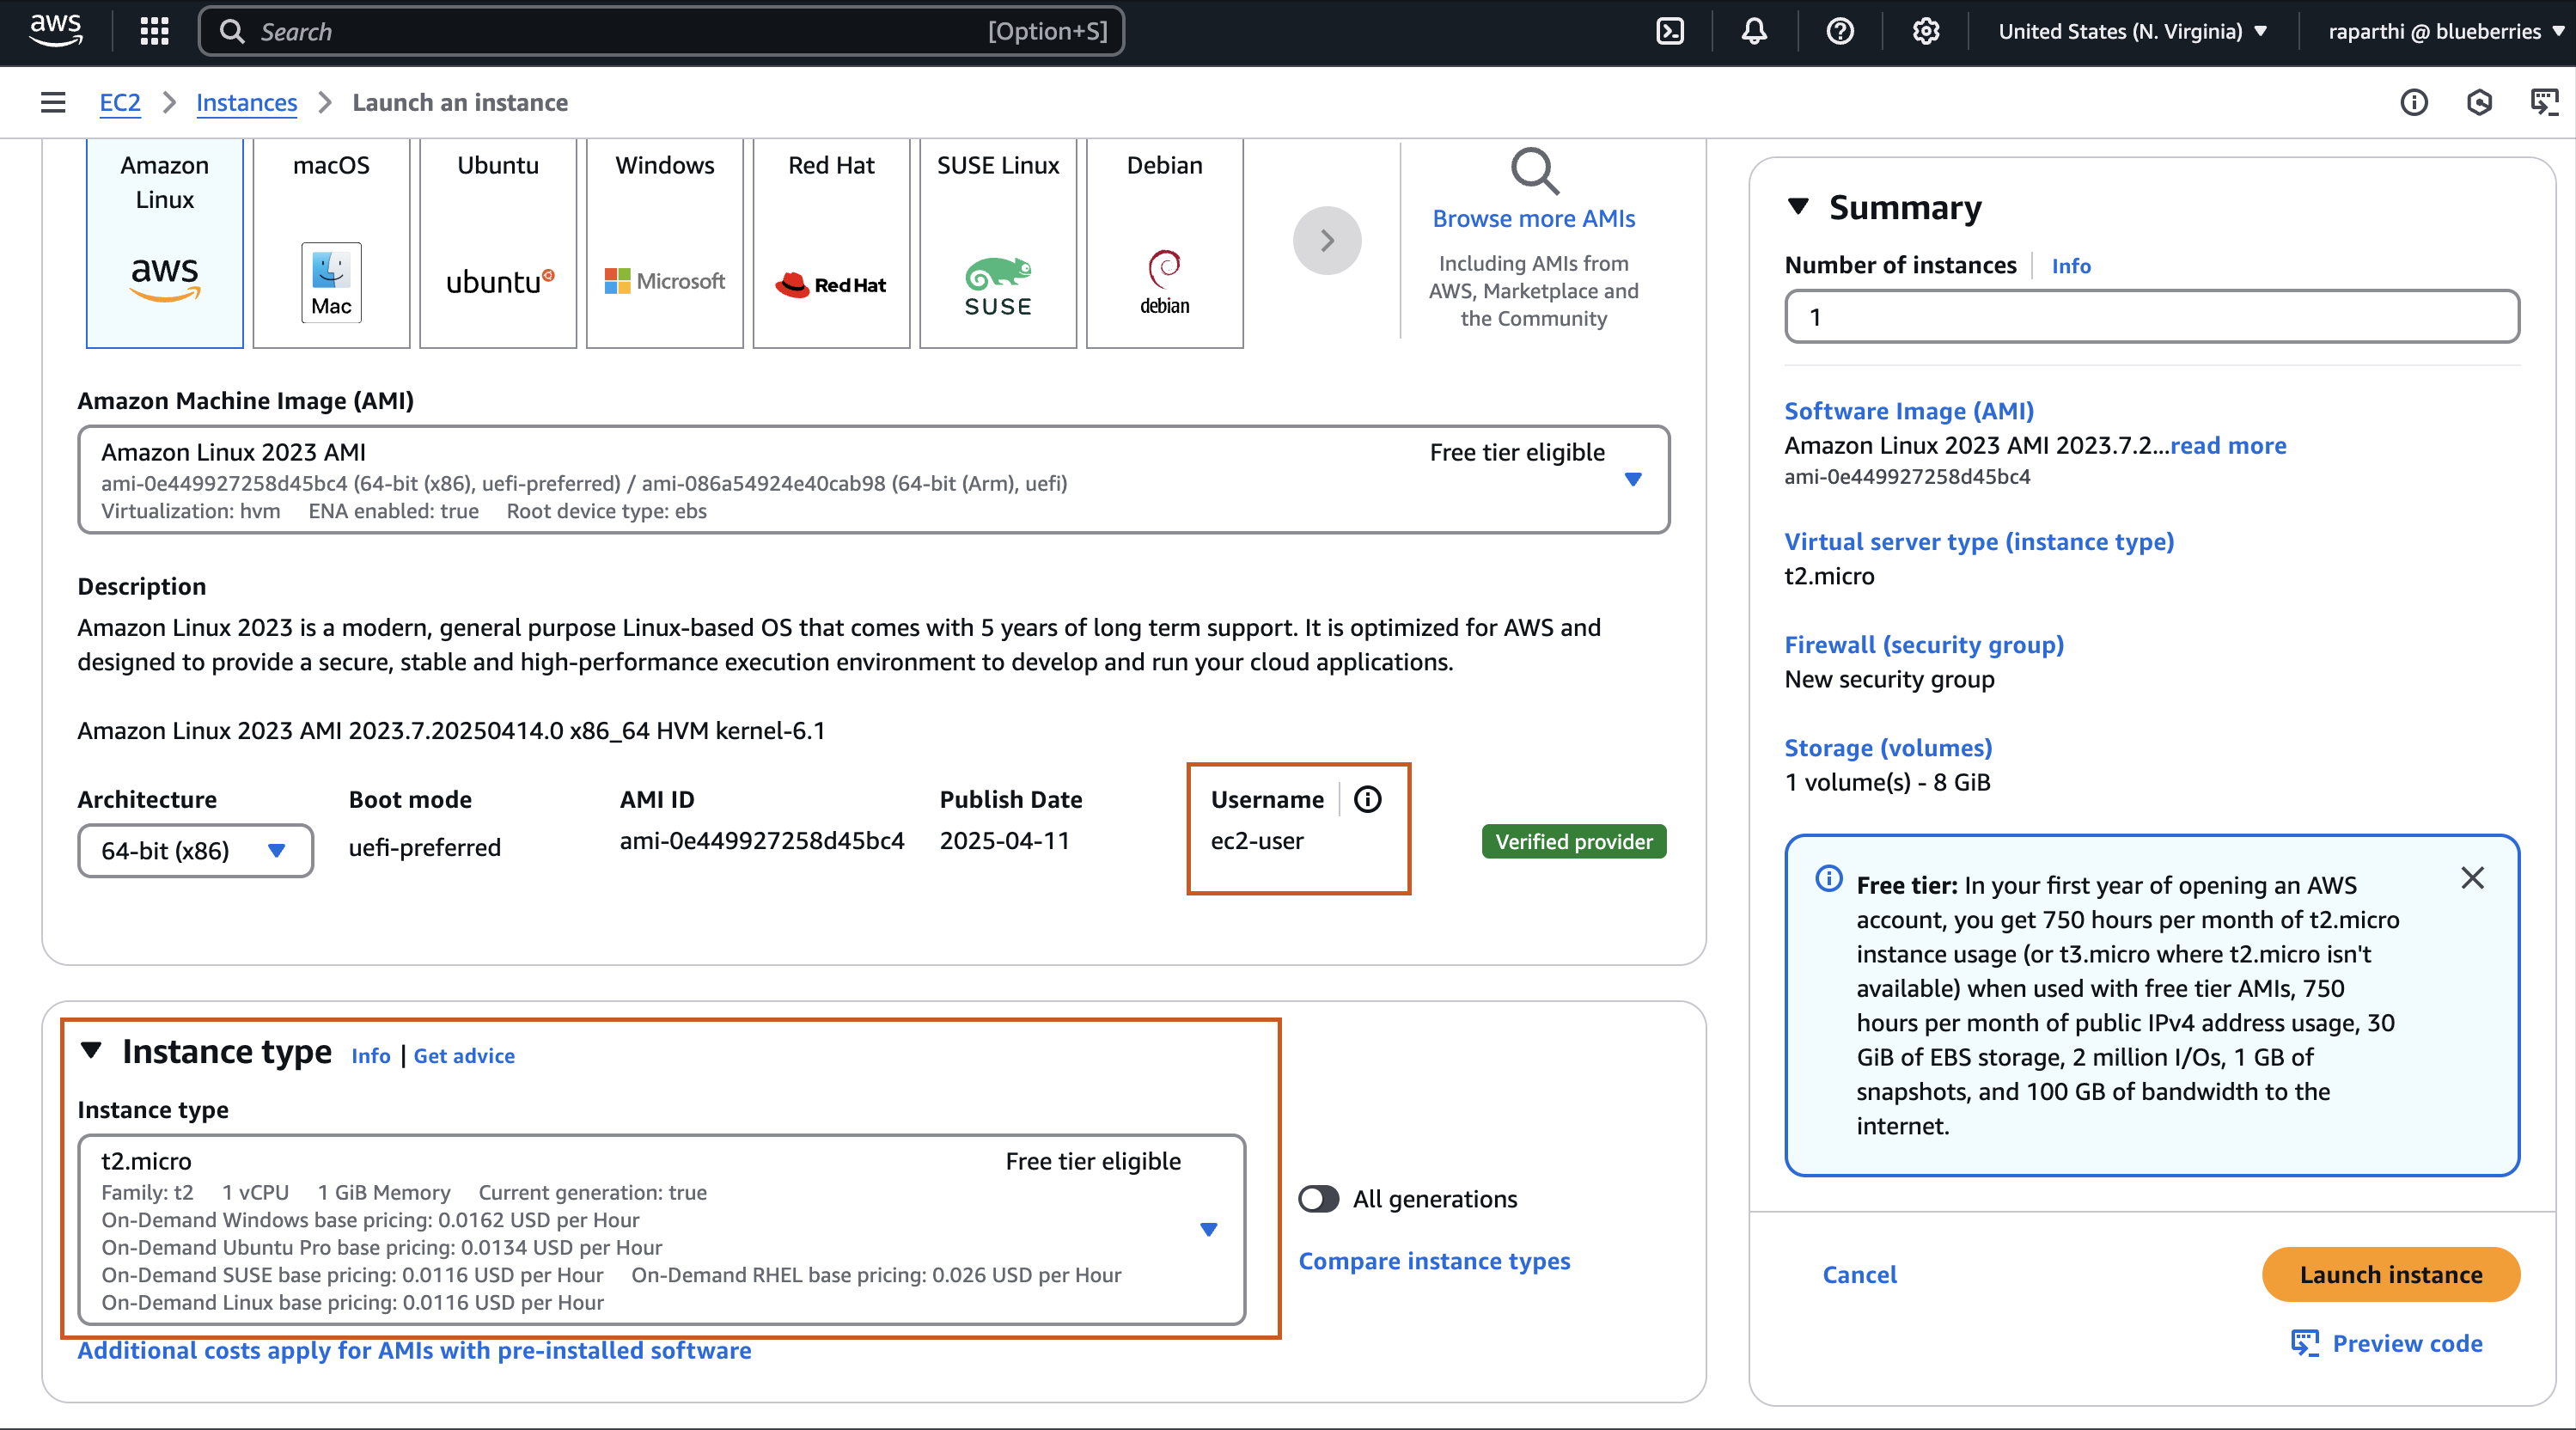
Start by giving your instance a unique name that helps you identify it easily. Then, under the operating system section, choose Amazon Linux AMI. It’s part of the free tier and is a great choice for most general-purpose use cases.
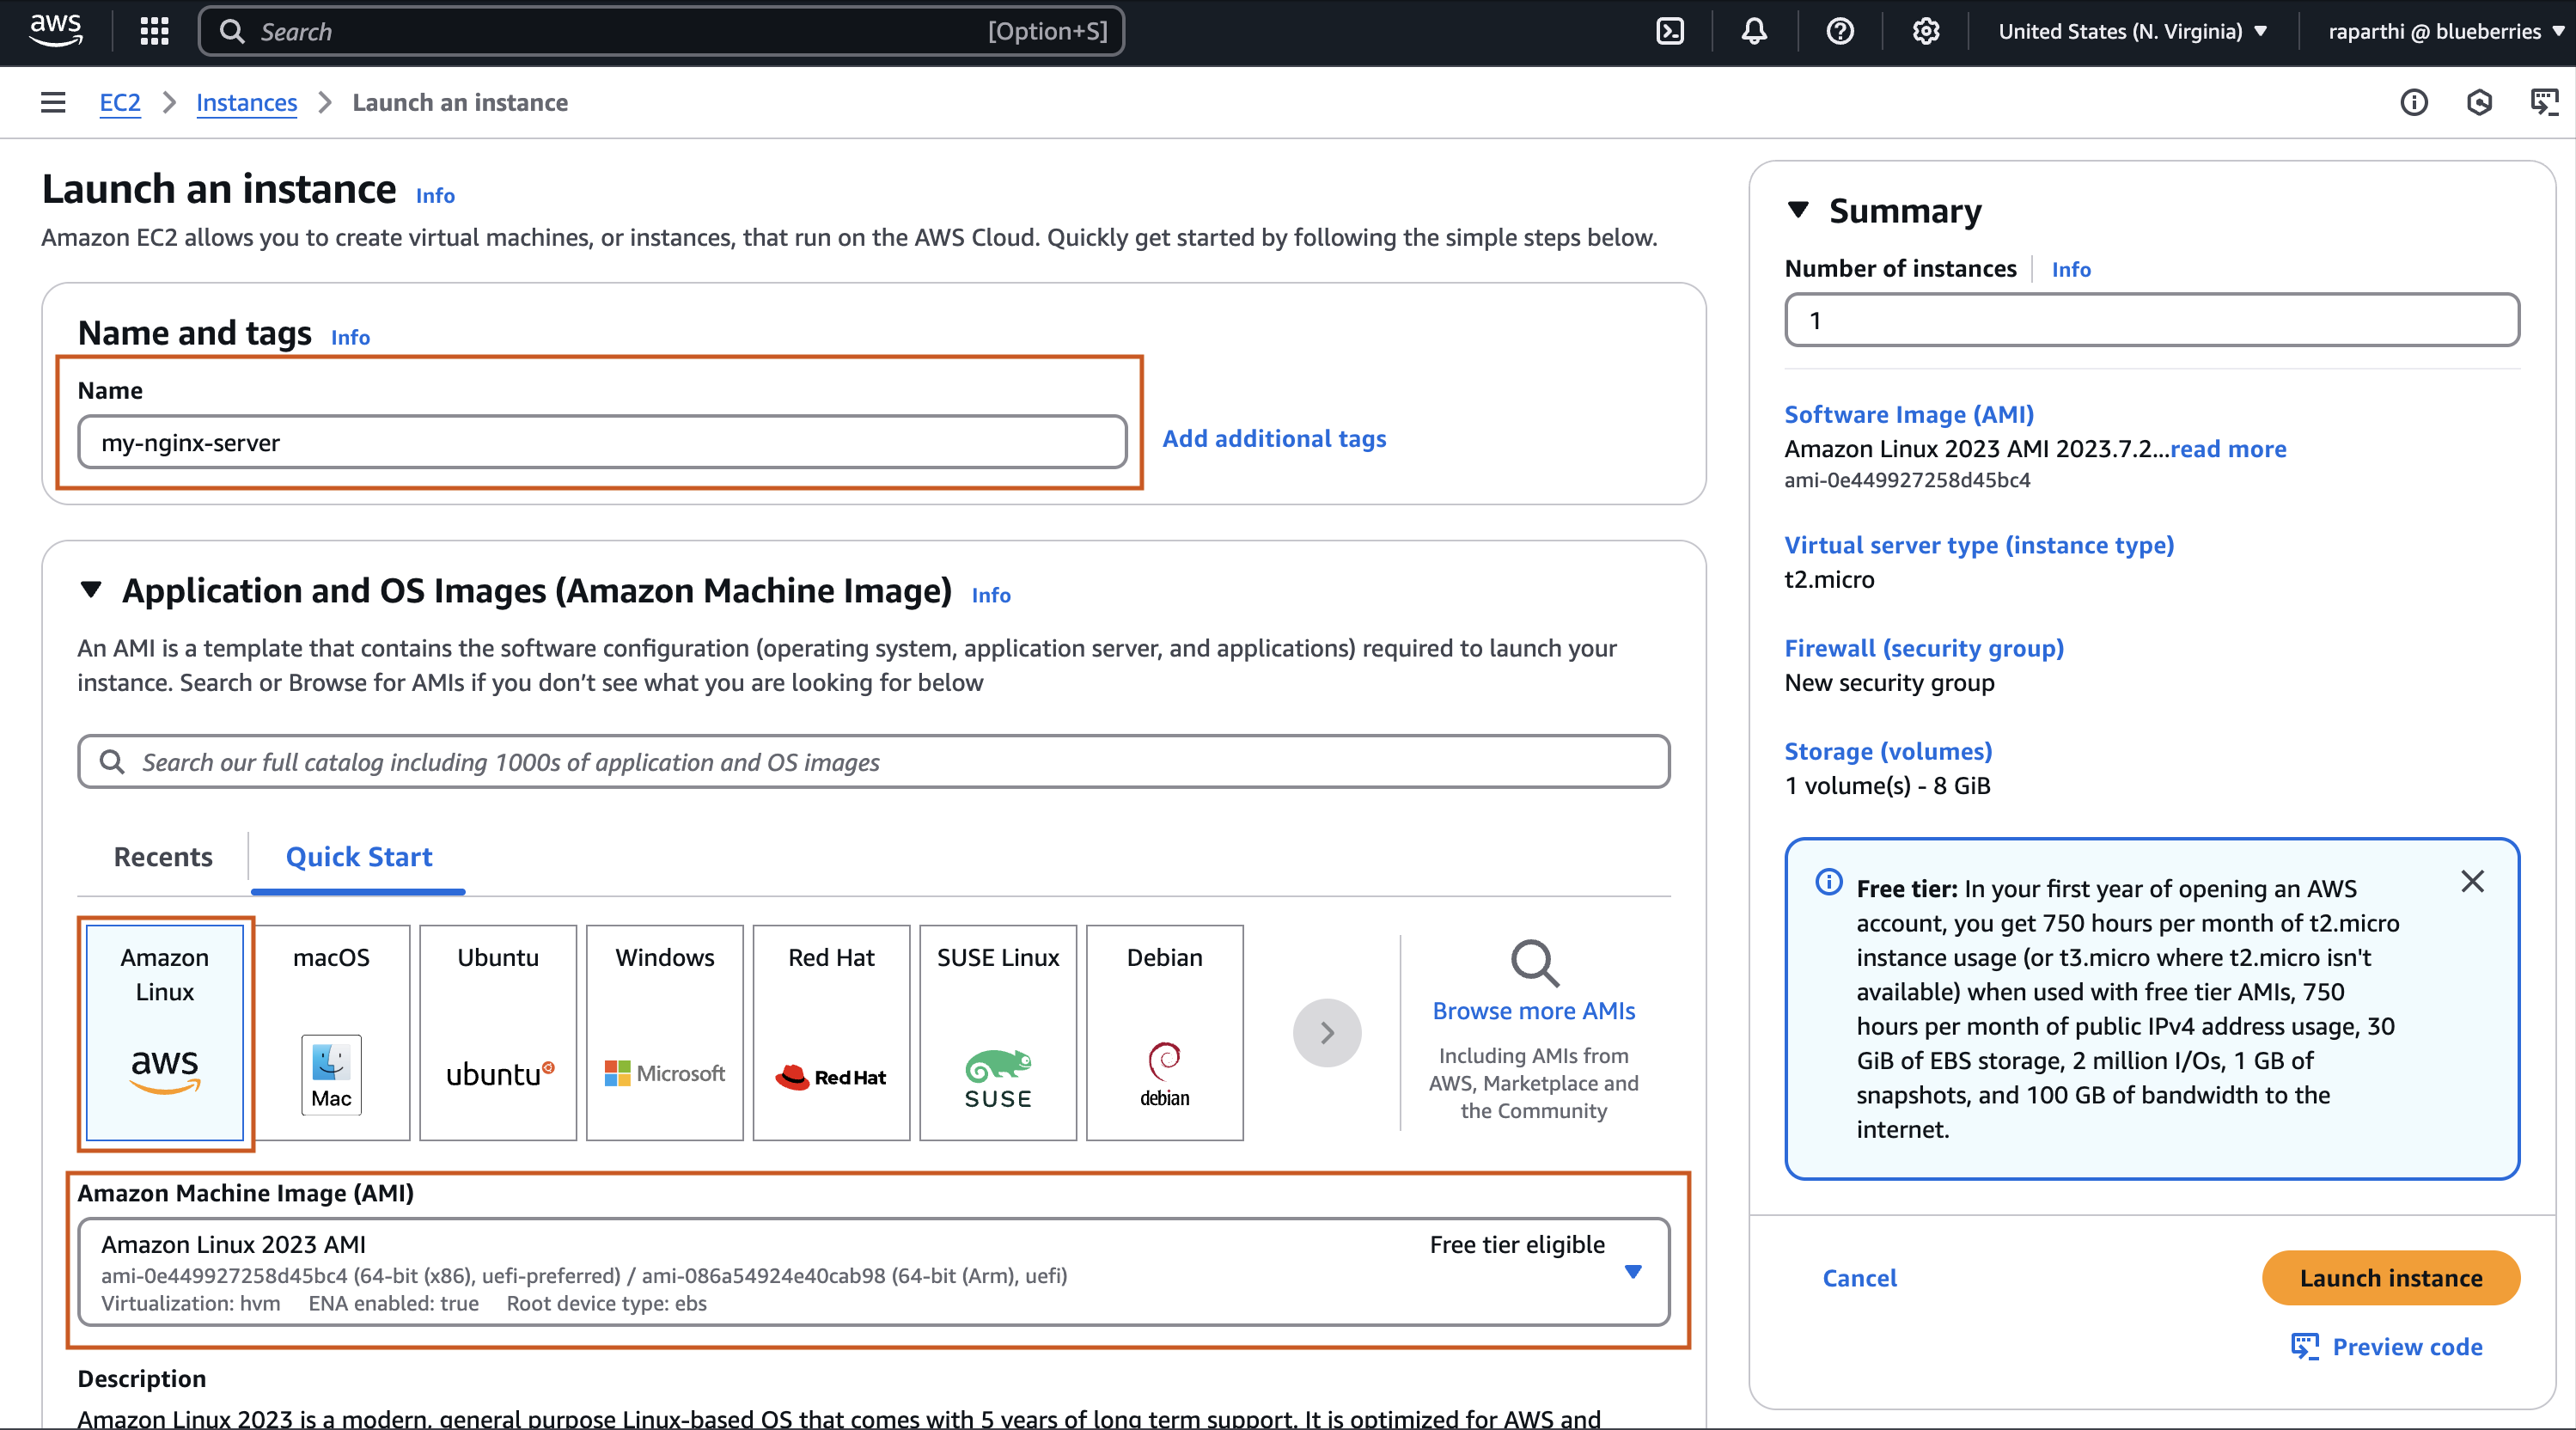
👤 Know Your Default Username and Choose the Right Instance Type
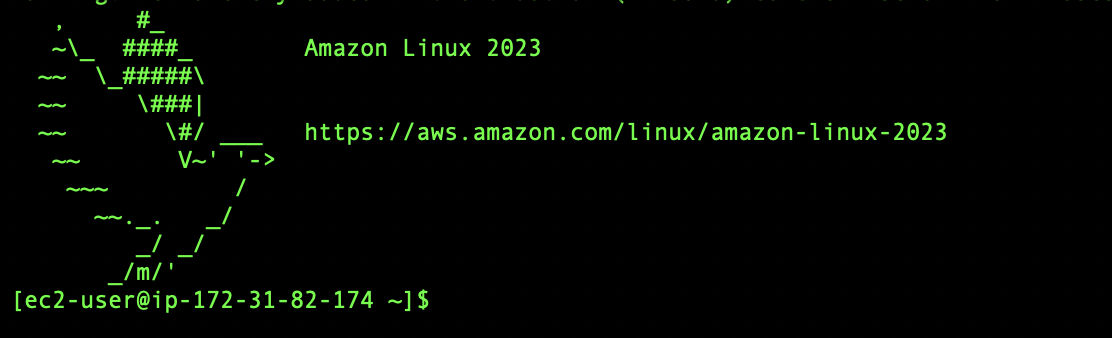
Since we’ve selected Amazon Linux AMI, the default SSH username will be ec2-user make sure to note that down, as you’ll need it when connecting to your instance later.
For the instance type, go with t2.micro. It’s part of the AWS Free Tier and is a solid choice for testing, development, or running lightweight apps without incurring costs.
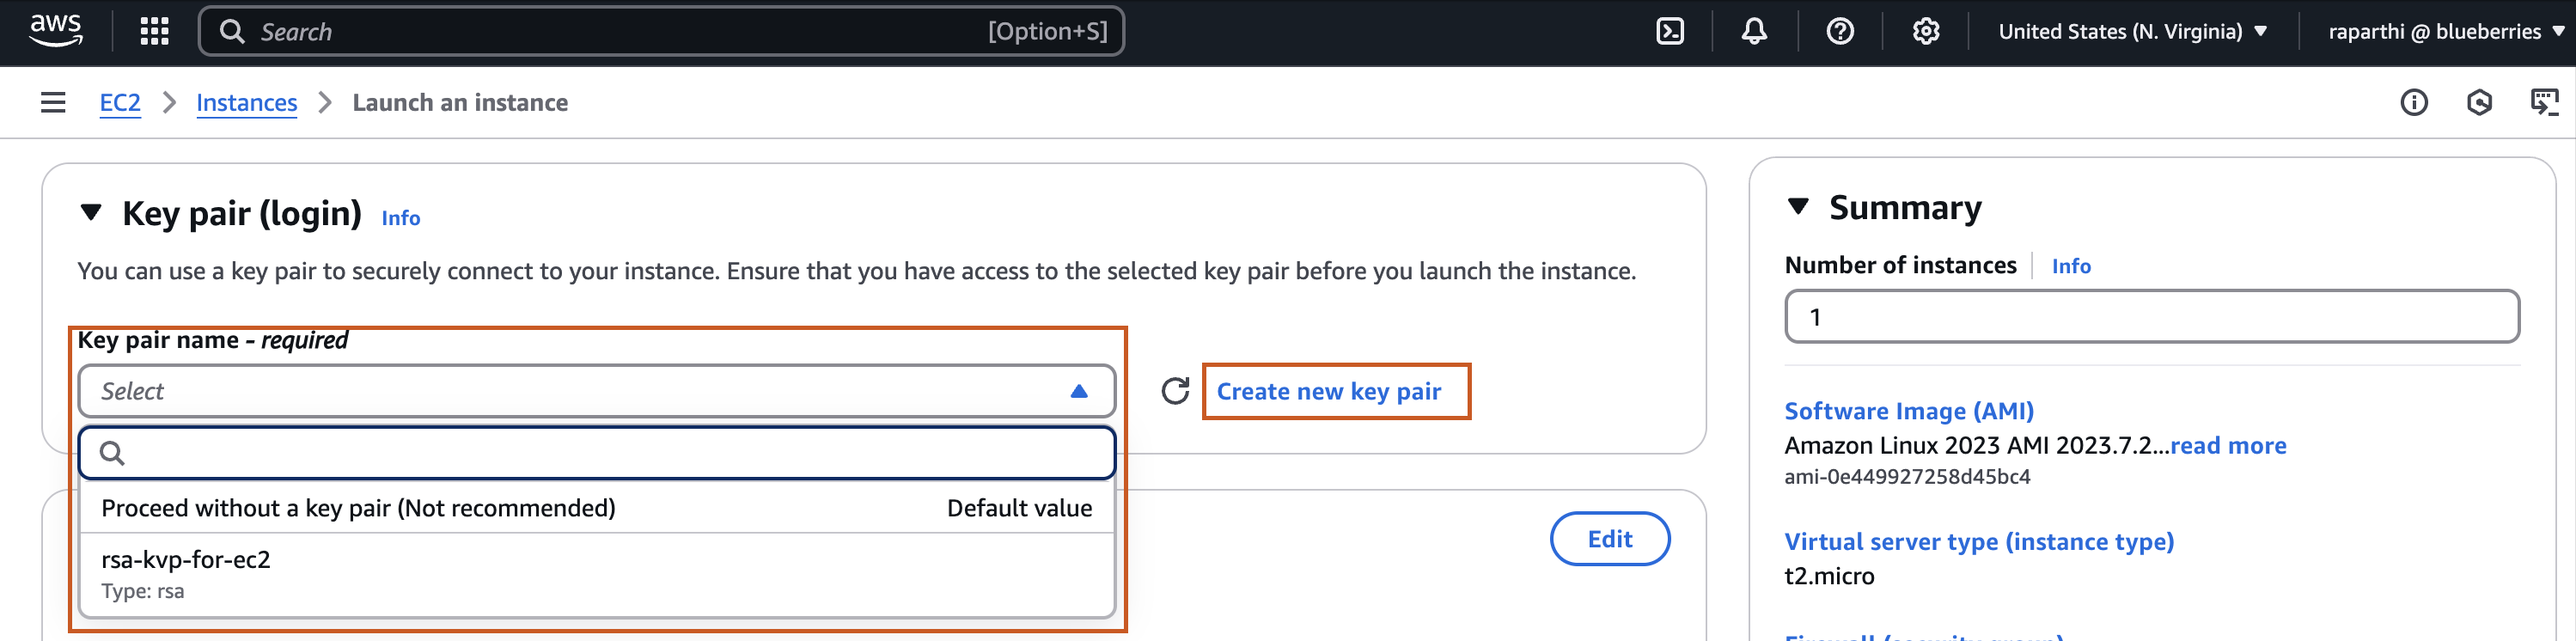
🔐 Key Pair for SSH Access
To securely connect to your instance using SSH, you’ll need a .pem file—this is your private key that grants access to the EC2 instance.
If you don’t already have one, no worries! Just create a new Key Pair during the setup process. Give it a recognizable name, select .pem as the file format, and then download it immediately.
⚠️ Important: You’ll only get one chance to download the .pem file. Store it in a safe, accessible location—you’ll need it every time you SSH into your instance.
This key is essential for authenticating your access later using a terminal or an SSH client.
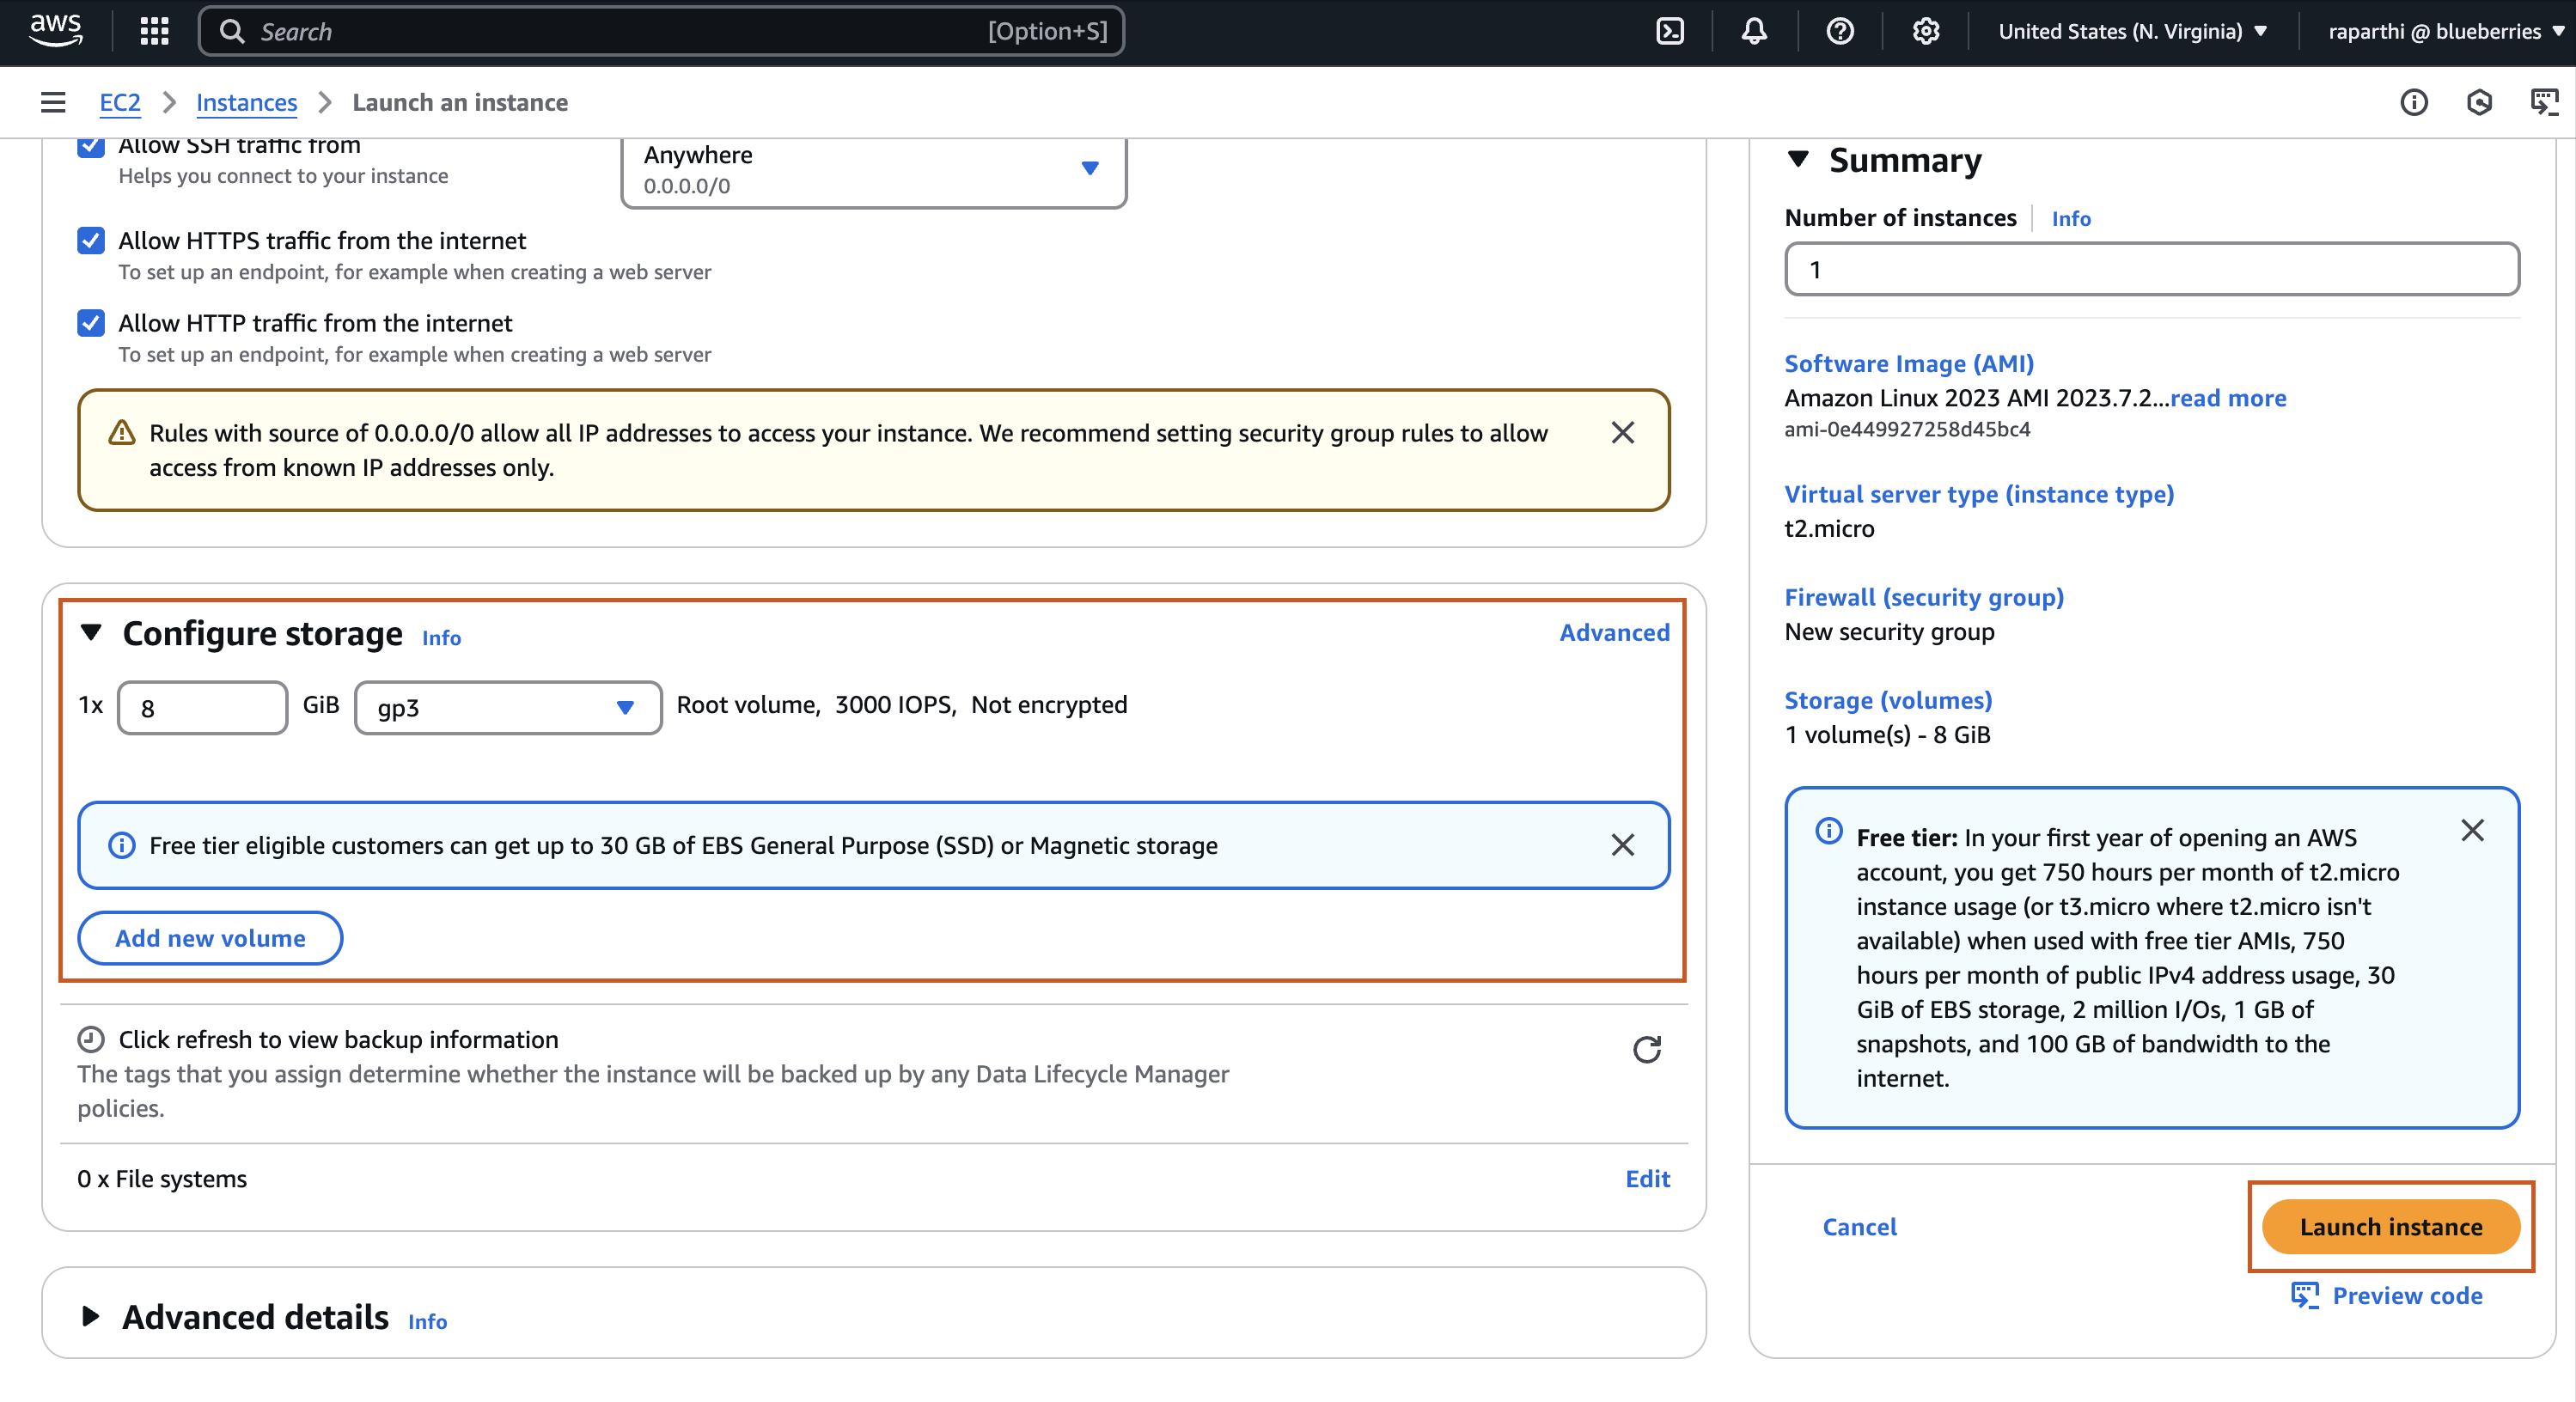
🔒 Configure Security Group (Your Virtual Firewall)
Next, it’s time to set up your Security Group, which acts like a virtual firewall controlling both inbound and outbound traffic to your instance.
For basic access, make sure to enable the following:
SSH (port 22) – so you can connect to the instance via terminal
HTTP (port 80) – for serving web traffic over an unsecured connection
HTTPS (port 443) – for secure web traffic
You can either create a new security group or reuse an existing one. If you plan on launching more instances with similar rules in the future, reusing the security group can save time.

💾 Configure Storage and Launch Your Instance
You can go ahead and stick with the default storage settings—they're usually sufficient for most basic use cases.
Once that’s done, simply click on Launch Instance!
That’s it—your EC2 instance is now up and running 🚀
Step 2: Connect to Your EC2 Instance via SSH
To connect to your EC2 instance, you’ll need the .pem file you generated earlier—this acts as your private key for secure access.
Mac or Linux users: You can simply use the terminal. Just make sure your .pem file has the correct permissions and run the SSH command (we'll cover that shortly).
Windows users: You’ll need an SSH client like MobaXterm or PuTTY, which comes with built-in SSH support.
If you're new to connecting EC2 instances on Windows, check out this detailed guide by Kedar Makode: How to Connect to EC2 Using MobaXterm
He walks through everything from setup to successful connection—super helpful for first-timers!
To connect to your EC2 instance from a Mac or Linux terminal, use the following command:
ssh -i "your-key.pem" ec2-user@your-ec2-public-ip
Replace your-key.pem with the name of your downloaded key file
Replace your-ec2-public-ip with the Public IPv4 address of your instance, you can find it in instance dashboard

that’s it—you’re now connected to your EC2 server in the cloud! 🎉
Step 3: Install NGINX and Deploy App
Before jumping into deploying our app, let’s install and configure Nginx—this will help us route traffic to our Node.js app later.
Run the following command to update all system packages:
sudo dnf update -y
Now install the Nginx server with:
sudo dnf install nginx -y
Once installed, start the Nginx server:
sudo systemctl start nginx
To verify it’s running, head over to your EC2 instance's public IP in the browser using http://your-ec2-public-ip, and you should see the default Nginx welcome page:

Clone the URL Shortener App
Let’s deploy the url-shortener repo from GitHub.
This is a basic project where we’re storing the URLs in a Map object, so the data isn’t persistent. That means once the Node.js app stops, the data is gone. But as long as your Node.js app is running, everything works just fine!
🔧 Install Node.js and Git
sudo dnf install nodejs -y

sudo dnf install git -y
📁 Clone the Repository
git clone https://github.com/blueberries4/url-shortener.git

cd url-shortener
Install the project dependencies:
npm install
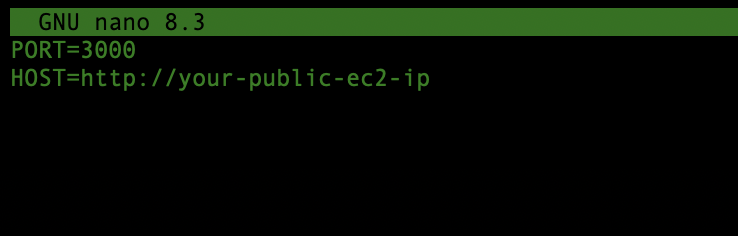
📝 Update Environment Variables
We need to modify the .env file to reflect your EC2 public IP instead of localhost. Open it using:
sudo nano .env
Replace localhost:3000 with your EC2 public IP and save the file.
🔐 Note: Never commit .env files with sensitive information to version control, especially in production environments.
🚀 Run the App
Now start the Node.js app:
node server.js
However, you still won’t be able to access it publicly until we configure Nginx to properly reverse proxy traffic to your app. That’s coming up next!
Step 4: Configure NGINX to Reverse Proxy to Node.js
📁 Create a New Nginx Config File
Create a new config file in /etc/nginx/conf.d/. You can name it anything, like app.conf:
sudo nano /etc/nginx/conf.d/app.conf
Paste the following configuration:
This configuration forwards all incoming requests on port 80 to our Node.js app running on port 3000.
server {
    listen 80;
    server_name _;

    location / {
        proxy_pass http://localhost:3000;
        proxy_http_version 1.1;
        proxy_set_header Upgrade $http_upgrade;
        proxy_set_header Connection 'upgrade';
        proxy_set_header Host $host;
        proxy_cache_bypass $http_upgrade;
    }
}
🔄 Restart Nginx
sudo systemctl restart nginx
Test the URL Shortener
✅ Verify It’s Working
Make sure your Node.js app is still running:
node server.js
Go to your EC2 instance's public IP in the browser:
http://your-ec2-public-ip
You should now see your Node.js app instead of the Nginx default page!

You can try it with any URL — just paste it in, and it’ll generate a short version for you. When you access that short URL, it will redirect you back to the original one.
🚀 Wrapping Up
And that’s it — you’ve now successfully launched a Node.js app on an EC2 instance, configured Nginx to route traffic, and built a working URL shortener! While this project uses in-memory storage for simplicity, it’s a solid foundation to build on. Next steps? Hook it up to a database, add user authentication, or even deploy it behind HTTPS with a custom domain.
✅ Don’t forget: If you’re just experimenting and no longer need the EC2 instance, make sure to stop or terminate it from the AWS console to avoid any unwanted charges. Also release any Elastic IPs you’re no longer using.
Keep experimenting and happy coding! 💻🌐