How to Integrate Machine Learning in an Android App Using Kotlin and Jetpack Compose
Machine learning is revolutionizing mobile apps by enabling intelligent features such as recommendations, predictions, and automation. In this guide, we’ll create an Iris flower classification app using TensorFlow Lite, Kotlin, Jetpack Compose, and clean architecture principles. This app predicts the species of an Iris flower based on its physical features.
What Are We Building?

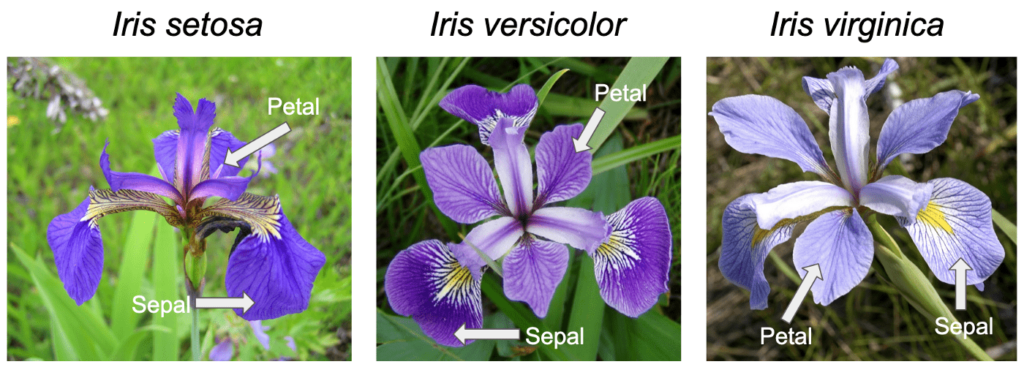
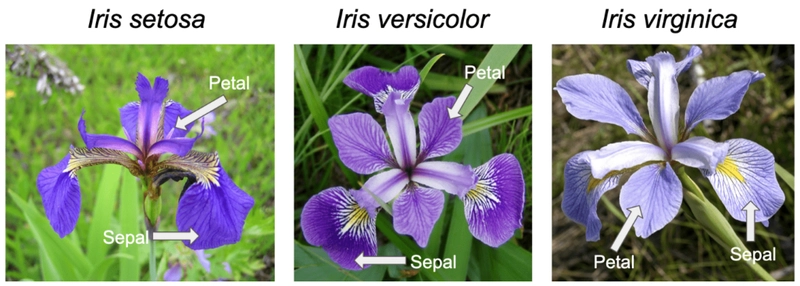
Image courtesy: embedded-robotics.com
The app we’re building is a Flower Species Predictor. It allows users to input four features of an Iris flower:
- Sepal length
- Sepal width
- Petal length
- Petal width
The app uses a pre-trained machine learning model to predict the flower species:
- Setosa
- Versicolor
- Virginica
Purpose and Usage
- Educational Tool: Demonstrates the end-to-end process of integrating machine learning into a mobile app.
- Real-World Application: Can be adapted for agriculture, healthcare, or retail.
- Outcome: A modular, scalable Android app designed with MVVM architecture and built using Jetpack Compose for UI.
Part 1: Training and Converting the ML Model
1.1 Use an Online Python Tool for Code Execution
Use Google Colab to train and convert your model. Colab is free, runs in your browser, and comes pre-installed with necessary libraries like TensorFlow.
1.2 Python Code to Train and Convert the Model
Copy and paste the following Python code into a Colab notebook to train and convert the model:
from sklearn.datasets import load_iris
from sklearn.model_selection import train_test_split
from sklearn.preprocessing import StandardScaler
import tensorflow as tf

# Load and preprocess the Iris dataset
data = load_iris()
X, y = data.data, data.target

# Normalize the data for better performance
scaler = StandardScaler()
X_scaled = scaler.fit_transform(X)

# Split the data into training and testing sets
X_train, X_test, y_train, y_test = train_test_split(X_scaled, y, test_size=0.2, random_state=42)

# Build the neural network model
model = tf.keras.Sequential([
tf.keras.layers.InputLayer(shape=(4,)), # Explicit input layer
tf.keras.layers.Dense(16, activation='relu', kernel_initializer='he_normal'), # Hidden layer with He initialization
tf.keras.layers.Dropout(0.2), # Dropout for regularization
tf.keras.layers.Dense(3, activation='softmax') # Output layer for 3 classes
])

# Compile the model with appropriate loss and optimizer
model.compile(optimizer='adam', loss='sparse_categorical_crossentropy', metrics=['accuracy'])

# Train the model
model.fit(X_train, y_train, epochs=10, validation_data=(X_test, y_test))

# Save the model in keras format for later conversion
model.save('iris_model.keras')

# Save the TFLite model to a file
with open('iris_model.tflite', 'wb') as f:
f.write(tflite_model)
After running the script, download the iris_model.tflite file, which will be used in the Android app.
Part 2: Setting Up Your Android Project
2.1 Create a New Android Project
- Open Android Studio and select "New Project."
- Choose the Empty Compose Activity template.
- Set the minimum SDK to 21 or higher to ensure TensorFlow Lite compatibility.
- Click Finish to create your project.
2.2 Add TensorFlow Lite Dependencies
Add the following dependencies in your app’s build.gradle file:
dependencies {
    implementation ("androidx.lifecycle:lifecycle-viewmodel-compose:2.8.7")
    implementation ("androidx.lifecycle:lifecycle-viewmodel-ktx:2.8.7")
    implementation ("androidx.compose.ui:ui:1.7.6")
    implementation ("org.tensorflow:tensorflow-lite:2.12.0")
    implementation ("org.tensorflow:tensorflow-lite-support:0.4.0")
}
Sync the project to download the dependencies.
2.3 Add the TFLite Model
- Create an assets folder in
src/main. - Copy the
iris_model.tflitefile into theassetsfolder. - Prevent the model from being compressed by updating
build.gradle:
androidResources {
    noCompress  += "tflite"
    ignoreAssetsPattern = "!.svn:!.git:!.ds_store:!*.scc:.*:!CVS:!thumbs.db:!picasa.ini:!*~"
}
Part 3: Implementing the MVVM Architecture
3.1 Domain Layer
The Domain Layer contains the core business logic. Create a simple data class to represent predictions:
data class IrisPrediction(val label: String, val confidence: Float)3.2 Data Layer
The Data Layer integrates TensorFlow Lite to handle predictions:
import android.content.Context
import org.tensorflow.lite.Interpreter
import java.nio.MappedByteBuffer
import java.nio.channels.FileChannel

class IrisModel(context: Context) {
    private val interpreter: Interpreter

    init {
        val modelFile = context.assets.openFd("iris_model.tflite").run {
            val inputStream = createInputStream()
            val fileChannel = inputStream.channel
            fileChannel.map(FileChannel.MapMode.READ_ONLY, startOffset, declaredLength)
        }
        interpreter = Interpreter(modelFile)
    }

    fun predict(input: FloatArray): IrisPrediction {
        val output = Array(1) { FloatArray(3) }
        interpreter.run(arrayOf(input), output)
        val maxIndex = output[0].indices.maxByOrNull { output[0][it] } ?: -1
        val labels = listOf("Setosa", "Versicolor", "Virginica")
        return IrisPrediction(labels[maxIndex], output[0][maxIndex])
    }
}
3.3 Presentation Layer
ViewModel
The ViewModel manages UI state and interacts with the data layer:
import androidx.lifecycle.ViewModel
import kotlinx.coroutines.flow.MutableStateFlow
import kotlinx.coroutines.flow.StateFlow

class IrisViewModel(private val irisModel: IrisModel) : ViewModel() {
    private val _uiState = MutableStateFlow(IrisUiState())
    val uiState: StateFlow<IrisUiState> = _uiState

    fun makePrediction(features: FloatArray) {
        val prediction = irisModel.predict(features)
        _uiState.value = IrisUiState(
            features = features.toList(),
            prediction = prediction.label,
            confidence = prediction.confidence
        )
    }
}

data class IrisUiState(
    val features: List<Float> = listOf(0f, 0f, 0f, 0f),
    val prediction: String = "",
    val confidence: Float = 0f
)
Compose UI
The Compose UI consumes the ViewModel’s state. Inject the ViewModel at the Activity level and pass it to the composable:
- Activity Setup
import android.os.Bundle
import androidx.activity.ComponentActivity
import androidx.activity.compose.setContent
import androidx.lifecycle.viewmodel.compose.viewModel

class MainActivity : ComponentActivity() {
    override fun onCreate(savedInstanceState: Bundle?) {
        super.onCreate(savedInstanceState)
        val irisViewModel: IrisViewModel = viewModel() // Provide ViewModel instance here

        setContent {
            IrisApp(viewModel = irisViewModel)
        }
    }
}- Composable Function
import androidx.compose.foundation.layout.*
import androidx.compose.material3.*
import androidx.compose.runtime.*
import kotlinx.coroutines.flow.collectAsState

@Composable
fun IrisApp(viewModel: IrisViewModel) {
    val uiState by viewModel.uiState.collectAsState()

    Column(
        modifier = Modifier.fillMaxSize().padding(16.dp),
        verticalArrangement = Arrangement.spacedBy(16.dp)
    ) {
        Text("Enter Iris Features")

        uiState.features.forEachIndexed { index, value ->
            TextField(
                value = value.toString(),
                onValueChange = { newValue ->
                    val updatedFeatures = uiState.features.toMutableList()
                    updatedFeatures[index] = newValue.toFloatOrNull() ?: 0f
                    viewModel.makePrediction(updatedFeatures.toFloatArray())
                },
                label = { Text("Feature ${index + 1}") }
            )
        }

        Button(onClick = { viewModel.makePrediction(uiState.features.toFloatArray()) }) {
            Text("Predict")
        }

        if (uiState.prediction.isNotEmpty()) {
            Text("Prediction: ${uiState.prediction}")
            Text("Confidence: ${uiState.confidence}")
        }
    }
}
Conclusion
The Flower Species Predictor App is a beginner-friendly project that introduces developers to machine learning on mobile using Kotlin, Jetpack Compose, and TensorFlow Lite. It follows Android best practices and uses MVVM architecture to ensure clean separation of concerns.
Whether you're just starting out with machine learning or looking to integrate intelligent features into your Android apps, this project provides a simple yet powerful foundation.
You can find the complete Kotlin code in the open-source repository here:
👉 github.com/OmarDroid/iris-prediction
If you found this post helpful, leave a ❤️ or 🦄 and drop a comment — I’d love to hear your thoughts!
👉 I'm sharing more projects and tutorials to help fellow developers learn, build, and grow.
📬 Let’s connect:
I'm always open to feedback, collaboration, or just chatting about mobile dev and career growth 🚀


