Introduction
In modern mobile applications, social logins like Facebook have become essential for smooth user onboarding and authentication. Facebook Login offers two primary methods for integration:
- Limited Facebook Login (commonly used in specific cases like iOS).
- Standard Facebook Graph API Login
This guide explains how to integrate Facebook login in a NestJS backend, including the logic for both standard and limited Facebook login. We’ll also clarify why Limited Facebook Login is particularly useful for iOS devices but generally not required for Android.
## Prerequisites:
NestJS Setup: A NestJS backend configured with basic authentication and JWT-based tokens.

Facebook Developer Account: A Facebook App set up in the Facebook Developer Console.

Facebook SDK/Graph API Access: Proper access to Facebook's Graph API or JWT-based access tokens.

## Directory Structure

Here’s a suggested directory structure to reflect the implementation of Facebook Login, including a fallback to Limited Facebook Login. It covers services, resolvers, utilities, and related GraphQL components.


src/
│
├── auth/
│   ├── dto/
│   │   ├── input/
│   │   │   └── login.facebook.input.ts
│   ├── service/
│   │   ├── user.name.service.ts
│   │   └── facebook.login.service.ts   <-- Contains Facebook login logic (Standard + Limited login)
│   └── facebook-jwt.utils.ts            <-- Utility function for verifying Facebook JWT
│
├── http-client/
│   └── service/
│       └── http.client.service.ts       <-- Service to interact with external APIs like Facebook Graph API
│
├── stat/
│   └── stat.service.ts                 <-- Service to handle statistics (like user creation)
│
├── token/
│   └── token.service.ts                <-- Service to handle JWT token generation
│
├── repository/
│   └── user.repository.ts              <-- Repository for user data (find, create, update user data)
│
├── entities/
│   └── user.entity.ts                  <-- User schema/entity
│
├── constants/
│   └── language.ts                    <-- Language constants (e.g., `Lang.CREATE_USER`)
│
├── config/
│   ├── facebook.config.ts              <-- Facebook related configurations (optional)
│
├── logger/
│   └── logger.ts                       <-- Custom logging functionality (optional)
│
└── app.module.ts                       <-- Main module where all services and controllers are integrated
ok excited ? , now lets dive deep but here in this facebook login is only the primary focused so i am assuming you already have your setup
Step 1: Install Dependencies
You’ll need to install a few dependencies for handling HTTP requests, JWT tokens, and Facebook OAuth interactions.
npm install @nestjs/axios axios jsonwebtoken jwks-rsa @nestjs/commonStep 2: Create Required Modules and Services
Assuming your auth module already contains the necessary DTOs and endpoints, let’s focus on creating the Facebook login logic.
Create auth/facebook.login.service.ts
I have included the NestJS Logger here solely for logging errors or key steps. I believe it's better to use the NestJS Logger instead of console.log(). Additionally, this service includes my UserNameService and TokenService, which are specific to my use case and may differ in your scenario. So, please focus only on the workings and functionalities of the Facebook login.
This service will handle both Standard and Limited Facebook login methods.
import { Injectable, InternalServerErrorException, UnauthorizedException } from '@nestjs/common';
import { FacebookLoginInput } from '@auth/dto/input/login.facebook.input';
import { HttpClientService } from '@http-client/service/http.client.service';
import { TokenService } from '@token/token.service';
import { UserRepository } from '@repository/user.repository';
import { UserNameService } from '@auth/service/user.name.service';
import { verifyFacebookJwt } from '@auth/facebook-jwt.utils';
import { Logger } from '@nestjs/common';

@Injectable()
export class FacebookLoginService {
  private readonly logger = new Logger(FacebookLoginService.name);

  constructor(
    private readonly httpClientService: HttpClientService,
    private readonly tokenService: TokenService,
    private readonly userNameService: UserNameService,
    private readonly userRepository: UserRepository,
  ) {}

  async loginWithFacebook({ accessToken }: FacebookLoginInput) {
    try {
      let facebookDetails: any;

      // Try standard Facebook Graph API login first
      try {
        facebookDetails = await this.httpClientService.getFacebookDetails(accessToken);
      } catch (standardLoginError) {
        this.logger.warn('Standard Facebook login failed. Attempting limited login.', {
          error: standardLoginError?.message || standardLoginError,
        });

        // Fallback to limited login (JWT-based)
        try {
          facebookDetails = await verifyFacebookJwt(accessToken);
        } catch (limitedLoginError) {
          this.logger.error('Limited Facebook login also failed.', {
            error: limitedLoginError?.message || limitedLoginError,
          });
          throw new InternalServerErrorException('Could not retrieve Facebook user data');
        }
      }

      if (!facebookDetails?.sub && !facebookDetails?.id) {
        throw new InternalServerErrorException('Could not retrieve Facebook user data');
      }

      // Process user data...
    } catch (error) {
      this.logger.error('Facebook login failed.', { error: error?.message || error });
      throw error instanceof UnauthorizedException ? error : new InternalServerErrorException('Facebook login failed');
    }
  }
}
Step 3: Create facebook-jwt.utils.ts
This utility handles JWT verification for Limited Facebook login.
here in this we will verify the token which will provide my mobile-user and in the process of verification instead of doing just jwt.decode() follow this process to verify because we need to check key and issuer too .
What jwt.decode() Does:
The jwt.decode() function only decodes the token payload without:
- Verifying the token’s signature
- Validating the token's authenticity
- Checking the issuer
- Checking expiration
This means anyone can tamper with the token payload, and jwt.decode() will still return data without any validation. This is dangerous in authentication systems.
Why We Should Use jwt.verify() Instead:
To ensure the integrity, authenticity, and trustworthiness of the Facebook-issued JWT, we must use jwt.verify() like this:
import * as jwt from 'jsonwebtoken';
import { UnauthorizedException } from '@nestjs/common';

export async function verifyFacebookJwt(token: string): Promise {
  const jwksClient = jwksLocalClient({
    jwksUri: 'https://www.facebook.com/.well-known/oauth/openid/jwks',
  });

  return new Promise((resolve, reject) => {
    jwt.verify(
      token,
      async (header, callback) => {
        const key = await jwksClient.getSigningKey(header.kid);
        const signingKey = key.getPublicKey();
        callback(null, signingKey);
      },
      {
        algorithms: ['RS256'],
        issuer: ['https://facebook.com', 'https://graph.facebook.com'],
      },
      (err, decoded) => {
        if (err) {
          reject(new UnauthorizedException('Invalid Facebook token.'));
        }
        resolve(decoded);
      },
    );
  });
}
the above is the main part so lets break it down with proper explanation
Verifying the Signature (with JWKS)
Facebook signs JWTs using a public-private key pair. To verify the token, we:
Fetch Facebook’s public key from its JWKS endpoint:https://www.facebook.com/.well-known/oauth/openid/jwks
Use that key to validate the token’s signature.
If someone modifies the token payload, the signature won't match, and verification will fail.
- Security benefit: Confirms the token is issued by Facebook and hasn’t been tampered with.
Validating the Issuer (issuer Claim)
The issuer claim tells us who issued the token. In this case, it should always be:
https://www.facebook.com
When we use jwt.verify() with issuer: 'https://www.facebook.com', it ensures that:
- The token really came from Facebook
- It hasn’t been faked or generated by a malicious third party
- If the token’s iss claim doesn’t match, it gets rejected.
Validating Expiration, Audience, and Algorithm
jwt.verify() also checks:
- If the token has expired (exp)
- The correct algorithm was used (RS256)
- Optional: whether the token is meant for your app (audience claim)
This full validation makes it safe to trust the token and use its payload to identify the user.
Step :3 Create http.client.service.ts
This service calls Facebook's Graph API to retrieve user profile information. This is the standard method used in most Android and web-based applications.
yes we can do this too and this is what we called as Standard Facebook Graph API Login
it will work for android and web based application in this way .
import { Injectable } from '@nestjs/common';
import { HttpService } from '@nestjs/axios';
import { lastValueFrom } from 'rxjs';
import { UnprocessableEntityException } from '@nestjs/common';
@Injectable()
export class HttpClientService {
constructor(private readonly httpService: HttpService) {}
async getFacebookDetails(accessToken: string) {
try {
const response: any = await lastValueFrom(
this.httpService.get(
`https://graph.facebook.com/me?fields=id,name,picture,email&access_token=${accessToken}`,
),
);
return response.data;
} catch (error) {
throw new UnprocessableEntityException(error.message);
}
}
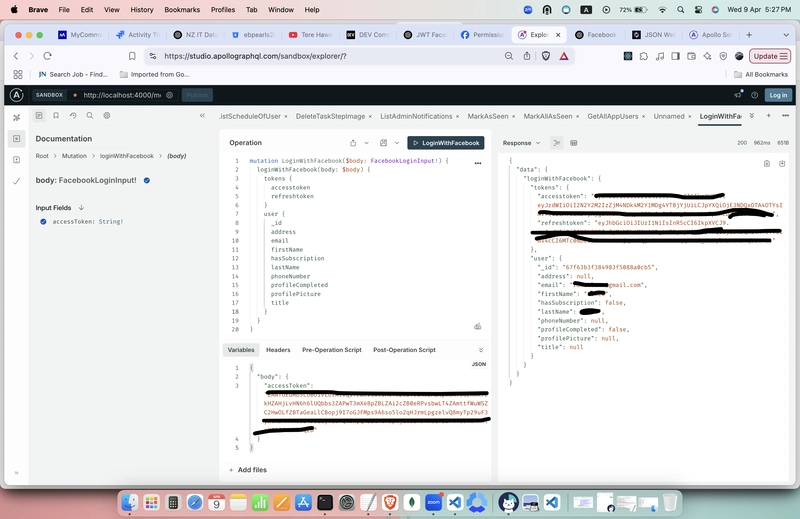
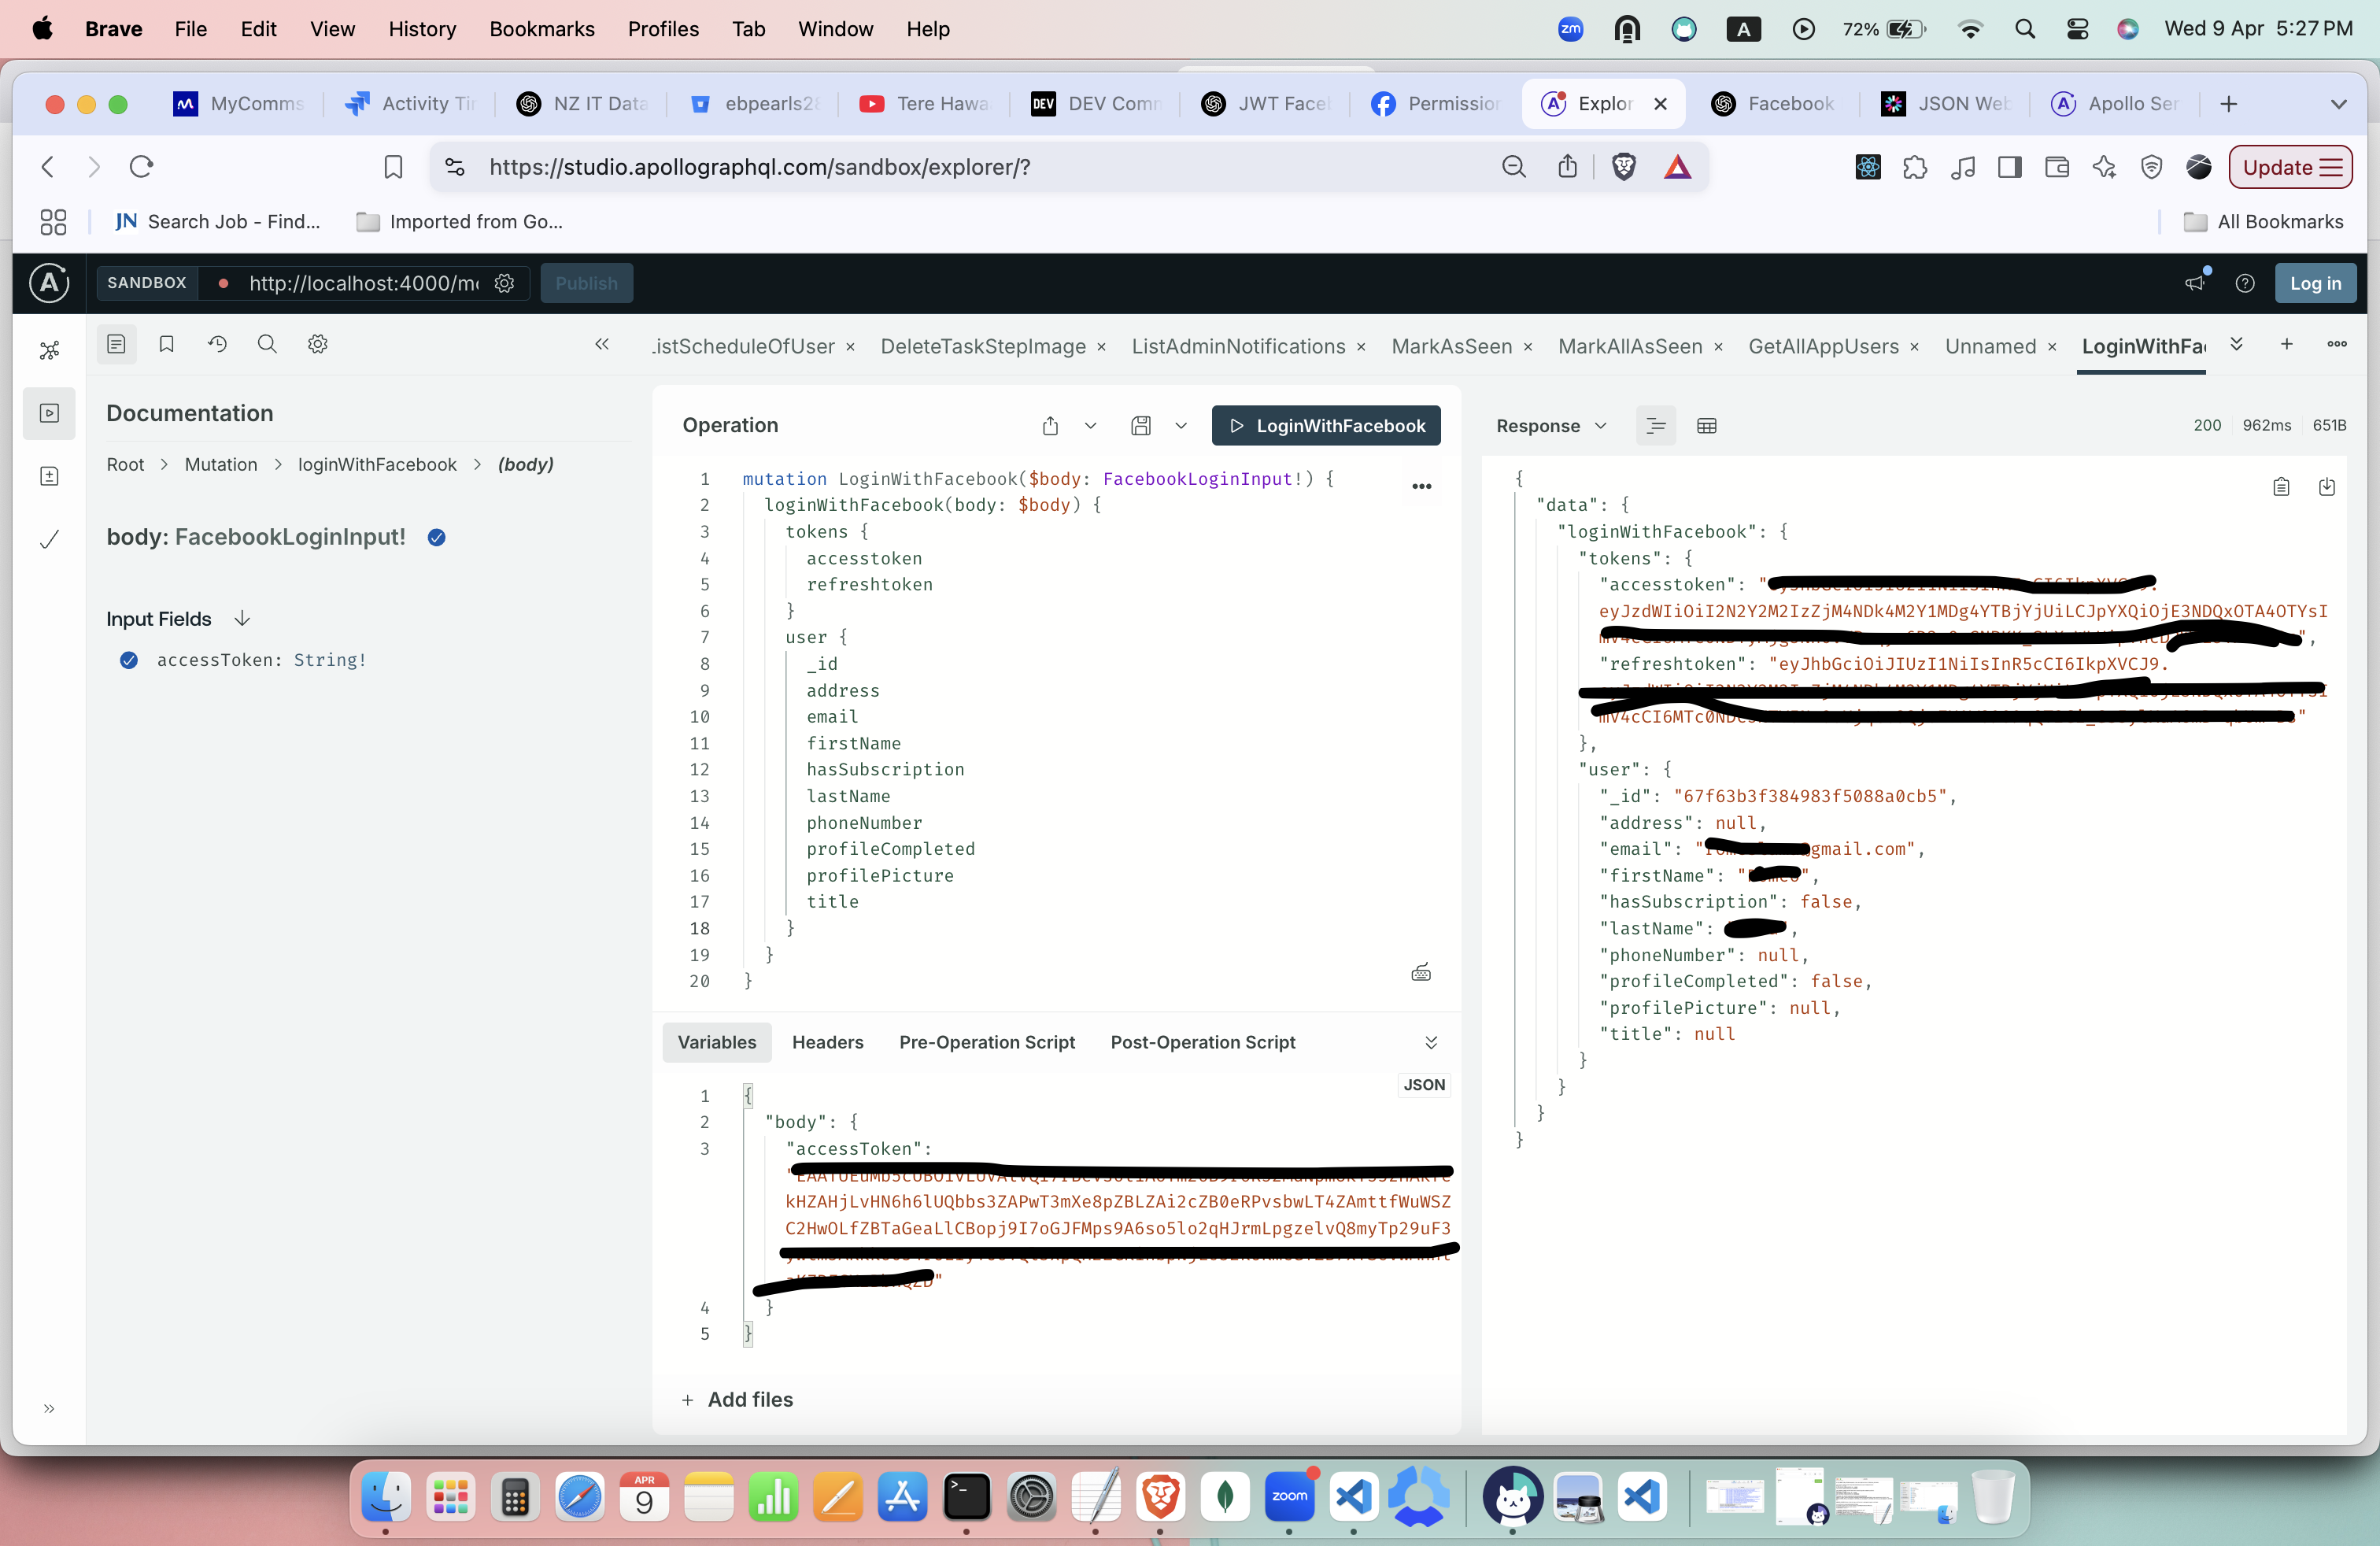
}Response from successful login:
Why Use Limited Facebook Login on iOS?
Apple enforces strict user privacy policies. iOS applications that use Facebook Login must comply with Apple’s App Store guidelines, which often restrict the use of certain Facebook SDK features.
Key Reasons:
Privacy Transparency:
Apple requires apps to limit data collection unless absolutely necessary. Limited Facebook Login complies by restricting access to only essential user info.WebView Restrictions:
iOS apps sometimes face issues with Facebook WebView-based login (used by standard login), which can fail or behave inconsistently.Token Type Differences:
On iOS, you typically receive an ID token (JWT), not just a long-lived access token, and need to verify it manually.Facebook SDK for iOS:
Facebook recommends using Limited Login for better compatibility with Apple’s login policies.
In contrast, Android does not enforce such strict limitations, making standard Facebook Graph API login more reliable for those devices.
Conclusion
Facebook Login integration in a NestJS backend can be implemented using both Standard and Limited methods. While the Standard Graph API Login is widely used and suitable for Android and web platforms, the Limited Facebook Login is a reliable fallback—especially for iOS environments that enforce stricter privacy and SDK rules.
By implementing both login types, your application becomes more resilient, cross-platform compatible, and user-friendly, ensuring seamless authentication across a variety of devices and platforms.
