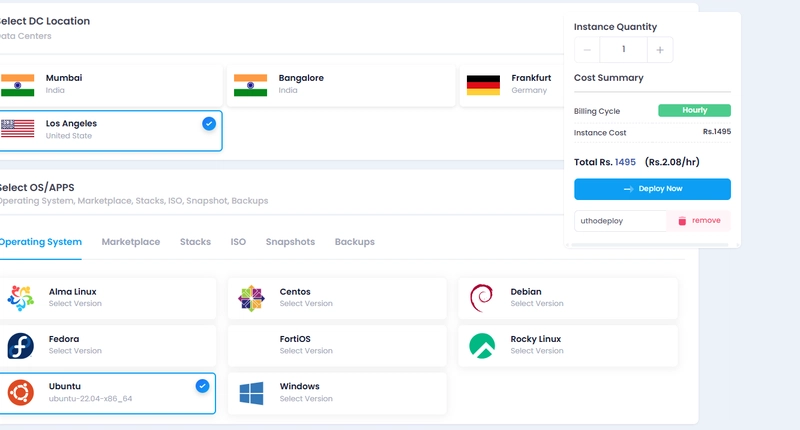
🌍 Step 1:
Select Data Center Location & Operating System
Begin by choosing the Data Center location that best suits your geographical or latency requirements. Then, select the desired Operating System (Linux, Windows, etc.).
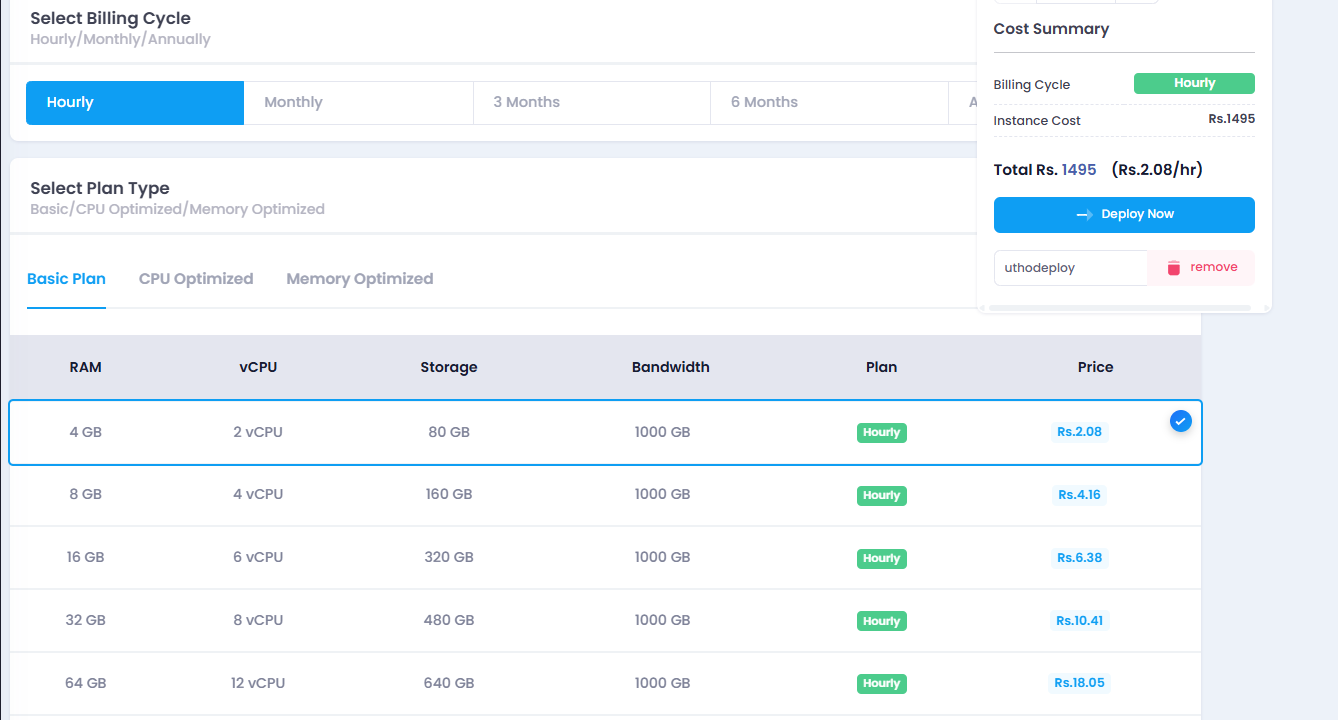
💰 Step 2:
Choose Billing Cycle & Instance Family
Select your preferred billing cycle (monthly or yearly) and pick an appropriate instance family based on your workload needs.
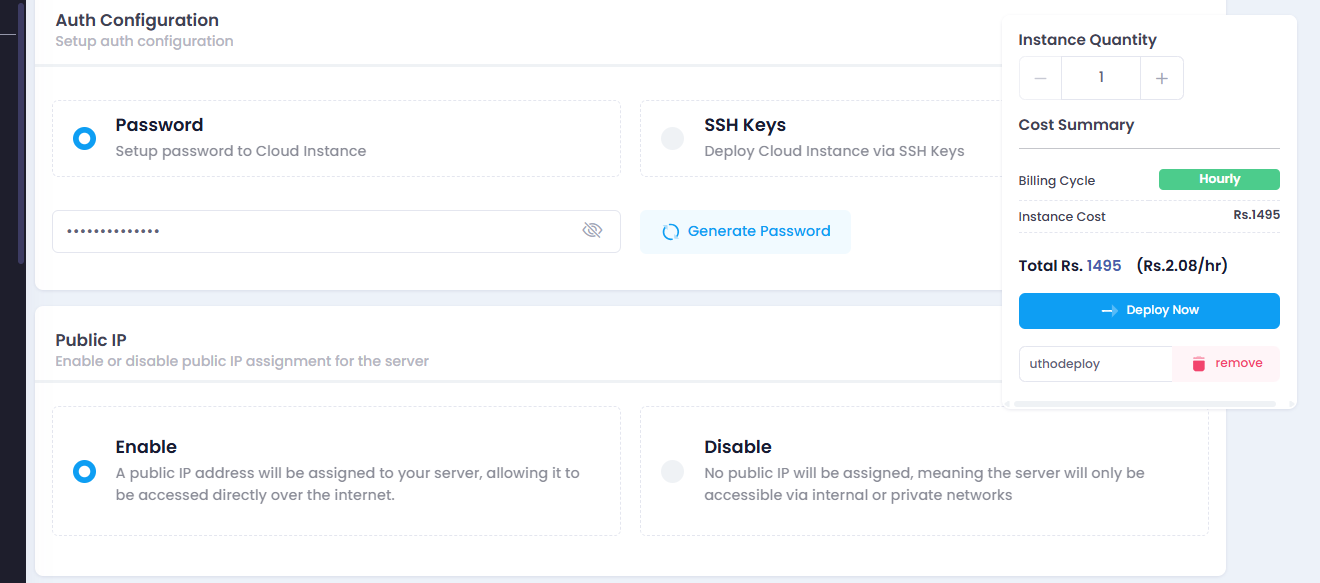
🔐 Step 3:
Configure Authentication
Next, configure how you'd like to access the VM:
🔑 Use SSH Keys (recommended for Linux)
🔒 Or enable Password Authentication (typically for Windows or simple use cases)
✅ Ensure "Public IP" is enabled if you want to access the machine from the internet.
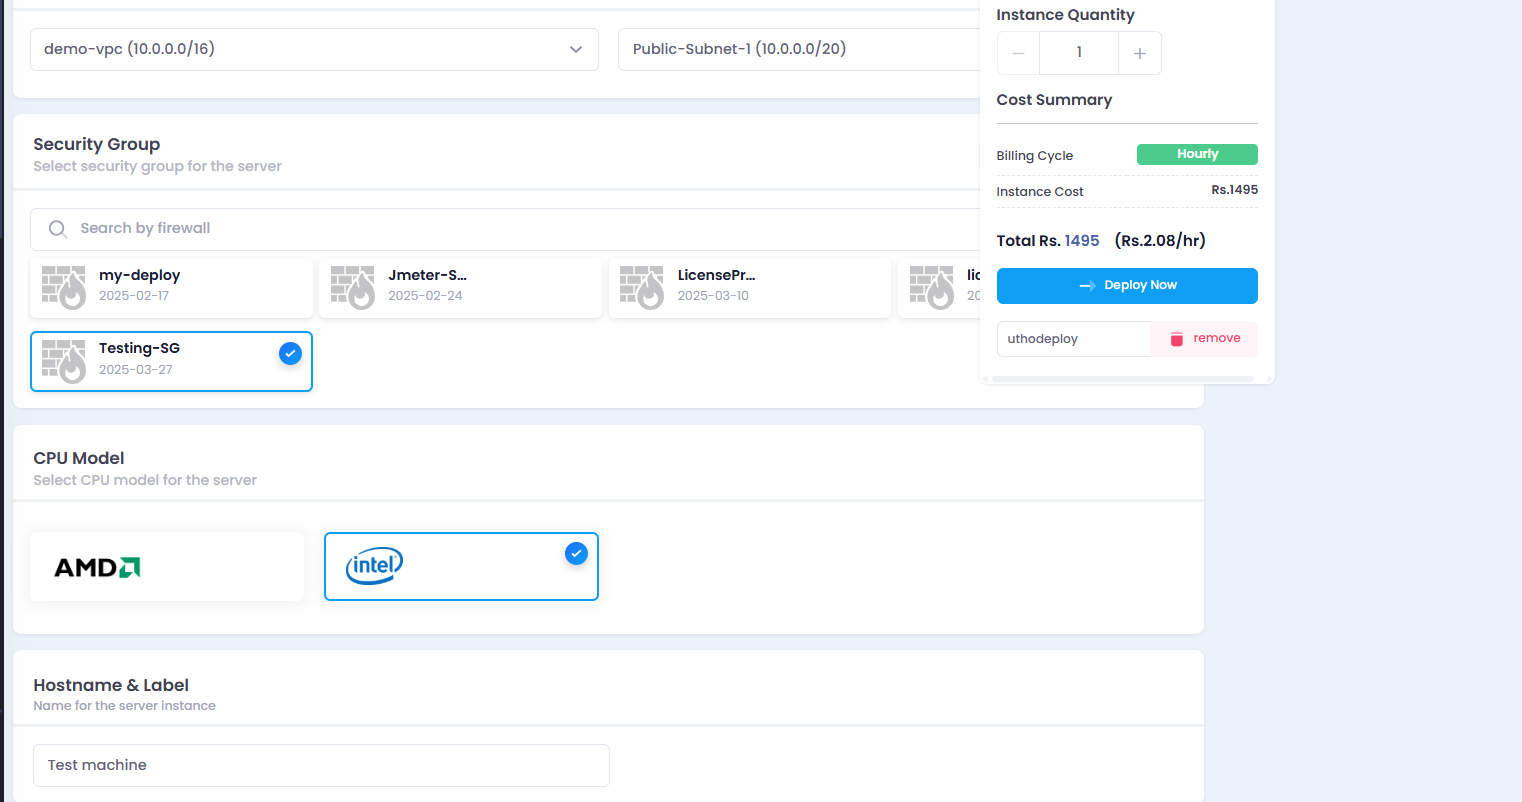
*🛡️ Step 4: *
Select Network Configuration
Choose the following:
🕸️ VPC
🌐 Subnet
🔐 Security Group (define allowed ports, protocols)
Once everything is set, hit Deploy to launch your VM!
You're all set! Your VM will be up and running in just a few moments. Stay tuned for more tutorials on post-deployment configuration, monitoring, and scaling.
