In our previous article, we developed the registration logic, creating a new registration page with a complete process from user input to password encryption and user creation in our database. The next crucial step in our CMS development is the login process. This authentication step is vital for user security and personalized access to our system. Today, we'll walk through creating a login page, configuring frontend requests, setting up backend endpoints, and implementing JWT for secure user sessions. By the end of this tutorial, we'll have a fully functional login system integrated into our CMS.Enough of the intro let's jump directly into the developing process...
1. Create a new Login form with React
So we had already created an "Empty" layout which we will use in the "Login" form, We also styled the "Registration" form and we will use the same design for our "Login" page. Okay let's start:
create a new "login" folder inside the "views" folder, then create 2 files, the "Login.jsx" component and the "login.styles.scss" file for SCSS;
import the "Login" page into our "App.jsx" file and set it near the "Registration" page, so that they both were inside the "auth" route;
<Route path="/auth/*" element={<EmptyLayout />}>
  <Route path='registration' element={<Registration />} />
  <Route path='login' element={<Login />} />
</Route>
import "React", "useState", "useNavigate", and file with our styles into our new component;
create new state values "password", and "email";
add return our HTML template which will represent the "Login" page with the "Login" form;
import React from 'react';
import { useState } from 'react';
import { NavLink, useNavigate } from 'react-router-dom';
import './login.styles.scss';

const Login = () => {
  const navigate = useNavigate();
  const [email, setEmail] = useState('');
  const [password, setPassword] = useState('');
  const handleLogin = async () => {}
  return (
    <div className="login">
      <div className='bold-line'></div>
        <div className='container'>
        <div className='window'>
            <div className='overlay'></div>
            <div className='content'>
            <div className='welcome'>Welcome Back!</div>
            <div className='subtitle'>Please login.</div>
            <div className='input-fields'>
                <input
                  type='email'
                  placeholder='Email'
                  className='input-line full-width'
                  onChange={(e) => setEmail(e.target.value)}></input>
                <input
                  type='password'
                  placeholder='Password'
                  className='input-line full-width'
                  onChange={(e) => setPassword(e.target.value)}></input>
            </div>
            <div className='spacing'>Do not have an account yet? <NavLink to="/auth/registration" className='highlight'>Register</NavLink>div>
            <div>
              <button className='ghost-round full-width loader-styles'
                onClick={handleLogin}>
                'Login'
              </button>
            </div>
            </div>
        </div>
        </div>
    </div>
  );
}

export default Login;
Great, we added a new "Login" form and new route into our CMS, but it will not work until we update the backend part (new route, controller, and token generation), so let's do it.
2. Prepare the backend for the login process
We already prepared the "users" folder and files structure, so that we can move directly to the login process itself:
- we need to add a new "login" route inside the "users.router.js" file;
usersRouter.post('/login', usersController.loginUser);- inside the "users.controller.js" file import the "jsonwebtoken" that we installed in the previous article;
const jwt = require('jsonwebtoken');- inside the "users.controller.js" file we will create a new "loginUser" function, that will receive "email", and "password" from the request body. Then search for the user with such an email, then check if the user was not found we will return an error message. Then compare two passwords one from the request and the other from the user object with the "bcrypt" compare method, if the password is not correct then a new error will be returned. If everything is fine we can move to the sign-in process, and create a JWT token with the sign method, inside the token we will encrypt the user ID, secret phrase, and expiration period. In the last part we will need to return this token, with a success message and user data without ID and password back to the client;
async function loginUser(req, res) {
    try {
        const { email, password } = req.body;
        const user = await usersModel.loginWithEmail({ email });
        if(!user){
            return res.status(404).json({status: "error", message: "User doesn't exist" });
        }
        const isPasswordCorrect = await bcrypt.compare(password, user.password);
        if(!isPasswordCorrect){
            return res.status(400).json({status: "error", message: "Invalid password" });
        }
        const token = jwt.sign({ id: user._id }, "secret phrase", { expiresIn: "24h" });
        const { _id, password, ...userResponse } = user._doc;
        return res.status(200).json({
            status: 'success',
            token,
            userResponse
        })
    } catch (error) {
        console.log(error);
        res.status(500).json({
            status: 'error',
            message: 'Internal server error'
        });
    }
}- we need also add the "loginWithEmail" function inside the "users.model.js" file, that function will simply get user data from the database and return it to the controller;
async function loginWithEmail(payload) {
    try {
        const user = await users.findOne(payload);
        return user;
    } catch (error) {
        console.error('Error logging in user:', error);
        throw error;
    }
}
Awesome, looks like we have the frontend and backend parts ready, now we need to connect them and start testing, let's do it on the next part.
3. Connect frontend with backend
So, we have an API endpoint that we can call after the user presses the login button, and then we will return a token or some message. That's simple, right?
- create a new "login" request function inside our "auth.services.js" file;
export const login = (data) =>
HTTP.post('/users/login', data).then(({data}) => data );- modify our "login.jsx" file. Import the "login" function from the "services" folder;
import { login } from '../../http/services/auth.services';- now the "Login" function itself. We need to send a request with login and password to the server, get the response, save the token and show something to the user;
const handleLogin = async () => {
  try {
    const result = await login({ email, password });
    if (result.status === 'success') {
      localStorage.setItem('token', result.token);
      navigate('/');
    } else {
      alert(result.message);
    }
  } catch (error) {
    console.error('Login error:', error);
    if (error.response && error.response.data?.status === "error") {
      alert(result.message);
    } else {
      alert('An error occurred. Please try again later.');
    }
  }
}
Yes, that's it, we created a "login" process with React and Node.js, we will need to work on UI and UX-like notifications, and loaders but it will be in the next article. And now we need to check the whole registration-login process and get some rest for the next time.
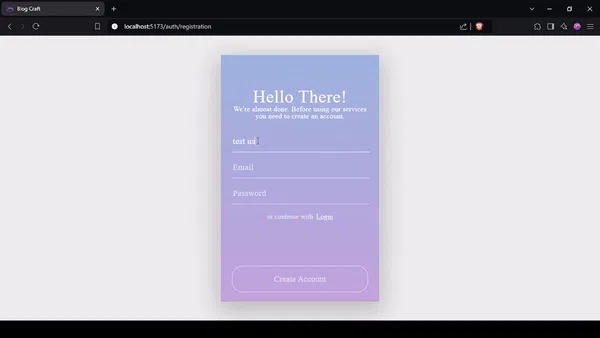
Now let's relaunch the server with the "npm run watch" command and our React app with the "npm run dev" command visit the localhost route and check how it works.
Looks great, also let's check our database if there is a new user, and the application tab in the browser console (local storage) if there is our security token. Yes, No, please write back or send a screenshot of the results.
In this article, we've successfully implemented a complete login system for our CMS. We've covered the essential steps from creating a React-based login form to setting up the backend authentication process and establishing the connection between the two.
We've built a secure login flow that includes email and password verification, JWT token generation, and proper error handling. This login system complements the registration process we developed earlier, providing a solid foundation for user authentication in our CMS.
Remember, while we now have a functional login system, there's always room for improvement. In future articles, we'll explore enhancing the user experience with features like loading indicators, more robust error messages, and perhaps implementing password reset functionality.
Thank you for following along, and happy coding! Don't hesitate to experiment with and build upon this login system as you grow your CMS project.
If you need a source code for this tutorial you can get it here.
Found this post useful? ☕ A coffee-sized contribution goes a long way in keeping me inspired! Thank you)

Next step: "Redux Integration: Enhancing Your Node.js and React CMS"
