
This is a submission for the Permit.io Authorization Challenge: Permissions Redefined
What We Built
MedRecord is a modern, privacy-first medical records management system that empowers doctors and patients with secure access to health data while giving administrators full oversight. We tackled the problem of data access control in healthcare - ensuring that only authorised users can read, update, or manage sensitive medical records.
With Permit.io, we implemented Attribute-Based Access Control (ABAC) and Role-Based Access Control (RBAC), allowing
- Admins to manage the entire system
- Doctors can view all records but update only their assigned patients
- Patients to view only their personal records
By decoupling permissions logic from our codebase, we built a scalable and maintainable system that’s easy to audit and extend.
Demo
🔗 Live Demo: Live Demo https://medrecord.vercel.app
Project Repo
🔗 GitHub – Walidadebayo/medrecord

Medical Records Management Application
A full-stack medical records management application built with Next.js, MongoDB, and Permit.io for role-based access control.
Features
- Role-Based Access Control: Admin, doctor, and patient roles with different permissions
- MongoDB Integration: Persistent data storage with MongoDB
- File Uploads: Upload and manage medical documents using Vercel Blob
- Advanced Search: Filter records by date, doctor, patient, and more
- Responsive Design: Works on desktop and mobile devices
- Modern UI: Clean interface with gradient styling
Setup Instructions
Prerequisites
- Node.js 18+ and npm
- MongoDB database (local or Atlas)
- Vercel account (for Blob storage)
- Permit.io account
Environment Variables
Create a .env.local file in the root directory with the following variables:
# MongoDB
MONGODB_URI=your_mongodb_connection_string

# Authentication
JWT_SECRET=your_jwt_secret_key

# Permit.io
PERMIT_API_KEY=your_permit_api_key

# Vercel Blob
BLOB_READ_WRITE_TOKEN=your_vercel_blob_token
Installation
- Clone the repository
- Install dependencies:
npm install
- Run the development server:
npm run dev
- Open http://localhost:2500 in your browser
Testing Different Roles
The…
Tech Stack: Next.js, TailwindCSS, MongoDB (Mongoose), Permit.io, Docker, Render, Vercel Blob (for files storage)
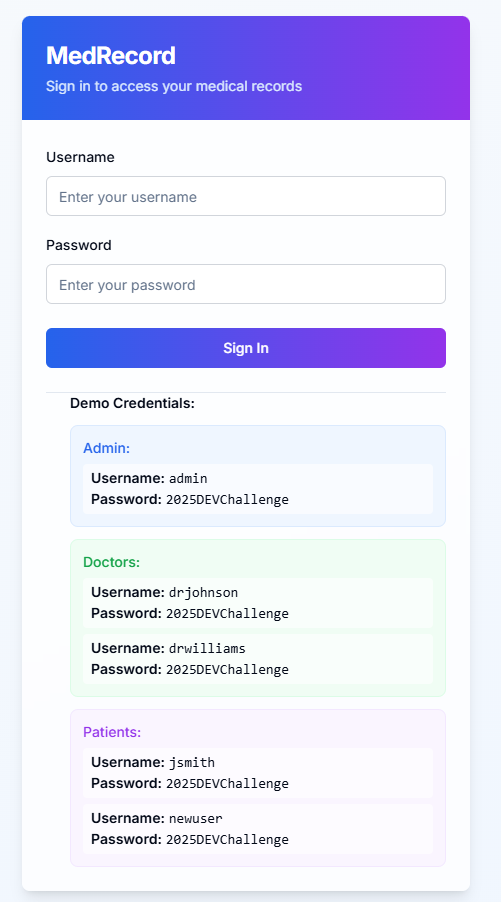
Login
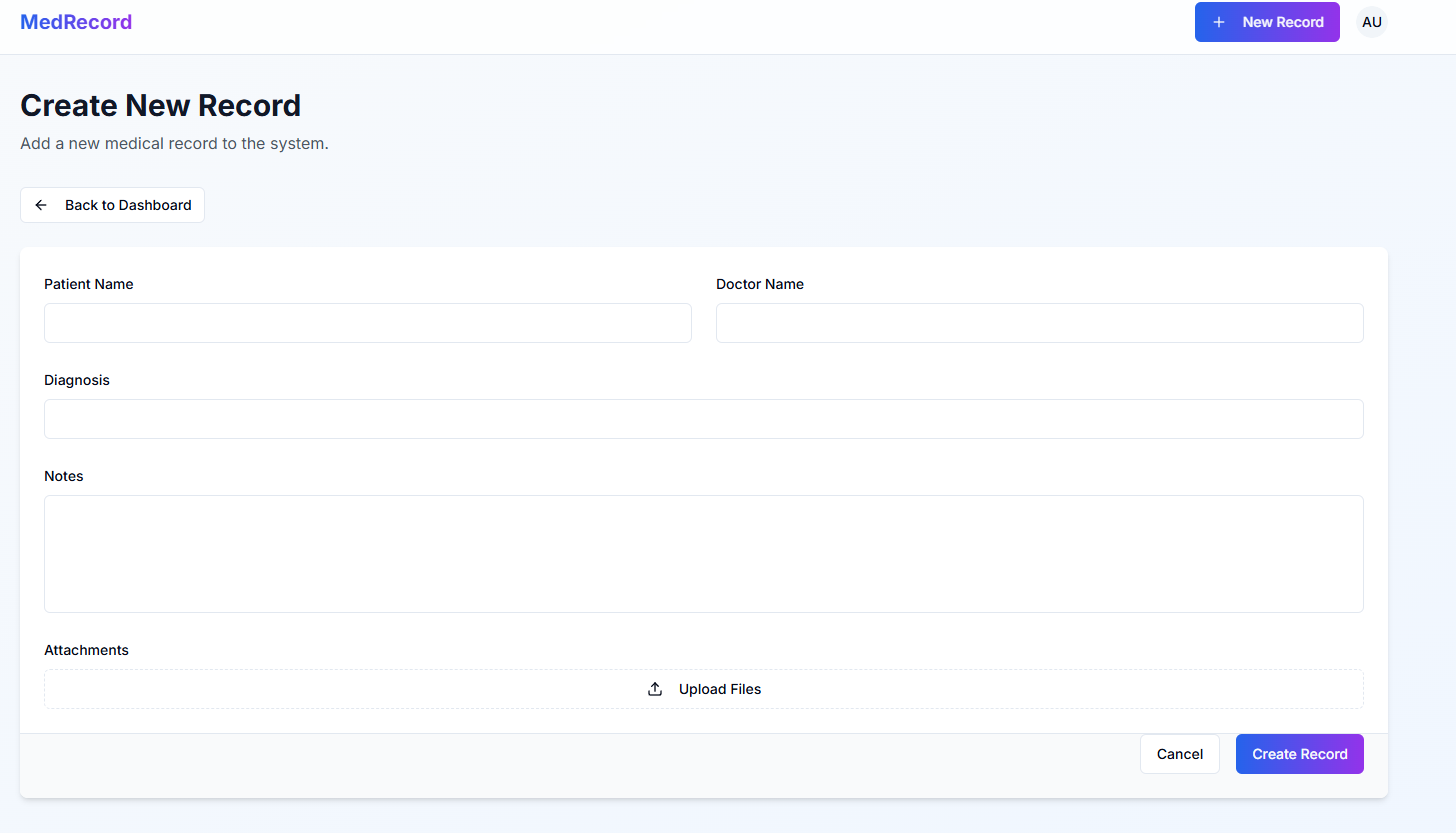
Create Record
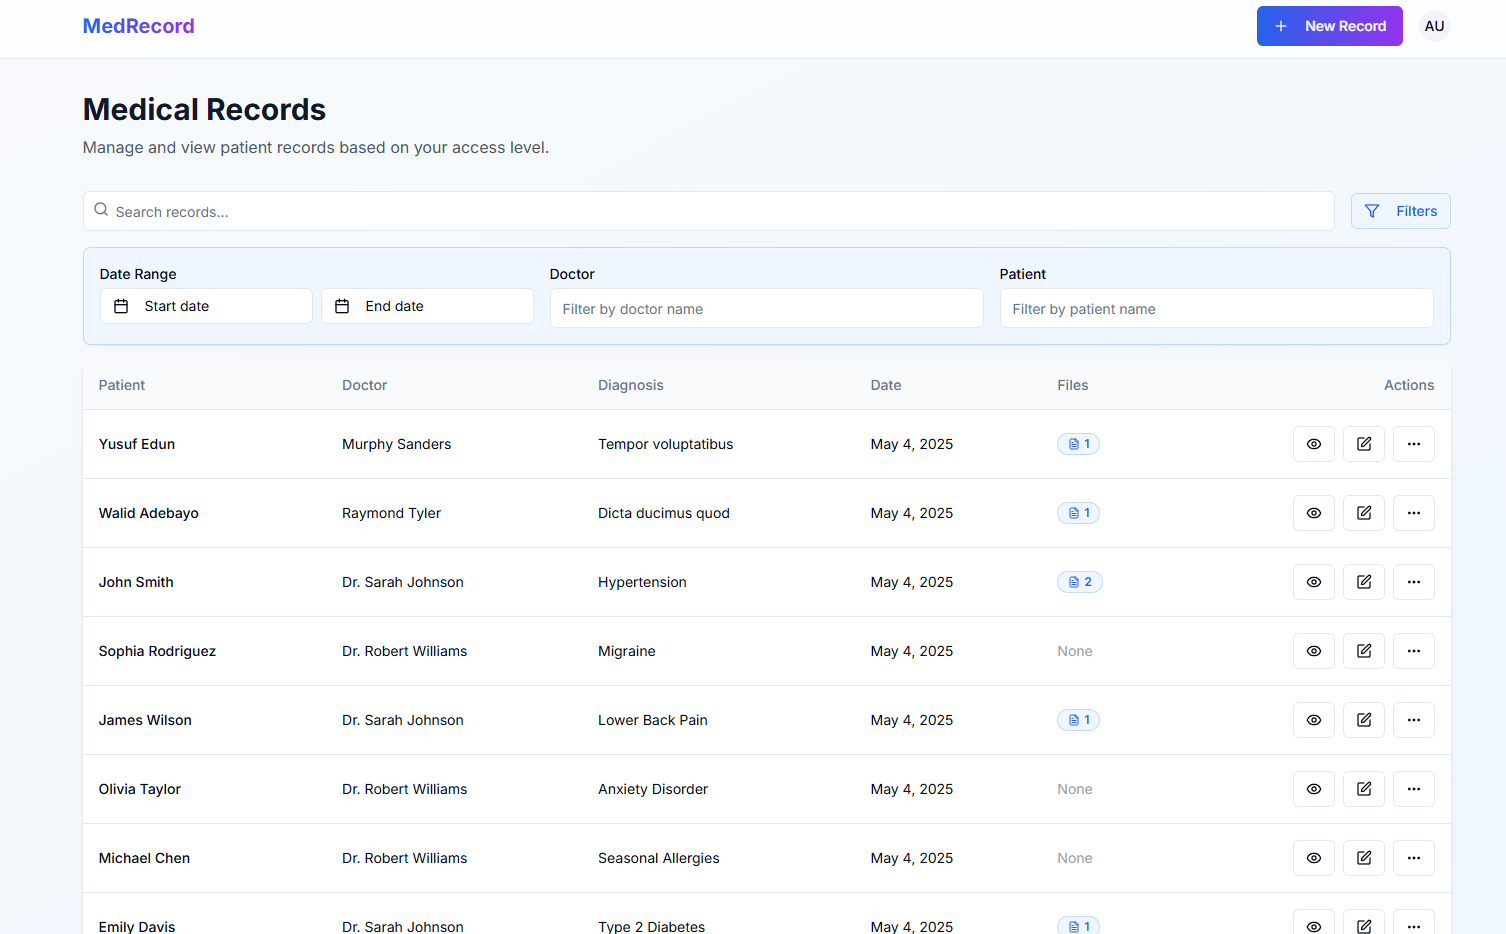
Dashbaord
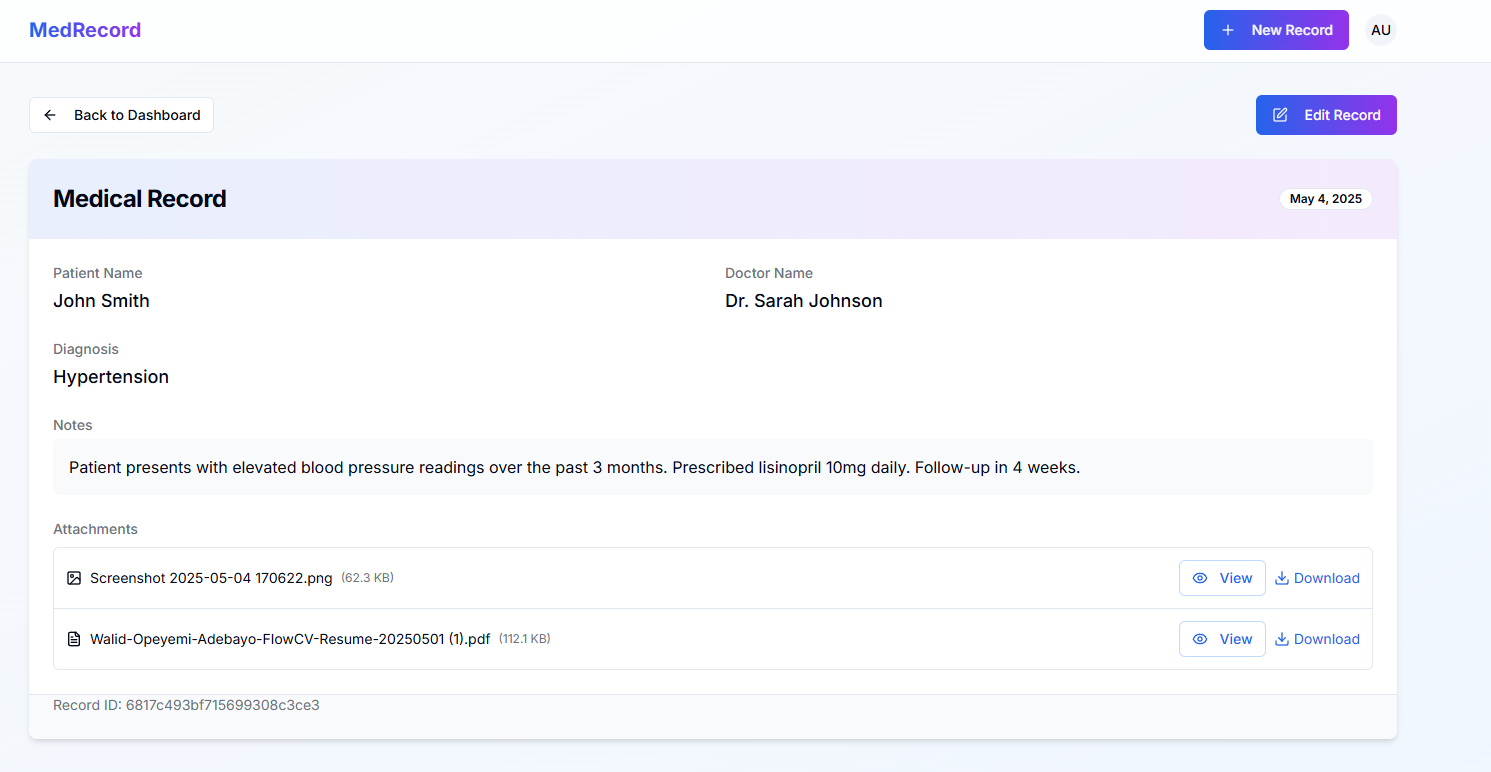
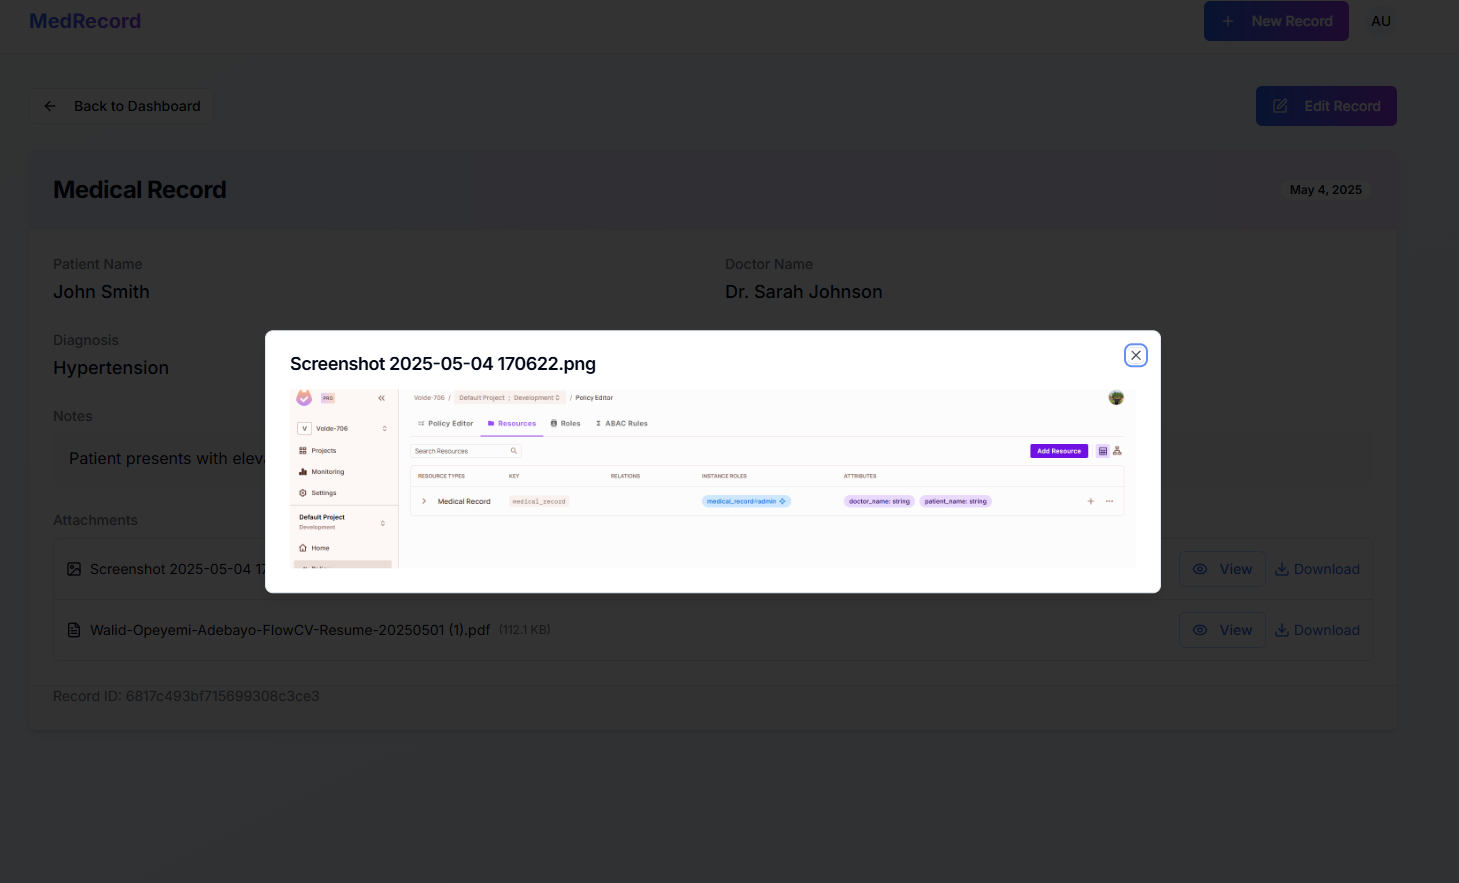
Record Details
Viewing Record Attachments
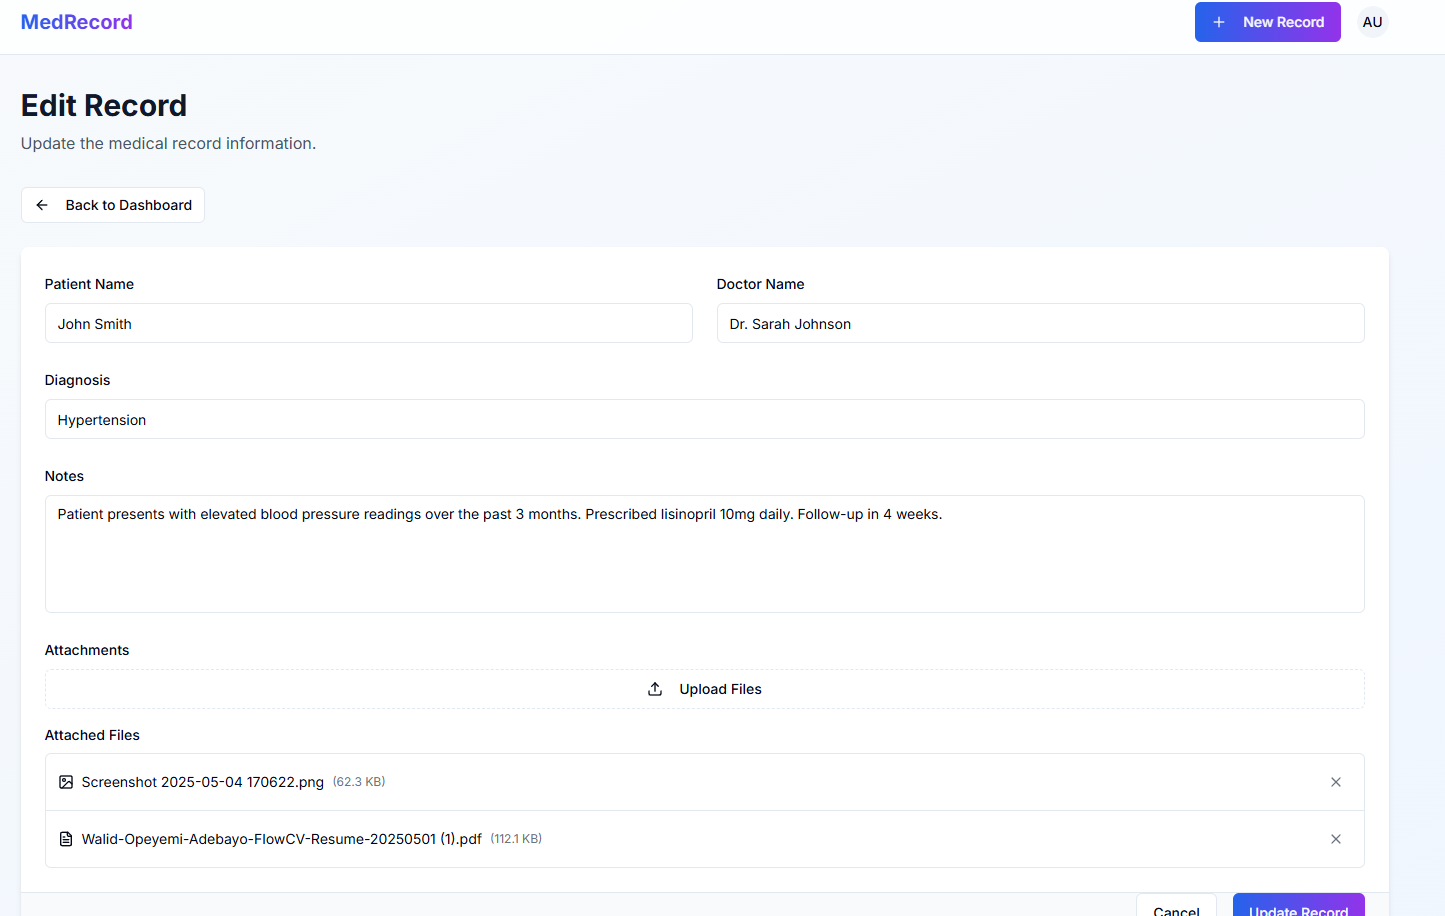
Edit Record
Our Journey
This project was built by a small but dedicated team of developers: @walidadebayo (frontend/backend), @volde (frontend/backend). Our main challenge was integrating Permit.io’s PDP (Policy Decision Point) in a production-like environment.
Challenges We Faced
- PDP Hosting: Initially, we ran Permit’s PDP locally, but this didn’t scale. We learned how to containerise it using Docker and deploy it to Render.
- Error 422 from Permit: We encountered recurring authorization errors from Permit (especially code 422) due to missing resources and users. We resolved this by programmatically registering all users, resources, and attributes during app setup.
- Fine-Grained ABAC Logic: We built a fallback RBAC+ABAC function in Node.js to complement Permit’s decisions when no matching usersets were found.
Key Learnings
- How to containerise a Node-less PDP using only Permit’s Docker image
- How to define and manage resource types, actions, roles, and relations in Permit
- How to write and test policies for both RBAC and ABAC scenarios
- How to log and debug authorization failures using Permit’s SDK and API responses
Using Permit.io for Authorization
Here’s how we integrated Permit.io into MedRecord:
-
User Provisioning: Upon signup, users are registered in Permit with attributes like
role,name, andemail. Roles likedoctor,patient, andadminare assigned using Permit’s SDK.
await permit.api.createUser({
      key: user.id.toString(),
      email: user.email,
      first_name: user.name.split(" ")[0],
      last_name: user.name.split(" ").slice(1).join(" "),
      attributes: {
        role,
      },
      role_assignments: [
        {
          role: user.role,
          resource_instance: "medical_record",
          tenant: "default",
        },
      ],
});-
Resource Registration: When a new medical record is created, it is registered as a Permit resource instance with attributes like
doctor_nameandpatient_name, so ABAC policies can reference them.
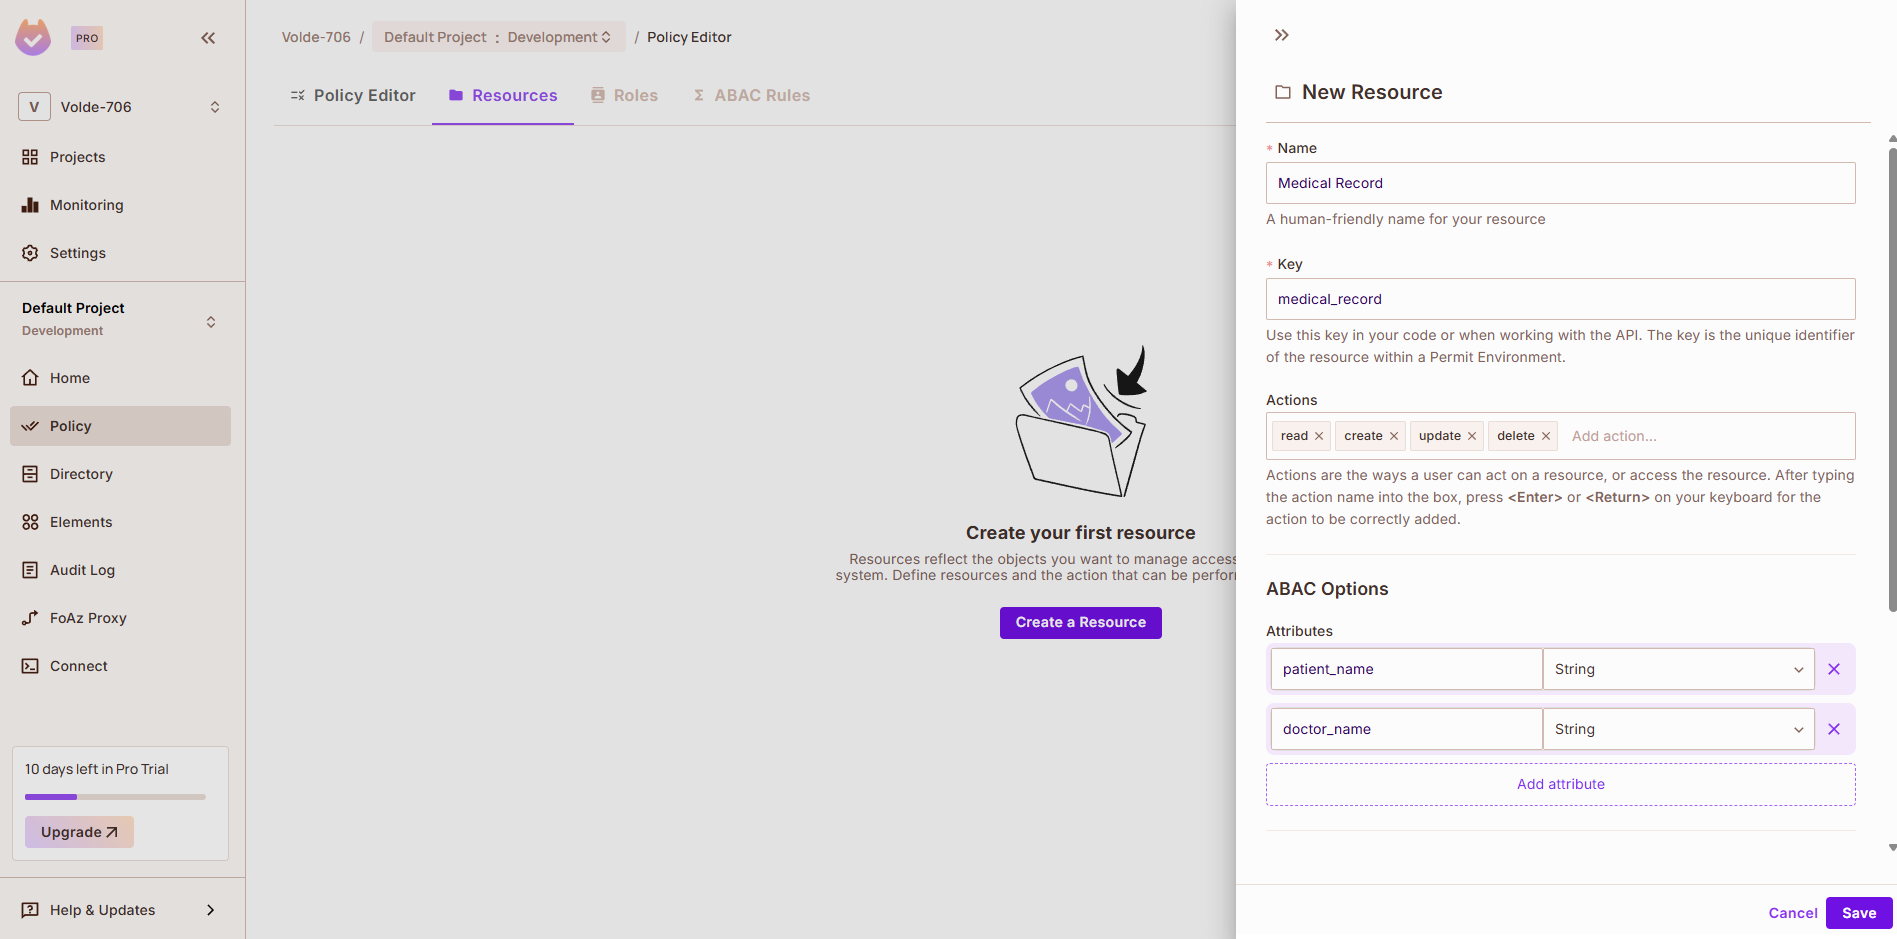
const resourceDefinition = {
  key: "medical_record",
  name: "Medical Record",
  description: "A patient’s medical record",
  actions: {
    read: { name: "Read", description: "Read the record" },
    update: { name: "Update", description: "Update the record" },
    delete: { name: "Delete", description: "Delete the record" },
    create: { name: "Create", description: "Create a new record" },
  },
  attributes: {
    doctor_id: { type: "string", description: "ID of the assigned doctor" },
    patient_id: { type: "string", description: "ID of the patient" },
  },
  roles: {
    admin: {
      permissions: ["read", "update", "delete", "create"],
    },
    doctor: {
      permissions: ["read", "update"],
    },
    patient: {
      permissions: ["read"],
    },
  },
};

const response = await permit.api.createResource(resourceDefinition);

 await permit.api.resourceInstances.create({
          key: record._id.toString(),
          resource: "medical_record",
          attributes: {
            patient_name: record.patient_name,
            doctor_name: record.doctor_name,
          },
});-
Authorization Check:
- Before showing or updating a record, we make a call to
permit.check(...) - If Permit allows, access proceeds.
- If no userset matches (e.g., newly created users), we fall back to a local RBAC+ABAC check to prevent access while still showing meaningful logs.
- Before showing or updating a record, we make a call to
Policy Hosting: The PDP is containerised via Docker and deployed to Render, exposing it via a secure endpoint that our app uses.
// Example Permit Check
const allowed = await permit.check({
  user: currentUserId,
  action: "update",
  resource: {
    type: "medical_record",
    key: recordId,
    attributes: {
      doctor_name: "Dr. Sarah Johnson",
      patient_name: "Emily Davis"
    }
  },
})
Permit’s CLI and dashboard helped us manage roles, write policies, and test everything without needing a custom permission system.
Team Members
This project was built by a team of two:
- Walid Adebayo - @walidadebayo
- Edun Yusuf - @volde
We truly enjoyed building this project and learned a lot about modern access control systems. Thanks to the Permit.io team for providing powerful tools and excellent documentation!
