
Github Repo My LinkedIn
This environment has been configured using Vite React app and TailwindCSS.
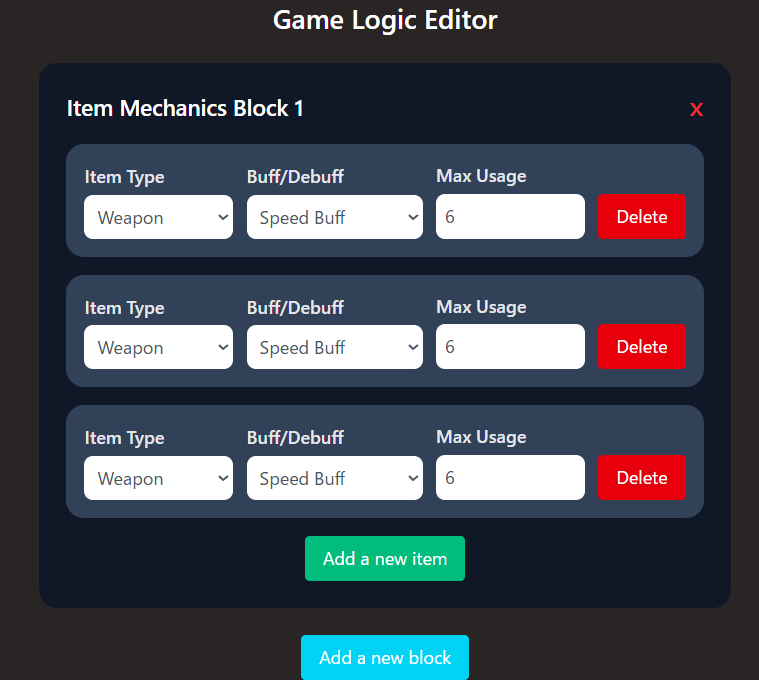
The challenge seems simple. We have a block with a button to add a new item row, one to delete it, one to delete the block, one to add a new block and three inputs.
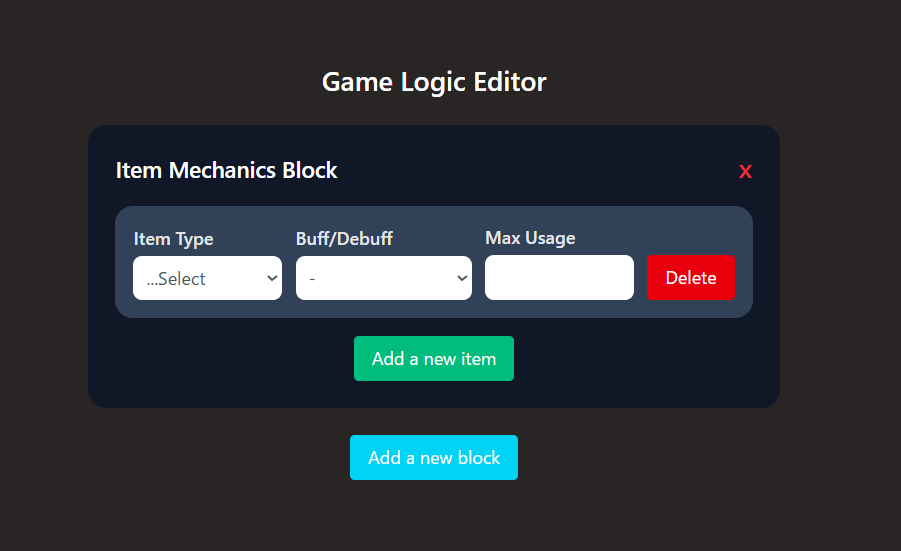
The static code looks like this:
App.jsx
function App() {
  return (
     <main className=" h-screen overflow-hidden flex flex-col items-center justify-center m-auto bg-stone-800">
      <div className="w-full container">
        <h1 className="text-center text-2xl font-bold text-white">
          Game Logic Editor
        h1>

     <section className="m-auto w-2/5 p-6 bg-gray-900 rounded-2xl mt-6 flex flex-col gap-4">
      <div className="flex justify-between items-center">
        <h1 className="text-white text-xl font-bold">Item Mechanics Blockh1>
        <button className="text-red-500 text-2xl font-mono font-medium cursor-pointer">
          x
        button>
       div>
       <div className="flex max-xl:flex-col max-xl:items-center gap-3 items-end-safe p-4 text-gray-600 bg-slate-700 rounded-2xl">
      <div className="flex flex-col w-full gap-1 ">
        <label htmlFor="type" className="font-medium text-gray-200">
          {ITEM_MECHANICS_LABELS.type}
        label>
        <select
          name="type"
          id="type"
          defaultValue="select"
          className="bg-white p-2 rounded-lg "
        >
          <option value="select" hidden>
            ...Select
          option>
          {ITEM_MECHANICS_VALUES.type.map((type, index) => (
            <option key={type + index} value={type}>
              {type}
            option>
          ))}
        select>
      div>
      <div className="flex flex-col w-full gap-1">
        <label htmlFor="effect" className="font-medium text-gray-200">
          {ITEM_MECHANICS_LABELS.effect}
        label>
        <select
          name="effect"
          id="effect"
          defaultValue="select"
          className="bg-white p-2 rounded-lg"
        >
          <option value="select" hidden>
            -
          option>
          {ITEM_MECHANICS_VALUES.effect.map((ef, index) => (
            <option value={ef} key={ef + index}>
              {ef}
            option>
          ))}
        select>
      div>
      <div className="flex flex-col w-full gap-1">
        <label htmlFor="usageLimit" className="font-medium text-gray-200">
          {ITEM_MECHANICS_LABELS.usageLimit}
        label>
        <input
          id="usageLimit"
          type="number"
          min={1}
          max={10}
          className="bg-white rounded-lg p-2"
        />
      div>
      <div>
        <button class="bg-red-600 hover:bg-red-700 text-white px-4 py-2 rounded cursor-pointer">
          Delete
        button>
      div>
    div>

        <div className="m-auto">
          <button class="bg-emerald-500 hover:bg-lime-500 text-white px-4 py-2 rounded cursor-pointer">
          Add a new item
          button>
        div>
      section>

      <div className="flex justify-center mt-6">
          <button class="bg-cyan-400 hover:bg-cyan-500 text-white px-4 py-2 rounded cursor-pointer">
            Add a new block
          button>
      div>
    main>
  );
}

export default App;

const ITEM_MECHANICS_LABELS = {
  type: "Item Type",
  effect: "Buff/Debuff",
  usageLimit: "Max Usage",
};

const ITEM_MECHANICS_VALUES = {
  type: ["Weapon", "Armor", "Consumable", "Artifact", "Material"],
  effect: ["Health Boost", "Speed Buff", "Defense Increase", "Attack Damage", "Special Ability"],
};
So let's get started.
Step 1: Break the UI into a component hierarchy
We can break this UI into two components. The block and the item row.
Now the code looks like this:
App.jsx
import { Block } from "./components/Block";

function App() {
  return (
    <main className=" h-screen overflow-hidden flex flex-col items-center justify-center m-auto bg-stone-800">
      <div className="w-full container">
        <h1 className="text-center text-2xl font-bold text-white">
          Game Logic Editor
        h1>

        <Block />

        <div className="flex justify-center mt-6">
          <button class="bg-cyan-400 hover:bg-cyan-500 text-white px-4 py-2 rounded cursor-pointer">
            Add a new block
          button>
        div>
      div>
    main>
  );
}

export default App;
Block.jsx
import { Row } from "./Row";

export function Block() {
  return (
    <section className="m-auto w-2/5 p-6 bg-gray-900 rounded-2xl mt-6 flex flex-col gap-4">
      <div className="flex justify-between items-center">
        <h1 className="text-white text-xl font-bold">Item Mechanics Blockh1>
        <button className="text-red-500 text-2xl font-mono font-medium cursor-pointer">
          x
        button>
      div>

      <Row />

      <div className="m-auto">
        <button class="bg-emerald-500 hover:bg-lime-500 text-white px-4 py-2 rounded cursor-pointer">
          Add a new item
        button>
      div>
    section>
  );
}
Row.jsx
import { ITEM_MECHANICS_LABELS, ITEM_MECHANICS_VALUES } from "../constants";

export function Row() {
  return (
    <div className="flex max-xl:flex-col max-xl:items-center gap-3 items-end-safe p-4 text-gray-600 bg-slate-700 rounded-2xl">
      <div className="flex flex-col w-full gap-1 ">
        <label htmlFor="type" className="font-medium text-gray-200">
          {ITEM_MECHANICS_LABELS.type}
        label>
        <select
          name="type"
          id="type"
          defaultValue="select"
          className="bg-white p-2 rounded-lg "
        >
          <option value="select" hidden>
            ...Select
          option>
          {ITEM_MECHANICS_VALUES.type.map((type, index) => (
            <option key={type + index} value={type}>
              {type}
            option>
          ))}
        select>
      div>
      <div className="flex flex-col w-full gap-1">
        <label htmlFor="effect" className="font-medium text-gray-200">
          {ITEM_MECHANICS_LABELS.effect}
        label>
        <select
          name="effect"
          id="effect"
          defaultValue="select"
          className="bg-white p-2 rounded-lg"
        >
          <option value="select" hidden>
            -
          option>
          {ITEM_MECHANICS_VALUES.effect.map((ef, index) => (
            <option value={ef} key={ef + index}>
              {ef}
            option>
          ))}
        select>
      div>
      <div className="flex flex-col w-full gap-1">
        <label htmlFor="usageLimit" className="font-medium text-gray-200">
          {ITEM_MECHANICS_LABELS.usageLimit}
        label>
        <input
          id="usageLimit"
          type="number"
          min={1}
          max={10}
          className="bg-white rounded-lg p-2"
        />
      div>
      <div>
        <button class="bg-red-600 hover:bg-red-700 text-white px-4 py-2 rounded cursor-pointer">
          Delete
        button>
      div>
    div>
  );
}
Step 2: Find the minimal but complete representation of UI state.
The inputs, the inputs row and the block are state because they change over time and can’t be computed from anything.
const [itemBlocks, setItemBlocks] = useState([0]);
  const [itemRows, setItemRows] = useState([{}]);
  const [item, setItem] = useState({
    type: "",
    effect: "",
    usageLimit: 0,
  });
Naturally, we can represent our state in this way above. And now let's apply it in the components. The modifications:
// App.jsx
      {...}
        {itemBlocks.map((block, index) => (
          <Block
            key={index}
            block={block}
            item={item}
            itemRows={itemRows}
          />
        ))}
       {...}
// Block.jsx
export function Block({ item, itemRows, block }) {
    {...}
        <h1 className="text-white text-xl font-bold">
            Item Mechanics Block {block + 1}
        h1>
    {...}
      {itemRows.map((ir, index) => (
        <Row key={index} item={item} />
      ))}
    {...}
}
// Rows.jsx

export function Row({ item }) {
     {...}
        <select
          name="type"
          id="type"
          value={item.type}
          defaultValue="select"
          className="bg-white p-2 rounded-lg "
        >
      {...}
        <select
          name="effect"
          id="effect"
          defaultValue="select"
          value={item.effect}
          className="bg-white p-2 rounded-lg"
        >
       {...}
        <input
          id="usageLimit"
          type="number"
          name="usageLimit"
          min={1}
          max={10}
          value={item.usageLimit}
          className="bg-white rounded-lg p-2"
        />
       {...}
}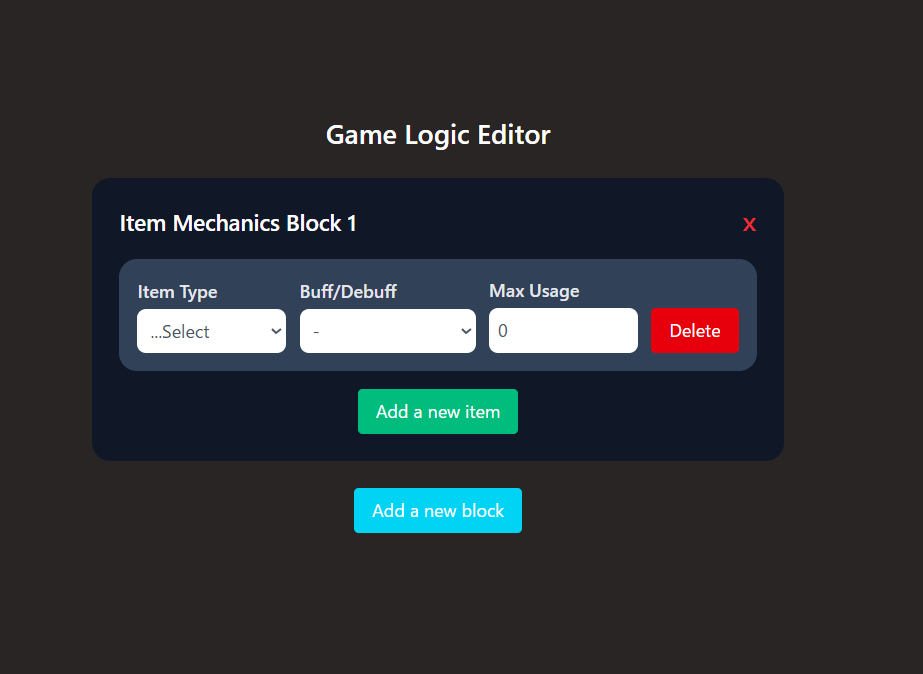
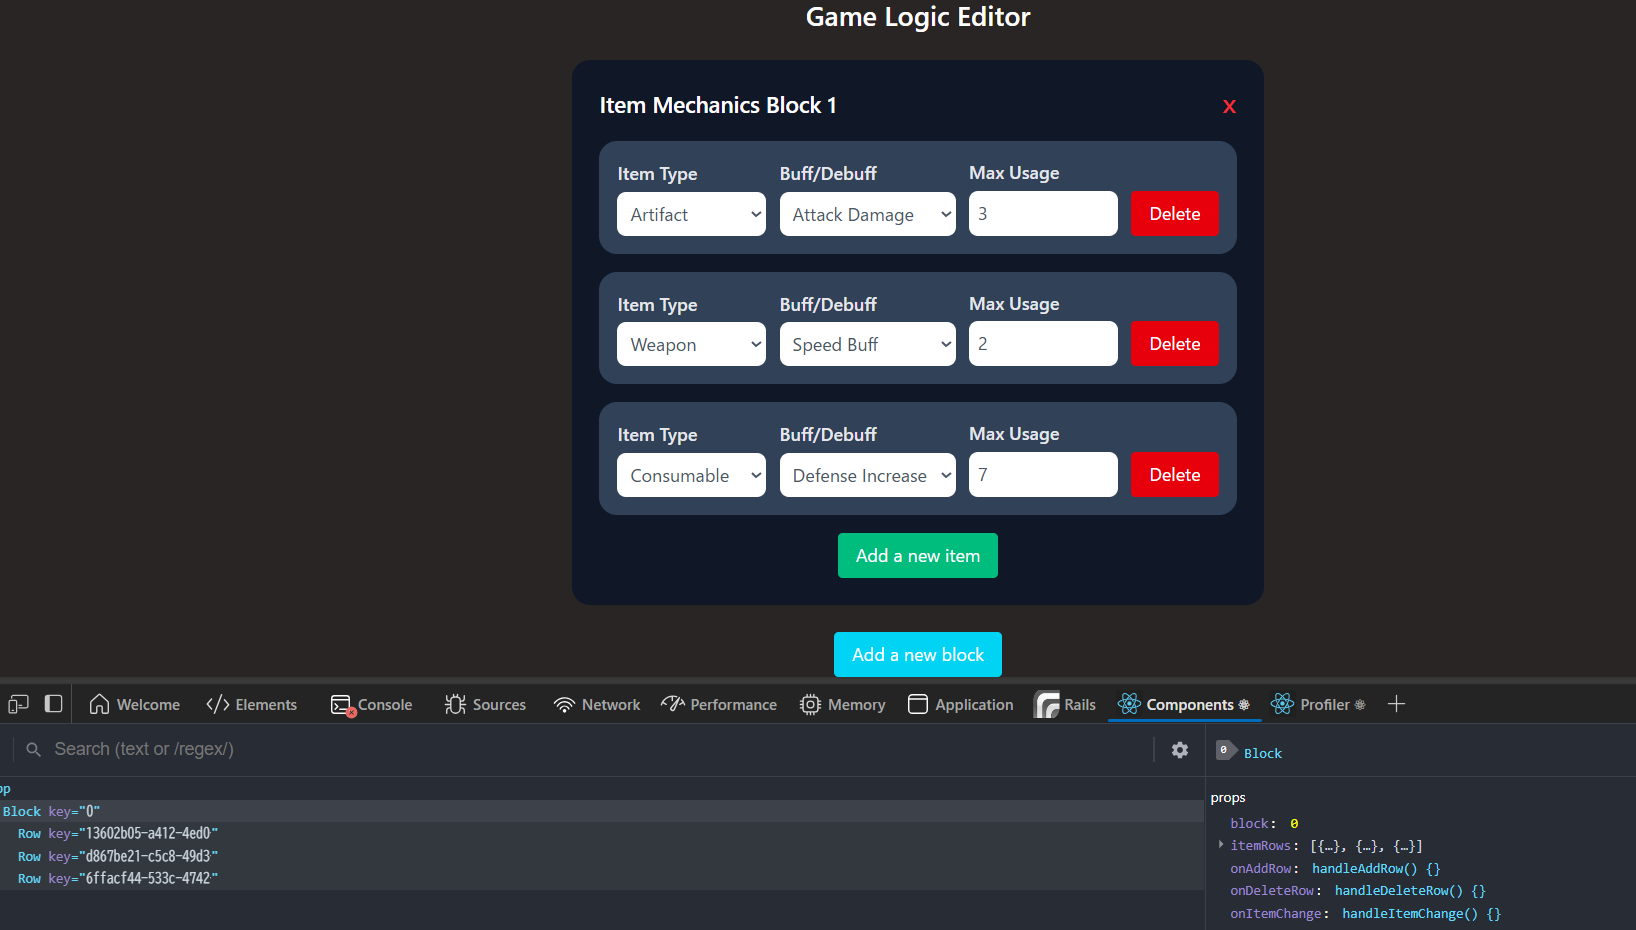
With the state created and the props passed, the application looks like this. So now let's add some interactivity.
Step 3: Create the handle functions to manipulate the state and add inverse data flow
The app renders correctly with props and state flowing down the hierarchy. But to change the state according to user input, we will need to support data flowing the other way: the row component deep in the hierarchy needs to update the state in App
The functions are:
const handleInputsChange = () => {...}

  const handleAddRow = () => {...}
  const handleDeleteRow = () => {...}

  const handleAddBlock = () => {...}
const handleDeleteBlock = () => {...}- We need to implement the handleInputsChange:
const handleItemChange = (name, value) => {
    setItem({
      ...item,
      [name]: value,
    });
};{itemBlocks.map((block, index) => (
<Block
key={index}
block={block}
item={item}
onItemChange={handleItemChange} // Add in the Block props
itemRows={itemRows}
/>
))}
// And the Row props
{itemRows.map((ir, index) => (
<Row key={index} item={item} onItemChange={onItemChange} />
))}Finally, call on the inputs (in the selects in the same way)
<input
          id="usageLimit"
          name="usageLimit"
          type="number"
          min={1}
          max={10}
          value={item.usageLimit}
          onChange={({ target }) => onItemChange(target.name, target.value)}
          className="bg-white rounded-lg p-2"
        />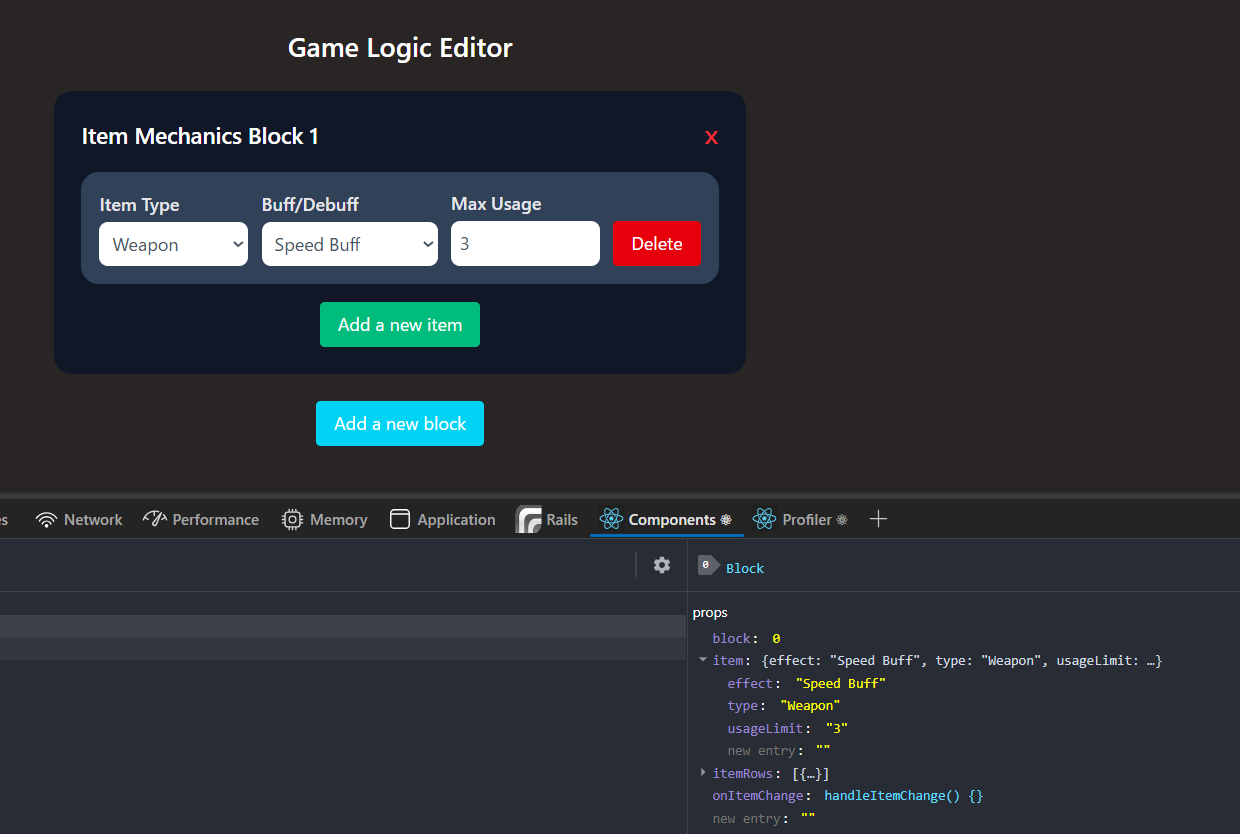
And Voilà the inputs now are controlled, the next function is the add and remove item row:
const handleAddRow = () => {
    setItemRows([
      ...itemRows,
      {
        type: "",
        effect: "",
        usageLimit: 0,
      },
    ]);
  };
Now we just add as props to the block and call on the Add item row button and:
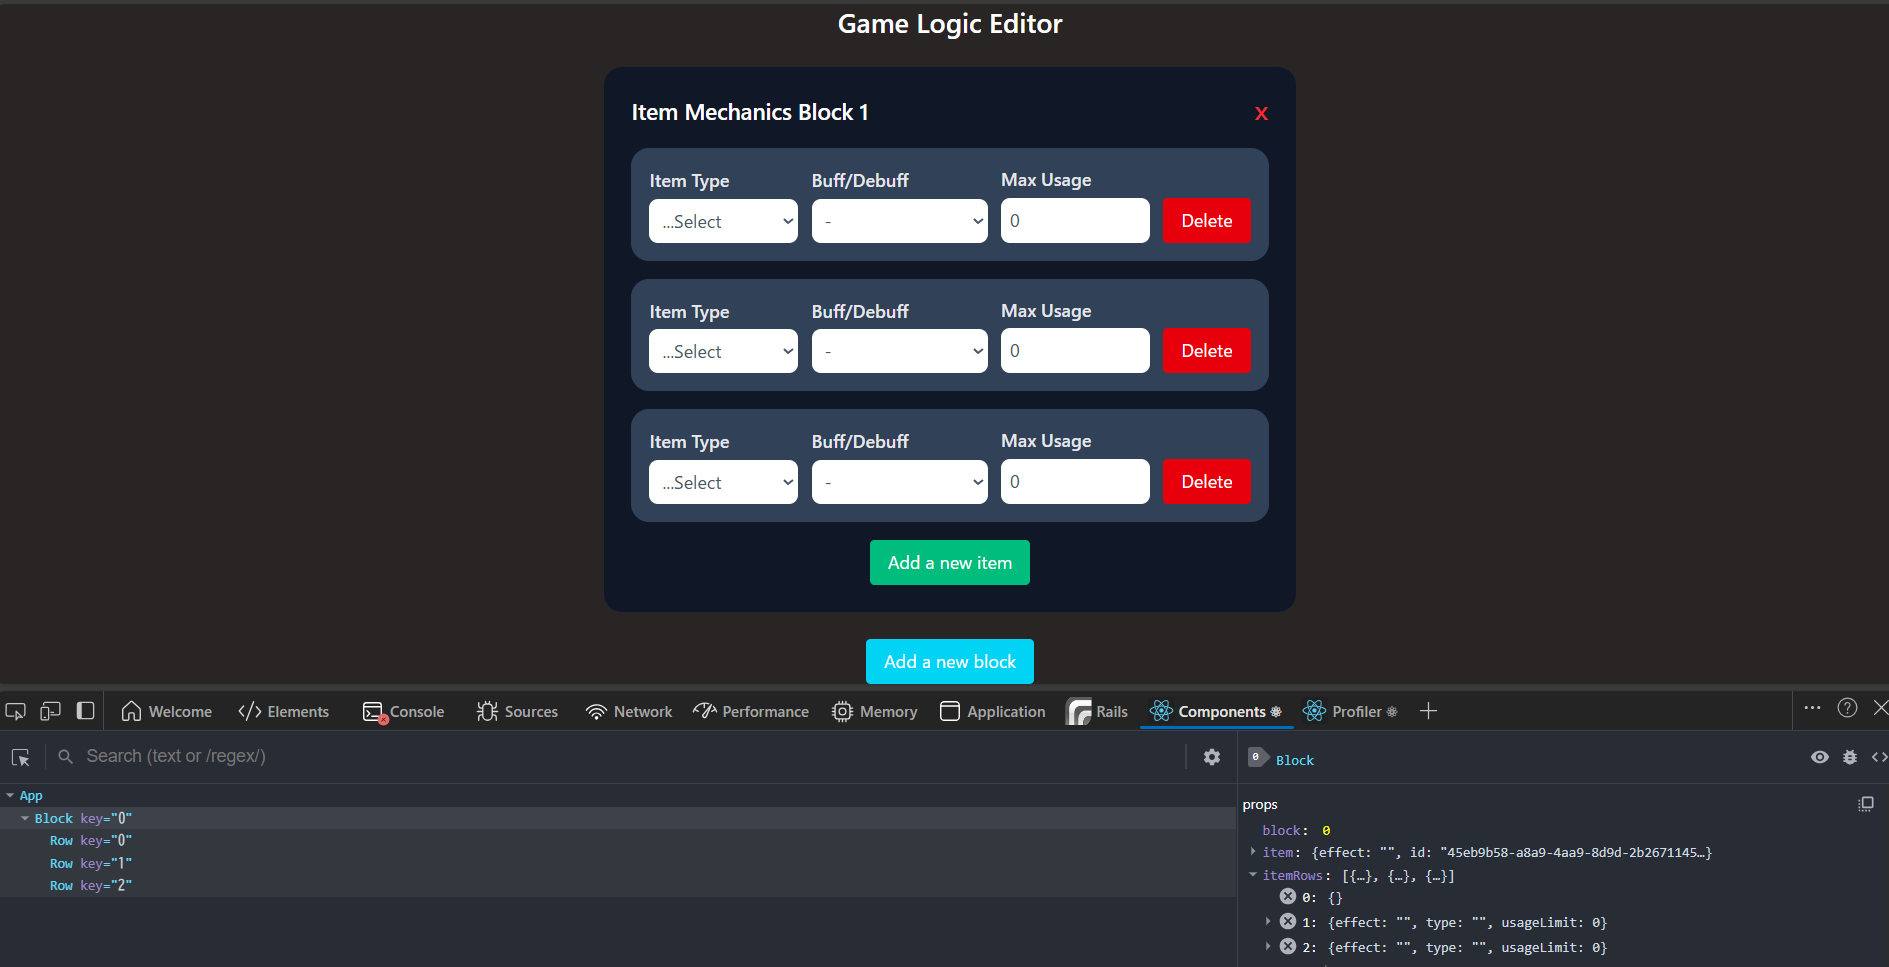
Done! But now we face the following problem:
The inputs values are mirrored, but this can be easily resolved by adding an ID to the item state and nesting it with the rows:
const [itemRows, setItemRows] = useState([{
    id: crypto.randomUUID(),
    type: "",
    effect: "",
    usageLimit: 0,
  }]);

  const handleItemChange = (id, name, value) => {
    setItemRows(itemRows.map((item) => {
      if (item.id === id)
        return { ...item, [name]: value };

      return item;
    }));
  };

  const handleAddRow = () => {
    setItemRows([
      ...itemRows,
      {
        id: crypto.randomUUID(), // add this line
        type: "",
        effect: "",
        usageLimit: 0,
      },
    ]);
  };

// With this alteration, we can implement the delete handler

  const handleDeleteRow = (id) => {
    setItemRows(itemRows.filter((item) => item.id !== id));
  };
Now just do the props modifications and in the Row component change the handleItemChange to accept the id, and now all is working well.
Last is the block handler. We learned we need an ID to delete and avoid duplicating, so let's do it:
const [itemBlocks, setItemBlocks] = useState([{ id: 0 }]);

  const handleAddBlock = () => {
    setItemBlocks([...itemBlocks, { id: itemBlocks.length }]);
  };

  const handleDeleteBlock = (id) => {
    setItemBlocks(itemBlocks.filter((block) => block.id !== id));
  };
Now is just to set the props and add to the button on click. Let's see if it works:
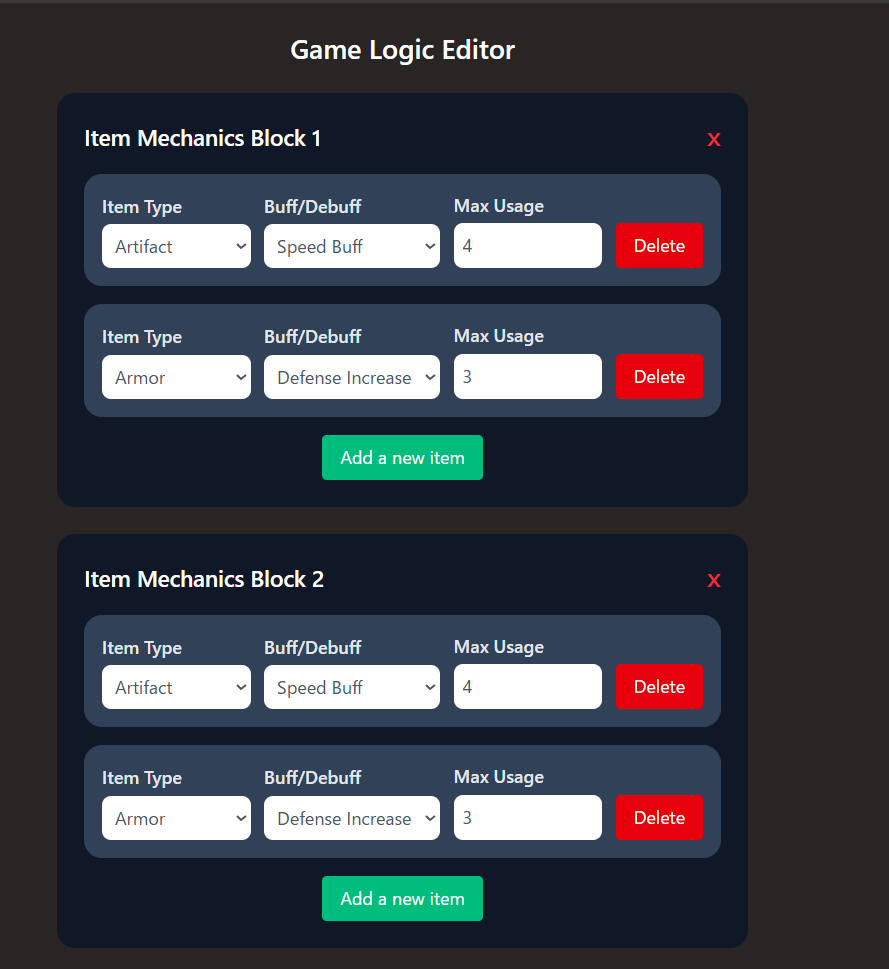
Hmm, worked, but not like as expected. This code broke what we had fixed. When we try to add a new item row duplicate in the blocks, the inputs are duplicating too. And when we try to delete the row in the same way.
The Problem
This occurs because the children in the ItemBlock didn't change together when they needed to. Like the rows and inputs before, we can fix this by nesting the state that needs to change together. Example: if the first block has 4 rows, we want to keep it, and when we add the new block, this block needs to have one row, and all this data needs to be isolated. So finally we achieve a state like this:
const [itemBlocks, setItemBlocks] = useState([
    {
      id: 0,
      rows: [
        {
          id: crypto.randomUUID(),
          type: "",
          effect: "",
          usageLimit: 0,
        },
      ]
    }
  ]);
But now, imagine the pain of modifying the inputs. In this state, we have a deep nesting complexity and performance issues with many blocks/rows; the update functions do a lot of work (multiple array iterations).
The handle function starts to look like this:
const handleItemChange = (id, blockId, name, value) => {
    setItemBlocks(
      itemBlocks.map((block) => {
        if (block.id === blockId) {
          const updatedRows = block.rows.map((row) => {
            if (row.id === id) {
              return { ...row, [name]: value };
            }
            return row;
          });
          return { ...block, rows: updatedRows };
        }
        return block;
      })
    );
  };
Step 4: The Solution, Normalise the state and modify the handlers.
With the normalised state we have something like this:
const normalisedState = {
  itemBlocks: {
    0: {
      id: 0,
      rowsIds: [1]
    }
  },
  itemRows: {
    1: {
      type: "",
      effect: "",
      usageLimit: 0,
    }
  }
}
Notice, now we just have one level of nesting over two of the past state. The idea is that the blocks just refer to the row ids like a SQL table referring to itself. Now the handleChange function looks like this:
const handleItemChange = (id, name, value) => {
    setItemBlocks({
      ...itemTree,
      itemRows: {
        ...itemTree.itemRows,
        [id]: {
          ...itemTree.itemRows[id],
          [name]: value
        }
      }
    })
  };
Conclusion
Using many nested objects/arrays in the state brings complexity and possibly performance issues. The idea is to maintain the state as flat as possible. And using Normalised Tree is a way to do that. If you have some functionality similar to this little challenge or have another way to solve that problem put in the comments and let's discuss it!
References
https://react.dev/learn/thinking-in-react
https://react.dev/learn/updating-objects-in-state
https://react.dev/learn/updating-arrays-in-state
