In game development, textures are frequently a primary culprit for performance issues. As games get better graphics, and screens get higher resolution, this often results in high memory usage, larger build size, as well as long loading times and slowdowns.
Luckily, fixing this is fairly simple, and will have a significant impact on your game. Let’s look at how we can do this in Unity.
Default Settings and Platform Overrides
When textures are added to a Unity project, they go through the Texture Importer, which converts them to a format the game engine, and the user hardware, can work with.
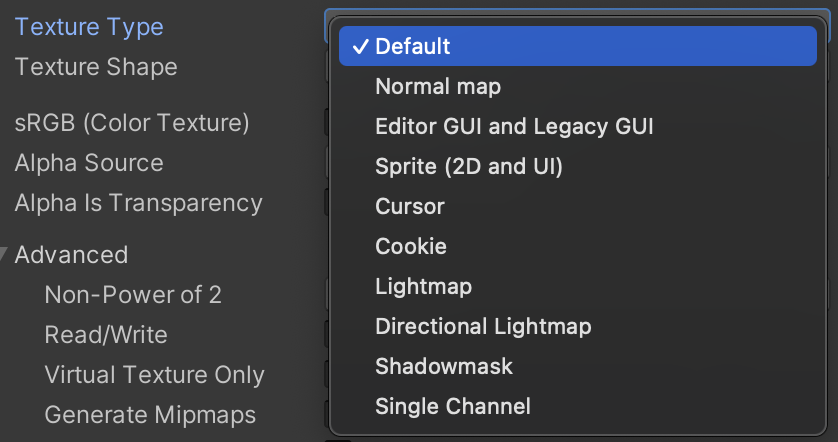
The first thing you’ll need to do is set the right type for that texture, based on how it will be used at runtime. Depending on the type you select, different settings will be available.
Looking at the Texture Importer inspector, you’ll notice a bunch of general settings, and then at the bottom a view with a Default entry, and additional tabs for each platform you have currently installed as Engine modules.
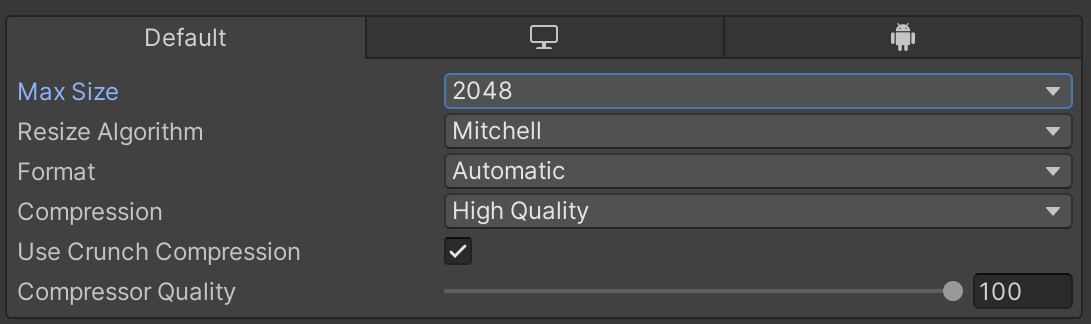
Unity allows you to define general Import Settings that apply to all platforms, and then define overrides for specific ones. While overrides are optional, it’s often worth looking into them to get the best of each platform.
Texture Max Size and Resizing
The Max Size defines the maximum dimension, in pixels, for the imported texture. If the original texture is larger (either width or height), it will be downscaled.
Developers often tend to overlook this value, leading to unnecessarily large textures on devices with fairly small screens, where the added details do not lead to perceivable visual quality. It might make sense to keep this value high for a full-screen image, but not as much for small icons and textures that rarely appear in-game. Tweaking this will often drastically reduce your build size and memory consumption.
This value can be overridden per platform, which is handy if you want smaller textures on mobile, and larger ones on PC and consoles.
The Resize Algorithm indicates the algorithm used by Unity to downscale the texture if it’s larger than the specified Max Size. The default, Mitchell, provides high quality results and should be used in most cases. The other option, Bilinear, is for cases where preserving sharp details is important, such as noise textures.
Compression Format
Setting the right compression format for your game textures is vital to achieve good runtime performance, minimising runtime memory usage, loading time and CPU usage, as well as reducing your build and asset bundle size.
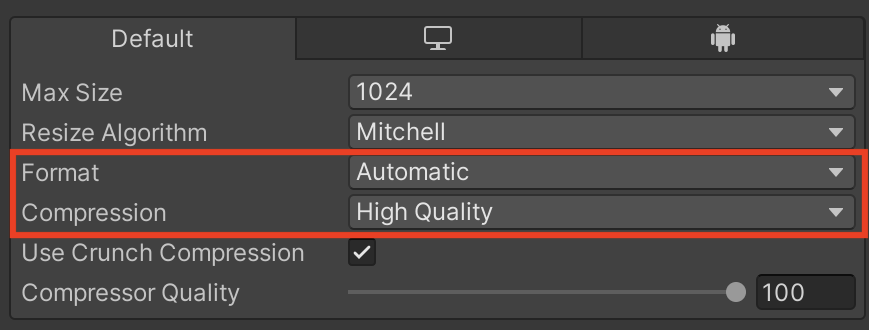
When the Format option is set to Automatic, Unity will pick a compression format based on the Compression setting, following this table.
You can override the default compression format for a specific platform, by going to Project Settings - Player - Other Settings, as shown below.

As mentioned earlier, you can define specific Import settings overrides per platform, by switching to the related tab and enabling the override.
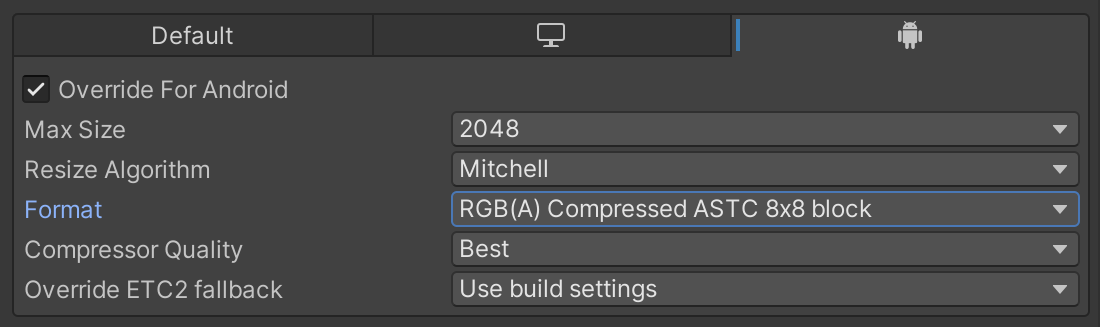
In this case, the Format option will offer a long list of compression formats specific for that platform. There are generally a mixture of compressed and uncompressed formats, normally indicated in the name.
The Compressor Quality option below is available for some specific formats, and defines how much time Unity should spend, at build time, to compress the texture. Setting it to Fast will make your builds faster, while Best will give you better quality at runtime, but can significantly increase your build time, especially for large textures. This option won’t have an actual impact on runtime performance, load time, and memory usage. For this reason, it’s normally a good idea to have it set to Fast during development for faster iteration times, and switch to Best for release builds.
Picking the right Compression Format
Each compression format offers a different balance between texture size, visual quality, level of detail, and support among different devices.
On Mobile platforms, it’s generally recommended to use ATSC (Adaptive Scalable Texture Compression), a lossy block-based texture compression algorithm.
When using ATSC, the block size determines how many bits will be stored per pixel. The lowest quality, ASTC 12×12, will store 0.89bits/pixel, while ASTC 4x4 will store 8 bits/pixel. As usual, more bits will lead to better image quality but higher build size and runtime memory usage.
If you are targeting older iOS devices using the A7 chipset (such as iPad Air 1st Gen and iPad Mini 2, where the Metal graphics API was first introduced), you should select ETC or ETC2. For even older devices, you should select PVRTC.
On Android, older devices with GPUs that run Vulkan or OpenGL ES 3.0 generally support the ETC2 format. Devices older than that will instead mainly rely on ETC.
You can see detailed specifications about each format in this table.
While other formats, such as DXT, give comparable results to ASTC, they are not as widely supported on Mobile. As an example, the Pixel 8 does not support it, as shown in this page.
If you attempt to load a texture at runtime with an unsupported compression format for that device, Unity will decompress it using the default uncompressed format for that platform, then store the uncompressed copy in memory alongside the compressed texture. This leads to increased loading time and significantly higher runtime memory usage.
You can check if the device supports a particular texture format by using SystemInfo.SupportsTextureFormat at runtime.
Some compression formats, such as ETC2 and DXT5|BC3, requires the texture’s width and height to be a multiple of 4. If the source texture doesn’t follow this rule, the texture will be kept uncompressed on disk and at runtime.
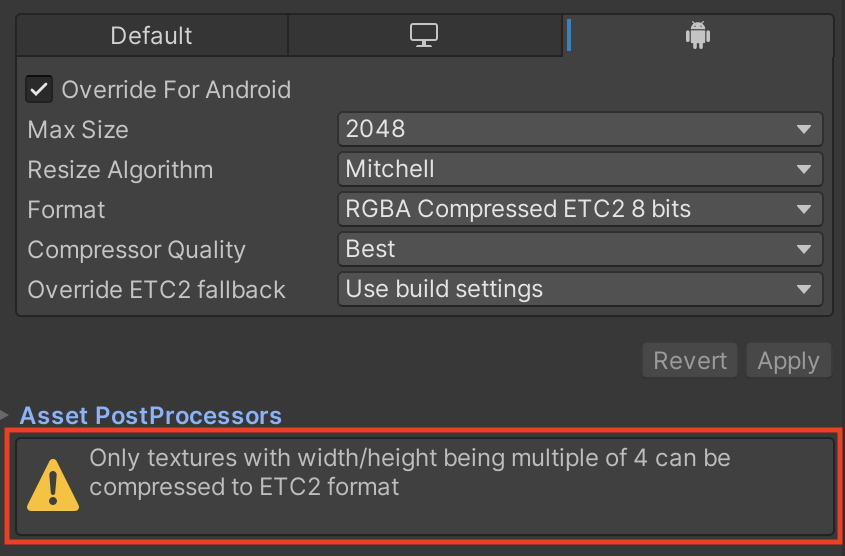
You can confirm this by looking at the Preview in the Inspector, where Unity will show what format it will be using instead (in most cases RGBA8 sRGB).
Texture Compressions Targeting
When working with Android, you have the option to include textures compressed with multiple compressions formats in your App Bundles, by enabling Texture compressions targeting and selecting the formats in Project Settings - Player - Other Settings.
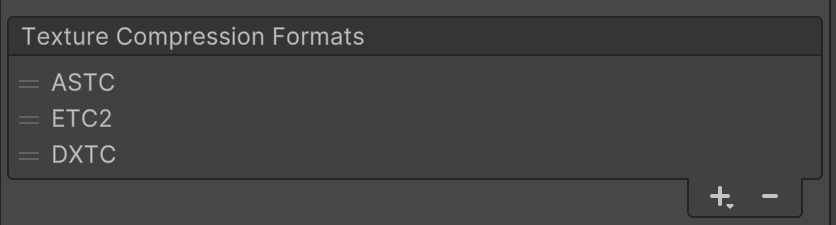
Google Play will then deliver an optimised APK to the user with the optimal compression format for their device. This option is only available from Unity 6 onwards.
Crunch Compression
Crunch compression is an additional pass that runs on top of the base compression.
This leads to smaller file size on disk, so it’s particularly beneficial for example when delivering assets remotely in asset bundles. Build time will increase when using this option, as compressing all textures can take some time. It also normally leads to faster loading times at runtime, but has no impact on runtime memory usage.
Crunch Compression uses a lossy algorithm, which means there will be a loss in image quality relative to the reduction in file size. You can adjust the balance by using the related slider, as shown below.
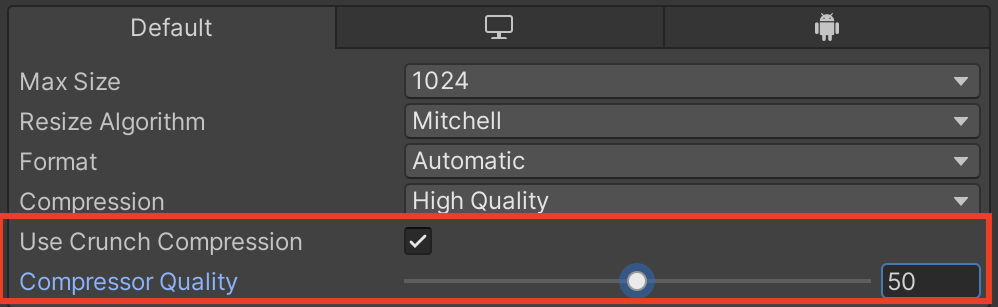
Not every Compression Format supports Crunch Compression. When defining a platform override, you will notice that some formats have “Crunched” in their name, meaning they will apply Crunch Compression.
Enabling Read/Write
When this option is enabled, Unity stores a copy of the texture on CPU-addressable memory, in order to allow using methods that run on the CPU, such as Texture2D.GetPixels.
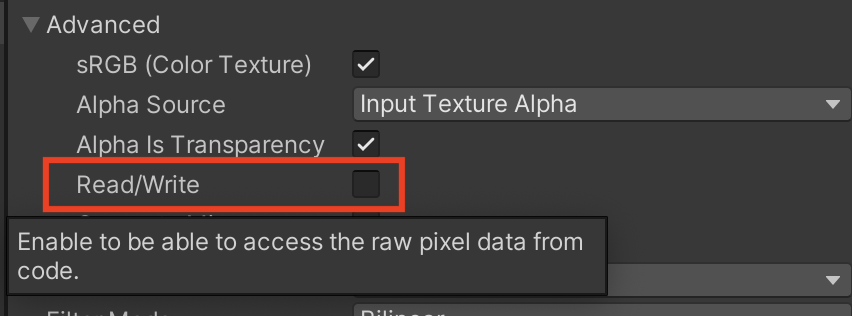
While this doesn’t affect image size on disk, it will result in higher runtime memory usage. For this reason, it’s recommended to use it only when strictly needed.
Note that methods that run on the GPU, such as Graphics.CopyTexture, do not require Read/Write to be enabled.
You can also toggle this option at runtime, to allow Unity to read the data and then free up the memory afterwards, by setting the relevant flag in Texture2D.Apply.
Enabling Mipmaps
Mipmaps are smaller versions of your texture, commonly used to reduce the level of details based on the distance from the camera, speeding up rendering.
They can be generated by selecting the “Generate Mipmaps” option in the Advanced settings.
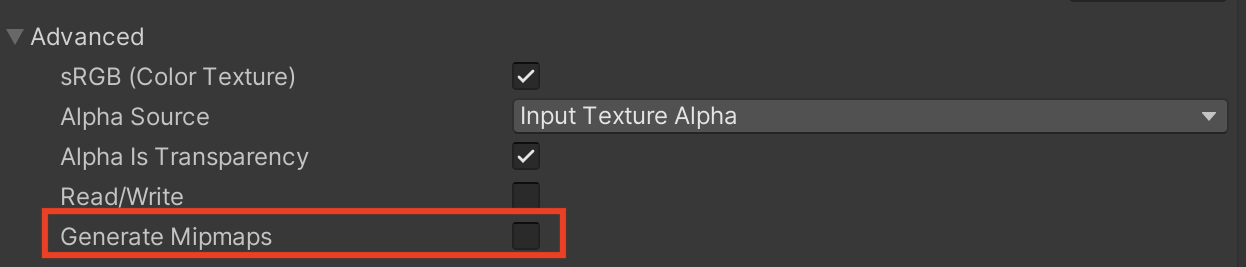
Enabling this option will increase the size of the texture by 33%, both on disk and runtime memory.
While this is useful for textures that are rendered at different sizes during gameplay, it has no benefit for fixed size textures such as UI images and icons. For this reason, it’s best to keep it disabled for textures that do not benefit from different levels of details.
Generating Physics Shape
When dealing with Sprite textures, Unity gives you the option to generate a sprite outline, used for 2D Physics Collisions and Raycasts.
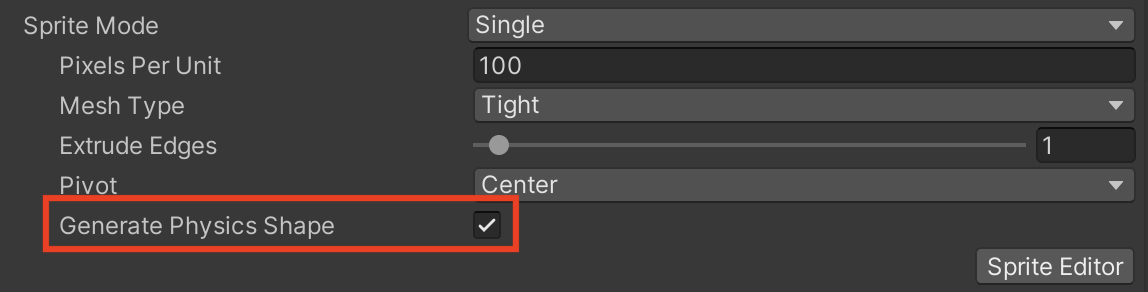
While the overhead and memory footprint for this option is generally very small, it’s a good idea to disable it if the sprite does not interact with the Physics system, to gain some marginal savings.
Defining Importer Presets
Setting the right importer values for a large amount of assets can be quite tedious. Luckily, we can automate some of this work using the Preset Manager.
To start, let’s create some presets. To do that, find a texture whose settings you want to use as a template for other assets, then click on the Preset button from the Inspector and select “Create new Preset…”.
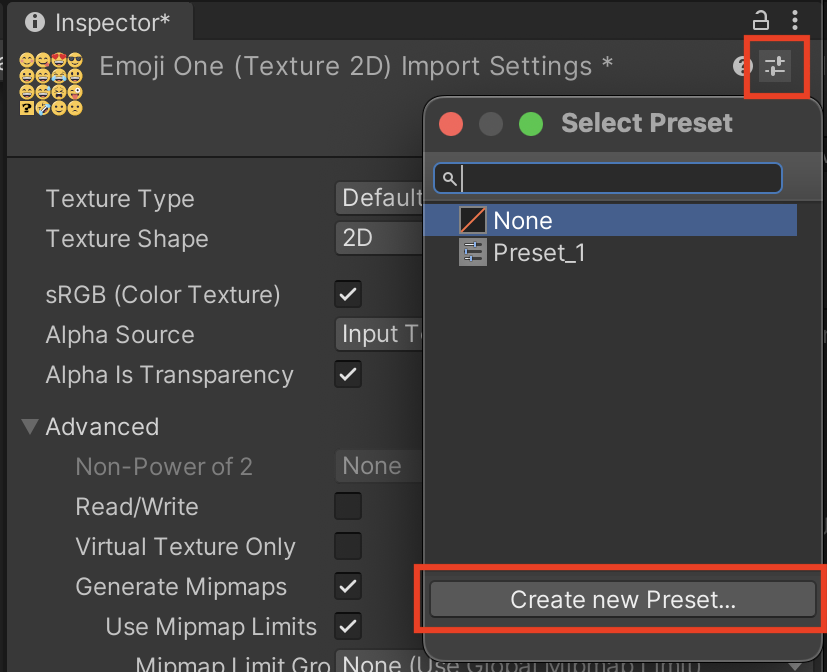
A new Importer Preset asset will be created, carrying over all the settings from the selected texture.
Then, navigate to Project Settings - Preset Manager, and select Default Preset - Importer - Texture Importer. Here, you can register the preset you just created.
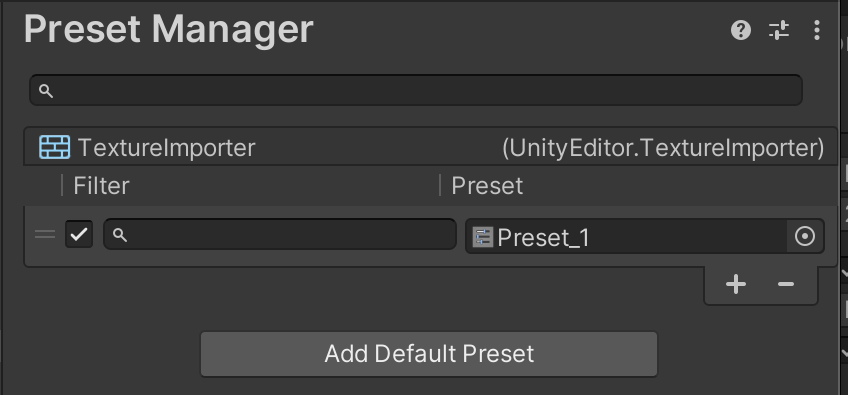
The filter field allows you to apply the Preset only to assets in specific folders.For example, if you want to apply the preset to all textures in a Background folder, you can use this filter:
glob:"Background/*.png"
In some cases you might want to apply a preset for certain values, without affecting others. To do so, you can navigate to your Importer Preset asset, then right click on the field you’d like to exclude, and select “Exclude Property”. A red marker will appear, indicating that the field won’t be overwritten by the preset.

If you define multiple Texture Importer presets, they will be applied in order, from top to bottom, taking into account the defined filters.
Note that presets will be applied whenever a new texture is imported into the project, but they will not automatically apply to existing textures, even if you reimport them. You will instead need to use the Reset option from the relevant inspector, or write some editor tooling to automate this.
Determining the final texture size on build
When you check the texture in the Inspector preview, Unity will show what resolution and format the Texture is using for the currently selected platform, and its current size while loaded in the editor.
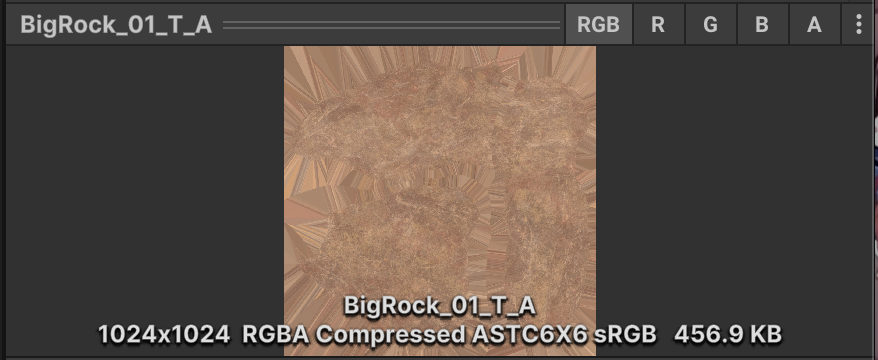
The texture size reported here is just an estimate of its final size when you build the game, and does not take into account further compression and processing happening at build time, such as mipstripping.
After making a build, you can go through the Build Report, in the Editor.log, to see all the textures included in your build and their size on disk. The values reported here might differ slightly from the ones shown in the Inspector, and they are a closer indication of their actual size at runtime.
Build Report
Uncompressed usage by category (Percentages based on user generated assets only):
Textures            1.1 gb  93.7%
[...]
Total User Assets   1.2 gb  100.0%
Complete build size 1.3 gb
Used Assets and files from the Resources folder, sorted by uncompressed size:
[...]
512.2 kb    1.2% Assets/Scenes/Oasis/Art/Environment/Textures/BigRock_01_T_A.png
[...]
Note, the description there is a bit misleading. This includes all game assets, not just the ones from the Resources folder. Also, “Uncompressed” refers to further compression passes that the actual game build or asset bundles might go through (such as LZ4 AssetBundle compression), but the textures sizes reported here are already compressed based on the settings we previously chose, ASTC6x6 in this case, and Crunch Compression if enabled.
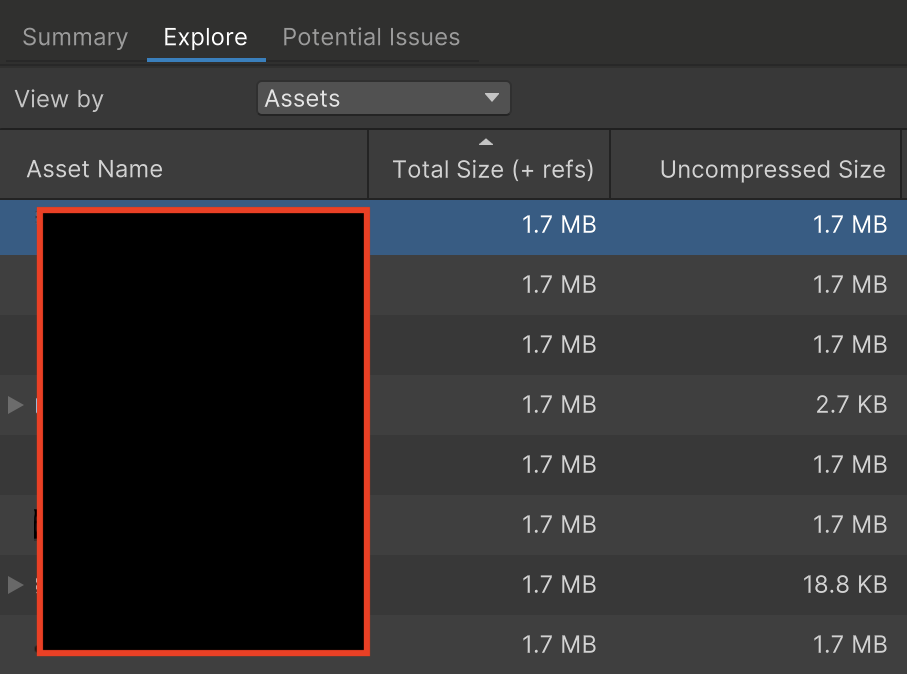
If you are using Addressables, you can check the Addressables Report to inspect what textures are included in your build, and their size on disk, by switching to the Explore tab and viewing by Assets.
Determining Texture memory usage at Runtime
The Memory Profiler is the best tool to determine what textures are loaded during gameplay, and how much memory they take. It works by manually taking captures at specific points of the game, which you can then inspect and compare afterwards.
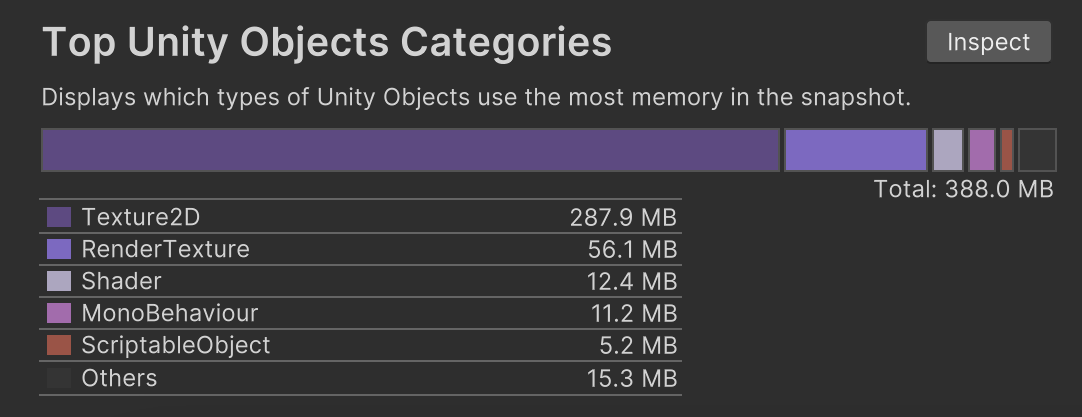
In the Summary tab, under “Top Unity Objects Categories”, you’ll see which asset category is taking the most memory, textures in this case.
Switching to the “Unity Objects” tab will allow you to inspect what textures are loaded in memory, and how much memory they occupy in each bucket.
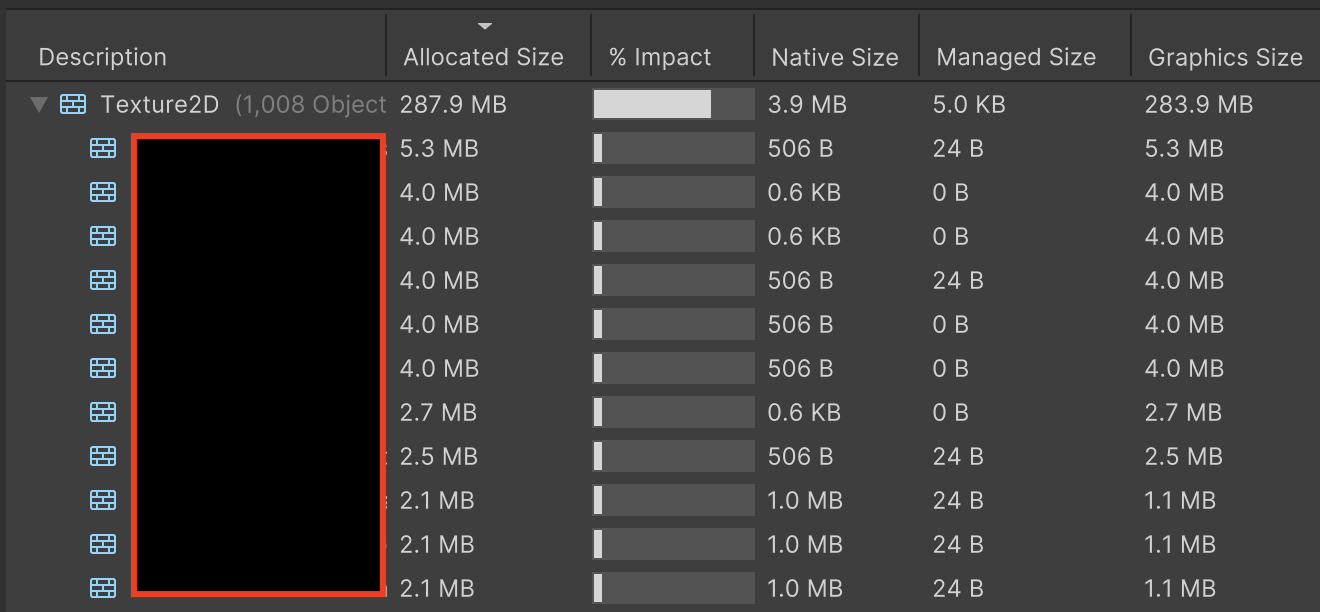
You can toggle the “Show Potential Duplicates Only” option at the bottom, to only show textures that are duplicated in memory. This often happens when working with Asset Bundles, and solving those is an effective way to improve runtime memory usage.
It’s important that you take memory captures from the game running on device. Captures taken from the editor will not accurately reflect what players will experience, as they will include assets loaded by the editor itself, as well as different compression formats and settings from the actual game build.