
This guide walks you through setting up a Raspberry Pi (headlessly) using Raspberry Pi Imager, enabling SSH, configuring Wi-Fi, setting up VNC Viewer, fixing common issues, and using essential commands.
📥 1. Installing Raspberry Pi OS Using Raspberry Pi Imager
✅ Step 1: Download Raspberry Pi Imager
- Download from the official site.
- Install and launch it.
✅ Step 2: Flash the OS to the MicroSD Card
- Insert a microSD card (≥16GB).
- Open Raspberry Pi Imager and select:
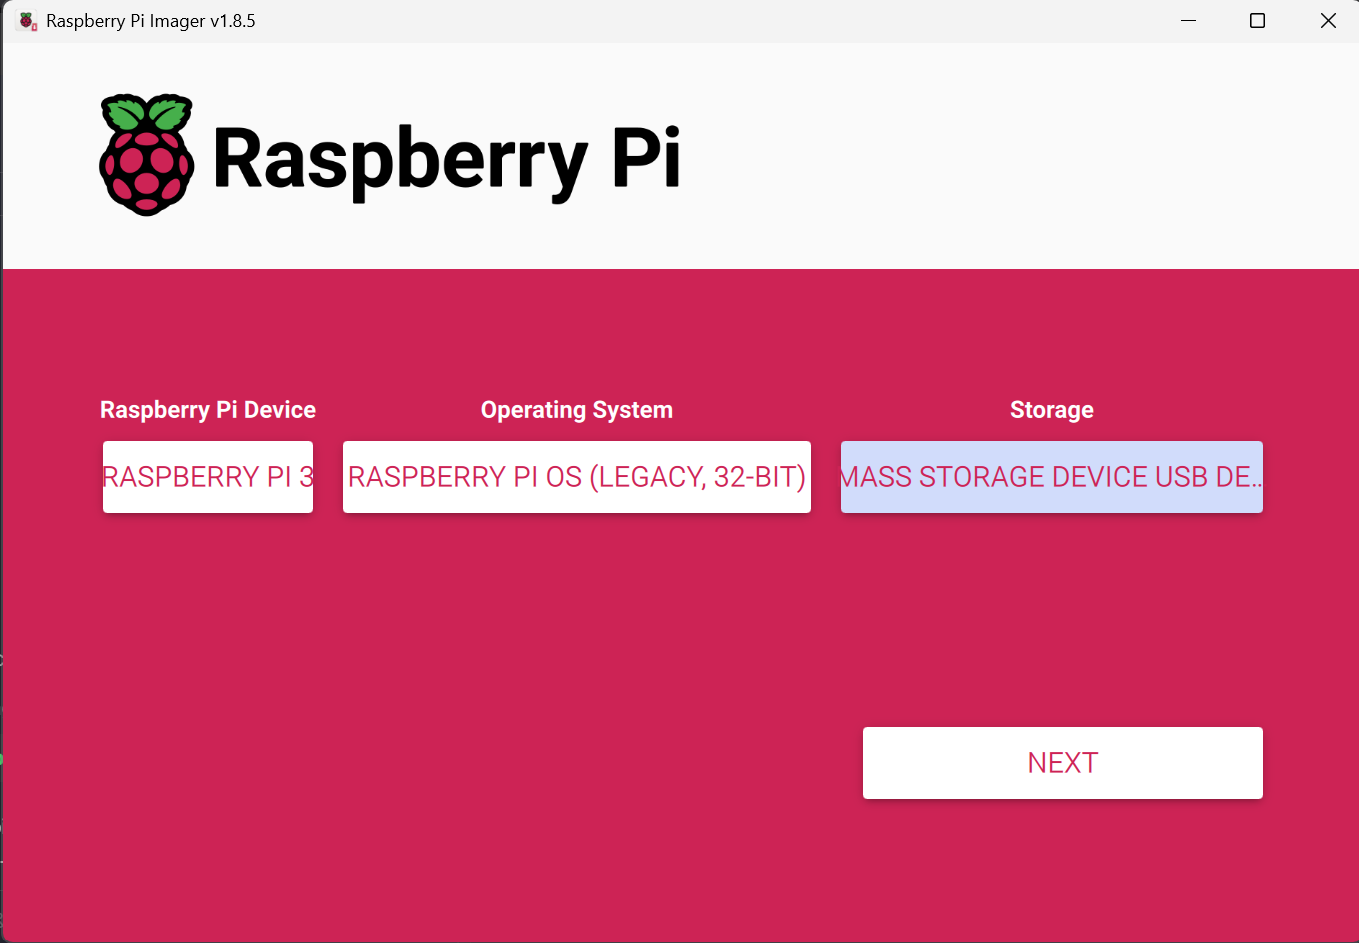
- Choose OS → Raspberry Pi OS (Recommended)
- Choose Storage → Select your SD card
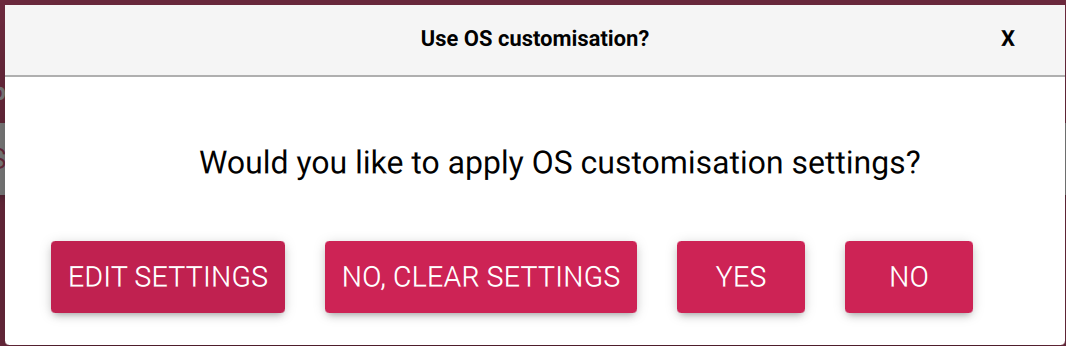
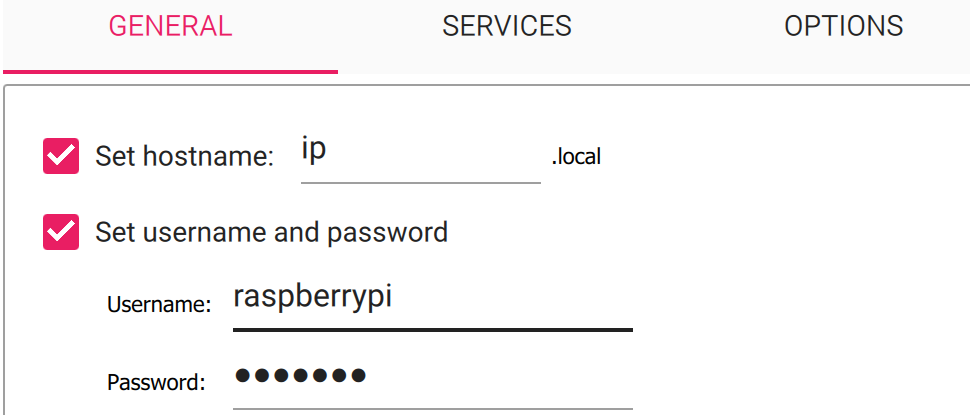
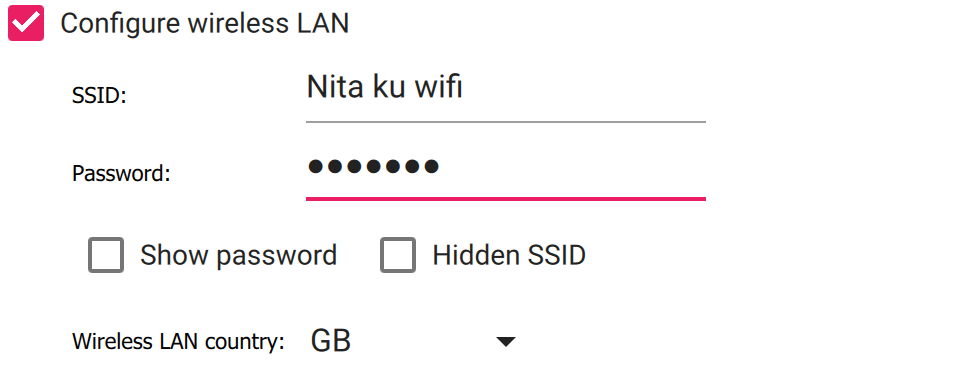
⚙️ Configure Wi-Fi and SSH (Optional but recommended)
- Click the ⚙️ (Settings) icon:
-
Set:
- Hostname
- Wi-Fi SSID & Password
- Enable SSH
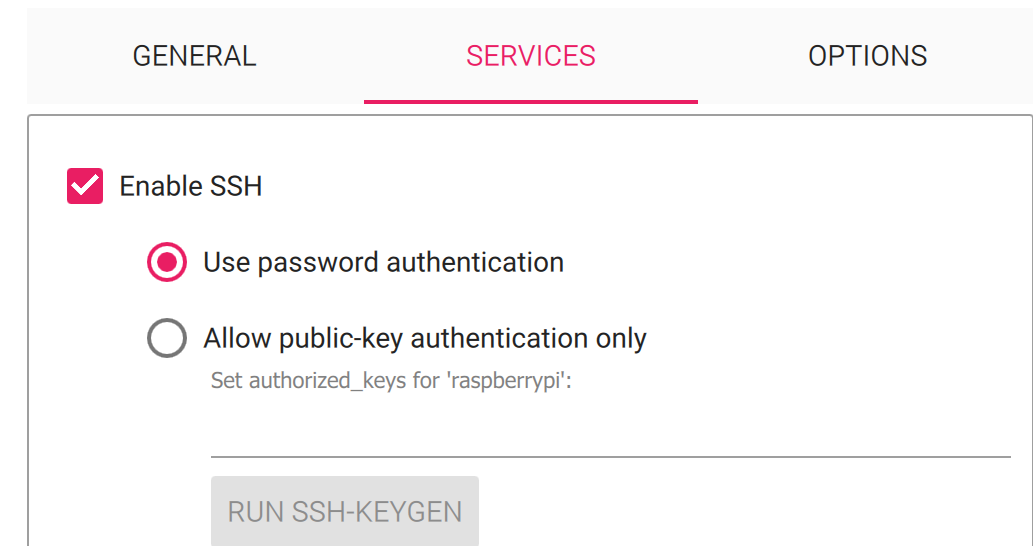
- Hostname
Save & click Write to flash.
🛠️ Step 3: Manual Headless SSH & Wi-Fi Setup (If Not Done Above)
- Open the boot partition on the SD card.
- Create empty
sshfile:
touch /boot/ssh- Create
wpa_supplicant.conf:
nano /boot/wpa_supplicant.confPaste:
country=US
ctrl_interface=DIR=/var/run/wpa_supplicant GROUP=netdev
update_config=1

network={
  ssid="Your_WiFi_Name"
  psk="Your_WiFi_Password"
  key_mgmt=WPA-PSK
}- Save & eject. Insert into Pi and power on.
💻 2. Connect to Raspberry Pi via SSH
🔍 Find the IP Address
- With monitor:
hostname -I- Headless:
ping raspberrypi.local🔐 SSH from PC
ssh pi@
# Example:
ssh [email protected]- Default user:
pi - Password:
raspberry
🔄 3. Update the Raspberry Pi
sudo apt update && sudo apt upgrade -y🖥️ 4. Enable & Configure VNC
Enable VNC Server:
sudo raspi-config- Go to Interfacing Options → VNC → Enable
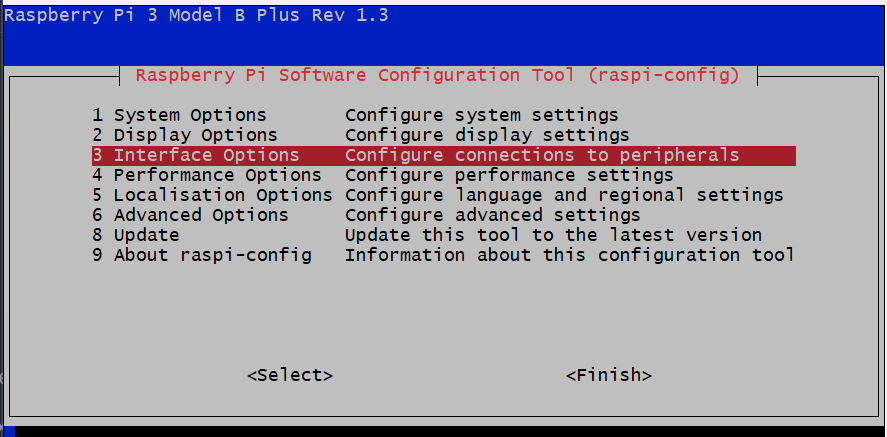
- Exit & reboot:
sudo rebootInstall VNC Server (if needed)
sudo apt install realvnc-vnc-server realvnc-vnc-viewer -yStart:
vncserver🔗 5. Connect via VNC Viewer
- Download: VNC Viewer
- Enter your Raspberry Pi IP (e.g.
192.168.1.100)
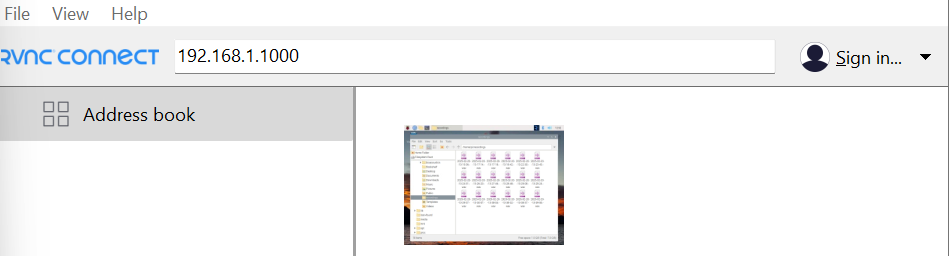
- Login:
- Username:
pi - Password:
raspberry
- Username:
🧯 6. Fix: “Cannot currently show the desktop”
Fix 1: Set a Virtual Display
sudo nano /boot/config.txtUncomment or add:
hdmi_force_hotplug=1
hdmi_group=2
hdmi_mode=82
Then:
sudo rebootFix 2: Restart VNC
sudo systemctl restart vncserver-x11-serviced
# or
vncserver
Fix 3: Reinstall Desktop
sudo apt install --reinstall raspberrypi-ui-mods
sudo reboot
🛠️ 7. Essential Raspberry Pi Commands
🔄 System Update
sudo apt update && sudo apt upgrade -y🔍 System Info
uname -a               # Kernel
vcgencmd measure_temp  # CPU Temp
df -h                  # Disk
free -m                # RAM
⚙️ Services
sudo systemctl status vncserver-x11-serviced
sudo systemctl restart vncserver-x11-serviced
🌐 Networking
ip a
ping google.com
📁 File Ops
ls
cd /path/to/folder
mkdir new_folder
rm -r folder_name
🔁 Reboot/Shutdown
sudo reboot
sudo shutdown -h now
🌐 8. Set Static IP (Optional)
sudo nano /etc/dhcpcd.confAdd:
interface wlan0
static ip_address=192.168.1.150/24
static routers=192.168.1.1
static domain_name_servers=8.8.8.8 8.8.4.4
Save and reboot.
📦 9. Install Useful Software
sudo apt install python3 python3-pip git nodejs npm -y⚡ 10. Enable GPIO for Projects
sudo raspi-config- Go to Interfacing Options → Enable GPIO
Install libraries:
sudo apt install python3-gpiozero python3-rpi.gpio -yTest:
import RPi.GPIO as GPIO
GPIO.setmode(GPIO.BCM)
print("GPIO Ready!")
🌍 11. Optional: Web Server Setup (Apache)
sudo apt install apache2 -y
sudo systemctl status apache2
Access from browser:
http://project files, or embed code repos.
