
Các tiêu đề liên quan:
Sử dụng Google Workspace làm IdP để đăng nhập AWS
Đăng nhập AWS bằng Google Workspace (SSO với SAML)
Tích hợp Google Workspace làm Identity Provider cho AWS
Google Workspace làm IdP: Giải pháp đăng nhập AWS đơn giản
Cấu hình SSO AWS với Google Workspace
Với Google Workspace,
Chúng ta có thể tạo SSO cho AWS theo 2 cách:
Pre-integrated SAML
- Định nghĩa: Là những ứng dụng đã được Google cấu hình sẵn.
-
Ưu điểm:
- Cài đặt nhanh chóng, đơn giản.
- Hỗ trợ Automatic Provisioning (SCIM).
-
Nhược điểm:
- Mỗi app chỉ tạo được một lần duy nhất.
- Định nghĩa: Dùng cho các ứng dụng không có sẵn trong danh mục của Google.
-
Ưu điểm:
- Tạo được nhiều Custom Application, phù hợp cho doanh nghiệp lớn, có nhiều phòng ban, sử dụng nhiều AWS account, AWS Organizations...
-
Nhược điểm:
- Không hỗ trợ Automatic Provisioning
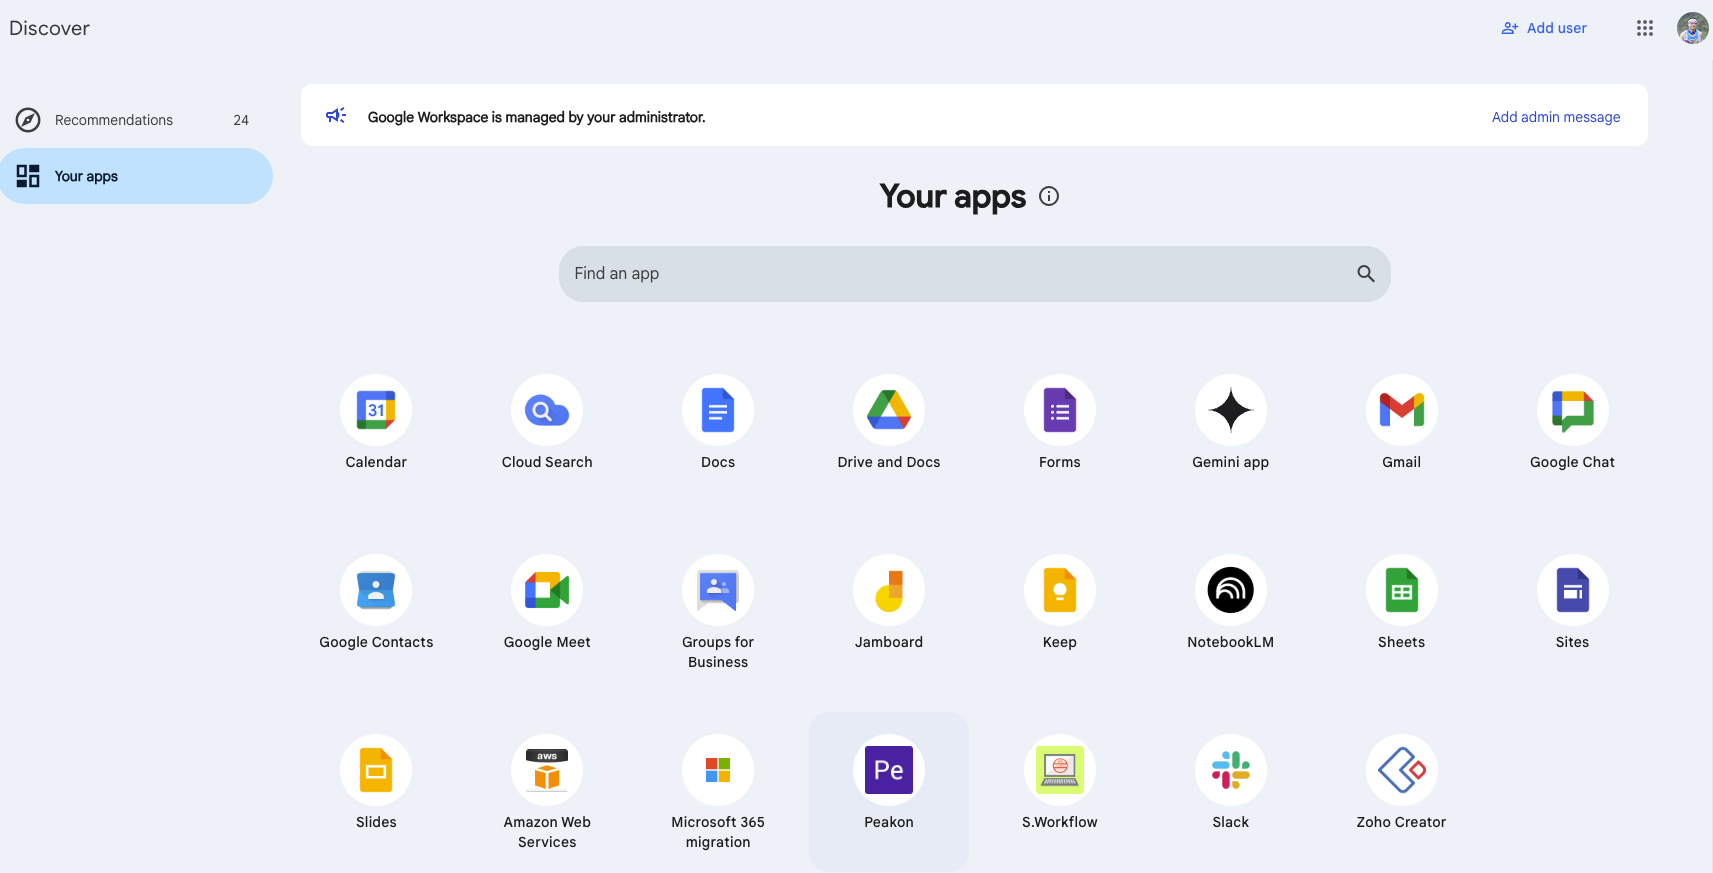
Cả 2 cách đều vào URL này https://admin.google.com/ac/apps/unified?hl=en
Hoặc App -> Web and mobile apps -> Add app:
Để chọn Pre-integrated SAML Apps, chọn: Search for apps.
Để chọn Custom, chọn: Add custom SAML app
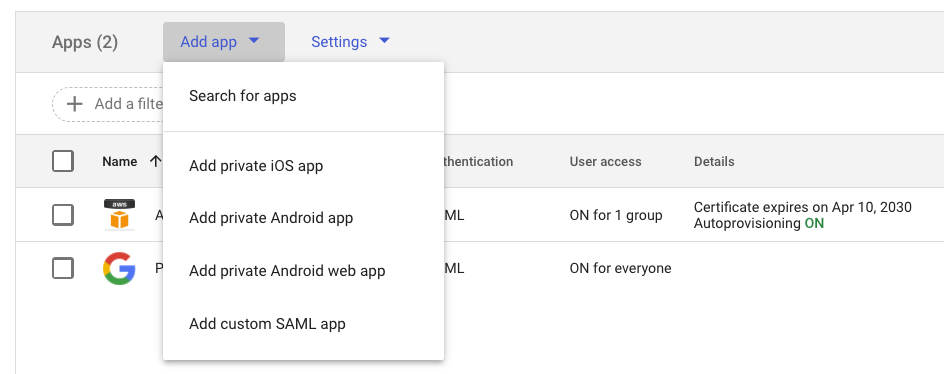
Khác biệt lớn của 2 cái trên chính là Pre-integrated SAML Apps thì có Autoprovisioning còn Custom SAML Apps thì không.
✨ So sánh chi tiết
| Feature | Pre-integrated SAML Apps | Custom SAML Apps |
|---|---|---|
| Definition | Pre-configured apps available in Google Workspace's catalog for easy integration. | Manually configured apps for services not listed in the catalog. |
| Setup Complexity | Simplified setup with pre-defined parameters (e.g., ACS URL, Entity ID). | Requires manual entry of service provider details (e.g., ACS URL, Entity ID, certificate). |
| Supported Applications | Over 200 popular cloud apps (e.g., Salesforce, Slack, Dropbox). | Any app that supports SAML 2.0 but is not pre-listed. |
| User Provisioning | Supports automated user provisioning via SCIM for certain apps. | Requires manual user provisioning or separate SCIM configuration. |
| Attribute Mapping | Pre-defined attribute mappings for supported apps. | Customizable attribute mappings based on the app's requirements. |
| Use Case | Ideal for widely-used enterprise applications with standard configurations. | Suitable for custom-built or niche applications requiring tailored SSO settings. |
| Maintenance | Minimal; updates are managed by Google Workspace. | Requires ongoing maintenance to ensure compatibility with the app. |
| Number of App Instances Allowed | Only Once per Application: Each app from the catalog can only be created once. | Unlimited: You can create multiple custom apps for different groups or use cases. |
Về phía AWS,
Hiện tại chúng ta sử dụng SSO với IdP là Google Workspace có 2 cách: Identity Providers trong IAM và IAM Identity Center
Cùng so sánh:
| Criteria | IAM Identity Providers (SAML in IAM) | IAM Identity Center + External IdP (SSO) |
|---|---|---|
| Configured in | IAM > Identity Providers + Roles | IAM Identity Center > Settings > External Identity Provider |
| SSO Protocol | SAML 2.0 | SAML 2.0 (OIDC support is coming) |
| User Experience | ❌ Manual login via /saml URL, no user portal |
✅ Has AWS SSO Portal (e.g., https://d-xxxx.awsapps.com/start) |
| User Provisioning | ❌ Not supported | ✅ Supports SCIM or Just-in-time (JIT) provisioning |
| Access Control (Roles) | Roles manually mapped via SAML attributes | ✅ Assign permission sets based on users/groups from IdP |
| Admin UX / UI | Basic and limited | ✅ Intuitive, full-featured management interface |
| Multi-account Support (Organizations) | ❌ No built-in support | ✅ Native support for multi-account via AWS Organizations |
| Third-party IdP Integration | Supported but manual | ✅ Simple metadata-based setup |
| CLI / SDK / AWS Console Access | ✅ Supported but requires scripts | ✅ Seamless via aws configure sso
|
| Scalability | Limited for large orgs | ✅ Highly scalable, enterprise-ready |
| Cost | Free | Free |
| AWS Recommendation | ❌ Legacy, no new feature development | ✅ Officially recommended by AWS |
🔍 Summary Recommendation
| Use Case | Recommended Method |
|---|---|
| Legacy systems, few users | IAM Identity Providers |
| Enterprise environments, multi-account | ✅ IAM Identity Center + External IdP |
| Need user portal and better UX | ✅ IAM Identity Center |
| SSO for CLI / SDK / GUI | ✅ IAM Identity Center |
| Google Workspace / Azure AD integration | ✅ IAM Identity Center |
Bắt đầu phần hướng dẫn cho cả 2 cách trên AWS
A. IAM Identity Center + External IdP (SSO)
Ở Google Workspace:
Pre-integrated SAML Apps
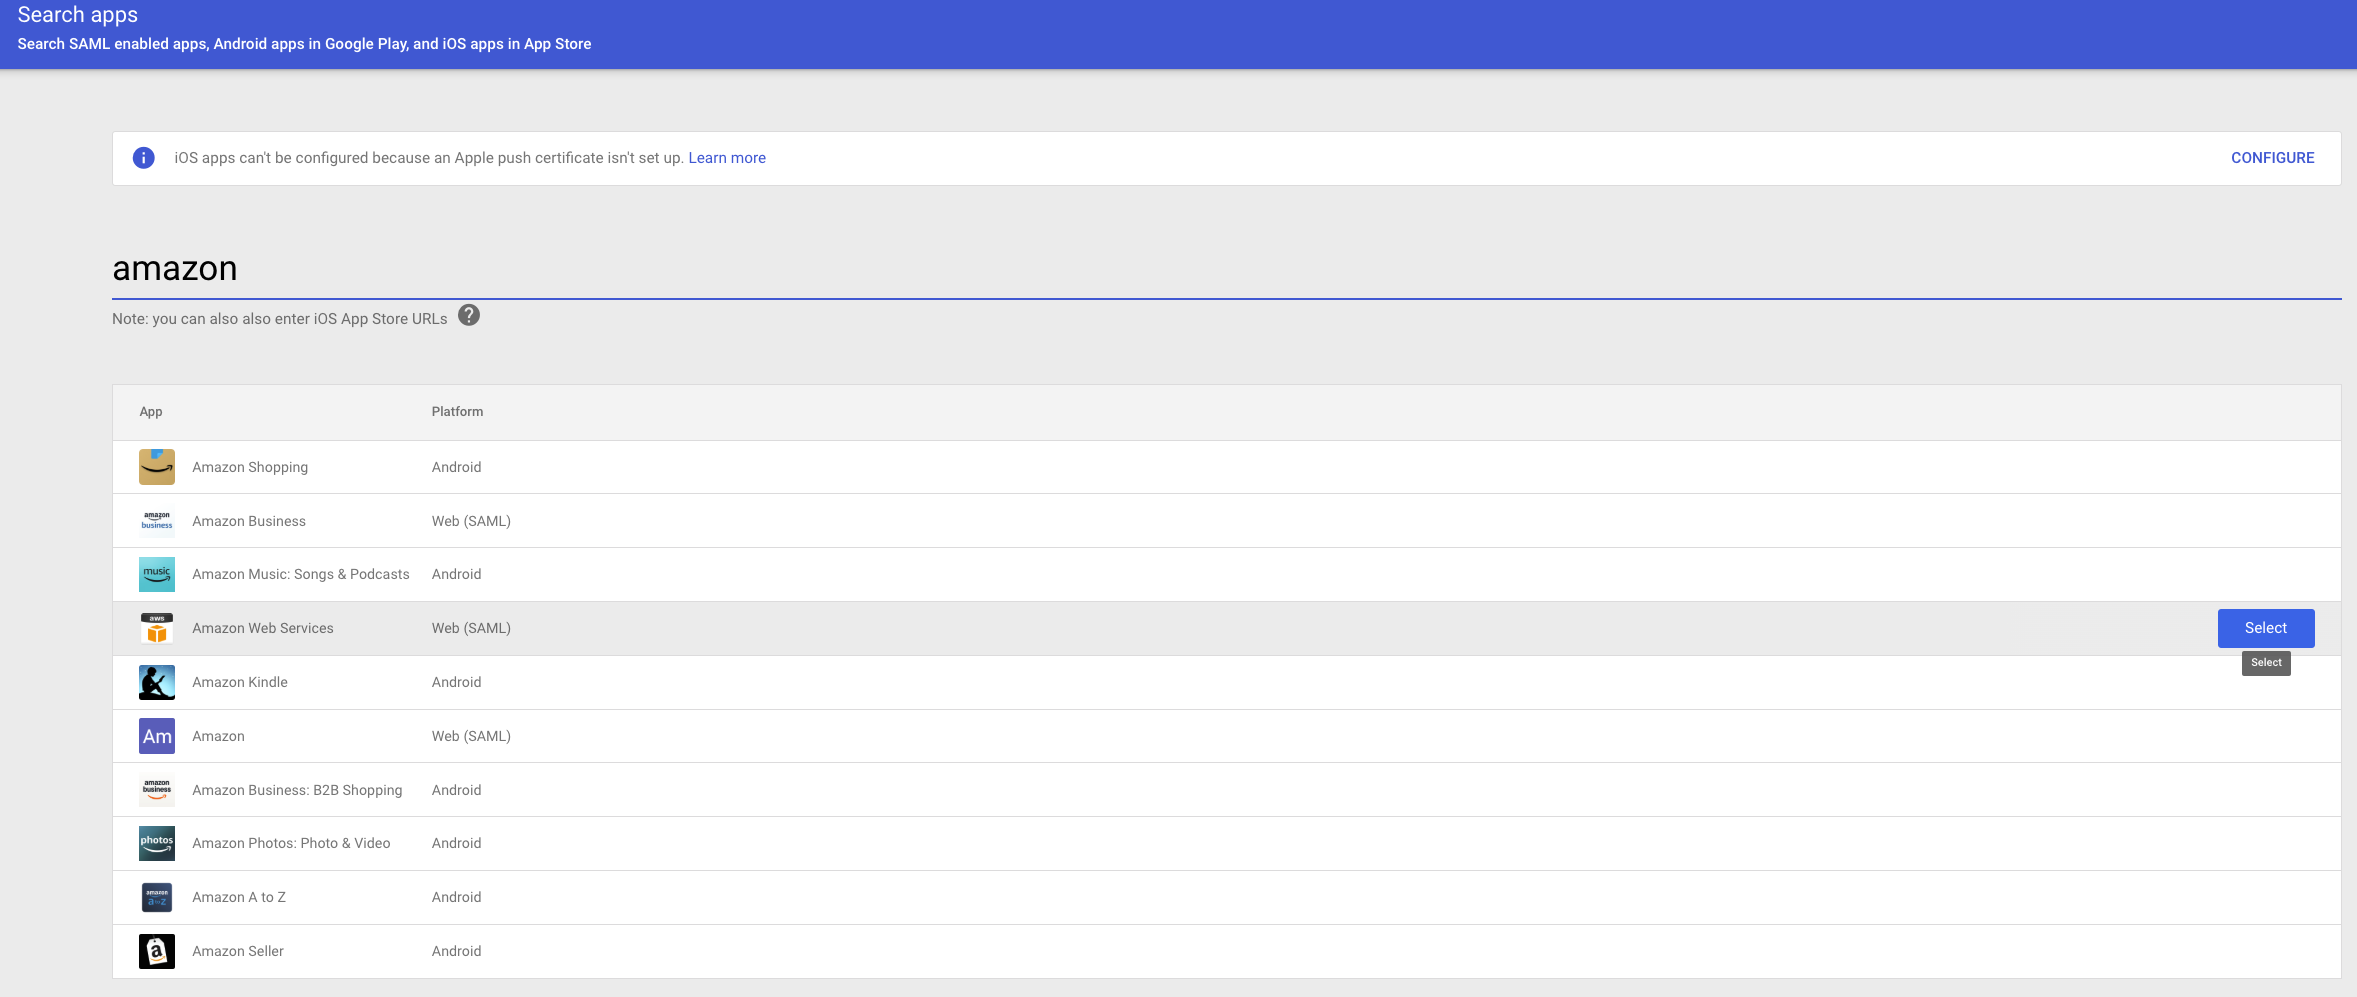
App -> Web and mobile apps -> Add app -> Search for apps
Type: Amazon
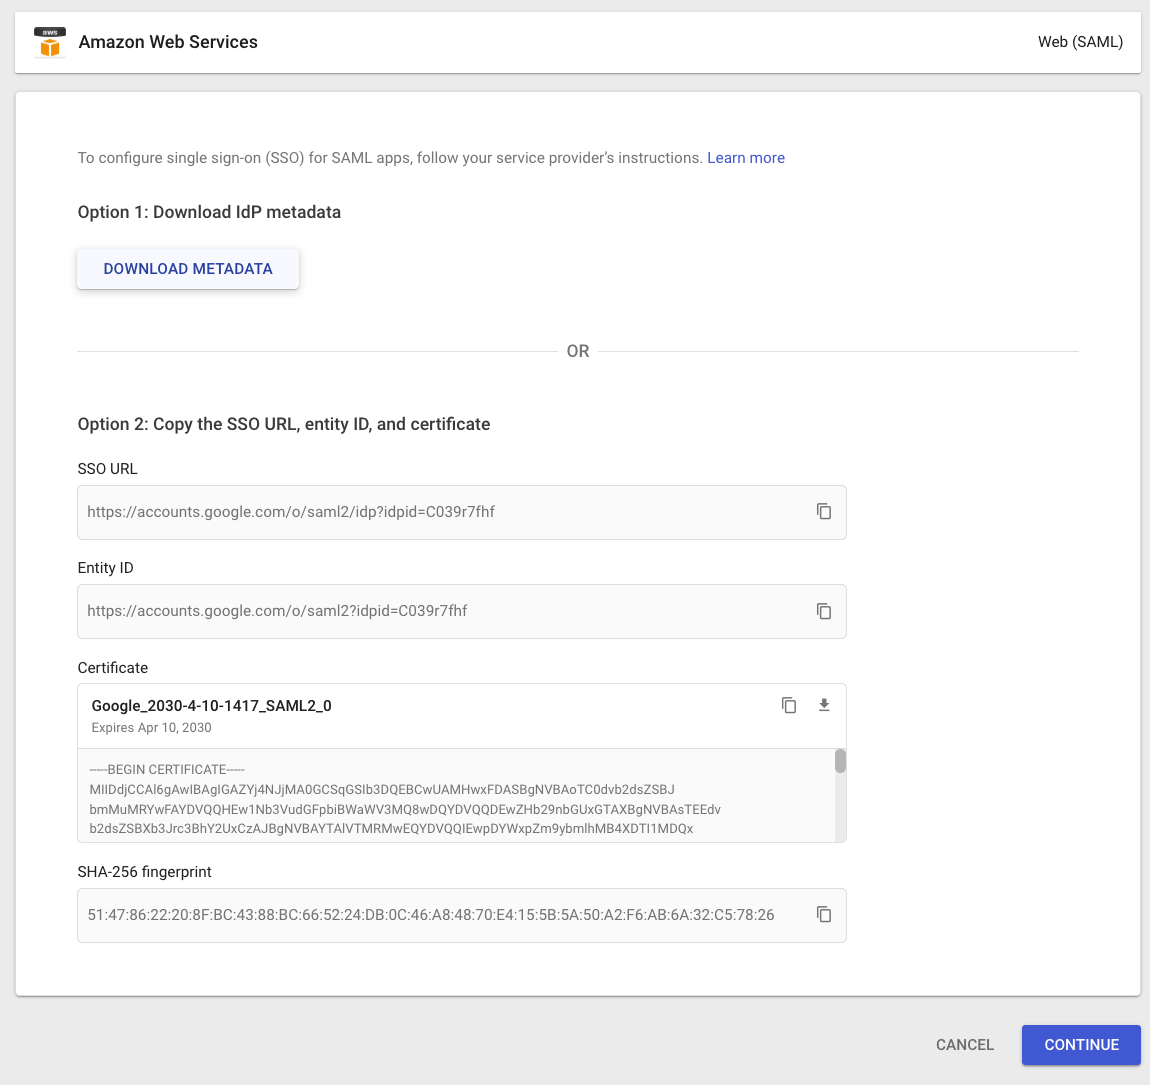
Download metadata and click Continue
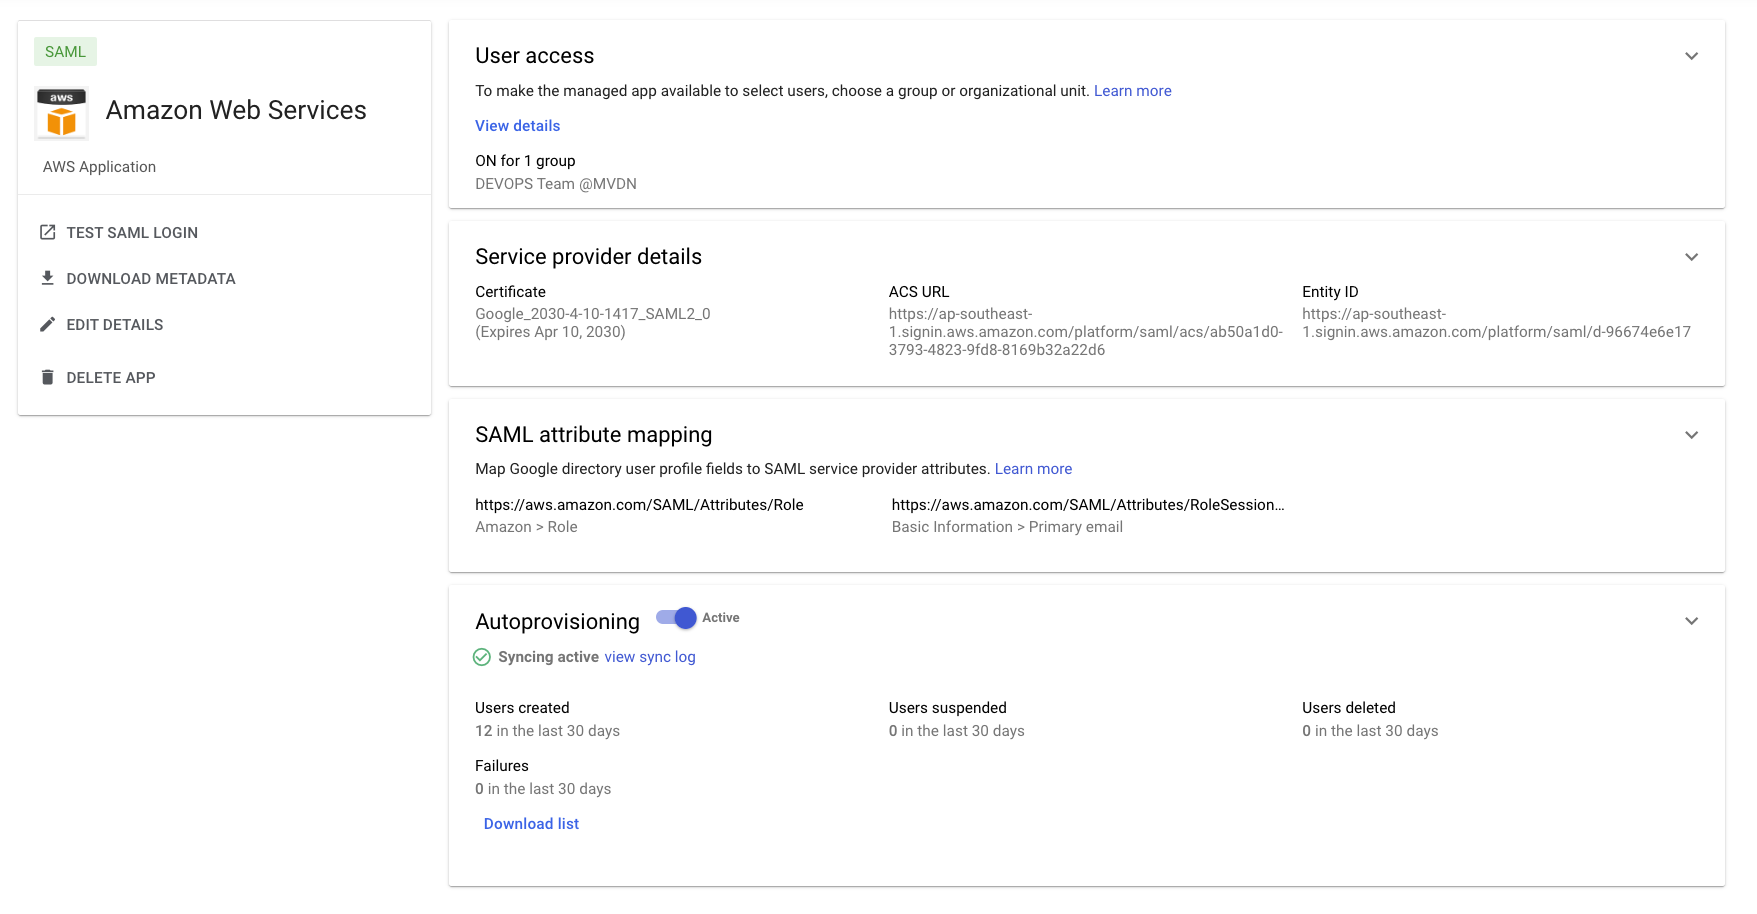
Tại bước này thì chờ sau khi import trên AWS:
SAML attribute mapping
Tại AWS Console:
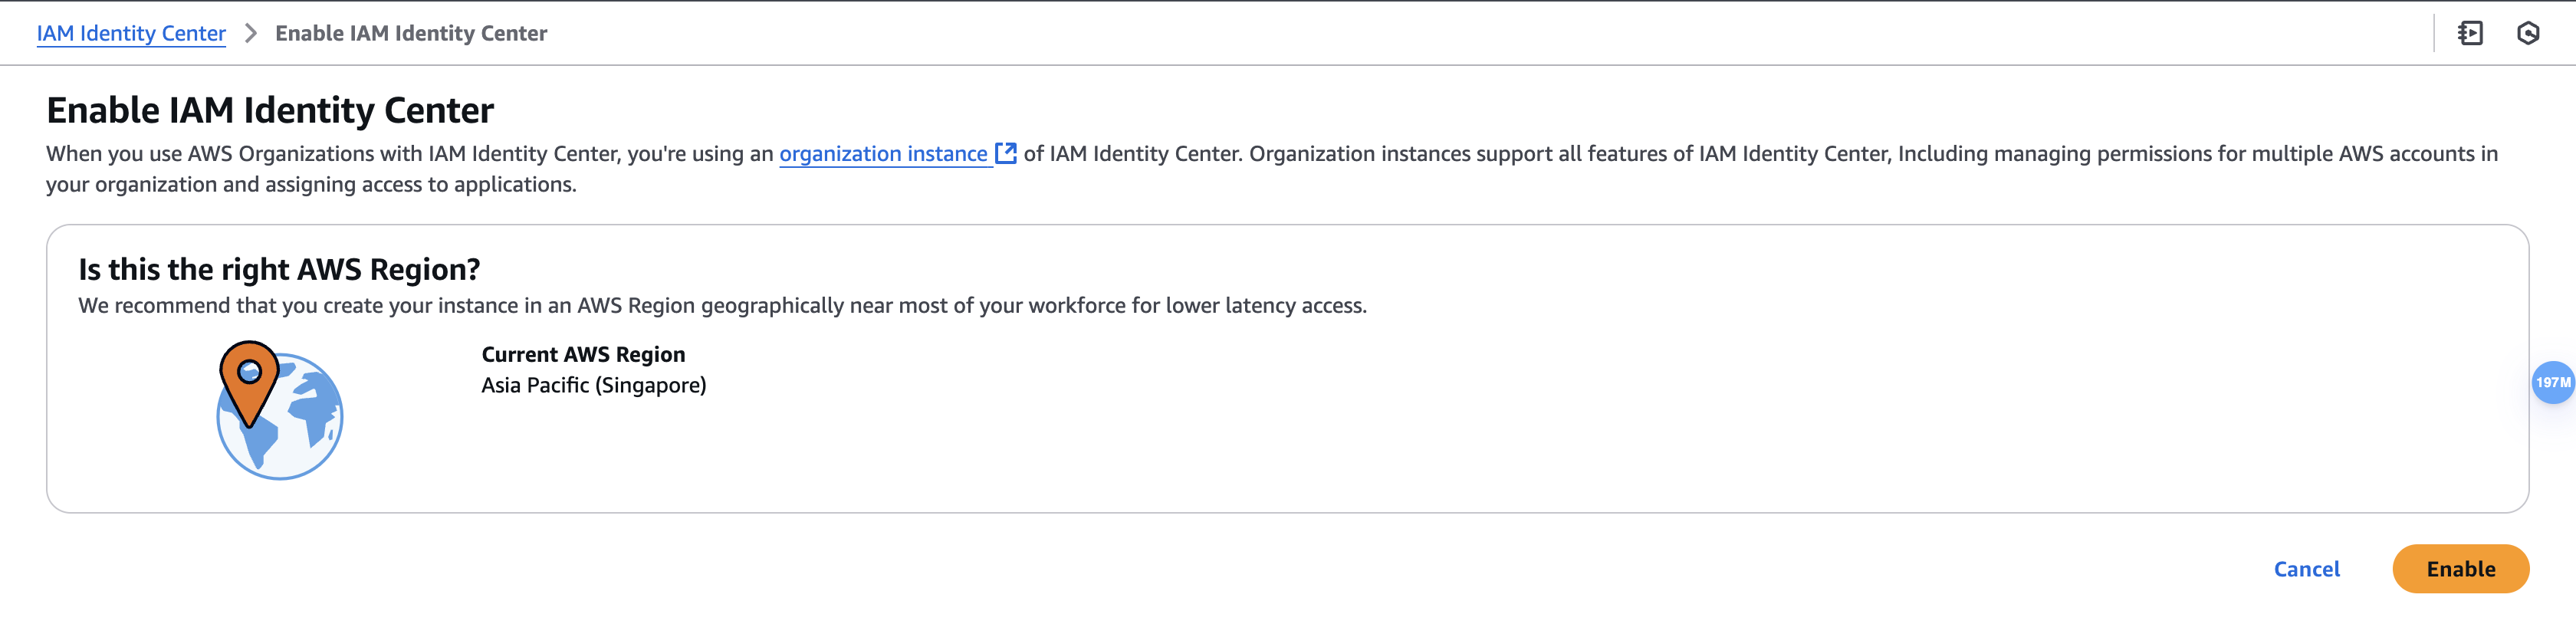
Chọn đúng region cần tạo,
Vào IAM Identity Center và nhấn Enable

Reconfirm: Enable
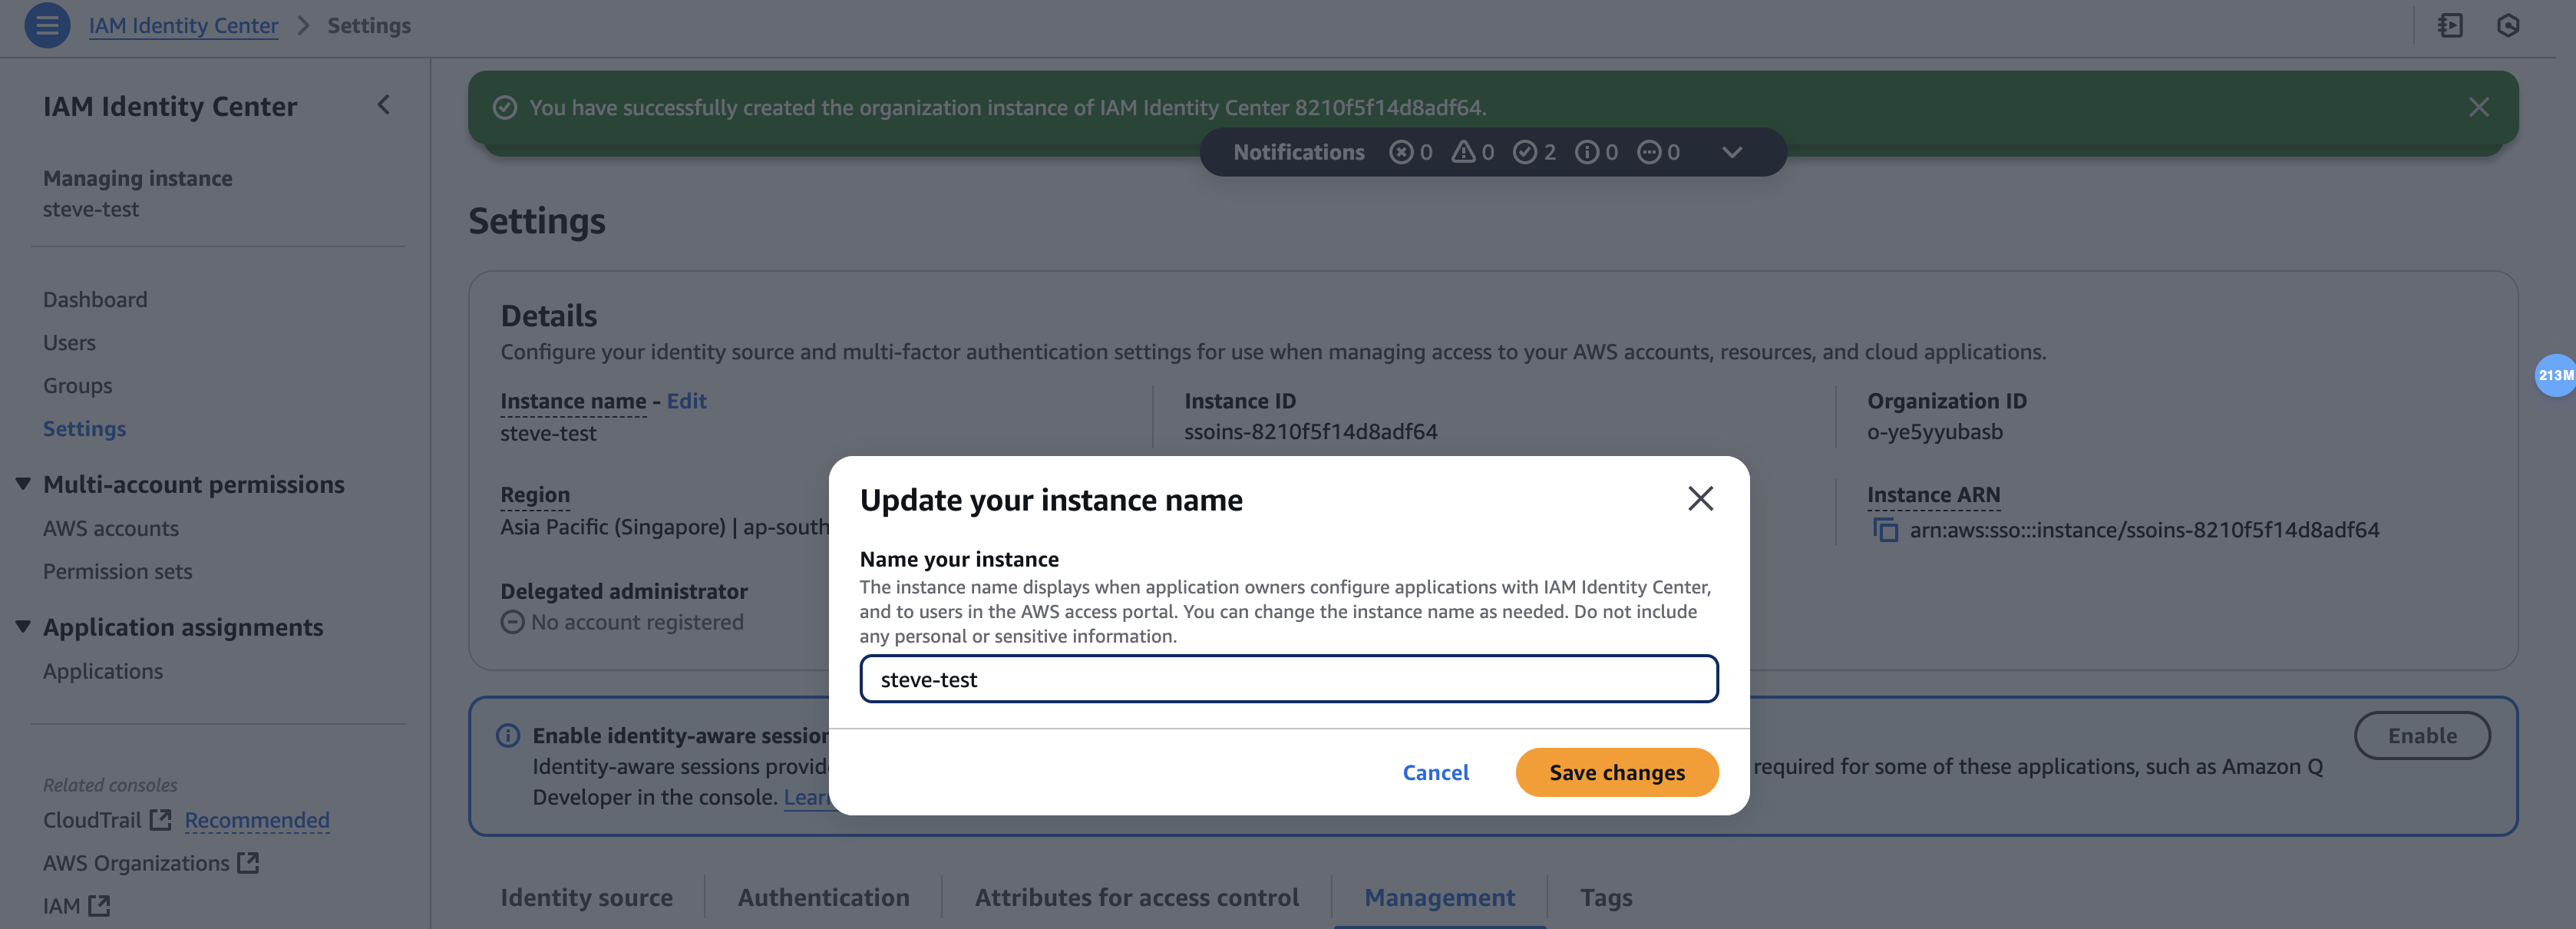
Settings -> edit Instance name
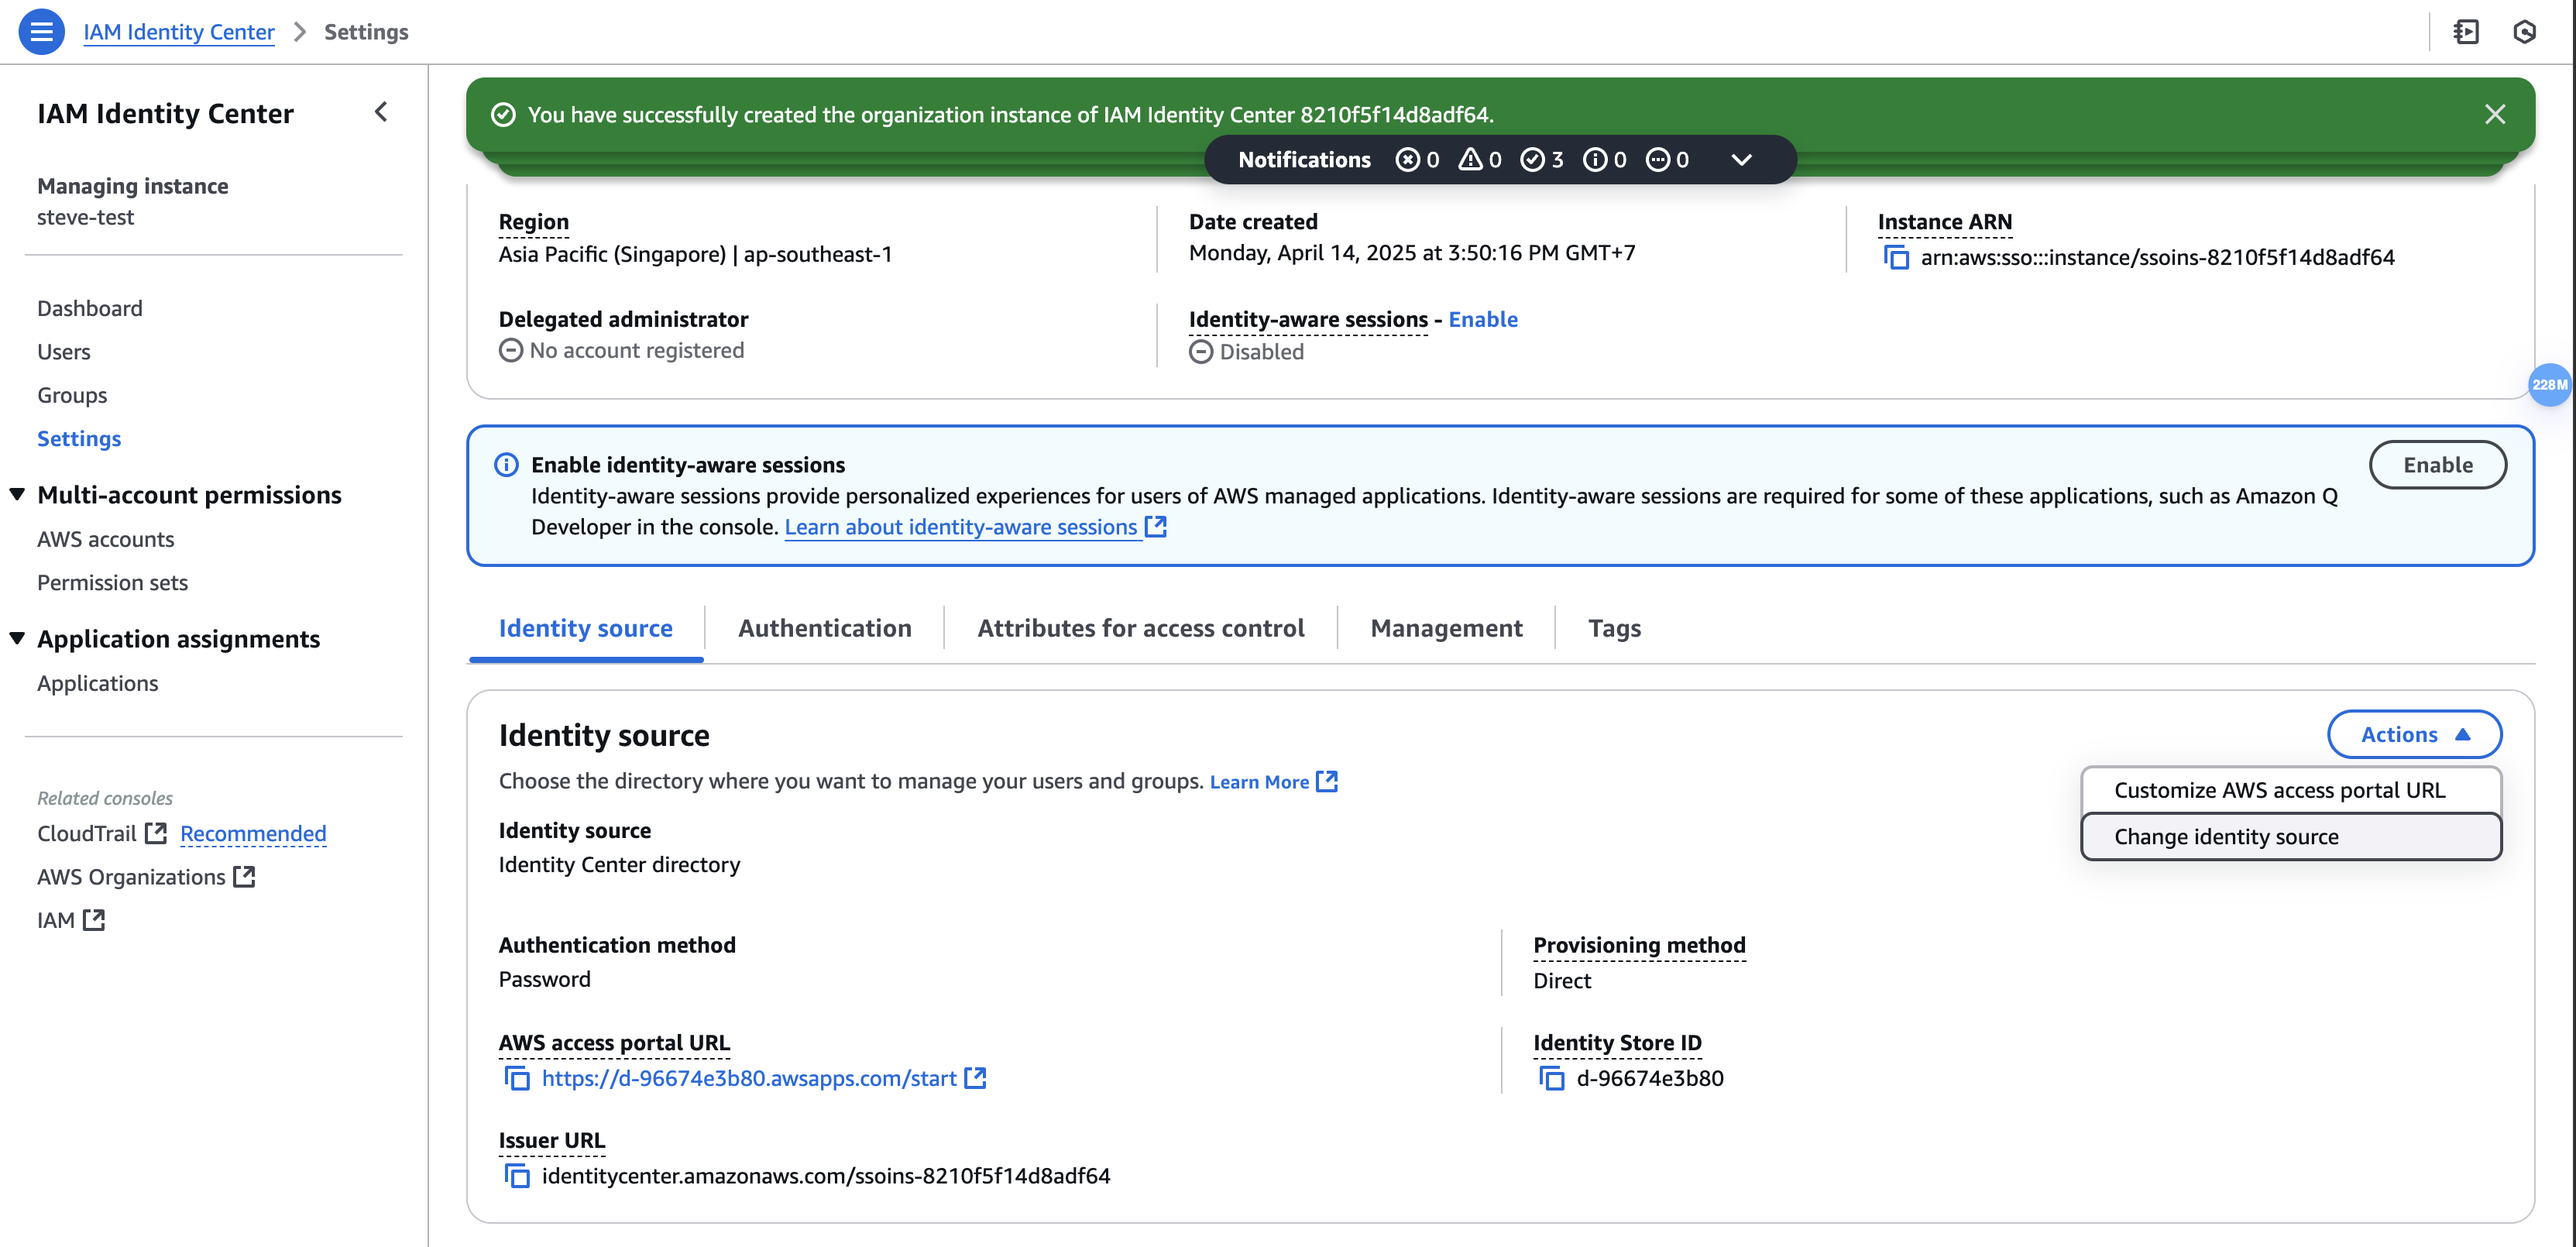
Select Identity Source, click Action and choose Change identity source
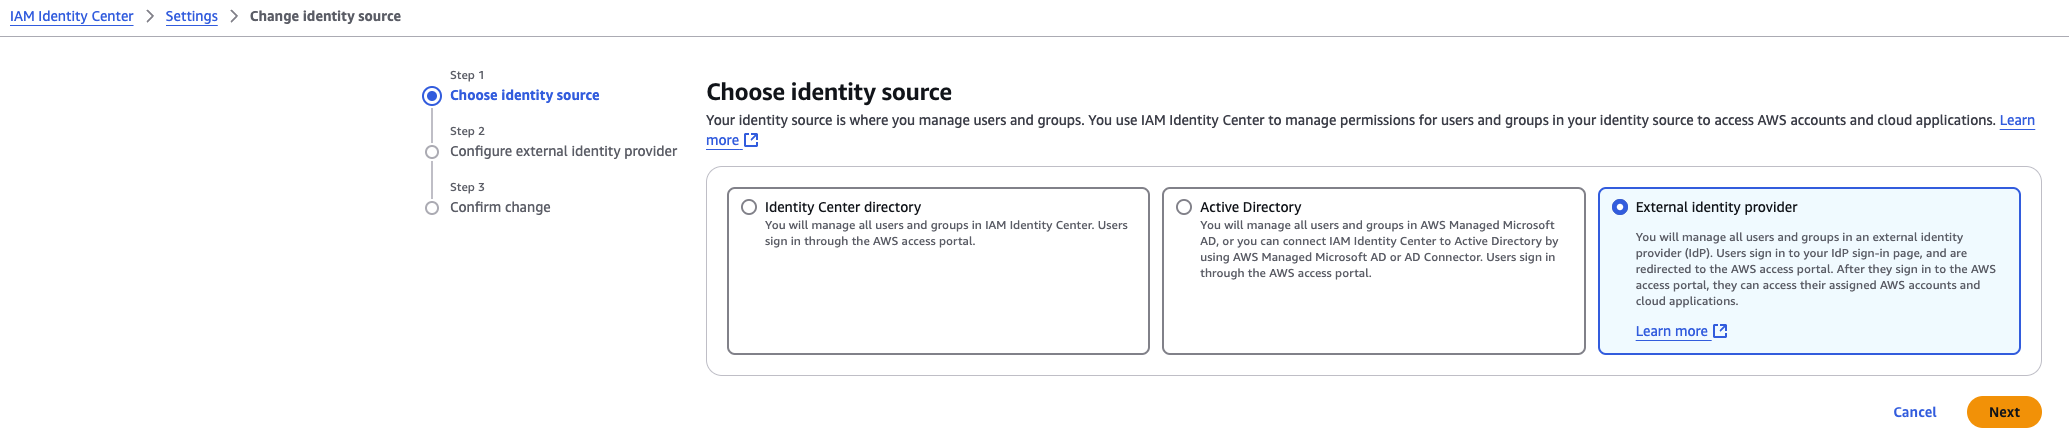
Choose External identity provider
Upload IdP SAML metadata
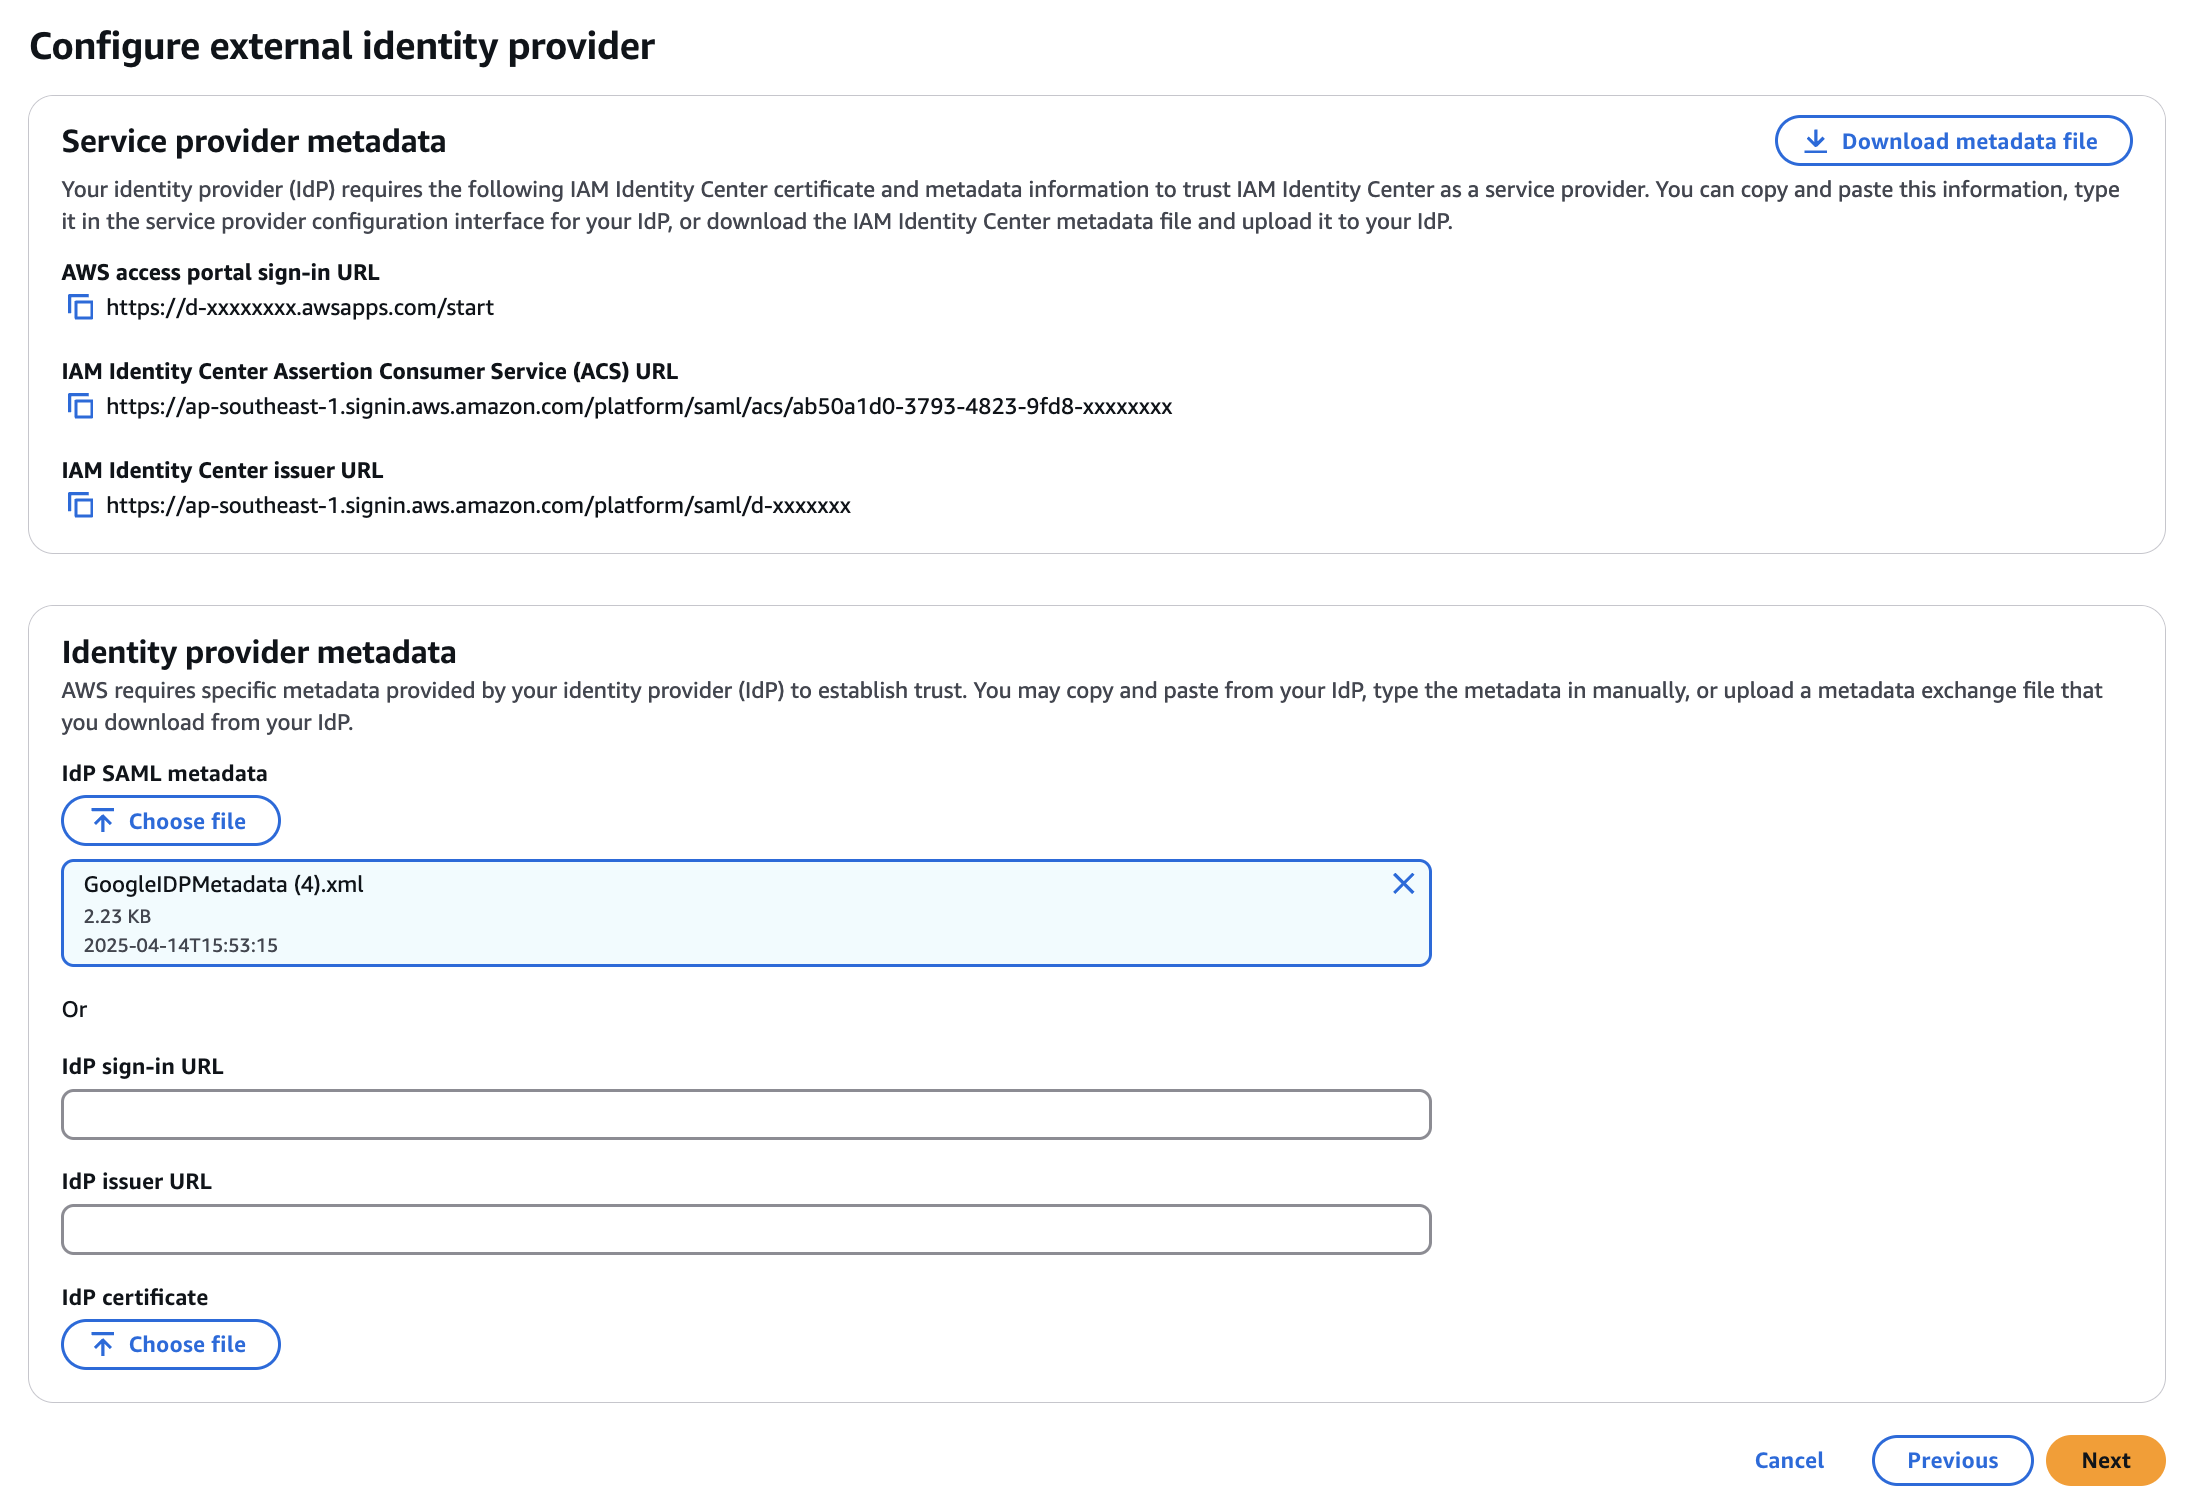
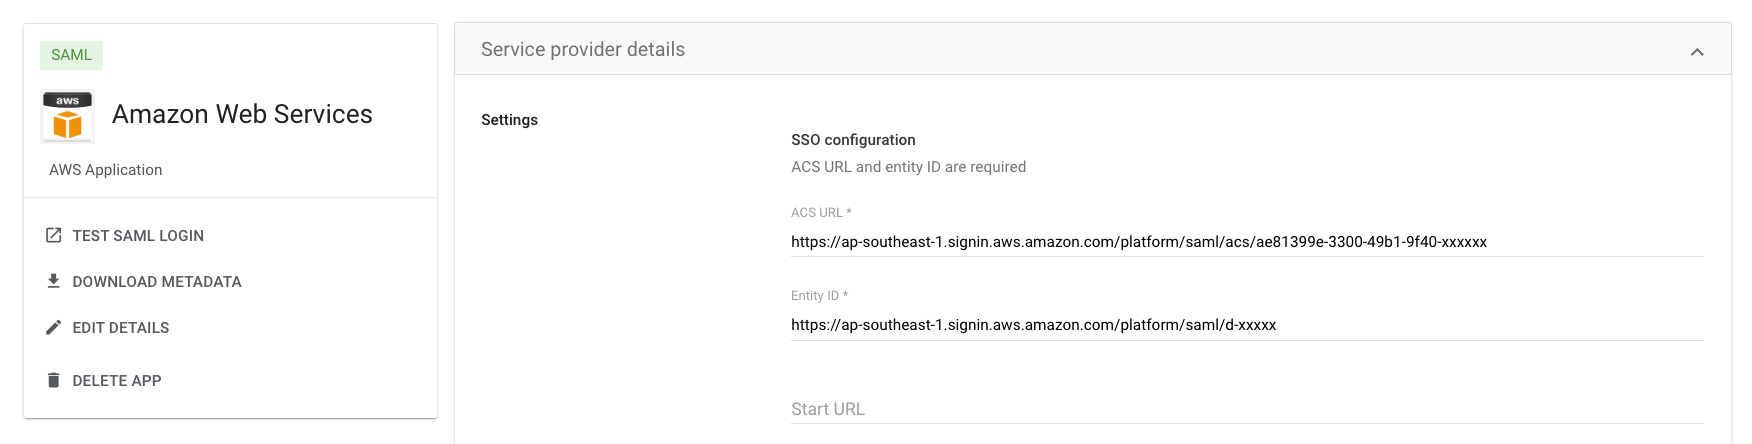
Copy các mục sau để copy vào Google Workspace:
| AWS | Google Workspace |
|---|---|
| AWS access portal sign-in URL | Để trống |
| IAM Identity Center Assertion Consumer Service (ACS) URL | ACS URL |
| IAM Identity Center issuer URL | Entity ID |
Như vậy ở trang Google Workspace:
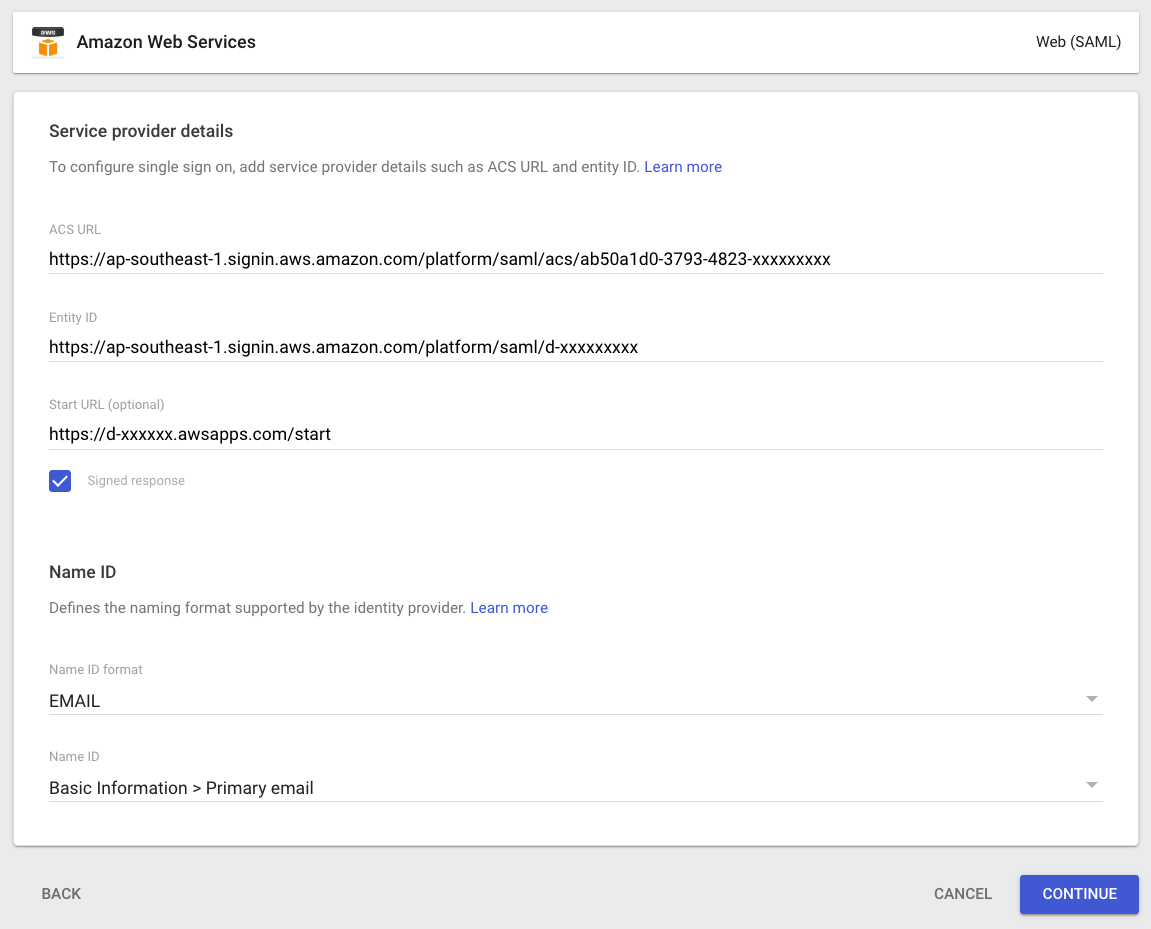
Nếu gặp lỗi đăng nhập không được khi click biểu tượng SSO Application từ Google, thì hãy để trống phần
Start URLở Google
Chú ý phần Name ID chọn Name ID format là EMAIL, sau đó chọn Continue
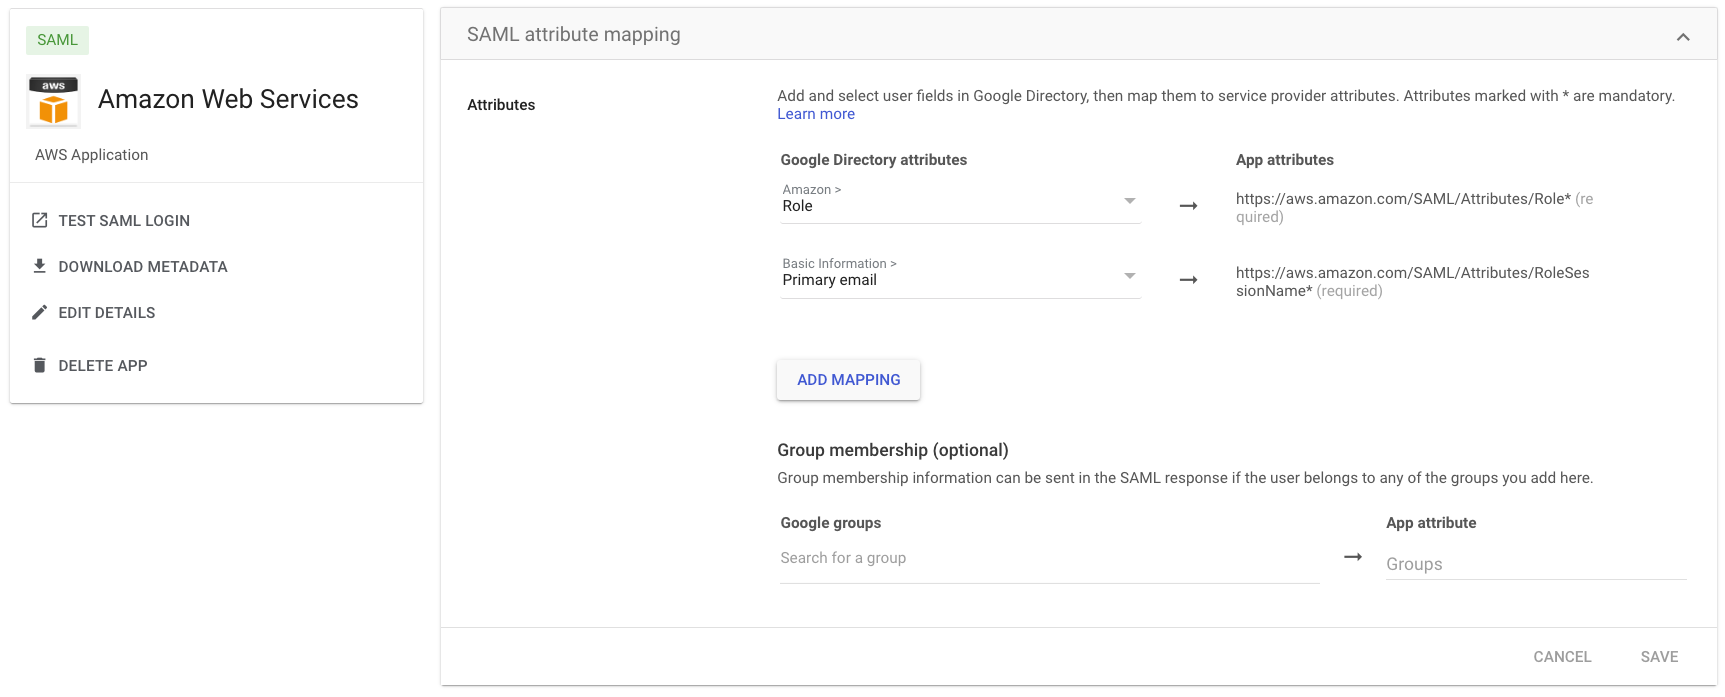
Phần Attribute, chọn như hình, sau đó nhấn FINISH:
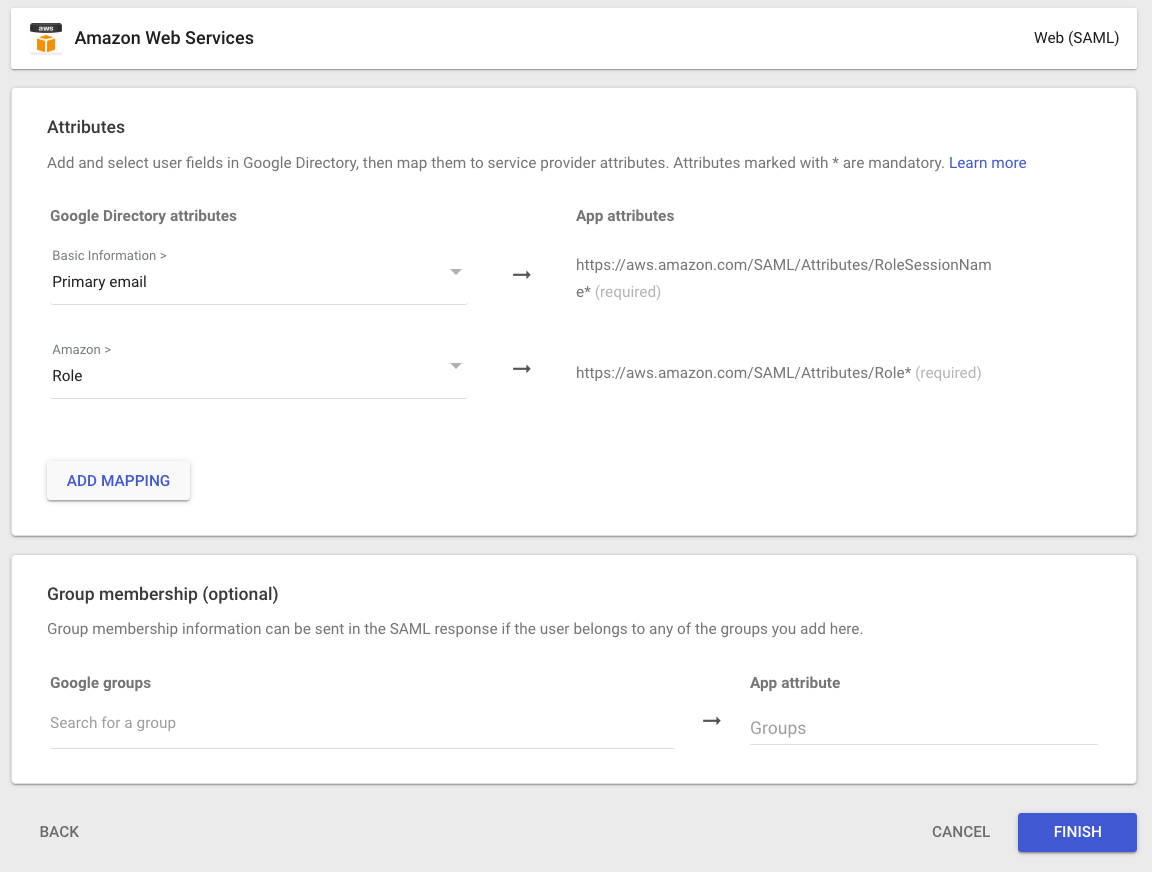
Chú ý Attribute Amazon thì tạo theo hướng dẫn: https://support.google.com/a/answer/6194963?sjid=10980572457906110988-NC#zippy=%2Cbefore-you-begin
Sign in with a super administrator account to the Google Admin console.
If you aren’t using a super administrator account, you can’t complete these steps.

Go to Menu and then Directory > Users.
At the top of Users list, click More options and thenManage custom attributes.
Requires the Schema Management privilege.
At the top right, click Add Custom Attribute.
Configure the custom attribute as follows:
Category: Amazon
Description: Amazon Custom Attributes
For Custom fields, enter the following:

Name: Role
Info type: Text
Visibility: Visible to user and admin
No. of values: Multi-value
Click Add.
The new category appears in the Manage user attributes page.
Back to AWS console:
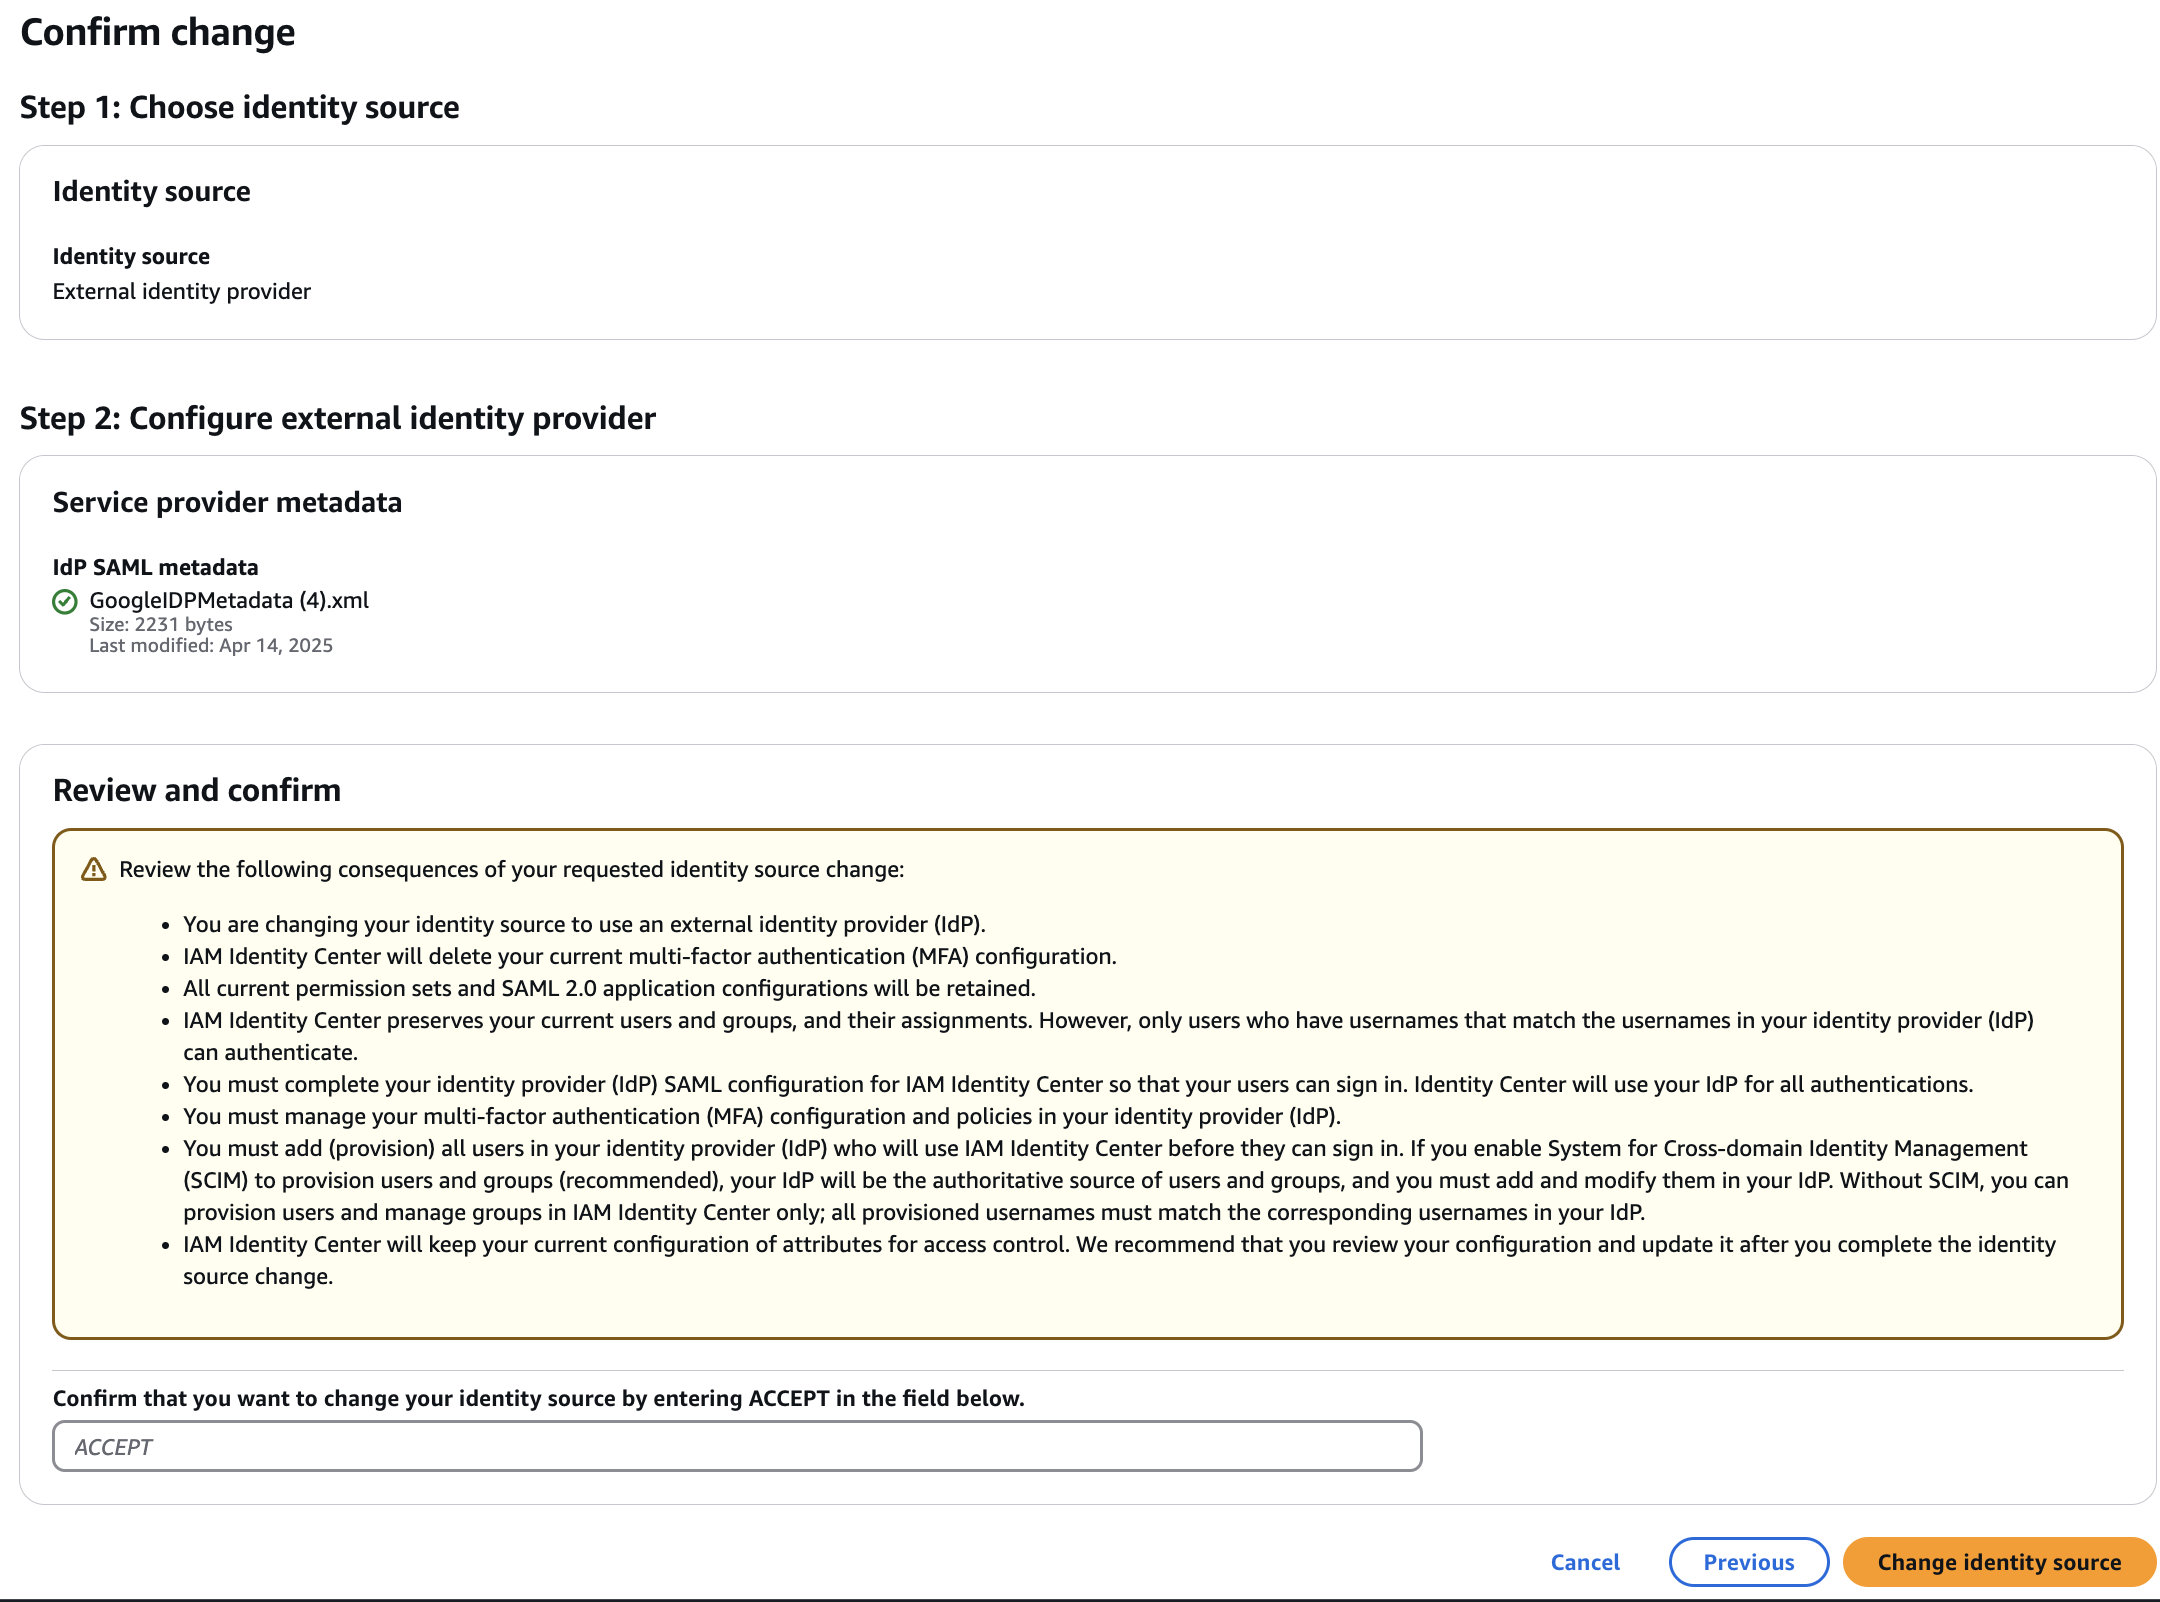
Nhấn Next và Gõ ACCEPT và click Change identity source để hoàn thành
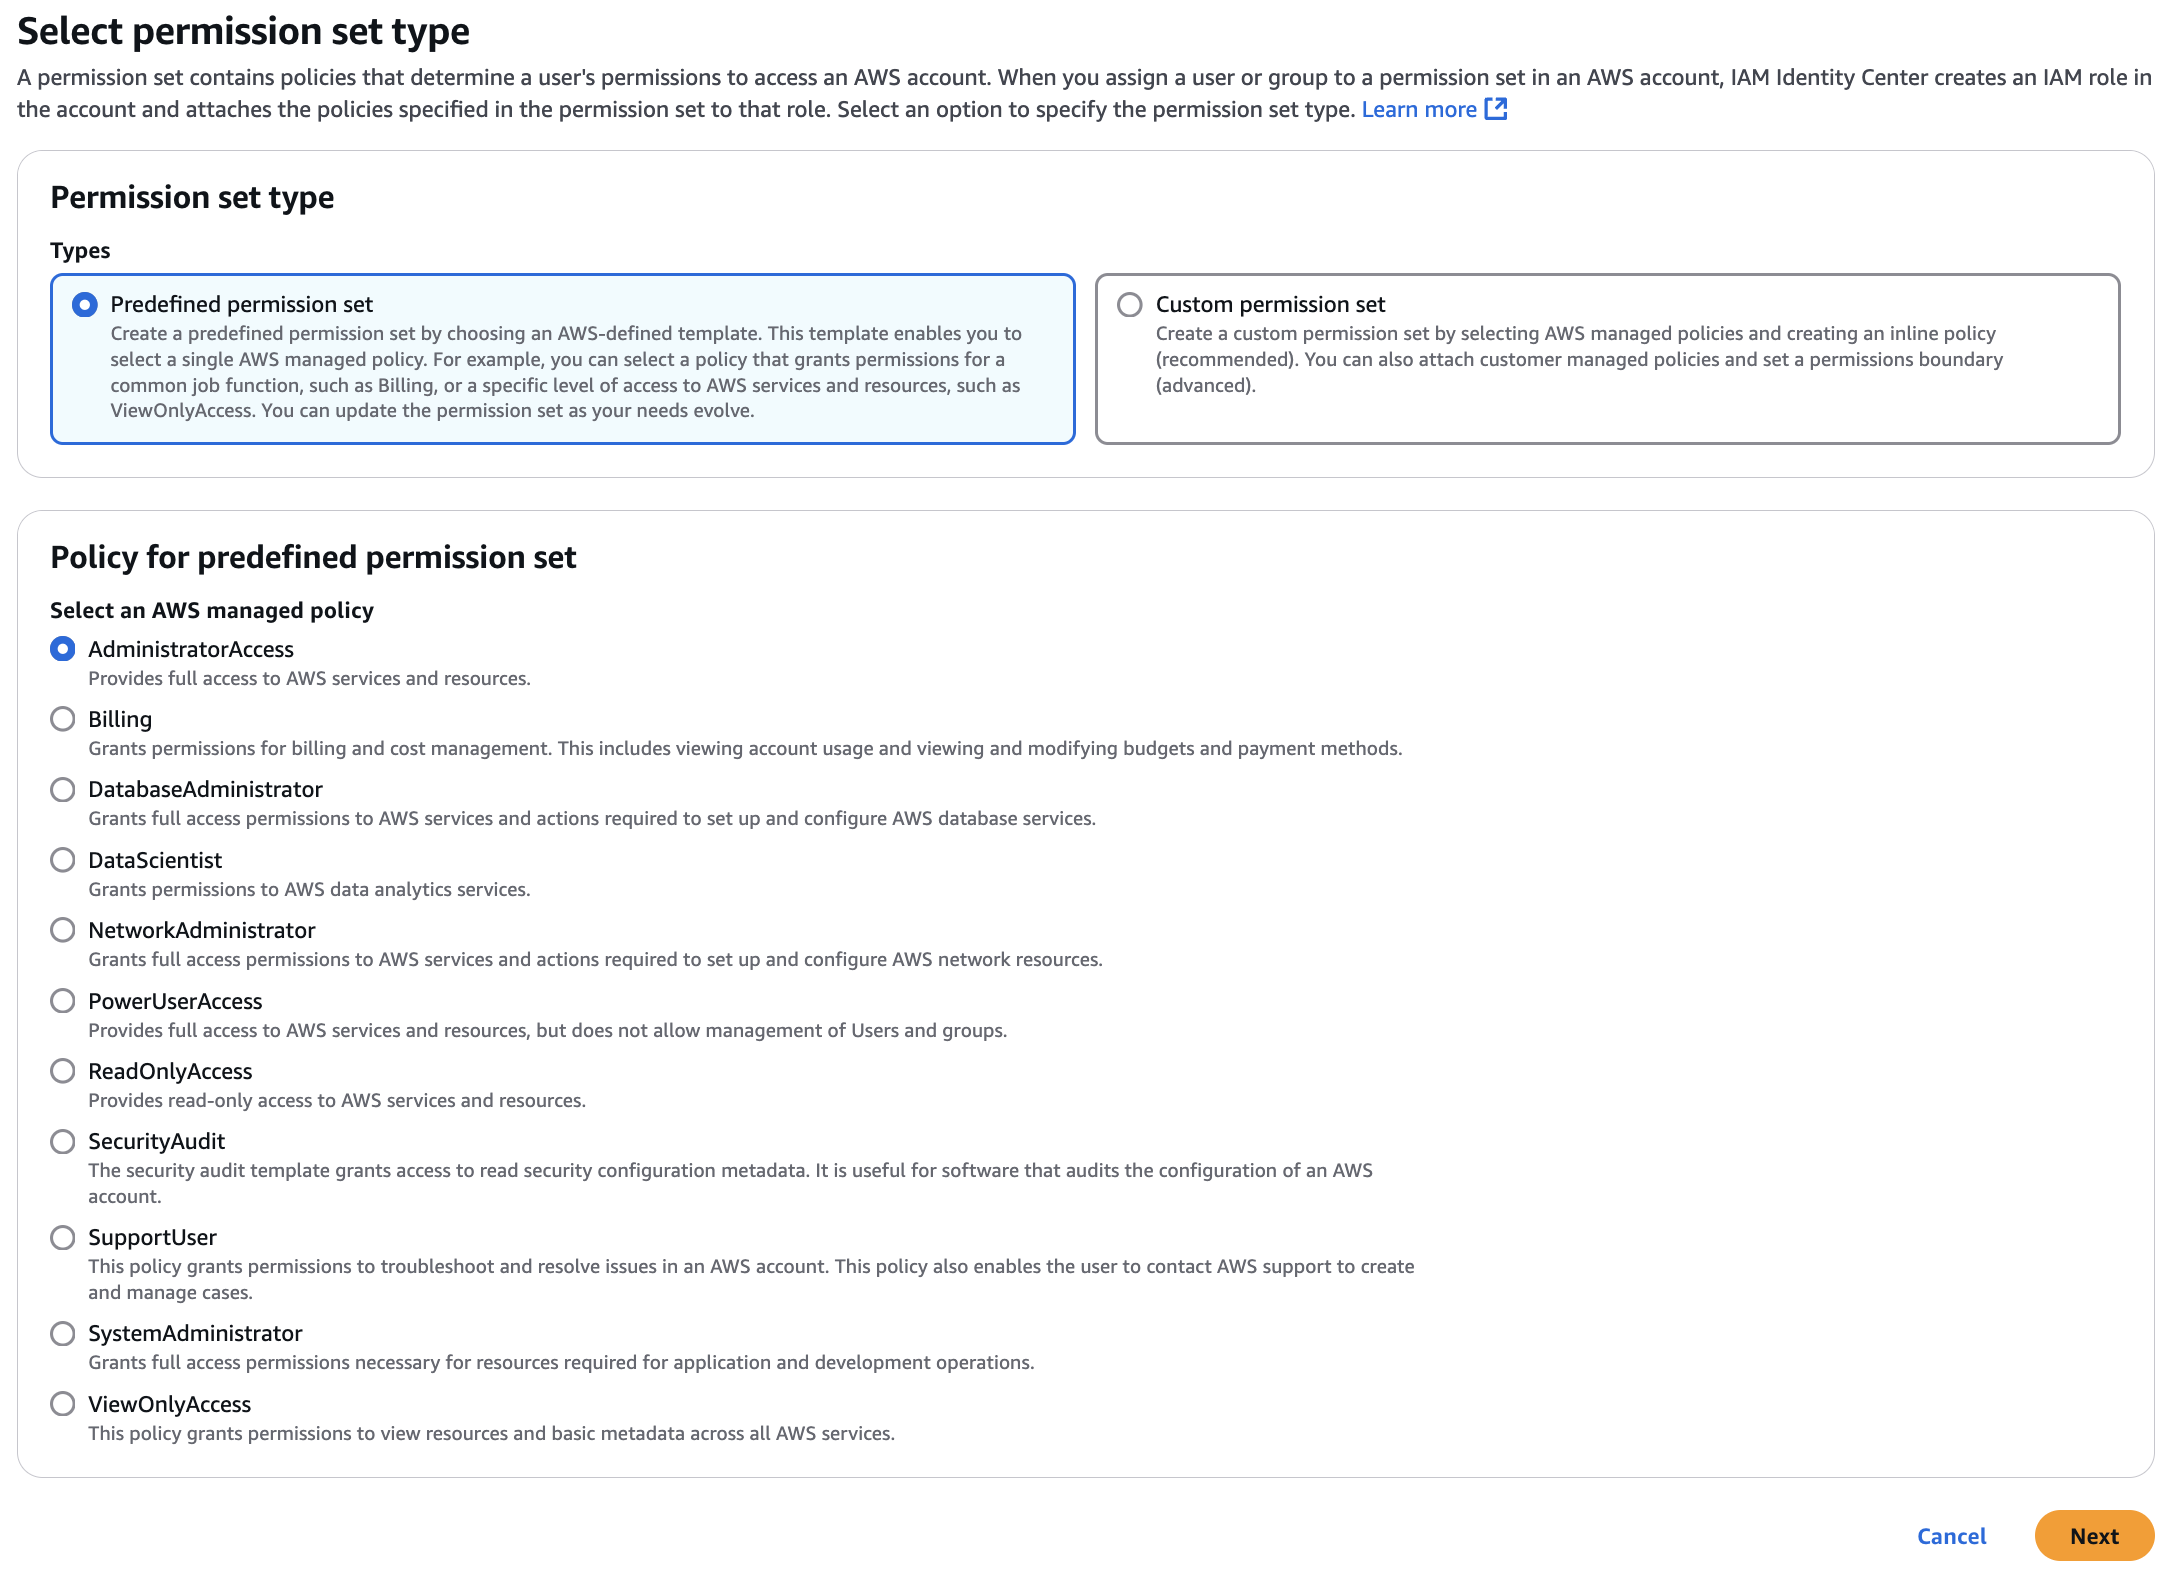
Tạo permission set

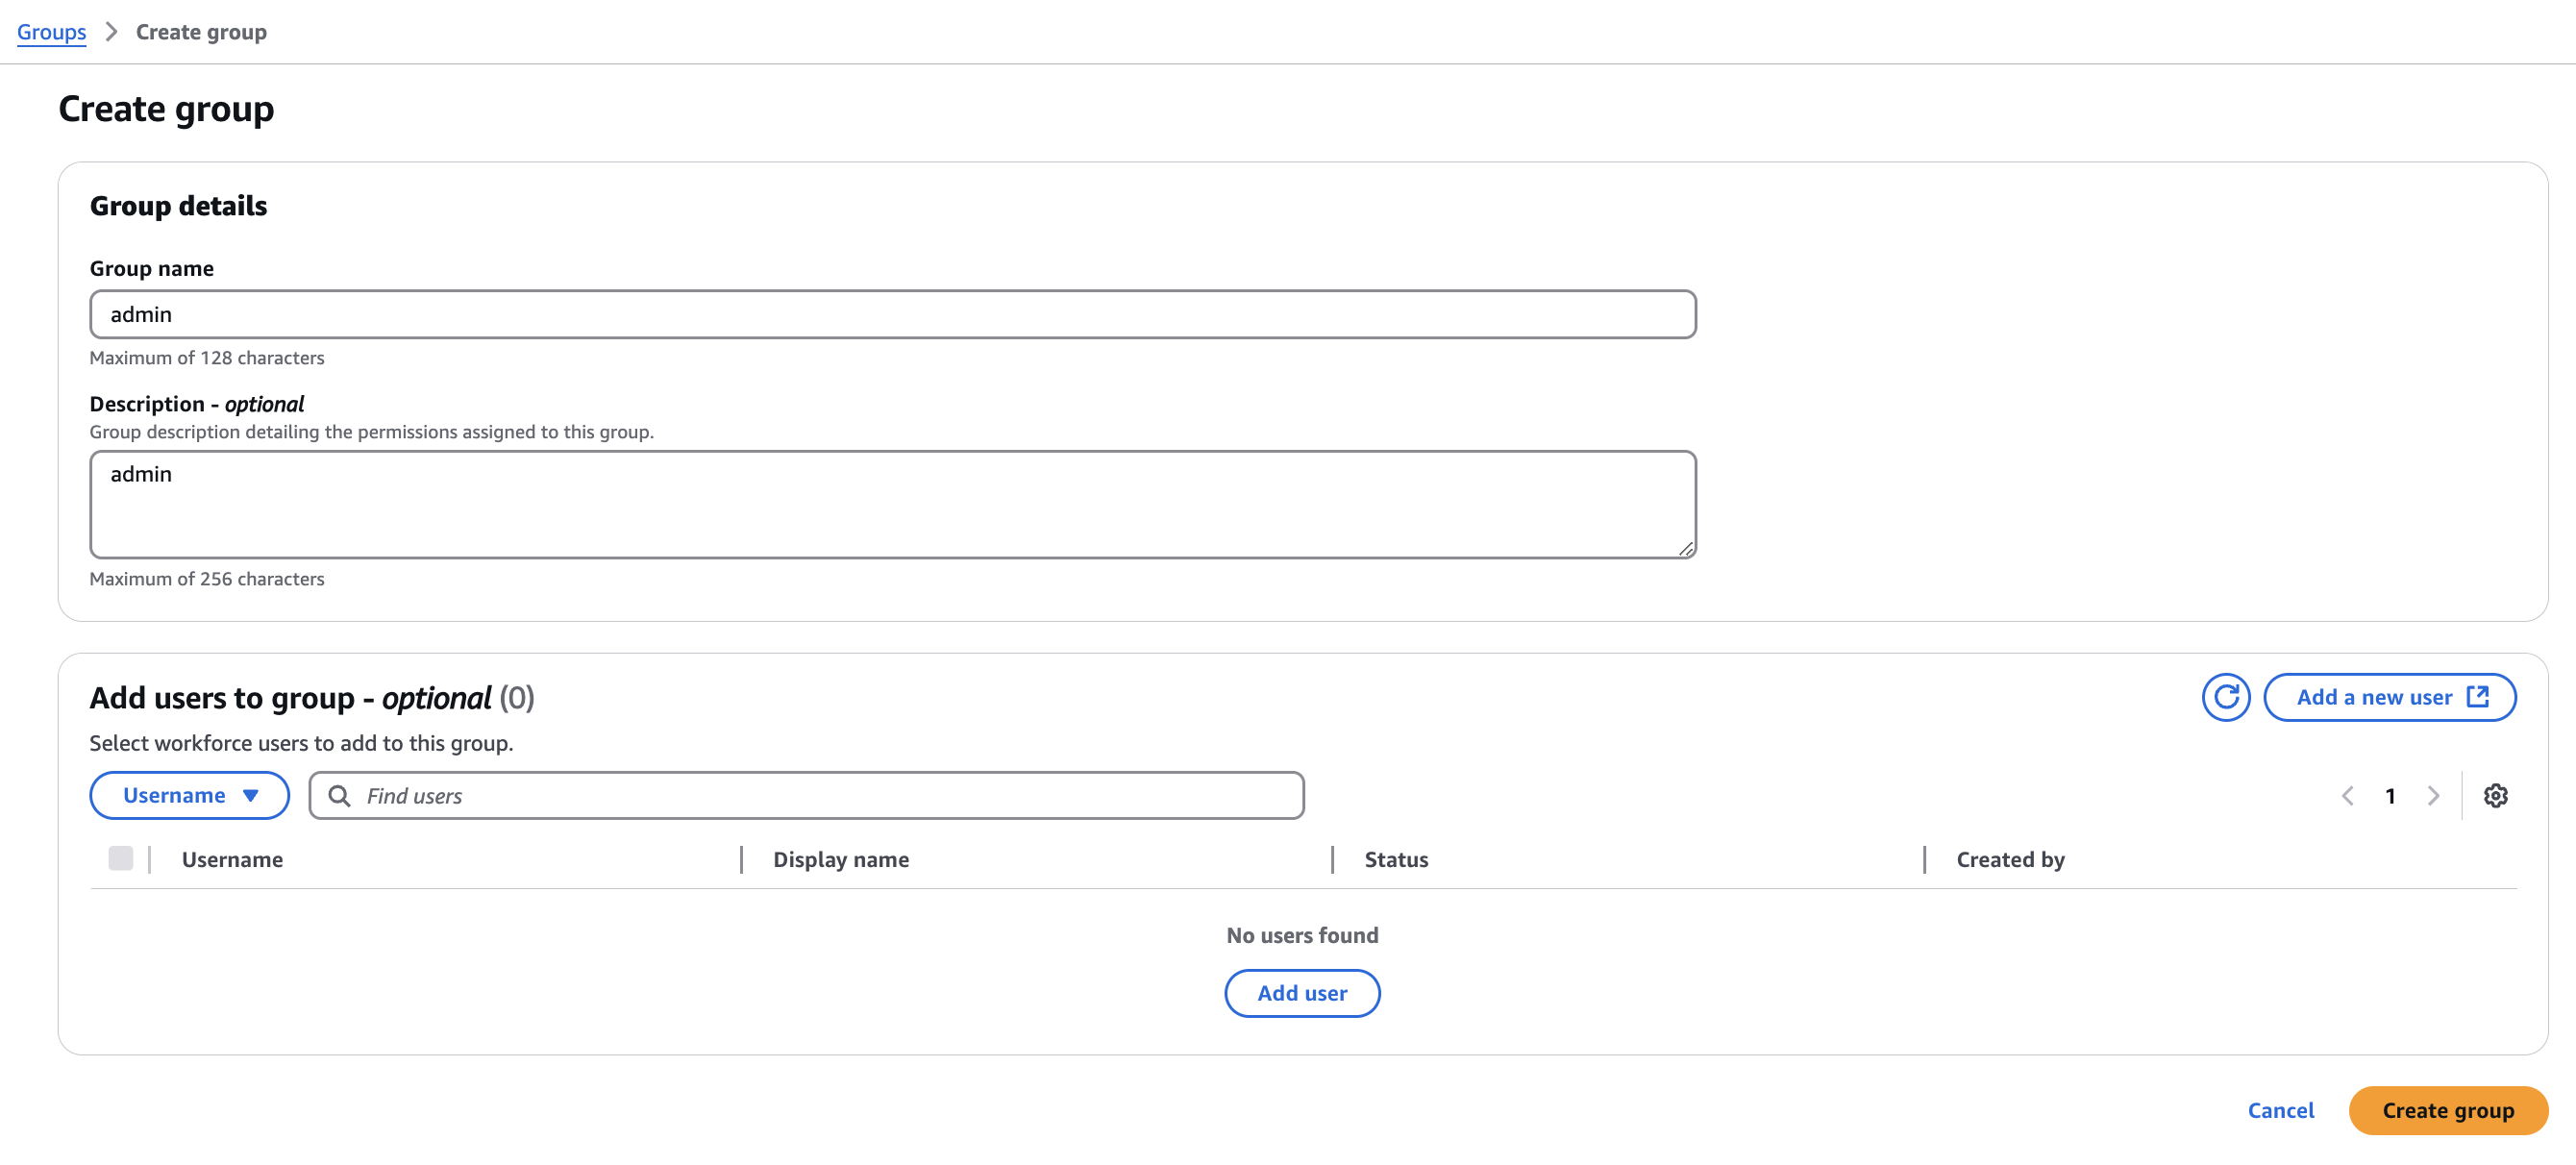
Tạo group
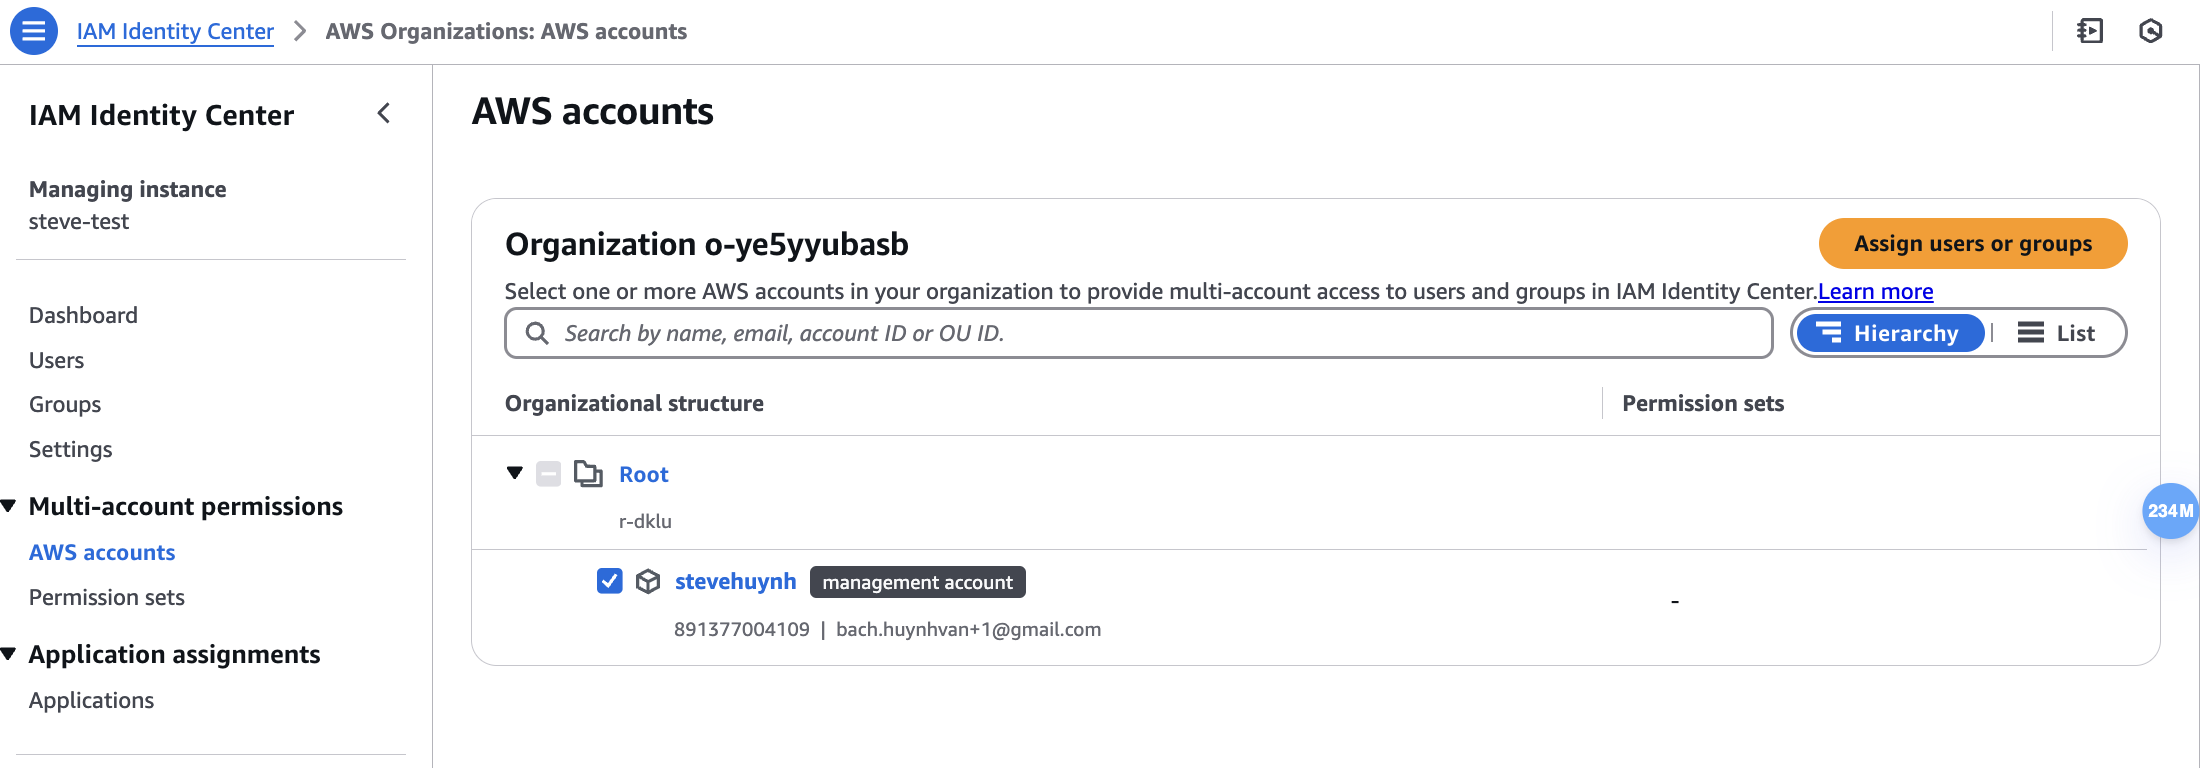
Assign group cho AWS accounts
Lưu ý:
- Thường nên sử dụng một tài khoản AWS khác chỉ để sử dụng IAM Identity Center.
- Kích hoạt AWS Organization để sử dụng hiệu quả hơn khi có thể dùng 1 IAM Identity Center để đăng nhập nhiều AWS accounts cùng Organization.
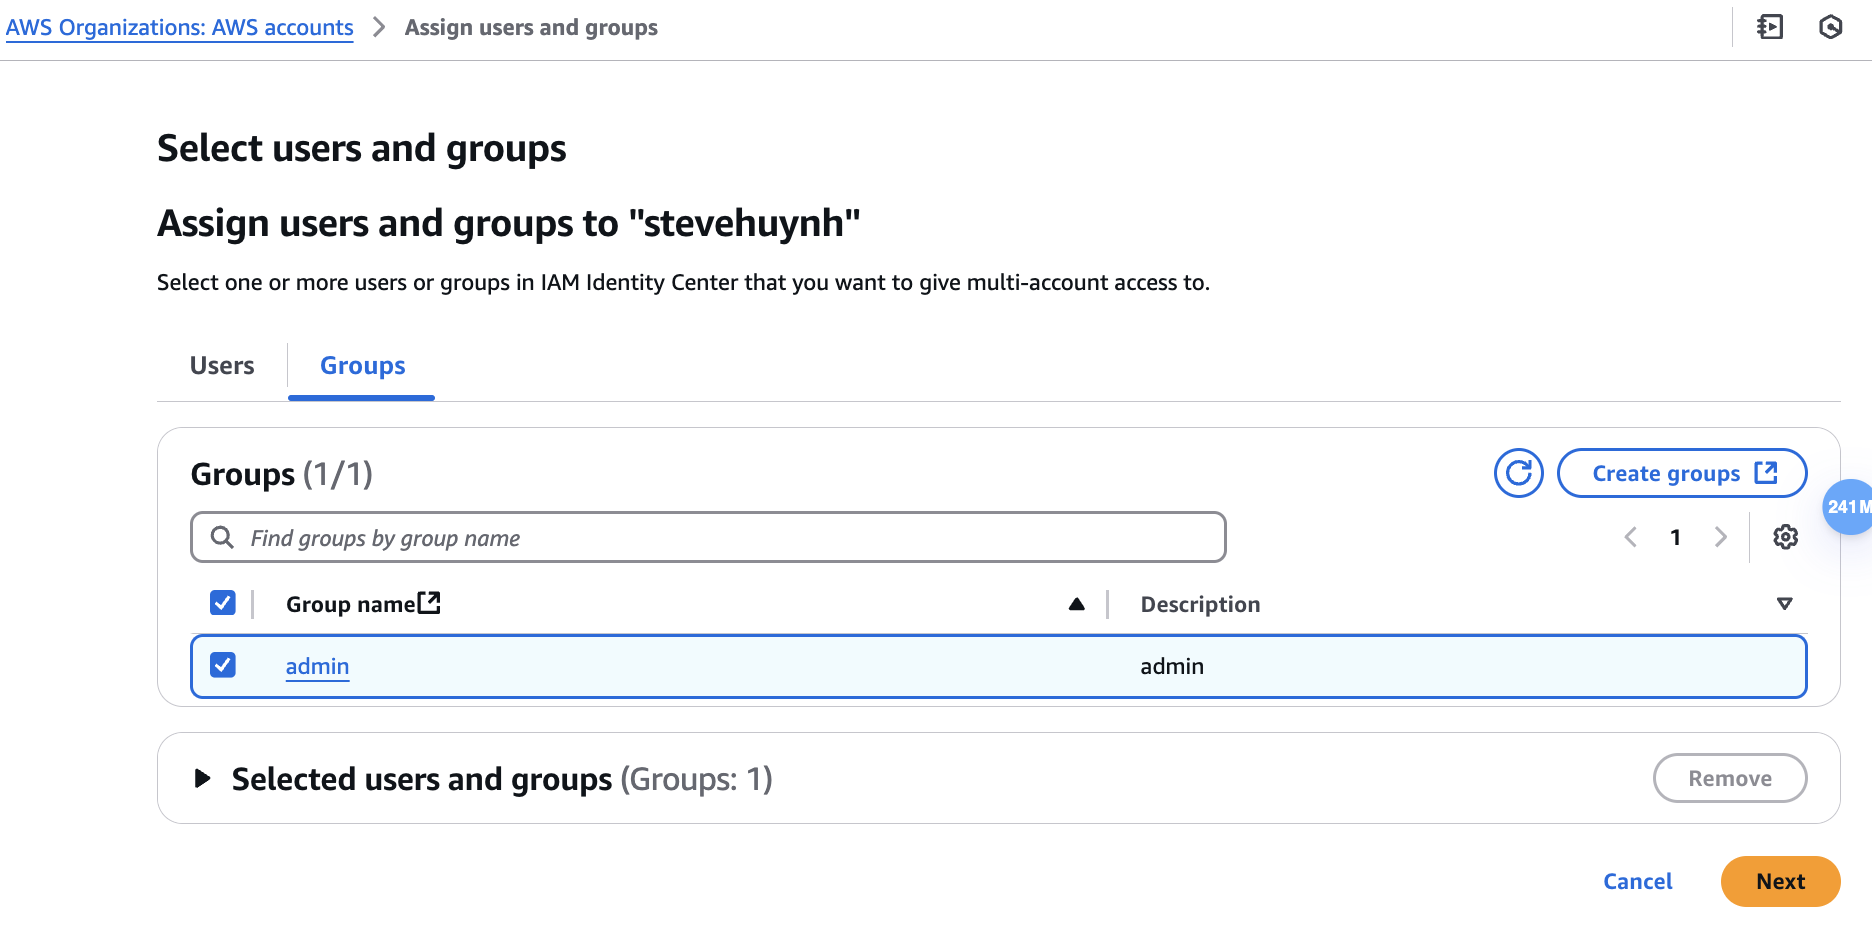
Chọn Group
Chọn Permission set cho Group trên
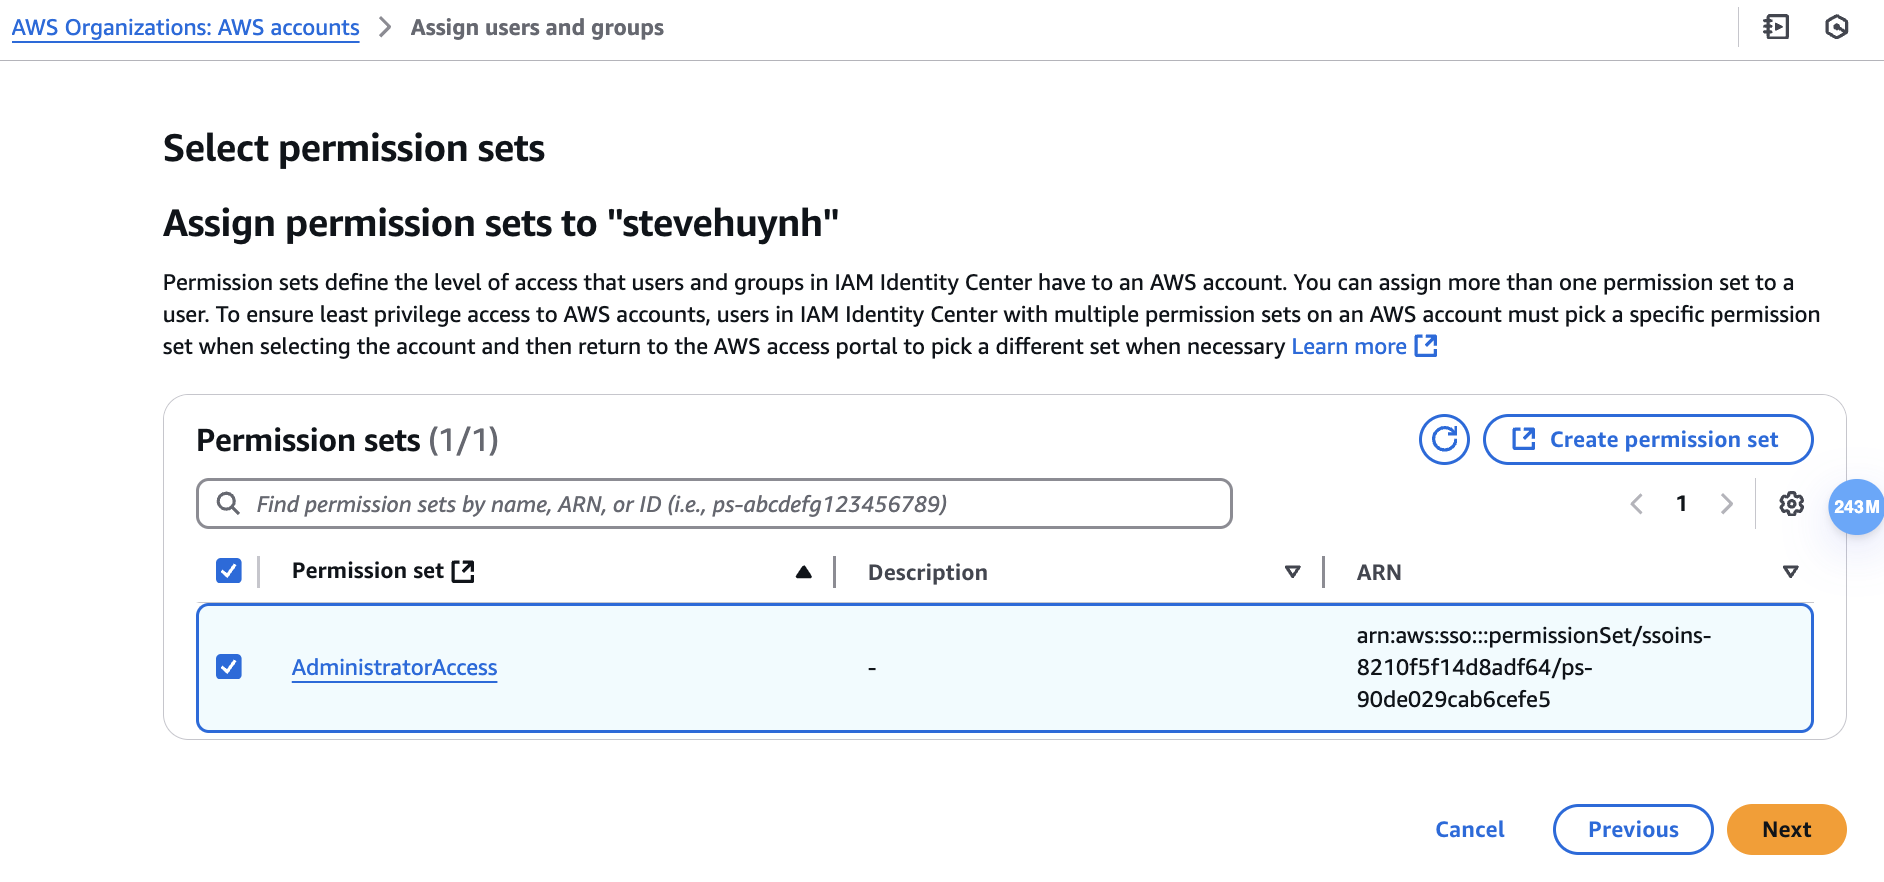
Sau đó nhấn Next -> Submit
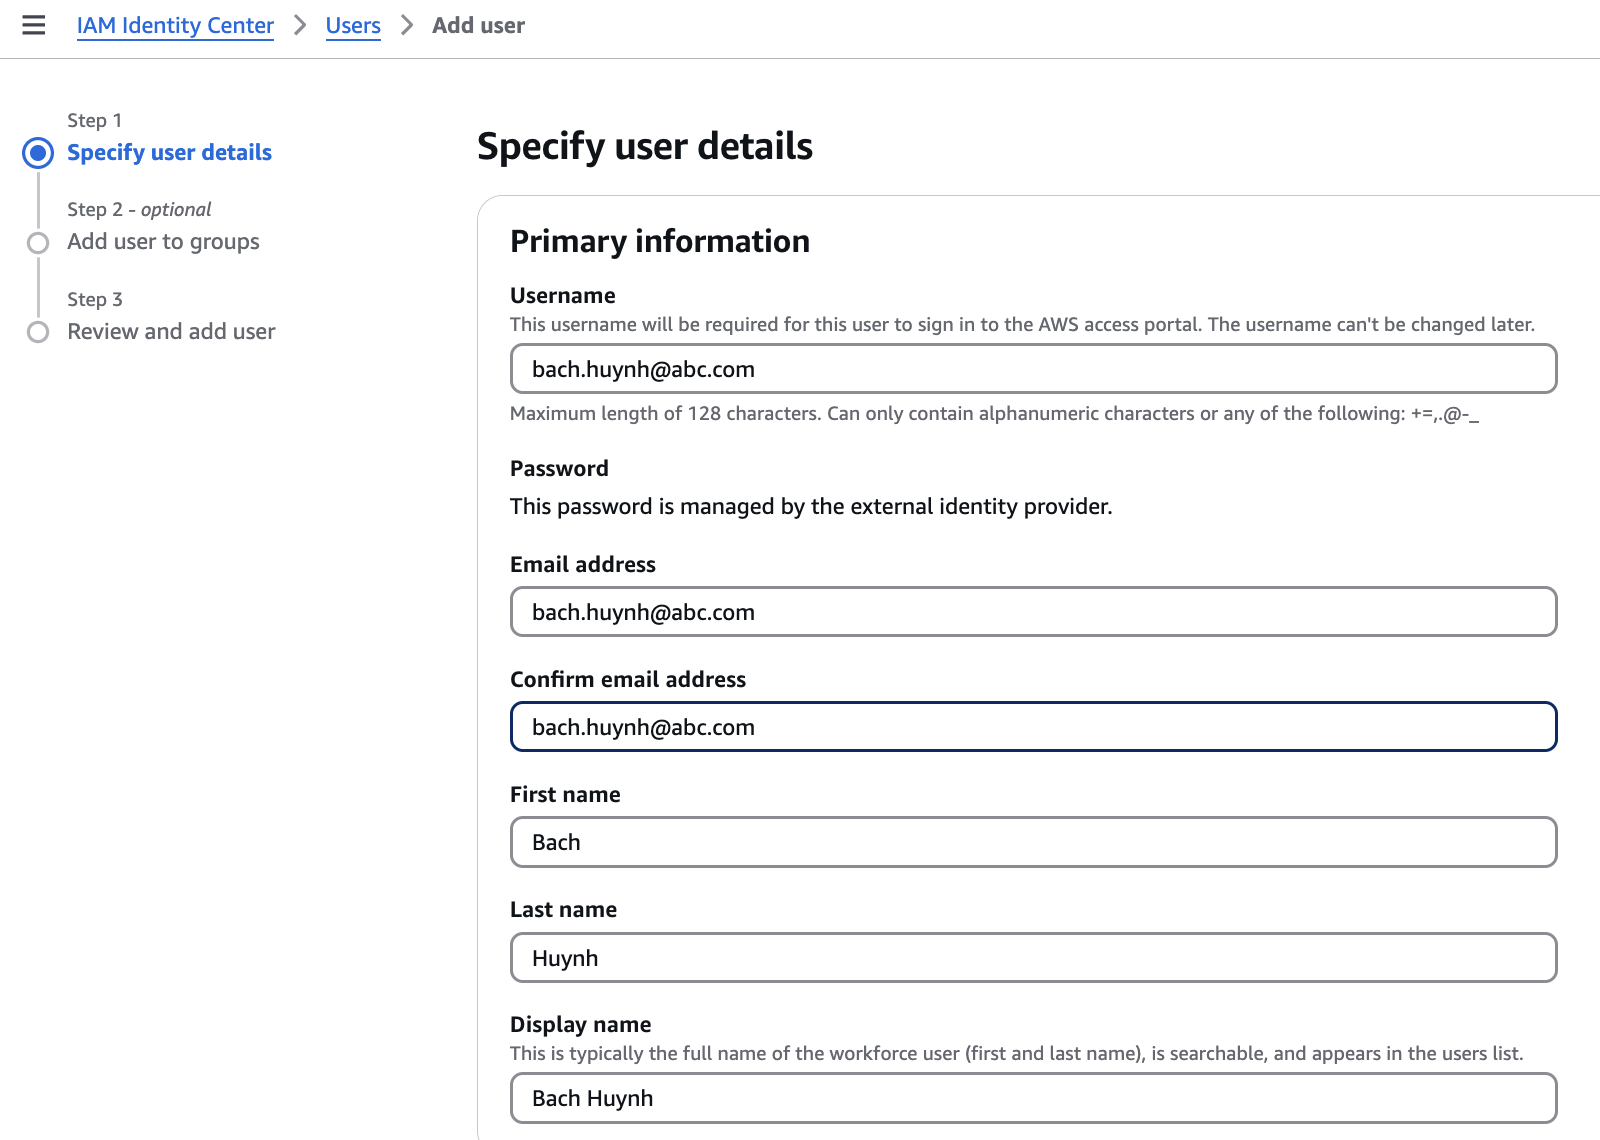
Tạo User:
Tạo một user với email tồn tại thực trên Google Workspace
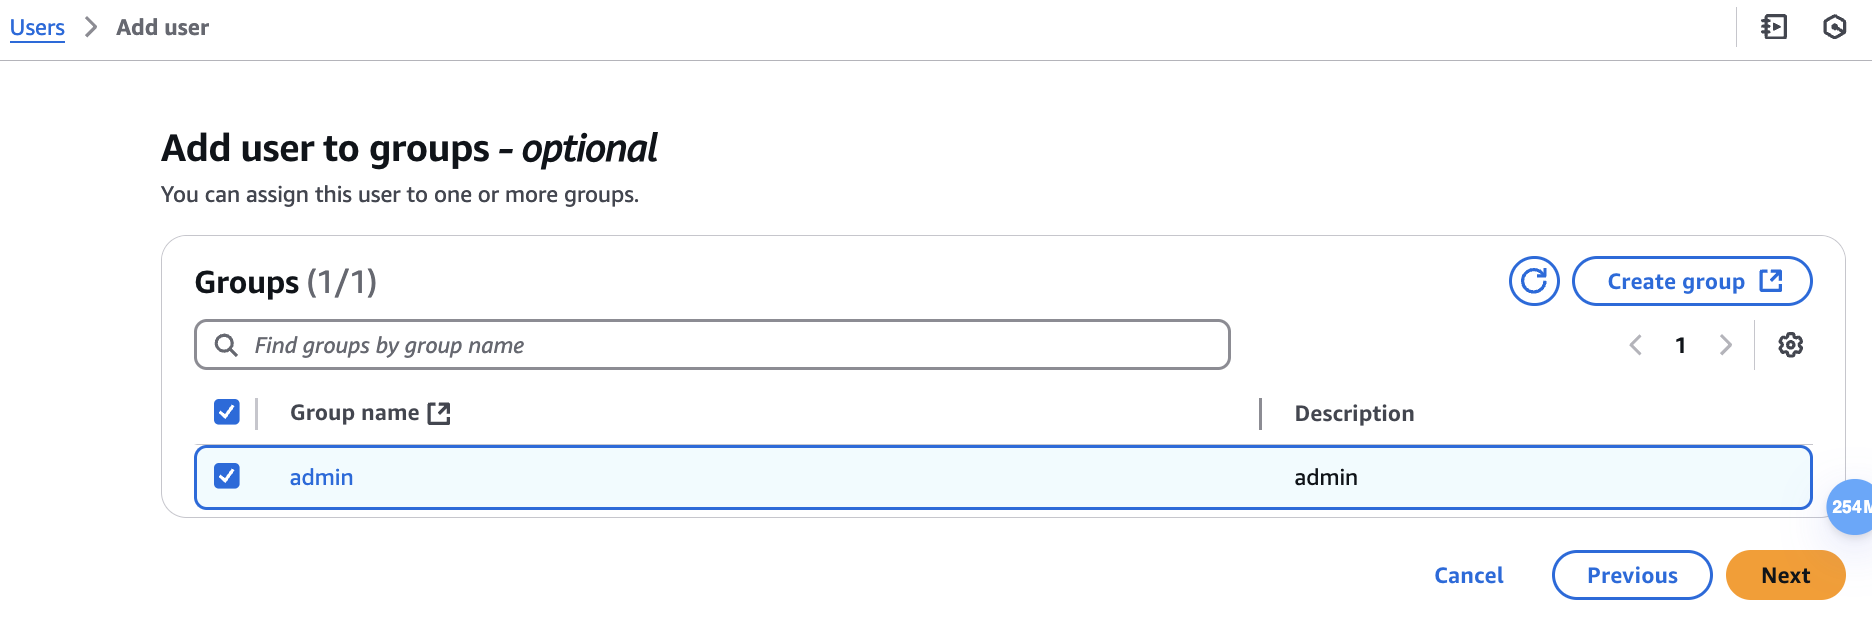
Gán Group cho user:
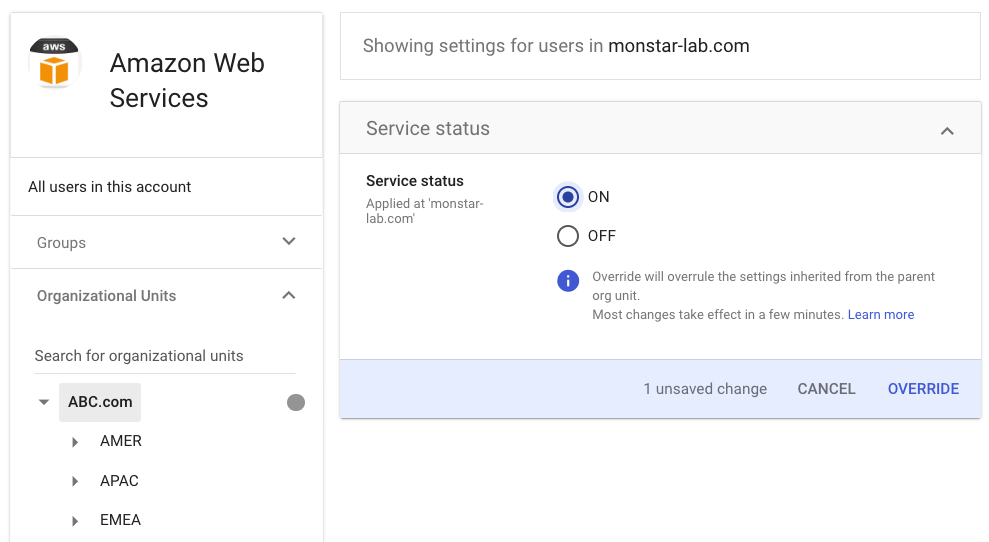
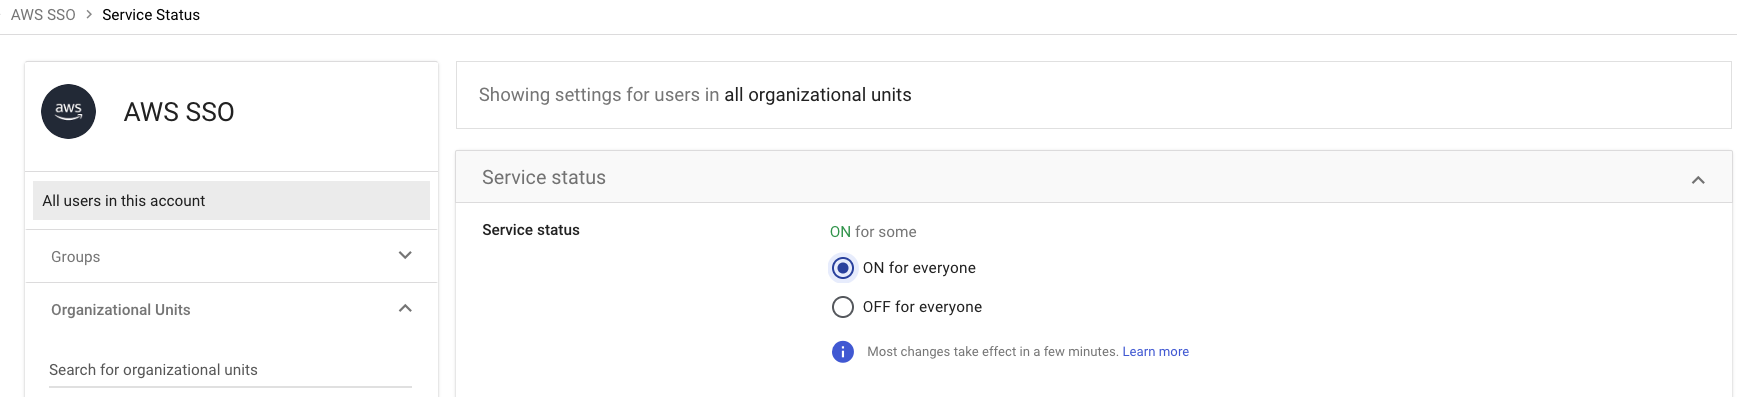
On Google Console:
Click User Access, and ON for everyone or bạn có thể chọn một Group nhỏ, hoặc chỉ một OU để bật SAML App cho nó.
Giờ thử test đăng nhập,
Có 2 cách
- Đăng nhập từ AWS access portal sign-in URL : https://d-xxxxx.awsapps.com/start (Sẽ bắt đăng nhập tài khoản Google workspace nếu sử dụng google chrome profile không đúng)
- Đăng nhập từ tài khoản Google Workspace: Vào URL https://workspace.google.com/dashboard
Hoặc từ bất kì Google service nào, ví dụ như mail, google search:
Nếu như hình dưới là đã đăng nhập thành công bằng SSO

Nếu Gặp lỗi:
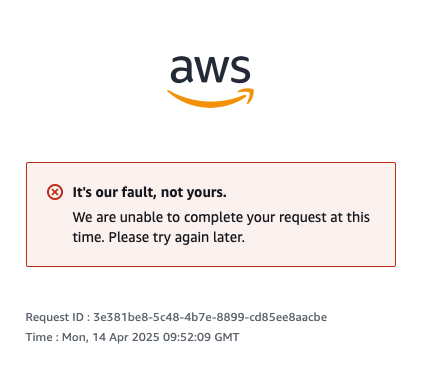
Thì cấu hình lại:
Để trống Start URL
Chú ý 1:
Nếu bật tính năng Automatic provisioning

Thì sẽ ko tạo user, group bằng tay được. Lúc này, user tự động sync từ Google Workspace qua.-
Automatic provisioning không tự động sync group qua:
SCIM automatic synchronization from Google Workspace is currently limited to user provisioning. Automatic group provisioning is not supported at this time. Groups can be manually created with AWS CLI Identity Store create-group command or AWS Identity and Access Management (IAM) API CreateGroup. Alternatively, you can use ssosync to synchronize Google Workspace users and groups into IAM Identity Center.
Theo hướng dẫn này https://docs.aws.amazon.com/singlesignon/latest/userguide/gs-gwp.html
Chúng ta cần tạo group bằng CLI, và assign user vào group cũng bằng CLI (Hoặc có thể tích hợp lambda function cho việc sync-up, đọc tài liệu thêm)
Tóm tắt cách này:
- Trên Google console:
- Tạo custom attribute cho user.
- Tạo saml app.
- Lấy metadata import vào AWS console khi tạo Identity provider.
- Cấu hình đúng các URL cần thiết.
- Cấu hình đúng attribute mapping.
- Enable saml app cho đối tượng group, ou, org cần thiết.
(Optional) Cấu hình Autoprovisioning để tự động sync-up user.
Trên AWS console:
Enable IAM Identity Center trên region cần thiết.
Tạo instance name
Thay đổi identity source thành external Identity Provider.
Import file metadata được tạo từ Google console
Tạo user/group manual (hoặc bật tính năng SCIM cho Autoprovisioning)
Tạo Permission sets.
Gán user/roup và permission sets cần thiết cho AWS account ID
B. IAM Identity Providers (SAML in IAM)
Trên Google:
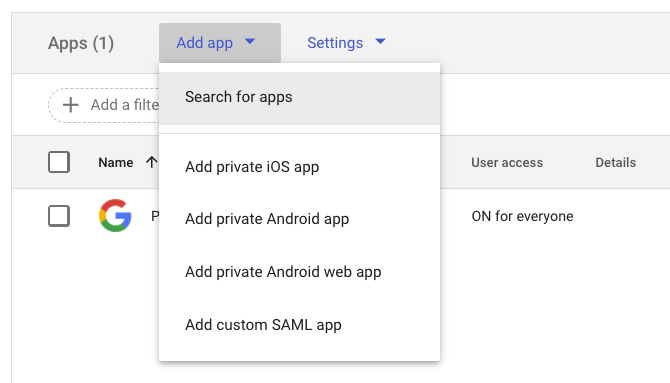
App -> Web and mobile apps -> Add app -> Add custom SAML app
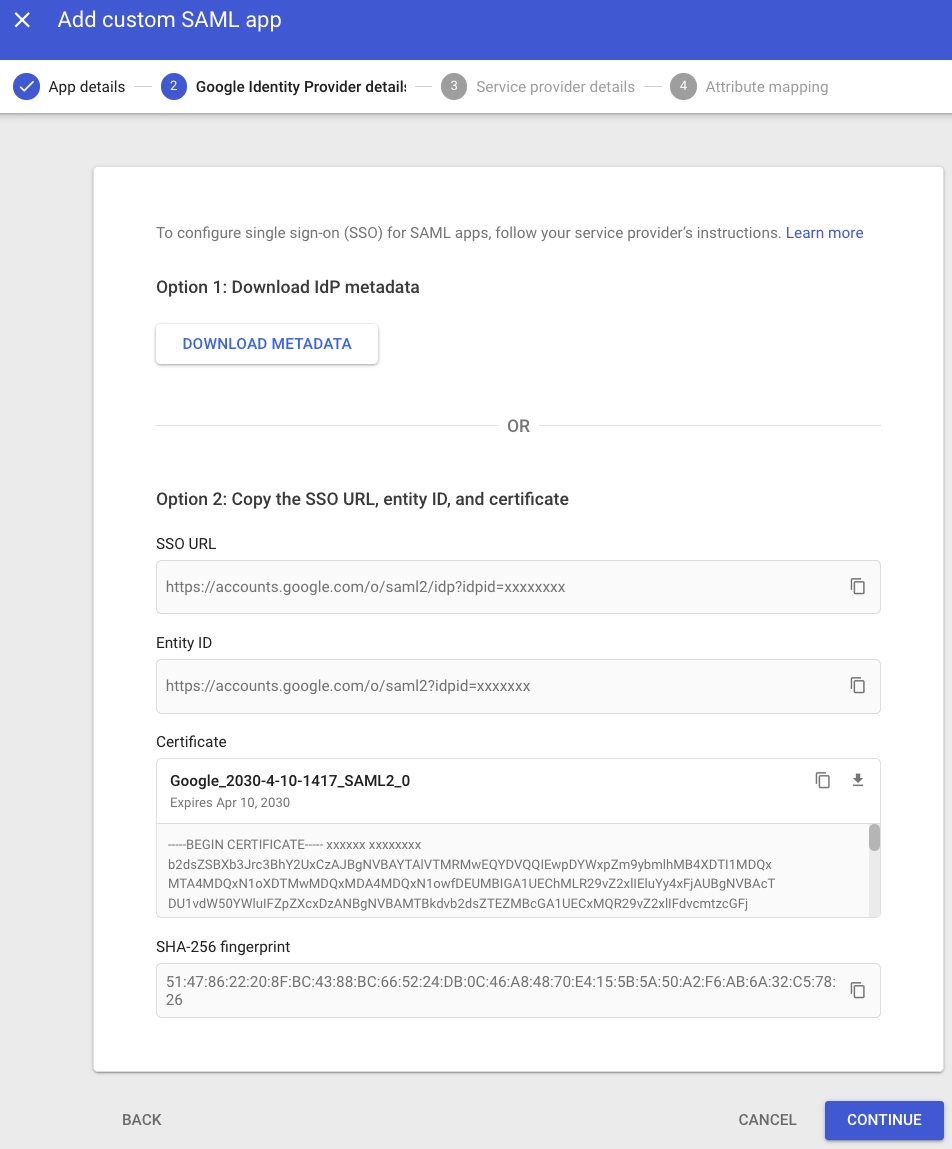
Nhấn Next. Chờ lấy thông từ AWS console
Trên AWS console:
IAM-> Identity providers -> Add provider:
Upload file xml vừa download ở Google dashboard

Select IdP vừa tạo,
Lấy các thông tin sau để nhập ngược lại trên Google console
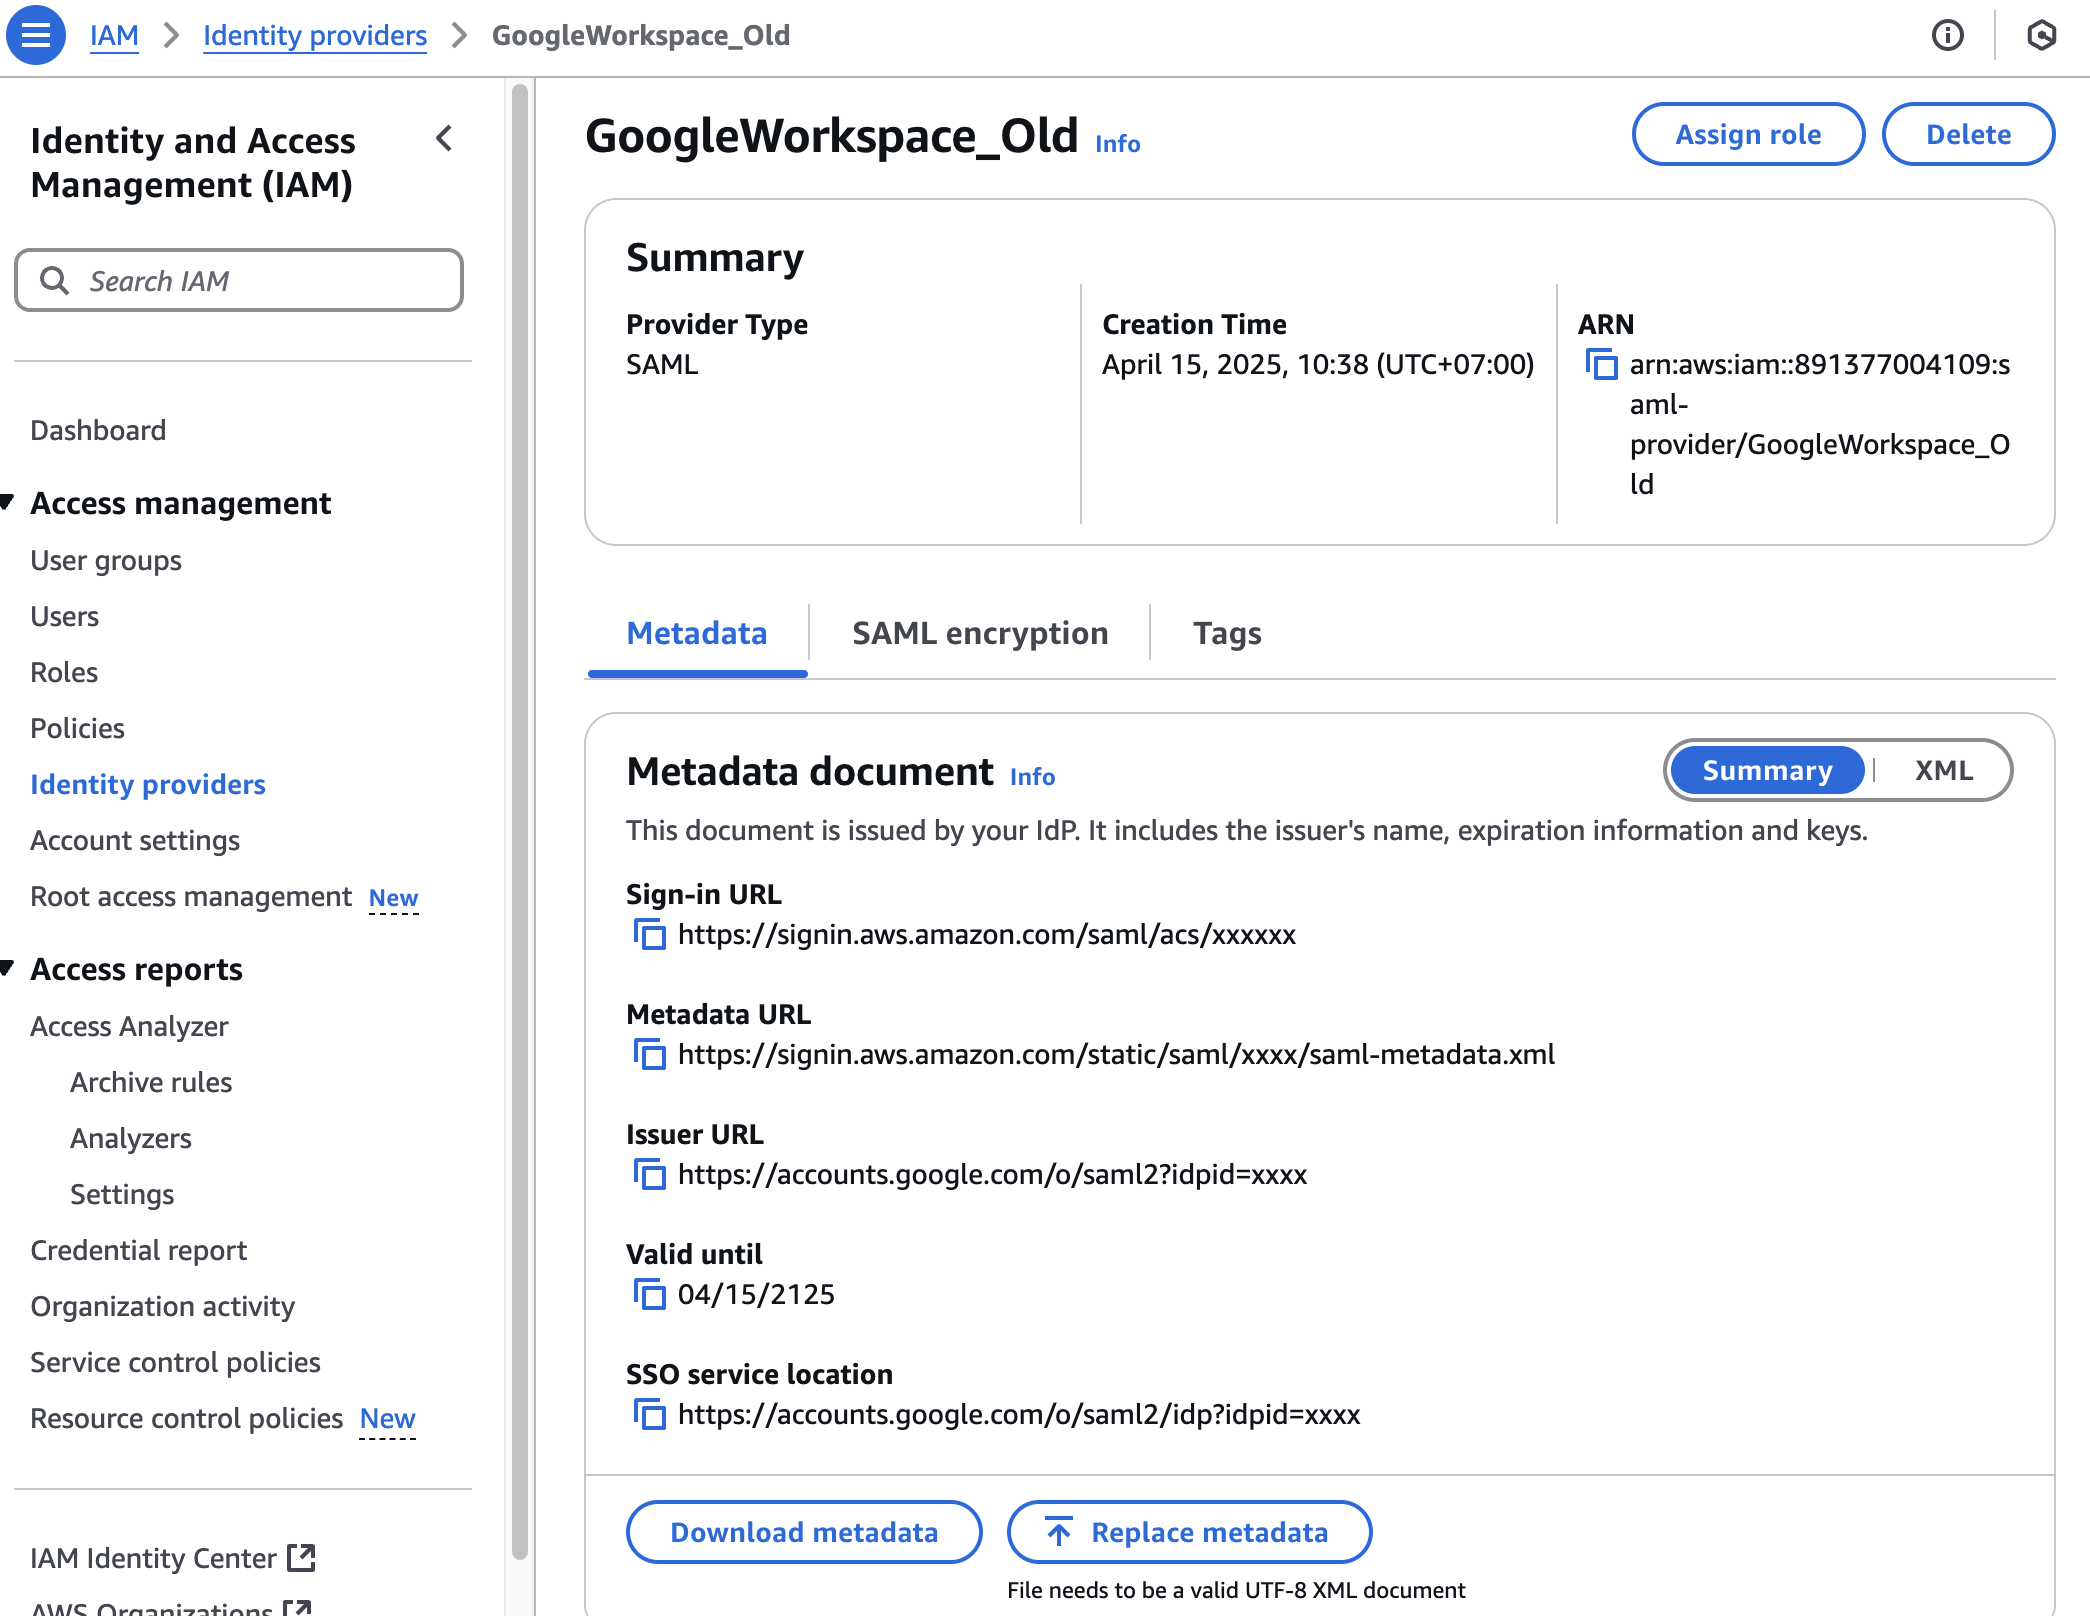
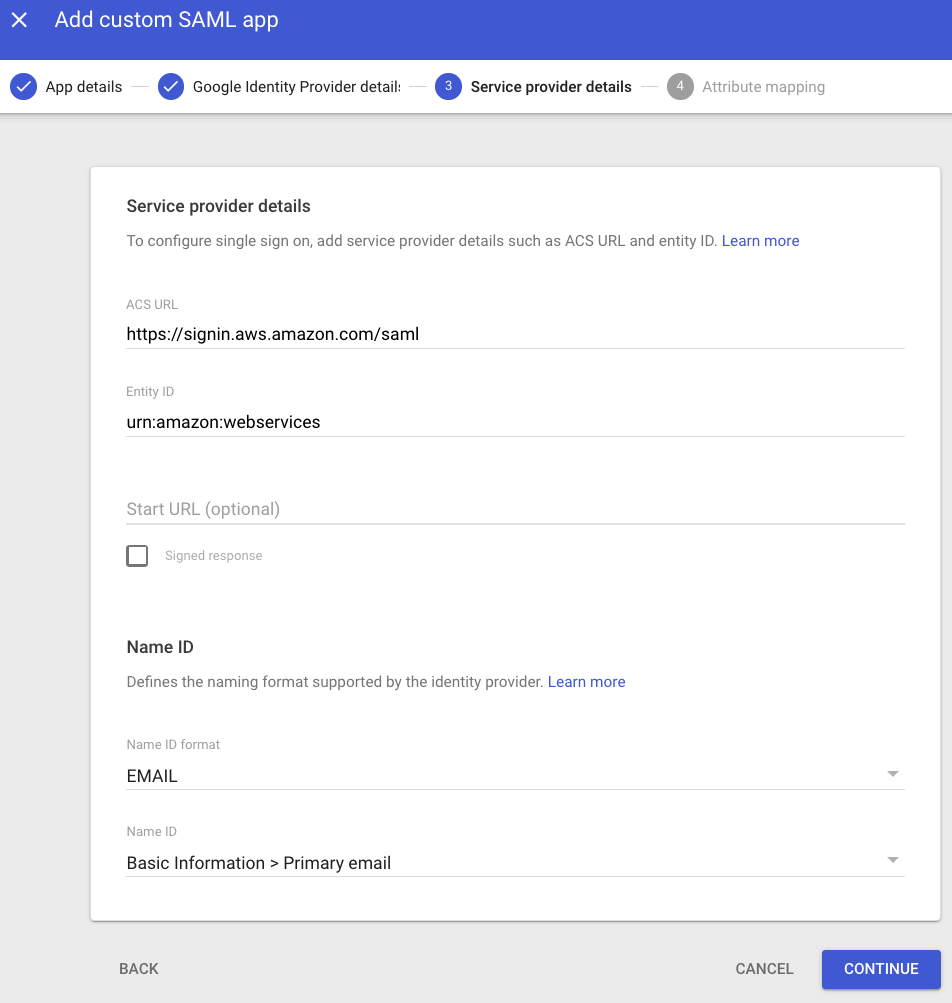
Trên Google console:
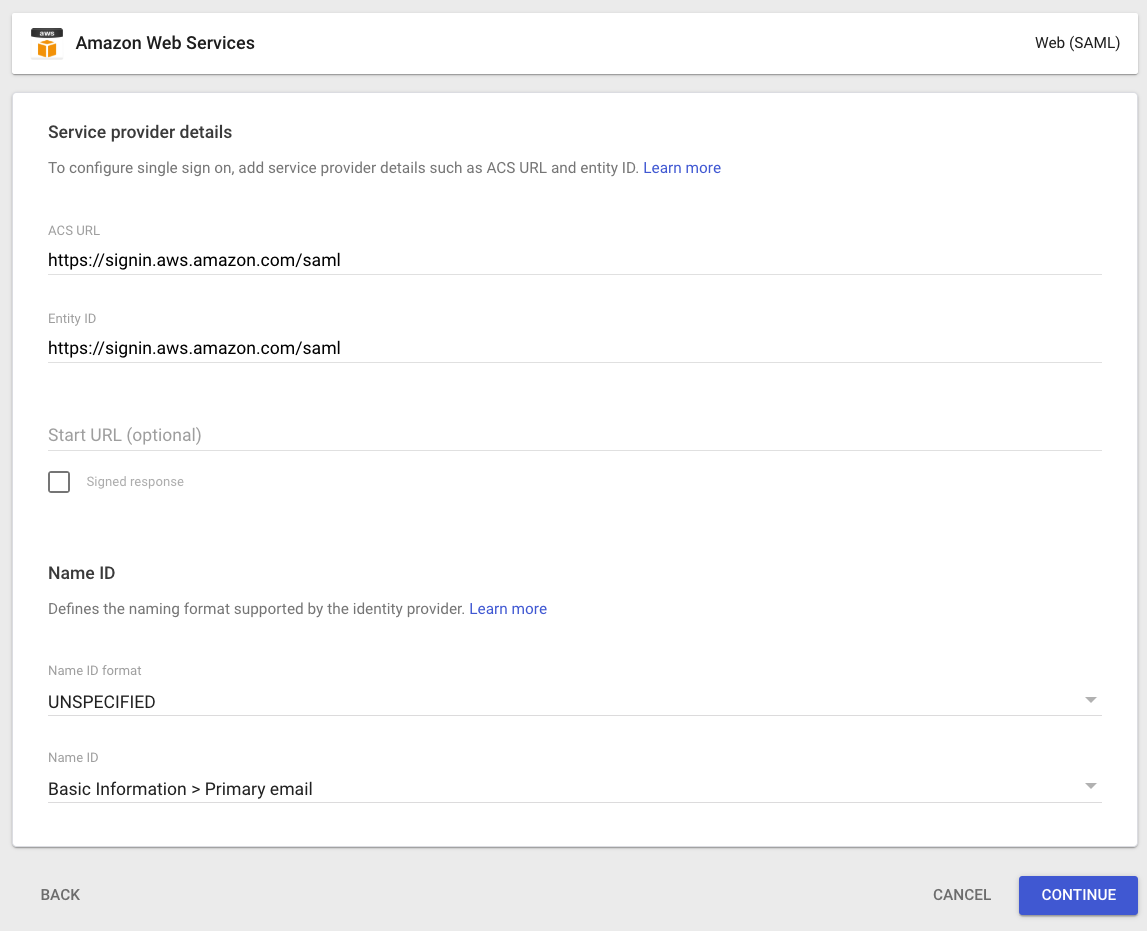
ACS URL: https://signin.aws.amazon.com/saml/acs/xxxxxx
Entity ID: https://signin.aws.amazon.com/saml/acs/xxxxxx
Name ID format: EMAIL
Name ID: Basic Information > Primary email
Sau đó chọn Continue
Chú ý: Thông tin trên hình chưa thay đổi theo đúng yêu cầu
Nhập như hình minh họa:
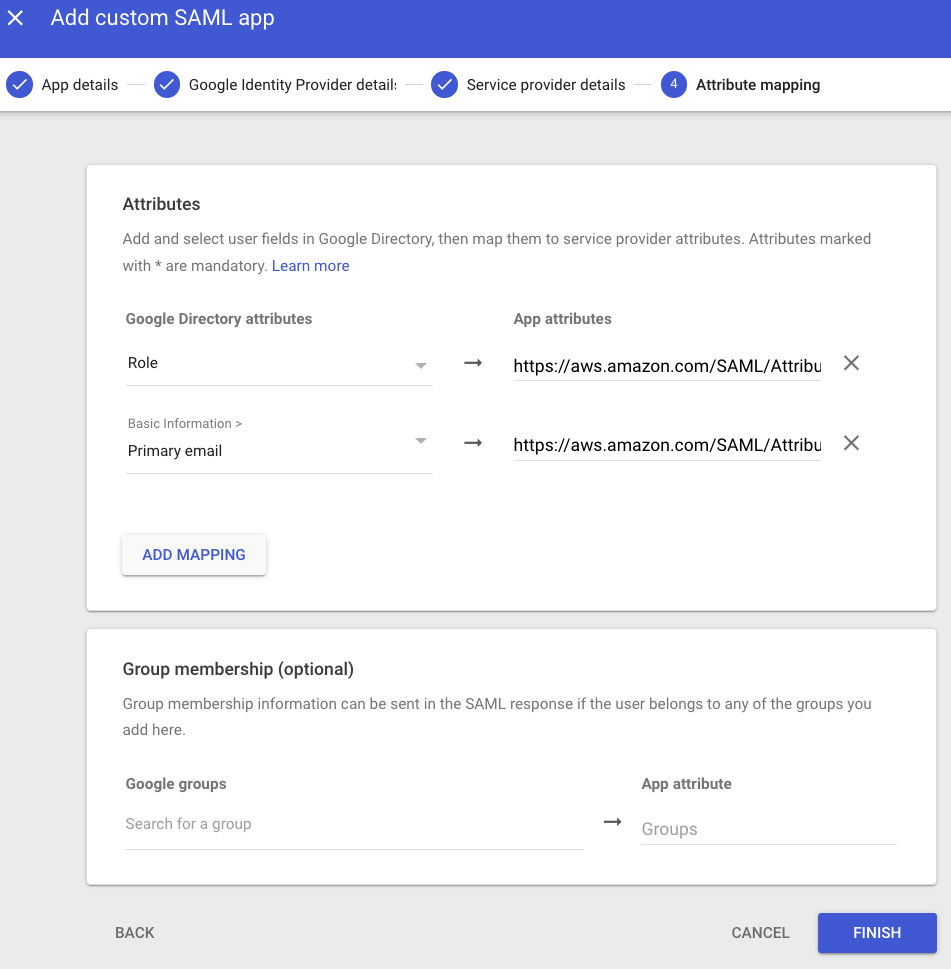
| Google Directory attributes | App attributes |
|---|---|
| AWS > Role* | https://aws.amazon.com/SAML/Attributes/Role |
| Basic Information > Primary email | https://aws.amazon.com/SAML/Attributes/RoleSessionName |
- Đây là custom attribute. Ở bài hướng dẫn này là Role, có một số bài hướng dẫn sẽ đặt tên là "AssumeRoleWithSaml"
Trên AWS console:
Tạo Role cho IdP:
IAM -> Roles -> Create role
- To create an IAM role, go to the AWS IAM console. Select Roles > Create role.
- Choose the SAML 2.0 federation role type.
- For SAML Provider, select the provider which you created in Step
- Choose Allow programmatic and AWS Management Console access to create a role that can be assumed programmatically and from the AWS Management Console.
- Review your SAML 2.0 trust information and then choose Next: Permissions.
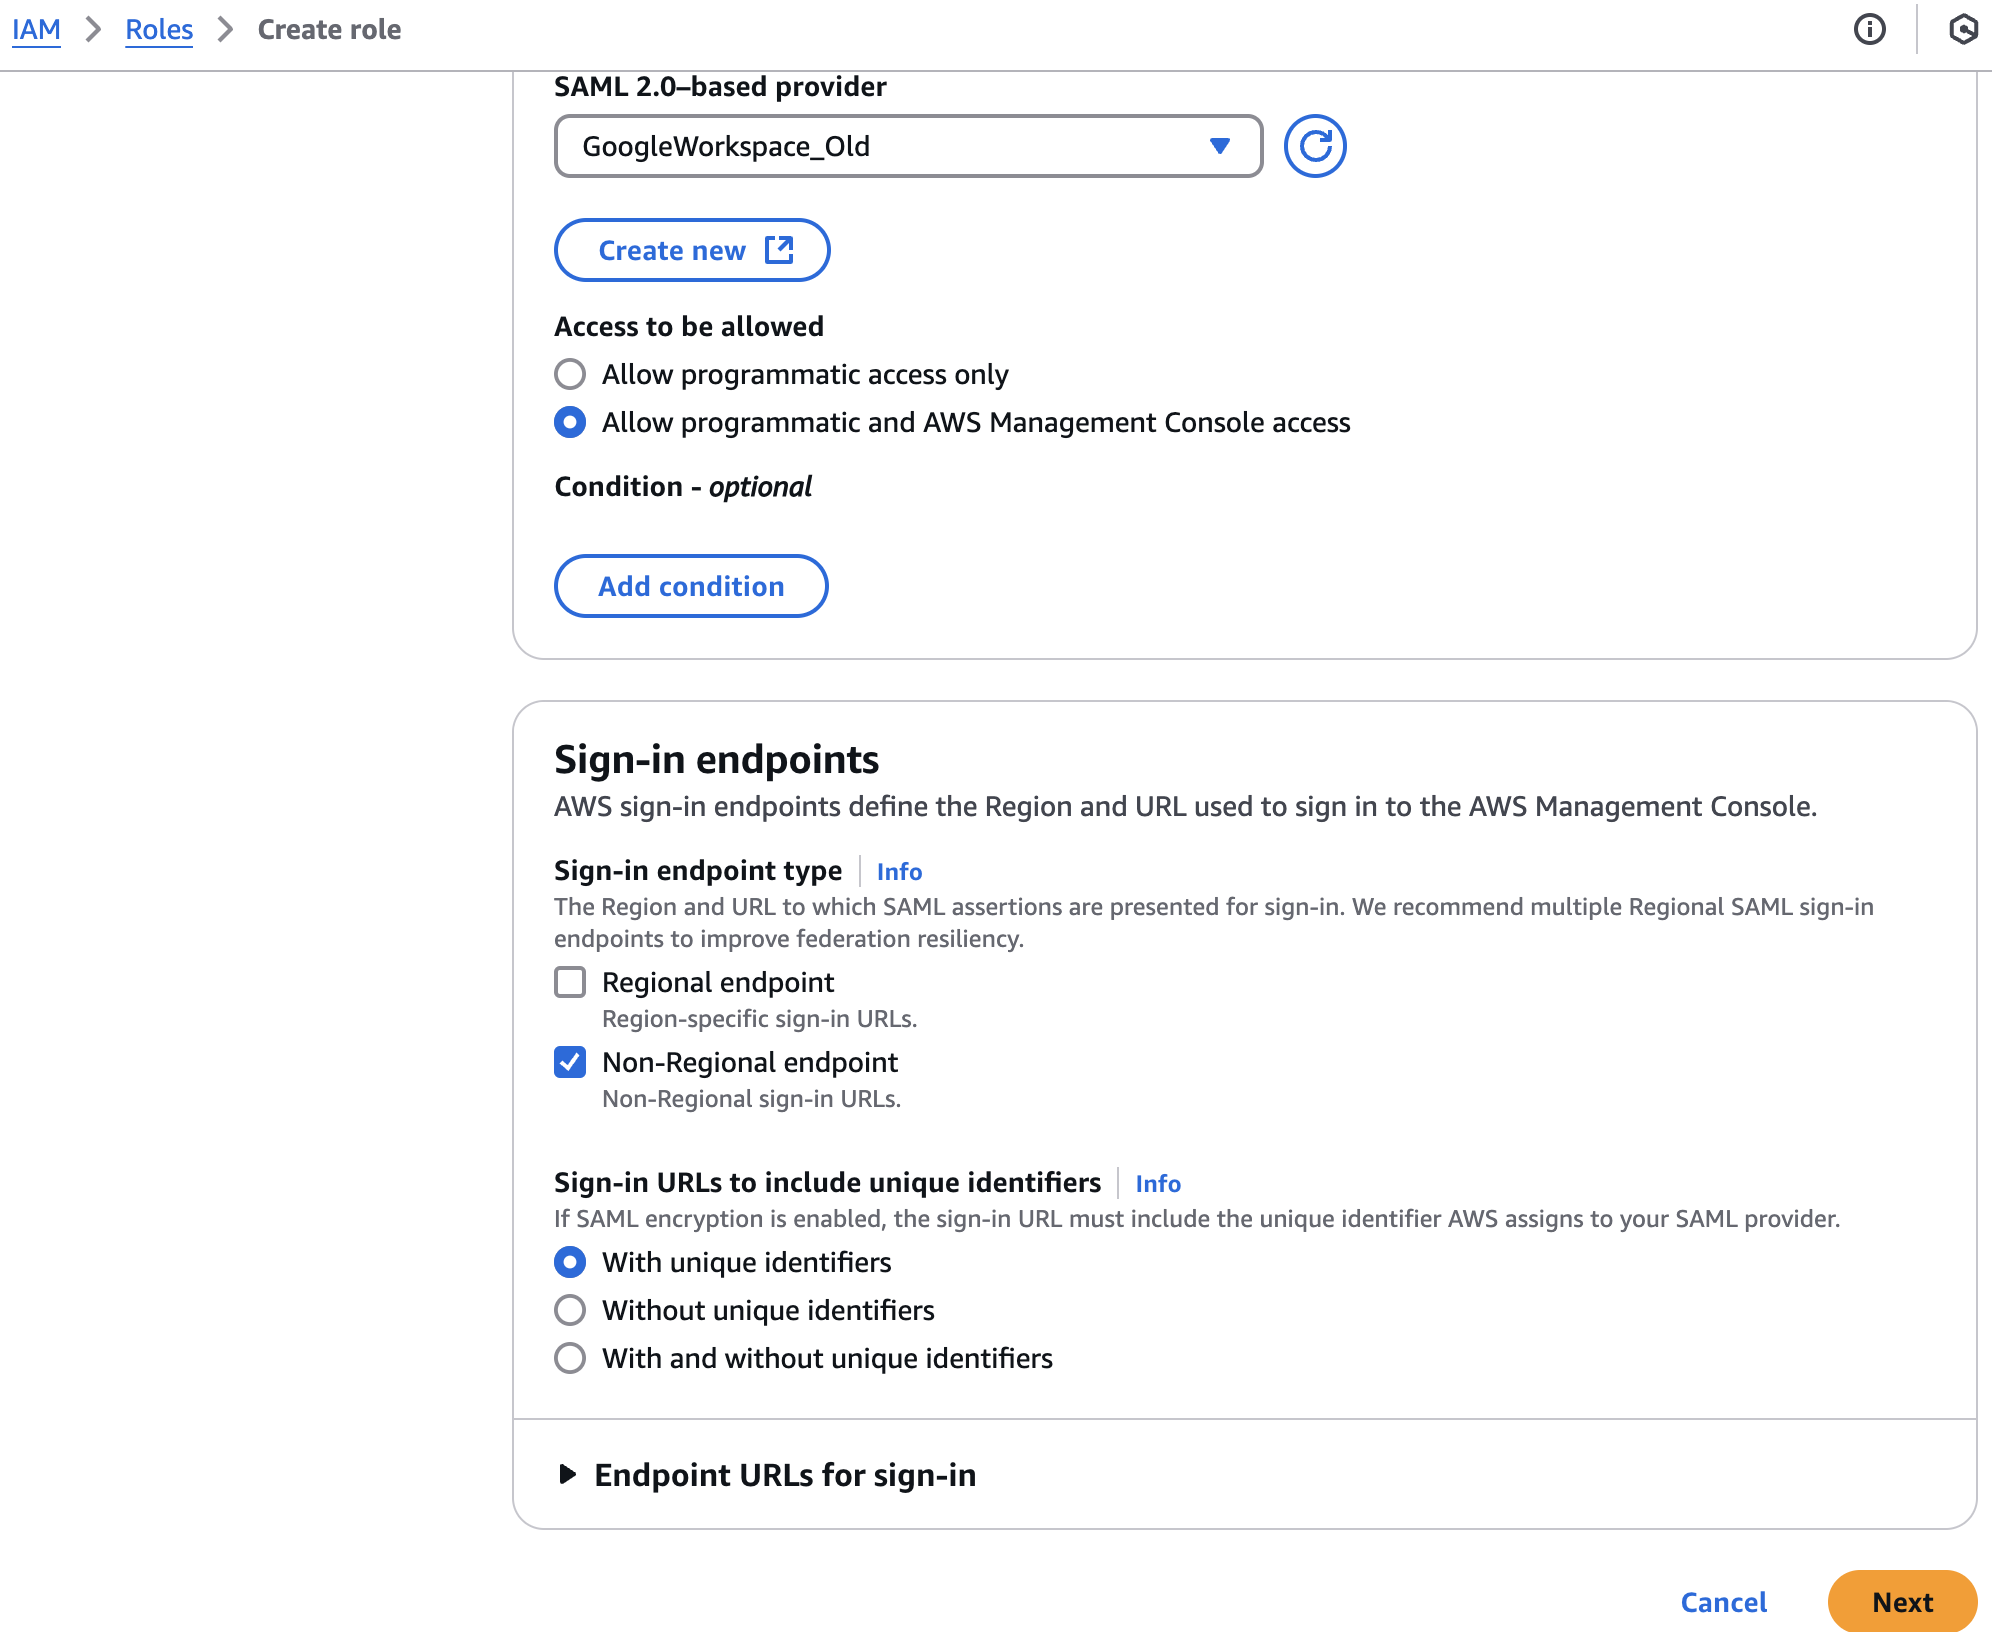
Select Permission, Next, Naming it "GoogleWorkspaceRole_old" and click Create Role
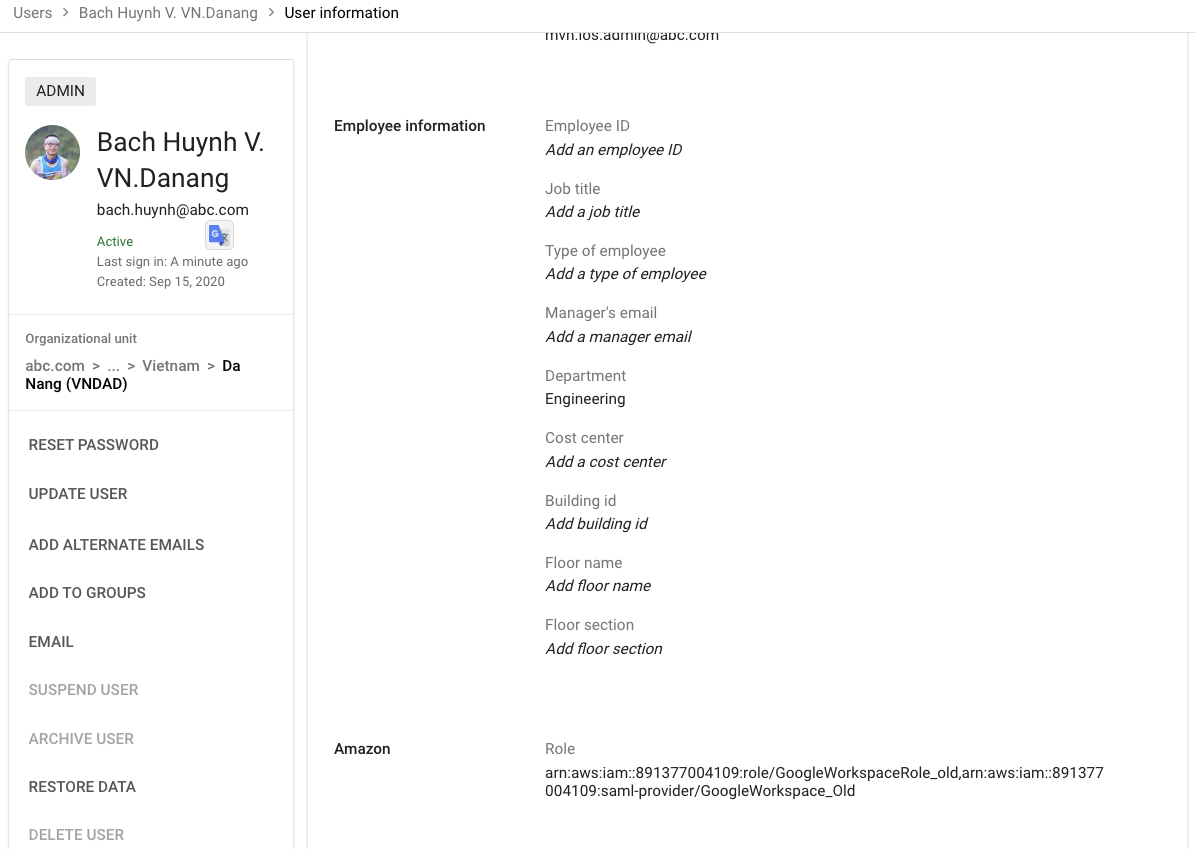
Giờ là lúc gán role cho user.
User > User Information > Category AWS
ở Role, nhập:
arn:aws:iam::891377004109:role/GoogleWorkspaceRole_old,arn:aws:iam::891377004109:saml-provider/GoogleWorkspace_OldChú ý: gồm arn của role và arn saml-provider, ngăn cách bởi dấu phẩy
Đảm bảo
SAML app đã được Enbale cho 1 group nhỏ, hoặc ou, hoặc toàn bộ unit, để đảm bảo user đó sử dụng được SAML app
Kiểm tra user đã login được chưa:
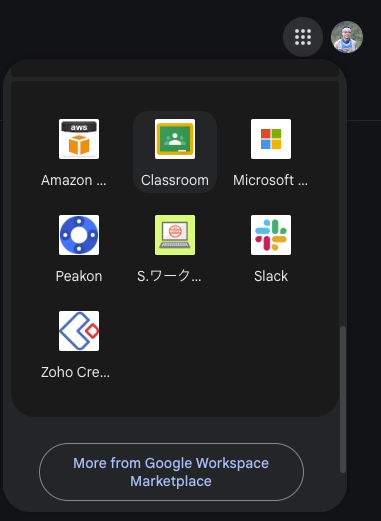
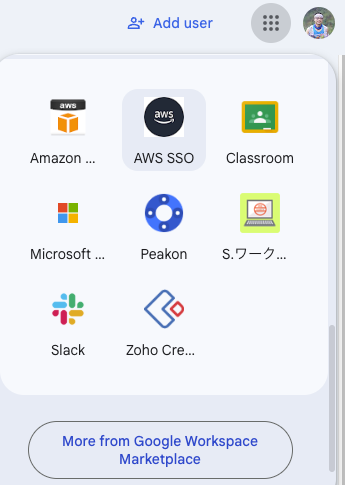
- Cách 1: vào https://workspace.google.com/dashboard chọn SAML app mới được tạo.
- Cách 2: Vào bất kỳ trang của google nào, ở góc trên bên phải, click vào biểu tượng 9 chấm, kéo xuống dưới cùng và tìm SAML app đó
Tóm tắt cách này:
- Trên Google console:
- Tạo custom attribute cho user.
- Tạo saml app.
- Lấy metadata import vào AWS console khi tạo Identity provider.
- Cấu hình đúng các URL cần thiết.
- Cấu hình đúng attribute mapping.
- Enable saml app cho đối tượng group, ou, org cần thiết.
Nhập "role_arn,saml-provider_arn" cho user đã được enable saml app.
Trên AWS console:
Tạo Identity Provider.
Import file metadata được tạo từ Google.
Tạo Role cho Identity provider vừa mới tạo. Gán quyền cần thiết. Có thể tạo nhiều role với các permission khác nhau dành cho những user khác nhau.
Tổng kết
Chúng ta đã tìm hiểu 2 cách tích hợp Google Workspace làm IdP trên AWS:
Cách 1: Identity Providers trong IAM
- Lấy IAM Role làm trọng tâm để phân quyền. Nhiều group với các quyền khác nhau thì phải tạo nhiều IAM Role.
- Đơn giản, dễ triển khai cho hệ thống cũ hoặc quy mô nhỏ
- Tuy nhiên, phải gán Role thủ công cho từng user
- Trước đây, mình dùng JumpCloud hỗ trợ gán Role theo Group rất tiện, nhưng chi phí cao
- Chuyển sang Google thì... phải cấu hình từng user một cách thủ công → bất tiện
Cách 2: IAM Identity Center + Google Workspace
- Việc gán quyền (Permission Set) cho user/group giờ làm trực tiếp trong IAM Identity Center
- Tạo SAML App trong Google (dùng pre-integrated SAML app)
- Bật Autoprovisioning → tự động sync user từ Google Workspace sang AWS Identity Center
Ưu điểm:
- Tự động sync toàn bộ user từ Google Workspace → không cần tạo user thủ công
- Có thể gán quyền theo Group → phù hợp tổ chức lớn
- Trải nghiệm người dùng tốt hơn (SSO Portal, CLI, GUI, SDK...)
Nhược điểm:
- Group chưa được tự động sync → phải:
- Tạo group thủ công bằng CLI
- Hoặc dùng Lambda function để sync-up
- Chỉ tạo được MỘT pre-integrated SAML app trên Google Workspace
- → Không phù hợp nếu bạn cần tạo nhiều app cho nhiều AWS Org khác nhau