If you’ve been managing Python projects long enough, you’ve probably dealt with a mess of tools: pip, pip-tools, poetry, virtualenv, conda, maybe even pdm.
Each brings something useful to the table, but also adds to the complexity.
UV — a fast, Rust-powered Python package and project manager that aims to unify and simplify all of this.
What is UV?
UV is a blazing-fast package and project manager for Python, written in Rust.
Think of it as a single tool to replace:
pippip-toolsvirtualenvpyenvpoetrypdm- and more...
It handles dependency installation, environment management, Python version management, and script execution, all from a single CLI tool.
Why is UV So Fast?
The secret sauce? UV is written in Rust, which brings serious speed gains over traditional Python-based tooling.
Benchmarks from the UV docs claim it's 10 to 100 times faster than pip. And in practice, it does feel ridiculously quick — installing NumPy, pandas, and other large libraries takes seconds, not minutes.
Installing UV
To get started:
pip install uvYou can also install it via curl or PowerShell, and it works across macOS, Linux, and Windows.
Getting Started with UV
Let’s walk through a quick project setup using UV.
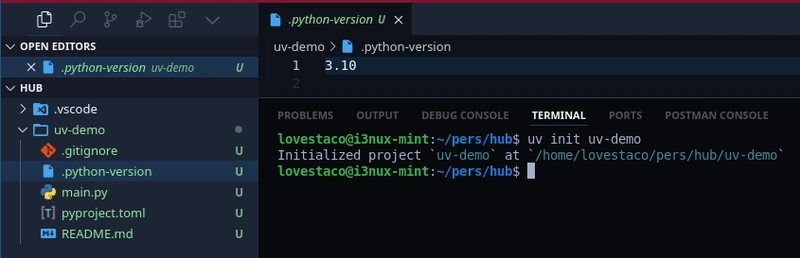
Step 1: Create a New Project
uv init uv-demoThis creates a structured project folder:
uv-demo/
├── .gitignore
├── main.py
├── project.uv.toml
├── README.md
└── .python-version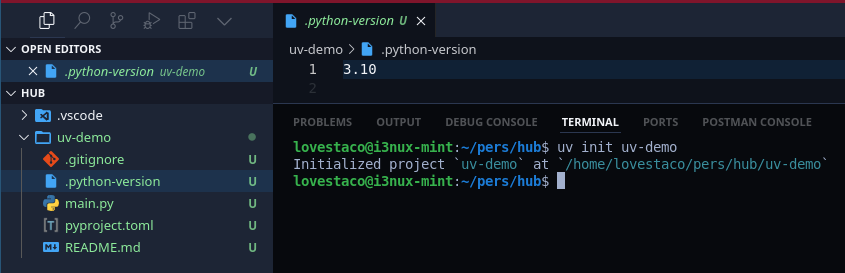
Step 2: Create a Virtual Environment
uv venvThis instantly creates a virtual environment using the selected Python version — no more typing python -m venv venv.
To activate it (Linux/macOS):
source .venv/bin/activateOr on Windows:
.venv\Scripts\activate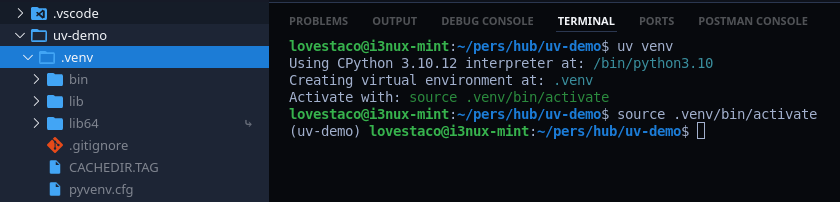
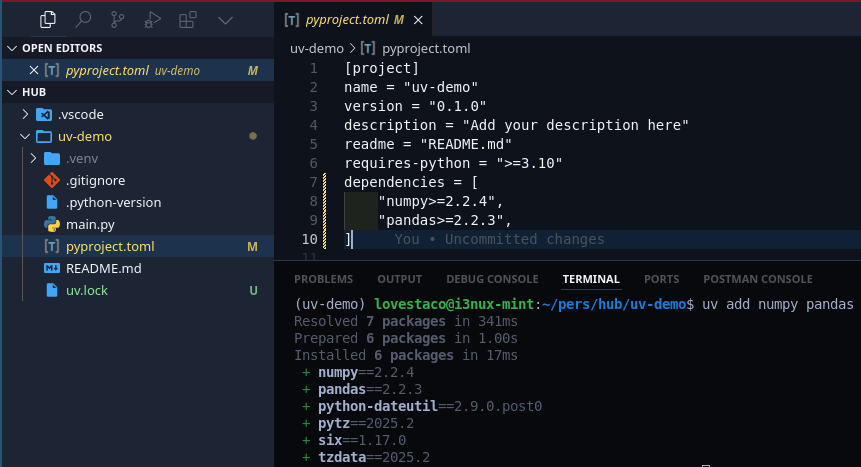
Step 3: Add Dependencies
Adding dependencies is straightforward:
uv add numpy pandasThis installs the packages and updates your project.uv.toml file:
Step 4: Install from requirements.txt
You can even install dependencies from a requirements.txt file:
# requirements.txt
numpy
pandas
Then run:
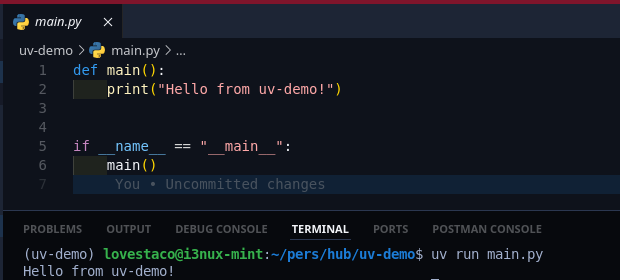
uv add -r requirements.txtStep 5: Run Python Scripts
Instead of:
python main.pyWith UV, just use:
uv run main.pyThis runs your script using the active environment.
Managing Python Versions
UV also supports managing Python versions:
uv python install 3.12
uv python install 3.11
Then create environments using a specific version:
uv venv --python 3.11
Highlights
- ⚡ Lightning-fast installs (thanks, Rust)
- 🧰 Replaces multiple tools with one CLI
- 🔁 Automatically handles
venvand Python version management - 📦 Supports
requirements.txt - 💻 Cross-platform: Linux, macOS, and Windows
- ✨ Familiar
pip-like syntax
TL;DR
UV simplifies Python project setup and dependency management into one consistent, fast, and modern tool.
Whether you’re tired of juggling venv, pyenv, and pip, or just want something faster, UV is worth trying out.
I’ve been actively working on a super-convenient tool called LiveAPI.
LiveAPI helps you get all your backend APIs documented in a few minutes
With LiveAPI, you can quickly generate interactive API documentation that allows users to execute APIs directly from the browser.

If you’re tired of manually creating docs for your APIs, this tool might just make your life easier.
