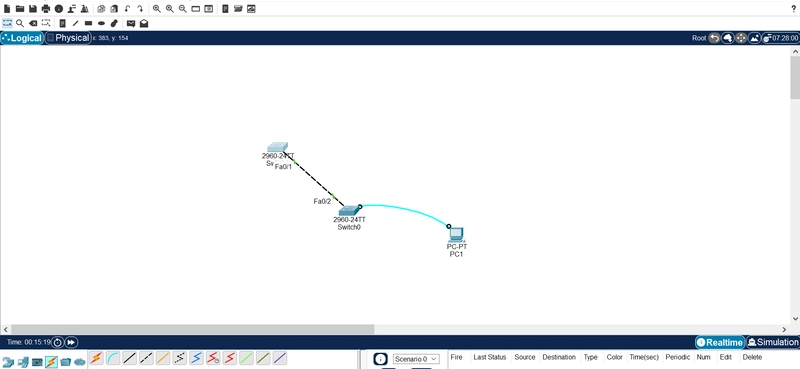
Today, I successfully configured SSH (Secure Shell) on a Cisco 2960 switch in Packet Tracer to enable encrypted remote access! Unlike Telnet, which transmits data in plain text, SSH ensures end-to-end encryption, making it the preferred choice for network security.
Switch> enable
Switch# configure terminal
Set the hostname
Switch(config)# hostname S1
Configure the domain name (needed for RSA key generation)
Switch1(config)# ip domain-name shahbaz.com
Generate RSA keys (1024-bit or higher for security)
Switch1(config)# crypto key generate rsa
Choose 1024 bits or more when prompted.
Create a local user with a strong password
Switch1(config)# username awan privilege 15 secret StrongPass123
Enable SSH version 2 for better security
Switch1(config)# ip ssh version 2
Assign an IP address to VLAN 1 for remote access
Switch1(config)# interface vlan 1
Switch1(config-if)# ip address 192.168.1.2 255.255.255.0
Switch1(config-if)# no shutdown
Switch1(config-if)# exit
Enable SSH access on Virtual Terminal (VTY) lines
Switch1(config)# line vty 0 4
Switch1(config-line)# login local # Use local authentication
Switch1(config-line)# transport input ssh # Allow only SSH
Switch1(config-line)# exit
Save configuration
Switch1# wr
This configuration enables SSH access, setting up local authentication and encrypting remote login sessions.
💡 How to Access the Switch via SSH from a PC?
On a Windows/Linux/Mac system, open a terminal or Command Prompt and use:
ssh -l awan 192.168.1.2
enter password StrongPass123
now you successfully configure the and access the ssh
💡 Pro Tip: Always use SSH over Telnet for securing your network infrastructure! Network security is critical, and encrypted communication helps prevent cyber threats like MITM (Man-in-the-Middle) attacks.
and the telnet configuration and lab are
🚀 Mastering Remote Switch Access with Telnet in Cisco Networking! 🔥
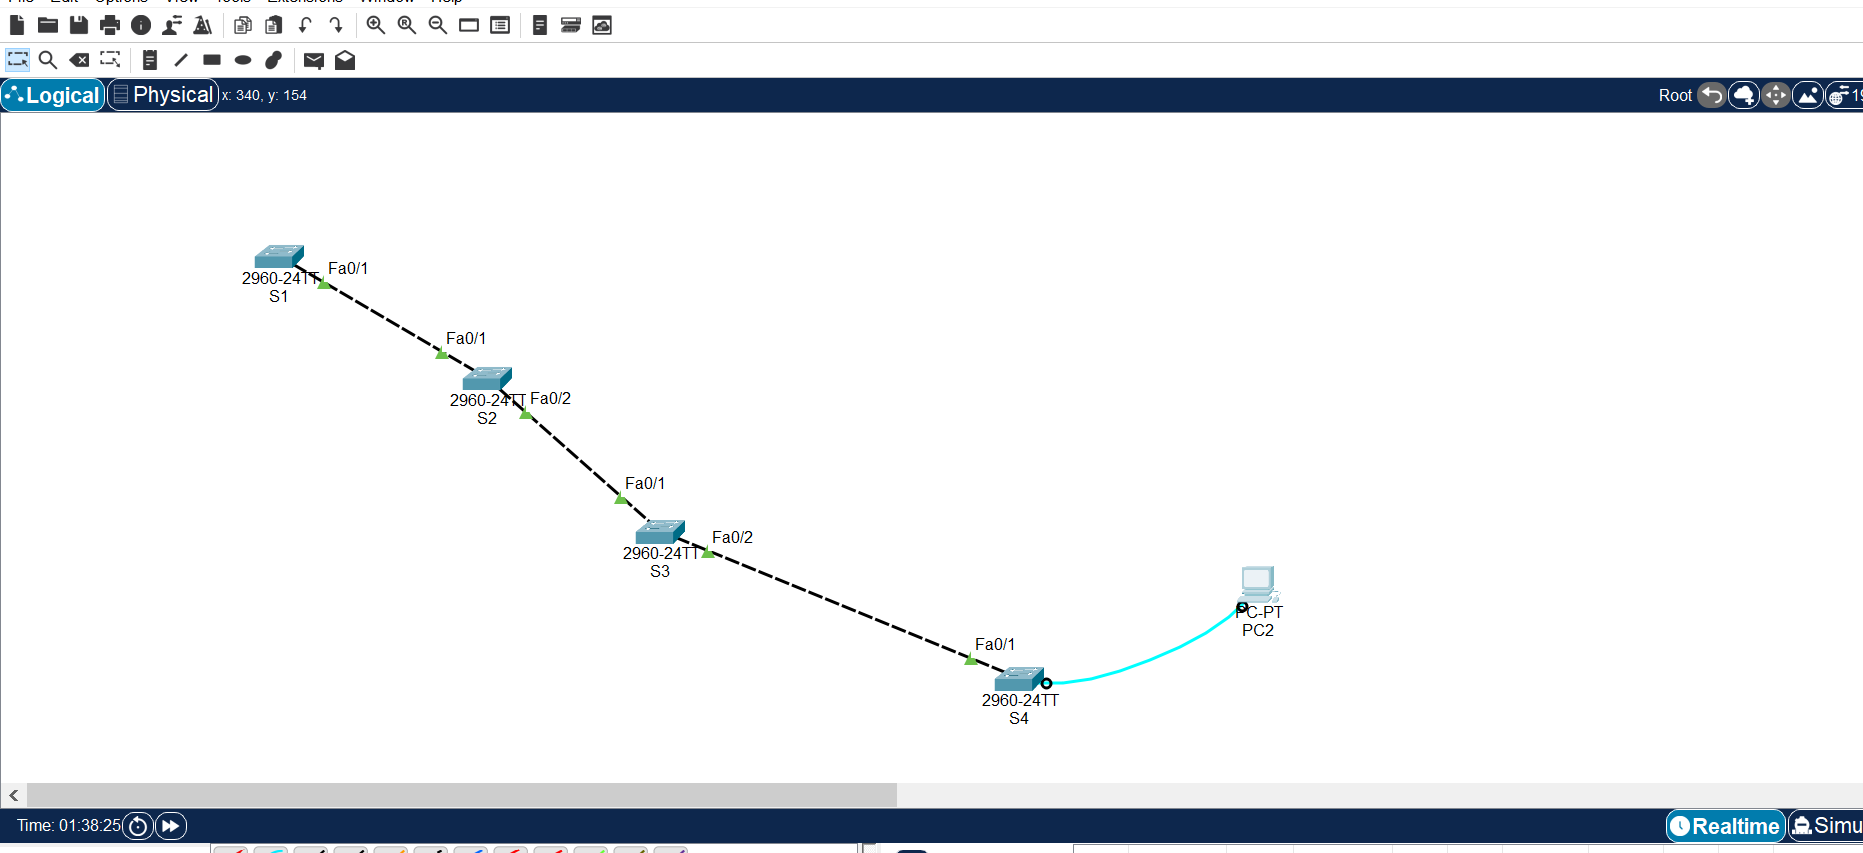
Today, I successfully set up Telnet remote access across multiple Cisco 2960 switches in Packet Tracer. This setup allows me to manage all switches from a single PC (PC2) without direct console access!
💡 Key Takeaways from this Lab:
✅ Configured VLAN 1 with unique IP addresses
✅ Enabled Telnet for remote switch management
✅ Verified connectivity with ping & telnet commands
🔍 What is Telnet?
Telnet (short for Telecommunication Network) is a remote access protocol that allows users to connect to network devices (like routers, switches, and servers) using a command-line interface. It operates on port 23 and is often used for device management in networking.
🌟 Key Features of Telnet
✅ Allows remote access to network devices
✅ Uses a virtual terminal for command execution
✅ Works over TCP/IP networks
✅ Used in Cisco devices for switch/router configuration
⚠️ Security Concern
🔴 Telnet transmits data in plain text (including passwords), making it insecure for modern networks.
lab work of telnet i take 4 switches and one pc with connect the console cable to gain the ramotely access
📡 Telnet Configuration for Your Packet Tracer Topology
🛠 Step 1: Assign IP Addresses to Switches
Since switches don’t have Layer 3 interfaces, we will assign VLAN 1 IP addresses for remote access.i used class c ip scheme
IP Addressing Scheme
Device and VLAN 1 IPs
S1=192.168.1.1,
S2=192.168.1.2,
S3=192.168.1.3,
S4=192.168.1.4,
PC2=192.168.1.100
🖥 Step 2: Configure Each Switch for Telnet
Apply this configuration on all switches (S1 to S4).
🔹 Replace the IP address with the one assigned to each switch.
📌 Example Config for S1 (Modify IP for S2, S3, S4)
enable
hashtag#configure terminal
hashtag#hostname S1
interface vlan 1
ip address 192.168.1.1 255.255.255.0
no shutdown
exit
line vty 0 4
password 1234
login
transport input telnet
exit
enable secret 1234
end
write memory
same configure all the switches jutt replace the ip address and for better performance run the trunk mode all the connected interfaces
🖥 Step 3: Configure PC2
Go to Desktop → IP Configuration
IP Address: 192.168.1.100
Subnet Mask: 255.255.255.0
🚀 Step 4: Access Switches from PC2
Open PC2’s Command Prompt
Telnet to any switch (e.g., S1):
and ping 192.168.1.1 after successfully ping then use telnet to access remotely using telnet...
telnet 192.168.1.1
enter password 1234
You're now remotely connected! 🎉,
we also create the users and manage the limilt of user maximum 16 user like 0 to 15