
In today's digital age, video conferencing has become an essential tool You can explore more on ZEGOCLOUD’s official website for powerful tools to build such apps... for remote work, education, and social interaction. Building a video conference application from scratch can be complex, but with ZEGOCLOUD's Video Conference Kit, developers can integrate feature-rich video conferencing capabilities into their web applications quickly and easily. This comprehensive guide will walk you through the process of setting up a video conference app using ZEGOCLOUD's Video Conference Kit in simple, beginner-friendly language. We'll cover everything from prerequisites to customization, including a detailed code tutorial with step-by-step instructions.
What is ZEGOCLOUD Video Conference Kit?
ZEGOCLOUD's Video Conference Kit is a prebuilt, feature-rich component that allows developers to embed video conferencing functionality into web and mobile applications with minimal coding. It provides a ready-to-use user interface (UI) and business logic, enabling you to create Zoom-like video conferencing apps in minutes. Key features include:
- High-quality video and audio: Supports crystal-clear voice and video, even in low-bandwidth conditions.
- Screen sharing: Allows users to share their screens during calls.
- Customizable layouts: Supports gallery and picture-in-picture layouts.
- Real-time interaction: Includes in-room messaging, participant management, and more.
- Cross-platform support: Works on web browsers (PC and mobile) and integrates with frameworks like React, Angular, and Vue.
This guide focuses on the web version of the Video Conference Kit, using HTML and JavaScript for integration.
Prerequisites
Before we dive into the tutorial, ensure you have the following:
-
Basic Knowledge:
- Familiarity with HTML, CSS, and JavaScript.
- Basic understanding of web development concepts.
-
Development Environment:
- A code editor (e.g., Visual Studio Code).
- A modern web browser (Google Chrome is recommended for best compatibility).
- Node.js and npm (if using a framework like React).
-
ZEGOCLOUD Account:
- Sign up for a free account on the ZEGOCLOUD Admin Console.
- Create a project to obtain your
AppIDandServerSecret, which are required for authentication.
-
Internet Connection:
- A stable internet connection for testing and deploying your application.
Step-by-Step Tutorial: Building a Video Conference App

Let's build a simple video conference app using ZEGOCLOUD's Video Conference Kit. We'll use the HTML script method for integration, as it's the simplest approach for beginners. Follow these steps carefully.
Step 1: Set Up Your ZEGOCLOUD Project
-
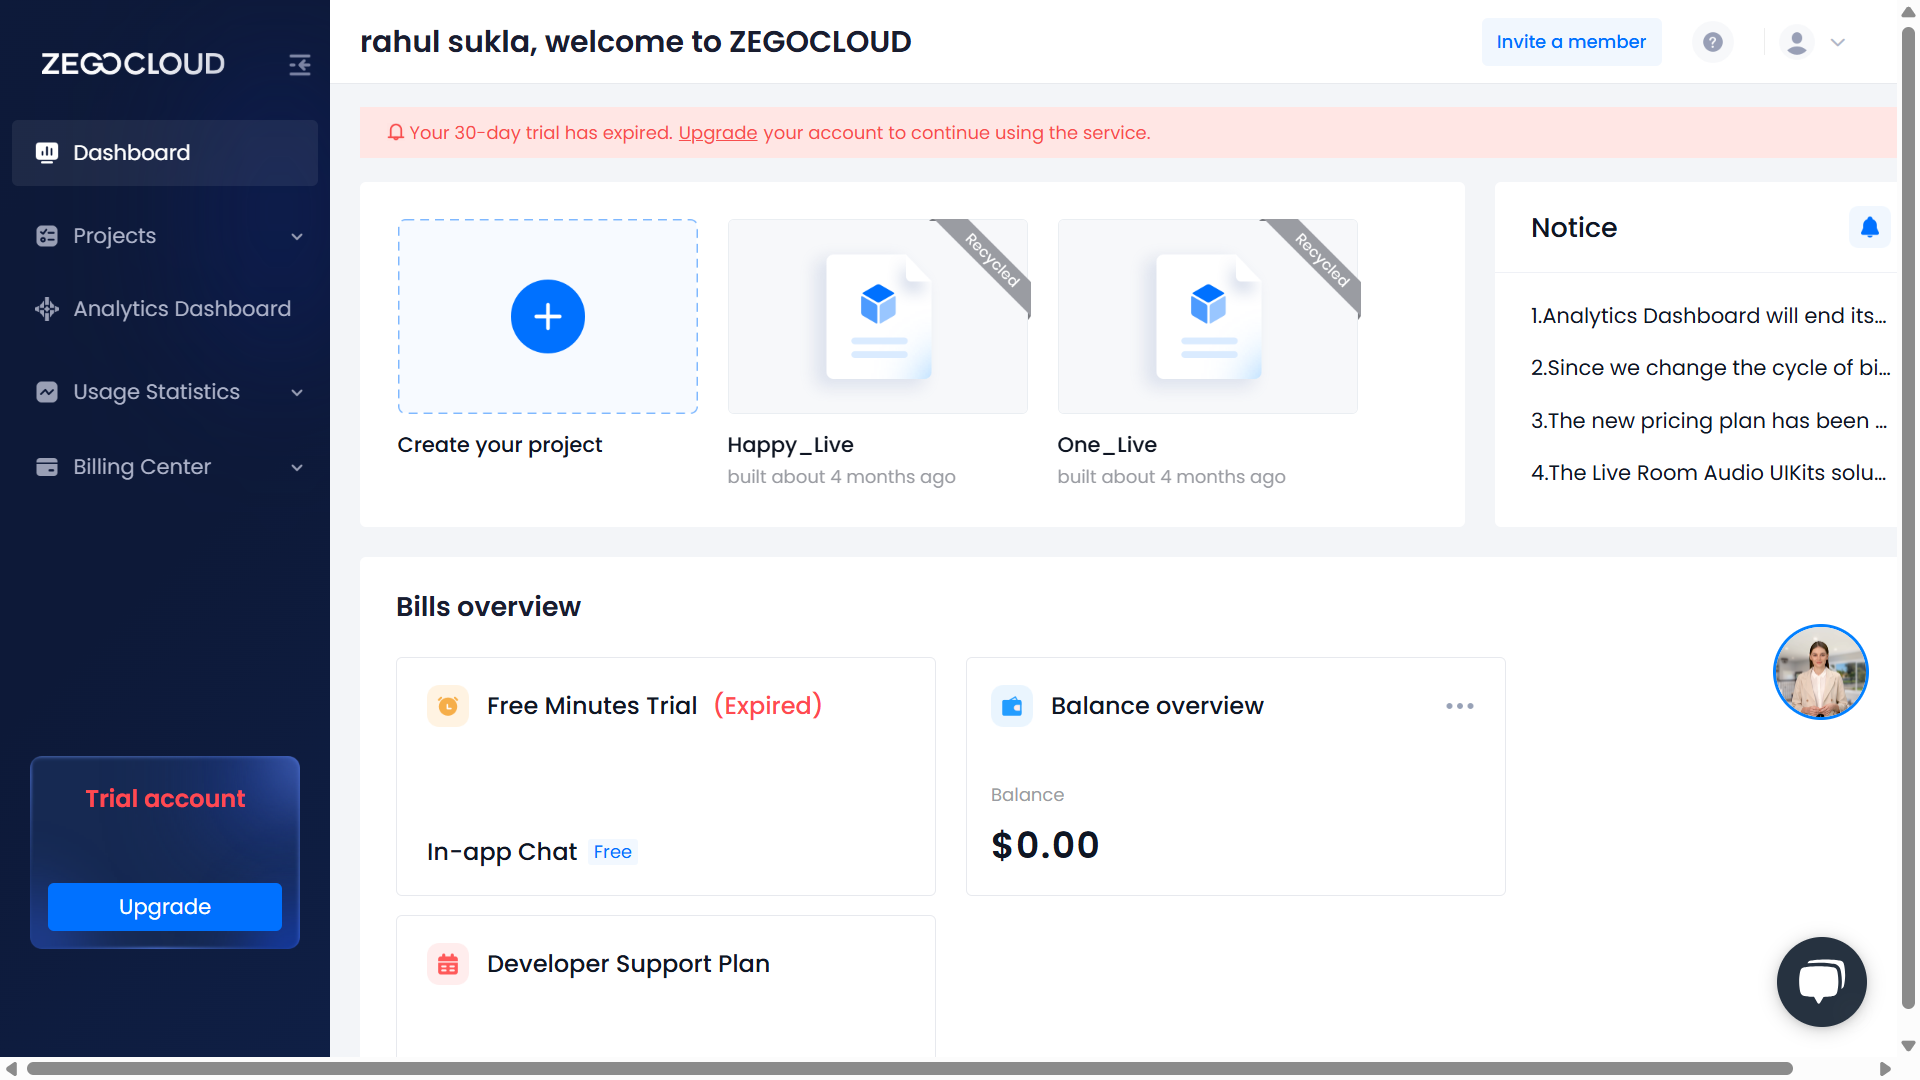
Log in to ZEGOCLOUD Admin Console:
- Visit ZEGOCLOUD Admin Console and sign in or create an account.
-
Create a New Project:
- Click on Create Project and select UIKit as the project type.
- Give your project a name (e.g., "VideoConferenceApp").
-
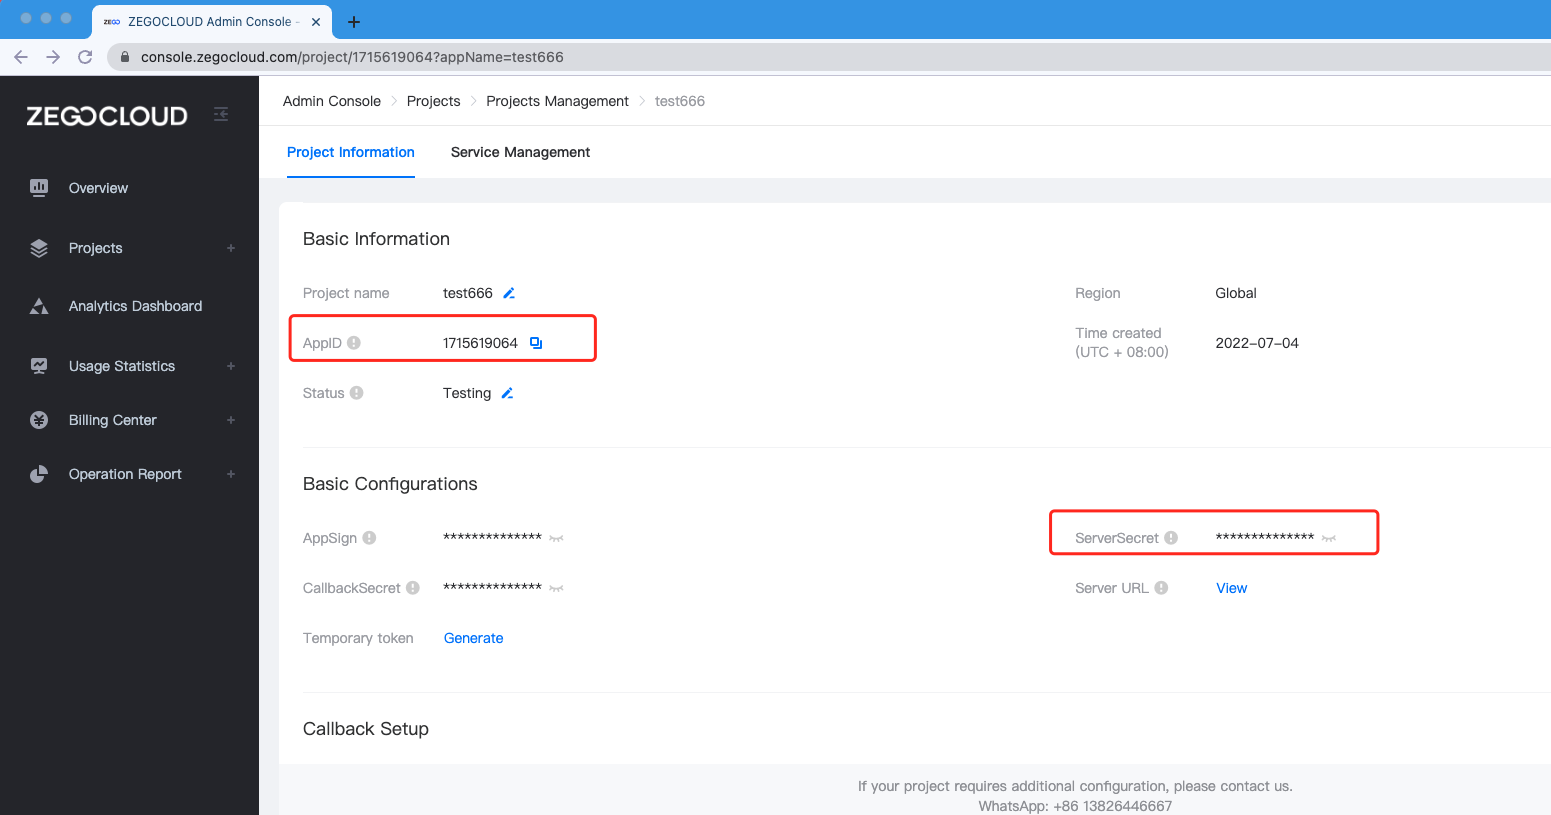
Obtain AppID and ServerSecret:
- Once the project is created, you'll see your
AppID(a numeric value) andServerSecret(a string). - Note these down, as you'll need them to generate a Kit Token for authentication.
- Once the project is created, you'll see your
-
Enable Video Conference Kit:
- In the project dashboard, ensure the Video Conference Kit is enabled. This is usually enabled by default for UIKit projects.
Step 2: Set Up Your Project Folder
-
Create a Project Directory:
- On your computer, create a new folder called
video-conference-app. - Inside this folder, create a file named
index.html.
- On your computer, create a new folder called
-
Basic HTML Structure:
- Open
index.htmlin your code editor and add the following basic HTML structure:
- Open
</span>
 lang="en">

     charset="UTF-8">
     name="viewport" content="width=device-width, initial-scale=1.0">
    ZEGOCLOUD Video Conference App

        #root {
            width: 100vw;
            height: 100vh;
        }


     id="root">


    Enter fullscreen mode


    Exit fullscreen mode


The #root div will serve as the container for the video conference UI.
The CSS ensures the video conference interface takes up the full viewport.


  Step 3: Import ZEGOCLOUD Video Conference Kit
1  Add the ZEGOCLOUD SDK:
Include the ZEGOCLOUD Video Conference Kit SDK by adding the following  tag inside the  of your index.html, just before the closing  tag:


<span class="na">src="https://unpkg.com/@zegocloud/zego-uikit-prebuilt/zego-uikit-prebuilt.js">


    Enter fullscreen mode


    Exit fullscreen mode


This script loads the prebuilt Video Conference Kit library from a CDN, making it easy to integrate without installing dependencies.
2  Verify SDK Import:
Save the file and open index.html in a browser (e.g., Chrome) using a local server. To run a local server, you can use:


VS Code: Install the "Live Server" extension and right-click index.html to open with Live Server.

Node.js: Run npx http-server in the project folder.


Ensure there are no errors in the browser's console.


  Step 4: Generate a Kit Token
The ZEGOCLOUD Video Conference Kit requires a Kit Token for authentication. This token is generated using your AppID, ServerSecret, and other parameters like roomID, userID, and userName.

Add Token Generation Logic:


Below the SDK script, add a  tag with the following JavaScript code to generate a Kit Token and initialize the video conference:


// Replace with your actual AppID and ServerSecret
const appID = YOUR_APP_ID; // e.g., 123456789
const serverSecret = "YOUR_SERVER_SECRET"; // e.g., "a1b2c3d4e5f6..."
// Generate a random roomID, userID, and userName
const roomID = Math.random().toString(36).substring(2, 7); // Random 5-character room ID
const userID = Math.floor(Math.random() * 10000) + ""; // Random user ID
const userName = "user_" + userID; // User name based on user ID
// Generate Kit Token
const kitToken = ZegoUIKitPrebuilt.generateKitTokenForTest(
    appID,
    serverSecret,
    roomID,
    userID,
    userName
);
// Initialize the Video Conference Kit
const zp = ZegoUIKitPrebuilt.create(kitToken);
// Join the video conference room
zp.joinRoom({
    container: document.querySelector("#root"),
    sharedLinks: [
        {
            name: "Personal link",
            url:
                window.location.protocol +
                "//" +
                window.location.host +
                window.location.pathname +
                "?roomID=" +
                roomID,
        },
    ],
    scenario: {
        mode: ZegoUIKitPrebuilt.VideoConference,
    },
});


    Enter fullscreen mode


    Exit fullscreen mode


2  Replace Credentials:
Replace YOUR_APP_ID with the AppID from your ZEGOCLOUD project.
Replace YOUR_SERVER_SECRET with the ServerSecret from your ZEGOCLOUD project.
3  Explanation of the Code:

AppID and ServerSecret: Authenticate your app with ZEGOCLOUD's servers.

roomID: A unique identifier for the video conference room. Users with the same roomID join the same conference.

userID and userName: Identify the user in the conference. For testing, we generate random values.

generateKitTokenForTest: A helper method to create a temporary token for testing. For production, you should generate tokens server-side for security.

joinRoom: Initializes the video conference UI inside the #root div and starts the conference.


  Step 5: Test Your Video Conference App


Run the Application:


Save index.html and open it in a browser using a local server (e.g., http://localhost:8080).
You should see the ZEGOCLOUD video conference interface, with options to enable your camera and microphone.


Join the Conference:


Allow browser permissions for camera and microphone access.
You'll see your video feed and the conference UI, including buttons for screen sharing, messaging, and participant management.


Test with Multiple Users:


Open another browser tab or window and navigate to the same URL with the same roomID (you can find the shared link in the UI).
Alternatively, modify the roomID in the code to a fixed value (e.g., room123) and open multiple tabs with ?roomID=room123 appended to the URL (e.g., http://localhost:8080?roomID=room123).
You should see multiple participants in the same conference.


  Step 6: Customize the Video Conference UI
ZEGOCLOUD's Video Conference Kit allows you to customize the UI and behavior using the ZegoUIKitPrebuiltVideoConferenceConfig object. Here are some common customizations:

Add a Leave Confirmation Dialog:


To prompt users before leaving the conference, modify the joinRoom configuration:


zp.joinRoom({
    container: document.querySelector("#root"),
    sharedLinks: [
        {
            name: "Personal link",
            url:
                window.location.protocol +
                "//" +
                window.location.host +
                window.location.pathname +
                "?roomID=" +
                roomID,
        },
    ],
    scenario: {
        mode: ZegoUIKitPrebuilt.VideoConference,
    },
    leaveConfirmDialogInfo: {
        title: "Leave the conference",
        message: "Are you sure you want to leave?",
        cancelButtonName: "Cancel",
        confirmButtonName: "Confirm",
    },
});


    Enter fullscreen mode


    Exit fullscreen mode


This adds a confirmation dialog when the user clicks the "Leave" button.
2  Change Layout:
By default, the kit uses a gallery layout. To switch to picture-in-picture, add:


scenario: {
    mode: ZegoUIKitPrebuilt.VideoConference,
    config: {
        layout: "PictureInPicture",
    },
},


    Enter fullscreen mode


    Exit fullscreen mode


3  Turn Off Camera by Default:
To disable the camera when joining:


config: {
    turnOnCameraWhenJoining: false,
},


    Enter fullscreen mode


    Exit fullscreen mode


4  Add Custom Avatars:
To display user avatars instead of the first letter of the username:


config: {
    avatar: "https://example.com/avatar.png",
},


    Enter fullscreen mode


    Exit fullscreen mode


  Step 7: Deploy Your Application


Host on a Web Server:


For production, host your index.html on a web server (e.g., Netlify, Vercel, or AWS).
Ensure the server supports HTTPS, as ZEGOCLOUD requires secure connections for camera and microphone access.


Generate Tokens Server-Side:


For security, avoid using generateKitTokenForTest in production. Instead, set up a server (e.g., using Node.js) to generate tokens. Refer to ZEGOCLOUD's documentation for server-side token generation.


Test Thoroughly:


Test your app across different browsers (Chrome, Firefox, Safari) and devices to ensure compatibility.
Verify features like screen sharing, messaging, and participant management.


  Complete Code Example
Here's the complete index.html file with all the code integrated:

</span>
 lang="en">

     charset="UTF-8">
     name="viewport" content="width=device-width, initial-scale=1.0">
    ZEGOCLOUD Video Conference App

        #root {
            width: 100vw;
            height: 100vh;
        }


     id="root">
    <span class="na">src="https://unpkg.com/@zegocloud/zego-uikit-prebuilt/zego-uikit-prebuilt.js">

        // Replace with your actual AppID and ServerSecret
        const appID = YOUR_APP_ID; // e.g., 123456789
        const serverSecret = "YOUR_SERVER_SECRET"; // e.g., "a1b2c3d4e5f6..."
        // Generate a random roomID, userID, and userName
        const roomID = Math.random().toString(36).substring(2, 7);
        const userID = Math.floor(Math.random() * 10000) + "";
        const userName = "user_" + userID;
        // Generate Kit Token
        const kitToken = ZegoUIKitPrebuilt.generateKitTokenForTest(
            appID,
            serverSecret,
            roomID,
            userID,
            userName
        );
        // Initialize the Video Conference Kit
        const zp = ZegoUIKitPrebuilt.create(kitToken);
        // Join the video conference room
        zp.joinRoom({
            container: document.querySelector("#root"),
            sharedLinks: [
                {
                    name: "Personal link",
                    url:
                        window.location.protocol +
                        "//" +
                        window.location.host +
                        window.location.pathname +
                        "?roomID=" +
                        roomID,
                },
            ],
            scenario: {
                mode: ZegoUIKitPrebuilt.VideoConference,
            },
            leaveConfirmDialogInfo: {
                title: "Leave the conference",
                message: "Are you sure you want to leave?",
                cancelButtonName: "Cancel",
                confirmButtonName: "Confirm",
            },
            config: {
                turnOnCameraWhenJoining: false,
            },
        });


    Enter fullscreen mode


    Exit fullscreen mode


  Advanced Integration with Frameworks
If you're using a JavaScript framework like React, Vue, or Angular, ZEGOCLOUD provides NPM packages for seamless integration. Here's a brief example using React:


  React Integration


Install the ZEGOCLOUD Package:


Run the following command in your React project:


npm install @zegocloud/zego-uikit-prebuilt


    Enter fullscreen mode


    Exit fullscreen mode


2  Create a Video Conference Component:
Create a file named VideoConference.js:


import React from "react";
import { ZegoUIKitPrebuilt } from "@zegocloud/zego-uikit-prebuilt";

function randomID(len) {
    let result = "";
    const chars =
        "12345qwertyuiopasdfgh67890jklmnbvcxzMNBVCZXASDQWERTYHGFUIOLKJP";
    const maxPos = chars.length;
    len = len || 5;
    for (let i = 0; i < len; i++) {
        result += chars.charAt(Math.floor(Math.random() * maxPos));
    }
    return result;
}

export default function VideoConference() {
    const roomID = randomID(5);
    const myMeeting = async (element) => {
        const appID = YOUR_APP_ID;
        const serverSecret = "YOUR_SERVER_SECRET";
        const kitToken = ZegoUIKitPrebuilt.generateKitTokenForTest(
            appID,
            serverSecret,
            roomID,
            randomID(5),
            randomID(5)
        );
        const zp = ZegoUIKitPrebuilt.create(kitToken);
        zp.joinRoom({
            container: element,
            sharedLinks: [
                {
                    name: "Personal link",
                    url: `${window.location.protocol}//${window.location.host}${window.location.pathname}?roomID=${roomID}`,
                },
            ],
            scenario: {
                mode: ZegoUIKitPrebuilt.VideoConference,
            },
        });
    };
    return <div ref={myMeeting} style={{ width: "100vw", height: "100vh" }} />;
}


    Enter fullscreen mode


    Exit fullscreen mode


3  Use the Component:
Import and use the VideoConference component in your React app.
For detailed framework-specific guides, refer to the ZEGOCLOUD documentation.


  Troubleshooting Common Issues


Camera/Microphone Not Working:


Ensure you're using HTTPS (required for camera/microphone access).
Check browser permissions for camera and microphone.


Token Errors:


Verify that your AppID and ServerSecret are correct.
For production, use server-side token generation instead of generateKitTokenForTest.


UI Not Displaying:


Confirm that the #root div exists and has sufficient width and height.
Check the browser console for JavaScript errors.


Cross-Browser Compatibility:


Test on Chrome, as it's the most compatible browser. For other browsers, check ZEGOCLOUD's Web SDK compatibility.


  Best Practices


Secure Token Generation:


Always generate tokens on the server side for production apps to prevent exposing your ServerSecret.


Optimize Performance:


Use a fixed roomID for consistent conference sessions.
Minimize customizations that increase load times.


User Experience:


Add clear instructions for users to enable camera/microphone permissions.
Customize the UI to match your app's branding.


Testing:


Test with multiple users and devices to ensure scalability.
Simulate low-bandwidth conditions to verify performance.


  Conclusion
ZEGOCLOUD's Video Conference Kit makes it incredibly easy to build a fully functional video conferencing app with minimal coding. By following this guide, you've learned how to:
Set up a ZEGOCLOUD project and obtain credentials.
Integrate the Video Conference Kit into a web app using HTML and JavaScript.
Customize the UI and behavior to suit your needs.
Deploy and test your application.
With just a few lines of code, you can create a Zoom-like experience that supports high-quality video, screen sharing, and real-time interaction. For more advanced features or framework-specific integrations, explore the ZEGOCLOUD documentation.For a production app, generate tokens securely on a server, add error handling, and maybe style it up a bit. But for now, you've got a solid foundation. Have fun streaming, and let me know how it goes!Start building your video conference app today and empower your users with seamless real-time communication!Written by Shubham Pandey
Subscribe: Doumcoding