
Simple guidance for data science and/or ML engineers to help application deployment to containers and kubernetes clusters.
Introduction
This article aims to demonstrate how to deploy Python applications to Kubernetes clusters or package them as containers. It will be particularly useful for application developers seeking to understand deployment methodologies.
👉 4 different Python frameworks are presented hereafter, FastAPI, Flask, Streamlit and Django, provided as sample apps and sample Dockerfiles and last but not least, deployments to a Kubernetes cluster.
FastApi Sample Application
The subsequent example showcases a straightforward FastApi Python application, gracefully presenting its functionality through a set of distinct and easily navigable routes.
from fastapi import FastAPI
from fastapi.routing import APIRouter
from datetime import datetime

app = FastAPI()

# Create a new router
hello_router = APIRouter()

# Define a path operation for the "hello world" endpoint within the router
@hello_router.get("/hello")
async def hello():
    return {"message": "Hello World"}

# Include the router in the main application
app.include_router(hello_router)

#  Define a message for the app
@app.get('/health')
async def health():
    return {
        'status': 'healthy',
        'timestamp': datetime.now().isoformat()
    }

@app.get("/")
async def root():
    return {"message": "Welcome to the FastAPI app!"}

if __name__ == "__main__":
    import uvicorn
    uvicorn.run(app, host="0.0.0.0", port=8000)
The code could run by the following command line;
uvicorn main-fastapi:app --reload
~/Devs/python-k8s uvicorn main-fastapi:app --reload ✔ took 3m 27s base at 08:55:39 ▓▒░
INFO: Will watch for changes in these directories: ['/Users/alainairom/Devs/python-k8s']
INFO: Uvicorn running on http://127.0.0.1:8000 (Press CTRL+C to quit)
INFO: Started reloader process [4840] using WatchFiles
INFO: Started server process [4842]
INFO: Waiting for application startup.
INFO: Application startup complete.Once the application is launched, it is accessible on localhost, port 8000. Now let’s say we want to run this application inside a container!

🙋♂️ First of all, why an application should be containerized? Well, containers package an application and its dependencies, ensuring consistency across different environments. This eliminates “it works on my machine” issues, simplifies deployment, and improves scalability. Containerization also allows for efficient resource utilization and microservices architecture.
So let’s write a Dockerfile which will help us move forward and build a container for the provided code.
# Use an official Python runtime as a parent image
FROM python:3.12-slim-buster

# Set the working directory in the container
WORKDIR /app

# Copy the requirements file into the container at /app
COPY requirements.txt .

# Install any dependencies specified in requirements.txt
RUN pip install --no-cache-dir -r requirements.txt

# Copy the application code into the container
COPY . .

# Expose the port that the FastAPI application will run on
EXPOSE 8000

# Define the command to run the application using Uvicorn
CMD ["uvicorn", "main:app", "--host", "0.0.0.0", "--port", "8000"]
OK for now, let’s move on to the second framework.
Flask sample application
Let’s right the same basic application in Flask!
from flask import Flask, jsonify
from datetime import datetime

app = Flask(__name__)

# Define a path operation for the "hello world" endpoint
@app.route('/hello', methods=['GET'])
def hello():
    return jsonify({"message": "Hello World"})

# Define a message for the app
@app.route('/health', methods=['GET'])
def health():
    return jsonify({
        'status': 'healthy',
        'timestamp': datetime.now().isoformat()
    })

@app.route('/', methods=['GET'])
def root():
    return jsonify({"message": "Welcome to the Flask app!"})

if __name__ == "__main__":
    app.run(host='0.0.0.0', port=8000, debug=True)
It is very common to run local apps on port “8000”! We’ll come back to this in a bit…
python main-flask.py

 * Running on all addresses (0.0.0.0)
 * Running on http://127.0.0.1:8000
 * Running on http://9.34.91.131:8000
And to make a container of this one do the following;
# Use an official Python runtime as a parent image
FROM python:3.10-slim-buster

# Set the working directory in the container
WORKDIR /app

# Copy the requirements file into the container at /app
COPY requirements.txt .

# Install any dependencies specified in requirements.txt
RUN pip install --no-cache-dir -r requirements.txt

# Copy the application code into the container
COPY . /app

# Expose the port that the Flask application will run on
EXPOSE 8000

# Define the command to run the application using Flask's built-in server
# CMD ["python", "app.py"] # Simple Flask, good for development

#Use gunicorn for production
CMD ["gunicorn", "--bind", "0.0.0.0:8000", "app:app", "--workers", "3", "--timeout", "600"]
Before we explore the next two frameworks, let’s consider a common scenario: running both applications on a single host. To achieve this seamlessly, we must address potential port conflicts, specifically with port 8000. Containerization offers an elegant solution, allowing us to encapsulate each application within its own isolated environment. This approach, among its many benefits 😉, prevents such conflicts and unlocks a multitude of other advantages for managing and deploying multiple applications.The following script excerpts show the way to avoid port conflicts.
from fastapi import FastAPI
import uvicorn

app = FastAPI()

@app.get("/fastapi")
async def fastapi_route():
    return {"message": "Hello from FastAPI!"}

if __name__ == "__main__":
uvicorn.run(app, host="0.0.0.0", port=8000) # Runs on port 8000from flask import Flask
app = Flask(__name__)
@app.route("/flask")
def flask_route():
return {"message": "Hello from Flask!"}
if __name__ == "__main__":
app.run(host="0.0.0.0", port=5000, debug=True) # Runs on port 5000Et voilà! Let’s move on 🎠…
Streamlit sample application
To obtain the main result as the previous apps, let’s adapt the code to Streamlit.
import streamlit as st
from datetime import datetime

# Streamlit doesn't use routers in the same way as FastAPI.
# Each Streamlit script acts as a single application.

#  Define a message for the app
def health():
    """
    Displays the health status and timestamp in the Streamlit app.
    """
    status = 'healthy'
    timestamp = datetime.now().isoformat()
    st.write(f"**Status:** {status}")  # Use st.write for output
    st.write(f"**Timestamp:** {timestamp}")

def root():
    """
    Displays a welcome message in the Streamlit app.
    """
    st.title("Welcome to the Streamlit app!") #Use st.title for main heading

def hello():
    """
    Displays "Hello World"
    """
    st.write("Hello World")

# Main execution flow of the Streamlit app.  This is where you structure
# your UI.  Streamlit apps run from top to bottom.
def main():
    st.sidebar.title("Navigation")  # Add a title to the sidebar
    # Create buttons in the sidebar to navigate to different sections
    page = st.sidebar.selectbox("Choose a page", ["Welcome", "Hello", "Health"])

    if page == "Welcome":
        root()  # Call the root function to display welcome message
    elif page == "Hello":
        hello()
    elif page == "Health":
        health() # Call the health function to display status

if __name__ == "__main__":
    main()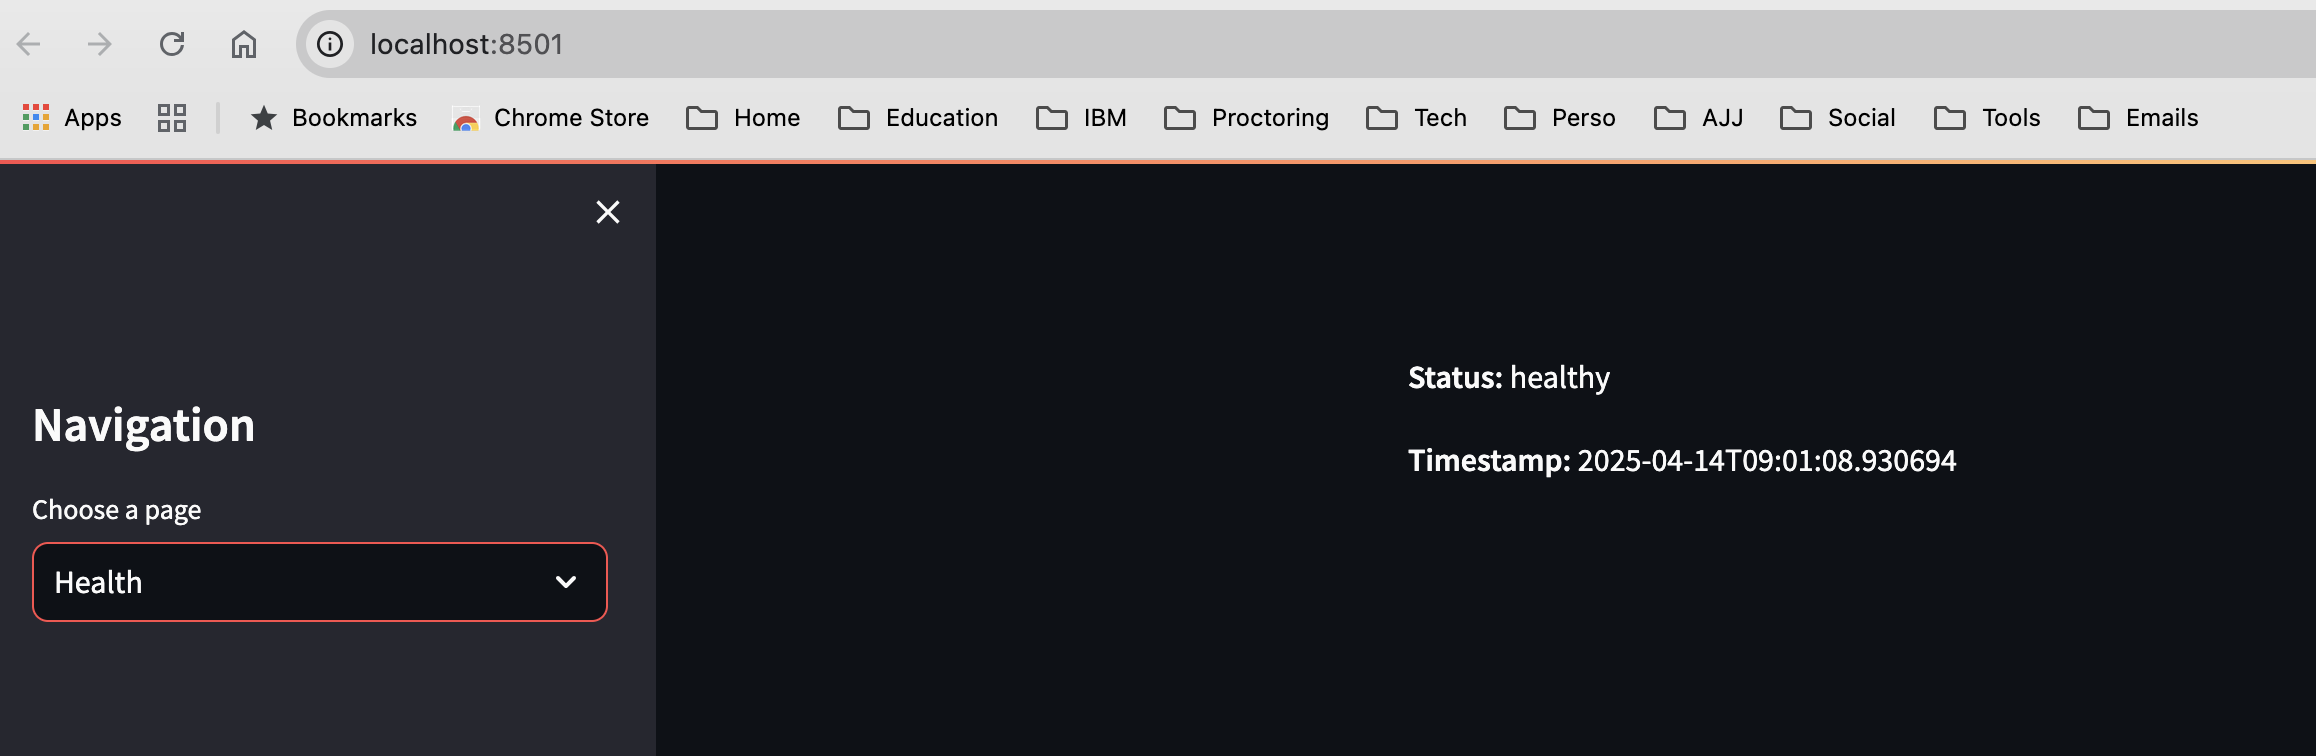
And the container image building process ⬇️
# Use an official Python runtime as a parent image
FROM python:3.10-slim-buster

# Set the working directory in the container
WORKDIR /app

# Copy the requirements file into the container at /app
COPY requirements.txt .

# Install required packages
RUN pip install --no-cache-dir -r requirements.txt

# Copy the Streamlit app files
COPY . /app

# Expose the port that Streamlit uses (default: 8501)
EXPOSE 8501

# Command to run the Streamlit application
CMD ["streamlit", "run", "streamlit_app.py", "--server.enableCORS", "false", "--server.enableXsrf", "false"]
Last but not least, a Django based application
Django is a very powerful framework, and also it could be a bit complex to write application with it (for me…), I still struggle a lot 😒. To use Django, unlike other samples I built a virtual environment.
python3 -m venv venv
source venv/bin/activate

# django-admin creates the project files structure
django-admin startproject myproject

# and then all starts from here...
cd myproject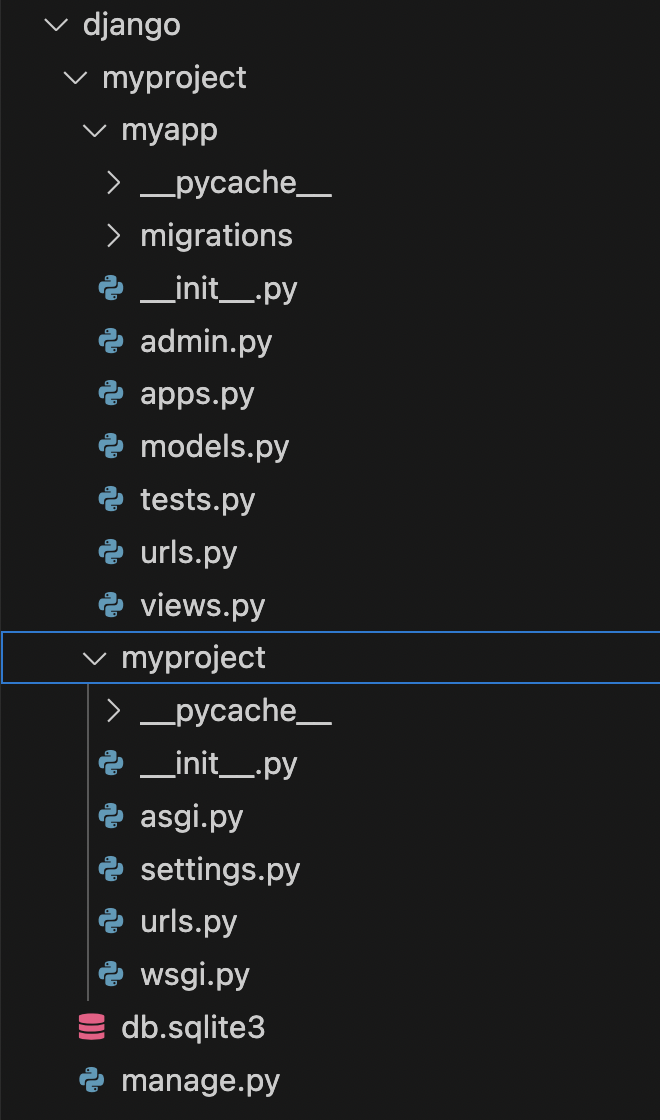
myproject/       # Project root directory
    manage.py      # Command-line utility for managing the project
    myproject/     # Project settings and URLs
        __init__.py
        asgi.py
        settings.py  # Project-level settings (database, etc.)
        urls.py      # Project-level URL configuration
        wsgi.py      # Entry point for WSGI servers
myapp/           # Your application directory
    __init__.py
    admin.py       # For registering models with the admin interface
    apps.py        # Application configuration
    models.py      # Database models
    tests.py       # Unit tests
    views.py       # Where you put your view functions
urls.py (optional) # App-level URL configuration (create this file)# myapp/urls.py
from django.urls import path
from . import views # Import views from the same directory
urlpatterns = [
path('hello/', views.hello, name='hello'),
path('health/', views.health, name='health'),
path('', views.root, name='root'), # Maps to /
]# myapp/views.py
from django.http import JsonResponse
from datetime import datetime
def hello(request):
"""
"Hello World" view.
"""
return JsonResponse({"message": "Hello World"})
def health(request):
"""
Health check view.
"""
return JsonResponse({
'status': 'healthy',
'timestamp': datetime.now().isoformat()
})
def root(request):
"""
Root view.
"""
return JsonResponse({"message": "Welcome to the Django app!"})# myproject/urls.py
"""
URL configuration for myproject project.
The `urlpatterns` list routes URLs to views. For more information please see:
https://docs.djangoproject.com/en/5.2/topics/http/urls/
Examples:
Function views
1. Add an import: from my_app import views
2. Add a URL to urlpatterns: path('', views.home, name='home')
Class-based views
1. Add an import: from other_app.views import Home
2. Add a URL to urlpatterns: path('', Home.as_view(), name='home')
Including another URLconf
1. Import the include() function: from django.urls import include, path
2. Add a URL to urlpatterns: path('blog/', include('blog.urls'))
"""
from django.contrib import admin
from django.urls import include, path #Import include
urlpatterns = [
path('admin/', admin.site.urls), # Django admin site
path('', include('myapp.urls')), # Include URLs from your app
]To run the application and in order to avoid “security” alerts run the application with the command “ — insecure” as shown in the sample below.
python manage.py runserver 0.0.0.0:8000 --insecure

* Open your browser or use `curl`:
    * `http://localhost:8000/`
    * `http://localhost:8000/hello/`
    * `http://localhost:8000/health/`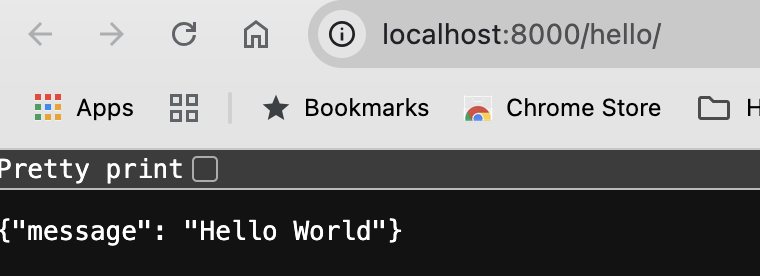
Now let’s dockerize it…
# Use an official Python runtime as a parent image
FROM python:3.10-slim-buster

# Set the working directory in the container
WORKDIR /app

# Copy the requirements file into the container at /app
COPY requirements.txt .

# Install any dependencies specified in requirements.txt
RUN pip install --no-cache-dir -r requirements.txt

# Copy the application code into the container
COPY . /app

# Expose the port that Django will run on
EXPOSE 8000

# Set environment variables.  This is important for Django.
ENV DJANGO_SETTINGS_MODULE=myproject.settings  # Replace "myproject" if needed
ENV PYTHONUNBUFFERED=1  # Don't buffer stdout/stderr

# Define the command to run the application using Django's runserver
CMD ["python", "manage.py", "runserver", "0.0.0.0:8000"]

# For production, you'd typically use a WSGI server like Gunicorn:
# CMD ["gunicorn", "--bind", "0.0.0.0:8000", "myproject.wsgi:application"]
All right, we have all these codes and Dockerfiles… but what about it 🤔
Let’s see how we make an image from a Dockerfile!
Building a Docker image
Heads-up: I use Podman which is free and open source and also 100% docker compatible and in many ways much more secure. I use ‘aliasing’ for my command line on my laptop and each time I use a “docker” command in the terminal, actually I’m calling the Podman engine!
Let’s try to build an image from the last sample.
docker build -t my-django-app .
docker run -p 8000:8000 my-django-app
Running container images offers a significant advantage: it provides a degree of platform execution independence. Generally speaking, your application, once containerized, can run consistently across various environments. Taking this a step further, let’s imagine deploying our sample application to a Kubernetes cluster. But the crucial question arises: why should we choose a K8s cluster for this endeavor?
Well, if you’re tired of tangled deployments, scaling headaches, and resource bottlenecks? Kubernetes (in my opinion) is the right answer. The powerful orchestration engine that transforms application deployment and management into a seamless, scalable, and resilient experience.
Deploying to Kubernetes cluster
Finally we’re going to the last part of the process, and will deploy the Django sample application to a Kubernetes cluster.
I use “Minikube” on my laptop which is quite easy to use.
# my configuration of Minikube using Podman
minikube start --driver=podman

  minikube v1.35.0 sur Darwin 15.4
✨  Utilisation du pilote podman (expérimental) basé sur la configuration de l'utilisateur
📌  Utilisation du pilote Podman avec le privilège root
👍  Démarrage du nœud "minikube" primary control-plane dans le cluster "minikube"
🚜  Extraction de l'image de base v0.0.46...
💾  Téléchargement du préchargement de Kubernetes v1.32.0...
    > preloaded-images-k8s-v18-v1...:  333.57 MiB / 333.57 MiB  100.00% 14.43 M
    > gcr.io/k8s-minikube/kicbase...:  500.31 MiB / 500.31 MiB  100.00% 9.81 Mi
E0407 11:03:18.386448   63922 cache.go:222] Error downloading kic artifacts:  not yet implemented, see issue #8426
🔥  Création de podman container (CPU=2, Memory=3575Mo) ...
🐳  Préparation de Kubernetes v1.32.0 sur Docker 27.4.1...E0407 11:04:31.625886   63922 start.go:132] Unable to get host IP: RoutableHostIPFromInside is currently only implemented for linux

    ▪ Génération des certificats et des clés
    ▪ Démarrage du plan de contrôle ...
    ▪ Configuration des règles RBAC ...
🔗  Configuration de bridge CNI (Container Networking Interface)...
🔎  Vérification des composants Kubernetes...
    ▪ Utilisation de l'image gcr.io/k8s-minikube/storage-provisioner:v5
🌟  Modules activés: storage-provisioner, default-storageclass
🏄  Terminé ! kubectl est maintenant configuré pour utiliser "minikube" cluster et espace de noms "default" par défaut.
To deploy applications on a Kubernetes cluster, we rely on YAML files because they provide a human-readable and declarative way to define the desired state of our application. Instead of issuing a series of imperative commands (which is a viable option by the way), we describe exactly what we want our deployment to look like — the number of replicas, container images, networking configurations, and more — all in a structured, version-controllable format. Kubernetes then reads these YAML specifications and works tirelessly to make the actual state of the cluster match our declared intent, ensuring consistency and simplifying the management of complex deployments.
- deployment.yaml for our Django app.
A Deployment YAML file in Kubernetes is like a blueprint for your application. It declaratively defines the desired state of your application, such as the number of replicas (identical instances of your application), the container image to use, and how updates should be rolled out. Kubernetes then takes this specification and ensures that the actual state of your cluster matches what you’ve described, handling tasks like creating, scaling, and updating your application pods automatically.
apiVersion: apps/v1
kind: Deployment
metadata:
  name: django-deployment
spec:
  replicas: 1
  selector:
    matchLabels:
      app: django-app
  template:
    metadata:
      labels:
        app: django-app
    spec:
      containers:
        - name: django-container
          image: k8s.gcr.io/my-django-app  # Use the tagged image
          ports:
- containerPort: 8000- service.yaml for the same app.
A Service YAML file, on the other hand, focuses on making your application accessible. It provides a stable IP address and DNS name for a set of pods, abstracting away the fact that individual pod IPs are ephemeral and can change. Services enable communication between different parts of your application within the cluster, as well as exposing your application to external traffic if needed, acting as a load balancer and traffic director to the underlying pods.
apiVersion: v1
kind: Service
metadata:
name: django-service
spec:
selector:
app: django-app
ports:
- protocol: TCP
port: 80
targetPort: 8000
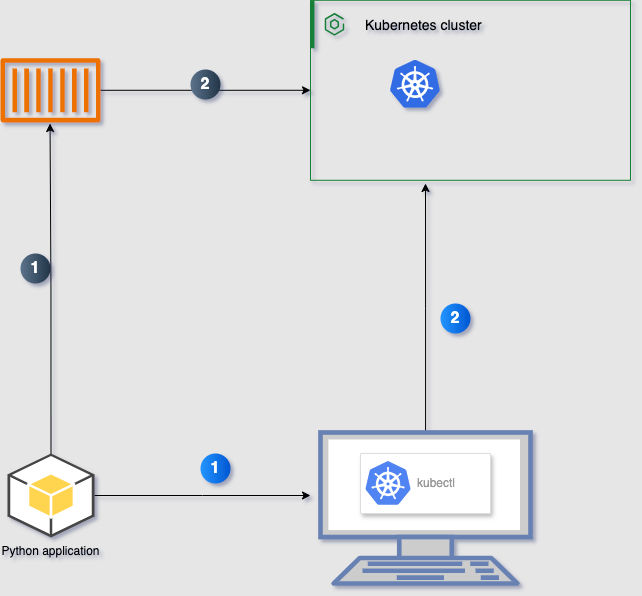
type: ClusterIP # changed from LoadBalancer to ClusterIPNow all we have to do to deploy our app using the YAML files AND the kubernetes CLI (which we should have locally 😂), we run the following commands.
- Deployment.yaml for FastAPI code
apiVersion: apps/v1
kind: Deployment
metadata:
  name: my-fastapi-deployment
  labels:
    app: my-fastapi-app
spec:
  replicas: 2  # Run two instances of your application for redundancy
  selector:
    matchLabels:
      app: my-fastapi-app
  template:
    metadata:
      labels:
        app: my-fastapi-app
    spec:
      containers:
        - name: my-fastapi-container
          image: my-fastapi-app:latest  # Replace with your Docker image name and tag
          ports:
            - containerPort: 8000  # The port your FastAPI app listens on
          # Optional: Define resource requests and limits
          resources:
            requests:
              cpu: 100m  # 100 millicores (0.1 CPU)
              memory: 128Mi # 128 mebibytes of memory
            limits:
              cpu: 500m  # 500 millicores (0.5 CPU)
memory: 512Mi # 512 mebibytes of memory- And the service.yaml would be;
apiVersion: v1
kind: Service
metadata:
  name: fastapi-service
  labels:
    app: fastapi-app
spec:
  selector:
    app: fastapi-app  # Select Pods with this label
  ports:
    - protocol: TCP
      port: 80     # The port you want to expose the service on *within* the cluster
      targetPort: 8000  # The port your application is listening on *in* the Pod/container
  type: ClusterIP  # changed from LoadBalancer to ClusterIP
If we are die-hards and/or don’t like YAML files, there is always the IMPERATIVE way to deploy applications to a kubernetes cluster!
# deployment step
kubectl create deployment fastapi-deployment --image=your-docker-image:tag --replicas=1 --port=8000

# ======
# `kubectl create deployment fastapi-deployment`: Creates a Deployment named "fastapi-deployment".
# `--image=your-docker-image:tag`:  Specifies the Docker image to use.  **Replace `your-docker-image:tag`** with your actual image name (e.g., `my-fastapi-app:latest`).
# `--replicas=1`:  Sets the number of Pods to 1.
# `--port=8000`:  Specifies the container port (the port your FastAPI app listens on).
# `--labels=app=fastapi-app`: Adds a label to the Deployment (and its Pods). This is *essential* for the Service to find the Pods.# exposing step
kubectl expose deployment fastapi-deployment --type=ClusterIP --port=80 --target-port=8000 --name=fastapi-service
# ===
# `kubectl expose deployment fastapi-deployment`: Creates a Service that exposes the "fastapi-deployment" Deployment.
# `--type=ClusterIP`: Creates a ClusterIP Service (only accessible within the cluster). If you want to expose it externally, you'd use `--type=NodePort` or `--type=LoadBalancer` (if your environment supports it).
# `--port=80`: The port that other applications in the cluster will use to access the service.
# `--target-port=8000`: The port that your FastAPI application is listening on (inside the Pod).
# `--name=fastapi-service`: The name of the Service.That’s all. No need to call operations to deploy the application, we’re all champs 🥇🥳
Conclusion
This article gently introduces the fundamentals of containerization and Kubernetes deployment, specifically crafted for experts like data scientists and machine learning engineers. While possessing profound knowledge in their core domains, they might find navigating the intricacies of application deployment a less familiar landscape. Our aim is to provide a clear and concise pathway, empowering these skilled professionals to autonomously deploy their innovative applications with confidence.
Embracing industrial-scale efficiency, cloud providers offer a rich ecosystem of tools designed to streamline these deployment workflows for developers. A prime example of such innovation is IBM Cloud Code Engine, a powerful platform that simplifies the complexities of cloud-native application deployment. This exciting avenue warrants its own dedicated exploration, so keep an eye out for our upcoming article for a deeper dive! 😉
Thanks for reading!
Links
- Docker fundamentals: https://www.docker.com/101-tutorial/
- Kubernetes basics: https://kubernetes.io/docs/tutorials/kubernetes-basics/