Welcome, fellow data sleuths, to a thrilling investigation into the heart of the digital wilderness! Our case? A single, unassuming file named raw.txt has mysteriously appeared, and it's our mission to transform it from raw evidence into sparkling insights using the incredible powers of the AWS cloud.
The Clue: Exhibit A - The Enigmatic raw.txt File📜
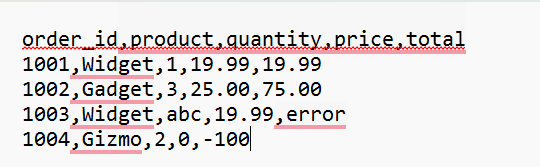
Our investigation begins with Exhibit A: the raw, unadulterated data from our mysterious raw.txt file. Take a close look, detectives!

As you can see, the data appears to be comma-separated, with a header row indicating the columns: order_id, product, quantity, price, and total. However, a closer inspection reveals some… irregularities:
- Row 3: The quantity is listed as "abc" and the total as "error" – clearly not the numerical values we'd expect!
- Row 4: The price is "0" and the total is "-100" while these could be valid data points, they warrant closer scrutiny. This, my friends, is the raw evidence we need to process and understand. Our mission, should we choose to accept it (and we have!), is to cleanse this data and extract meaningful insights from the chaos. Let the digital forensics begin!
Our Toolkit: The AWS Investigator's Essentials🛠️
Before we get our hands dirty, let's familiarize ourselves with the powerful AWS services we'll be using in this investigation:
1. Amazon S3 (Simple Storage Service): Think of S3 as our secure, scalable digital evidence locker in the cloud. It's where we'll store our raw data and the processed results.
2. AWS Glue: Our expert forensics team! Glue is a fully managed, extract, transform and load (ETL) service that makes it easy to prepare and load your data for analytics. We'll use its "Crawler" feature to automatically discover the schema of our data.
3. Amazon Athena: Our high-tech analysis lab! Athena is an interactive query service that makes it easy to analyze data directly in S3 using standard SQL.
Now, let's follow the trail of data!
The Scene of the Crime: S3 - The Digital Vault🔒
Our journey begins in the seemingly ordinary Amazon S3, our secure digital vault. Just like any good detective, we needed a safe place to store our initial clue.
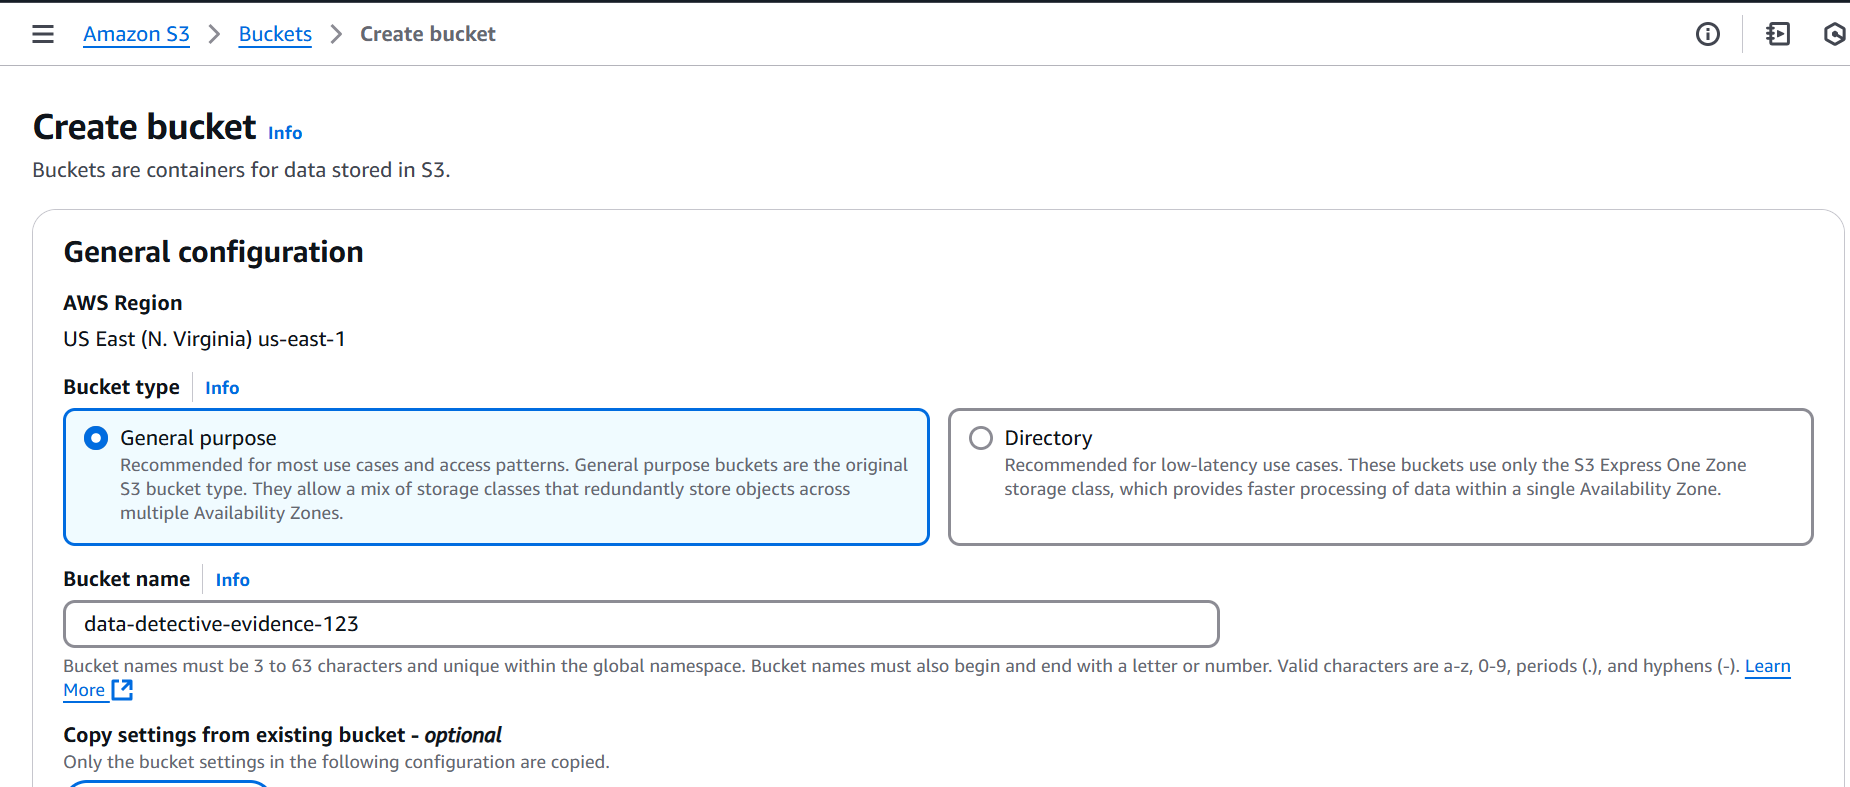
- Step 1: Forging Our Evidence Locker (Creating an S3 Bucket)
Our first task was to establish our very own evidence locker an S3 bucket named data-detective-evidence-123. Think of it as our private, highly secure filing cabinet in the vast AWS archives. Case file initiated!
- Step 2: Depositing the Initial Clue (Uploading to S3)
With our locker ready, we carefully deposited our primary piece of evidence: the enigmatic raw.txt.
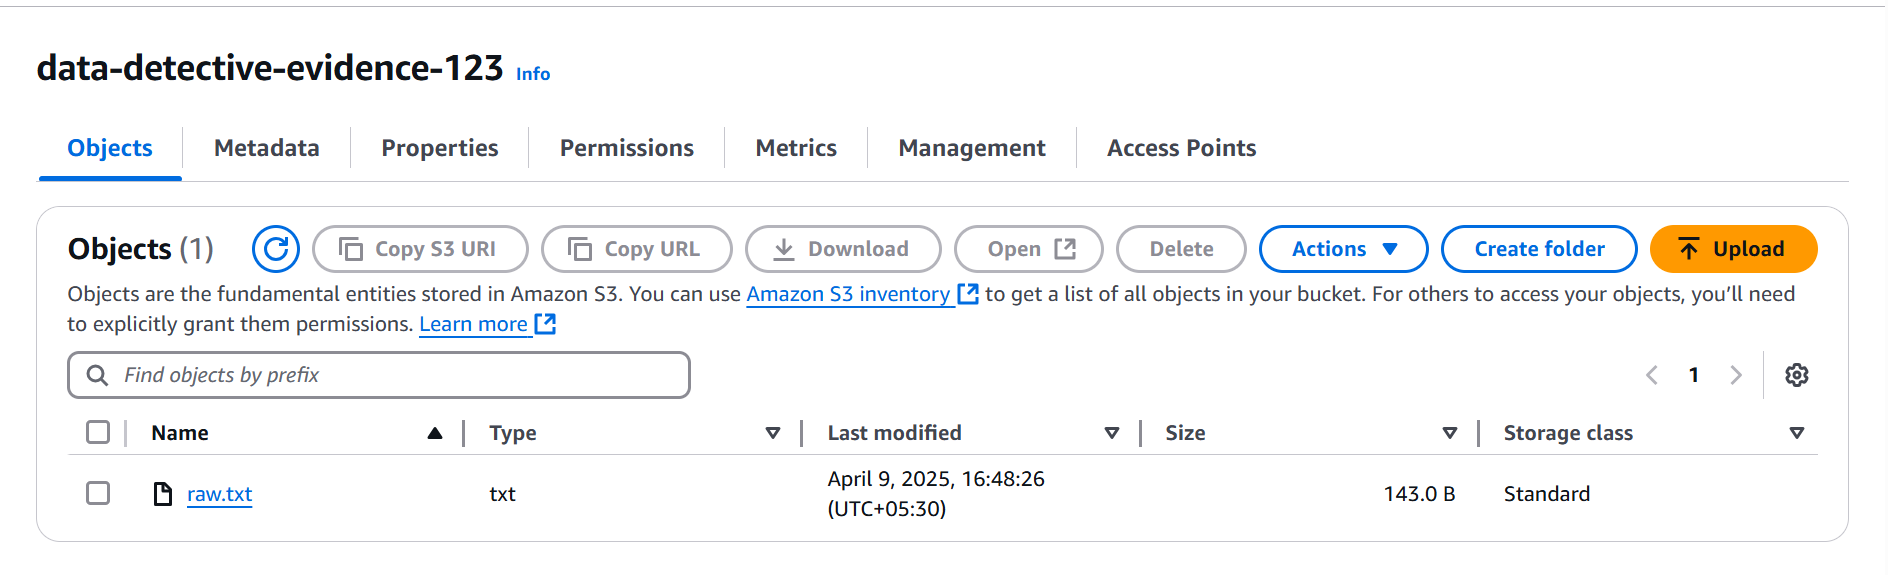
This unassuming file holds the secrets we're determined to uncover. But to understand its contents, we need to bring in the experts.
Enter the Forensics Team: AWS Glue - The Metadata Mavericks 🧙♂️
To make sense of our raw.txt, we need to understand its structure; the digital equivalent of dusting for fingerprints and analyzing fibers. That's where AWS Glue, our team of metadata mavericks, comes in!
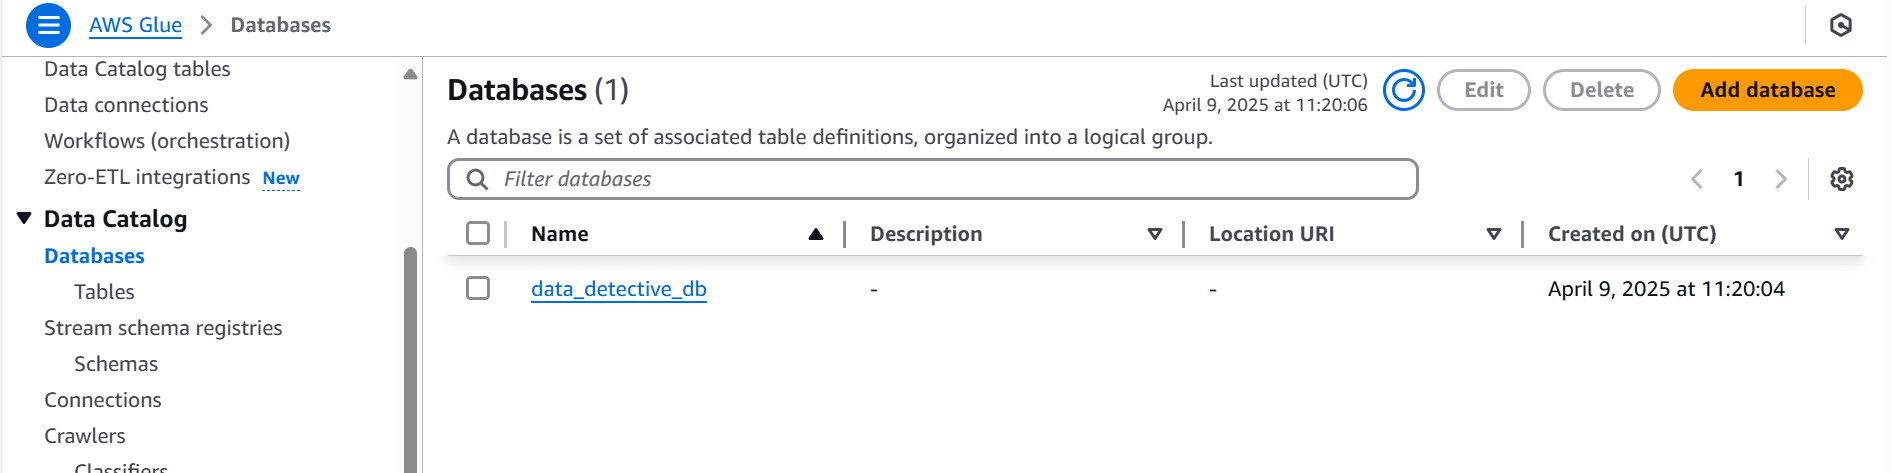
- Step 3: Scouting the Territory (Navigating AWS Glue Databases)
Before we unleash our Glue crawlers, we checked our existing catalog. Aha! A database named data_detective_db was already present. Perhaps a previous case? Either way, it's a logical place to organize our findings.
- Step 4 & 5: Training Our Sniffer Dogs (Configuring the Glue Crawler - Data Source)
Now, to the crucial step: training our digital sniffer dog - The Glue crawler! We pointed its nose directly at our S3 bucket (s3://data-detective-evidence-123/) and told it to sniff out the data.

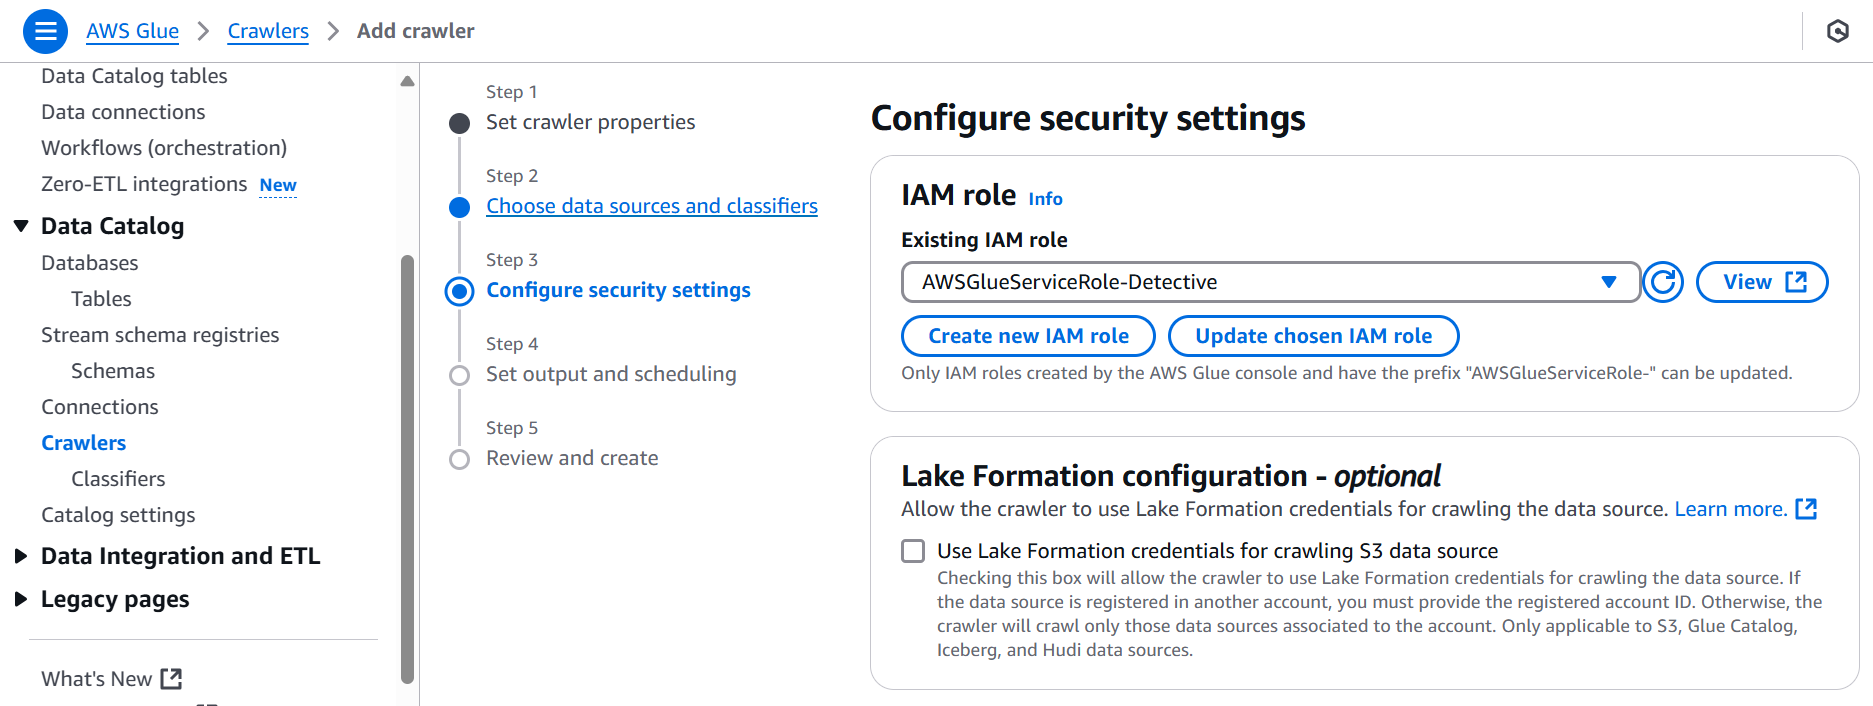
- Step 6: Equipping Our Agent (Configuring Security Settings)
Every good agent needs the right credentials. We equipped our crawler with an IAM role (AWSGlueServiceRole-Detective) – its very own "access granted" badge to enter the S3 vault and report back its findings.
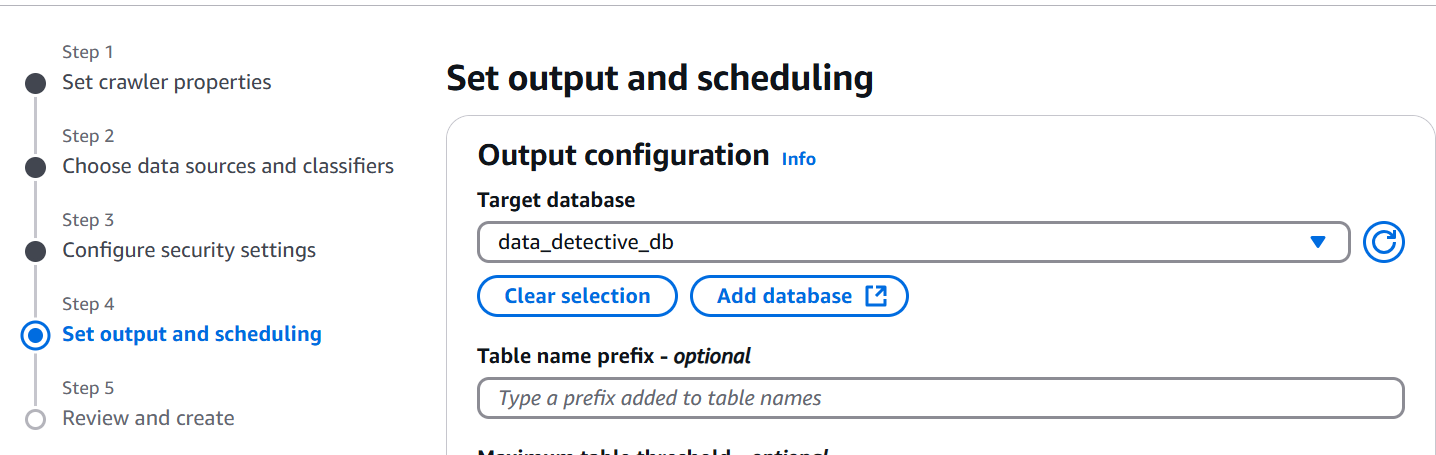
- Step 7: Setting the Reporting Protocol (Configuring Output and Scheduling)
We instructed our crawler to report its findings (the metadata) back to our data_detective_db. For now, we set it to run "On demand".

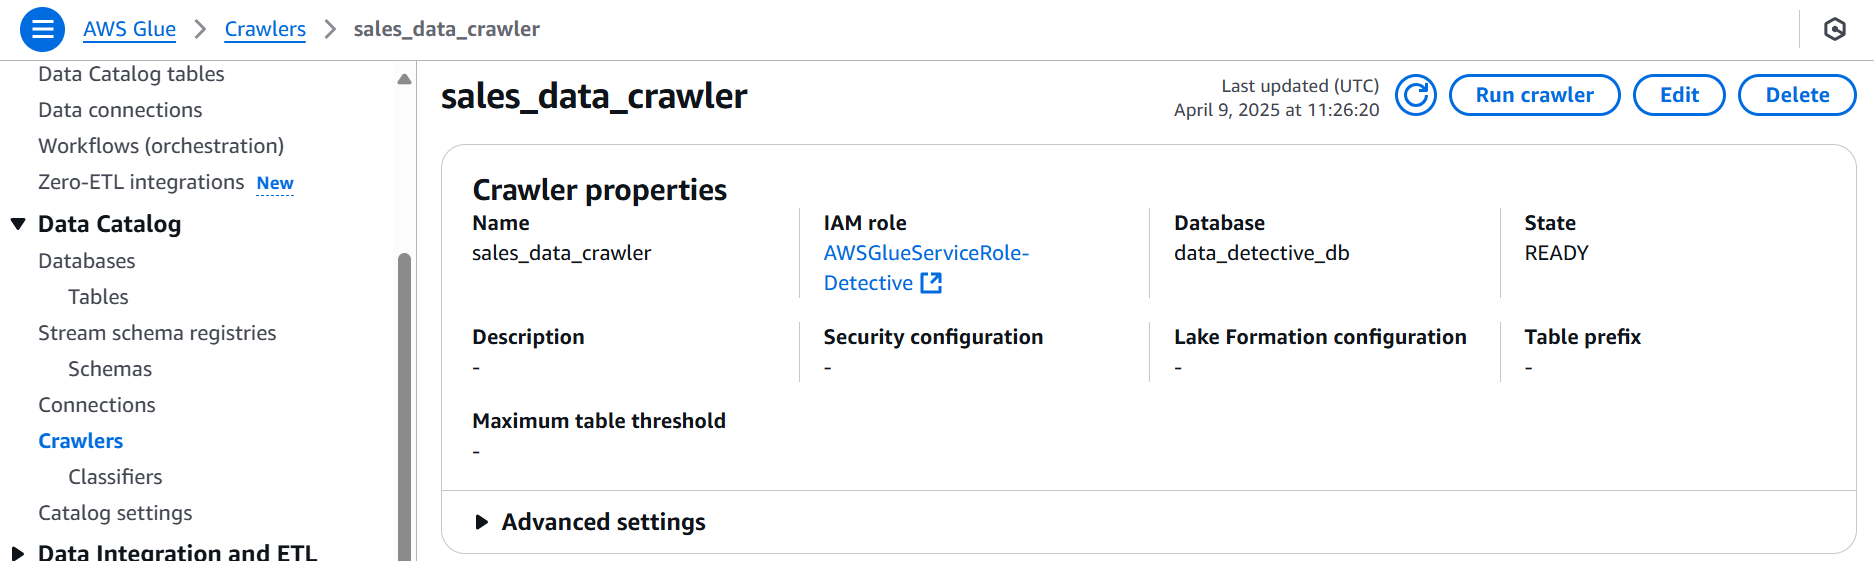
- Step 8: The First Sweep (Running the Crawler)
Time for action! We unleashed our sales_data_crawler (or whatever you named yours!) to take its first sweep of the data-detective-evidence-123 bucket.
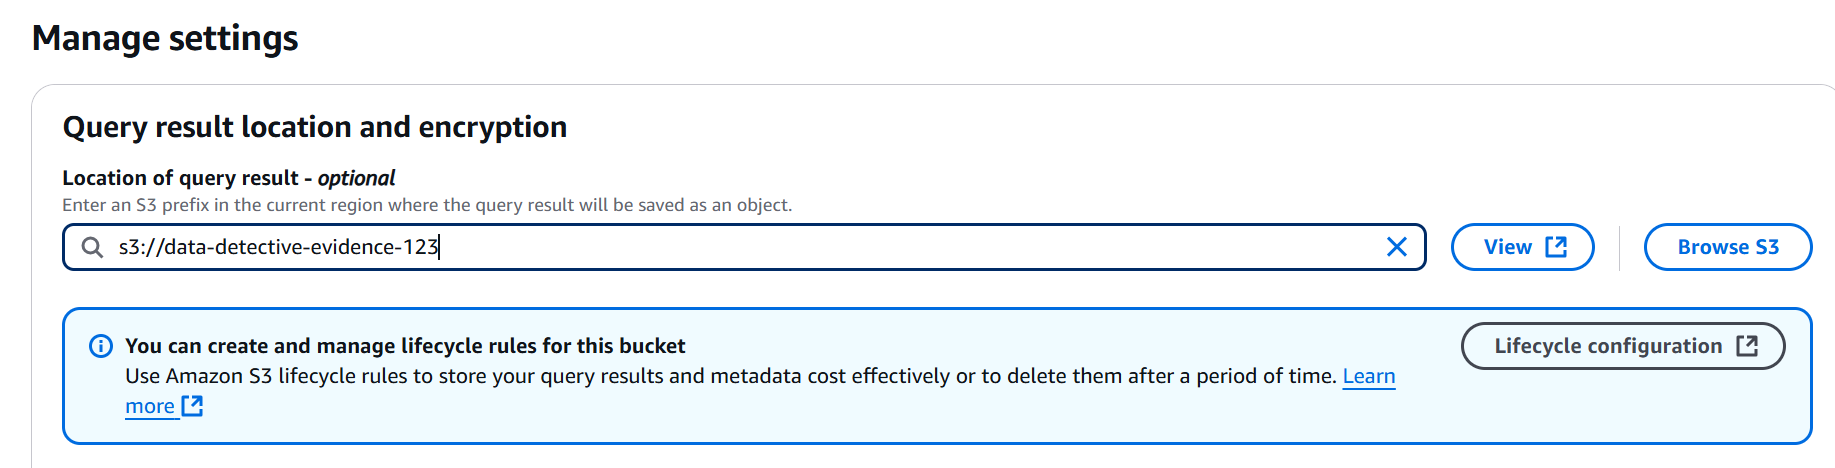
- Step 9: Setting Up Our Analysis Lab (Configuring Athena Query Results)
With the metadata gathered, it's time to analyze the clues! We head over to Amazon Athena, our high-tech analysis lab. Before we start dissecting, we need a place to store our findings, an S3 location for query results within our evidence bucket.
- Step 10 & 11: Interrogating the Data (Querying with Athena - Initial Look)
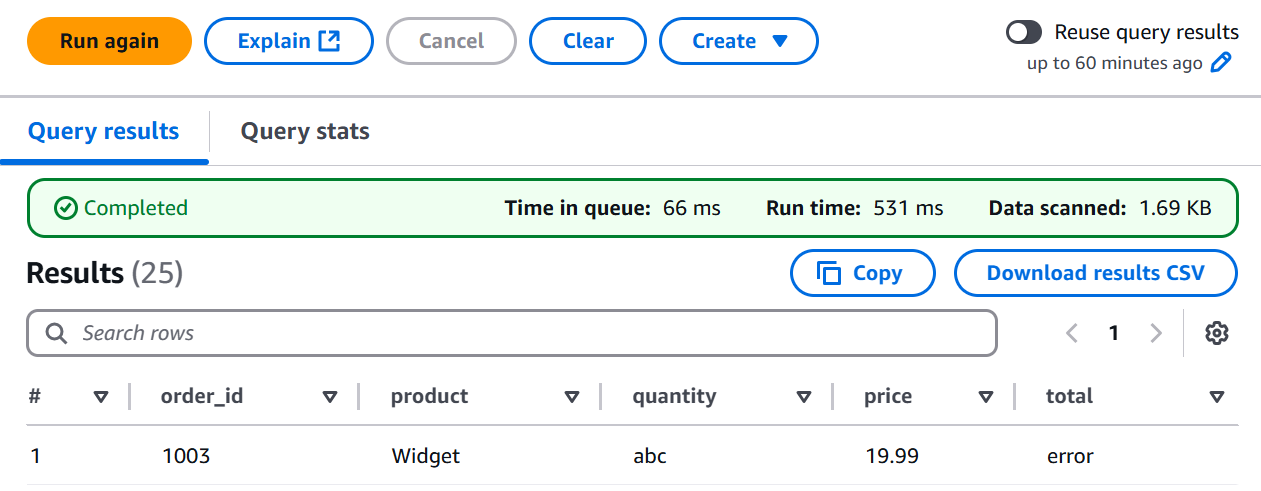
Let the interrogation begin! We fired off a simple SELECT * FROM data_detective_evidence_123; to see what our crawler had discovered. The initial results… well, they were a bit messy!

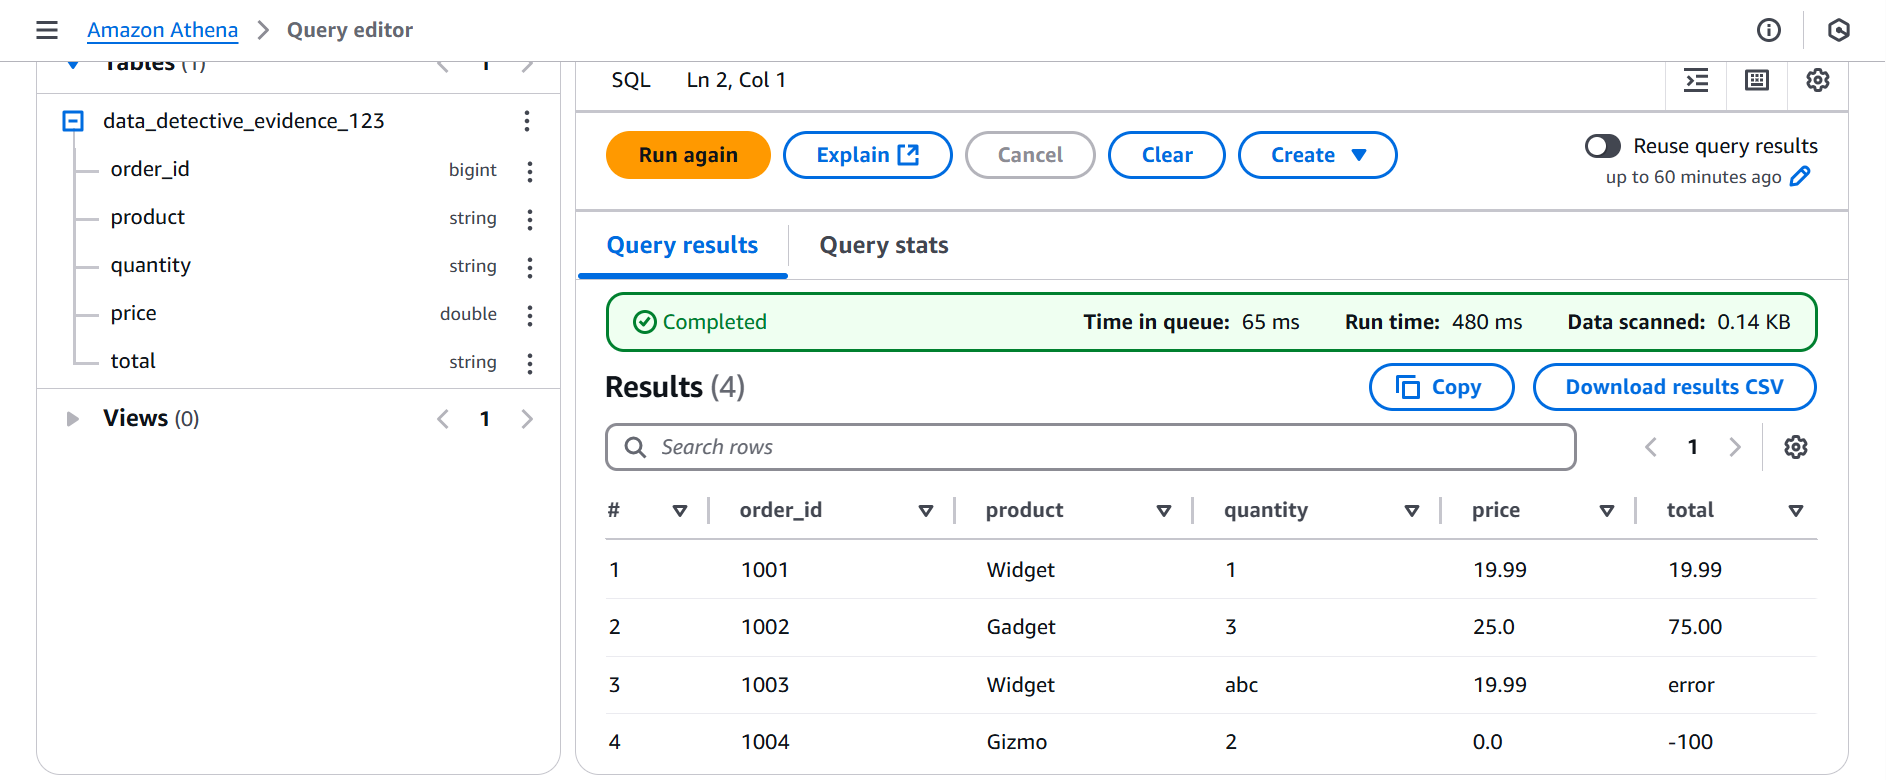
Detective's Note: Looks like we have some inconsistencies! Our quantity and total columns seem to have some… unexpected entries. Time for some data wrangling!
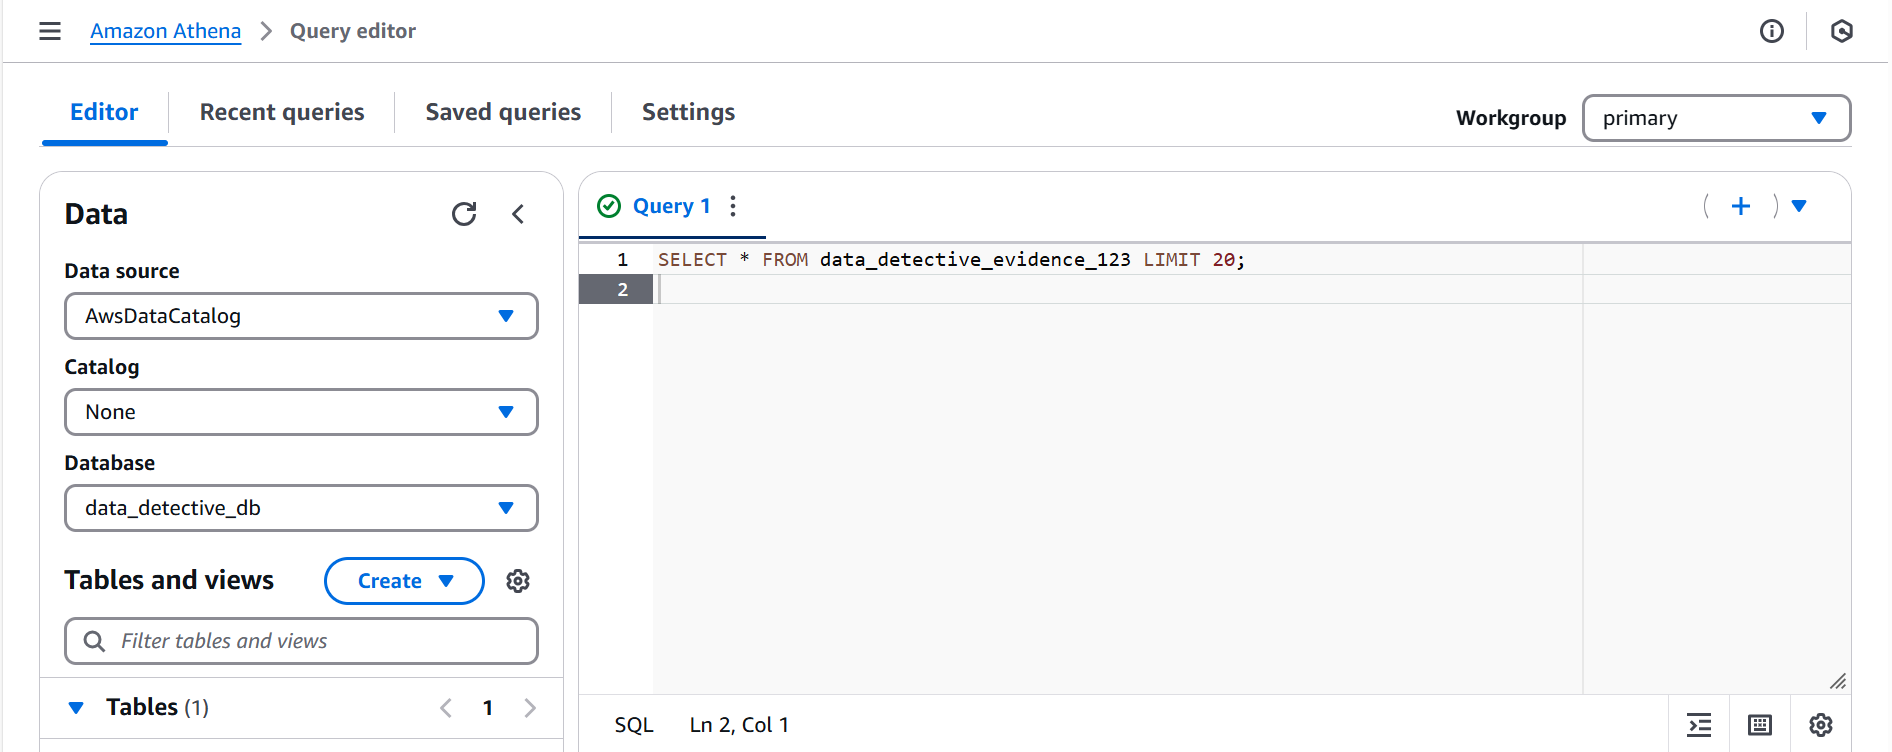
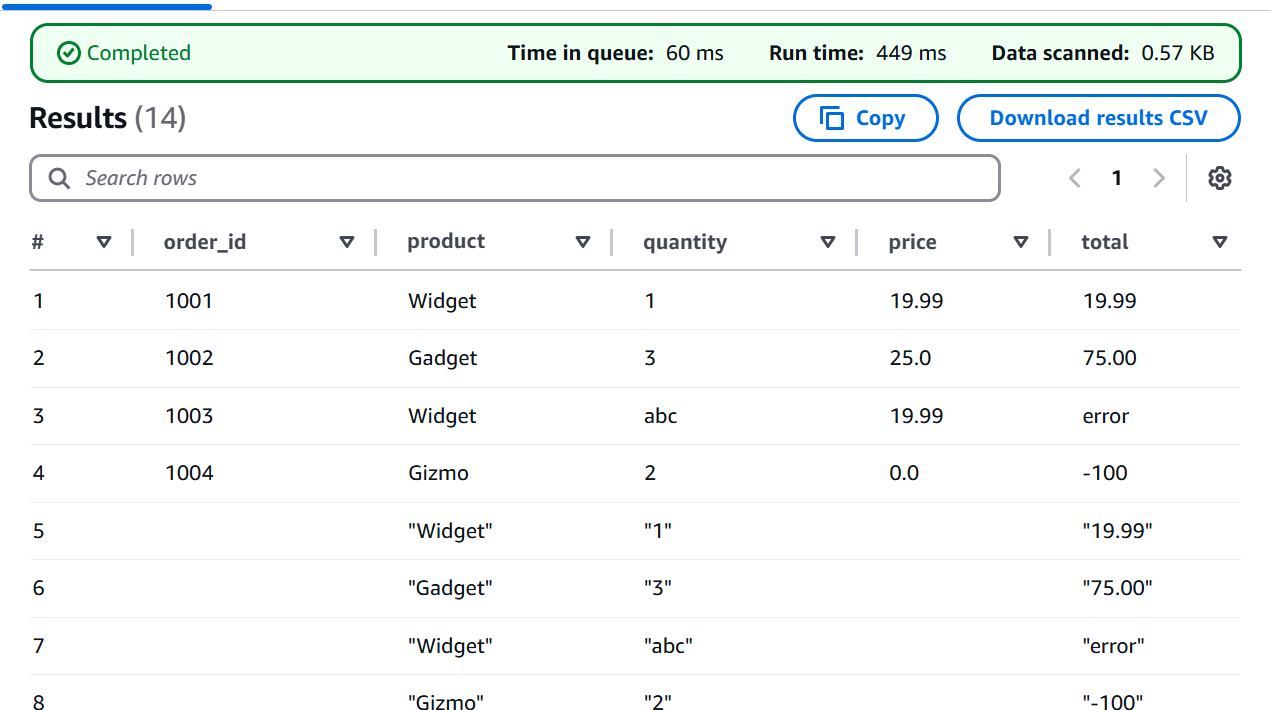
- Step 12 & 13: Refining Our Search (Using LIMIT and Observing Full Results)
To get a better handle on the situation, we used LIMIT to take a quick peek, and then observed the full unfiltered picture. The inconsistencies were clear, our data needed a good scrub!
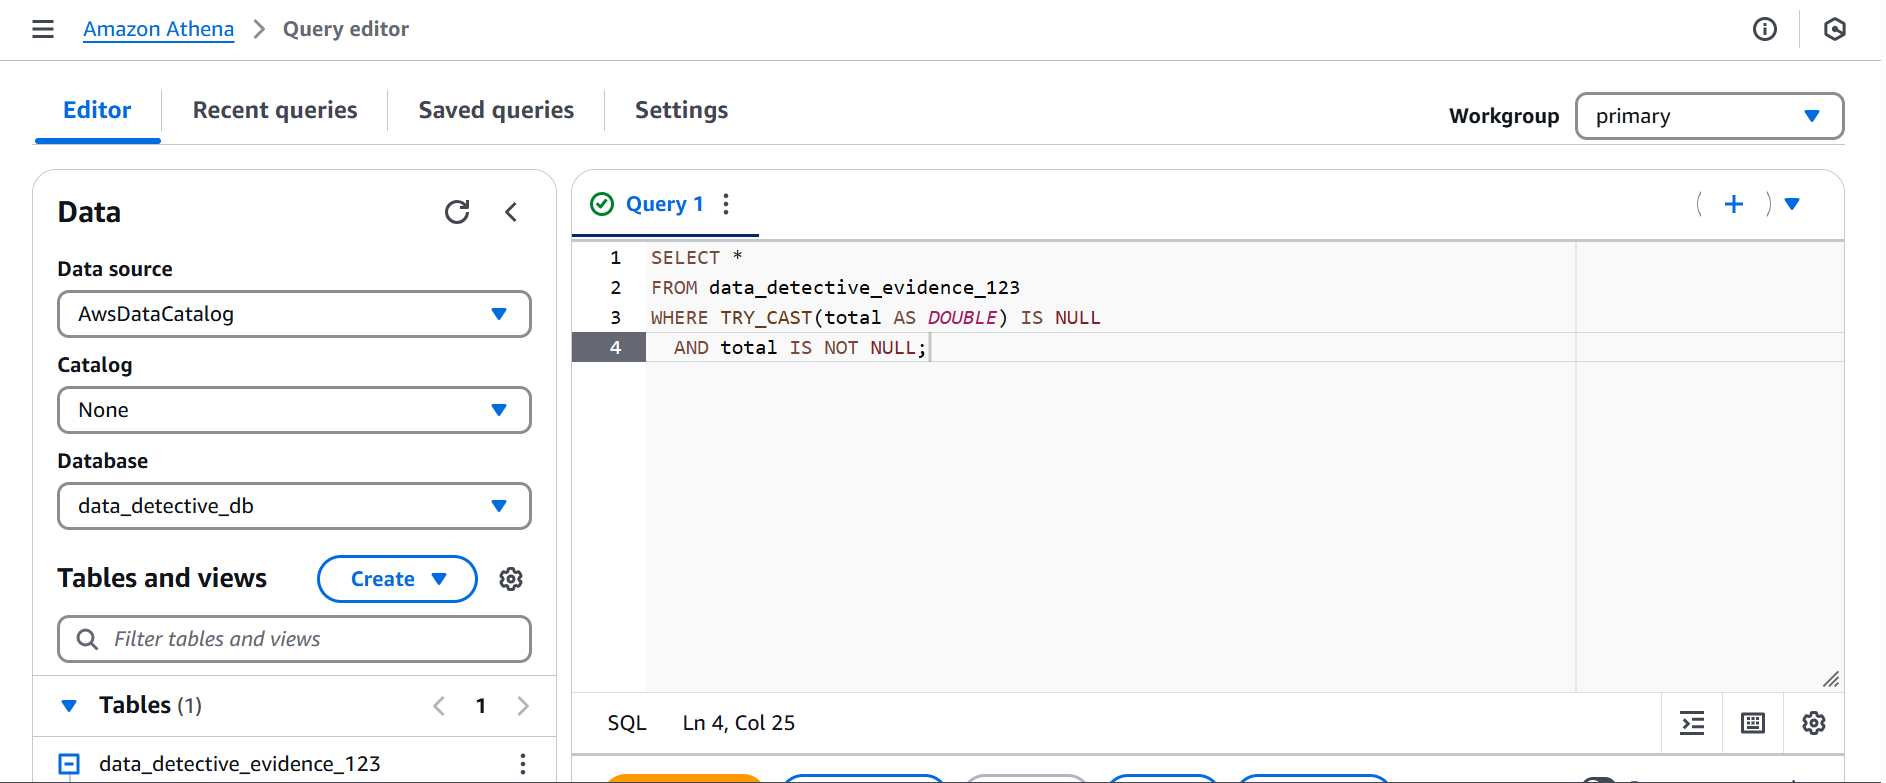
- Step 14: Applying Forensic Techniques (Filtering with TRY_CAST)
Using our advanced forensic tools in Athena, we employed TRY_CAST to filter out the noise, i.e the entries that couldn't be properly converted to numbers. This helped us isolate the potentially valid data.
- Step 15: Double-Checking Our Work (Observing Results - Hopefully Filtered!)
We ran our filtering query and carefully examined the results to ensure we were on the right track.
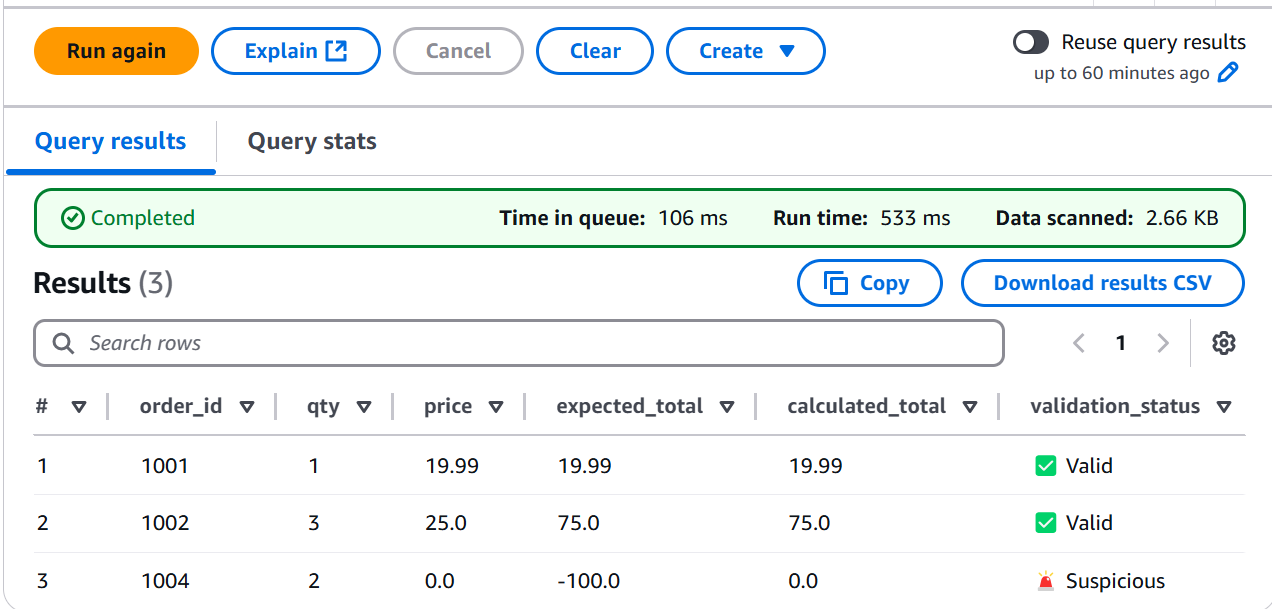
- Step 16 & 17: Calculating and Validating (Advanced Athena Query)
Now for some serious detective work! We crafted a more complex query to not only cast our data types but also to calculate the expected_total and compare it to the stored total, flagging any Suspicious discrepancies.

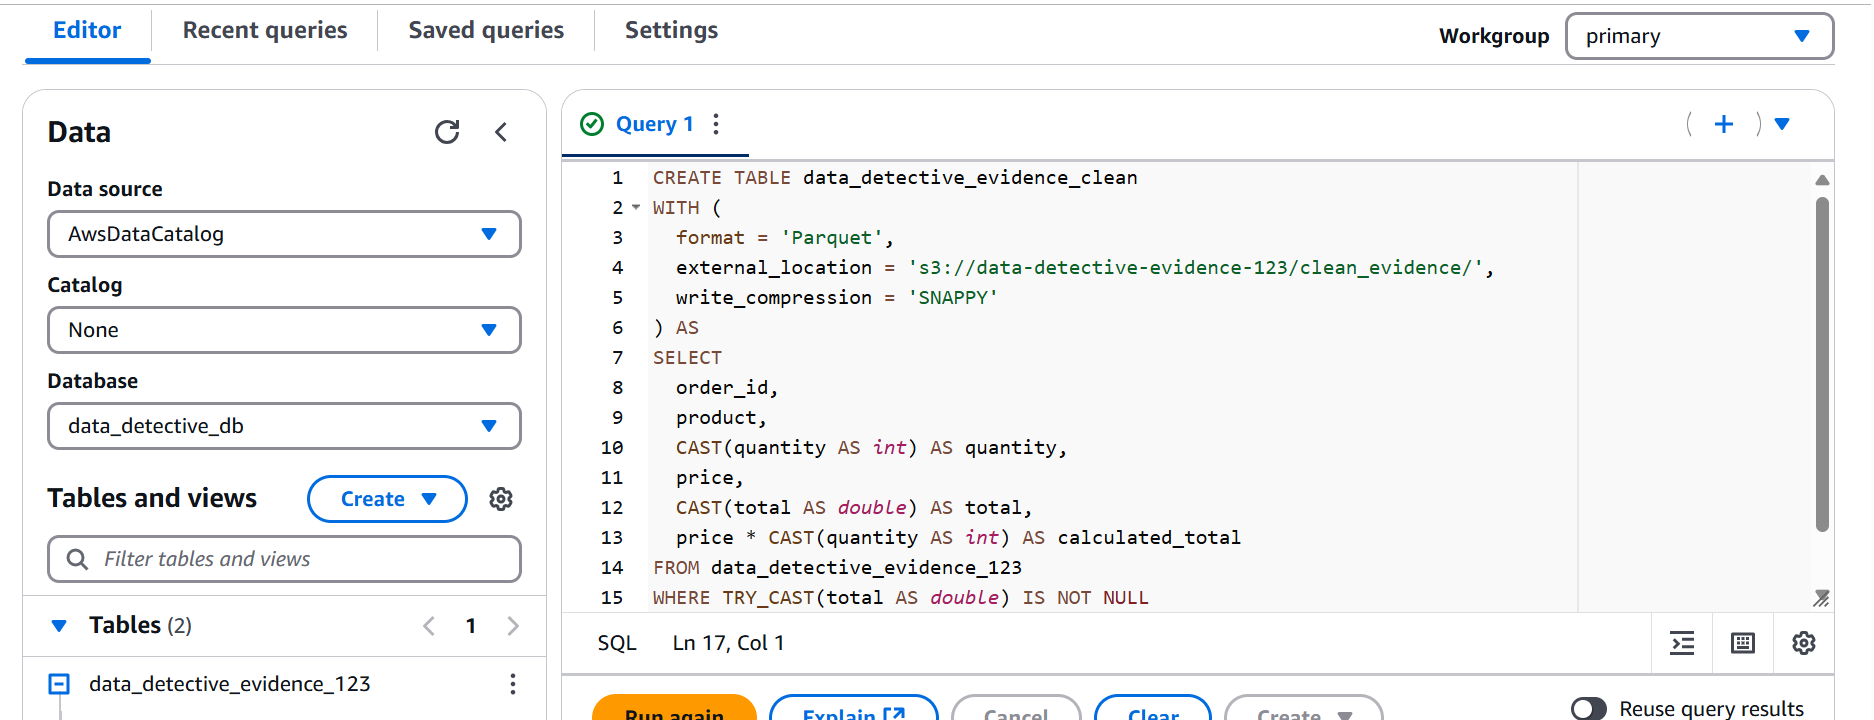
- Step 18 & 19: Creating a Cleaned Evidence File (CTAS in Athena and Verifying)
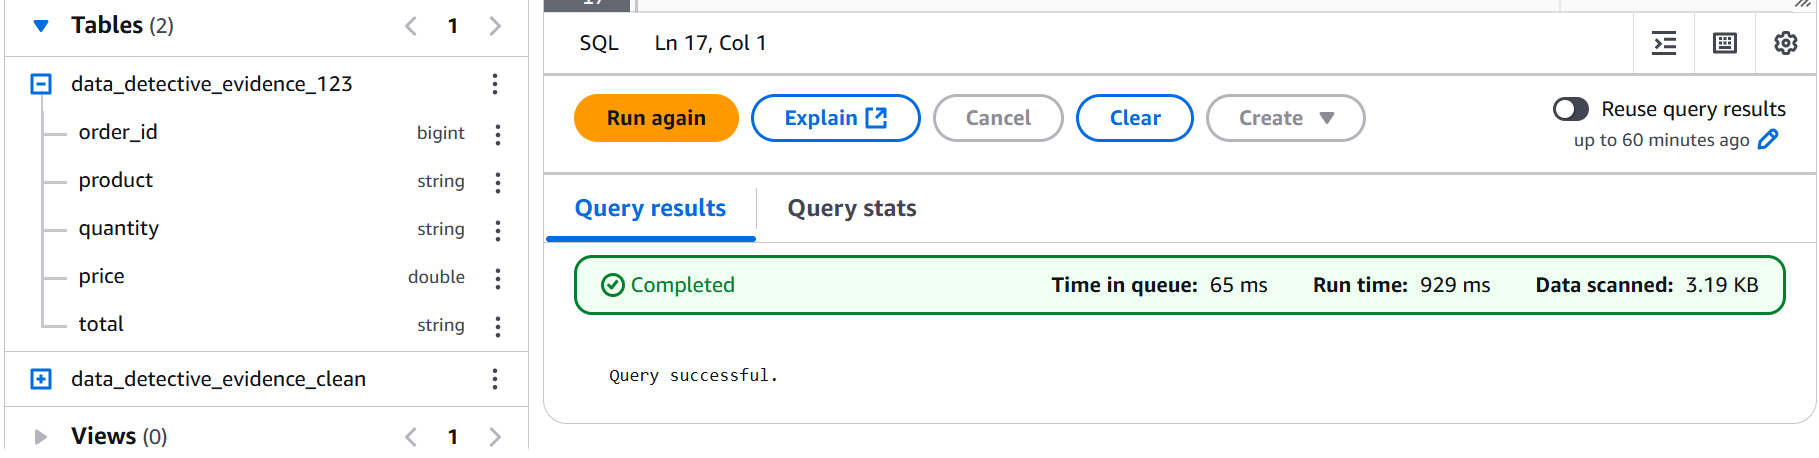
To ensure the integrity of our investigation we created a new cleaned evidence file, a new table named data_detective_evidence_clean using Athena's CREATE TABLE AS SELECT (CTAS) statement. We even stored it in the efficient Parquet format! We then verified that this new table was indeed created.

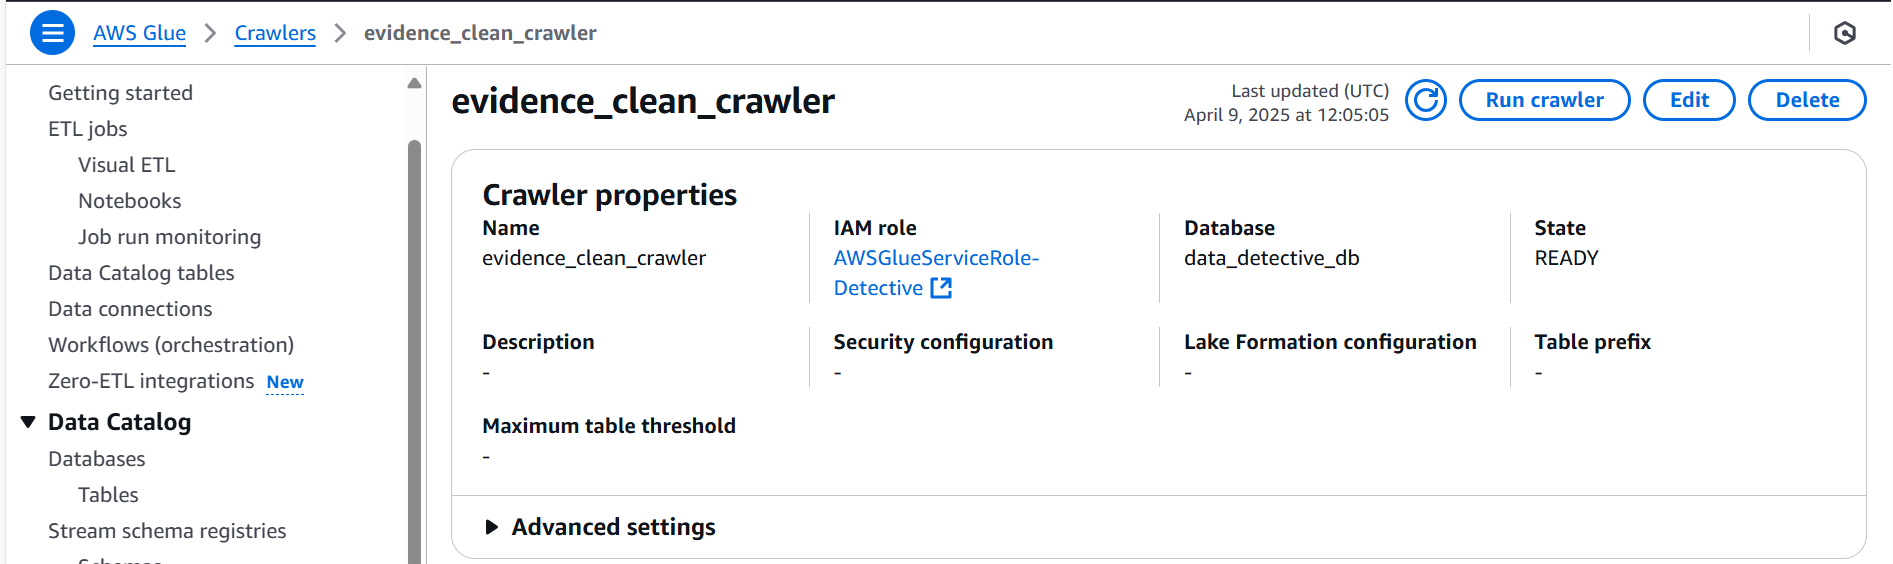
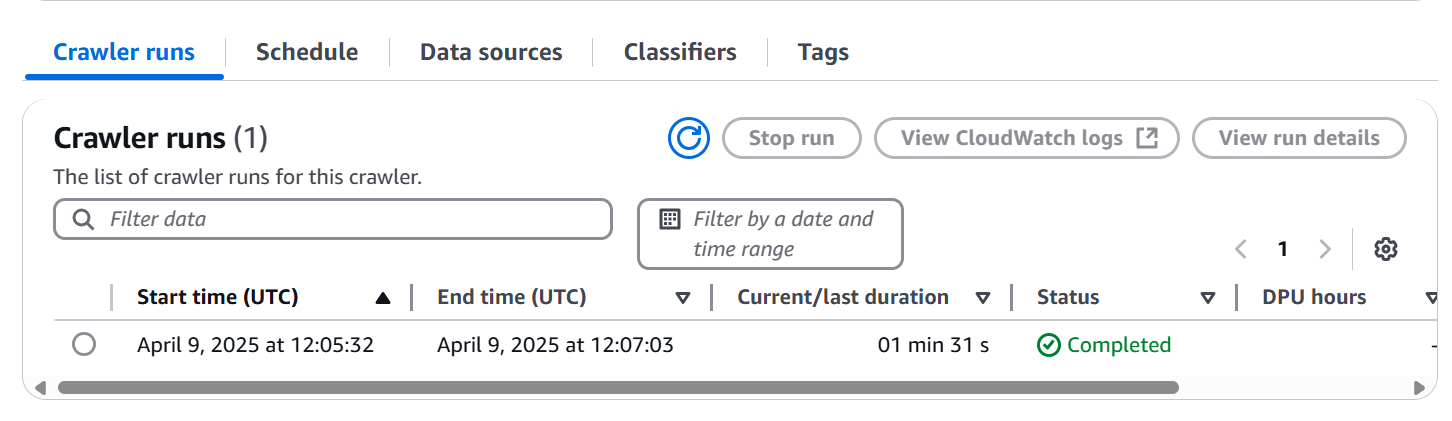
- Step 20 & 21: Setting Up a New Tracking System (Glue Crawler for Cleaned Data and Verification)
Just like any well-organized investigation we set up a new tracking system, a new Glue crawler (evidence_clean_crawler) specifically for our cleaned data in its new S3 location. We ran it and confirmed its successful execution.
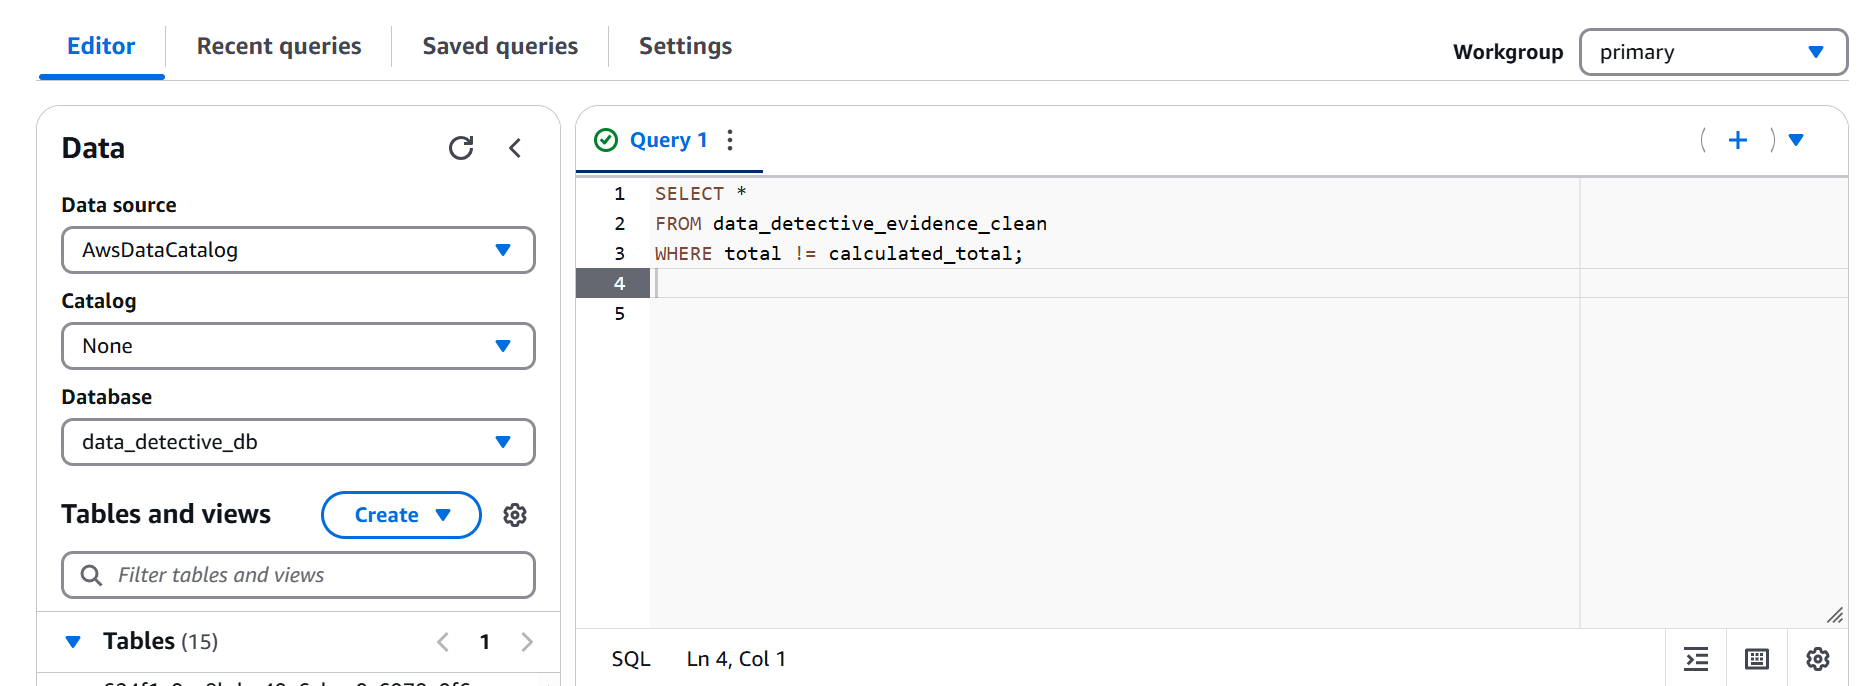
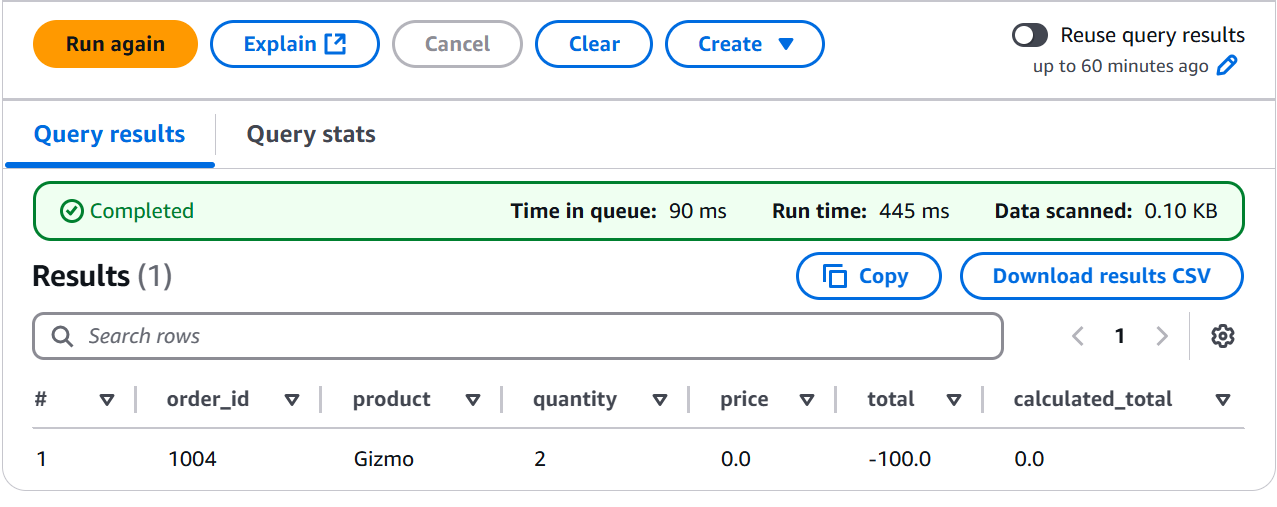
- Step 22: The Final Examination (Final Analysis Query)
Time for the ultimate test! We ran a final query against our data_detective_evidence_clean table to see if any discrepancies remained.
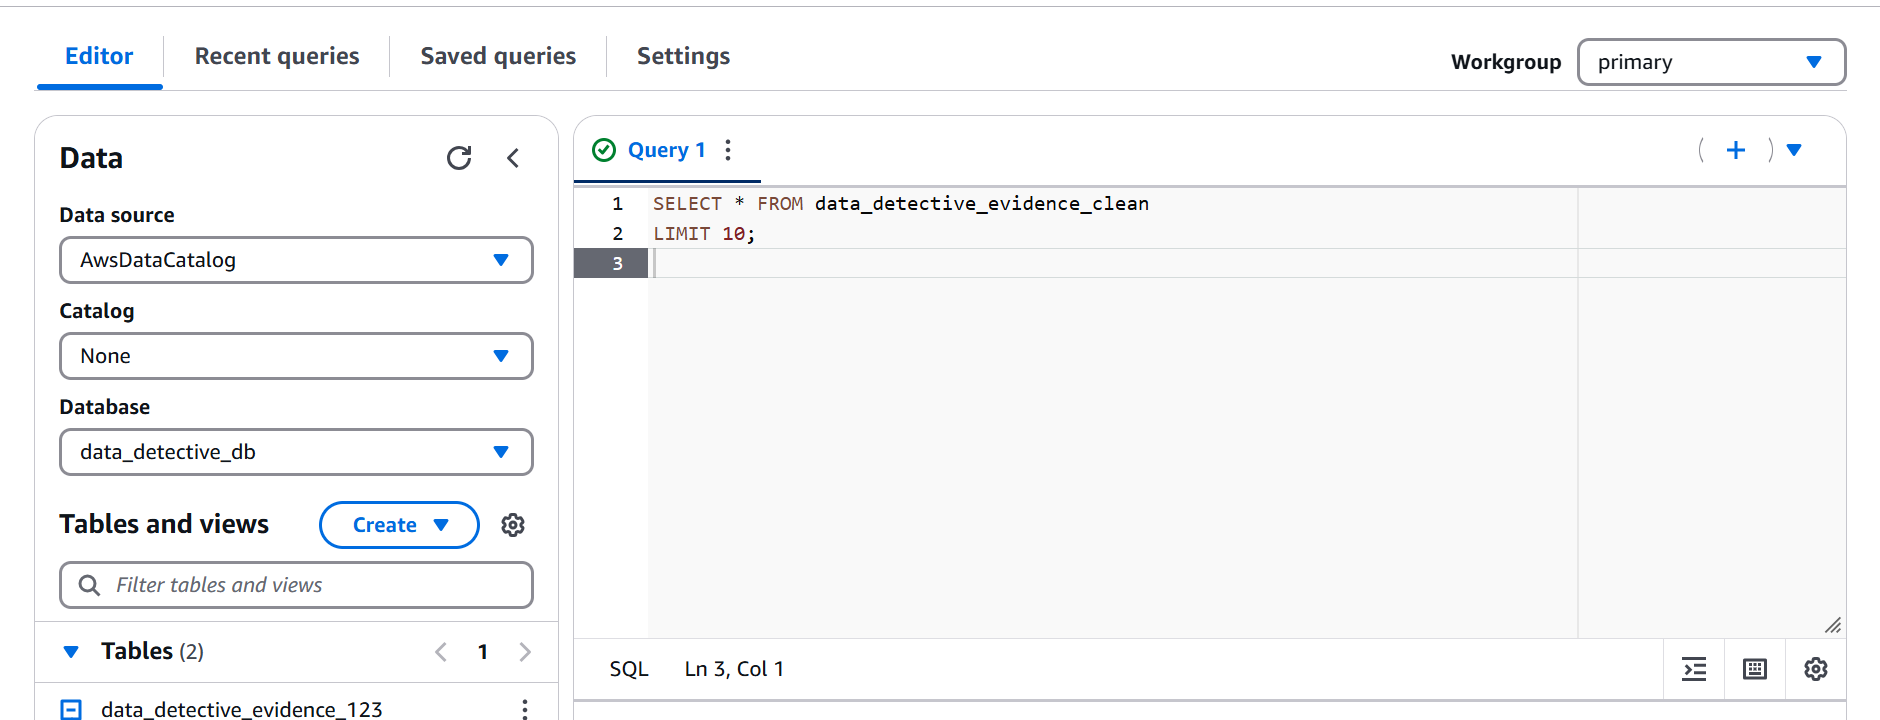
- Step 23: A Glimpse of the Clean Evidence (Previewing Cleaned Data)
Finally, we took a clean look at our processed evidence, limiting the results to get a clear view of the transformed data.

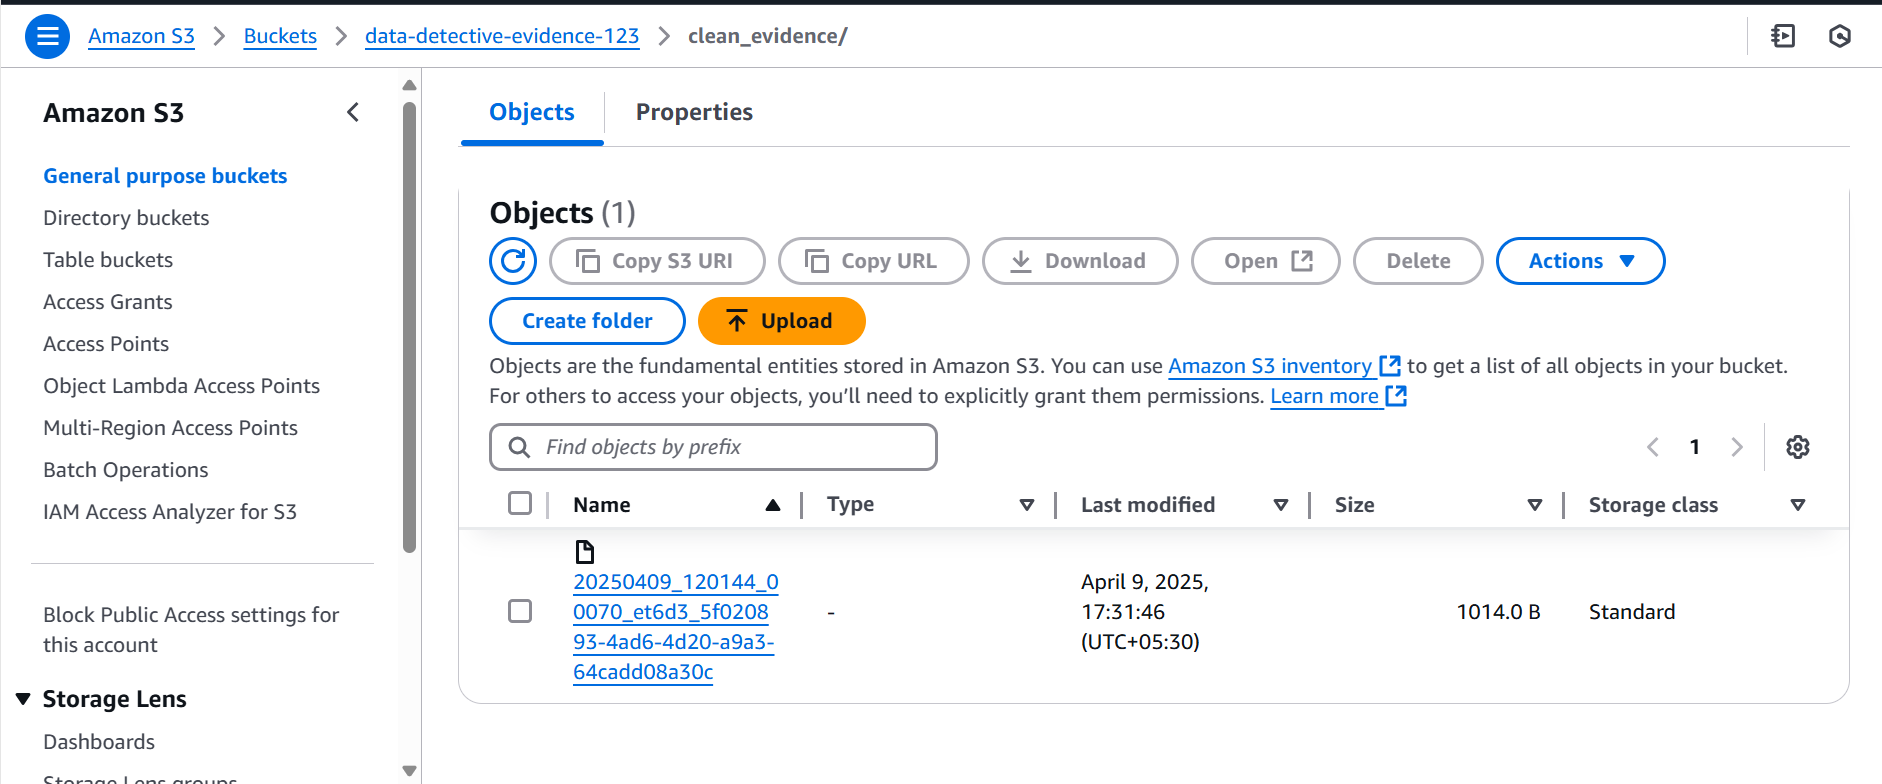
- Step 24 & 25: Securing the Cleaned Evidence (Checking S3 Location)
As any meticulous detective would, we double-checked where our cleaned evidence was stored safe and sound in our S3 bucket, in efficient Parquet files within the clean_evidence/ folder.

Case Closed (for Now!)
And that’s a wrap, fellow investigators! We started with a single, mysterious raw.txt file and, with the help of powerful AWS tools like S3, Glue, and Athena transformed it into a structured and queryable dataset. This case reminds us of a crucial truth in the world of data: cleaning is not just a step; it's the foundation. Proper data cleaning ensures accuracy, reliability, and meaningful insights down the road. Without it, even the best analytics can't solve the mystery. Until the next case! 🕵️♀️