Introduction
Building on our earlier discussion about enterprises needing dedicated hosting for MCP servers and ToolHive's Kubernetes-based solution, we're excited to announce our new Kubernetes Operator for ToolHive. This specialised tool streamlines the secure deployment of MCP servers to Kubernetes environments for enterprise and engineers.
In this article, we'll explore practical ways to leverage this new operator's capabilities.
Let's jump right in! 🚀
Deploying the Operator
For the installation of the ToolHive Operator, we’ve assumed there is already a Kubernetes cluster available with an Ingress controller. We have used Kind for this post as it is simple to set up, free and easy to use.
For simplified local ingress setup with Kind we utilise a basic IP with the Kind Load Balancer - feel free to follow our guide for easy steps on how to do this. To keep things straightforward, we won't use a local hostname in this setup.
Now, with a running cluster, execute the following commands (remember to adjust the --kubeconfig and --kube-context flags as needed).
-
Apply the ToolHive Operator Custom Resource Definitions (CRD’s):
$ kubectl apply -f https://raw.githubusercontent.com/StacklokLabs/toolhive/main/deploy/operator/crds/toolhive.stacklok.dev_mcpservers.yaml -
Create the Operator namespace:
$ kubectl apply -f https://raw.githubusercontent.com/StacklokLabs/toolhive/main/deploy/operator/namespace.yaml -
Setup Role Based Access Control (RBAC) resources:
$ kubectl apply -f https://raw.githubusercontent.com/StacklokLabs/toolhive/main/deploy/operator/rbac.yaml $ kubectl apply -f https://raw.githubusercontent.com/StacklokLabs/toolhive/main/deploy/operator/toolhive_rbac.yaml -
Deploy the Operator:
$ kubectl apply -f https://raw.githubusercontent.com/StacklokLabs/toolhive/main/deploy/operator/operator.yaml
At this point, the ToolHive Kubernetes Operator should now be installed and running.
To verify this, run the following:
$ kubectl get pods -n toolhive-system

NAME                                READY   STATUS    RESTARTS   AGE
toolhive-operator-7f946d9c5-9s8dk   1/1     Running   0          59s
Deploy an MCP Server
Now to install a sample fetch MCP server, run the following:
$ kubectl apply -f https://raw.githubusercontent.com/StacklokLabs/toolhive/main/deploy/operator/samples/mcpserver_fetch.yamlTo verify this has been installed, run the following:
$ kubectl get pods -n toolhive-system -l toolhive=true

NAME                     READY   STATUS    RESTARTS   AGE
fetch-0                  1/1     Running   0          115s
fetch-649c5b958c-nhjbq   1/1     Running   0          2m1s
As shown above, 2 pods are running. The fetch MCP server (fetch-0) is a pod associated with the MCP Server StatefulSet. The other - fetch-xxxxxxxxxx-xxxxx - is the proxy server that deals with all communication between the fetch MCP server and external callers.
Looking back, let’s review how the MCP server was created. Here is the fetch MCP server resource that we’ve applied to the cluster.
apiVersion: toolhive.stacklok.dev/v1alpha1
kind: MCPServer
metadata:
  name: fetch
  namespace: toolhive-system
spec:
  image: docker.io/mcp/fetch
  transport: stdio
  port: 8080
  permissionProfile:
    type: builtin
    name: network
  resources:
    limits:
      cpu: "100m"
      memory: "128Mi"
    requests:
      cpu: "50m"
      memory: "64Mi"
The ToolHive Operator introduces a new Custom Resource called: MCPServer. Here’s a breakdown of the MCPServer configuration:
-
transport: stdio- This creates the MCP server allowing only stdin and stdout traffic. In Kubernetes this results in the proxy server attaching to the container via the Kubernetes API. No other access is given to the caller. -
permissionProfile.type: builtin- This references the built-in profiles with ToolHive -
permissionProfile.name: network- Permits outbound network connections to any host on any port (not recommended for production use).
Now to connect an example Client such as Cursor to our MCP server, we can do so simply with an Ingress record that is enabled by the Load Balancer mentioned earlier.
We can apply the following Ingress entry, ensuring that the ingressClassName matches what we have in our cluster.
apiVersion: networking.k8s.io/v1
kind: Ingress
metadata:
  name: mcp-fetch-ingress
  namespace: toolhive-system
  annotations:
    nginx.ingress.kubernetes.io/rewrite-target: /
spec:
  ingressClassName: nginx
  rules:
  - http:
      paths:
      - path: /
        pathType: Prefix
        backend:
          service:
            name: mcp-fetch-proxy
            port:
              number: 8080
At this point we should be able to connect to the running fetch MCP server using the external IP address of our Load Balancer.
Note: If you have not chosen Kind for the cluster and you have a different Load Balancer setup than what is followed in this post, you will have to make the respective changes in your configuration to send ingress traffic to the fetch server proxy service.
Due to the fact that we did not use the CLI to create the MCP server, the server configuration did not get automatically applied to our local Client configurations. For this reason, we have to add the configuration manually.
For Cursor, we go to Users/$USERNAME/.cursor/mcp.json, ensuring to replace $USERNAME with our home directory username and we add the following:
{
"mcpServers": {
"fetch": {"url": "http://localhost:8080/sse#fetch"}
}
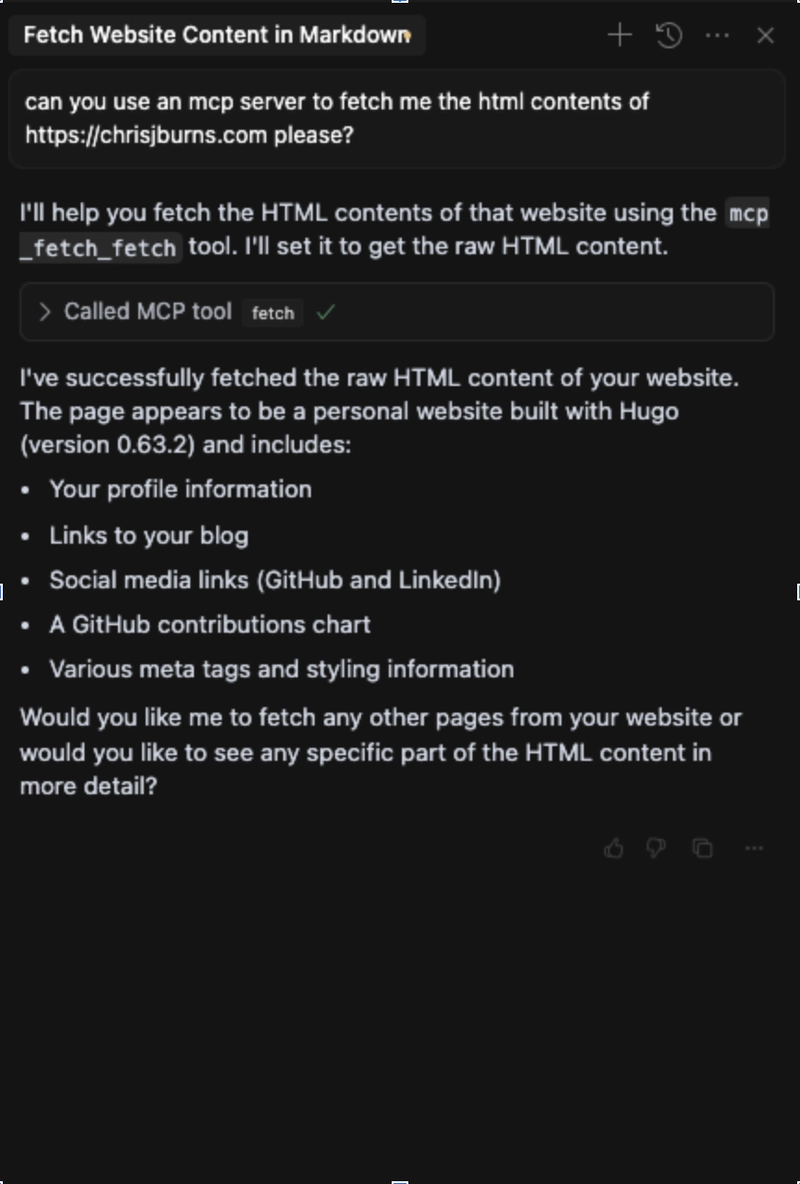
}Now, if we go into the Cursor chat, and we ask it to fetch the contents of a web page, it should ask us for approval for the use of the fetch MCP server and then return the content.
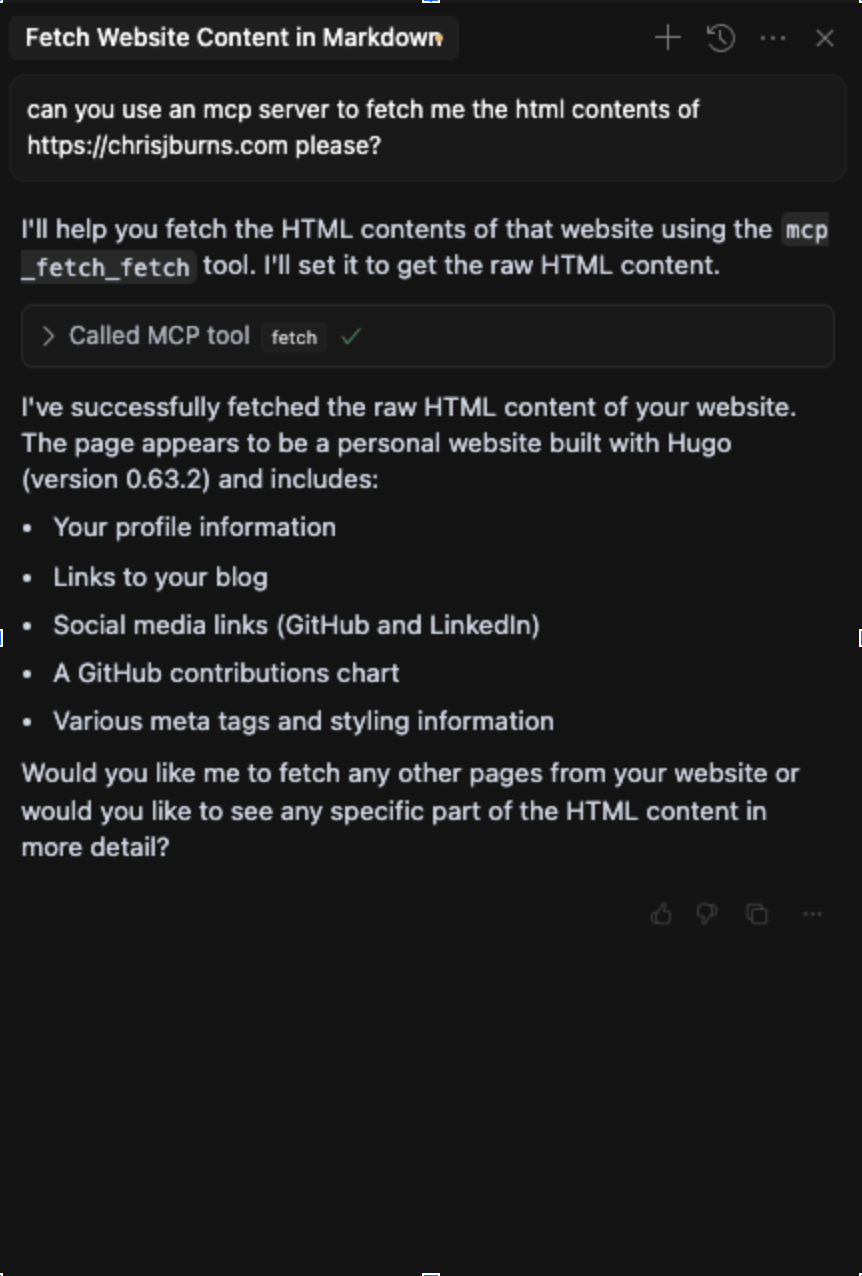
Now if we see the logs for the fetch MCP server.
$ {"jsonrpc":"2.0","id":2,"result":{"content":[{"type":"text","text":"Contents of https://chrisjburns.com/:\n\n\nchrisjburns\n\n# Chris Burns\n\n## Software engineer\n\n"}],"isError":false}}
$ {"jsonrpc":"2.0","id":2,"result":{"content":[{"type":"text","text":"Content type text/html; charset=utf-8 cannot be simplified to markdown, but here is the raw content:\nContents of https://chrisjburns.com/:\nchrisjburnschrisjburns\n\nBLOGChris BurnsSoftware engineer"}],"isError":false}}


    Enter fullscreen mode


    Exit fullscreen mode


There we have it, an MCP Server, created in Kubernetes using the new ToolHive Operator.


  Summary
At this point, we hope that it is possible to see the power that this will give engineers and enterprises that want to create MCP servers within Kubernetes. For those who have already played around with Operators and used them, they already know that the potential capabilities are unrivalled when it comes to creating and managing workloads inside of Kubernetes. We know at Stacklok, that behind the Operator we can hide away a lot of complexity that is normally burdened onto the engineer. We really are excited to release this and we are even more excited to see where it goes.Give it a try, and let us know what you think!Essential Links:
GitHub
Discord
Youtube