Threat Intelligence
Threat Intelligence Classifications:
Threat Intel is geared towards understanding the relationship between your operational environment and your adversary. With this in mind, we can break down threat intel into the following classifications:
- Strategic Intel: High-level intel that looks into the organisation's threat landscape and maps out the risk areas based on trends, patterns and emerging threats that may impact business decisions.
- Technical Intel: Looks into evidence and artefacts of attack used by an adversary. Incident Response teams can use this intel to create a baseline attack surface to analyse and develop defence mechanisms.
- Tactical Intel: Assesses adversaries' tactics, techniques, and procedures (TTPs). This intel can strengthen security controls and address vulnerabilities through real-time investigations.
- Operational Intel: Looks into an adversary's specific motives and intent to perform an attack. Security teams may use this intel to understand the critical assets available in the organisation (people, processes, and technologies) that may be targeted.
UrlScan.io
Urlscan.io is a free service developed to assist in scanning and analysing websites. It is used to automate the process of browsing and crawling through websites to record activities and interactions.
When a URL is submitted, the information recorded includes the domains and IP addresses contacted, resources requested from the domains, a snapshot of the web page, technologies utilised and other metadata about the website.
The site provides two views, the first one showing the most recent scans performed and the second one showing current live scans.
Scan Results
URL scan results provide ample information, with the following key areas being essential to look at:
- Summary: Provides general information about the URL, ranging from the identified IP address, domain registration details, page history and a screenshot of the site.
- HTTP: Provides information on the HTTP connections made by the scanner to the site, with details about the data fetched and the file types received.
- Redirects: Shows information on any identified HTTP and client-side redirects on the site.
- Links: Shows all the identified links outgoing from the site's homepage.
- Behaviour: Provides details of the variables and cookies found on the site. These may be useful in identifying the frameworks used in developing the site.
- Indicators: Lists all IPs, domains and hashes associated with the site. These indicators do not imply malicious activity related to the site.
Abuse.ch
Abuse.ch was developed to identify and track malware and botnets through several operational platforms developed under the project. These platforms are:
- MalwareBazaar: A resource for sharing malware samples.
- FeodoTracker: A resource used to track botnet command and control (C2) infrastructure linked with Emotet, Dridex and TrickBot. (search malicious IPs)
- SSL Blacklist: A resource for collecting and providing a blocklist for malicious SSL certificates and JA3/JA3s fingerprints.
- URLhaus: A resource for sharing malware distribution sites.
- ThreatFox: A resource for sharing indicators of compromise (IOCs).
PhishTool
Email Phishing
Email phishing is one of the main precursors of any cyber attack. Unsuspecting users get duped into opening and accessing malicious files and links sent to them by email, as they appear to be legitimate.
PhishTool seeks to elevate the perception of phishing as a severe form of attack and provide a responsive means of email security. Through email analysis, security analysts can uncover email IOCs, prevent breaches and provide forensic reports that could be used in phishing containment and training engagements.
PhishTool has two accessible versions: Community and Enterprise. We shall mainly focus on the Community version and the core features in this task. Sign up for an account via this link to use the tool.
The core features include:
- Perform email analysis: PhishTool retrieves metadata from phishing emails and provides analysts with the relevant explanations and capabilities to follow the email’s actions, attachments, and URLs to triage the situation.
- Heuristic intelligence: OSINT is baked into the tool to provide analysts with the intelligence needed to stay ahead of persistent attacks and understand what TTPs were used to evade security controls and allow the adversary to social engineer a target.
- Classification and reporting: Phishing email classifications are conducted to allow analysts to take action quickly. Additionally, reports can be generated to provide a forensic record that can be shared.
Additional features are available on the Enterprise version:
- Manage user-reported phishing events.
- Report phishing email findings back to users and keep them engaged in the process.
- Email stack integration with Microsoft 365 and Google Workspace.
We are presented with an upload file screen from the Analysis tab on login. Here, we submit our email for analysis in the stated file formats. Other tabs include:
- History: Lists all submissions made with their resolutions.
- In-tray: An Enterprise feature used to receive and process phish reports posted by team members through integrating Google Workspace and Microsoft 365.
Analysis Tab
Once uploaded, we are presented with the details of our email for a more in-depth look. Here, we have the following tabs:
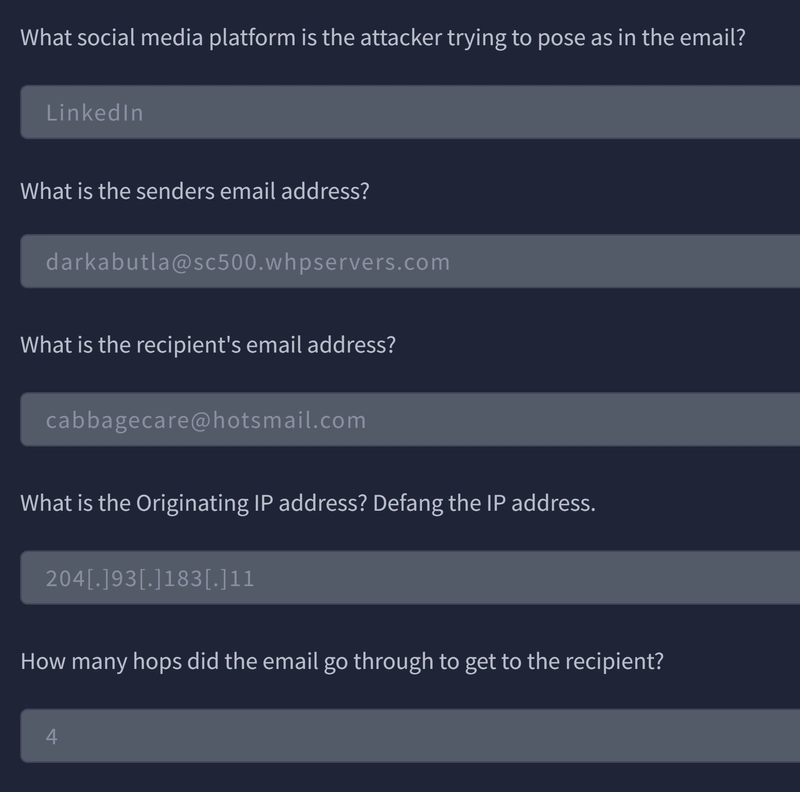
- Headers: Provides the routing information of the email, such as source and destination email addresses, Originating IP and DNS addresses and Timestamp.
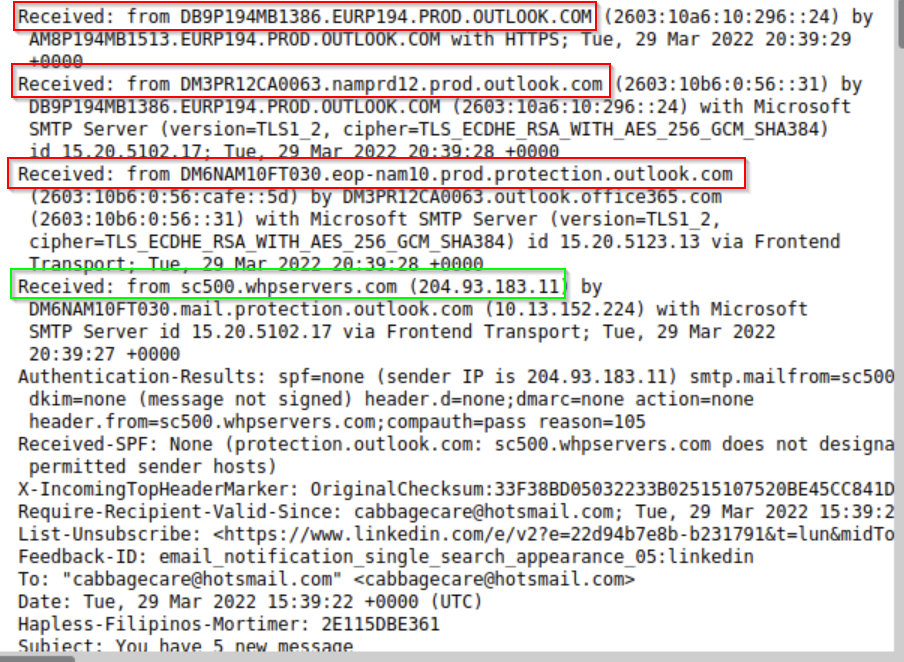
- Received Lines: Details on the email traversal process across various SMTP servers for tracing purposes.
- X-headers: These are extension headers added by the recipient mailbox to provide additional information about the email.
- Security: Details on email security frameworks and policies such as Sender Policy Framework (SPF), DomainKeys Identified Mail (DKIM) and Domain-based Message Authentication, Reporting and Conformance (DMARC).
- Attachments: Lists any file attachments found in the email.
- Message URLs: Associated external URLs found in the email will be found here.
Above the Plaintext section, we have a Resolve checkmark. Here, we get to perform the resolution of our analysis by classifying the email, setting up flagged artefacts and setting the classification codes. Once the email has been classified, the details will appear on the Resolution tab on the analysis of the email.
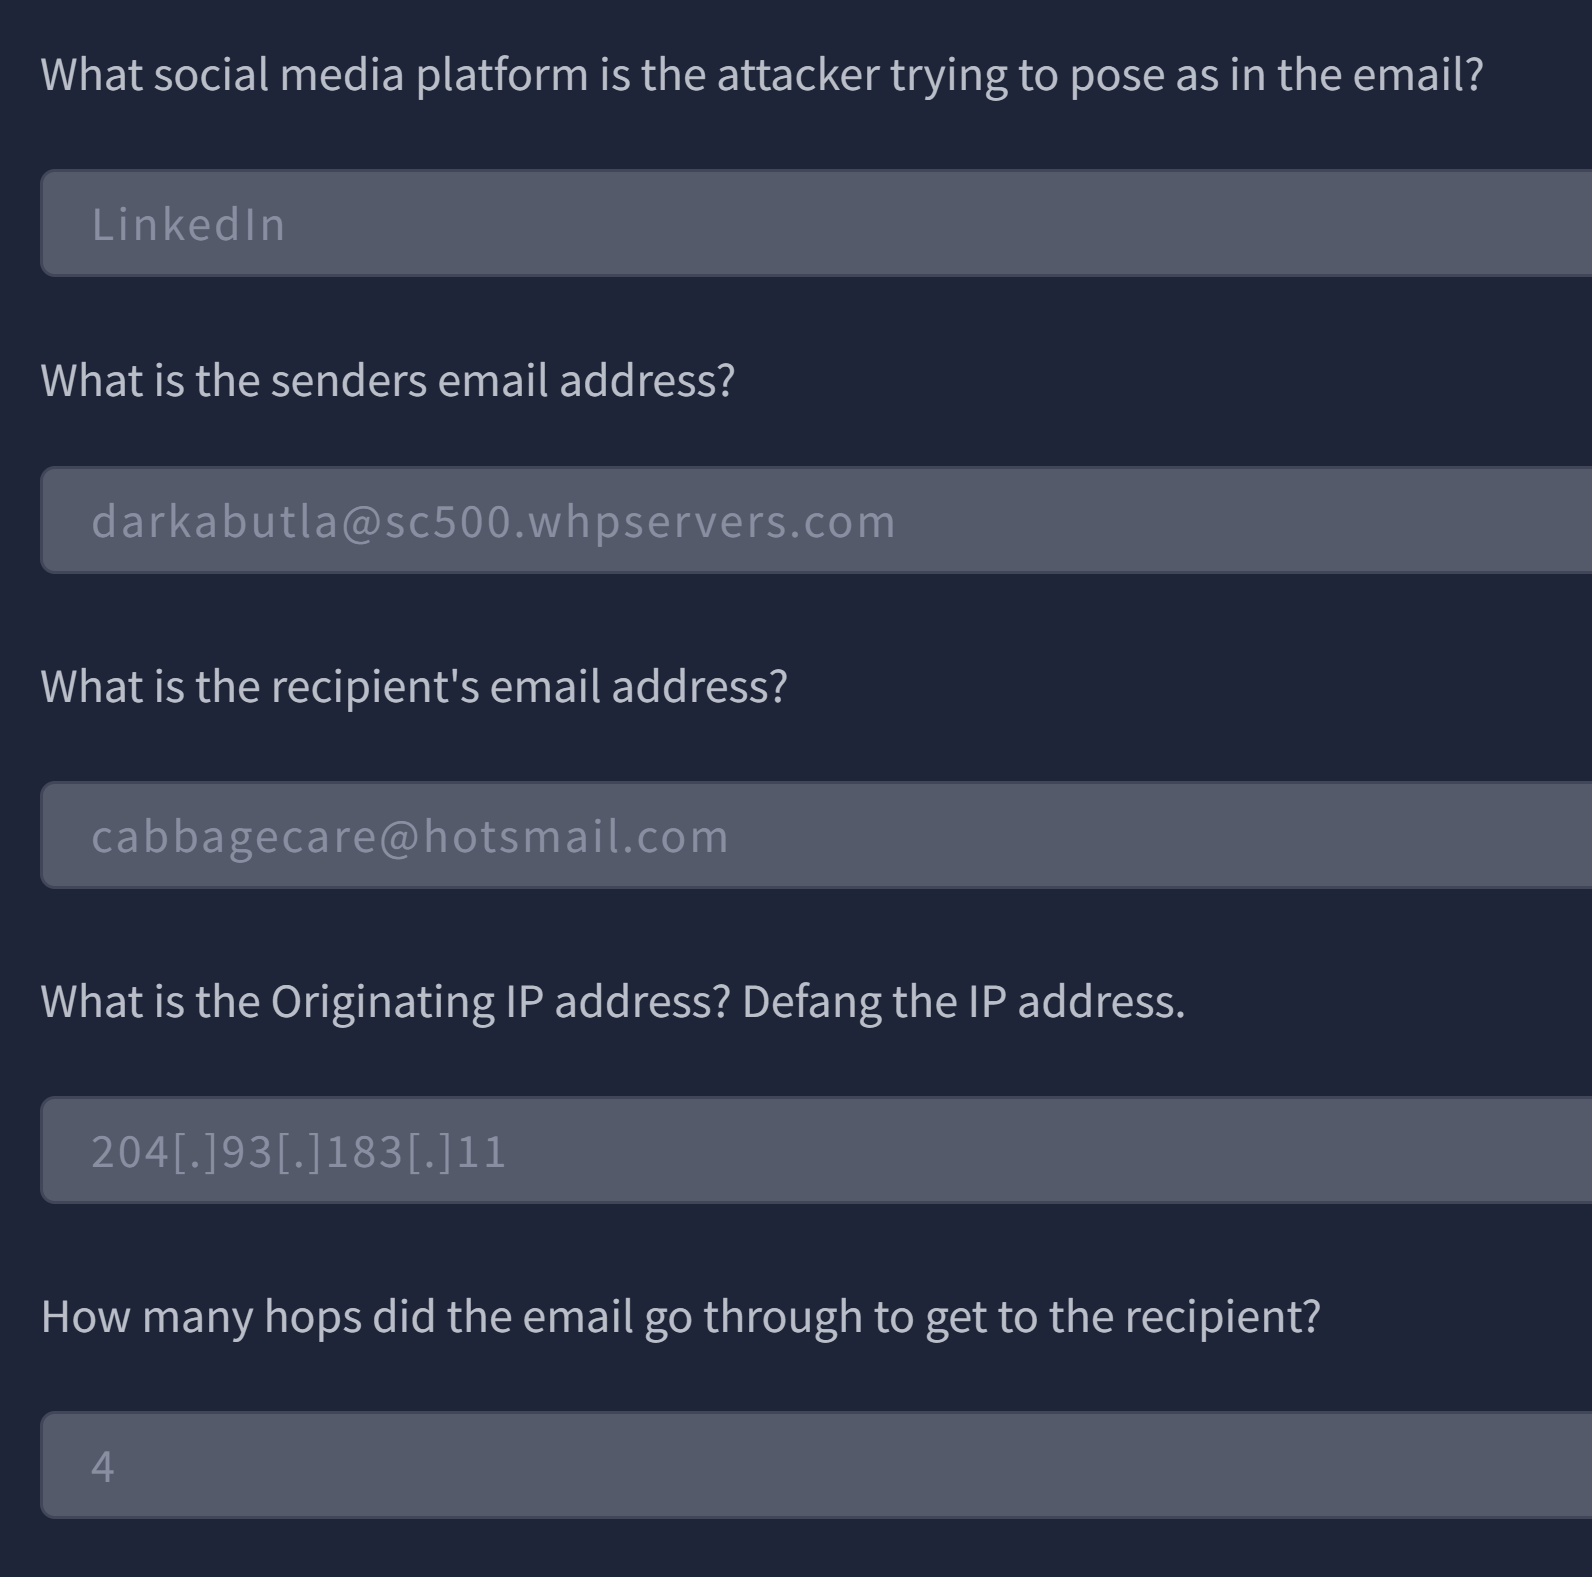
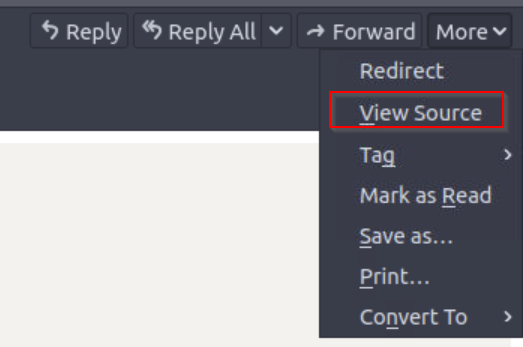
To get the IP address, just navigate to View Source.
As we can see, 4 hops are all it took to get the email to the recipient.
Cisco Talos Intelligence
IT and Cybersecurity companies collect massive amounts of information that could be used for threat analysis and intelligence. Being one of those companies, Cisco assembled a large team of security practitioners called Cisco Talos to provide actionable intelligence, visibility on indicators, and protection against emerging threats through data collected from their products. The solution is accessible as Talos Intelligence.
Cisco Talos encompasses six key teams:
- Threat Intelligence & Interdiction: Quick correlation and tracking of threats provide a means to turn simple IOCs into context-rich intel.
- Detection Research: Vulnerability and malware analysis is performed to create rules and content for threat detection.
- Engineering & Development: Provides the maintenance support for the inspection engines and keeps them up-to-date to identify and triage emerging threats.
- Vulnerability Research & Discovery: Working with service and software vendors to develop repeatable means of identifying and reporting security vulnerabilities.
- Communities: Maintains the image of the team and the open-source solutions.
- Global Outreach: Disseminates intelligence to customers and the security community through publications.
More information about Cisco Talos can be found on their White Paper
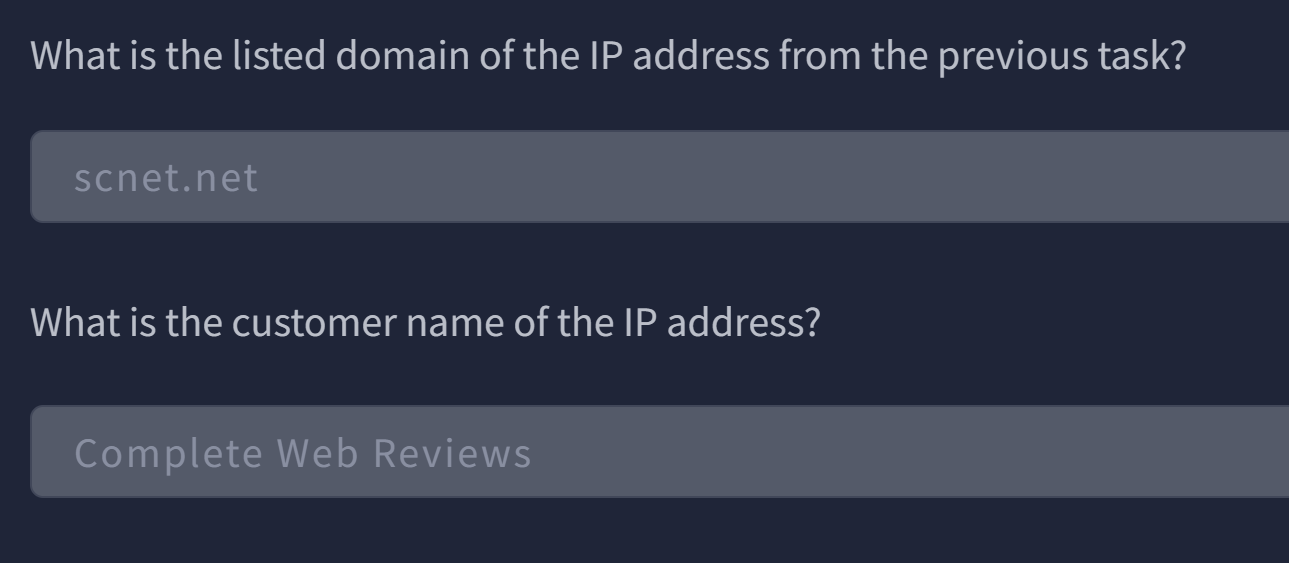
The domain can be found by searching the IP using Cisco Talos.

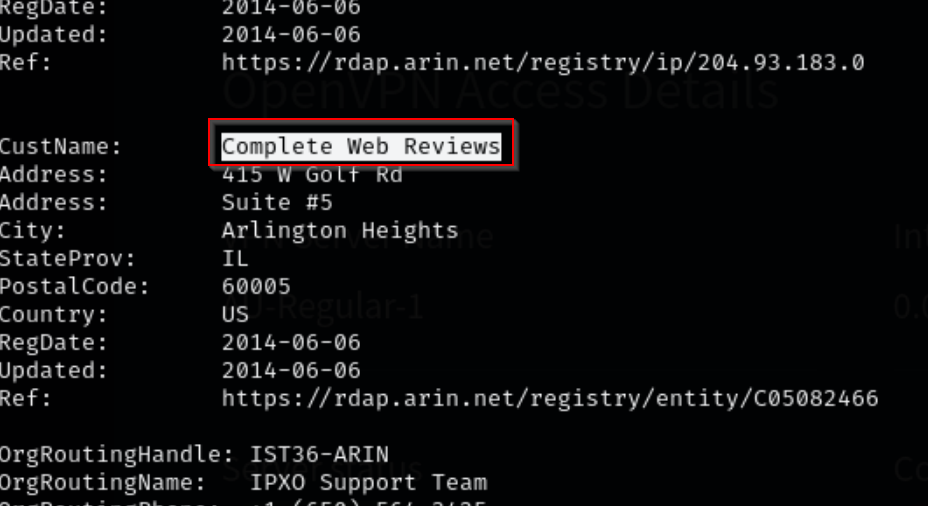
As for the last flag, I ran whois on my Kali machine on the IP.

As we scroll down further, we will find our customer name.
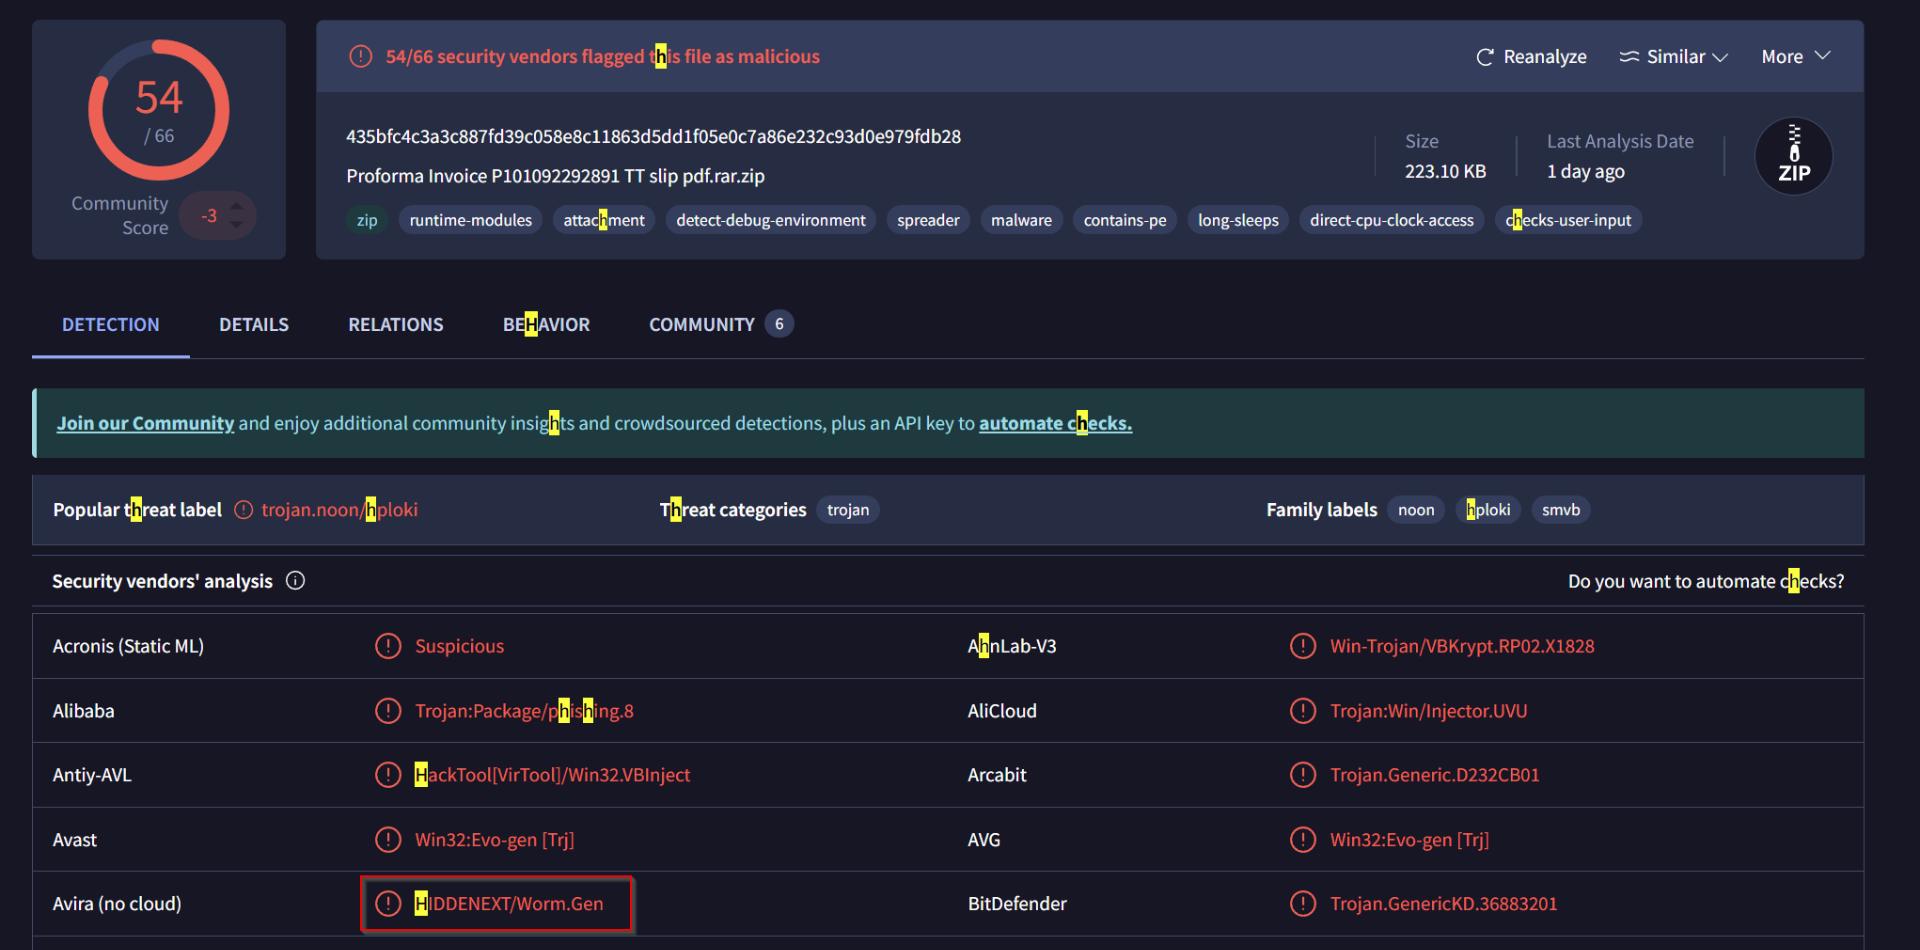
Scenario 1
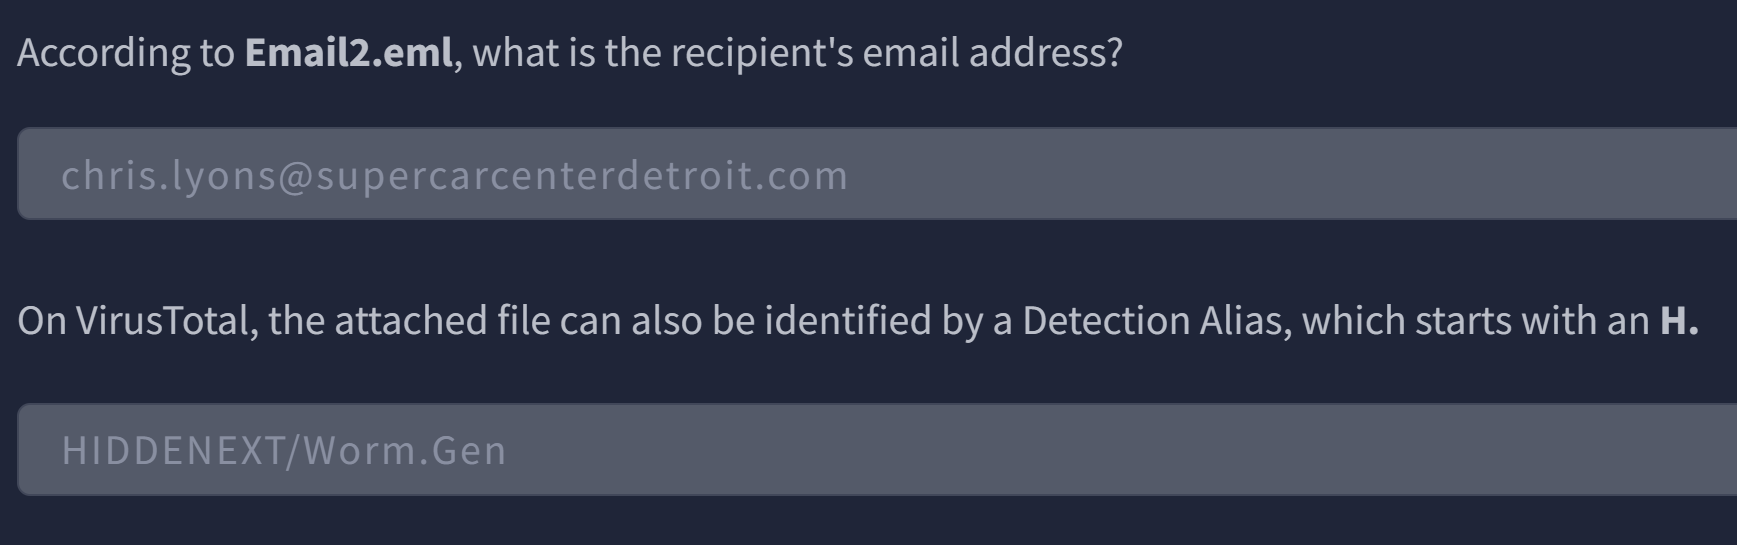
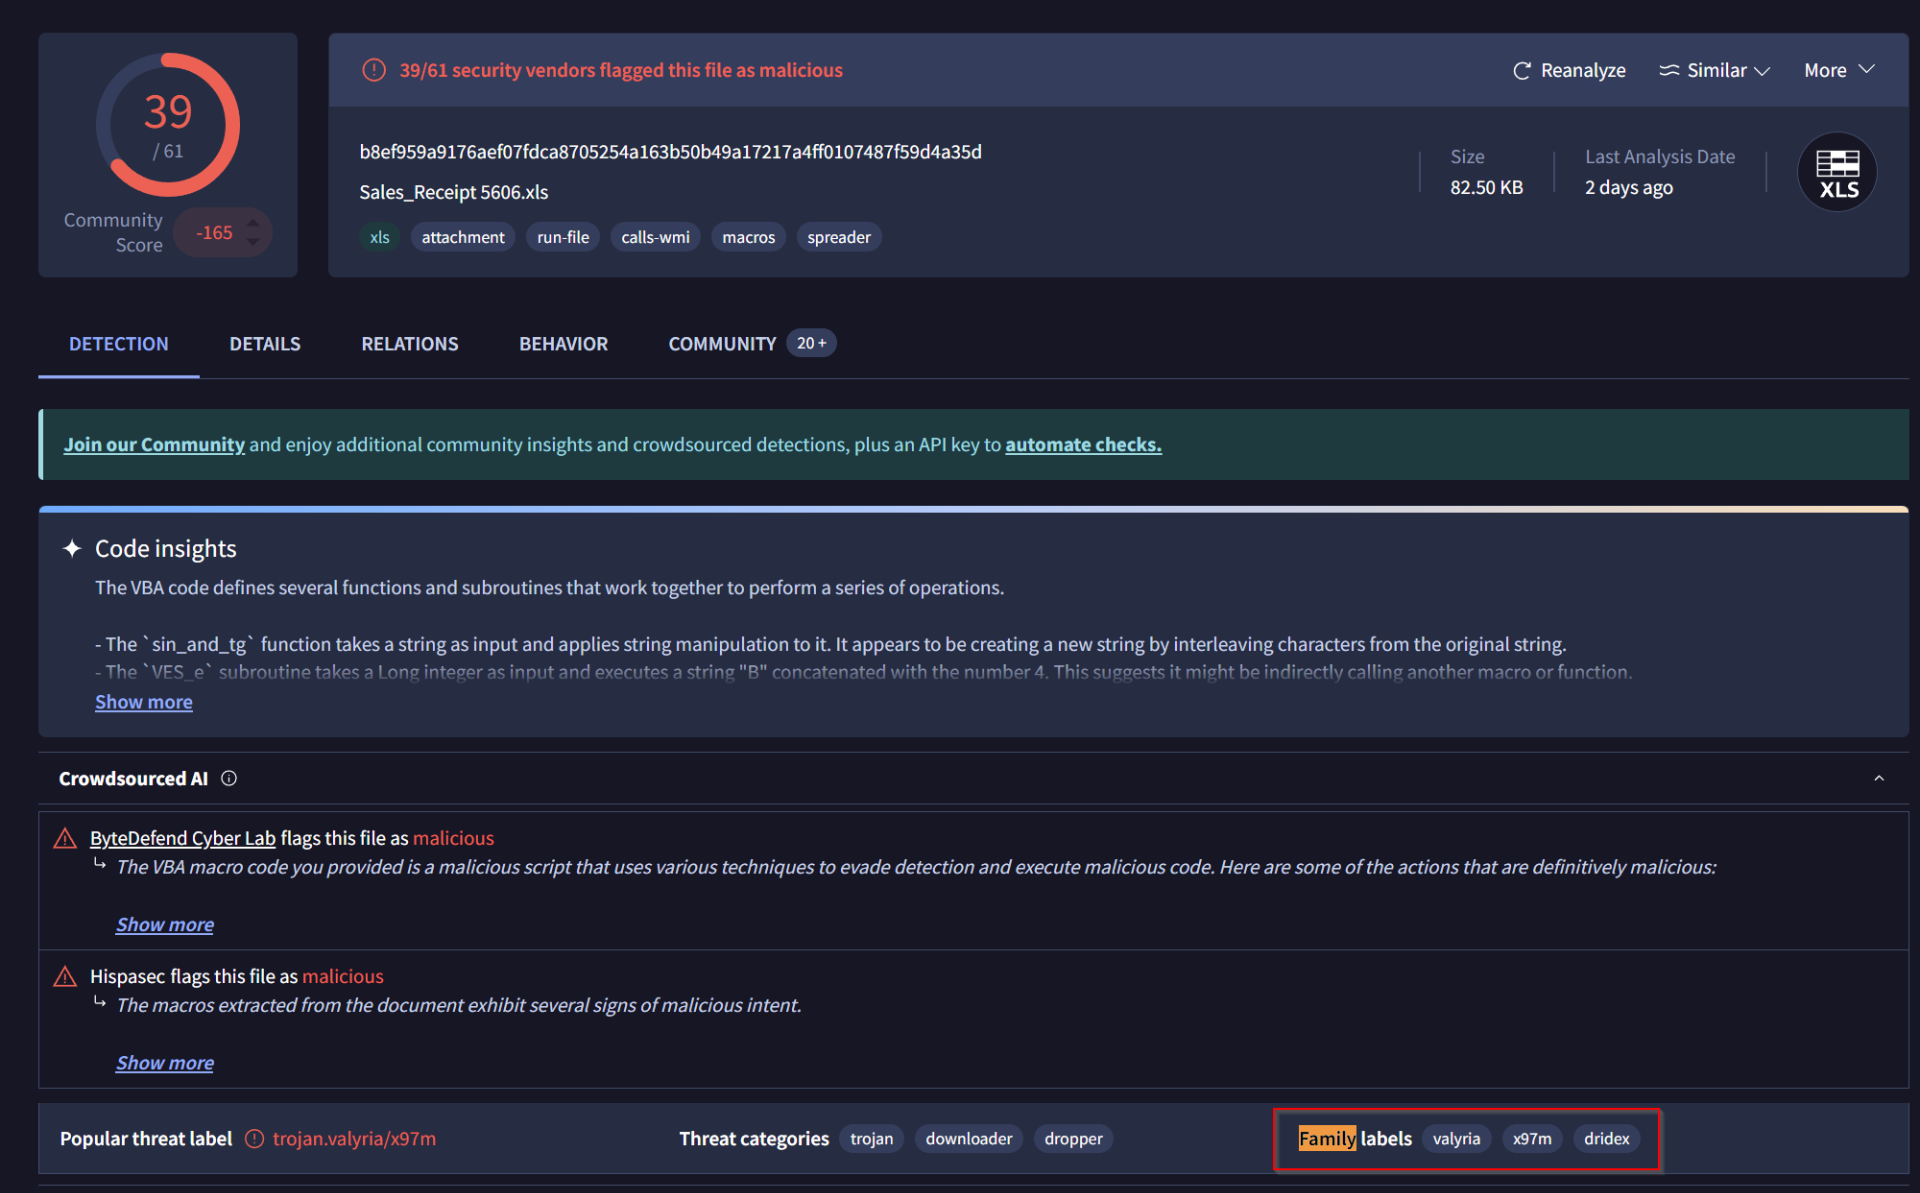
To get the last flag, I obtained the file hash after saving the attached file in the Desktop folder.

I then searched it on VirusTotal, and there it is.
Scenario 2
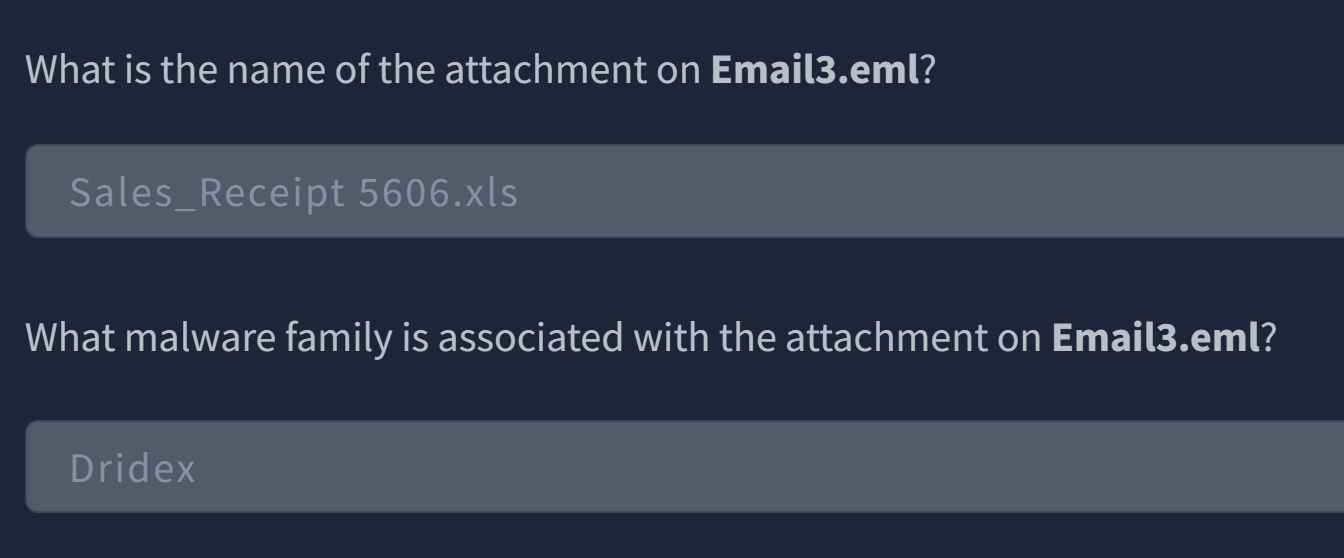
To obtain the last flag, same steps as Scenario 1, where we get the file hash by running sha256sum then search it on VirusTotal.