In API development, securing your endpoints and ensuring only legitimate users can access them is paramount. Two key mechanisms for achieving this are JWT (JSON Web Tokens) authentication and email verification during registration. In this article, I’ll break down these concepts, explain how to implement them in a Django project using Django REST Framework (DRF), and demonstrate their application in a real-world project: LiveStatusAPI, a real-time presence tracking API I'm building.
LiveStatusAPI enables applications to monitor user activity, predict response times, and analyze engagement trends. It includes real-time presence tracking, engagement analytics, webhook integration, and role-based access control features.
In this post, I’ll focus on how I rebuilt the user registration and login system for LiveStatusAPI, replacing its basic session-based authentication with JWT and adding email verification to ensure that only verified users can access the API. Let’s dive in!
What is JWT Authentication?
Understanding JWT
JWT (JSON Web Token) is a compact, self-contained standard for securely transmitting information between parties as a JSON object. It’s widely used for authentication in APIs because it’s stateless and scalable. A JWT consists of three parts, separated by dots (.):
Header: Contains metadata about the token, such as the type (JWT) and the signing algorithm (e.g., HMAC SHA256).
Payload: Contains the claims, which are statements about the user (e.g., user ID, email) and additional data (e.g., expiration time).
Signature: Verifies the token’s integrity by combining the encoded header, payload, and a secret key.
For example, a JWT might look like this:
eyJhbGciOiJIUzI1NiIsInR5cCI6IkpXVCJ9.eyJ1c2VyX2lkIjoiMTIzNDU2Nzg5MCIsImV4cCI6MTY3ODkwMTIzNH0.SflKxwRJSMeKKF2QT4fwpMeJf36POk6yJV_adQssw5cWhen decoded, the payload might reveal:
{
  "user_id": "1234567890",
  "exp": 1678901234
}
How JWT Authentication Works
JWT authentication is stateless, meaning the server doesn’t store session information. Here’s the typical flow:
User Logs In: The user sends their credentials (e.g., email and password) to a login endpoint.
- Token Generation: The server verifies the credentials and generates a JWT (access token and optionally a refresh token). The access token is short-lived (e.g., 60 minutes), while the refresh token is longer-lived (e.g., 1 day).
- Token Usage: The client includes the access token in the Authorization header of subsequent requests (e.g., Authorization: Bearer ).
- Token Verification: The server verifies the token’s signature and checks its expiration. If valid, the request is processed; otherwise, it’s rejected.
- Token Refresh: When the access token expires, the client can use the refresh token to request a new access token without re-authenticating.
Why Use JWT?
- Stateless: No need to store session data on the server, making it ideal for scalable APIs.
- Secure: Tokens are signed, ensuring data integrity and authenticity.
- Cross-Domain: JWTs can be used across different domains, making them suitable for microservices or single sign-on (SSO).
What is Registration with Email Verification?
The Importance of Email Verification
Email verification is a security measure that ensures a user’s email address is valid and belongs to them before granting access to an application. Without verification, malicious users could register with fake emails, potentially leading to spam accounts or unauthorized access. Email verification typically involves:
- User Registration: The user provides their email, username, and password.
- Email Sending: The server sends a verification email with a unique link or token to the user’s email address.
- Email Verification: The user clicks the link, confirming their email and account is activated.
Why Use Email Verification?
- Security: Ensures only legitimate users can access the system.
- User Trust: Verifying emails reduces spam and builds trust with users.
- Data Quality: Helps maintain a database of valid email addresses for communication.
Implementing JWT Authentication and Email Verification in Django
Let’s walk through the steps to implement JWT authentication and email verification in a Django project using DRF. I’ll use the djangorestframework-simplejwt package for JWT authentication, which provides a robust implementation of JWT with access and refresh tokens.
Step 1: Set Up the Project
Install Dependencies
First, install the necessary packages:
bash
pip install django djangorestframework djangorestframework-simplejwt python-decoupleAdd these to your requirements.txt:
django==4.2.7
djangorestframework==3.14.0
djangorestframework-simplejwt==5.3.1
python-decouple==3.8
Configure Django Settings
Update your settings.py to include DRF, rest_framework_simplejwt, and email settings for sending verification emails:
# your_project/settings.py

import os
from datetime import timedelta
from decouple import config

# Define the custom user model (we’ll create this next)
AUTH_USER_MODEL = 'users.CustomUser'

INSTALLED_APPS = [
    'django.contrib.admin',
    'django.contrib.auth',
    'django.contrib.contenttypes',
    'django.contrib.sessions',
    'django.contrib.messages',
    'django.contrib.staticfiles',
    'rest_framework',
    'rest_framework_simplejwt',
    'users',
]

REST_FRAMEWORK = {
    'DEFAULT_AUTHENTICATION_CLASSES': (
        'rest_framework_simplejwt.authentication.JWTAuthentication',
    ),
    'DEFAULT_PERMISSION_CLASSES': (
        'rest_framework.permissions.IsAuthenticated',
    ),
}

SIMPLE_JWT = {
    'ACCESS_TOKEN_LIFETIME': timedelta(minutes=60),
    'REFRESH_TOKEN_LIFETIME': timedelta(days=1),
    'ROTATE_REFRESH_TOKENS': True,
    'BLACKLIST_AFTER_ROTATION': True,
    'AUTH_HEADER_TYPES': ('Bearer',),
    'USER_ID_FIELD': 'id',
    'USER_ID_CLAIM': 'user_id',
}

# Email settings for verification
EMAIL_BACKEND = 'django.core.mail.backends.smtp.EmailBackend'
EMAIL_HOST = config('EMAIL_HOST', default='smtp.gmail.com')
EMAIL_PORT = config('EMAIL_PORT', default=587, cast=int)
EMAIL_USE_TLS = True
EMAIL_HOST_USER = config('EMAIL_HOST_USER')
EMAIL_HOST_PASSWORD = config('EMAIL_HOST_PASSWORD')
DEFAULT_FROM_EMAIL = EMAIL_HOST_USER
Create a .env file to store sensitive information:
# .env
SECRET_KEY=your-django-secret-key
EMAIL_HOST=smtp.gmail.com
EMAIL_PORT=587
[email protected]
EMAIL_HOST_PASSWORD=your-app-password
Understanding the Email Settings in Django
Django provides a built-in email-sending framework that can be configured to send emails via various backends (e.g., SMTP, console, file-based). We’re using the SMTP backend (django.core.mail.backends.smtp.EmailBackend) to send emails through an external SMTP server (Gmail, by default). These settings define how Django connects to the SMTP server and sends emails.
Here’s a breakdown of each setting in the configuration:
EMAIL_BACKEND = 'django.core.mail.backends.smtp.EmailBackend': Specifies the backend Django will use to send emails.
EMAIL_HOST = config('EMAIL_HOST', default='smtp.gmail.com'): Defines the hostname of the SMTP server Django will connect to. The default is
smtp.gmail.com.EMAIL_PORT = config('EMAIL_PORT', default=587, cast=int): Specifies the port number to use when connecting to the SMTP server.
EMAIL_USE_TLS = True: Enables TLS encryption for the connection to the SMTP server.
EMAIL_HOST_USER = config('EMAIL_HOST_USER') - Specifies the email address (username) used to authenticate with the SMTP server.
EMAIL_HOST_PASSWORD = config('EMAIL_HOST_PASSWORD'): Specifies the password to authenticate with the SMTP server.
DEFAULT_FROM_EMAIL = EMAIL_HOST_USER: Sets the default
fromemail address for emails sent by Django.
Setting Up Gmail for Sending Emails
Since the default EMAIL_HOST is smtp.gmail.com, let’s set up Gmail to work with Django. Gmail has strict security measures, so you’ll need to use an App Password instead of your regular Gmail password.
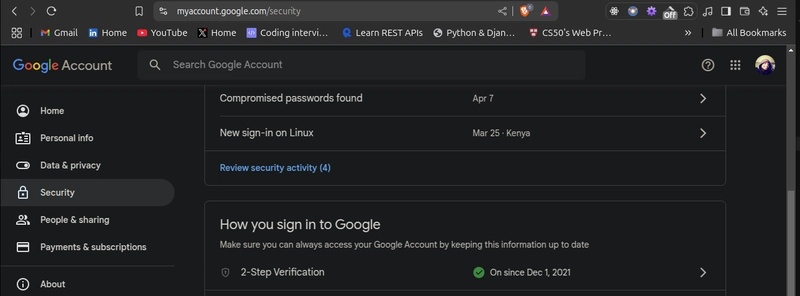
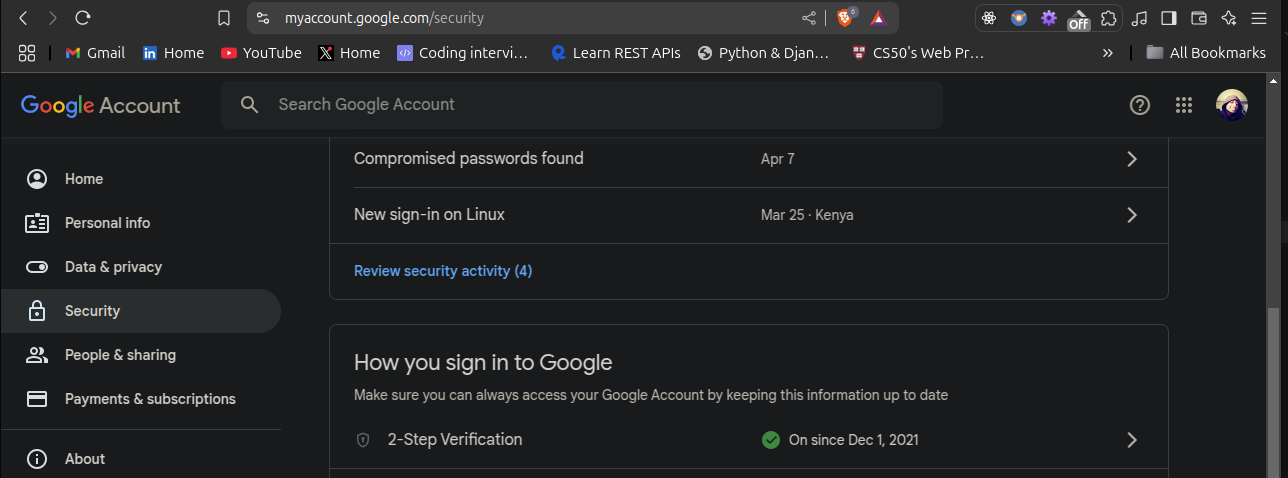
Step 1. Enable 2-Step Verification on Your Gmail Account
- Go to your Google Account settings:.
- Navigate to Security > 2-Step Verification.
- Follow the steps to enable 2-step verification (e.g., using your phone number for verification).
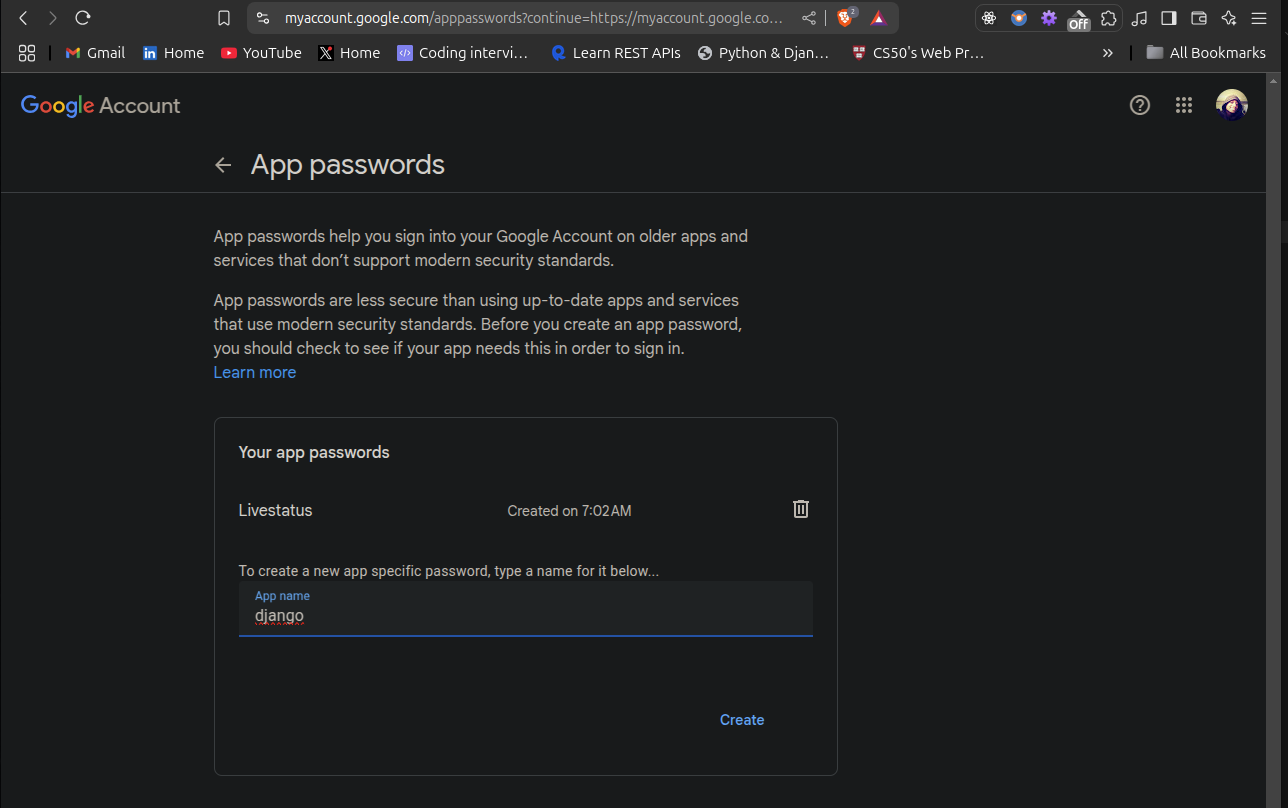
Step 2. Generate an App Password
- After enabling 2-step verification, go to Security > App Passwords (or search for “App Passwords” in your Google Account settings).
- Click Generate.
- Select App as “Mail” and Device as “Other (Custom name)”, then name it (e.g., “Django”).
- Click Generate. Google will provide a 16-character App Password (e.g., abcd efgh ijkl mnop).
- Copy this password (ignore the spaces).
Step 3. Update Your .env File
Add the Gmail credentials to your .env file using the App Password:
# .env
EMAIL_HOST=smtp.gmail.com
EMAIL_PORT=587
[email protected]
EMAIL_HOST_PASSWORD=your-app-password  # e.g., abcdefghijklmnop
Step 4. Test Sending an Email
To confirm the setup works, run a quick test in the Django shell:
python manage.py shellfrom django.core.mail import send_mail
send_mail(
'[email protected]',
'This is a test email from Django.',
'[email protected]',
['[email protected]'],
fail_silently=False,
)
If the email is sent successfully, your configuration is correct.
If it fails, check the error message:
- SMTPAuthenticationError: Likely an issue with
EMAIL_HOST_USERorEMAIL_HOST_PASSWORD. Double-check yourApp Password. - ConnectionRefusedError: Ensure
EMAIL_PORTandEMAIL_USE_TLSare correct (587 and True for Gmail).
Set Up URLs
Add the JWT token endpoints to your project’s urls.py:
# your_project/urls.py

from django.contrib import admin
from django.urls import path, include
from rest_framework_simplejwt.views import (
    TokenObtainPairView,
    TokenRefreshView,
)

urlpatterns = [
    path('admin/', admin.site.urls),
    path('api/', include('users.urls')),
    path('api/token/', TokenObtainPairView.as_view(), name='token_obtain_pair'),
    path('api/token/refresh/', TokenRefreshView.as_view(), name='token_refresh'),
]
Step 2: Create a Custom User Model
Create a CustomUser model to support email verification:
# users/models.py

from django.contrib.auth.models import AbstractUser
from django.db import models
import uuid

class CustomUser(AbstractUser):
    id = models.UUIDField(primary_key=True, default=uuid.uuid4, editable=False)
    email = models.EmailField(unique=True)
    verification_token = models.CharField(max_length=36, blank=True, null=True)
    is_verified = models.BooleanField(default=False)

    REQUIRED_FIELDS = ['email']

    def __str__(self):
        return self.username
Run migrations to apply the changes:
python manage.py makemigrations
python manage.py migrate
Step 3: Implement Registration with Email Verification
Create a Registration Serializer
Create a serializer to handle user registration and send a verification email:
# users/serializers.py

from rest_framework import serializers
from django.contrib.auth import get_user_model
from django.core.mail import send_mail
from django.urls import reverse
import uuid

User = get_user_model()

class RegisterSerializer(serializers.ModelSerializer):
    password = serializers.CharField(write_only=True, min_length=8)
    email = serializers.EmailField()

    class Meta:
        model = User
        fields = ['username', 'email', 'password']

    def validate_email(self, value):
        if User.objects.filter(email=value).exists():
            raise serializers.ValidationError("A user with this email already exists.")
        return value

    def create(self, validated_data):
        user = User.objects.create_user(
            username=validated_data['username'],
            email=validated_data['email'],
            password=validated_data['password'],
            is_active=False
        )

        verification_token = str(uuid.uuid4())
        user.verification_token = verification_token
        user.save()

        verification_url = self.context['request'].build_absolute_uri(
            reverse('verify-email', kwargs={'token': verification_token})
        )
        subject = 'Verify Your Email Address'
        message = f'Click the link to verify your email: {verification_url}'
        send_mail(
            subject,
            message,
            '[email protected]',
            [user.email],
            fail_silently=False,
        )

        return user
Create Registration and Verification Views
Create views for registration and email verification:
# users/views.py

from rest_framework import generics, status
from rest_framework.response import Response
from rest_framework.permissions import AllowAny
from .serializers import RegisterSerializer
from django.contrib.auth import get_user_model

User = get_user_model()

class RegisterView(generics.CreateAPIView):
    queryset = User.objects.all()
    serializer_class = RegisterSerializer
    permission_classes = [AllowAny]

    def create(self, request, *args, **kwargs):
        serializer = self.get_serializer(data=request.data)
        serializer.is_valid(raise_exception=True)
        user = serializer.save()
        return Response({
            "message": "User registered successfully. Please verify your email to activate your account.",
            "user": {
                "id": str(user.id),
                "username": user.username,
                "email": user.email
            }
        }, status=status.HTTP_201_CREATED)

class VerifyEmailView(generics.GenericAPIView):
    permission_classes = [AllowAny]

    def get(self, request, token, *args, **kwargs):
        try:
            user = User.objects.get(verification_token=token)
            if user.is_verified:
                return Response({"message": "Email already verified."}, status=status.HTTP_400_BAD_REQUEST)
            user.is_verified = True
            user.is_active = True
            user.verification_token = None
            user.save()
            return Response({"message": "Email verified successfully. You can now log in."}, status=status.HTTP_200_OK)
        except User.DoesNotExist:
            return Response({"error": "Invalid verification token."}, status=status.HTTP_400_BAD_REQUEST)
Set Up URLs
Add the endpoints to users/urls.py:
# users/urls.py

from django.urls import path
from .views import RegisterView, VerifyEmailView

urlpatterns = [
    path('register/', RegisterView.as_view(), name='register'),
    path('verify-email//', VerifyEmailView.as_view(), name='verify-email'),
]
Step 4: Implement JWT Authentication for Login
Customize the Login Process
Since the CustomUser model uses email as the unique identifier, customize the login process to allow users to log in with their email:
# users/views.py (continued)

from rest_framework_simplejwt.views import TokenObtainPairView
from rest_framework_simplejwt.serializers import TokenObtainPairSerializer
from rest_framework import status
from rest_framework.response import Response

class CustomTokenObtainPairSerializer(TokenObtainPairSerializer):
    def validate(self, attrs):
        email = attrs.get("email")
        password = attrs.get("password")

        if email and password:
            user = User.objects.filter(email=email).first()
            if user and user.check_password(password):
                if not user.is_verified:
                    raise serializers.ValidationError("Please verify your email before logging in.")
                if not user.is_active:
                    raise serializers.ValidationError("User account is inactive.")
                attrs['username'] = user.username
                return super().validate(attrs)
            else:
                raise serializers.ValidationError("Invalid email or password.")
        else:
            raise serializers.ValidationError("Must include 'email' and 'password'.")

class CustomTokenObtainPairView(TokenObtainPairView):
    serializer_class = CustomTokenObtainPairSerializer

    def post(self, request, *args, **kwargs):
        serializer = self.get_serializer(data=request.data)
        serializer.is_valid(raise_exception=True)
        return Response({
            "access": serializer.validated_data['access'],
            "refresh": serializer.validated_data['refresh'],
            "user": {
                "id": str(serializer.user.id),
                "username": serializer.user.username,
                "email": serializer.user.email
            }
        }, status=status.HTTP_200_OK)
Update URLs
Add the custom login endpoint:
# users/urls.py

from django.urls import path
from .views import RegisterView, VerifyEmailView, CustomTokenObtainPairView

urlpatterns = [
    path('register/', RegisterView.as_view(), name='register'),
    path('verify-email//', VerifyEmailView.as_view(), name='verify-email'),
    path('login/', CustomTokenObtainPairView.as_view(), name='login'),
]
Case Study: Applying JWT Authentication and Email Verification to LiveStatusAPI
Now that we’ve covered the theory and implementation, let’s see how I applied these concepts to LiveStatusAPI, a real-time presence-tracking API I’ve been building. LiveStatusAPI already had basic user registration and login functionality, but it used session-based authentication and lacked email verification. On Day 1 of my project, I rebuilt these components to use JWT authentication and added email verification to ensure only verified users can access the API.
Step 1: Reviewing the Existing Setup
LiveStatusAPI uses Django and DRF, with a CustomUser modelthat extends AbstractUser and uses a UUID as the primary key. The project had basic registration (POST /api/register/) and login endpoints, but they didn’t enforce email verification, and authentication was session-based.
I started by ensuring the project was running:
cd LiveStatusAPI
source livevenv/bin/activate
git pull # since its open-sourced
pip install -r requirements.txt
python manage.py runserver
Step 2: Configuring JWT and Email Settings
I updated settings.py to replace session-based authentication with JWT and add email settings for verification:
# LiveStatusApi/settings.py

import os
from datetime import timedelta
from decouple import config

AUTH_USER_MODEL = 'users.CustomUser'

INSTALLED_APPS = [
    'django.contrib.admin',
    'django.contrib.auth',
    'django.contrib.contenttypes',
    'django.contrib.sessions',
    'django.contrib.messages',
    'django.contrib.staticfiles',
    'rest_framework',
    'rest_framework_simplejwt',
    'users',
]

REST_FRAMEWORK = {
    'DEFAULT_AUTHENTICATION_CLASSES': (
        'rest_framework_simplejwt.authentication.JWTAuthentication',
    ),
    'DEFAULT_PERMISSION_CLASSES': (
        'rest_framework.permissions.IsAuthenticated',
    ),
}

SIMPLE_JWT = {
    'ACCESS_TOKEN_LIFETIME': timedelta(minutes=60),
    'REFRESH_TOKEN_LIFETIME': timedelta(days=1),
    'ROTATE_REFRESH_TOKENS': True,
    'BLACKLIST_AFTER_ROTATION': True,
    'AUTH_HEADER_TYPES': ('Bearer',),
    'USER_ID_FIELD': 'id',
    'USER_ID_CLAIM': 'user_id',
}

EMAIL_BACKEND = 'django.core.mail.backends.smtp.EmailBackend'
EMAIL_HOST = config('EMAIL_HOST', default='smtp.gmail.com')
EMAIL_PORT = config('EMAIL_PORT', default=587, cast=int)
EMAIL_USE_TLS = True
EMAIL_HOST_USER = config('EMAIL_HOST_USER')
EMAIL_HOST_PASSWORD = config('EMAIL_HOST_PASSWORD')
DEFAULT_FROM_EMAIL = EMAIL_HOST_USER
I updated the .env file with my Gmail credentials, using an App Password for security:
# .env
SECRET_KEY=your-django-secret-key
EMAIL_HOST=smtp.gmail.com
EMAIL_PORT=587
[email protected]
EMAIL_HOST_PASSWORD=your-app-password
Step 3: Updating the CustomUser Model
The existing CustomUser model didn’t have fields for email verification. I added verification_token and is_verified:
# users/models.py

from django.contrib.auth.models import AbstractUser
from django.db import models
import uuid

class CustomUser(AbstractUser):
    id = models.UUIDField(primary_key=True, default=uuid.uuid4, editable=False)
    email = models.EmailField(unique=True)
    verification_token = models.CharField(max_length=36, blank=True, null=True)
    is_verified = models.BooleanField(default=False)

    REQUIRED_FIELDS = ['email']

    def __str__(self):
        return self.username
I ran migrations to apply the changes:
python manage.py makemigrations
python manage.py migrate
Step 4: Rebuilding Registration with Email Verification
I created a RegisterSerializer to handle the updated registration process, ensuring users must verify their email before their account is activated:
# users/serializers.py

from rest_framework import serializers
from django.contrib.auth import get_user_model
from django.core.mail import send_mail
from django.urls import reverse
import uuid

User = get_user_model()

class RegisterSerializer(serializers.ModelSerializer):
    password = serializers.CharField(write_only=True, min_length=8)
    email = serializers.EmailField()

    class Meta:
        model = User
        fields = ['username', 'email', 'password']

    def validate_email(self, value):
        if User.objects.filter(email=value).exists():
            raise serializers.ValidationError("A user with this email already exists.")
        return value

    def create(self, validated_data):
        user = User.objects.create_user(
            username=validated_data['username'],
            email=validated_data['email'],
            password=validated_data['password'],
            is_active=False
        )

        verification_token = str(uuid.uuid4())
        user.verification_token = verification_token
        user.save()

        verification_url = self.context['request'].build_absolute_uri(
            reverse('verify-email', kwargs={'token': verification_token})
        )
        subject = 'Verify Your Email Address'
        message = f'Click the link to verify your email: {verification_url}'
        send_mail(
            subject,
            message,
            '[email protected]',
            [user.email],
            fail_silently=False,
        )

        return user
I updated the existing RegisterView and added a VerifyEmailView:
# users/views.py

from rest_framework import generics, status
from rest_framework.response import Response
from rest_framework.permissions import AllowAny
from .serializers import RegisterSerializer
from django.contrib.auth import get_user_model

User = get_user_model()

class RegisterView(generics.CreateAPIView):
    queryset = User.objects.all()
    serializer_class = RegisterSerializer
    permission_classes = [AllowAny]

    def create(self, request, *args, **kwargs):
        serializer = self.get_serializer(data=request.data)
        serializer.is_valid(raise_exception=True)
        user = serializer.save()
        return Response({
            "message": "User registered successfully. Please verify your email to activate your account.",
            "user": {
                "id": str(user.id),
                "username": user.username,
                "email": user.email
            }
        }, status=status.HTTP_201_CREATED)

class VerifyEmailView(generics.GenericAPIView):
    permission_classes = [AllowAny]

    def get(self, request, token, *args, **kwargs):
        try:
            user = User.objects.get(verification_token=token)
            if user.is_verified:
                return Response({"message": "Email already verified."}, status=status.HTTP_400_BAD_REQUEST)
            user.is_verified = True
            user.is_active = True
            user.verification_token = None
            user.save()
            return Response({"message": "Email verified successfully. You can now log in."}, status=status.HTTP_200_OK)
        except User.DoesNotExist:
            return Response({"error": "Invalid verification token."}, status=status.HTTP_400_BAD_REQUEST)
I updated users/urls.py to include the email verification endpoint:
# users/urls.py

from django.urls import path
from .views import RegisterView, VerifyEmailView

urlpatterns = [
    path('register/', RegisterView.as_view(), name='register'),
    path('verify-email//', VerifyEmailView.as_view(), name='verify-email'),
]
Step 5: Rebuilding Login with JWT
I replaced the existing session-based login with JWT, customizing the login process to use email:
# users/views.py

from rest_framework_simplejwt.views import TokenObtainPairView
from rest_framework_simplejwt.serializers import TokenObtainPairSerializer
from rest_framework import status
from rest_framework.response import Response

class CustomTokenObtainPairSerializer(TokenObtainPairSerializer):
    def validate(self, attrs):
        email = attrs.get("email")
        password = attrs.get("password")

        if email and password:
            user = User.objects.filter(email=email).first()
            if user and user.check_password(password):
                if not user.is_verified:
                    raise serializers.ValidationError("Please verify your email before logging in.")
                if not user.is_active:
                    raise serializers.ValidationError("User account is inactive.")
                attrs['username'] = user.username
                return super().validate(attrs)
            else:
                raise serializers.ValidationError("Invalid email or password.")
        else:
            raise serializers.ValidationError("Must include 'email' and 'password'.")

class CustomTokenObtainPairView(TokenObtainPairView):
    serializer_class = CustomTokenObtainPairSerializer

    def post(self, request, *args, **kwargs):
        serializer = self.get_serializer(data=request.data)
        serializer.is_valid(raise_exception=True)
        return Response({
            "access": serializer.validated_data['access'],
            "refresh": serializer.validated_data['refresh'],
            "user": {
                "id": str(serializer.user.id),
                "username": serializer.user.username,
                "email": serializer.user.email
            }
        }, status=status.HTTP_200_OK)
I updated users/urls.py to include the custom login endpoint:
# users/urls.py

from django.urls import path
from .views import RegisterView, VerifyEmailView, CustomTokenObtainPairView

urlpatterns = [
    path('register/', RegisterView.as_view(), name='register'),
    path('verify-email//', VerifyEmailView.as_view(), name='verify-email'),
    path('login/', CustomTokenObtainPairView.as_view(), name='login'),
]
Step 6: Testing the Implementation
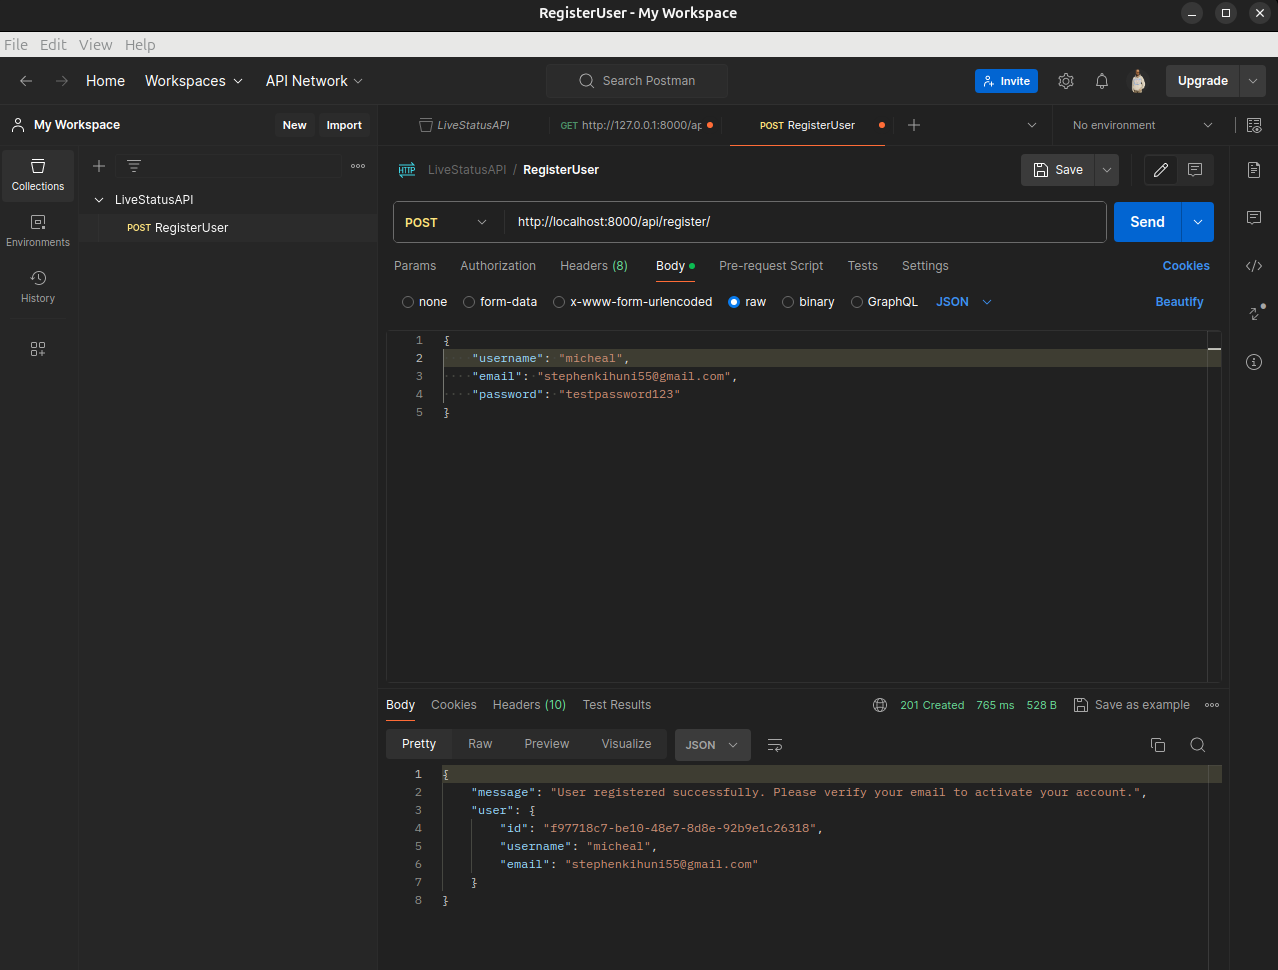
I tested the updated registration and login flow with Postman:
Register a User (POST /api/register/):
{
    "username": "testuser",
    "email": "[email protected]",
    "password": "testpassword123"
}
Response:
{
    "message": "User registered successfully. Please verify your email to activate your account.",
    "user": {
        "id": "some-uuid",
        "username": "testuser",
        "email": "[email protected]"
    }
}
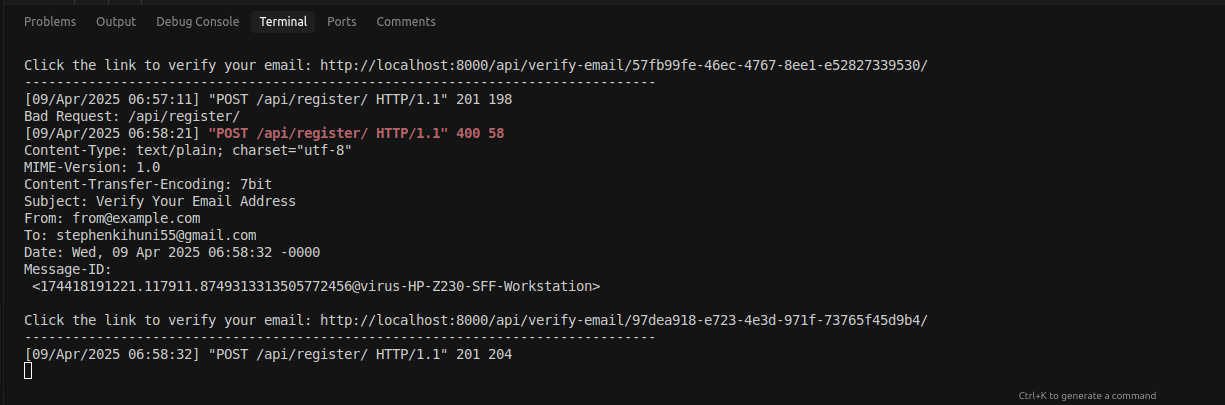
I received a verification email with a link like http://localhost:8000/api/verify-email//.
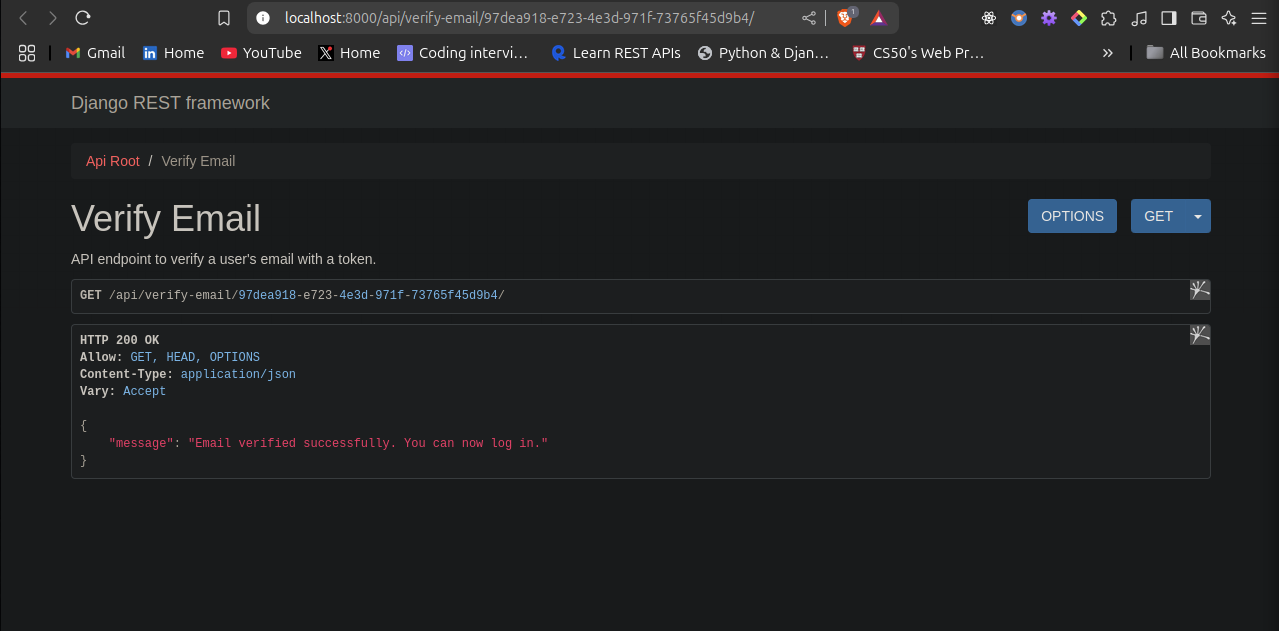
Verify Email (GET /api/verify-email//):
Response:
{
    "message": "Email verified successfully. You can now log in."
}
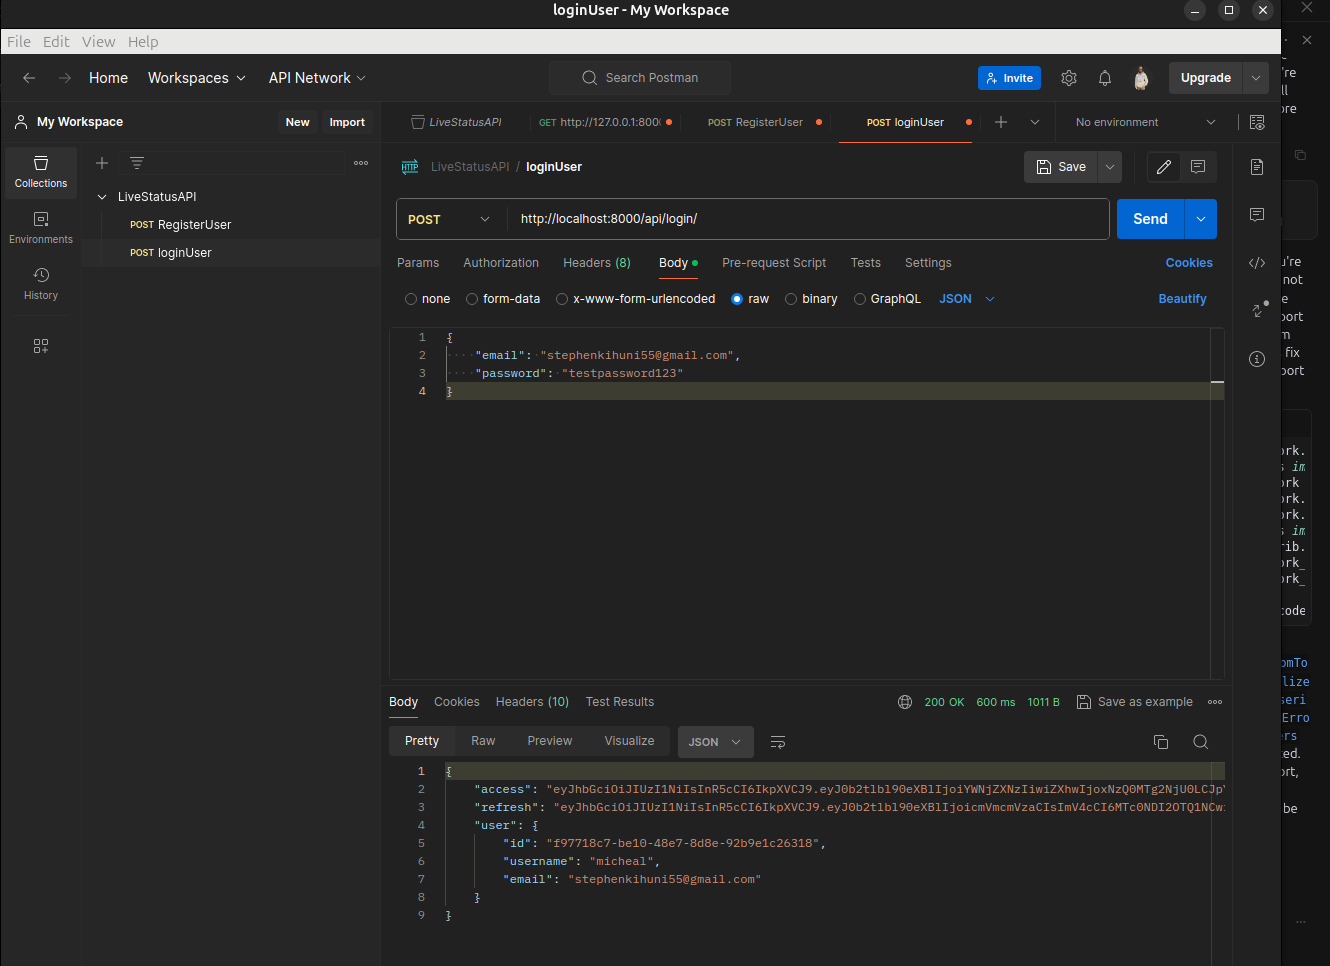
Login (POST /api/login/):
{
    "email": "[email protected]",
    "password": "testpassword123"
}
Response:
{
    "access": "your-access-token",
    "refresh": "your-refresh-token",
    "user": {
        "id": "some-uuid",
        "username": "testuser",
        "email": "[email protected]"
    }
}
Conclusion
This implementation sets a secure foundation for LiveStatusAPI. In future articles, I’ll build on this by implementing features like the GET /users/{userId}/presence endpoint to retrieve user presence data, ensuring it’s protected with JWT authentication. I’ll also add caching, webhooks, and analytics, continuing to use LiveStatusAPI as a case study to demonstrate how these concepts apply in a real-world project.
If you have feedback or suggestions for improving LiveStatusAPI, feel free to leave a comment or reach out on GitHub https://github.com/kihuni/LiveStatusAPI.
