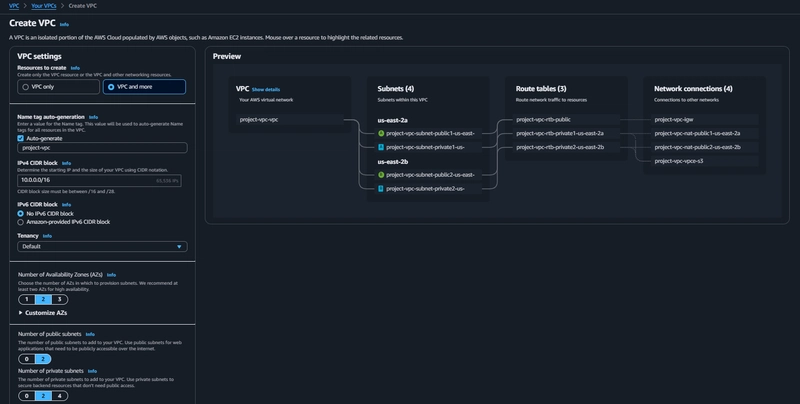
VPC Creation
VPC > Your VPCs > create VPC
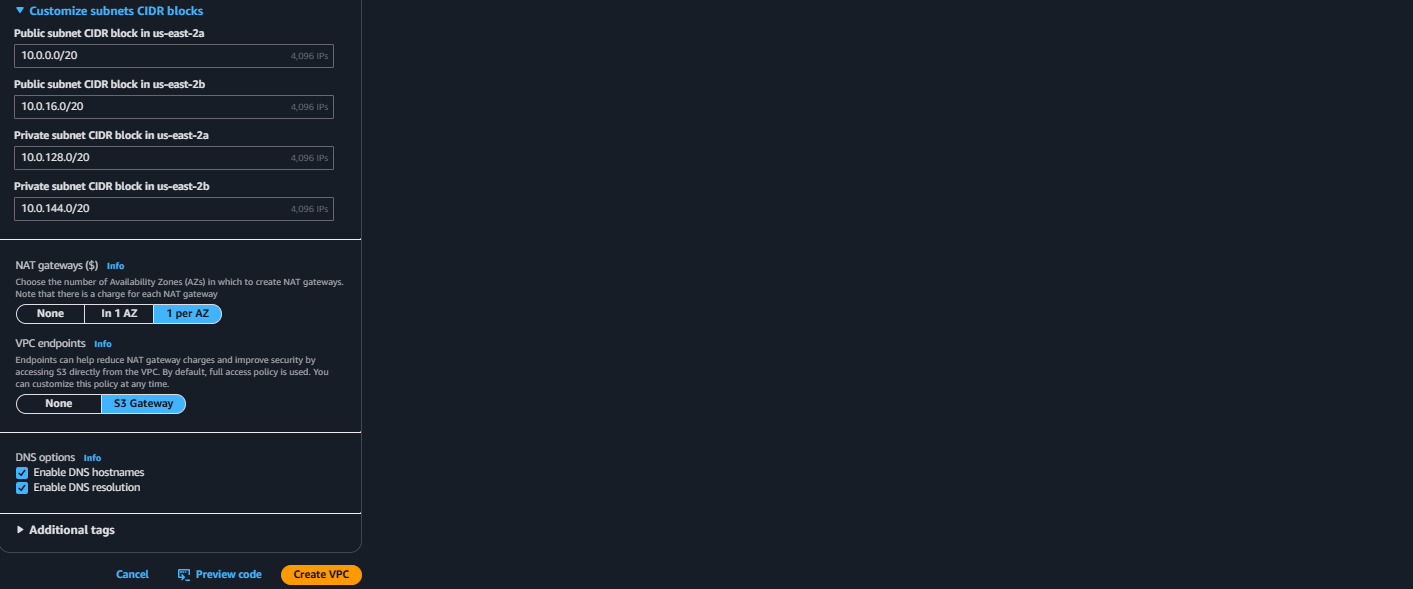
- Select VPC and more
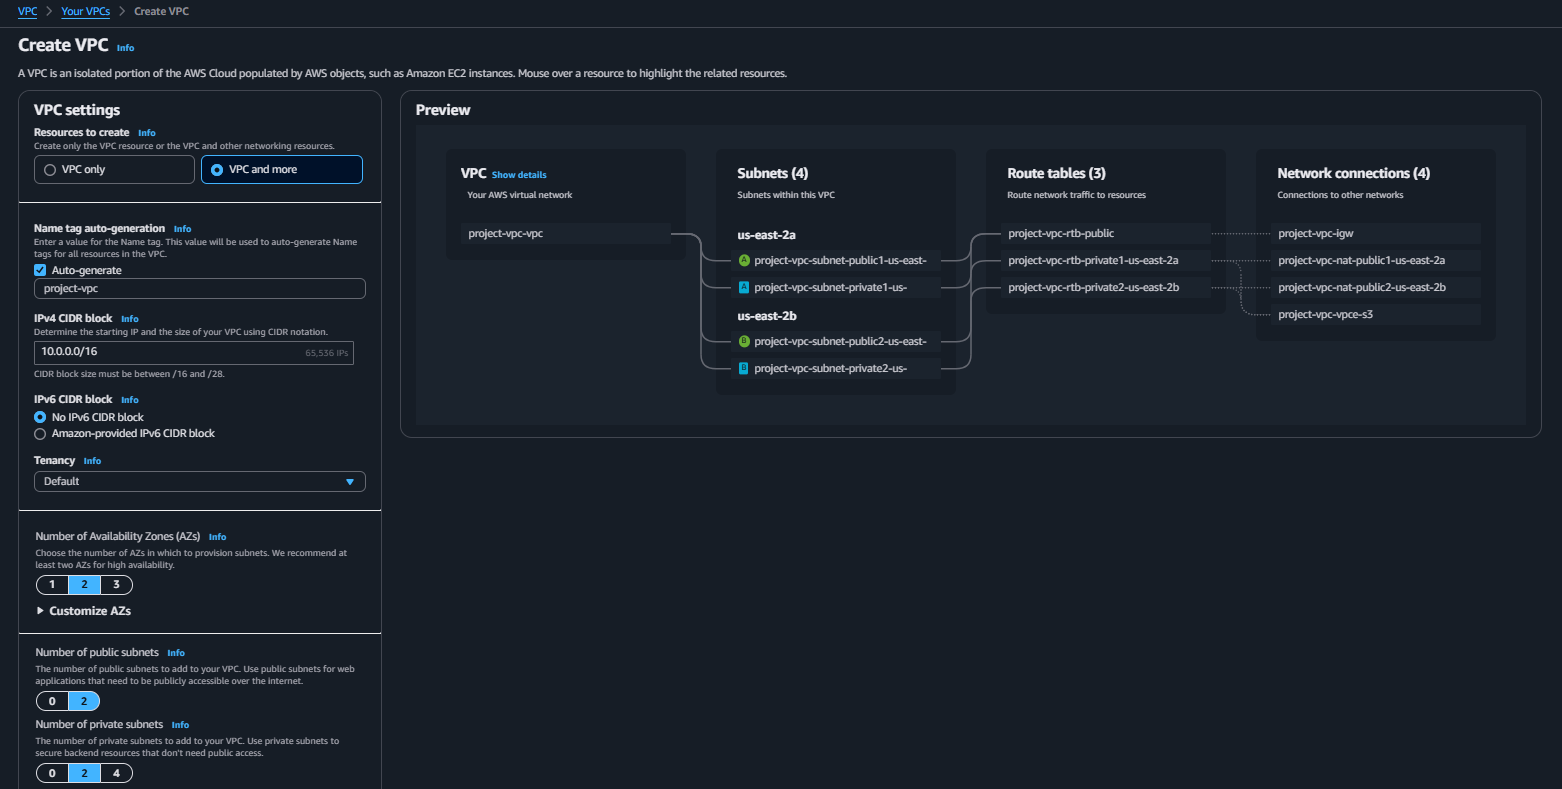
- In the NAT gateways section, select 1 per AZ.
- Click Create VPC.
Security Groups
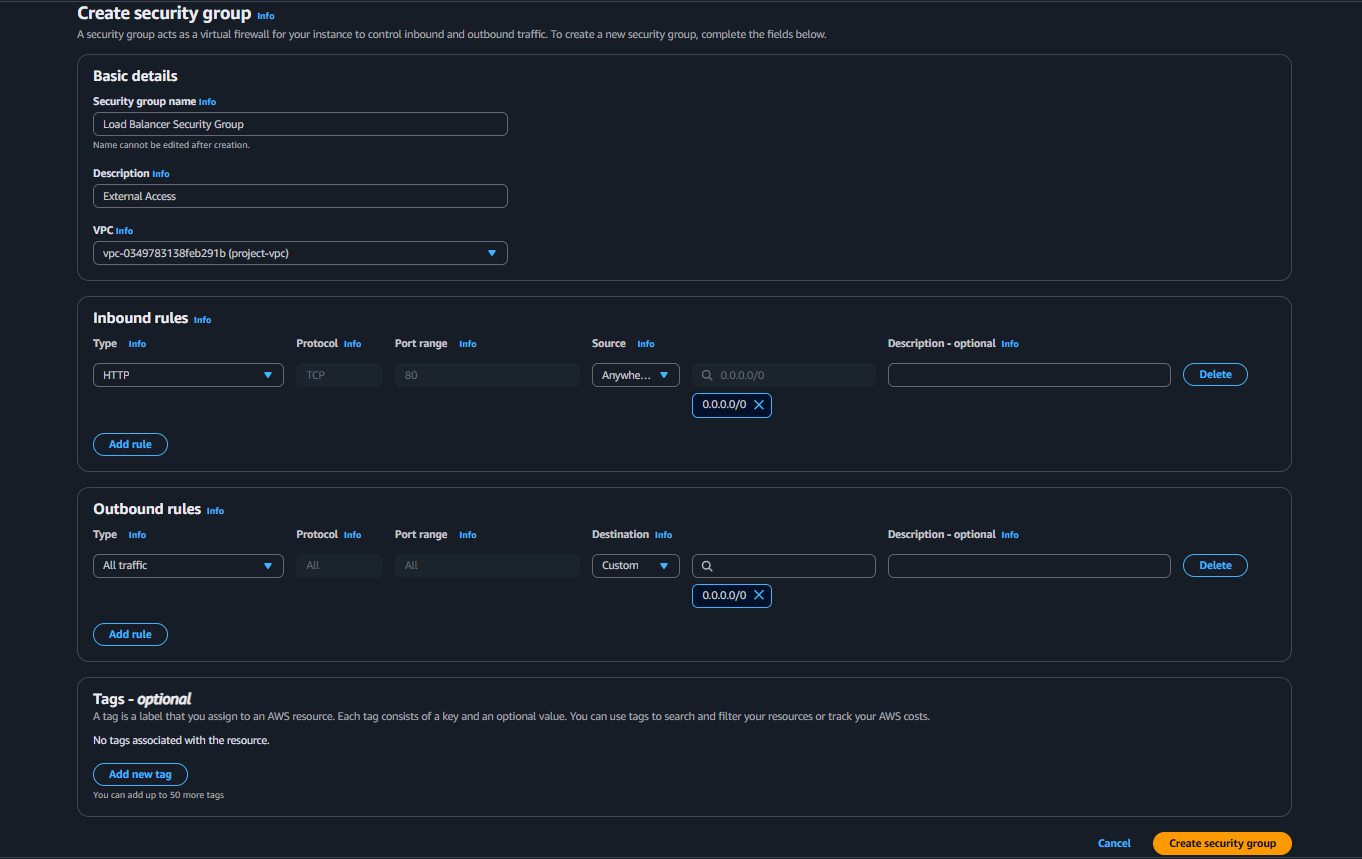
1.Security group for internet facing load balancer
- Click Create security group
- In the Inbound rules section click Add rule and Type: "HTTP", Protocol: "TCP", Port Range: "80" & Source: "Anywhere-IPv4".
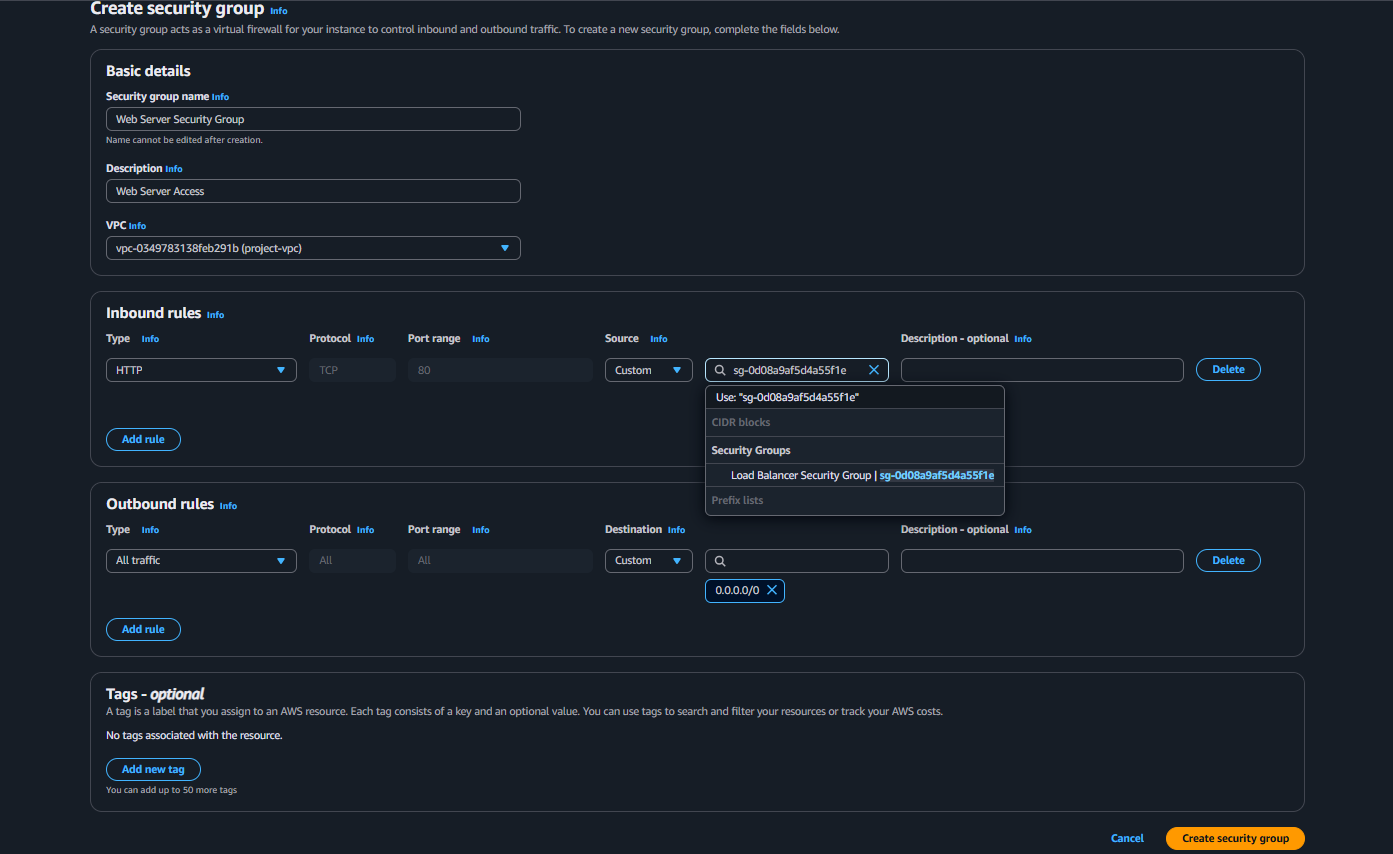
 2.Security group for Web Server
- Click Create security group
- In the Inbound rules section click Add rule and Type: "HTTP", Protocol: "TCP", Port Range: "80" & Source: "Custom" and also select the load balancer security group
Access Management(IAM)
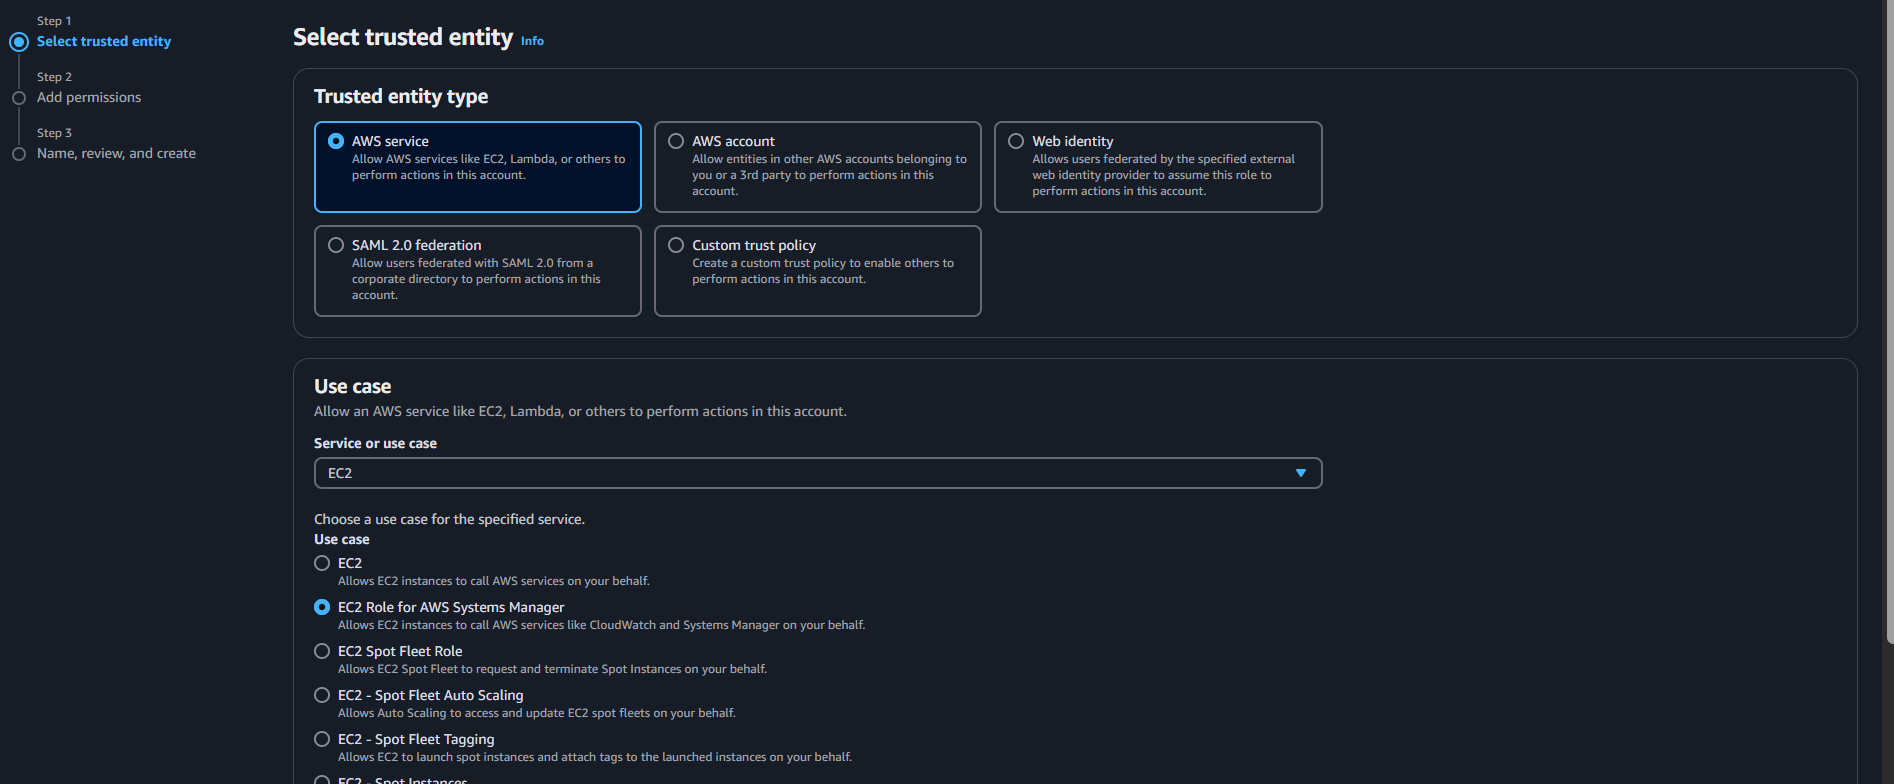
- Create a new IAM role and associate it with the EC2 instance profile for the web server. IAM >Roles > Create role
- Select Roles, click Create role. Select AWS Service. Choose EC2 for the service or use case.
- Select EC2 Role for AWS Systems Manager and click Next
 Confirm that the AmazonSSMManagedInstanceCore policy has been added.
 Name the role and click Create role.
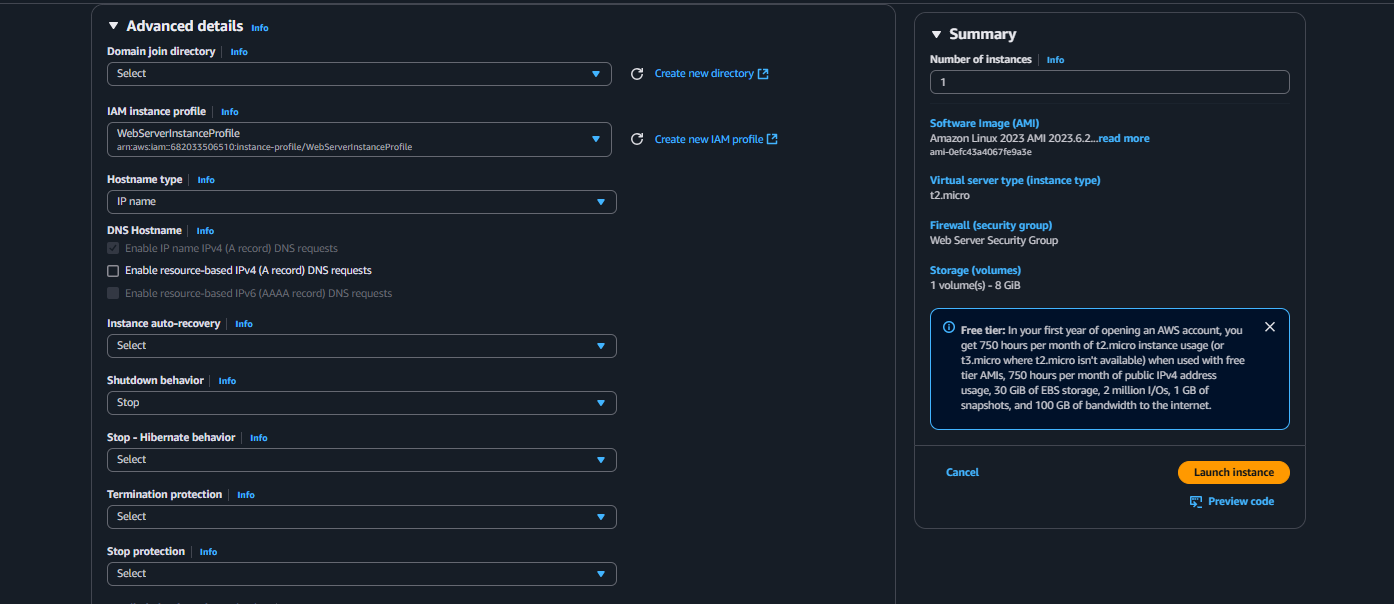
Instance Creation
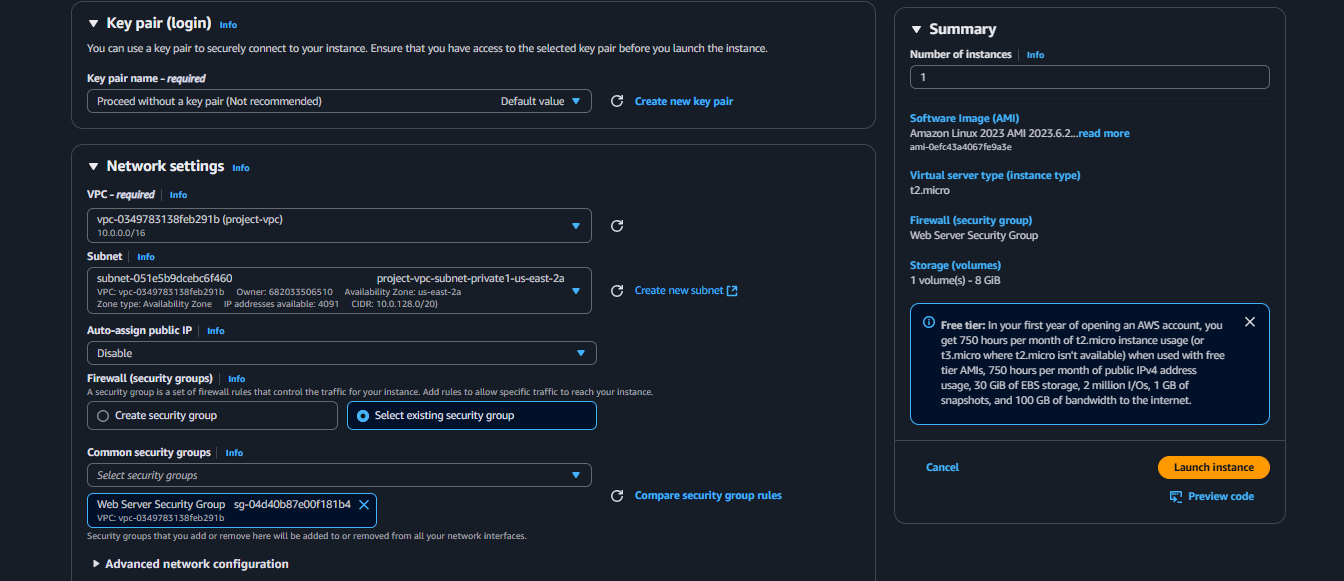
EC2 > Instances > Launch an instance
Name the server
Select the t2.micro instance type

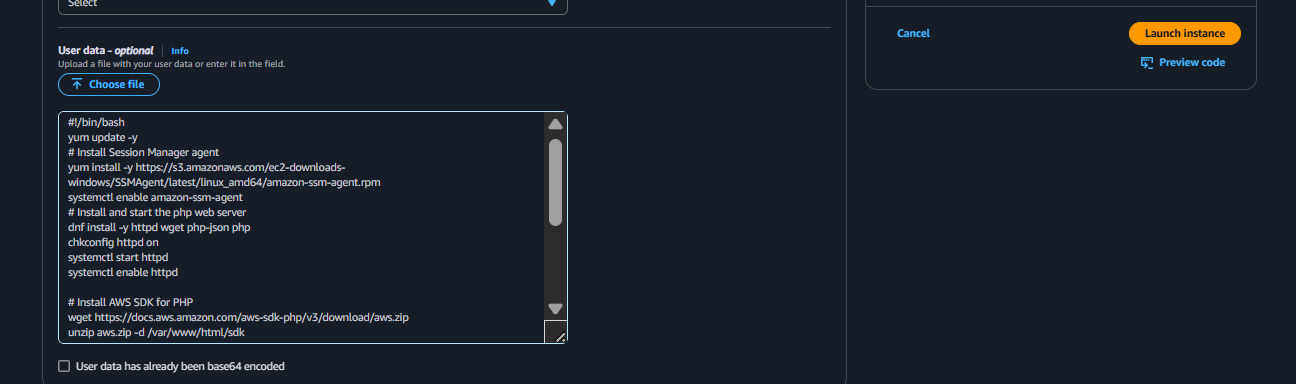
!/bin/bash
yum update -y
Install Session Manager agent
yum install -y https://s3.amazonaws.com/ec2-downloads-windows/SSMAgent/latest/linux_amd64/amazon-ssm-agent.rpm
systemctl enable amazon-ssm-agent
Install and start the php web server
dnf install -y httpd wget php-json php
chkconfig httpd on
systemctl start httpd
systemctl enable httpd
Install AWS SDK for PHP
wget https://docs.aws.amazon.com/aws-sdk-php/v3/download/aws.zip
unzip aws.zip -d /var/www/html/sdk
rm aws.zip
Install the web pages for our lab
if [ ! -f /var/www/html/index.html ]; then
rm index.html
fi
cd /var/www/html
wget https://ws-assets-prod-iad-r-iad-ed304a55c2ca1aee.s3.us-east-1.amazonaws.com/2aa53d6e-6814-4705-ba90-04dfa93fc4a3/index.php
Update existing packages
dnf update -y
SSM
Ensure the web server instance is still selected and click Connect.
Select the Session Manager tab and click Connect.

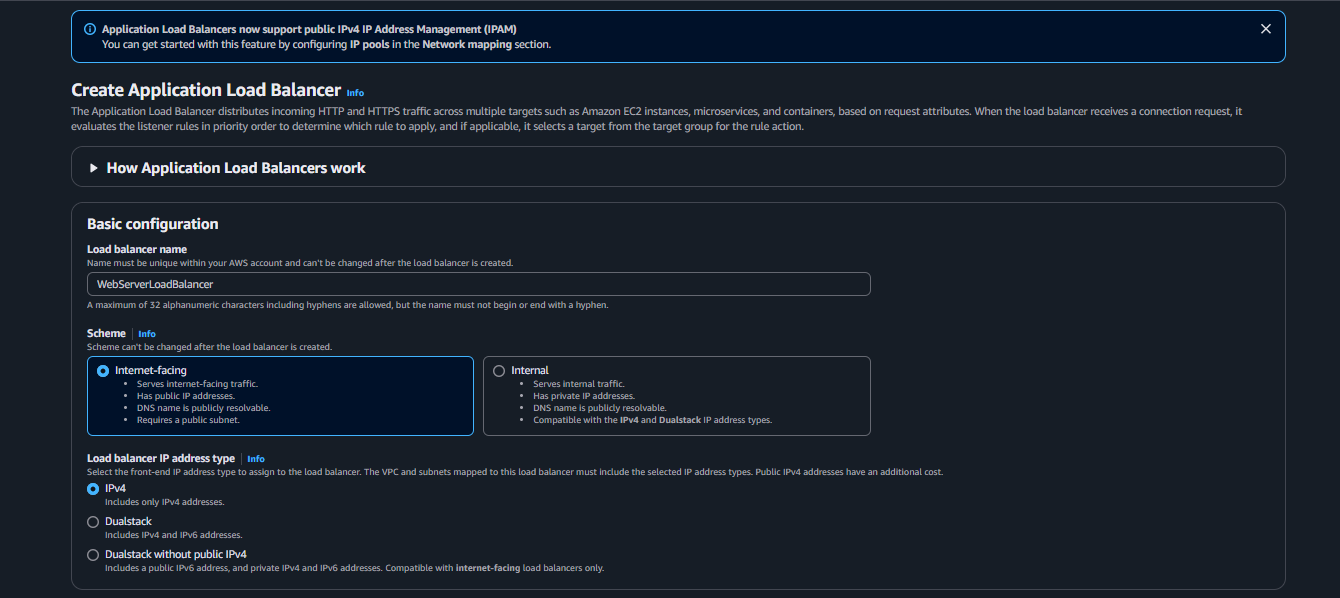
Load Balancing
EC2 > Load Balancing > Load Balancers > Create load balancer
- click Create Load Balancer
- We'll be using an Application Load Balancer for our HTTP traffic so click the create button for that option.
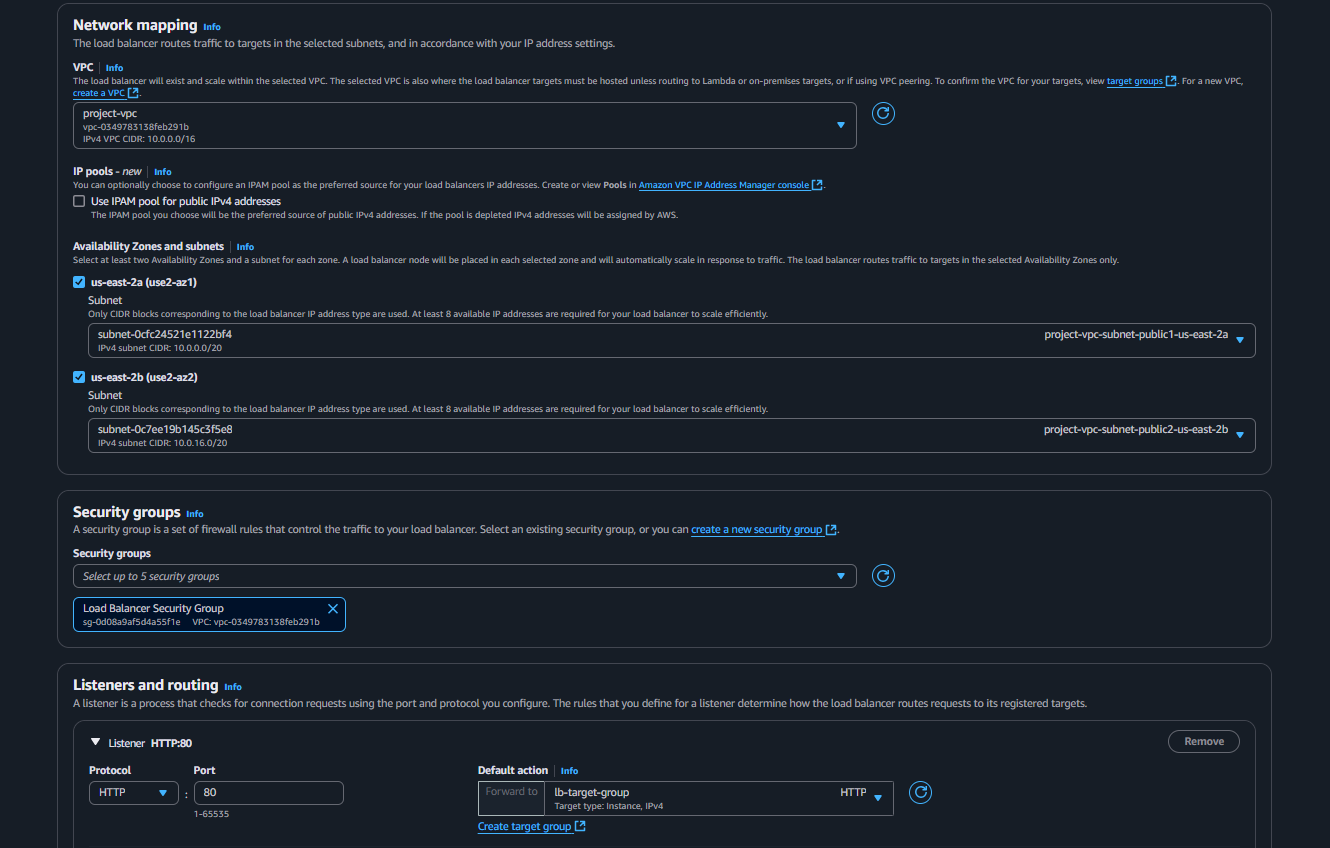
- After giving the load balancer a name, be sure to select Internet facing
- Select the correct network configuration for VPC and private subnets.
- Select the security group we created for this internet facing ALB. Now, this ALB will be listening for HTTP traffic on port 80.
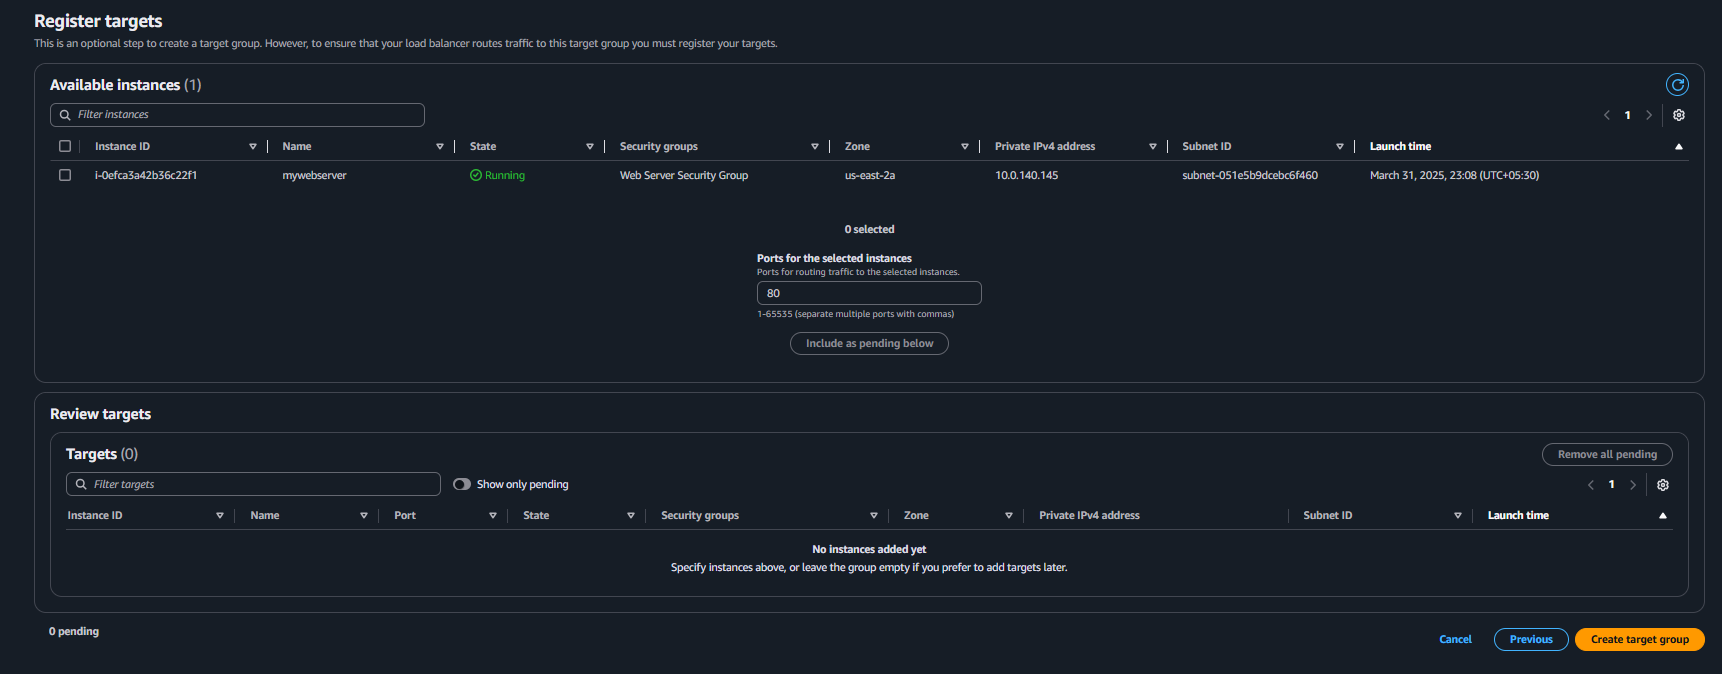
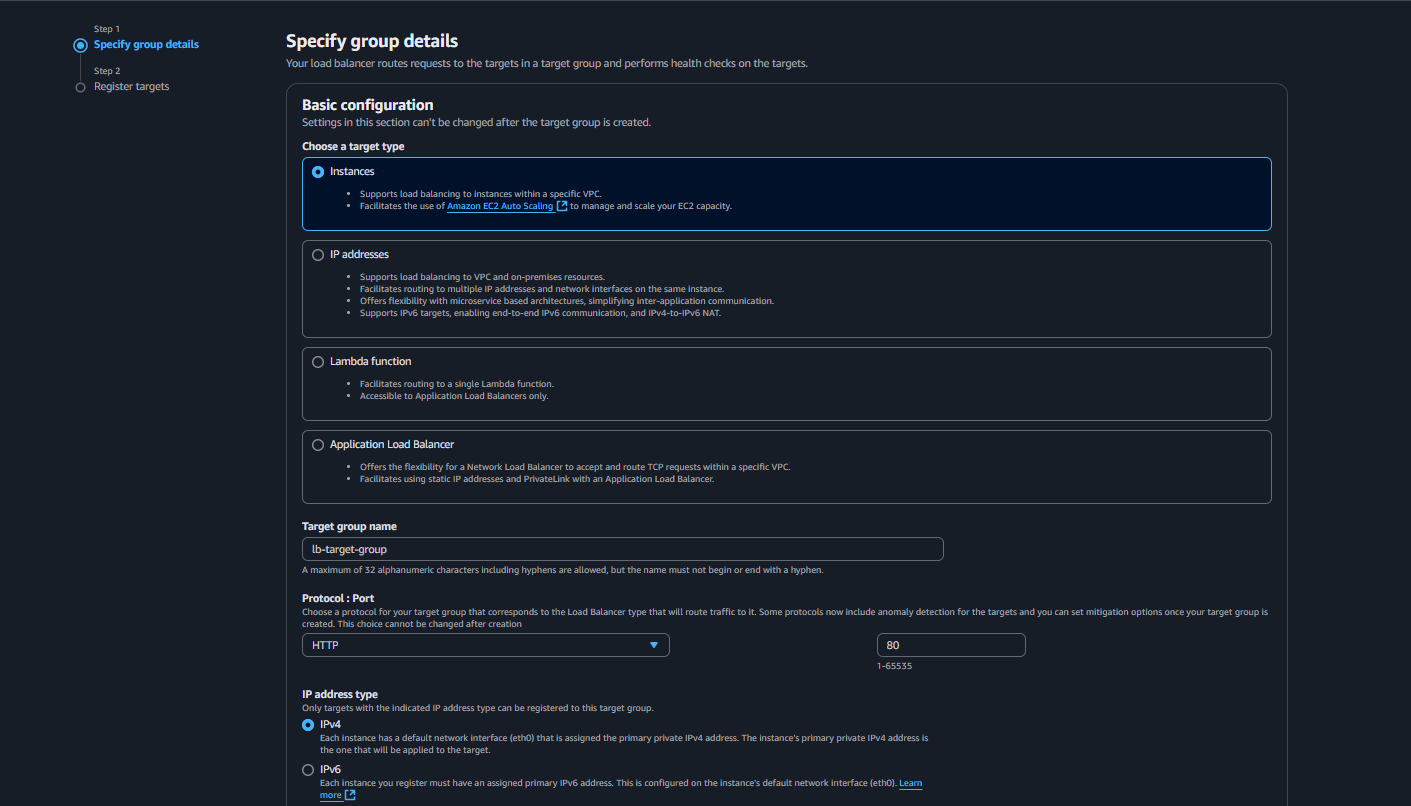 Create a Target group
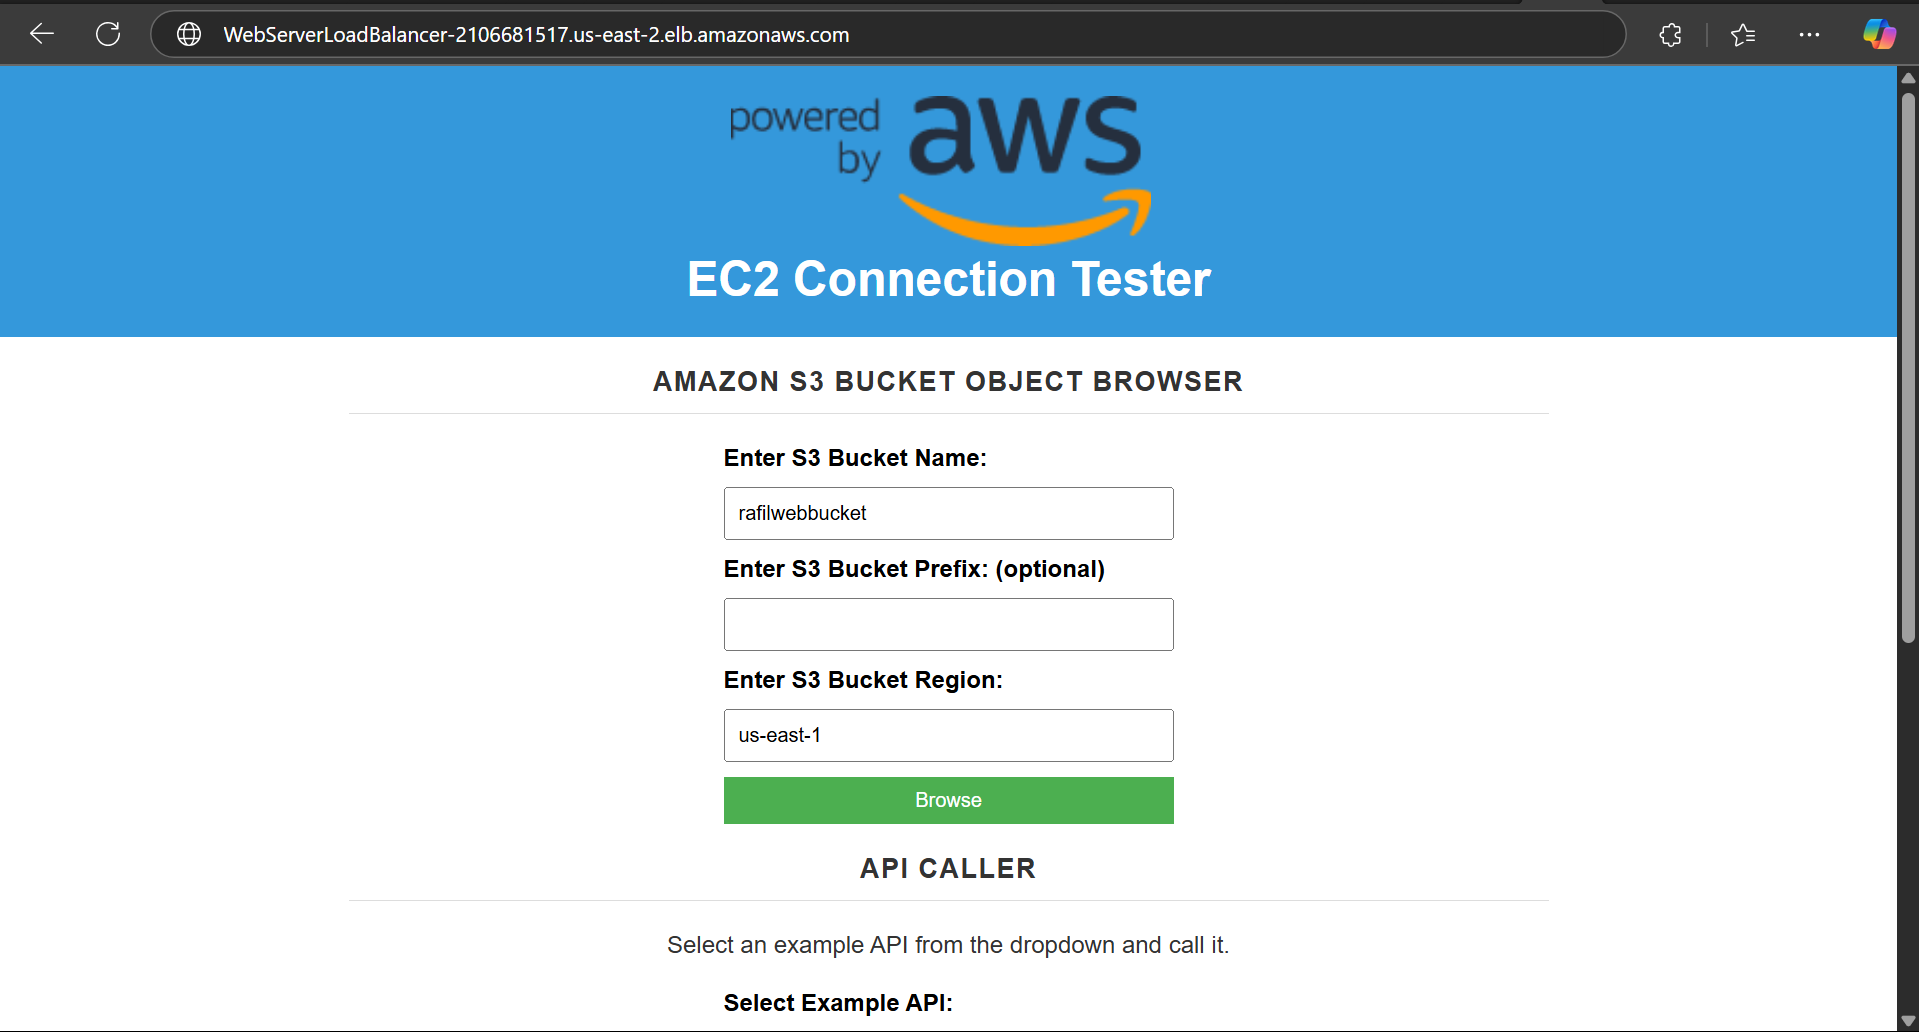
Testing
- Copy the DNS name from the Load Balancer page and paste it into a new browser tab.
- Please open new tab, type http:// and the paste copied DNS name.
S3 Bucket Creation
Click Create Bucket
Give the S3 bucket a fun and unique name
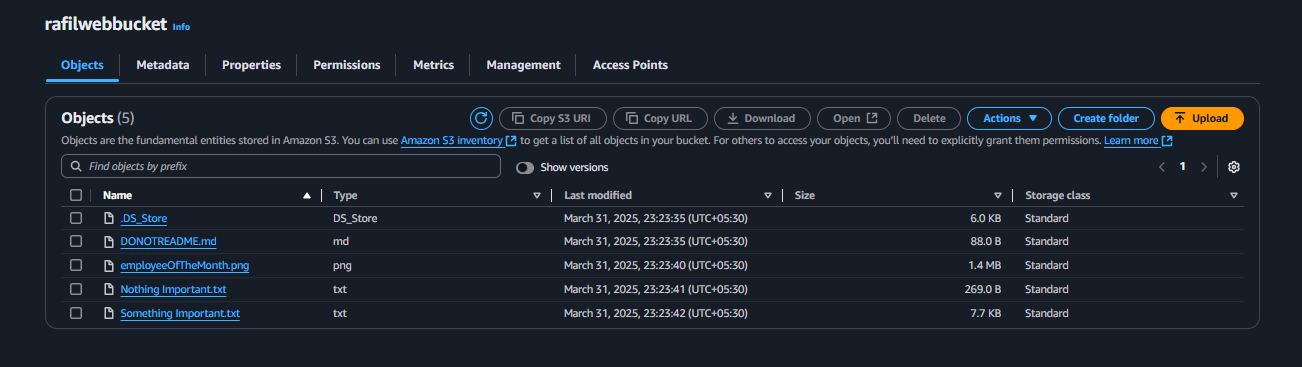
 Next, let's upload some files to the bucket
Use the S3 console to upload the files you downloaded. Click Add files and select all the unarchived files.
 Switch back to the website and enter the bucket name and region in the provided fields.