Here’s a quick backstory. I wanted a GitHub CI action that kicks in whenever I create/re-open a PR, scans the code changes, and checks if the new code I’ve pushed follows a set of custom rules defined in the ai-code-rules folder at the root of the repo, where each rule lives in its own .md file created by me.
If any rule is broken, the CI should automatically drop a comment on the PR with the issue, a clear explanation, suggested code fixes, test cases (if needed), and a link to the rule file that was violated.
This use case originally came up through a challenge by the team at Jump—and I liked the idea enough to build my own take on it. Here’s how you can do the same for yourself or your organisation!
Quick heads-up: The purpose of writing this article is to guide you through the process and not providing you code for each and everything step by step. I have added the GitHub repo of the 'full working code' at the end of this article for that, so enjoy!
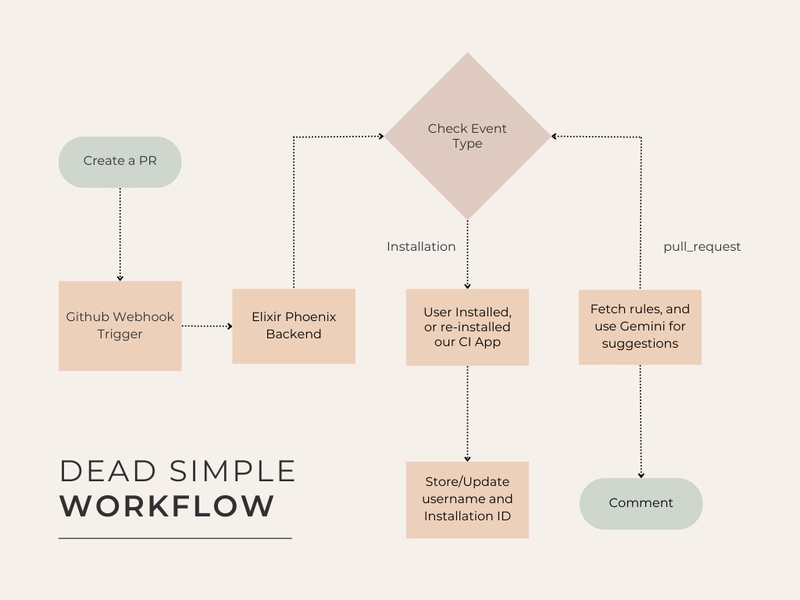
Level 0: Workflow Overview
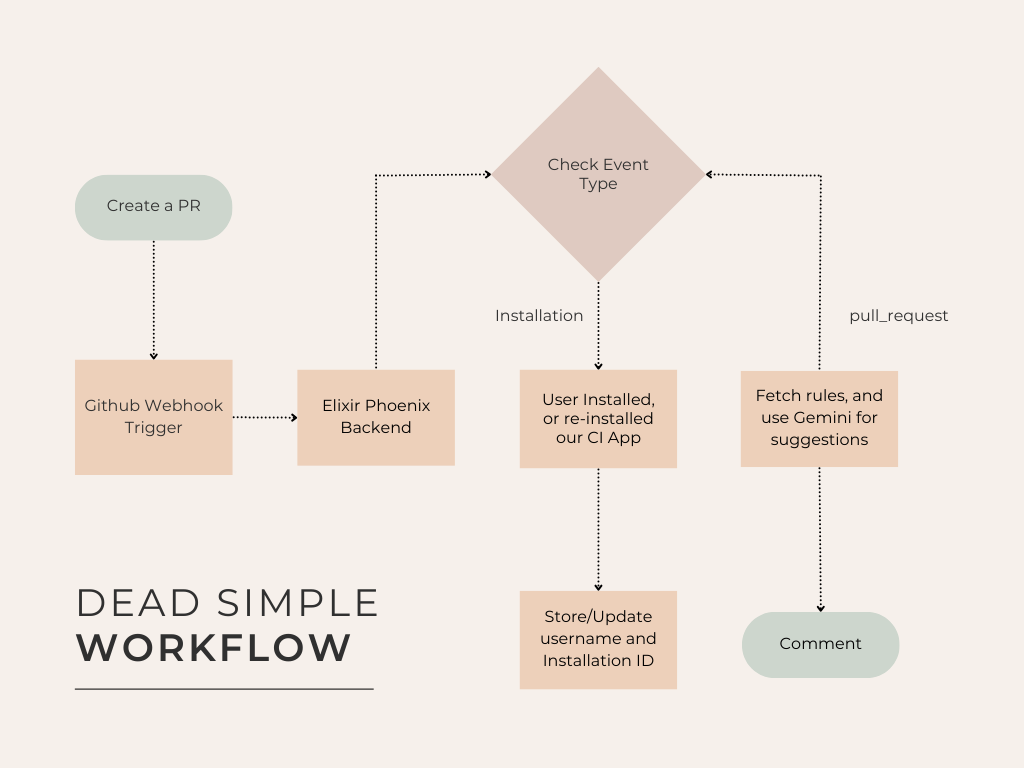
Nothing crazy, right?
Level 1: Registering our GitHub Application
To create a new GitHub Application, go to github.com/settings/apps/new and fill up all the basic details (leave the callback and webhook URL empty for now).
Now, we will be having two parts to setup:
- Permissions (for access to GitHub API on behalf of user), and
- Events (webhook triggers)
Under Permissions > Repository permissions, select read/write for:
- Contents
- Discussions
- Issues
- Metadata (by default)
- Pull requests
- Webhooks
And under Permissions > Organization permissions, select read/write for:
- Webhooks
For Events, select:
- Installation target
- Pull request
- Pull request review
Now add a secret key for your GitHub app and hit save! Then go to your newly created Application and copy your App ID, download the PEM file (your app's private key), and let's move on to the next step.
Level 2: From Zero to Phoenix
(Assuming that you already have Elixir set up on your machine), use the following command to create a new Elixir Phoenix app with boilerplate:
mix phx.newDone??? Cool! Let's create our webhook POST endpoint.
Firstly, update your route.ex to this:
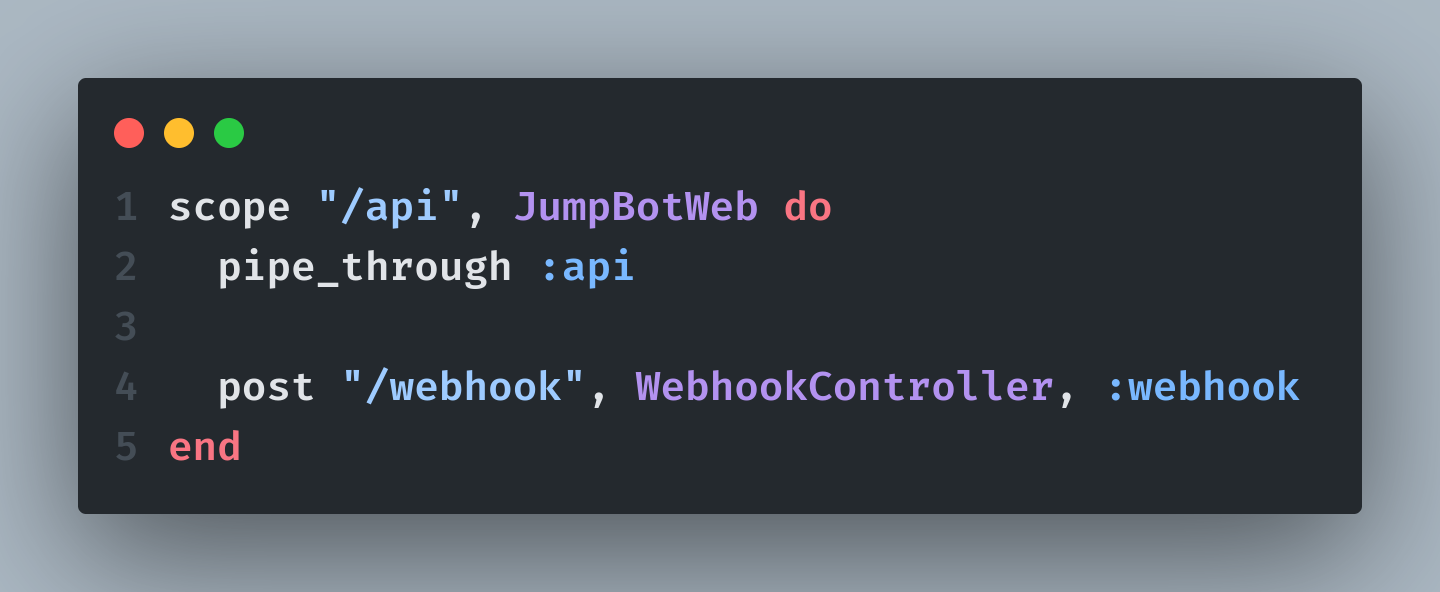
Now let's create a webhook_controller.ex file inside our lib/your_app_name_web/controllers/webhook_controller.ex and write a webhook() function to check if the trigger is working or not.
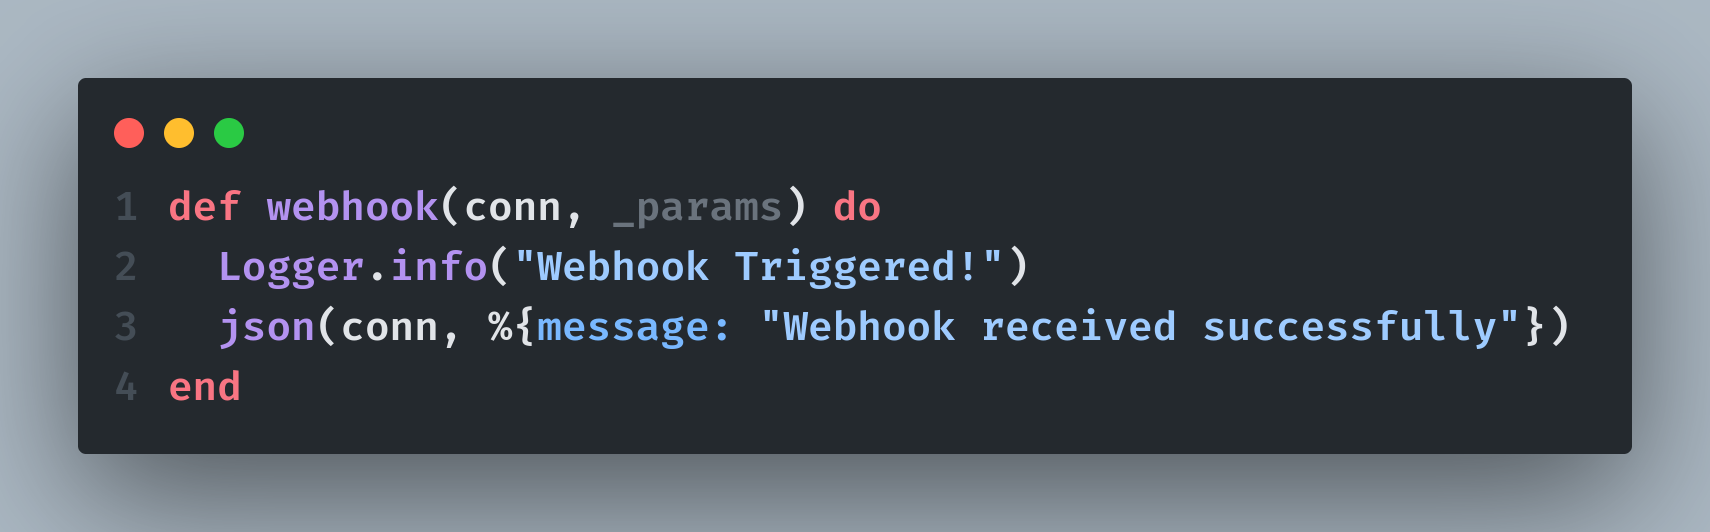
To run our phoenix application, use the following command:
mix deps.get (if running for the first time)
mix phx.server
Andddd... our webhook is up and running!
Well—locally, at least. But GitHub doesn’t know that as it can’t reach our machine through localhost, so we need a way to expose it. Sure, deploying the service would solve this, but that’s overkill for now. Instead, let’s use reverse tunneling with Pinggy to make our local webhook publicly accessible (for an hour—that's what you get for free).
Type the following command in your terminal and copy the new https link it generates:
ssh -p 443 -R0:localhost:8000 [email protected]Perfect! Now add the copied link to your webhook, and callback URL which we left blank earlier, and hit save.
Now anytime a user installs our GitHub App, we'll receive events on PR requests being opened/re-opened to our Webhook.
Level 2: Trust, but Verify (Those Webhooks)
Now that we have setup our webhook, we have to verify it. Verifying webhook requests ensures they're genuinely from GitHub and not some random bot hitting our endpoint. It’s a simple way to protect your system from spoofed or malicious calls. To verify our requests we would need to check:
- Signature Header (
x-hub-signature-256) - Event Type (
x-github-event)
Every time GitHub hits our webhook, we must verify the request’s authenticity using the signature header and our GitHub secret (remember setting that up while creating the app?).
But there’s a catch: GitHub signs the raw request body, and in Phoenix, if you read the body using Plug.Conn.read_body(), it's a one-time thing—you consume it, and then it's gone. That’s a problem because we still need to parse the body into JSON after verifying the signature. Classic Phoenix quirk.
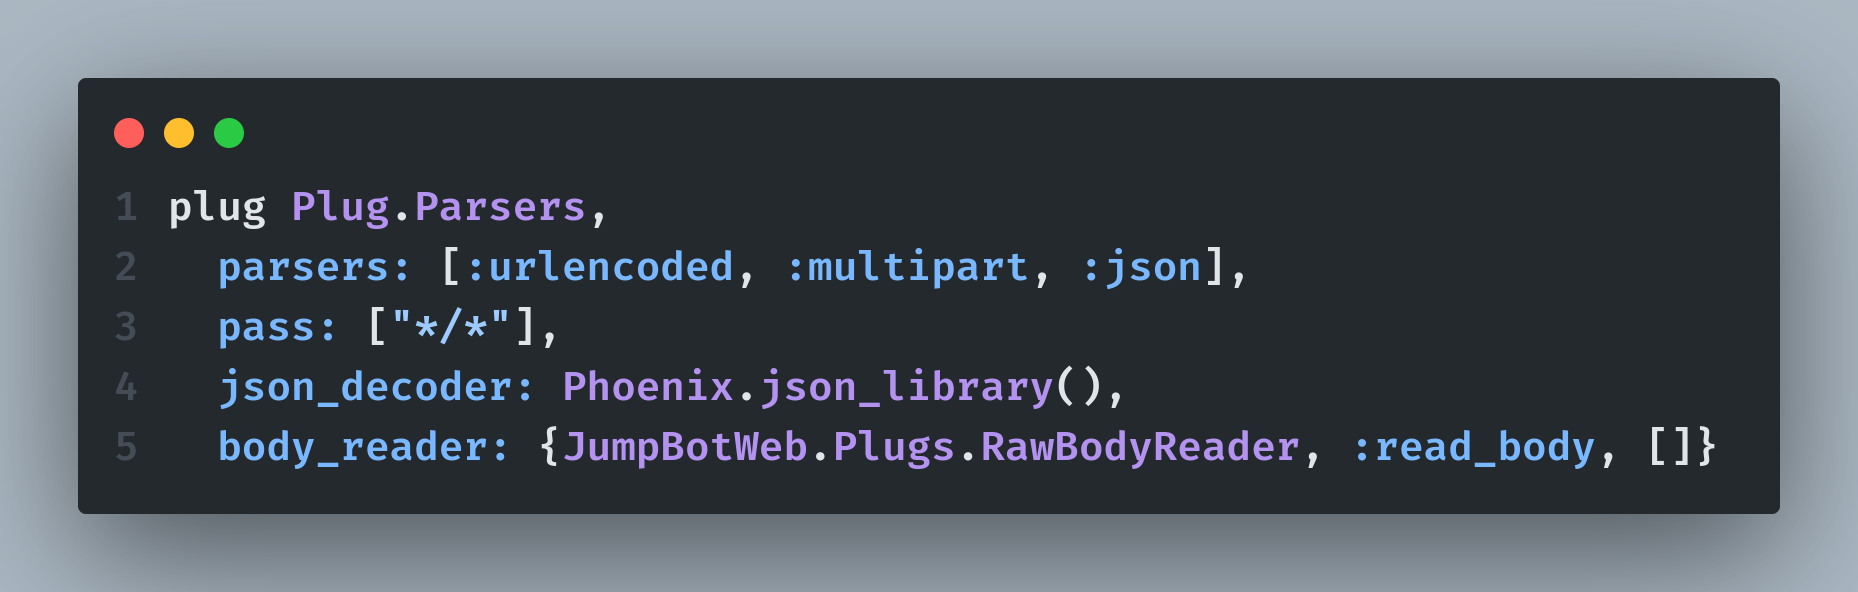
The fix? We take control of body parsing by customizing the Plug.Parsers pipeline using a :body_reader. This lets us intercept the body before it’s consumed, cache it, and make it available downstream however many times we want.
Here's what’s happening under the hood:
- Our custom
body_readerreads and stores the raw body. - We stash it in
conn.assigns[:raw_body]. - Now both our signature verification and
JSONparsing work without stepping on each other!
Neat, right? Now you can safely call conn.assigns[:raw_body] anywhere down the pipeline as many times as needed.
Here's the function code for caching requests and passing it downstream:
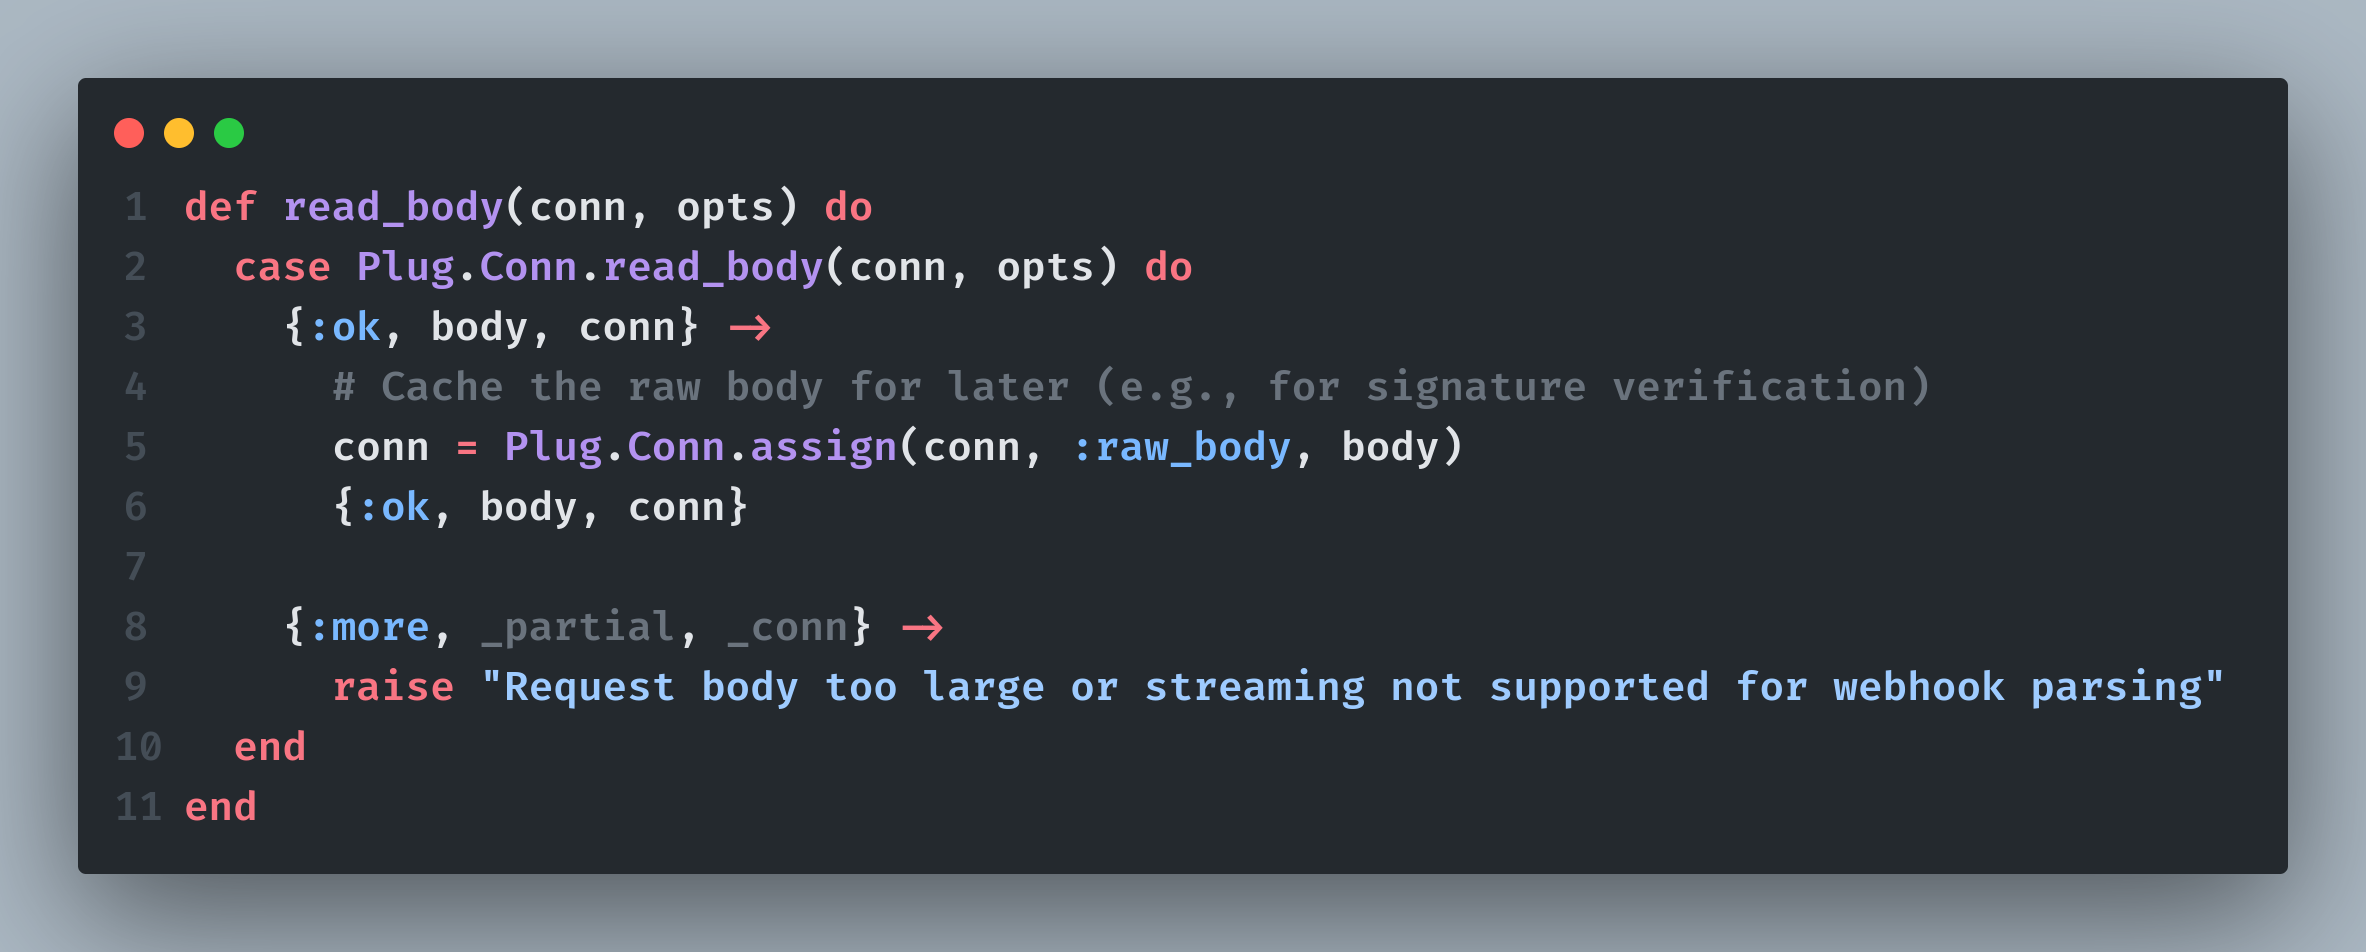
Cool! Now we can simply read raw_body by doing conn.assigns[:raw_body] as much times we want.
Now we can safely move to signature verification:
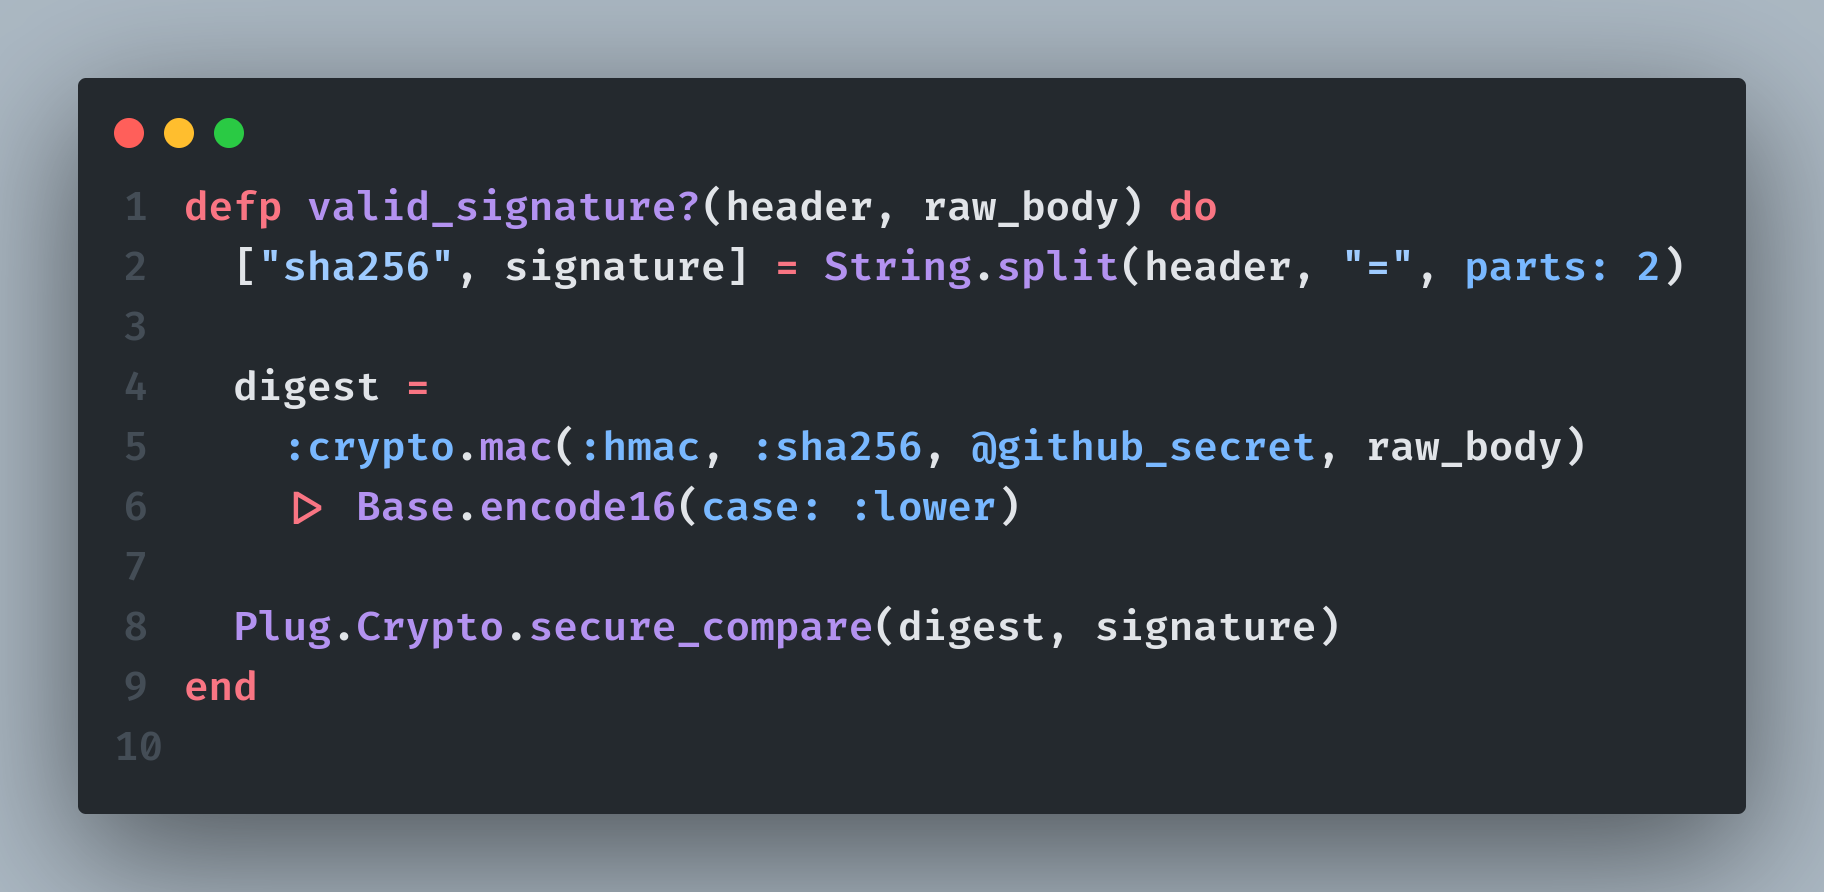
The way this function works, is that:
It extracts the hash algorithm and signature from the
X-Hub-Signature-256header (usually formatted likesha256=abcdef123)Then it recomputes the
HMACdigest of the raw request body using:crypto.mac(:hmac, :sha256, @github_secret, raw_body). This uses your shared webhook secret@github_secretandSHA-256to match GitHub's hashing method.Finally it compares GitHub's signature with your own digest.
If all of this is checked then only we should let the request be processed. Otherwise, discard.
Level 3: Handling Webhook Events
We want to monitor two types of events here:
- On Installation/Re-installation of our GitHub App
- PR creation/re-opening
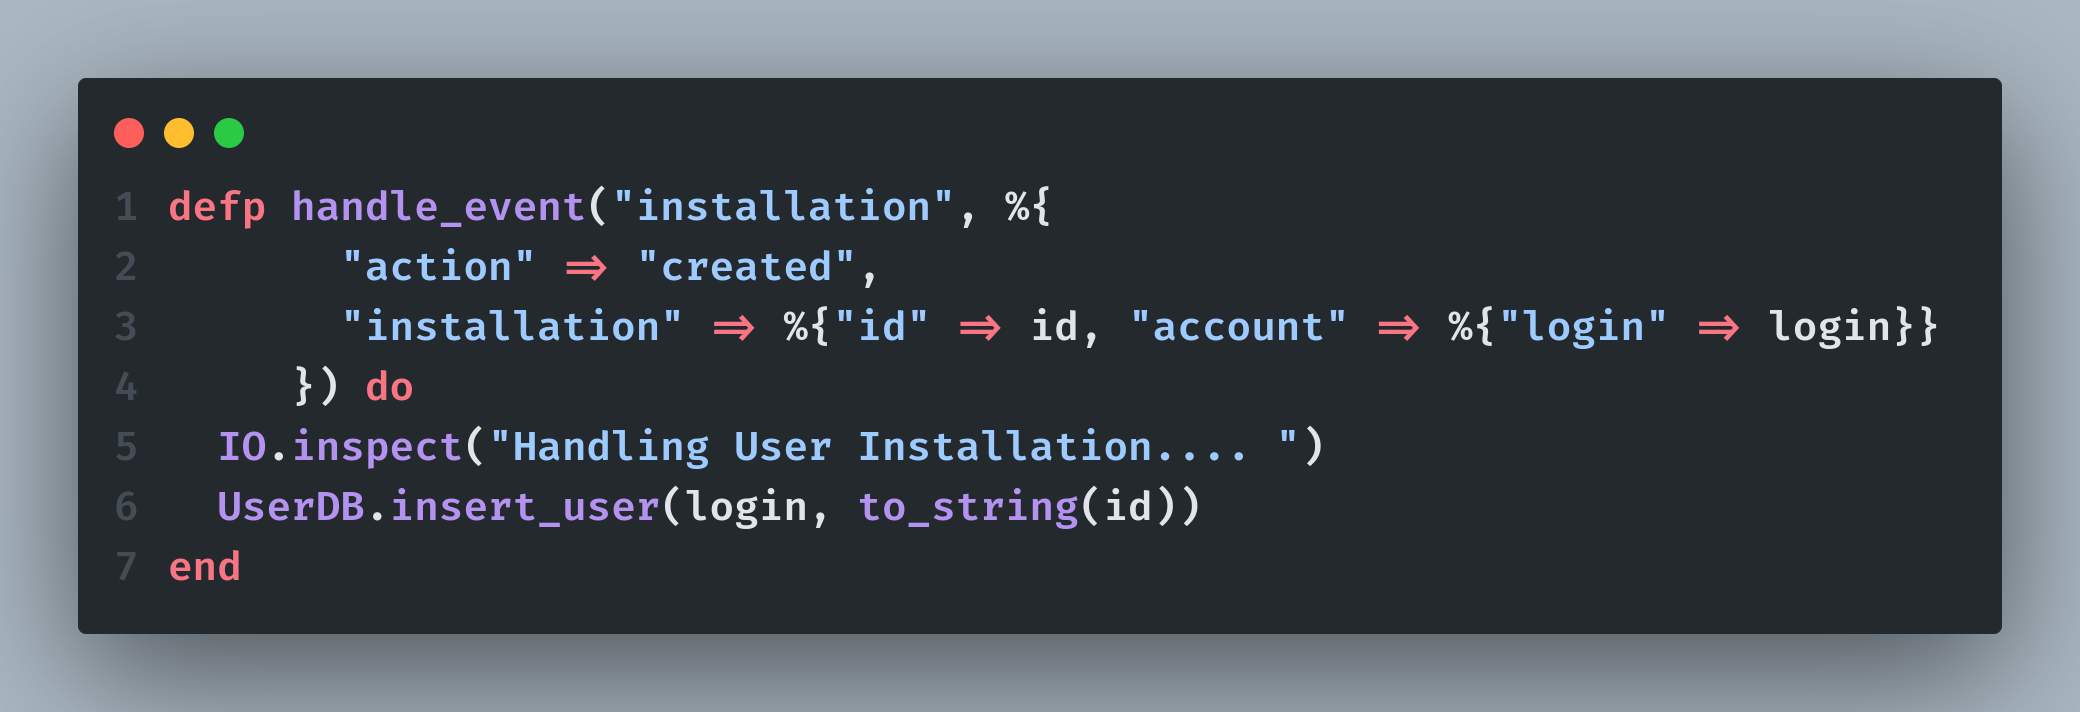
On installation event, we will be storing username with their respective installation ID extracted from request body, in our database.
Wait, but why?
Because in order to make any API requests to GitHub (like adding a comment, or reading a private repo of a user), we would need a access token, and to generate access token, we need installation ID with us, and that's why it is important. Here's how to do it:
Okay, installation event is checked, now handling PR request is remaining. Here's the process:
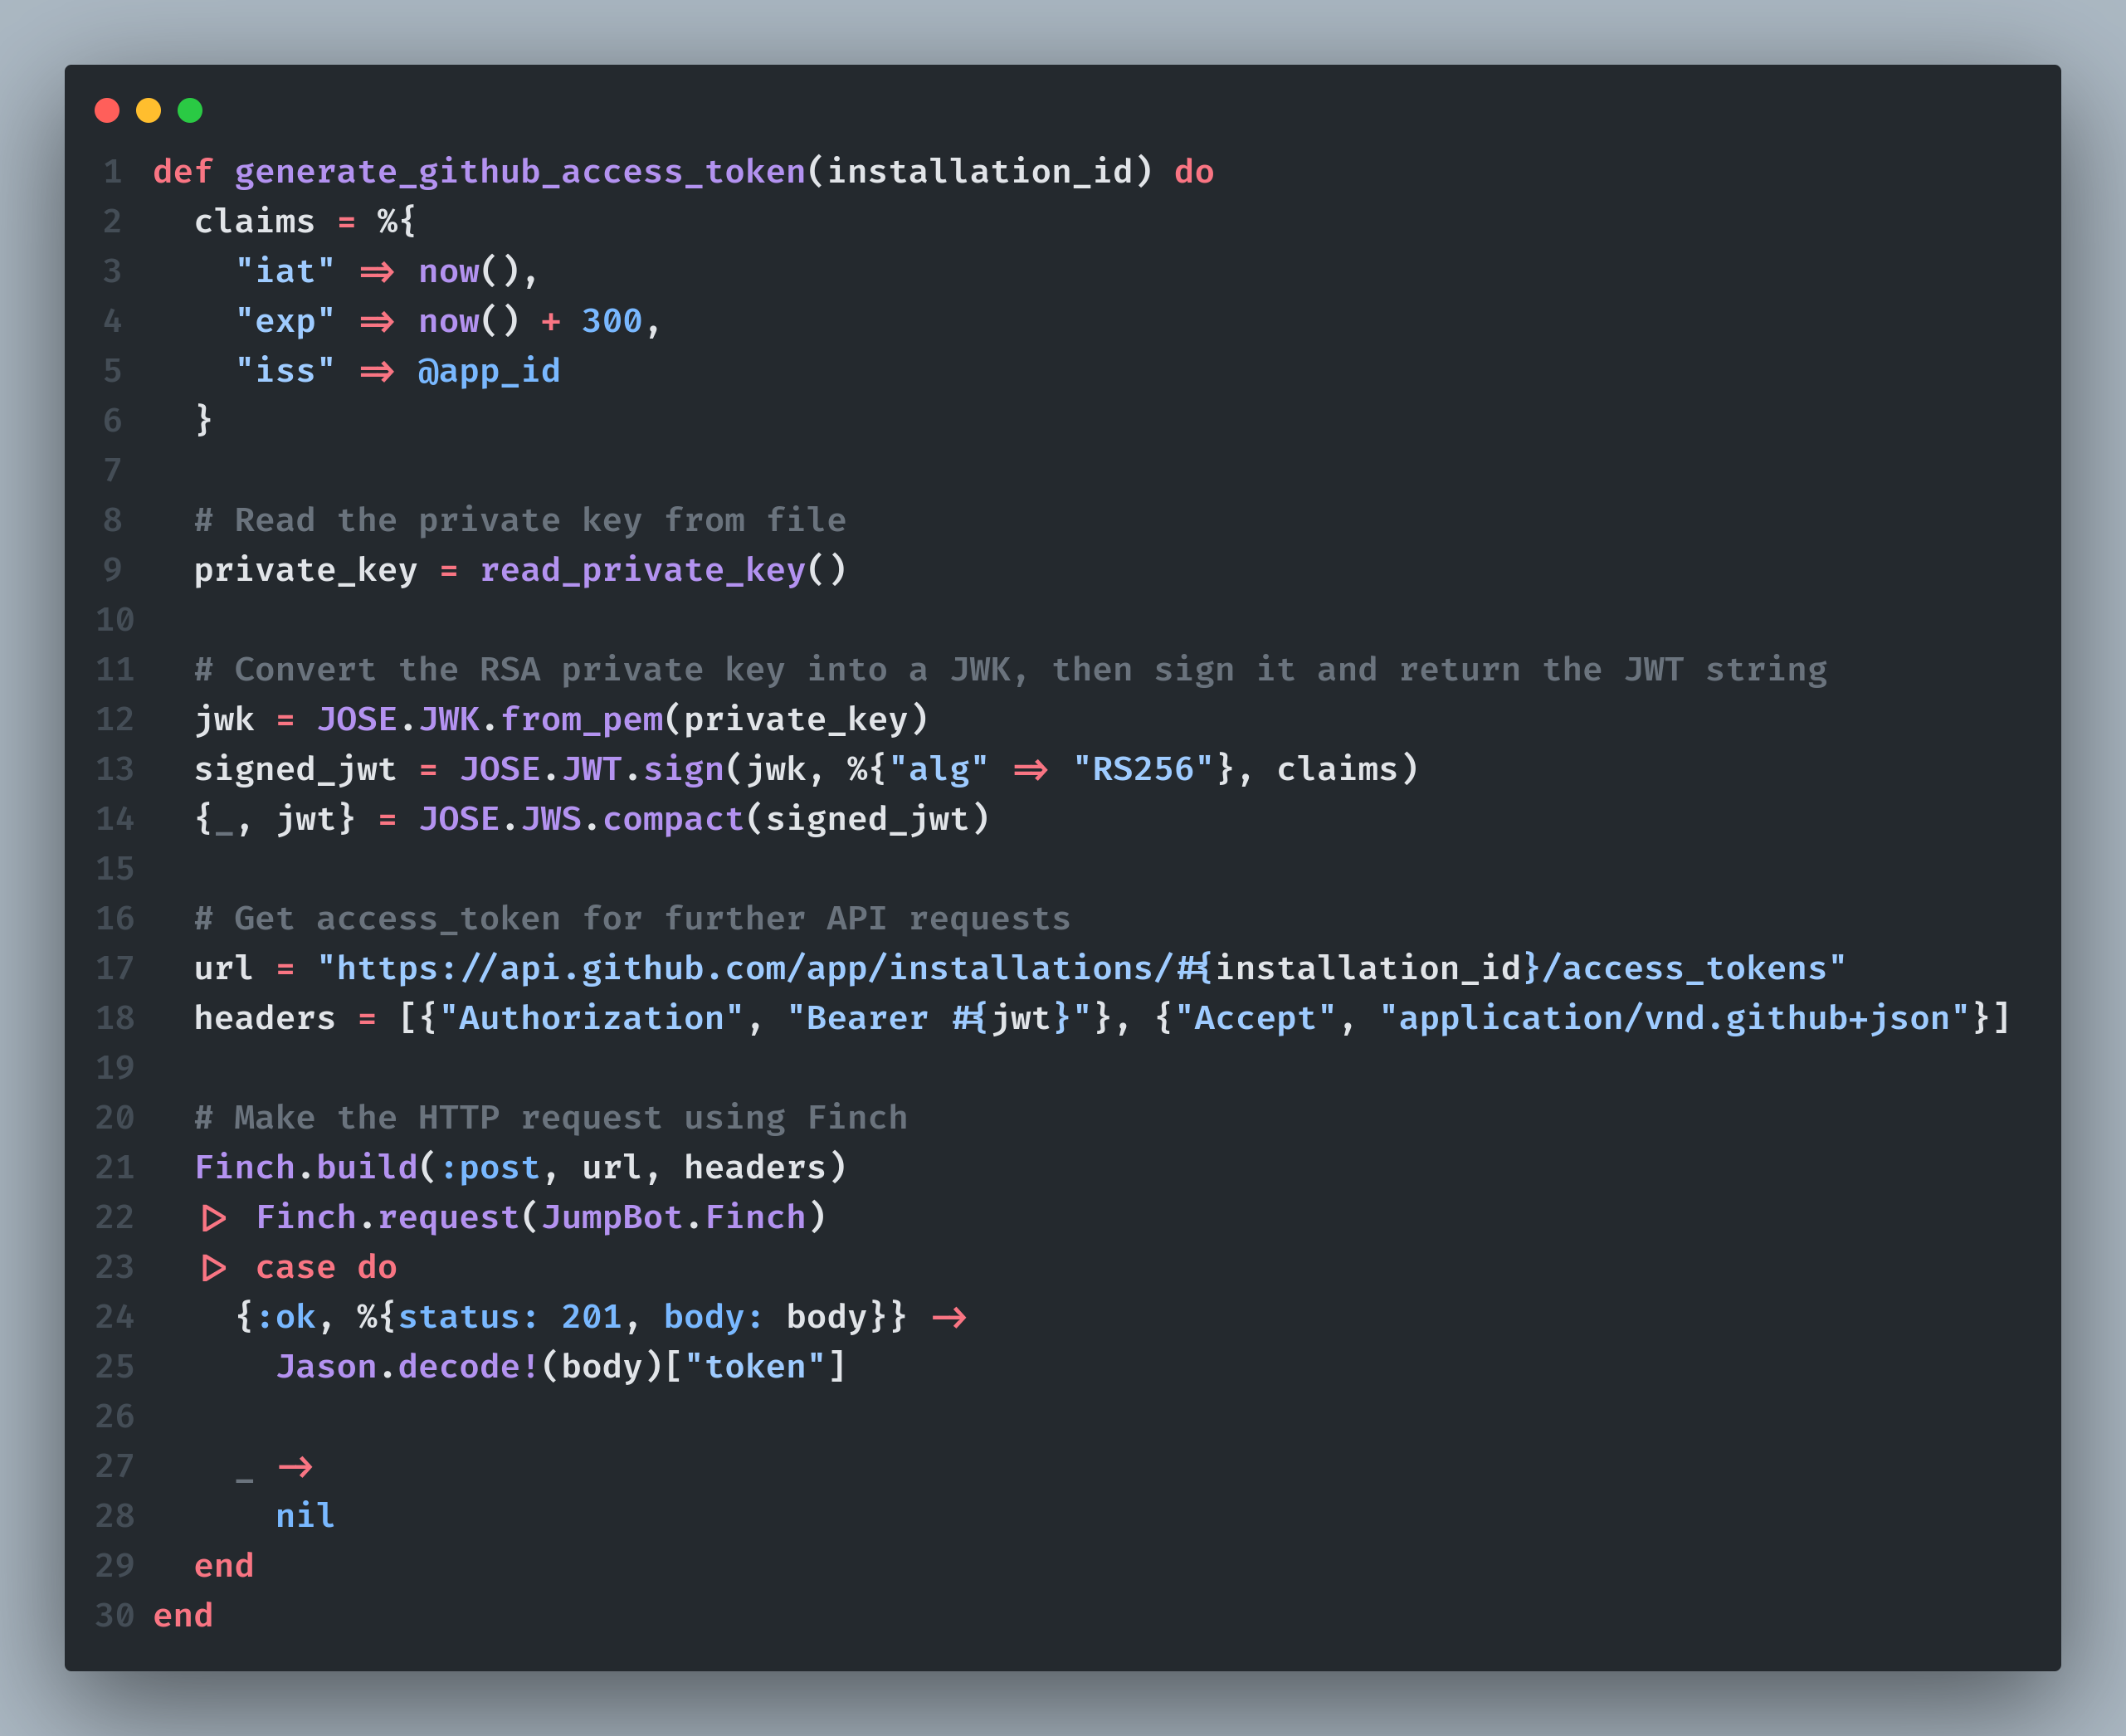
- Whenever a user creates a PR, your webhook would capture it and you'll get the username from the request body itself. From that, you can search for username and get
installation_idfrom database. - Use that
installation_idto generate GitHub access token - From that access token we can further perform actions like reading a PR code diff or adding a comment.
Here's how it would look like in code:
Phew...
Let's get to the last part, which is reading the PR data. You'll have to feed repo_full_name, base_sha and head_sha to the URL which you can extract from the webhook request body itself and you'll be good to go. Here's how the endpoint will look like:
https://api.github.com/repos/#{repo_full_name}/compare/#{base_sha}...#{head_sha}Level 4: Getting the rules right!
Now that we got the code segment we need from our PR request, we have to fetch the rules folder and read each rule from .md files. The way we do it, is that we send a request to this endpoint:
https://api.github.com/repos/#{repo}/contents/ai-code-rulesThen we check if ai-code-rules is a folder or not by confirming if it is a list[]. If it is, then we get all the files inside it in a loop and then fetch the base64 code for file contents of each file and return all rules like so:
[
  {'rule01.md': 'Don't over comment'},
  {'rule02.md': 'Format properly'},
  {'rule03.md': 'Use camel casing in function names'}
]
Here's how it looks like:

Level 5: Turning Markdown Rules into AI-Driven Code Reviews
I’ll get straight to it—Gemini is cheap and generous, especially compared to OpenAI’s pricing gymnastics. That’s why I picked it.
I am using the Gemini 1.5 Pro model for solid code reviews, with the temperature set to 3 for more predictable and consistent outputs. If you really want LLMs to shine, context and examples are key—feed it like a hungry baby, and it will give you better results.
(Don’t worry, the exact prompt is in the repo. No gatekeeping.)
Now for API calls, you have to use Gemini functions in order to get responses strictly in JSON, so that we can format and extract results easily. Here is the exact setting you gotta use:
%{
contents: [
%{
role: "user",
parts: [%{text: prompt}]
}
],
tools: [
%{
functionDeclarations: [
%{
name: "ai_response",
description: "The AI response containing fixed code suggestions",
parameters: %{
type: "object",
required: ["rule_files", "rule", "test_code", "reasoning", "fixed_code"],
properties: %{
rule_files: %{
type: "array",
items: %{type: "string"}
},
rule: %{type: "string"},
test_code: %{type: "string"},
reasoning: %{type: "string"},
fixed_code: %{type: "string"}
}
}
}
]
}
],
toolConfig: %{
functionCallingConfig: %{mode: "ANY"}
},
generationConfig: %{
temperature: 0.3,
topP: 0.95,
topK: 40,
maxOutputTokens: 8192
}
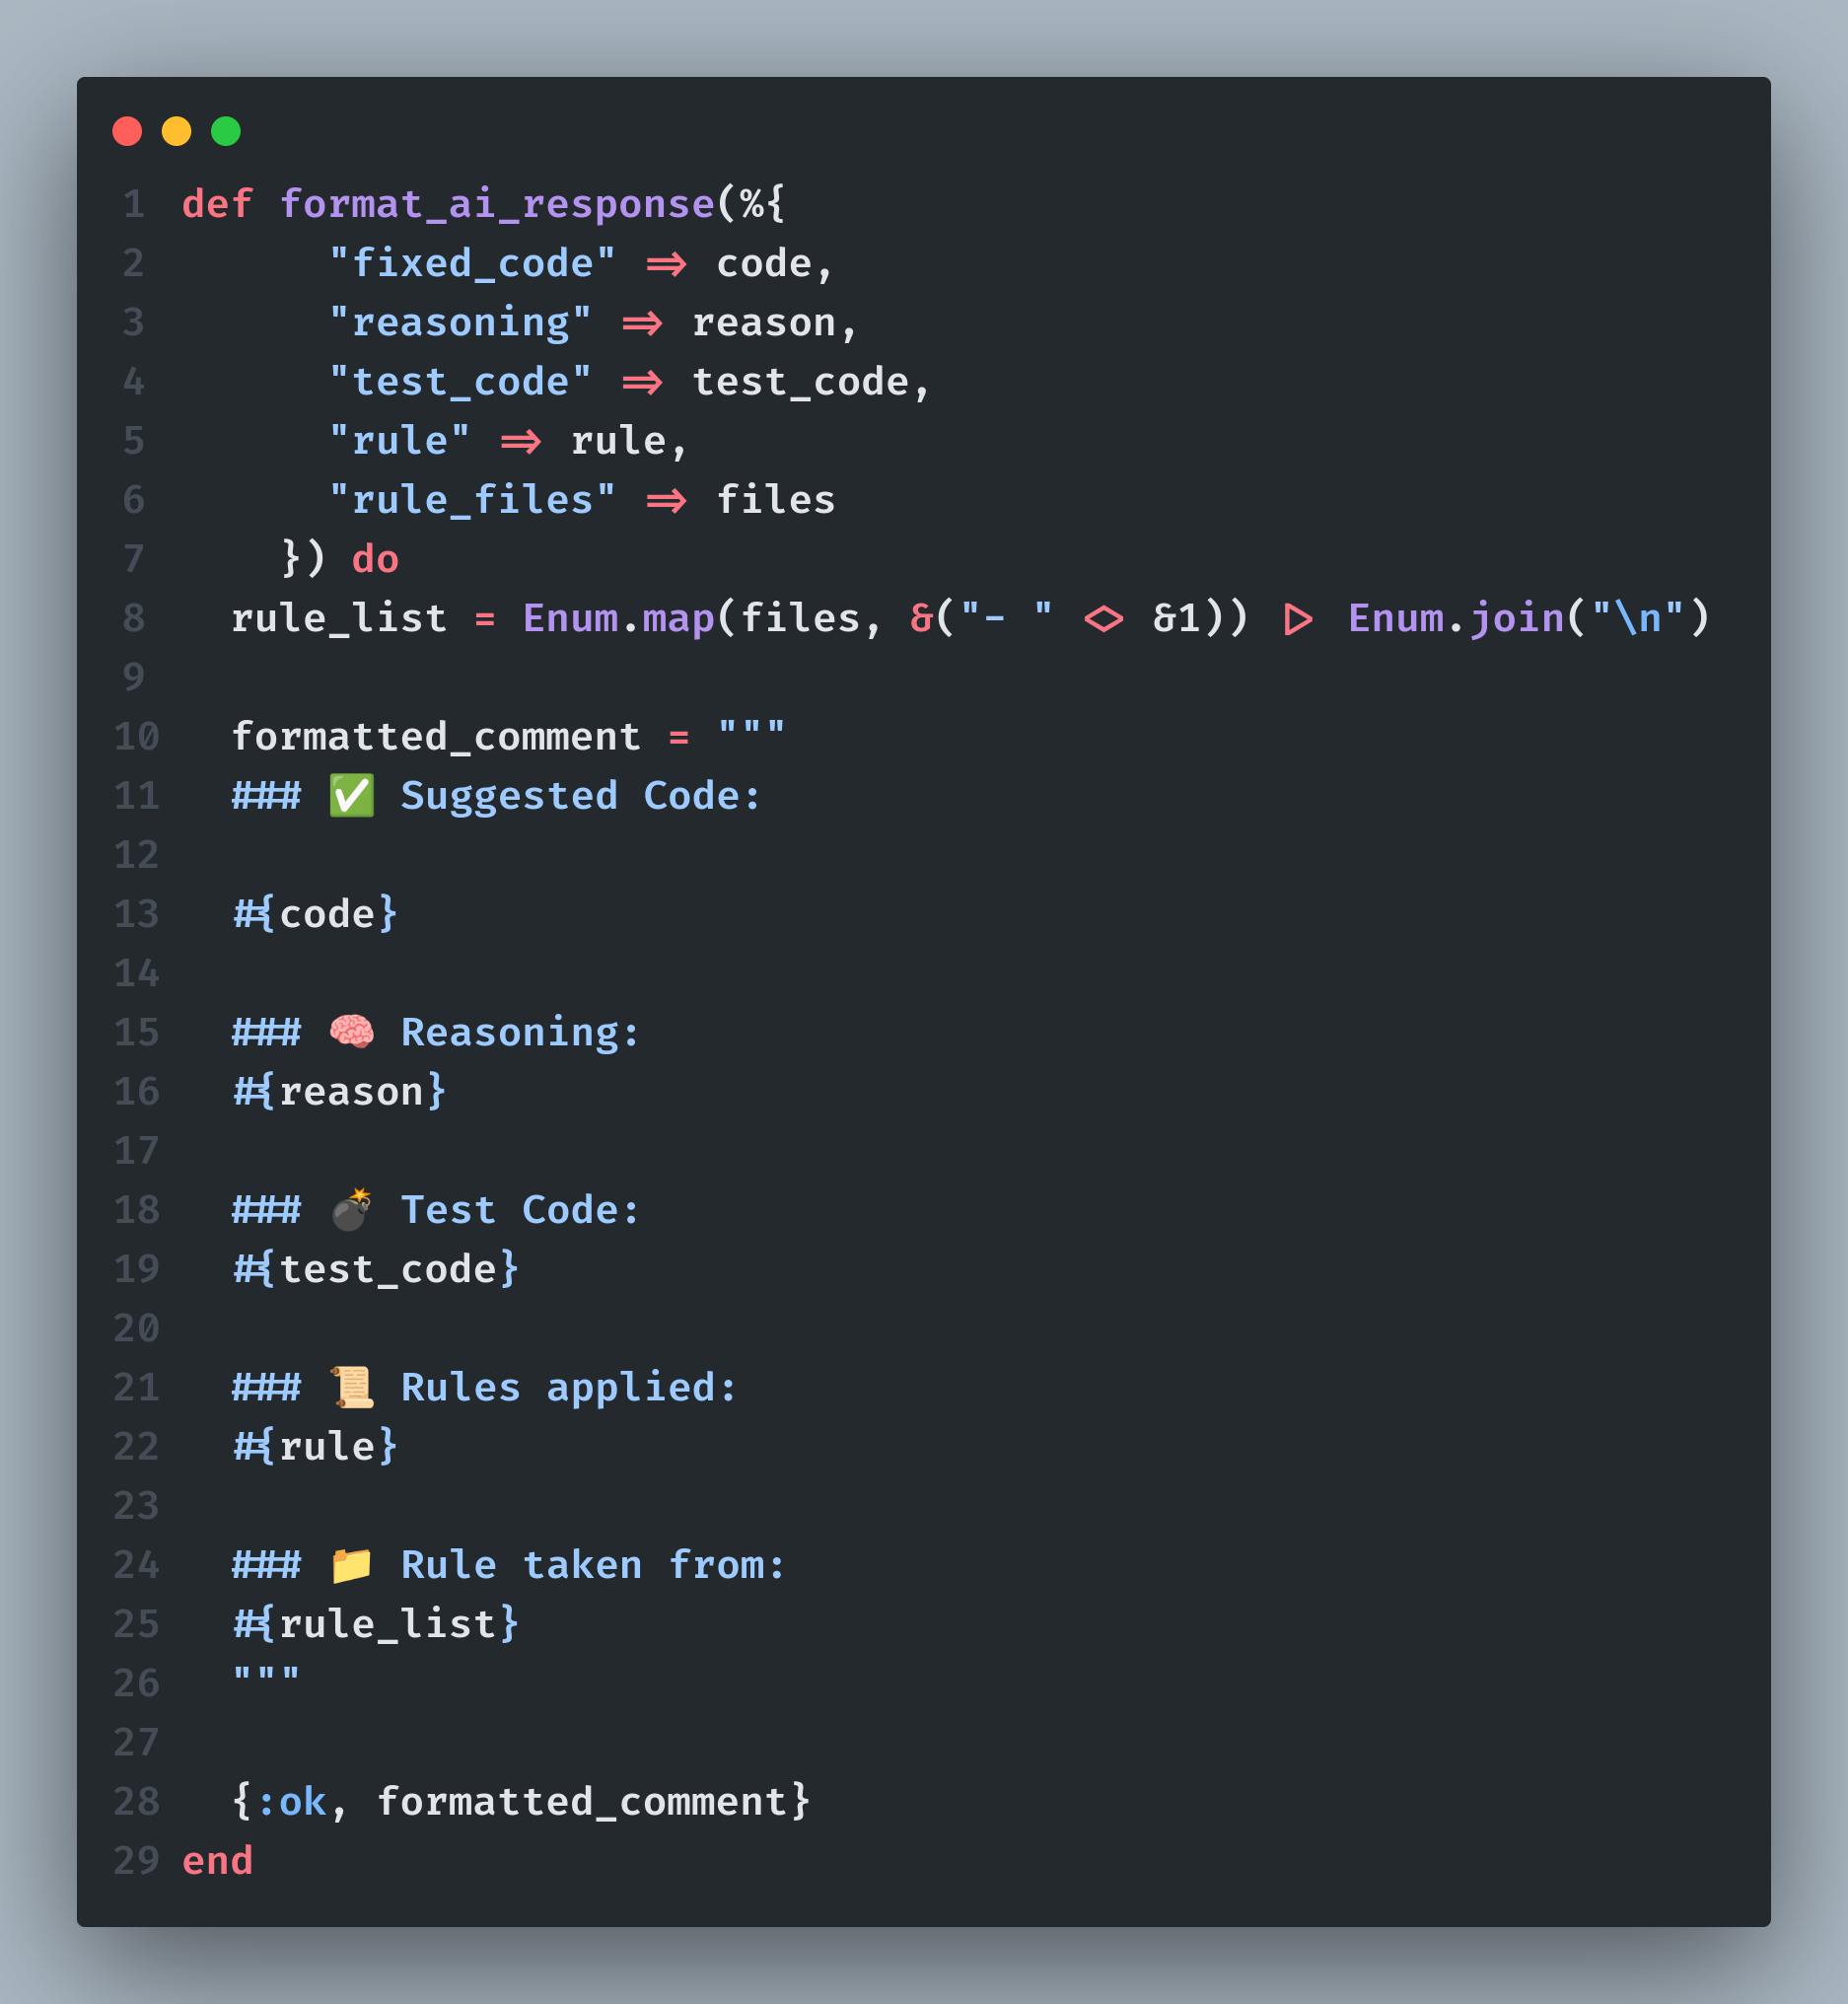
}We can format the response like we prefer. Here's how I did it:
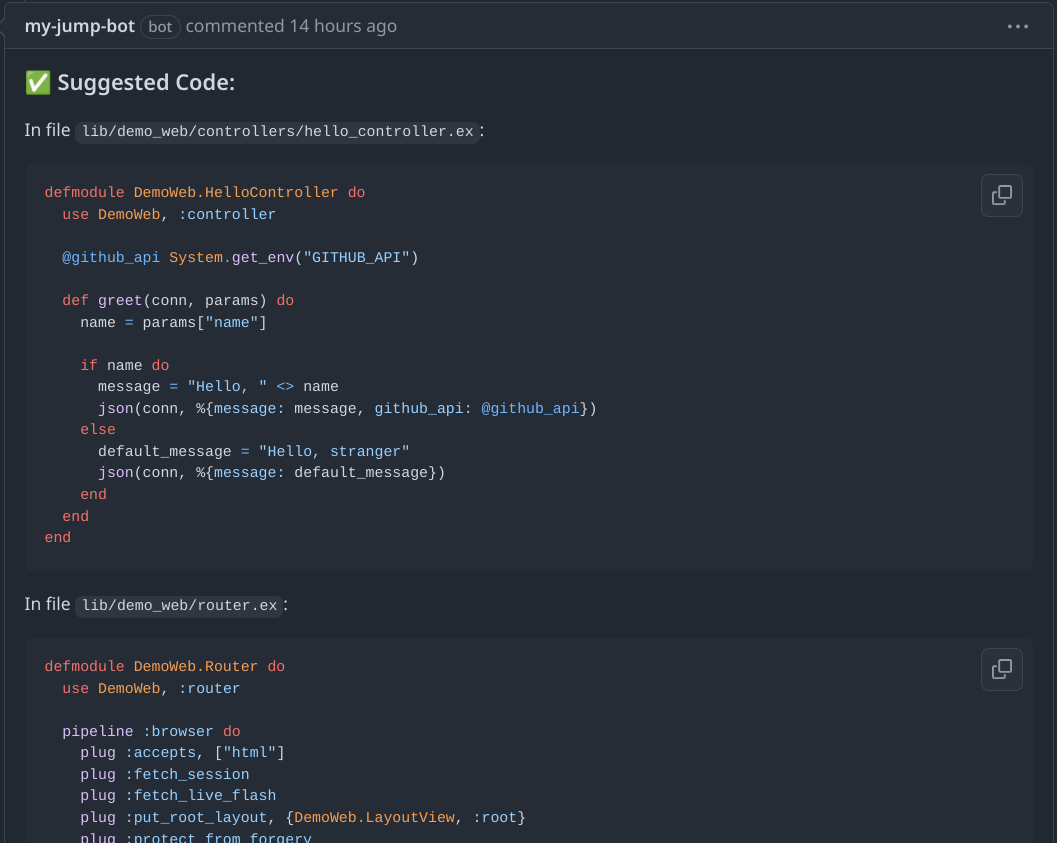
Now we can post this response as a comment by hitting a POST request to this endpoint:
https://api.github.com/repos/#{repo_full_name}/issues/#{pr_number}/commentsResult:

I hope this helped you in some way or the other. Here's the repository link, clone it, extend it, witness it yourself: (https://github.com/Git002/jump_bot)
Have a great day!