I ❤️ my cats 🐱
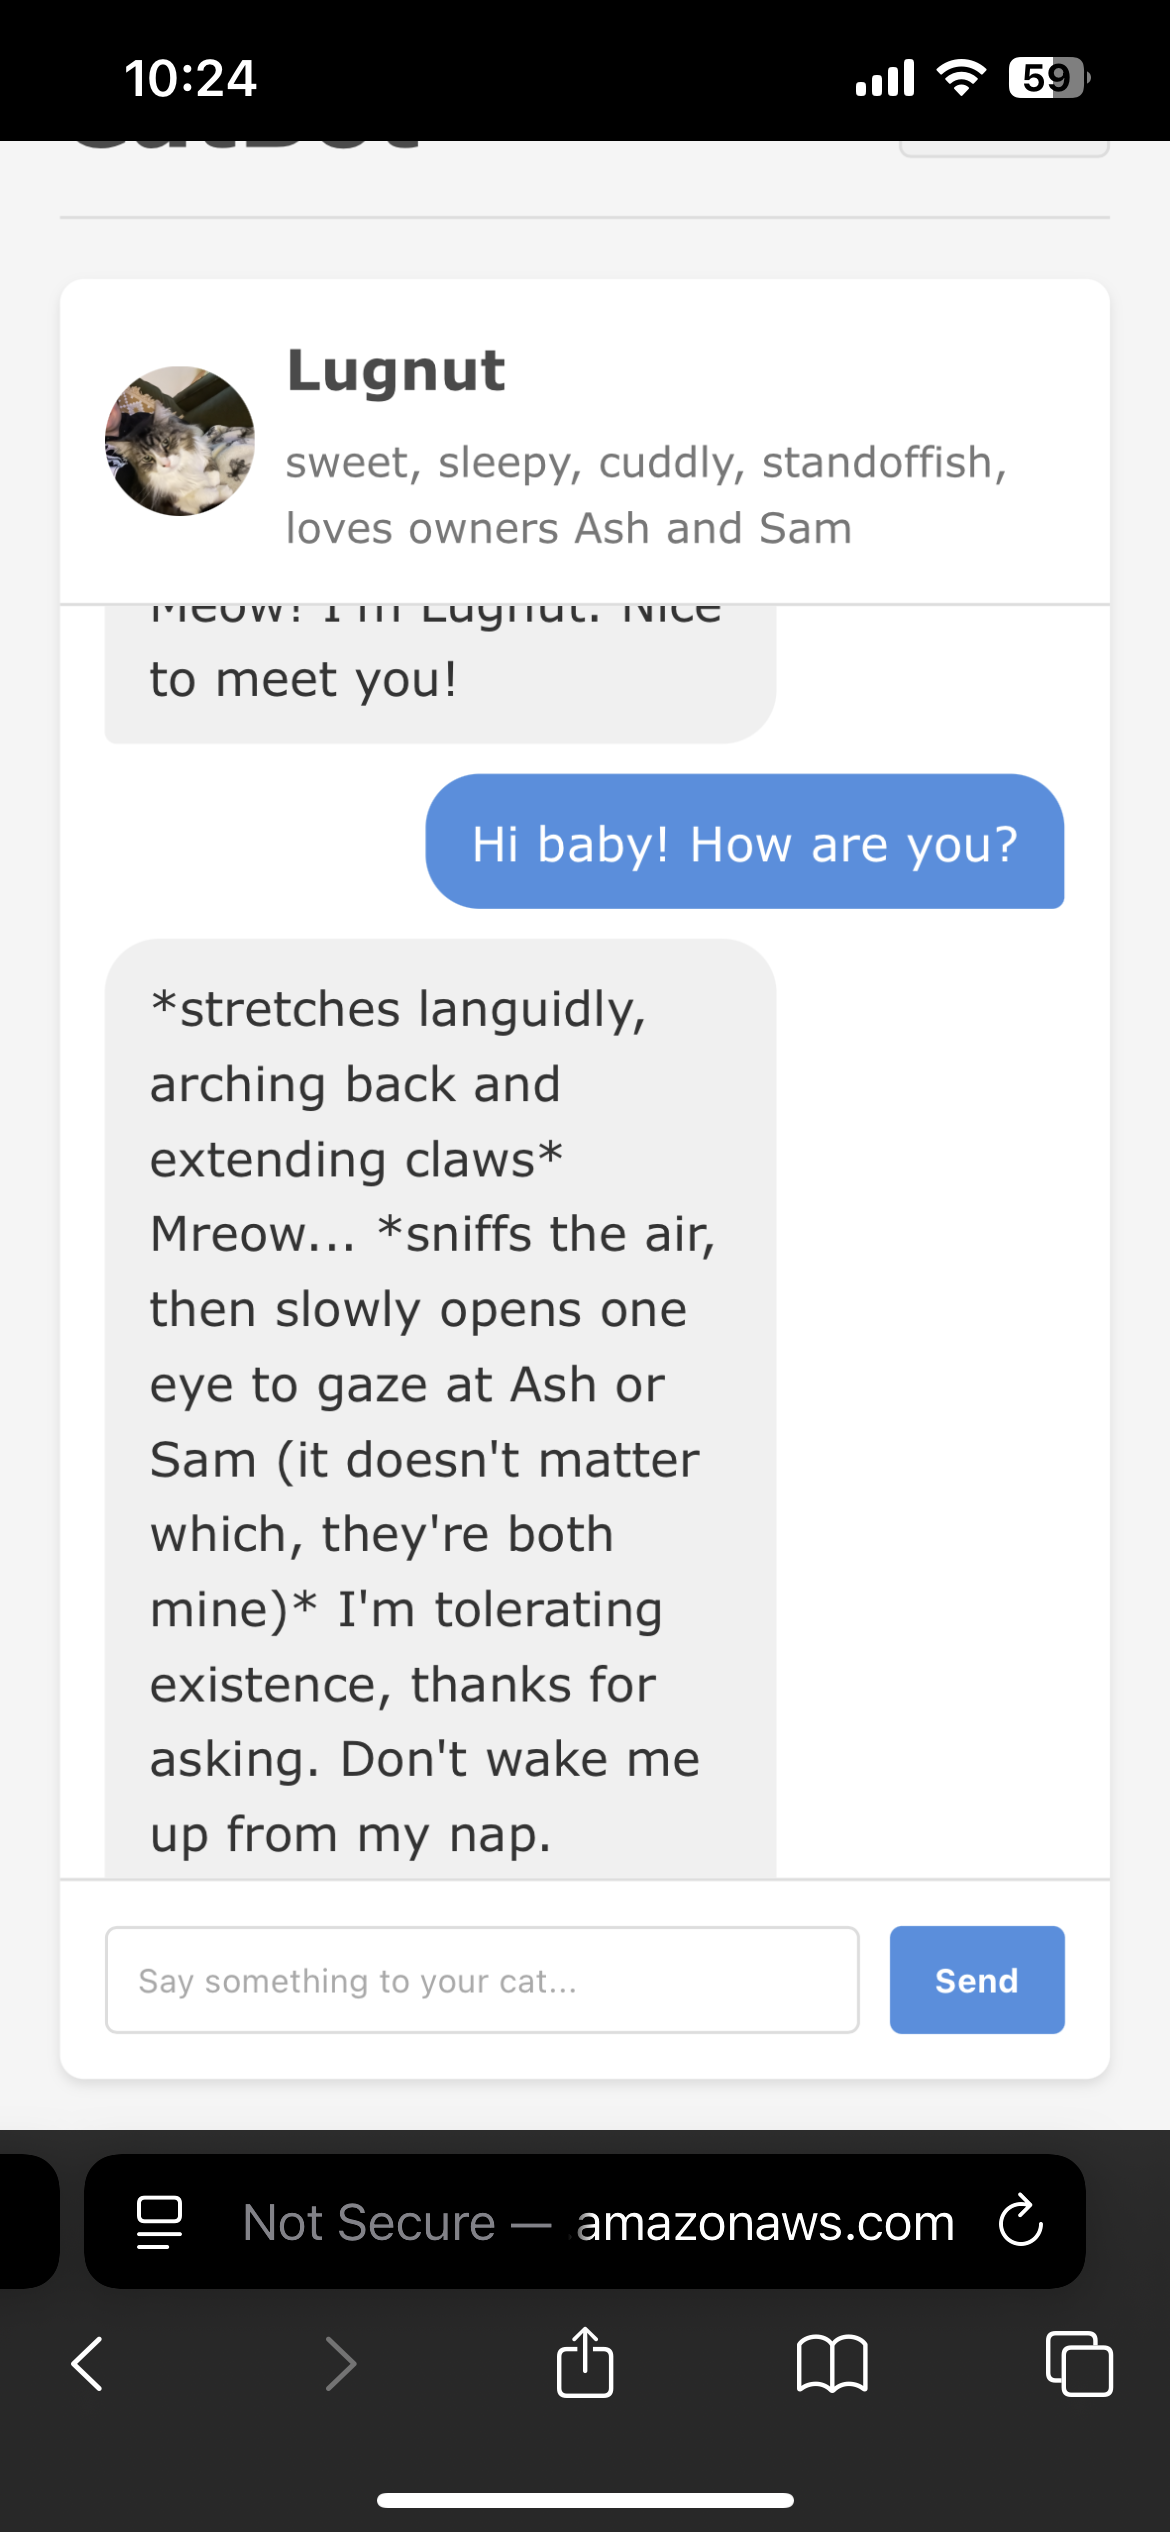
Have you ever looked at your pet and asked yourself, what exactly is going on inside that head? What do you need when you cry out – food, water, attention? Maybe you just want to ask how they are doing and know they are okay. My partner, who travels often for work, texted me asking how our kitten was after an emergency vet visit, and followed up with “I wish I could just text him.” And boom, the idea for CatBot, an AI-assisted chat-bot that replies as your furry friend was born.
How does this relate to Docker... or K8s? 🐳
I decided to try to make this idea a reality. At first I thought about the building blocks - I would need a frontend chat-like interface to build a profile for the cat, and then I would need some mechanism to take in my conversation and build a prompt for some large language model. These would serve as disparate services, and each service could run on a Docker container. These containers need to run somewhere, and the whole application needs to be accessible to the internet so me and my partner can both reach it.
Part 1: The Code - Logic, Modules, and More
I started with the frontend — I am by no means a frontend guru, so I graciously accepted the assistance of Claude from Anthropic to generate some JavaScript and CSS for me. The primary part of the application code that I needed to modify was handling the input to the chatbot. I created a new string with not just the input, but the context that I wanted my model to respond in the style of the cat that has certain traits input when the cat profile is created. Then, I executed a POST command with these parameters against my running server listening on a different port.
Frontend and backend? Not a power couple
I wanted to decouple my frontend and backend code, but still package both into one container since a. I wanted to avoid additional networking configuration (which didn’t happen...), and b. the
backend serviced one request, which was “execute the command” and talk to a different container running an LLM. So, I created a separate server file and modified my startup script (npm start) to not only run npm start, but to run node server.js, starting up my server to listen for requests on port 5001 to execute a command. This would also come in handy when my Dockerfile’s final line was to run npm start upon starting a container.
My container will be calling your container 😎
Initially, I knew I needed to talk to a running Docker container from another container. More specifically, I wanted to execute a command, such as ollama run llama3.2, on a running container. So naturally, I figured I would need a way to exec into the container and run this command. I found Dockerode, which is a Node module that allows you to manage and manipulate containers. I set it up, instantiated Docker, and got the container by its expected name, which I specified in my Docker Compose file. Then, I referenced the container and essentially exec’ed into it, ran the command ollama run llama3.2 && + {my prompt}, to startup the Ollama model and execute the command remotely.
The Dockerode solution for working with the running LLM container seemed perfect at the time, and worked when I was doing fully local testing, but Dockerode did not play nicely when I ran this implementation on a minikube cluster. It needed to be instantiated and have the Docker socket file accessible, which is used to communicate with the Docker daemon. However, Kubernetes does not use Docker as its container runtime, even though it can create containers from built Docker images.
Breaking up with Dockerode 💔
So, I ended up scrapping Dockerode completely since my end goal was to deploy this application on a Kubernetes cluster. Instead, I used axios, a promise-based HTTP client for NodeJS, to do a post call to my LLM container. Using a promise-based client was critical for dealing with timing issues I ran into early on, since sometimes my app would not get a response from the LLM in time and display some error text. Initially, I pointed to localhost as my host, since my LLM container was running on port 11434 on my machine. This worked great when I would run my Node app as a container, or even run npm start on my local machine; I could still interact with my LLM container that was accessible at localhost:11434. However, this did not work in the Kubernetes implementation, since my containers were no longer port mapped to a port on my local machine. This is where the Kubernetes magic comes in.
Part 2: Spinning it Up - Local Dev Startup → Minikube → EKS
I talk a lot about using containers for local development. The container that I always used was some running LLM container that I pulled from the Docker Hub official AI image registry. I initially started dev work by just running npm start to get my app running and test connecting to a container, and then I got more savvy with my approach by leveraging Docker Compose. Docker Compose allowed me to automatically spin up my containers, set up port mapping, and even run a post_start command on my LLM container to pull the correct model.
Docker Compose... meet your Bridge
Docker Compose was extremely useful for this use case, since I had expected names for containers and ports that were hardcoded in my code. However, I eventually wanted to deploy this application in a way that was accessible outside of just my machine. I attempted to follow a guide for deploying a Docker Compose-orchestrated application to Amazon Elastic Container Service (ECS) via the Docker Compose CLI, only to find that that CLI command had been deprecated. Our general guidance is to use Docker Compose for bootstrapping your development efforts and Kubernetes for production applications. So, I asked around and found out about Docker Compose Bridge – and it did the trick, for the most part.
Docker Compose Bridge takes your compose.yaml file and translates it into Kubernetes manifests. This saved me significant time translating my Compose file into the finicky manifests, all by running a quick command. I did have to make some initial tweaks to my manifests, most notably:
- In my model deployment, I added a lifecycle section to execute a command post start of the container to pull the correct model from Ollama
- In my server deployment, I set the imagePullPolicy to Always, since I was working off a “hotfix image” (which I begrudgingly tagged as
:latest, against best practice to develop rapidly… the classic warning of “don’t do that in prod” applies here 😅).
Then, I ran kubectl apply and saw my pods spin up! Compose Bridge even exposed some LoadBalancer services for each container so my pods could communicate with each other. Things were looking swell.
And yet, whoever said “learn networking before Kubernetes” was a smart LinkedIn influencer, because wow, I ran into some issues. To keep things short for you all, I discovered a few key problems:
Ah networking... my fickle friend
Remember how my frontend + backend that handles requests were coupled into one container? This isn’t typically the best practice, but you could argue these logical units could live in the same container. Since I implemented it this way, I needed to expose both my frontend port (3000) and the port my server was running on (5001). This involved updating my EXPOSE command in my Dockerfile to handle both ports and updating both my server deployment and service manifests to have both ports listed as well. Initially I was able to execute commands on my remote server running in the same container by pointing to localhost:5001, but this fell apart in the EKS deployment which required more specific networking configuration and the use of services. I did a lot of testing connections by exec’ing into my app containers and running curl commands against the execute endpoint, to troubleshoot why I could get a response inside the container, but not in the UI, which led me to explicitly stating all ports that were listening on a running container in Kubernetes.
Once I specifically defined all my ports, I was able to get started deploying to something internet facing – a cloud based Kubernetes cluster. I was doing my testing on a single node cluster using Minikube, so I decided to start deploying to Amazon EKS.
AWS time! 💃
I followed a Medium article on how to set up a cluster, which involved a few steps. Some of those included creating an IAM user with various permissions attached to it related to EC2, CloudFormation, IAM and EKS, installing the EKS CLI, and running a few commands to get the cluster up and running, as well as an IAM policy for the cluster nodes themselves.
Once my cluster was up, and I gave myself as the root user permission to view information in the AWS console (LOL), I switched context to my EKS cluster from Minikube. Then I was able to run the same kubectl apply command provided by the Docker Compose Bridge documentation to spin up my app. This led to two final problems:
- I still had connection issues even though my server port was exposed.
- When I was able to connect, my LLM container was slow to respond.
For point one, I updated my request to use the exposed service URL from EKS as the host, since my server was now running on EKS port 5001. This needed to be called out explicitly in my code, as I was no longer port mapping to localhost.
For point two, I updated my manifests to have explicit resource requests for CPU and memory. By running kubectl top pod as a request was being served, I was able to see the consumption of the pods and amp those requests up in the manifest. This sped up the response time, but I noticed there was still a lag, which I identified partly as not leveraging the Ollama API’s stream feature to display responses one word at a time instead of as one pile of text.
So uh... did you get it working yet?
And just like that, my CatBot app was up and running! I successfully used Docker images, Docker Compose, Docker Compose Bridge, Minikube, and Amazon EKS to talk to my cats. Get a life, am I right? Just go upstairs and talk to them, Sam! Just kidding. 😂
Tune in next time where I dive into optimizing the process – automating my builds in a CI/CD pipeline, using proper versioning for my images, leveraging Docker Build Cloud for faster builds, and more.