
As developers, we’ve all heard the term DevOps—a combination of practices that aim to bridge the gap between development and operations. The goal? Deliver software faster, more reliably, and with better collaboration between teams. One key part of this is CI/CD.
CI/CD stands for Continuous Integration and Continuous Delivery/Deployment. It’s all about automating the steps that run when you push changes to your code repository. With CI/CD, you can build, test, and deploy your app in one seamless, automated process.
In this article, we’ll walk through setting up a CI/CD pipeline using GitHub Actions. And in the final stage, we’ll deploy the app to Vercel, so it’s live and accessible to everyone.
Let’s dive into the code and get started!
Build Angular Project
First, make sure Angular CLI is installed globally with this command:
npm install -g @angular/cliThen, create a new Angular project:
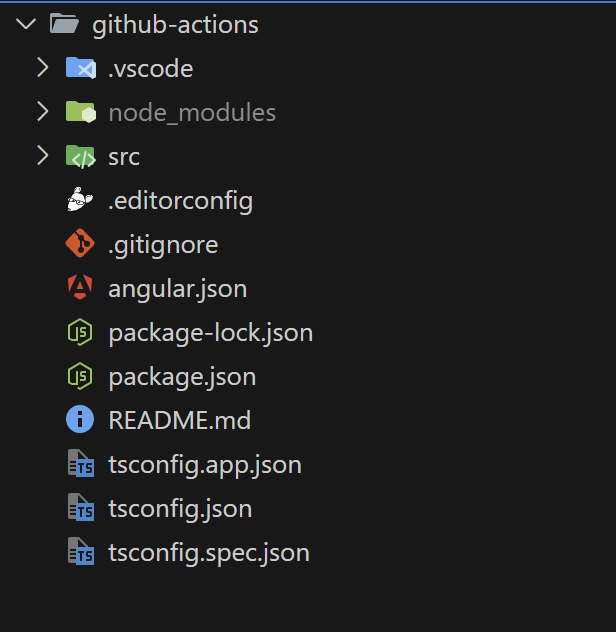
ng new github-actionsYou can choose your preferred setup. In my case, I went with CSS for styling and turned off Server-Side Rendering (SSR) and Static Site Generation (SSG/Prerendering). The project structure will look something like this:
Now, move into the project directory and run project:
ng serveBoom—you should see your project running in the browser.
Create .yaml File
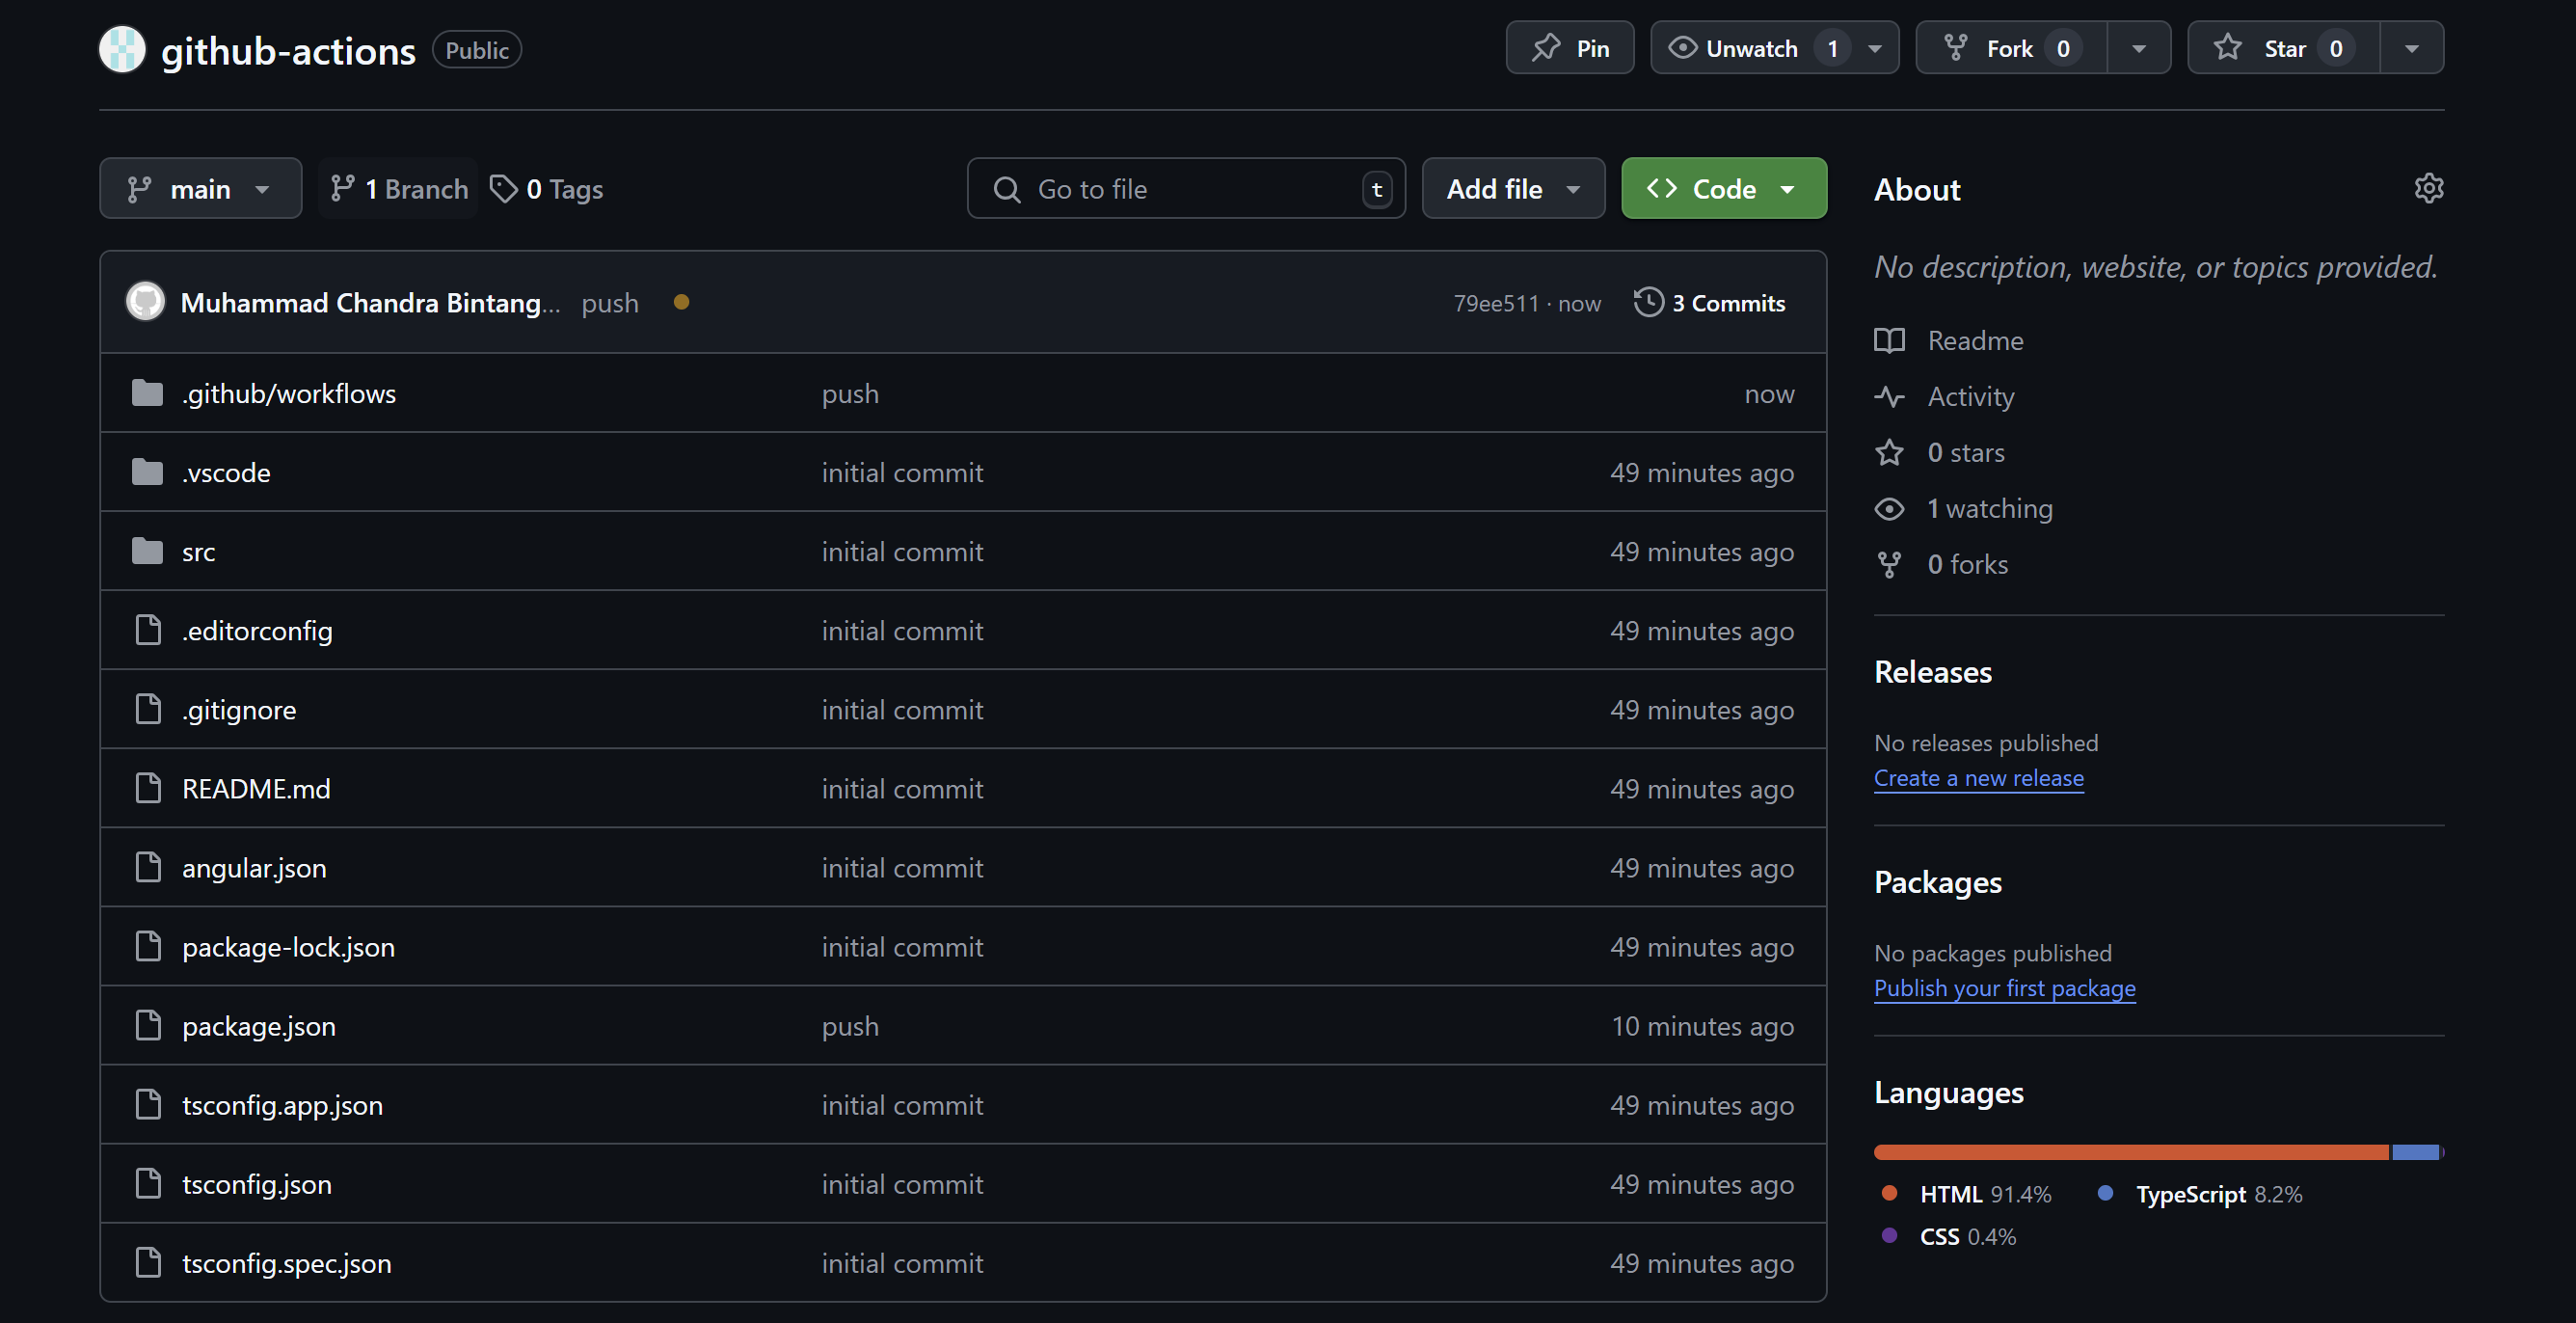
Inside your Angular project, create a new folder called .github, and inside it, add a folder named workflows. Now, create two files in the workflows folder: development.yaml and production.yaml.
development.yaml
name: Production

env:
  VERCEL_ORG_ID: ${{ secrets.VERCEL_ORG_ID }}
  VERCEL_PROJECT_ID: ${{ secrets.VERCEL_PROJECT_ID }}


on:
  push:
    branches:
      - main

jobs:

  Deploy-Production:
    runs-on: ubuntu-latest
    steps:

        - uses: actions/checkout@v3

        - name: Installation Vercel
          run: npm i -g vercel

        - name: Pull vercel environment
          run: vercel pull --yes --environment=production --token=${{ secrets.VERCEL_TOKEN }}

        - name: Build project
          run: vercel build --prod --token=${{ secrets.VERCEL_TOKEN }}

        - name: Deploy project
          run: vercel deploy --prebuilt --prod --token=${{ secrets.VERCEL_TOKEN }}
production.yaml
name: Production

env:
  VERCEL_ORG_ID: ${{ secrets.VERCEL_ORG_ID }}
  VERCEL_PROJECT_ID: ${{ secrets.VERCEL_PROJECT_ID }}

on:
  push:
    branches:
      - main

jobs:
  Test:
    runs-on: ubuntu-latest
    steps:

        - uses: actions/checkout@v3

        - uses: actions/setup-node@v3
          with:
            node-version: 18

        - run: npm ci
        - run: npm run test:production

  Deploy-Production:
    runs-on: ubuntu-latest
    steps:

        - uses: actions/checkout@v3

        - name: Installation Vercel
          run: npm i -g vercel

        - name: Pull vercel environment
          run: vercel pull --yes --environment=production --token=${{ secrets.VERCEL_TOKEN }}

        - name: Build project
          run: vercel build --prod --token=${{ secrets.VERCEL_TOKEN }}

        - name: Deploy project
          run: vercel deploy --prebuilt --prod --token=${{ secrets.VERCEL_TOKEN }}
Create GitHub Repo and Push Your Project
Once your .yaml files are set up, go ahead and create a new GitHub repository and push your project to it.
Set Up Vercel Project
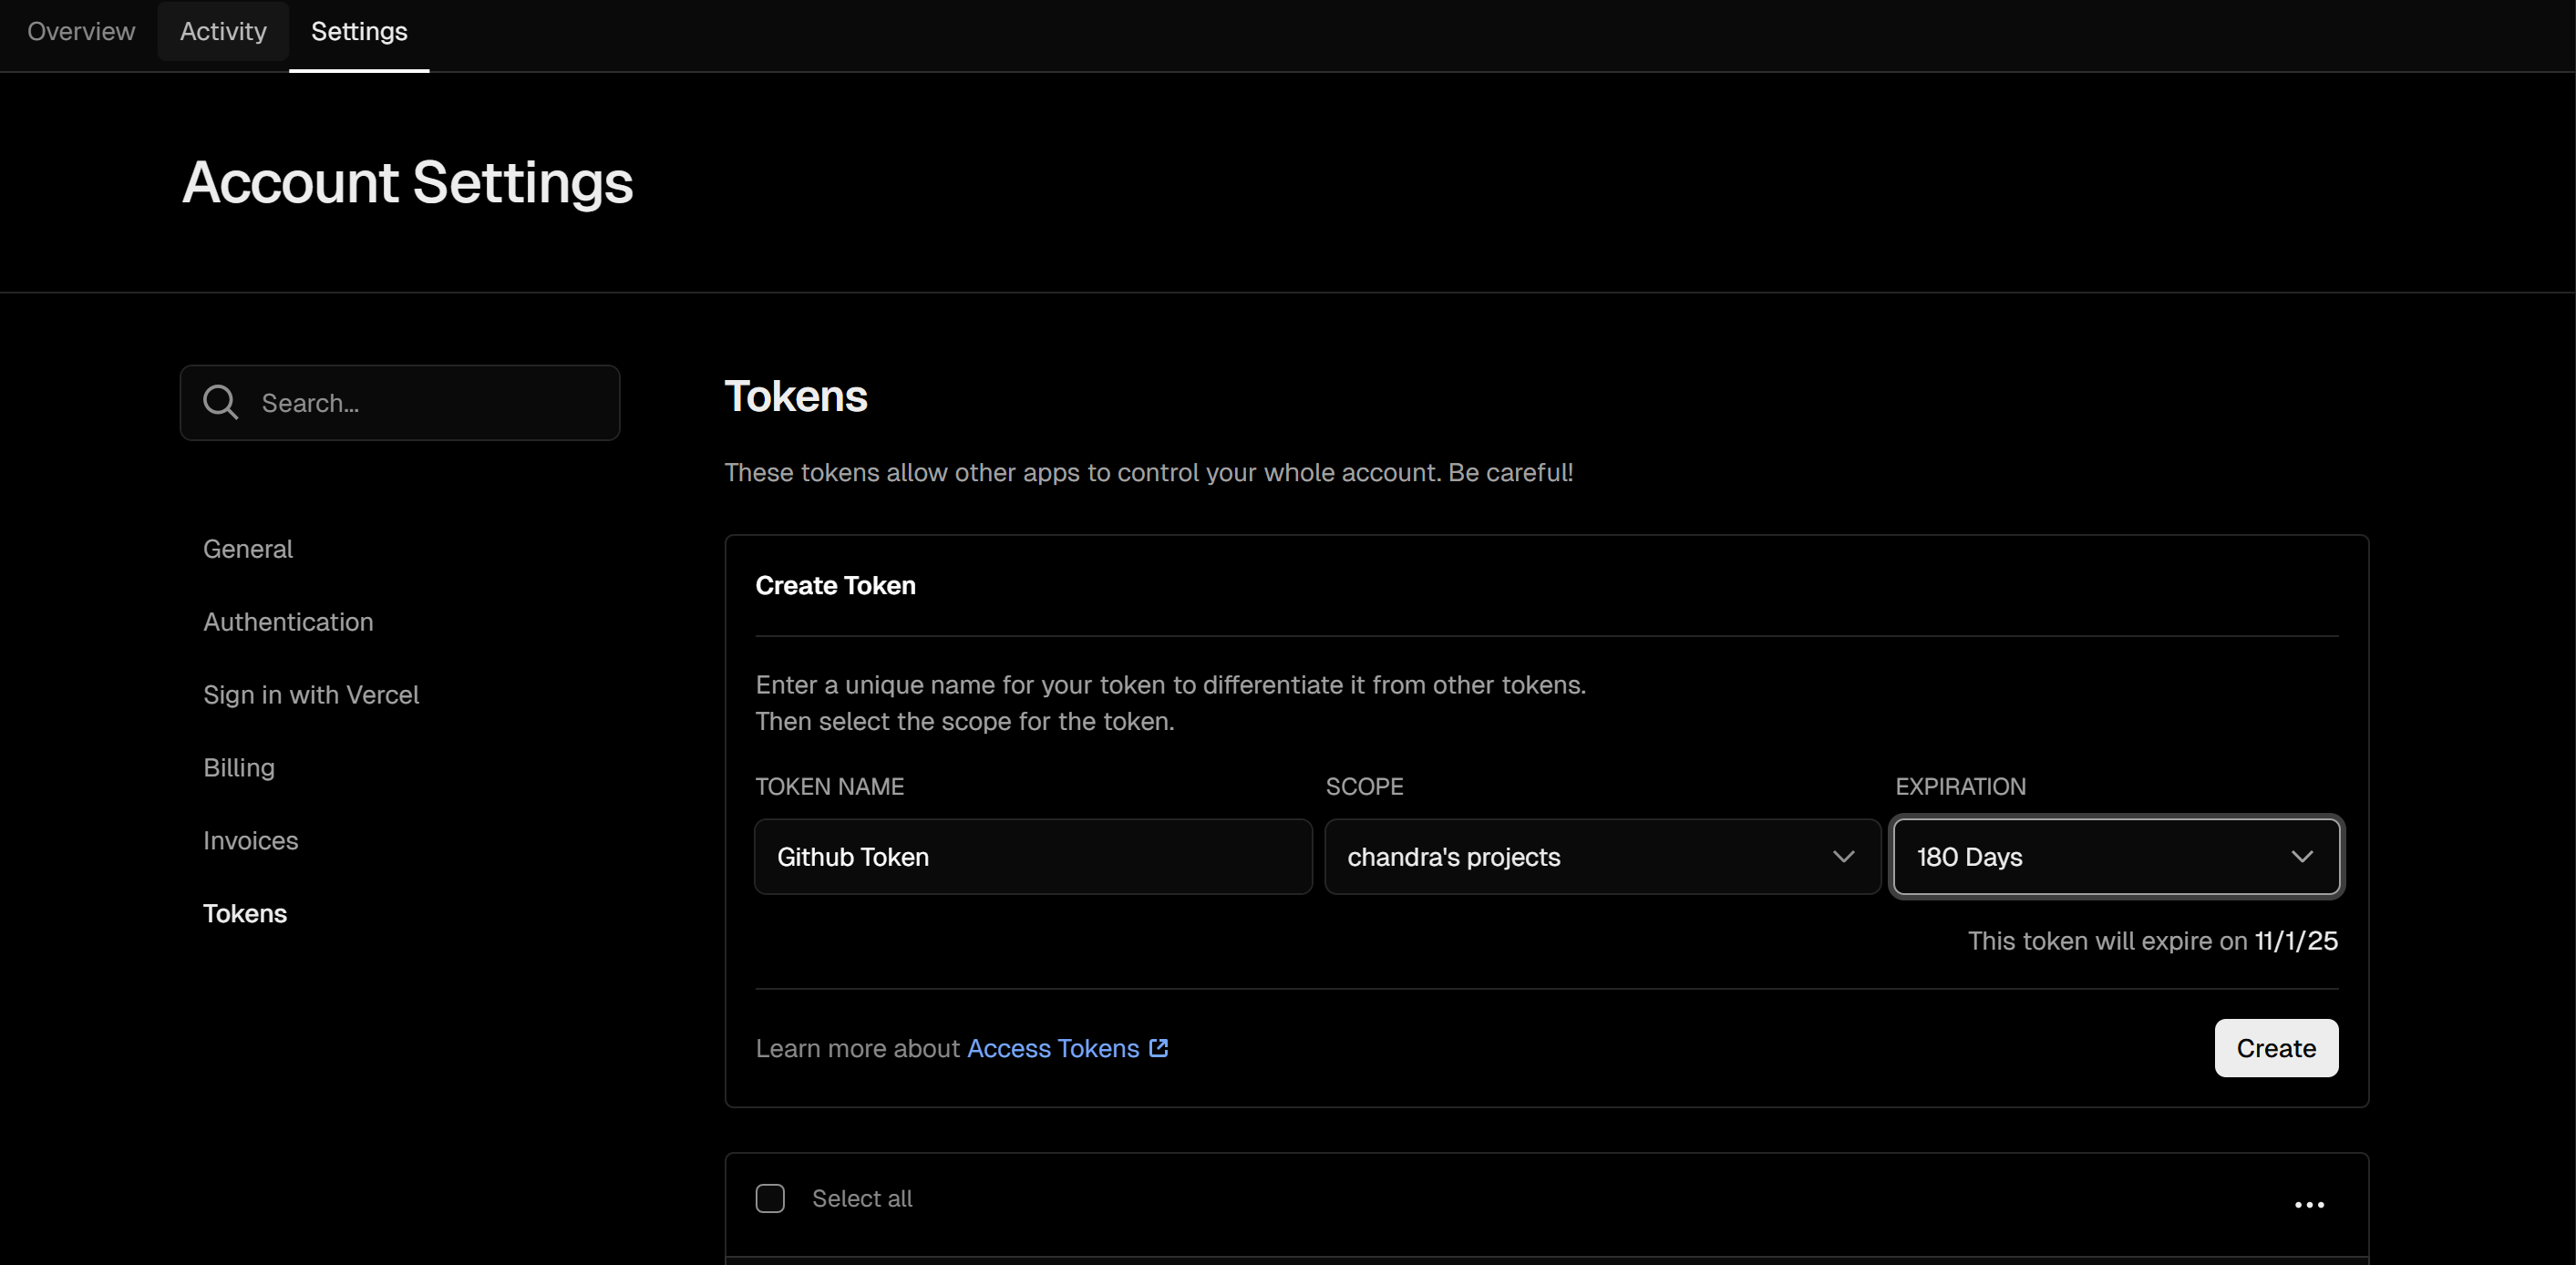
Log in to Vercel, go to Account Settings, then navigate to the Tokens tab. Create a new token—you’ll need it for GitHub integration.
Add Vercel Secrets to GitHub
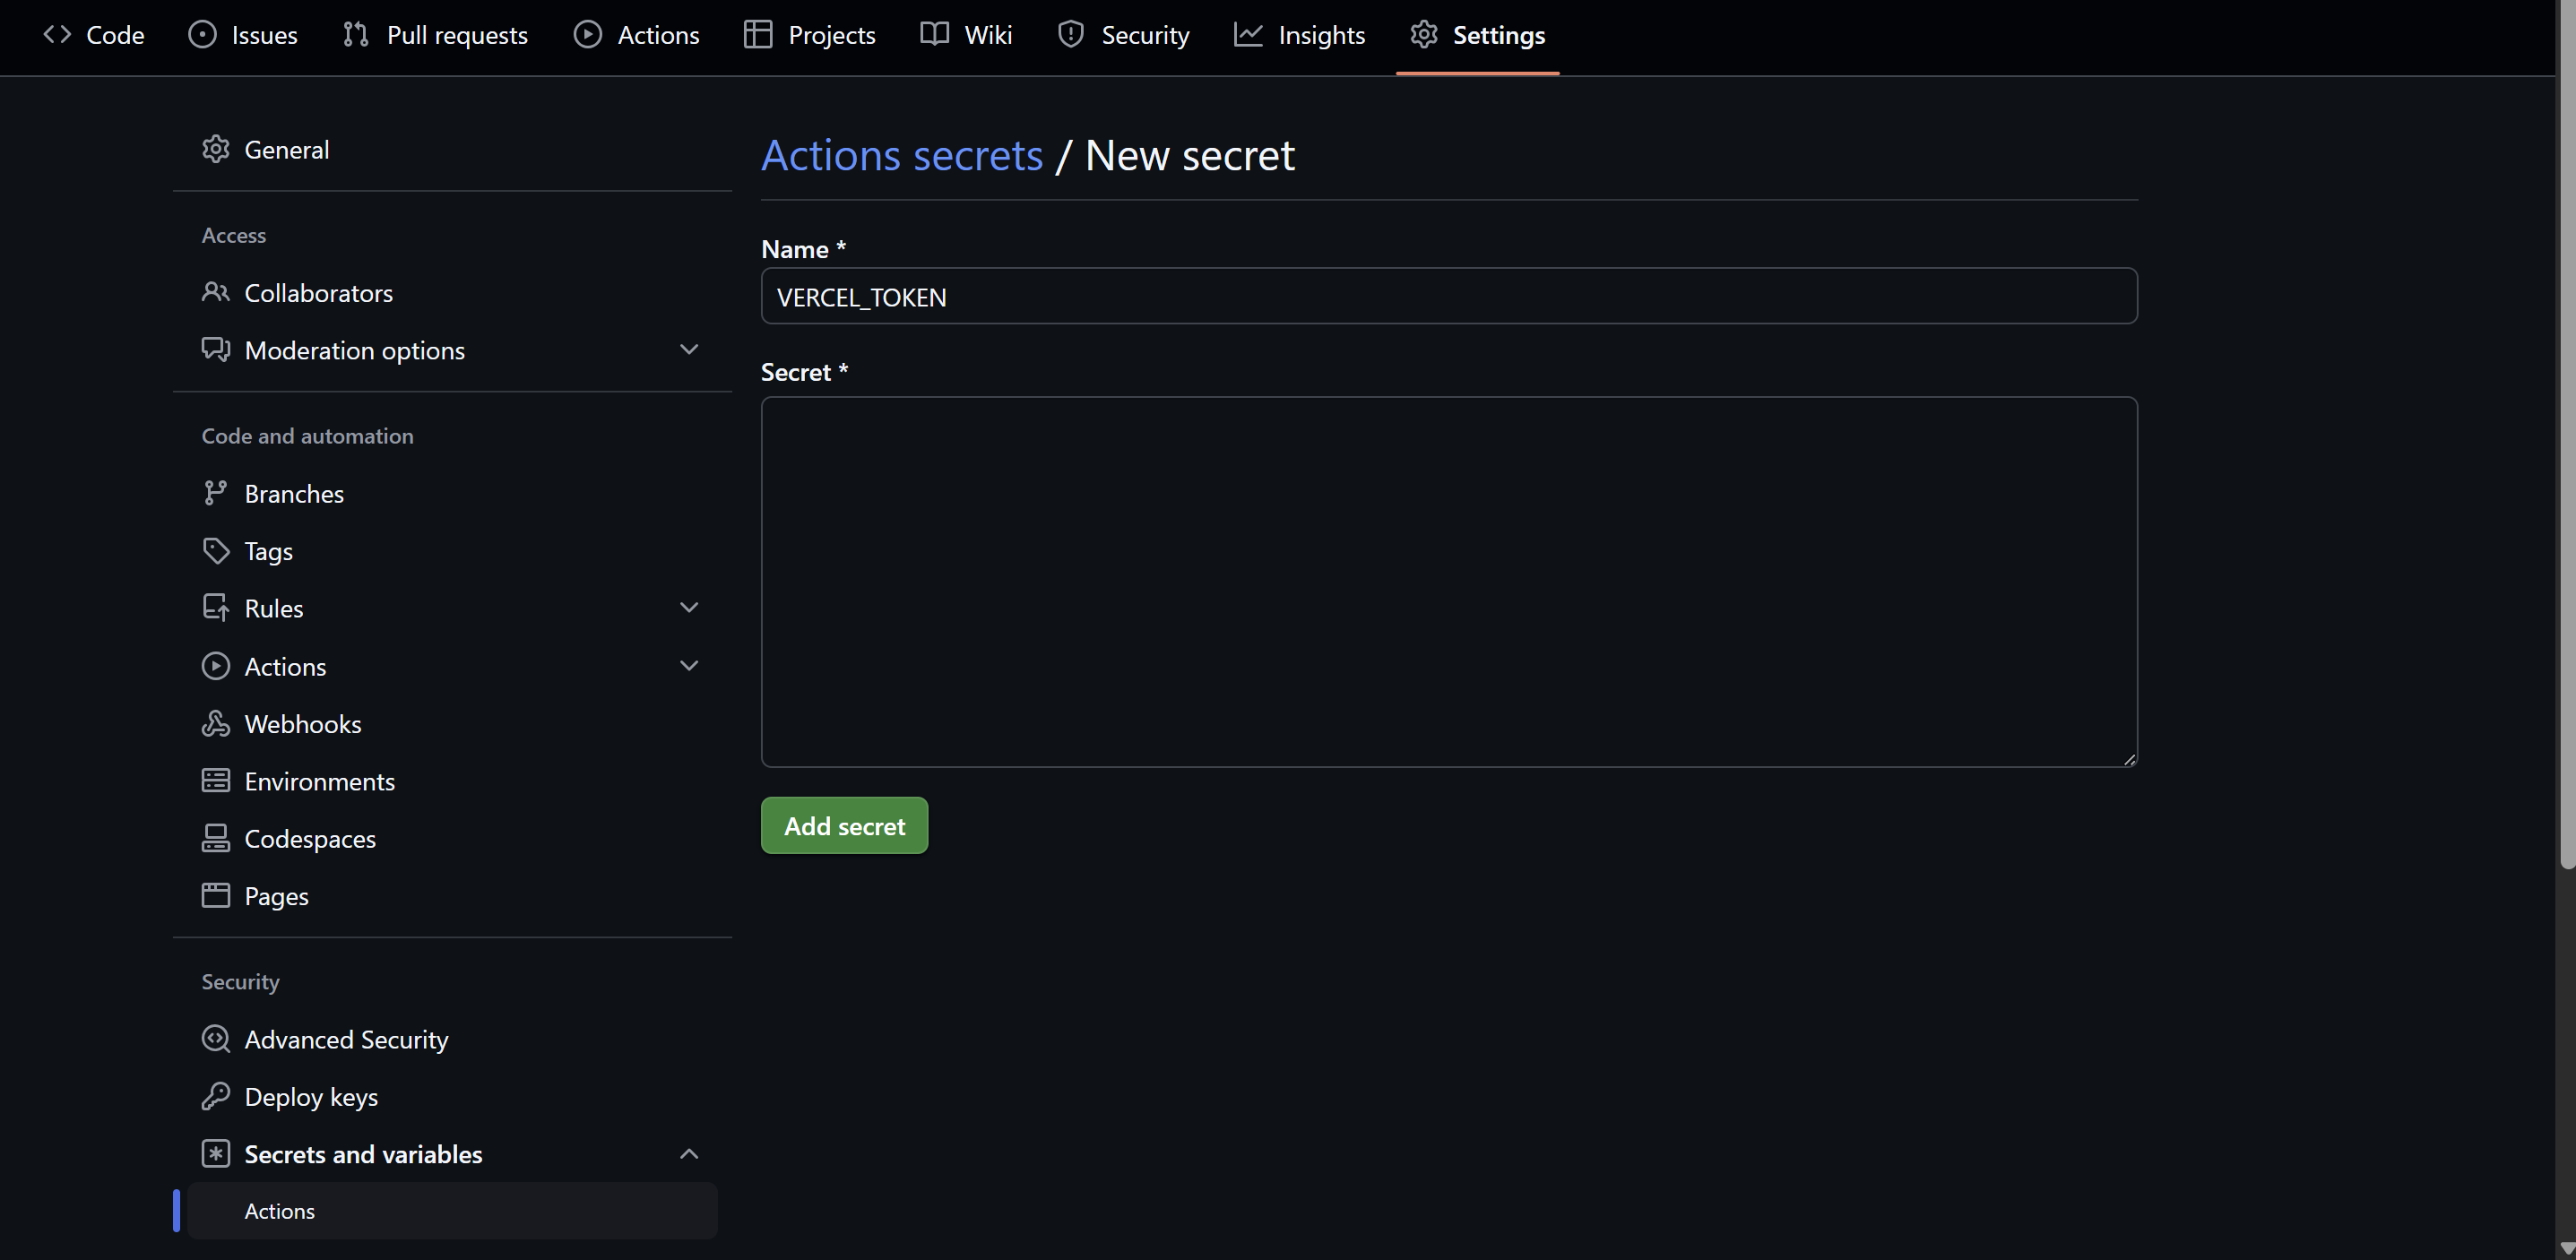
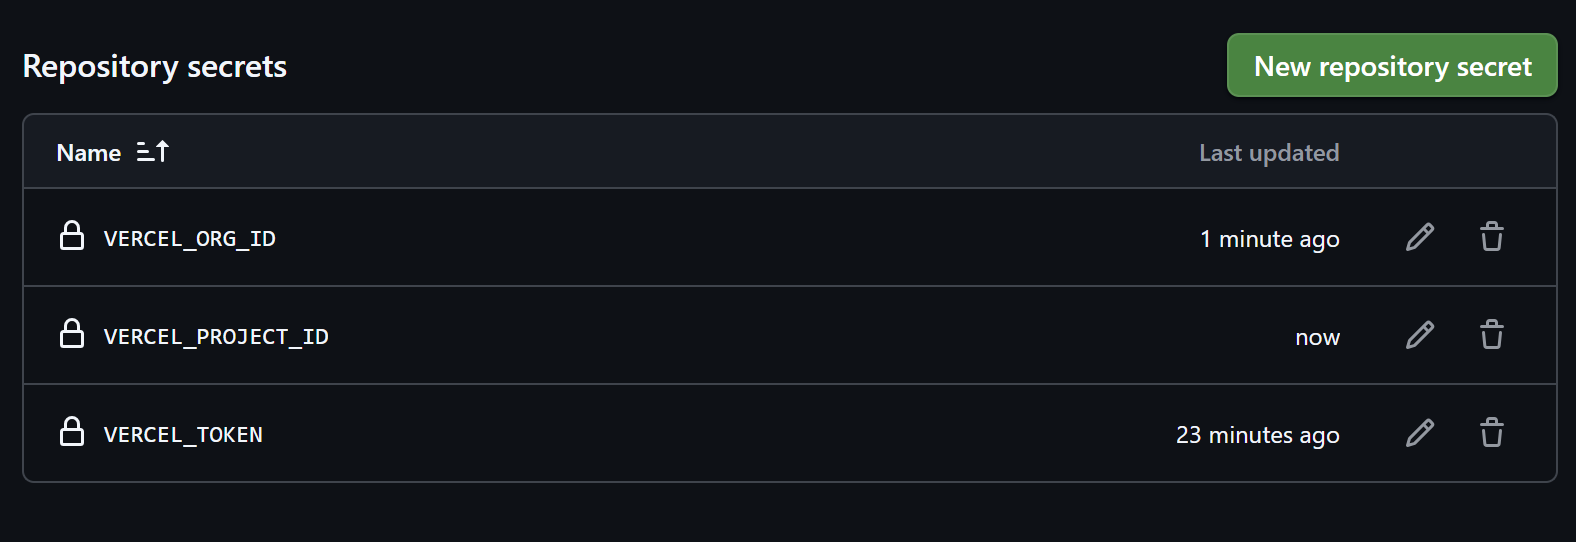
In your GitHub repo, go to Settings > Secrets and variables > Actions. Add a new secret named VERCEL_TOKEN and paste the token you generated on Vercel.
Install Vercel CLI Locally
You’ll need the Vercel CLI to get VERCEL_ORG_ID and VERCEL_PROJECT_ID. Start by installing it globally:
npm i -g vercelThen log in to Vercel:
vercel loginChoose your preferred login method, and once you're in, run:
vercel linkThis will create a .vercel folder containing project.json. Inside that file, you’ll find both VERCEL_ORG_ID and VERCEL_PROJECT_ID.
Add those two as secrets in GitHub just like you did with VERCEL_TOKEN.
So in total, you should now have these three secrets:
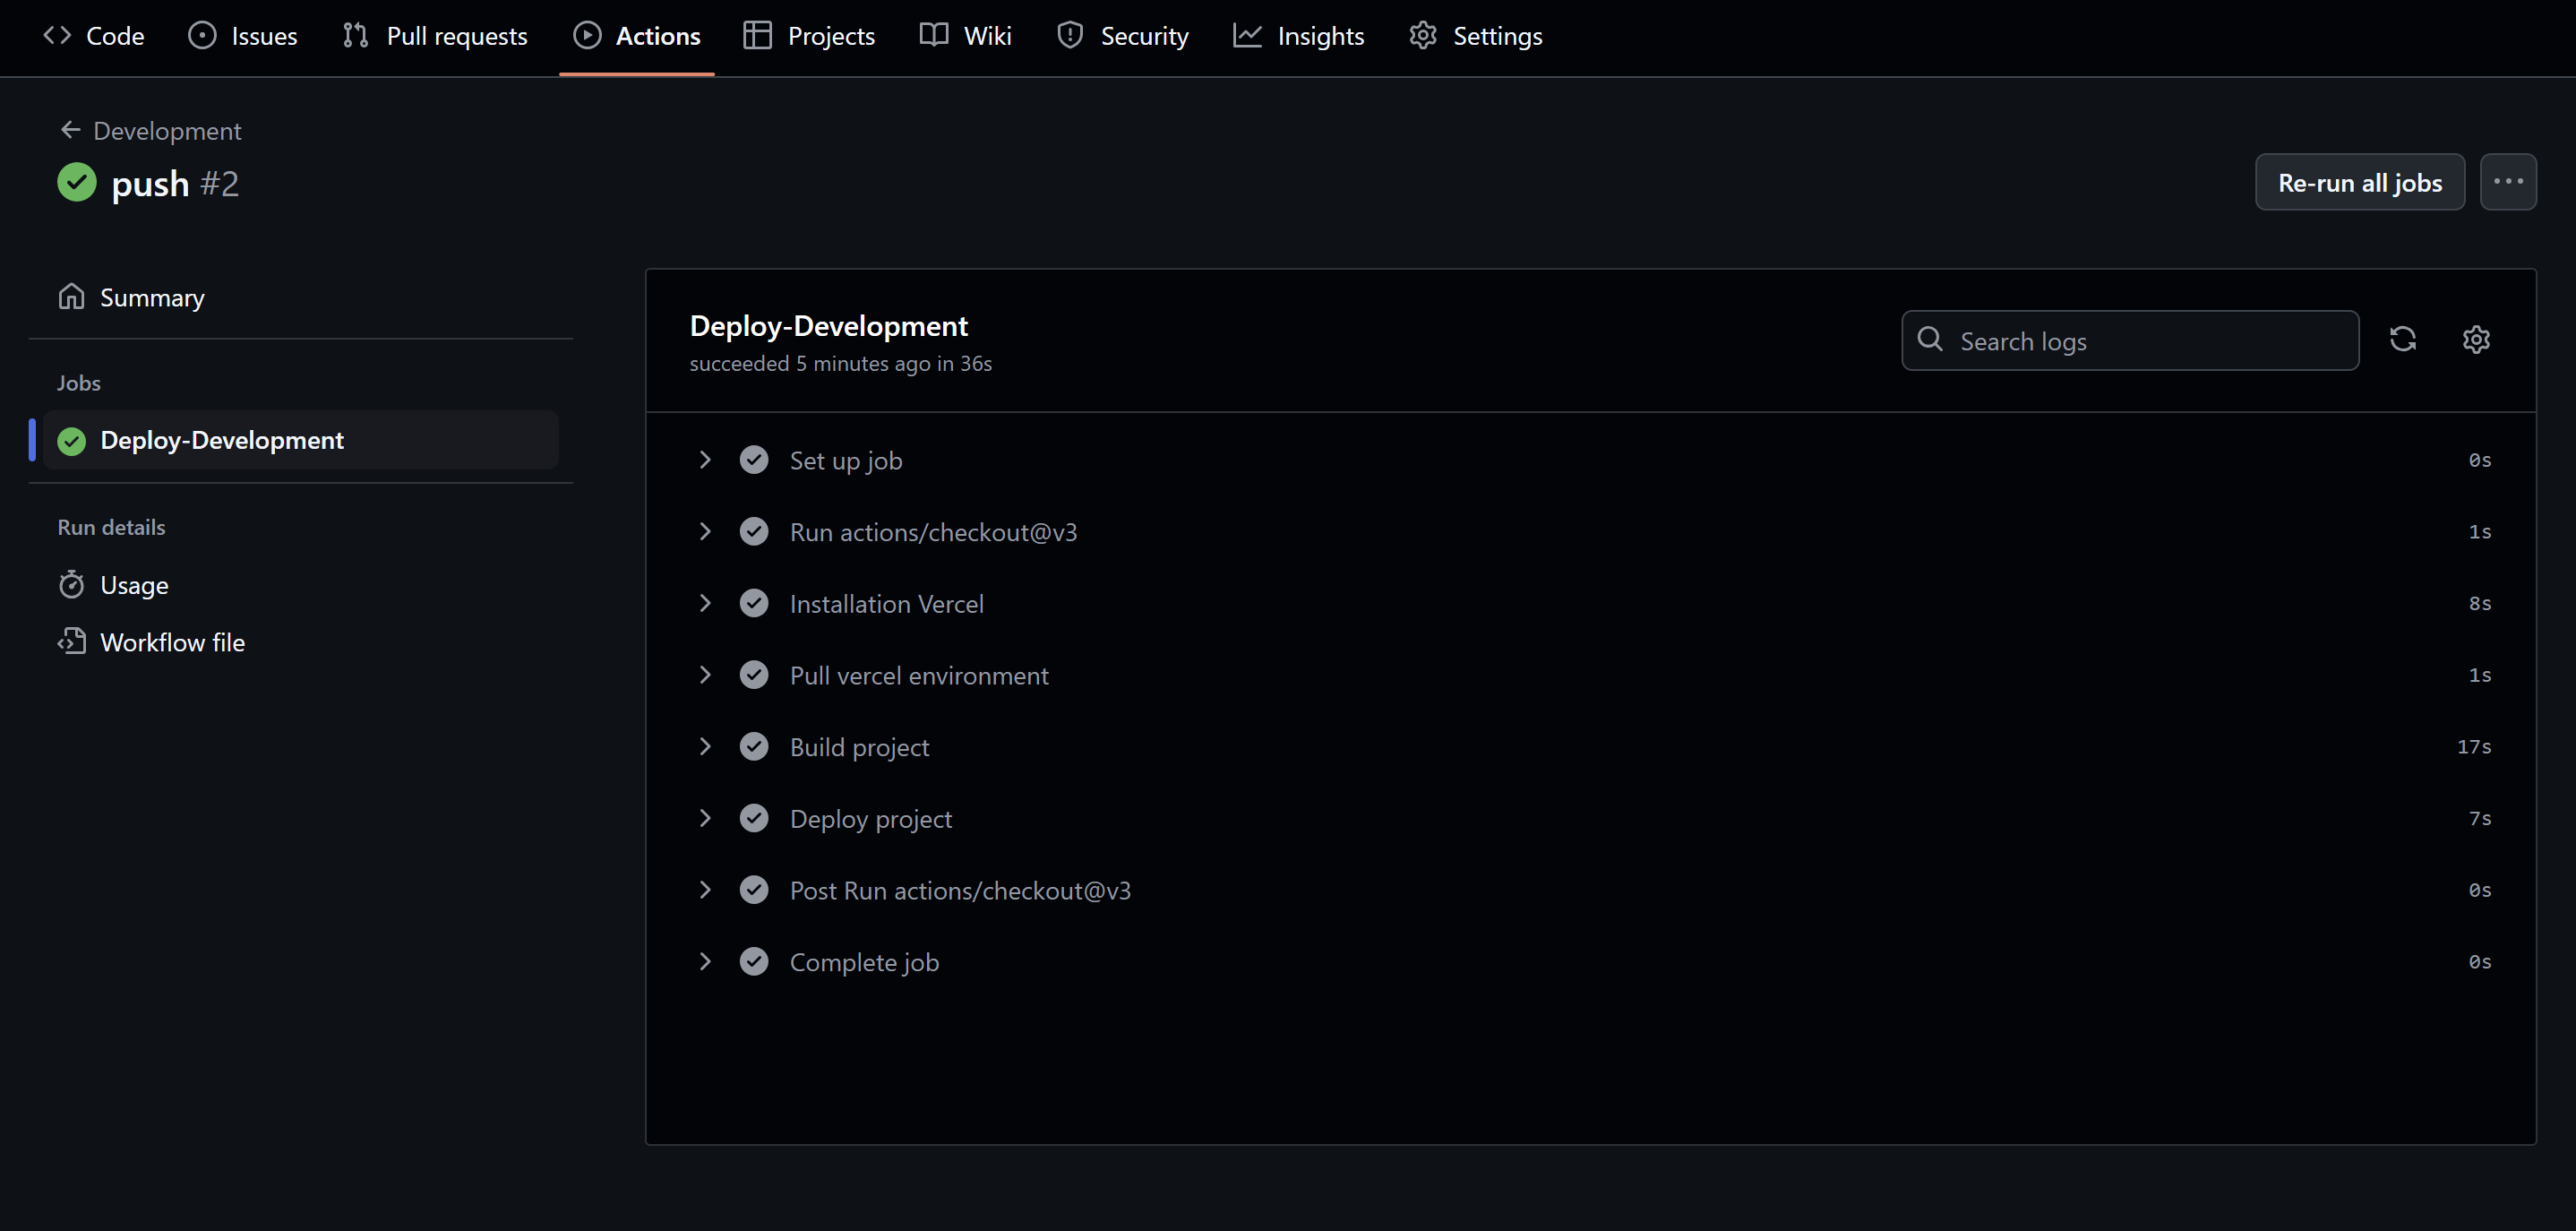
Create a Dev Branch and Test
Create a new branch (e.g., dev), make some changes, and push it. The development.yaml workflow will run automatically. If everything’s set up right, you’ll see a successful build like this:
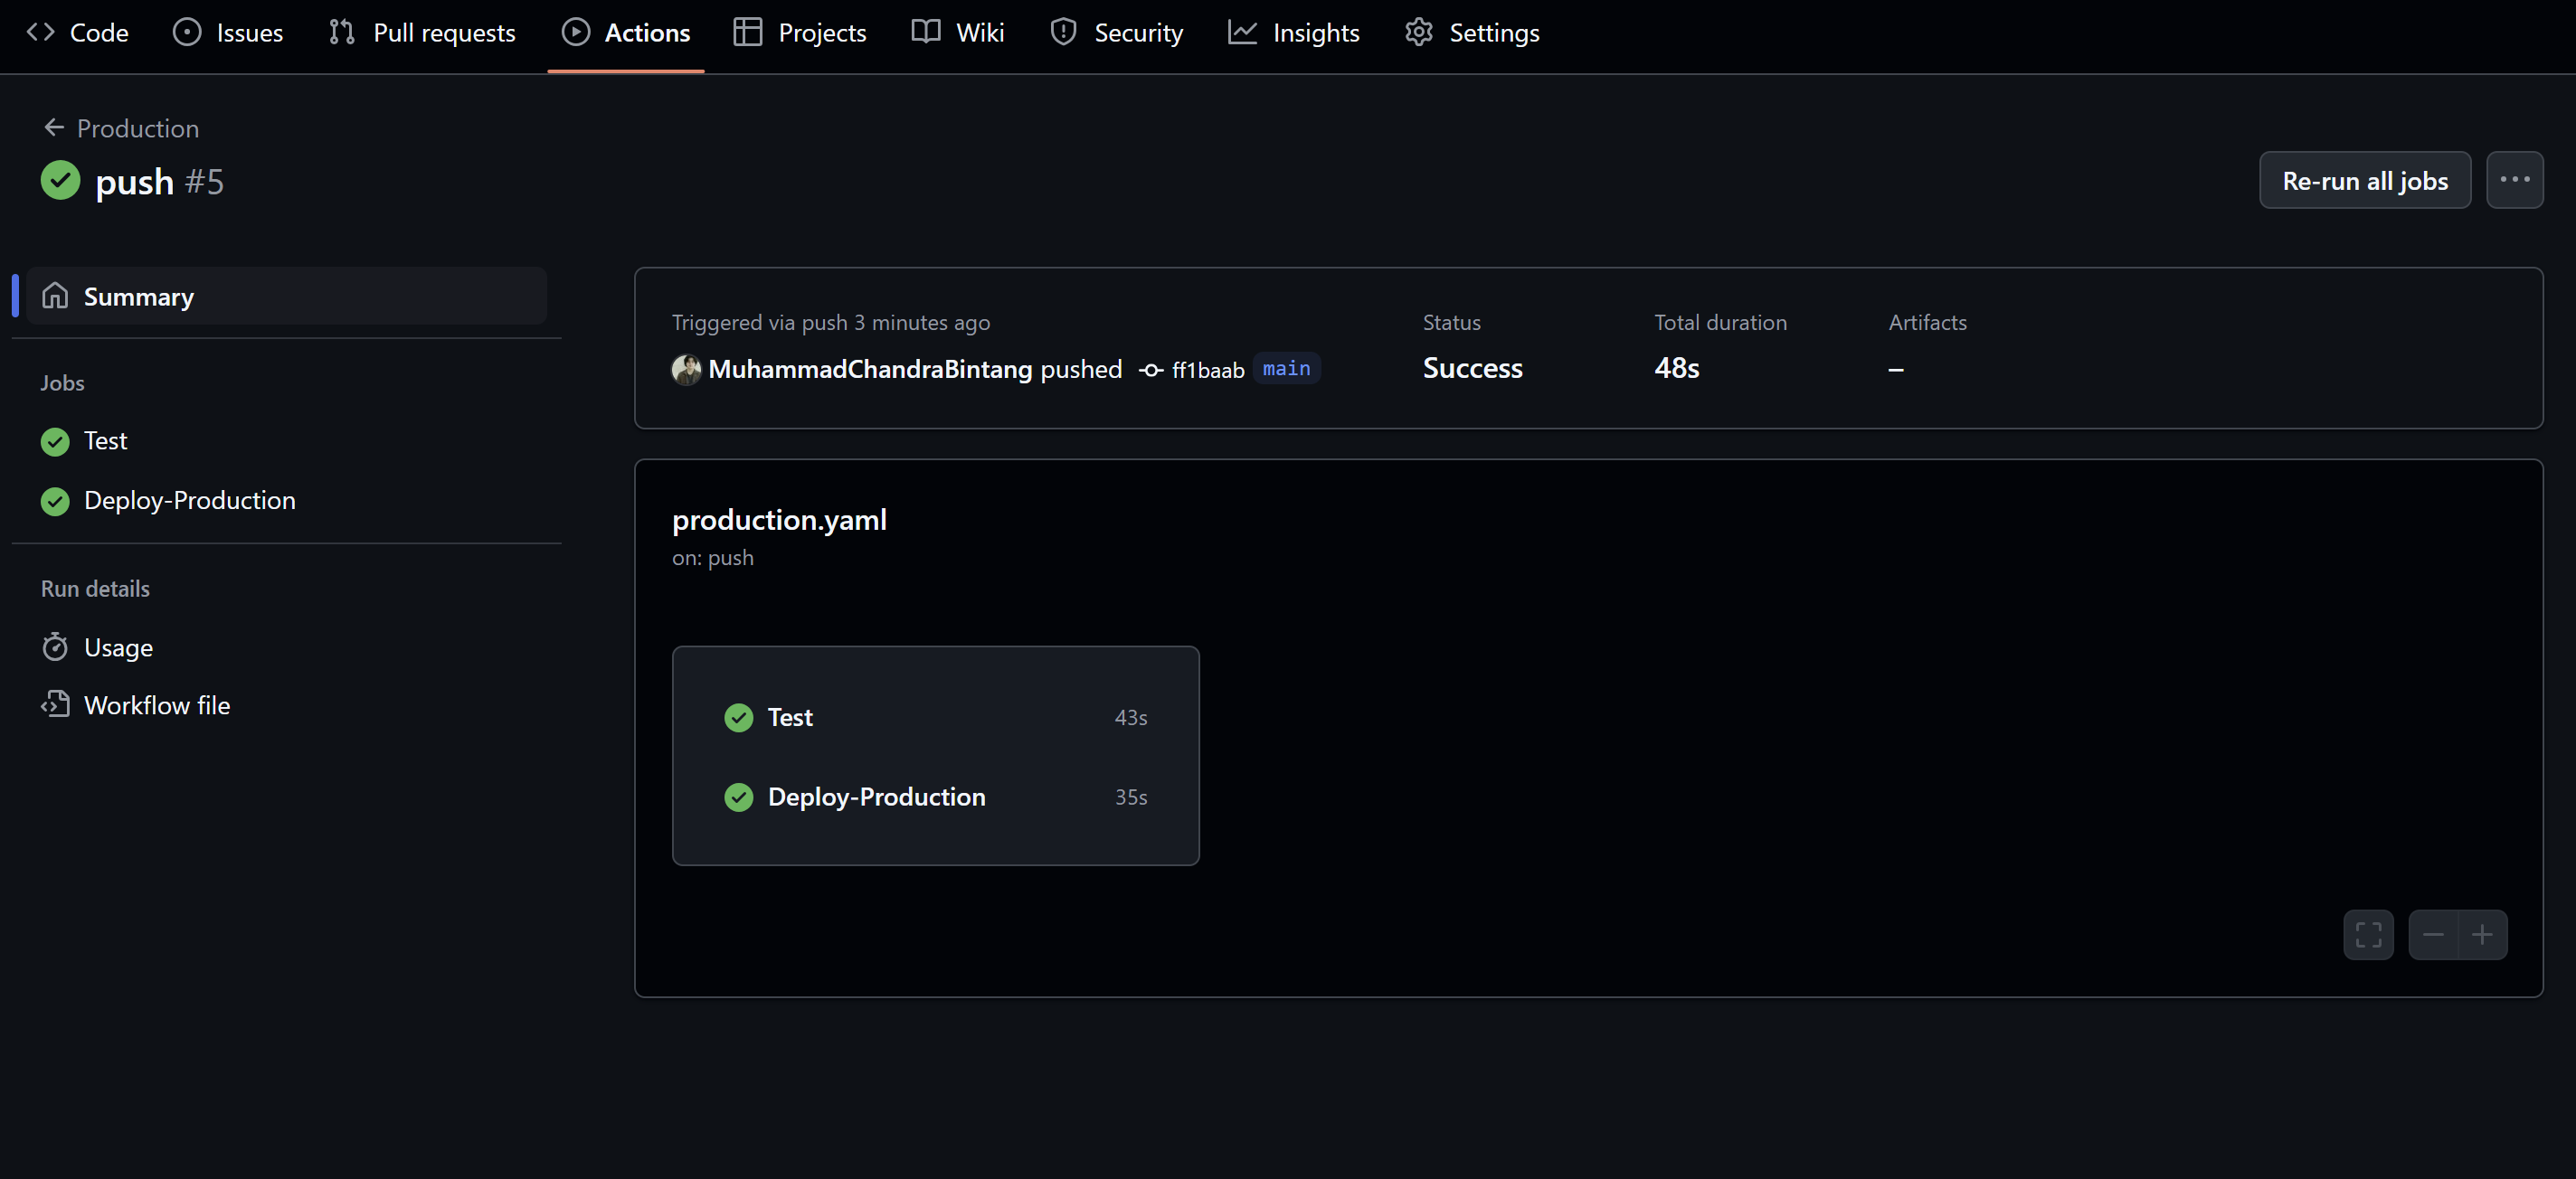
Merge to Main for Production
After you’ve tested your changes and everything looks good, merge your branch into main and push. This will trigger the production workflow and automatically deploy your changes to Vercel.
If you run into test errors, double-check your spec files to ensure your tests are running as expected.
Check Your Vercel Project
Your project should now appear in your Vercel dashboard:
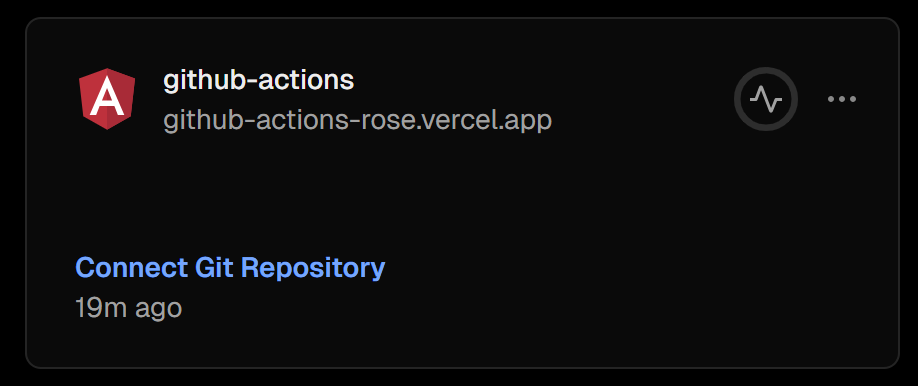
And inside your Vercel project:

Conclusion
Using GitHub Actions to build CI/CD pipelines makes your DevOps flow cleaner and more efficient. With automation in place, you can build, test, and deploy your app without hassle.
I hope this tutorial helped you get the hang of it. Thanks for sticking around—now go build something awesome!