📚 Git & GitHub Series
➡️ You're reading Part 4
⬅️ Part 3: Creating Commits & Exploring the .git Folder
Understanding Branching with an Analogy
Think of a branch in Git as a railway track.
Each commit is like a rail car placed on that track, and the branch name (e.g., main) is the track's label.
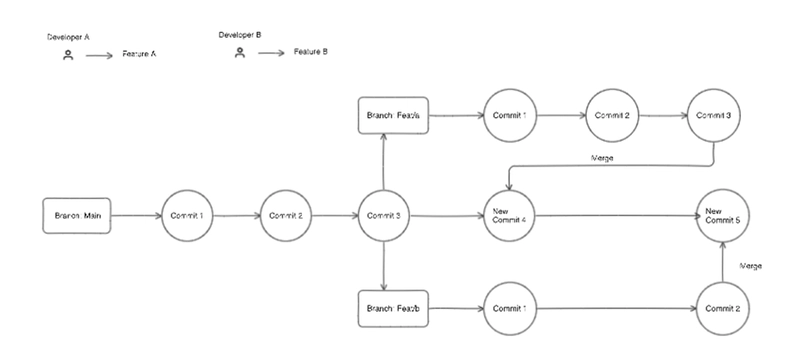
Now let’s imagine two developers, Developer A and Developer B, working on their respective features.
Why Not Work on the Same Branch?
If both developers work directly on the same branch (main), over time the commit history gets polluted.
Now imagine if we need to revert Developer A’s changes, doing so would also affect Developer B’s work.
This is why we avoid working directly on
mainand instead create branches.
How Branching Helps

At the beginning, the HEAD (which points to the latest commit) is on the last commit of the main branch.
- Developer A needs to work on a new feature.
- They create a new branch from
mainusing:
git checkout -b feat/a- Developer A commits code into
feat/a, creating 3 commits.
Meanwhile, other contributors may add commits to the main branch, moving its HEAD forward.
When Developer A completes their work:
- The
feat/abranch is merged back intomain. - The merge can happen in one of two ways:
- As individual commits
- As a single commit using squash:
git merge --squash feat/aReal-World Git Rules (In Companies)

Different organizations follow different Git workflows, but a common approach includes:
- The
mainbranch is treated as the Single Source of Truth. - Developers never push directly to
main. - Instead, they follow a similar process to this:
- Create a feature branch (e.g.,
feat/login). - Push it to the remote repository.
- Open a Pull Request (PR) to merge into
main. - The PR is reviewed, discussed, and approved.
- After approval, it gets merged into
main.
This keeps the
mainbranch clean, stable, and production-ready.
Branch Naming Conventions in Companies
To maintain clarity and consistency across teams, branches are often named following specific patterns:
git branch "feat/whatsapp-integration" #New feature
git branch "bug/login-not-working" #Fixing a bug
git branch "wip/wontBeFinishedSoon" #Work in progress
git branch "junk/experimenting" #Temporary or experimental work
💡 Best Practices for Branch Naming:
- Always use lowercase letters and hyphens
-to separate words. - Start the branch name with a category prefix (
feat/,bug/,wip/,chore/,junk/). - Keep branch names short but descriptive.
- Avoid using spaces or special characters other than
-and/.
A consistent naming convention makes it easier to automate workflows, review pull requests, and manage releases.
Let's Perform Branching & Merging in Git
Follow along with this hands-on example to understand branching, committing, and merging.
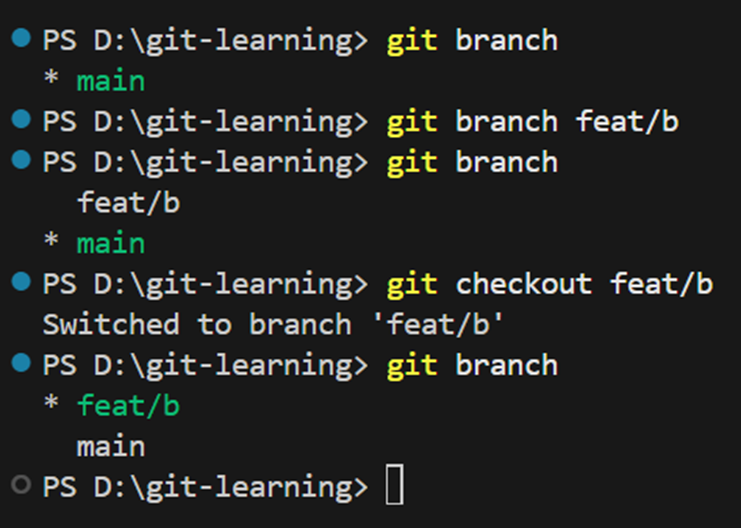
Step 1: Check Which Branch You’re On
To see your current branch:
git branchYou’ll likely see main (or master).
If you’re not on main, switch to it:
git checkout mainStep 2: Create a New File and Commit
Create a file named Then stage and commit the file: Let’s say you want to start working on Feature B: This: Create a file called Make another small change, then: You can view commit history in two ways: Or a simplified version: Now that your work is done in Your changes from This is a shortcut to create and move into a branch: Make some changes in Then merge into After the merges: You’ll see the new commits from To keep your branch list clean, delete branches that have already been merged: This won’t delete any history, your changes are already part of the Squashing is a hybrid merging approach where multiple commits are combined into a single commit at the time of merging a branch. When you merge a feature branch into You’ll see 4 separate commits in Switch to the Perform a squash merge: Git will stage all changes from Check the updated commit log: You’ll see just one new commit on Let's break down how a branch is created and how merging works with and without squash. Creating the Branch Regular Merge Squash Merge Let’s say your branch is 3 commits ahead of Once pushed, GitHub will show: "3 commits ahead of main" Suppose your organization has locked the So, you'll create a Pull Request by clicking "Compare & pull request" on GitHub. To merge cleanly into This will: This keeps the After merging the PR, update your local repo: By following this squash-based GitHub flow, your history stays clean, yet your collaboration remains fully traceable. Rebase is powerful, clean, and dangerous if misused. If you’re on Or: This replays your commits on top of the latest from To keep the This brings in all the changes from your feature branch as one commit and avoids clutter in the commit log. In this article, you learned: By applying these concepts, you’ll keep your repository organized, your main branch production-ready, and your team collaboration smooth. Enjoyed this post?feat-a.html and add some text inside the .
git add feat-a.html
git commit -m "Working on feat/a"
Step 3: Create a Branch from
main and Switch to It
git checkout -b feat/b
feat/b
HEAD at the last commit from main
Step 4: Make Changes and Commit in the New Branch
feat-b.html, add some content in it, and make two commits:
git add feat-b.html
git commit -m "Added feature b file"
git commit -am "Updated feature b file"
Step 5: View the Commit History
git log
git log --oneline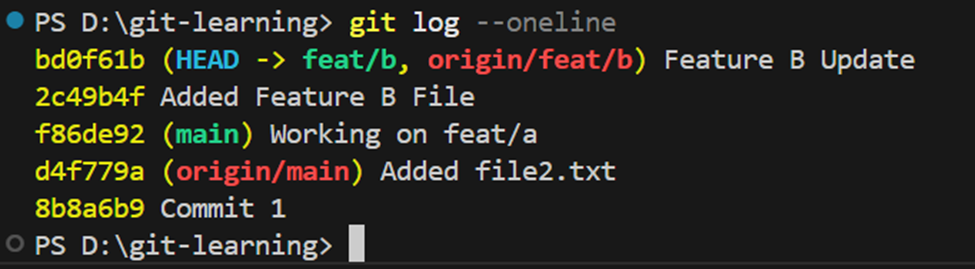
Step 6: Merge
feat/b into main
feat/b, let’s merge it back to main:
git checkout main
git merge feat/b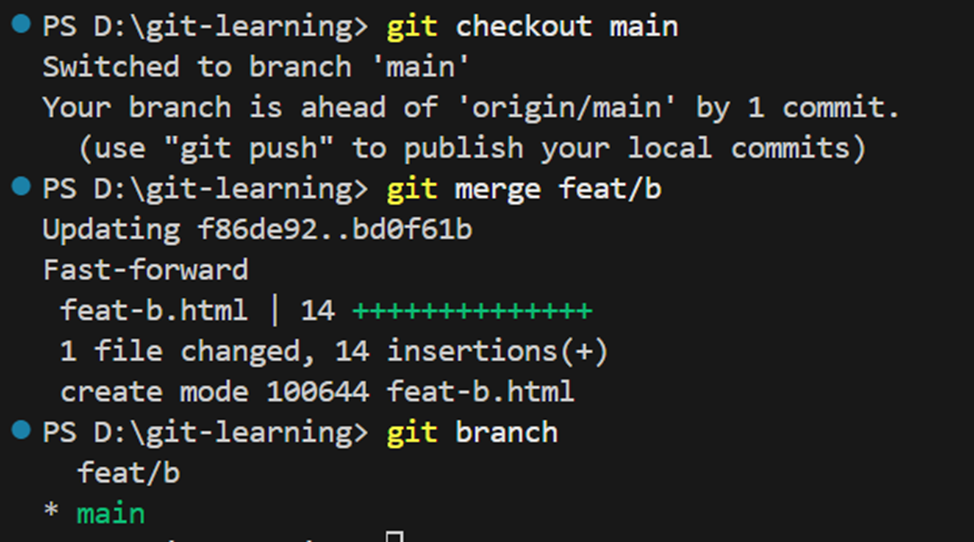
feat/b are now part of the main branch.
Step 7: Create a New Branch and Switch in One Command
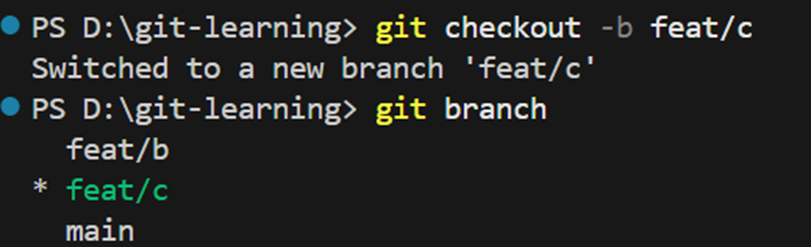
git checkout -b feat/cfeat/c, then:
git add feat-c.html
git commit -m "Added feature c"main:
git checkout main
git merge feat/c
Step 8: View Your Updated Commit History
git log --oneline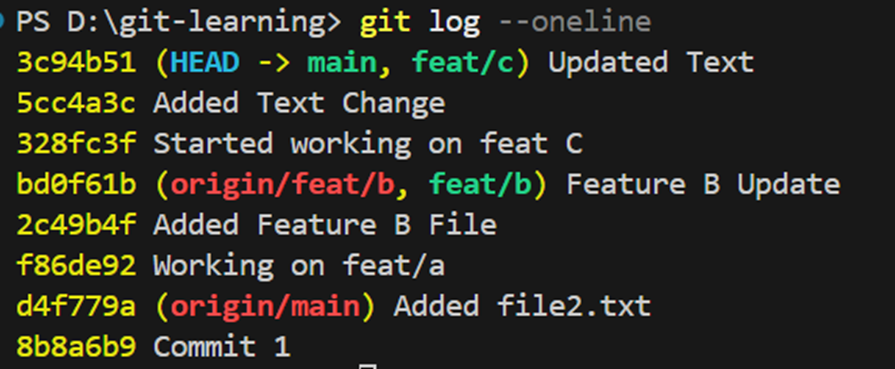
feat/b and feat/c as part of the main branch history.
Delete Merged Branches (Recommended)
git branch -d feat/b
git branch -d feat/cmain branch.
What Is a Squash Merge?
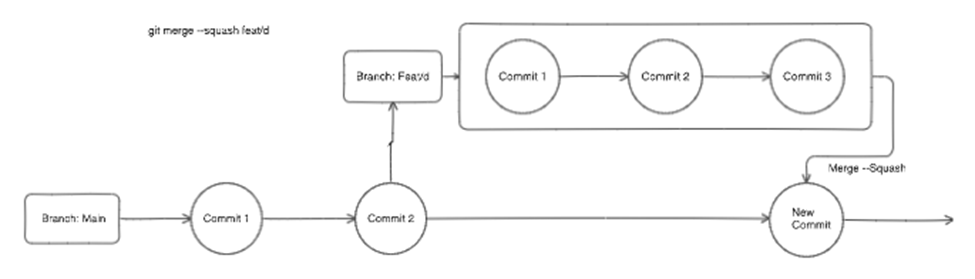
main using squash, Git adds all changes but keeps the main branch history clean.
Benefits of Squash Merging:
main
Disadvantages of Squash Merging:
Try It Yourself: Squash Example
git checkout -b feat/d
git log --oneline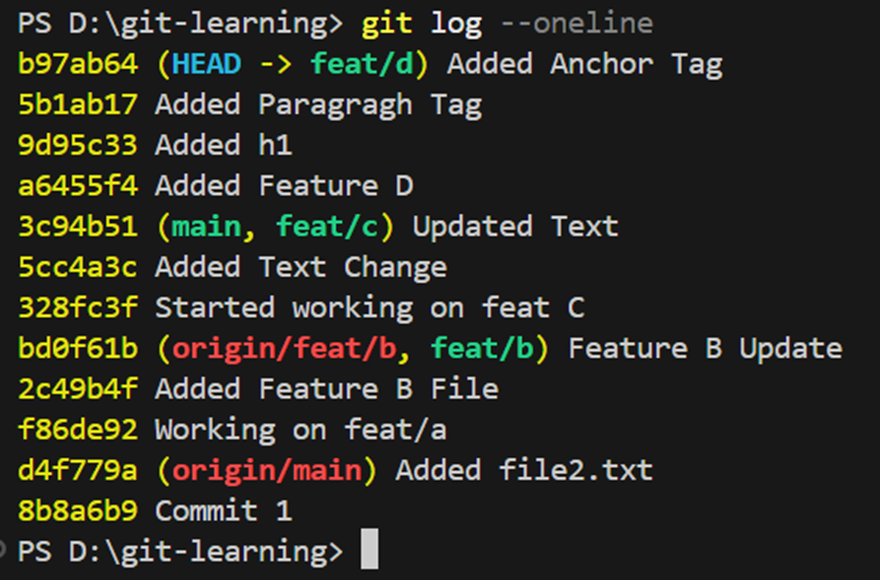
feat/d.
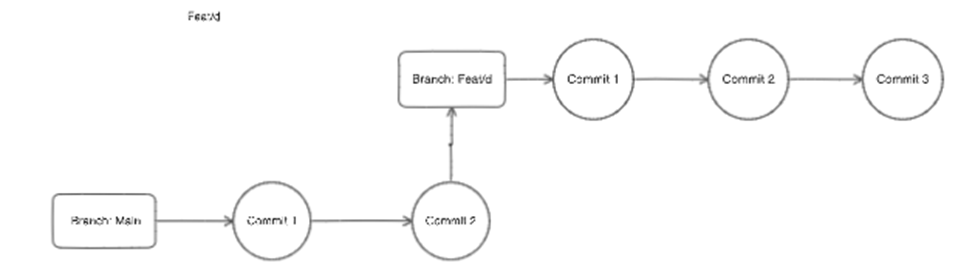
Now Squash the Branch into Main
main branch:
git checkout main
git merge --squash feat/dfeat/d. Now create a single squashed commit:
git commit -m "Squashed: Feature D implementation"
git log --oneline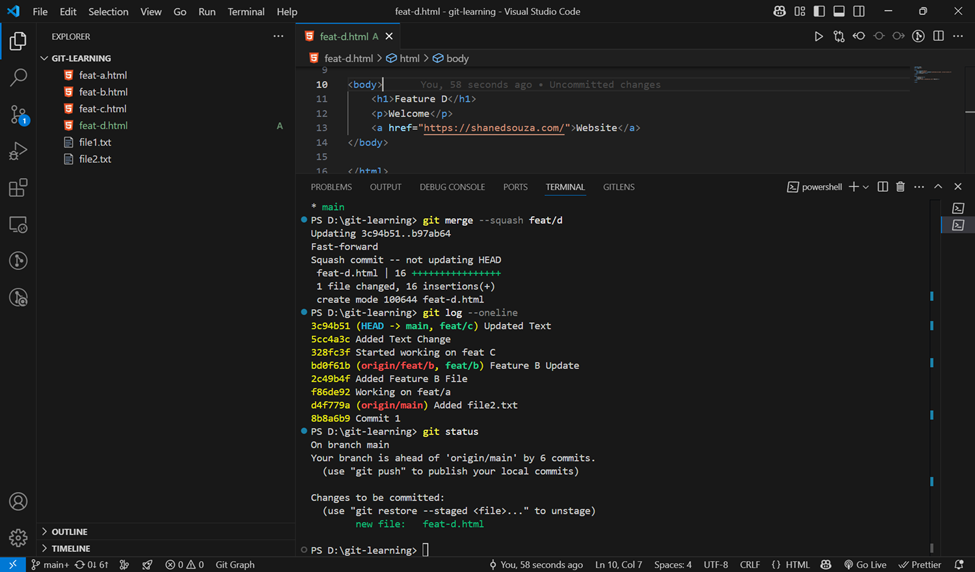
main.
The 4 commits from feat/d are not shown separately.
Visual Breakdown

Real-World Scenario: GitHub Flow with Squash
main.
1. Create a Feature Branch
git checkout -b feat/z
2. Make 3 Commits and Push
git push --set-upstream origin feat/z
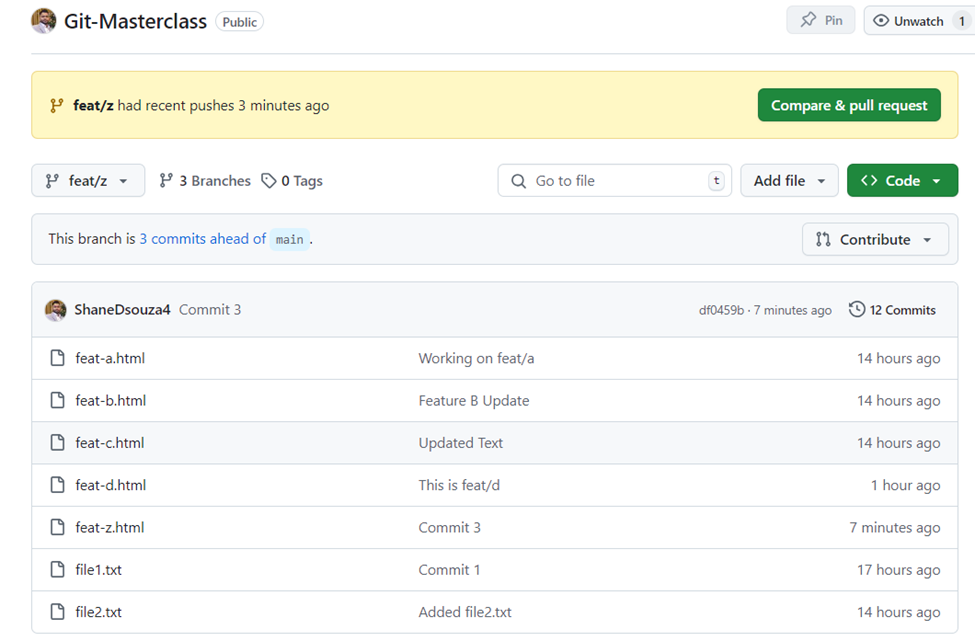
3. Open a Pull Request
main branch — you can't push directly.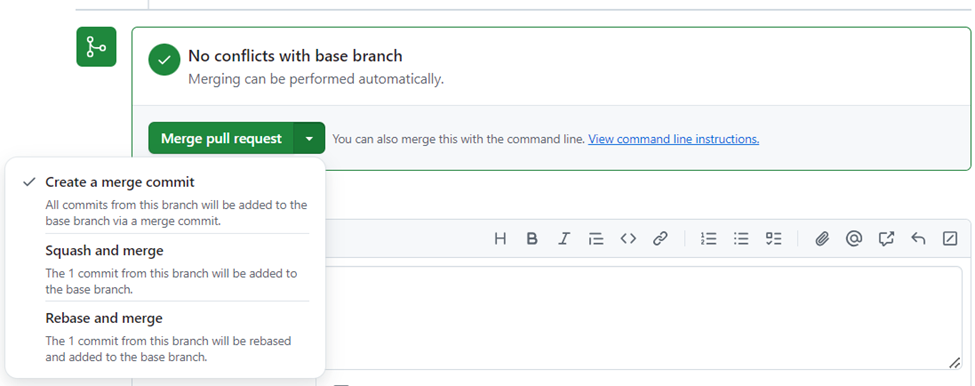
4. Choose Squash & Merge
main, select "Squash and Merge".
main
#3)feat/z) visible until deleted
main timeline clean while retaining traceability via the PR number.
5. Pull the Latest Changes to Your Local
main
git checkout main
git pull origin main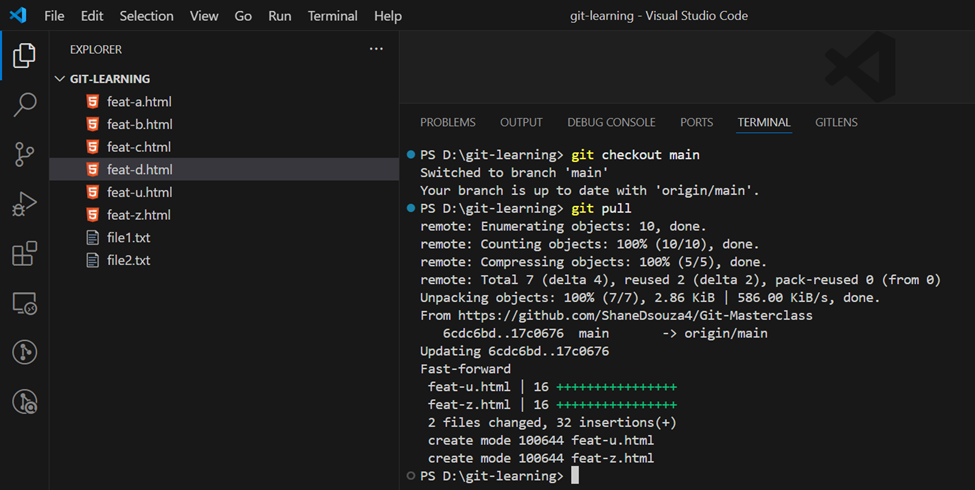
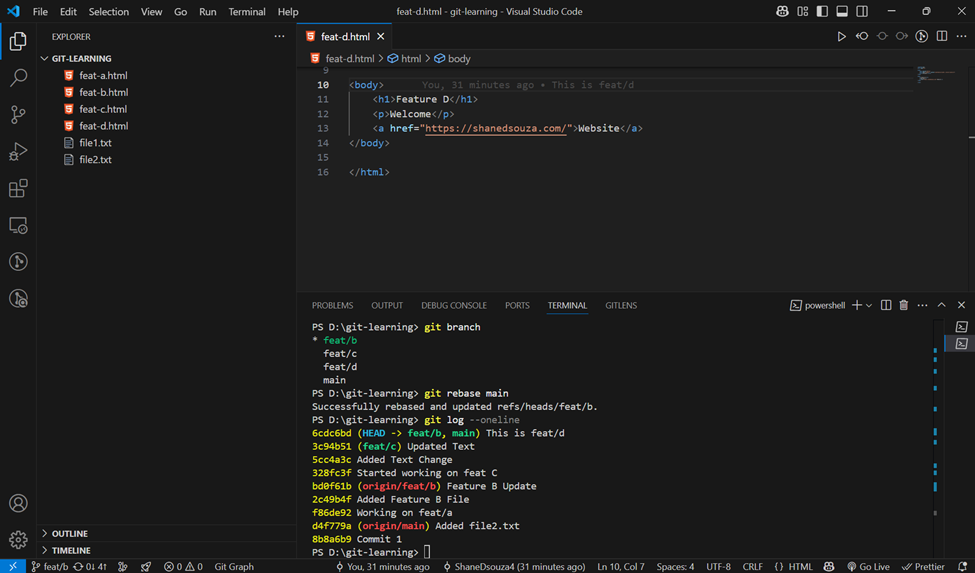
Git Rebase
It rewrites commit history by placing your branch commits on top of another branch (usually main).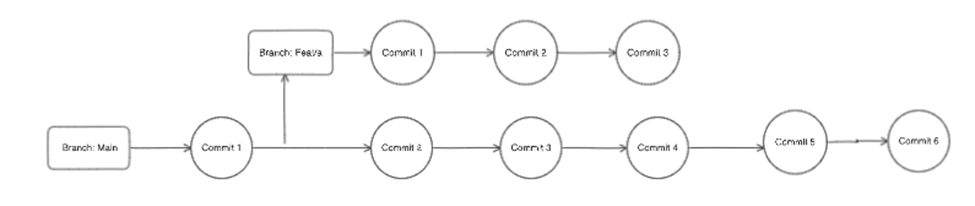
When to Rebase?
main has moved ahead
Common Mistake
feat/b, avoid this:
git merge main # This works but pollutes the history
git merge --squash main # Uncommon usage, may not behave as expected
Correct Way: Rebase
git checkout feat/b
git rebase mainmain, keeping your history linear and clean.
Best Practice for Merging Into Main
main branch clean and organized:
git checkout main
git merge --squash feat/b
Wrapping Up
git rebase can help you keep a linear commit history
📚 More from the Series
Found this helpful? Drop a comment, share it with your team, or follow along for the next deep dive.
