Next.js is a powerful React framework that provides server-side rendering, static site generation, and API routes. Deploying a Next.js app on an AWS EC2 instance allows for better control and customization of the hosting environment. This guide will walk you through the process of setting up a Next.js application on AWS EC2 using Docker and NGINX while automating deployment with GitHub Actions.
Before following this Next.js tutorial, we recommend that you first consult Build and Deploy a ReactJS App to AWS EC2 with Docker, NGINX, and Automate with GitHub Actions.. This guide is a continuation of the series on React deployment, focusing solely on Next.js-specific updates. The basic steps remain the same, and you can refer to the previous article for more details.
Table of Contents
- Setting Up the Project
- Dockerizing the NextJS application
- Setting up NGINX
- Automating deployment with GitHub **Actions on **AWS EC2
Note that you can find the link of final source code in the https://github.com/kilamaelie/Deploy-a-Next.js-App-on-AWS-EC2-with-Docker-NGINX-and-Automate-with-GitHub-Actions repository.
Step 1. Setting Up the Project
Open your terminal and navigate to the directory where you want to create the project, for the purpose of this tutorial we’ll create a directory with a name next-tutorial-app or you can name it anything depending on your project name. This folder is considered as the root directory for our application which contains all folders and files structures.
Then, we will change our directory into the next-tutorial-app folder and all other parts of configuration files or folders will be in this folder.
> mkdir next-tutorial-app
> cd next-tutorial-app
Inside the next-tutorial-app folder, to create a new Next project runs the following command using create-next-app@latest
npx create-next-app@latest # website is our app-name or folder nameLet’s change the directory into website as our app-name for NextJs application and start development server.
cd website # app-name
npm run dev # start the development server*Step 2: Dockerizing the Next.js App
*
Create a Dockerfile in the root directory of your website folder:
FROM node:23.10.0-alpine

WORKDIR /app

COPY ./package*.json ./

# Install dependencies
RUN yarn

# Copy all files
COPY . .

# Expose the listening port
EXPOSE 3000
Then, create a .dockerignore file to exclude unnecessary files:
node_modules
.next
.DS_Store
dist
In your project’s root directory as next-tutorial-app, create a file named docker-compose.yml. This file will contain the configuration for your multi-container application.
services:
  website:
    build:
      context: ./website
      dockerfile: Dockerfile
    command: yarn dev
    ports:
      - "3000:3000"
So to test it, just go in your terminal, navigate to the directory containing the docker-compose.yml file and run:
docker-compose upKill the task in the terminal where docker-compose up is running in order to stop the. To remove the containers and their associated resources, run:
docker-compose rm -vStep 3: Setting Up NGINX as a Reverse Proxy in Docker
In the root of your project directory, create a Nginx directory named nginx then create a configuration file named nginx.conf . So inside nginx.conf file adds the following configuration:
server {
     listen 80;
     server_name localhost;
     #server_name can add your domain or Ip address for your server in the production

    location / {
        proxy_pass http://website:3000;
        proxy_http_version 1.1;
        proxy_set_header Upgrade $http_upgrade;
        proxy_set_header Connection 'upgrade';
        proxy_set_header Host $host;
        proxy_cache_bypass $http_upgrade;
     }
 }
in the same directory as your Nginx, create a Dockerfile which defines how to build a custom Nginx Docker Image:
# Use an official Nginx image as the base image
FROM nginx:latest

# Remove any existing config files
RUN rm /etc/nginx/conf.d/*
# Copy the custom Nginx configuration
COPY nginx.conf /etc/nginx/conf.d/
# Expose port 80 for Nginx
EXPOSE 80
Before testing in development, let’s update our docker-compose file by adding the Nginx service
services:
  website:
    build:
      context: ./website
      dockerfile: Dockerfile
    ports:
    - 3000:3000

  nginx:
    build:
     context: ./nginx
     dockerfile: Dockerfile
    ports:
      - "80:80"
    depends_on:
      - website
Also update the Dockerfile for the next app in the website directory
# Stage 1: Install Dependencies
ARG NODE=node:20-alpine
FROM ${NODE} AS deps

RUN apk add --no-cache libc6-compat

WORKDIR /app

COPY package*.json ./
RUN npm install

# Stage 2: Build
FROM ${NODE} AS builder

WORKDIR /app

COPY --from=deps /app/node_modules ./node_modules
COPY . .

RUN npm run build

# Stage 3: Production Runner
FROM ${NODE} AS runner

WORKDIR /app

ENV NODE_ENV production
ENV PORT 3000
ENV NEXT_TELEMETRY_DISABLED 1

# Install PM2 globally
RUN npm install -g pm2

# Create a non-root user
RUN addgroup --system --gid 1001 nodegroup
RUN adduser --system --uid 1001 appuser

# Copy necessary files
COPY --from=builder /app/public ./public
COPY --from=builder /app/package.json ./package.json
COPY --from=builder --chown=appuser:nodegroup /app/.next/standalone ./
COPY --from=builder --chown=appuser:nodegroup /app/.next/static ./.next/static

USER appuser

EXPOSE 3000

# Start the application using PM2
CMD ["pm2-runtime", "node", "--", "server.js"]
Before testing, ensure that output: 'standalone' is set in the next.config.js file to optimize the build for Docker deployment.
To test if everything works, open a terminal, navigate to your root directory, and run the following command:
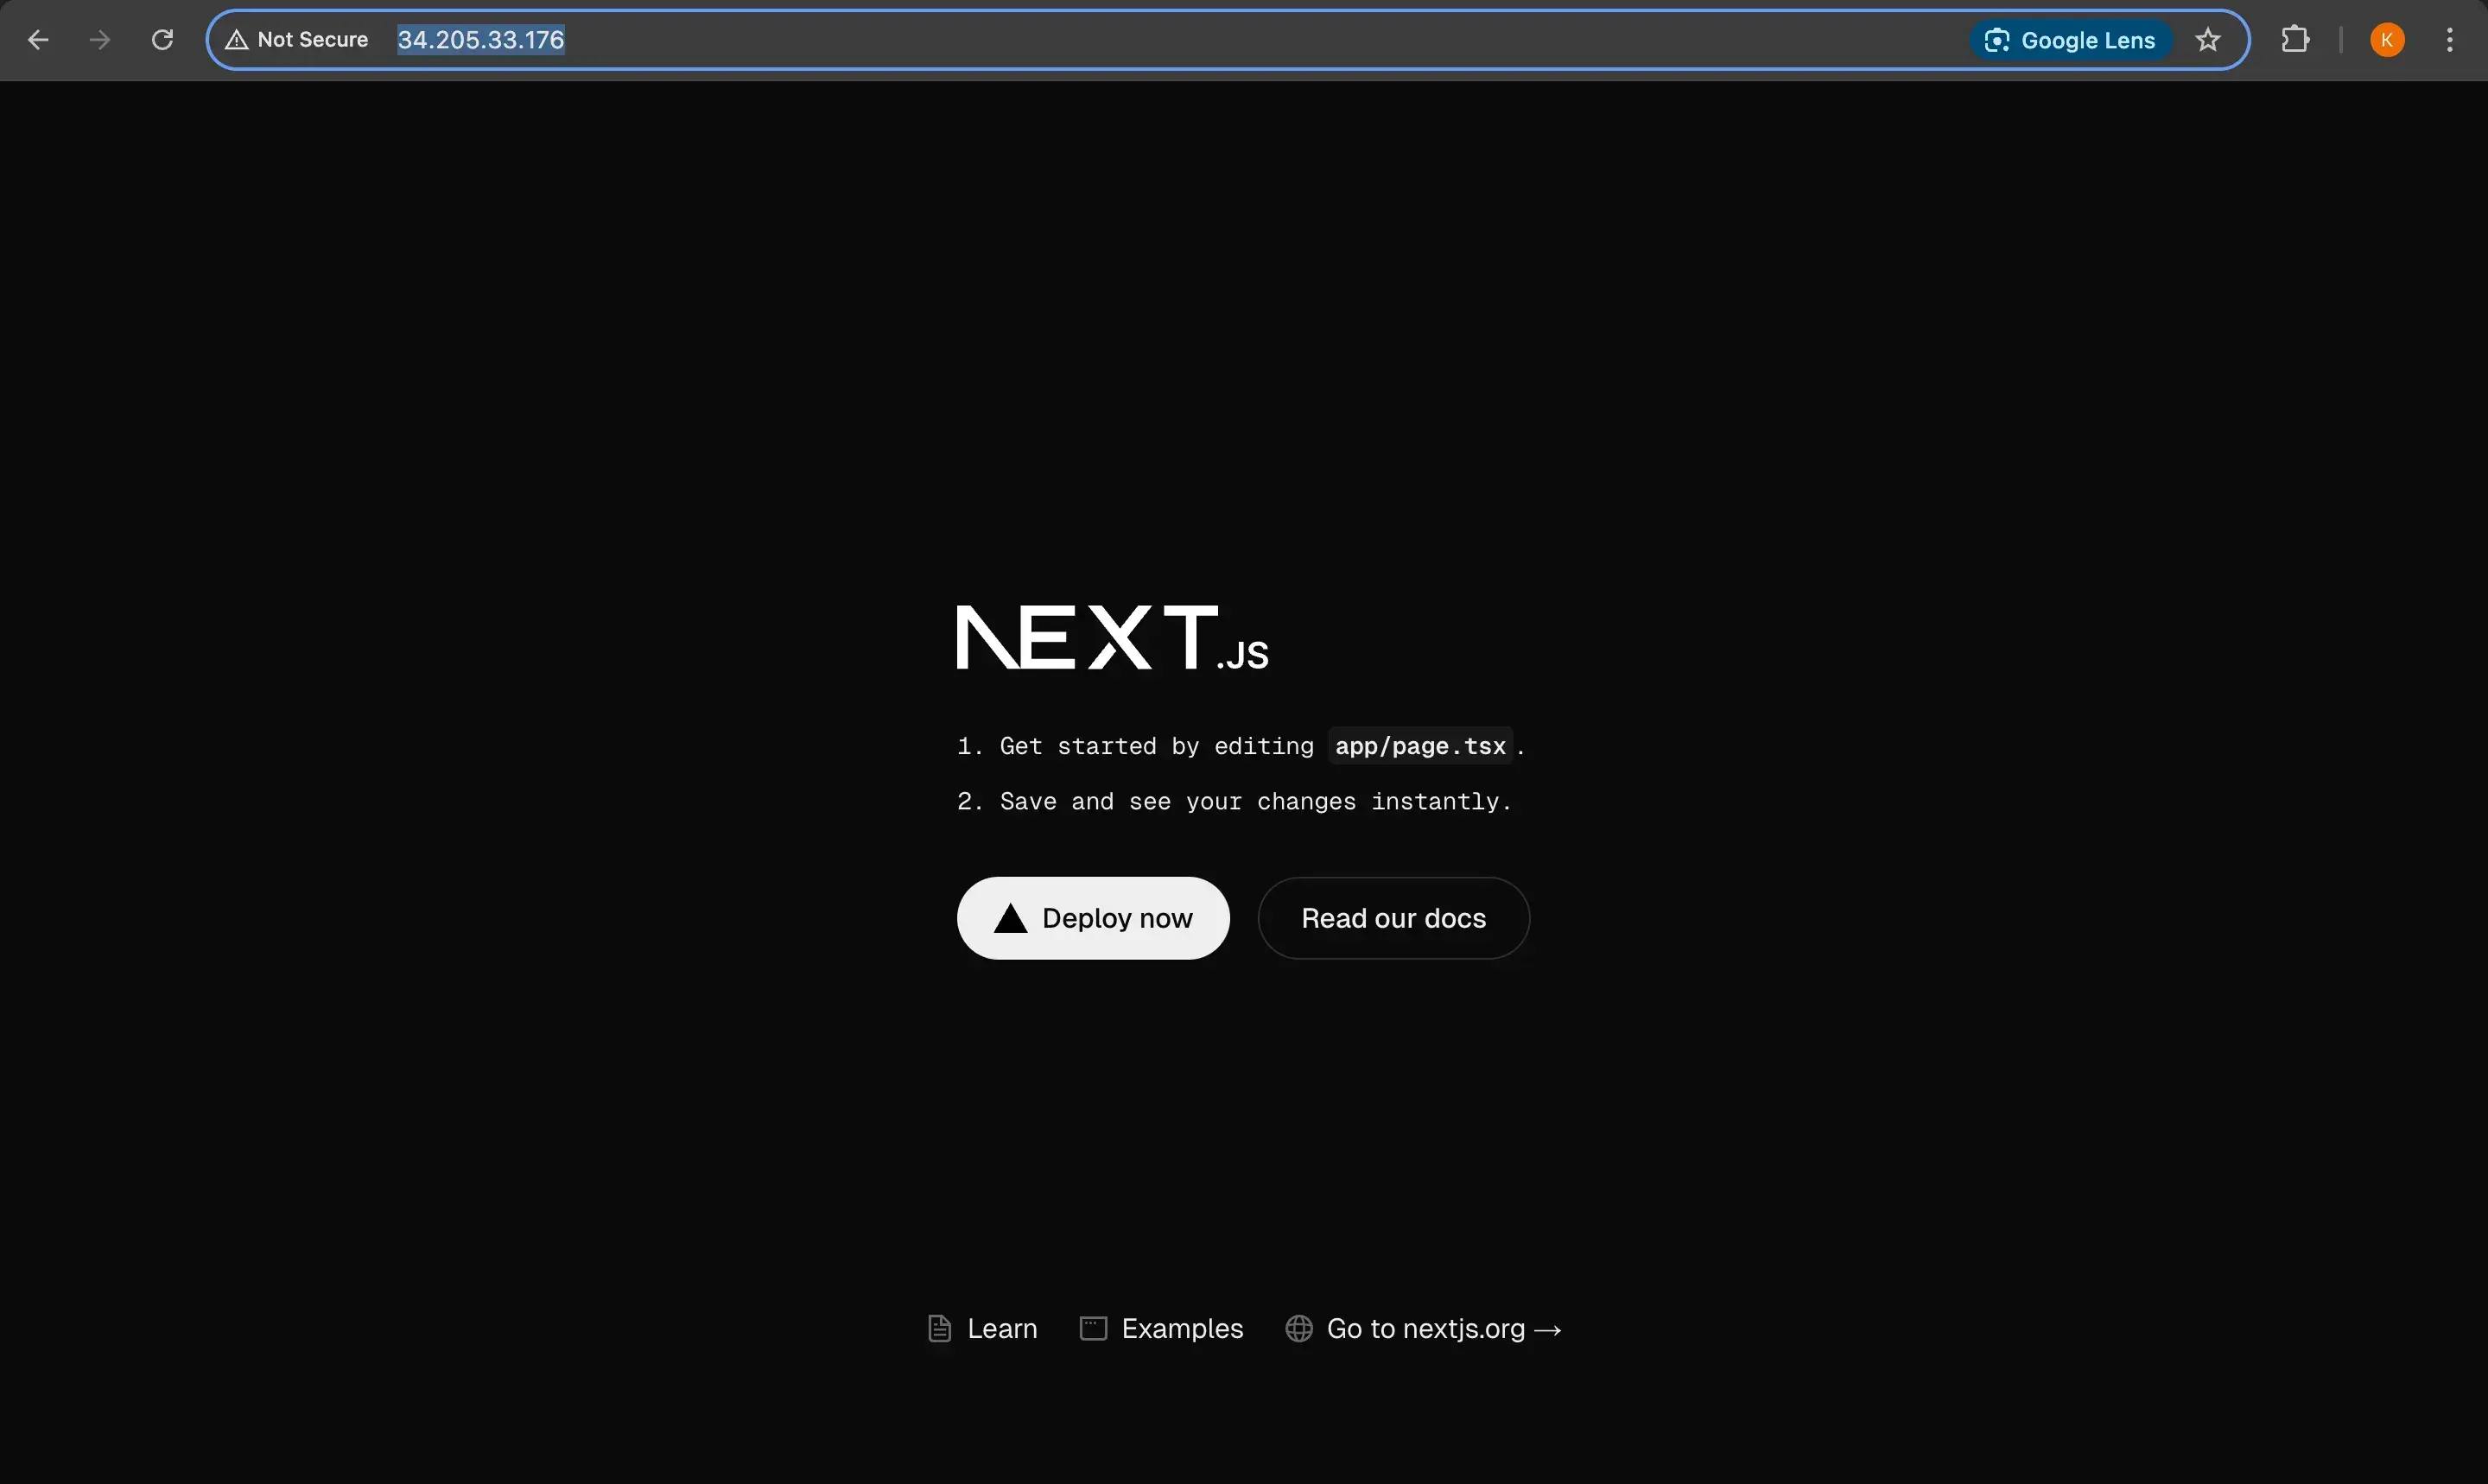
docker-compose up #Then let’s testing athttp://localhost:80 or http://127.0.0.1:80
Kill the task in the terminal
docker-compose rm -vThen, let’s create docker-compose.ci and docker-compose.prod files for the production and workflow purpose in the root directory of the project
Docker-compose.ci
services:
  website:
    container_name: website
    build:
      context: ./website
      dockerfile: Dockerfile
      cache_from:
        - '${NEXT_APP_WEBSITE_IMAGE}'
    image: '${NEXT_APP_WEBSITE_IMAGE}'
    env_file:
      - ./.env
    ports:
      - '3000:3000'

  nginx:
    container_name: nginx
    build:
      context: ./nginx
      dockerfile: Dockerfile
      cache_from:
        - '${NEXT_APP_NGINX_IMAGE}'
    image: '${NEXT_APP_NGINX_IMAGE}'
    ports:
      - '80:80'
    restart: always
    depends_on:
      - website
Docker-compose.prod
services:
  website:
    container_name: website
    image: '${NEXT_APP_WEBSITE_IMAGE}'
    env_file: .env
    ports:
      - '3000:3000'

  nginx:
    container_name: nginx
    image: '${NEXT_APP_NGINX_IMAGE}'
    ports:
      - '80:80'
    depends_on:
      - website
    restart: always
So for this tutorial will use Github packages for hosting the images.
Step 4: Automating Deployment with GitHub Actions
Create a GitHub Actions workflow file at .github/workflows/deploy.yml in the root of the project.
main.yml
Please make sure your on main branch because the workflow’s can only trigger on the main branch other you can it to your preferences.
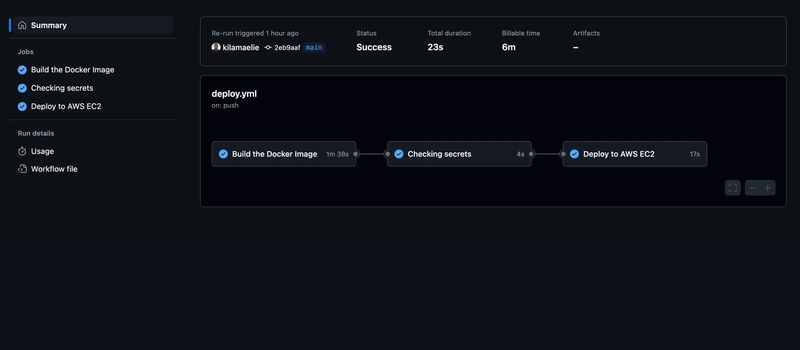
Workflow successfully finished :

🚀 👏💻 By following these steps, you have successfully deployed a Next.js application on AWS EC2 using Docker and NGINX, with automated deployments using GitHub Actions. You can further enhance this setup by integrating SSL certificates with Let’s Encrypt and using AWS services like RDS or S3 for storage.
If you would like to improve your skills, click on the following link on Master React App Deployment: AWS EC2, Route 53, SSL & GitHub Actions,A comprehensive manual which walks you through the deployment process, leveraging the power of Docker, AWS EC2, Route 53, SSL encryption and GitHub actions to build a robust CI/CD pipeline.
Keep exploring, stay curious and keep building on this foundation to create even more sophisticated and powerful projects. Happy coding!
Thanks for reading through and I hope you liked what you read here. Feel free to connect with me on LinkedIn, twitter and GitHub.