In this post, I’ll walk through how I built a simple machine learning app using Python, packaged it into a Docker image, and then pushed that image to DockerHub. This setup makes it easy to run the app on any machine, without worrying about installing dependencies or setting up the environment.
The Machine Learning App
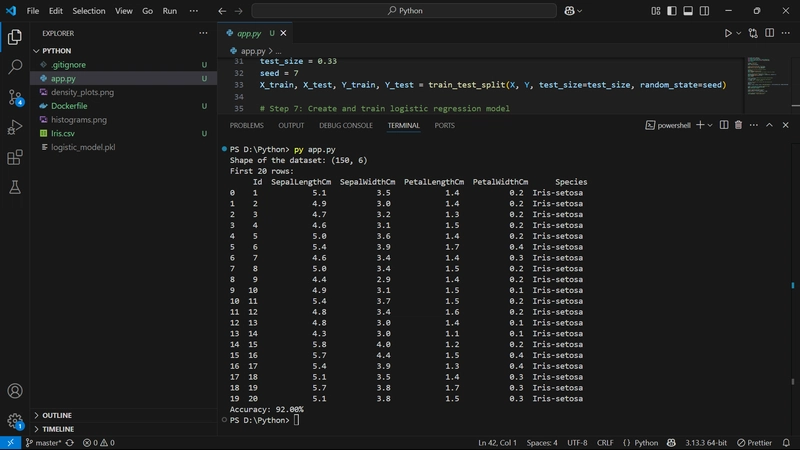
The app trains a logistic regression model on the Iris dataset to classify flowers based on sepal and petal measurements. It loads the data, prints basic info, generates and saves visualizations, splits the dataset, trains the model, evaluates accuracy, and saves the trained model using Joblib.
Make sure to place the Iris.csv file in the same directory as app.py so that the script can access it during execution.
Here's the Python file used:
from pandas import read_csv
from matplotlib import pyplot
from sklearn.linear_model import LogisticRegression
from sklearn.model_selection import train_test_split
import joblib

# Step 1: Load dataset
filename = "Iris.csv"
data = read_csv(filename)

# Step 2: Display data shape and preview
print("Shape of the dataset:", data.shape)
print("First 20 rows:\n", data.head(20))

# Step 3: Plot and save histograms silently
data.hist()
pyplot.savefig("histograms.png")
pyplot.close()  # Close the plot so it doesn't show up in prompt

# Step 4: Plot and save density plots silently
data.plot(kind='density', subplots=True, layout=(3,3), sharex=False)
pyplot.savefig("density_plots.png")
pyplot.close()

# Step 5: Convert to NumPy array and extract features/labels
array = data.values
X = array[:, 1:5]  # Features: Sepal/Petal measurements
Y = array[:, 5]    # Target: Species

# Step 6: Split data into training (67%) and testing (33%)
test_size = 0.33
seed = 7
X_train, X_test, Y_train, Y_test = train_test_split(X, Y, test_size=test_size, random_state=seed)

# Step 7: Create and train logistic regression model
model = LogisticRegression(max_iter=200)
model.fit(X_train, Y_train)

# Step 8: Evaluate and display accuracy
result = model.score(X_test, Y_test)
print("Accuracy: {:.2f}%".format(result * 100))

# Step 9: Save the trained model to a file
joblib.dump(model, "logistic_model.pkl")
Writing the Dockerfile
Once the app was working locally, the next step was to containerize it using Docker. For this, I created a simple Dockerfile that starts from a lightweight Python base image, installs the required dependencies, copies the code into the image, and defines the command to run the script when the container starts.
Here's the Dockerfile used:
FROM python:3.9-slim

RUN pip install pandas scikit-learn matplotlib joblib

COPY . .

CMD ["python", "app.py"]
This setup ensures that anyone who runs this image will get the same environment and behavior, no matter where they are.
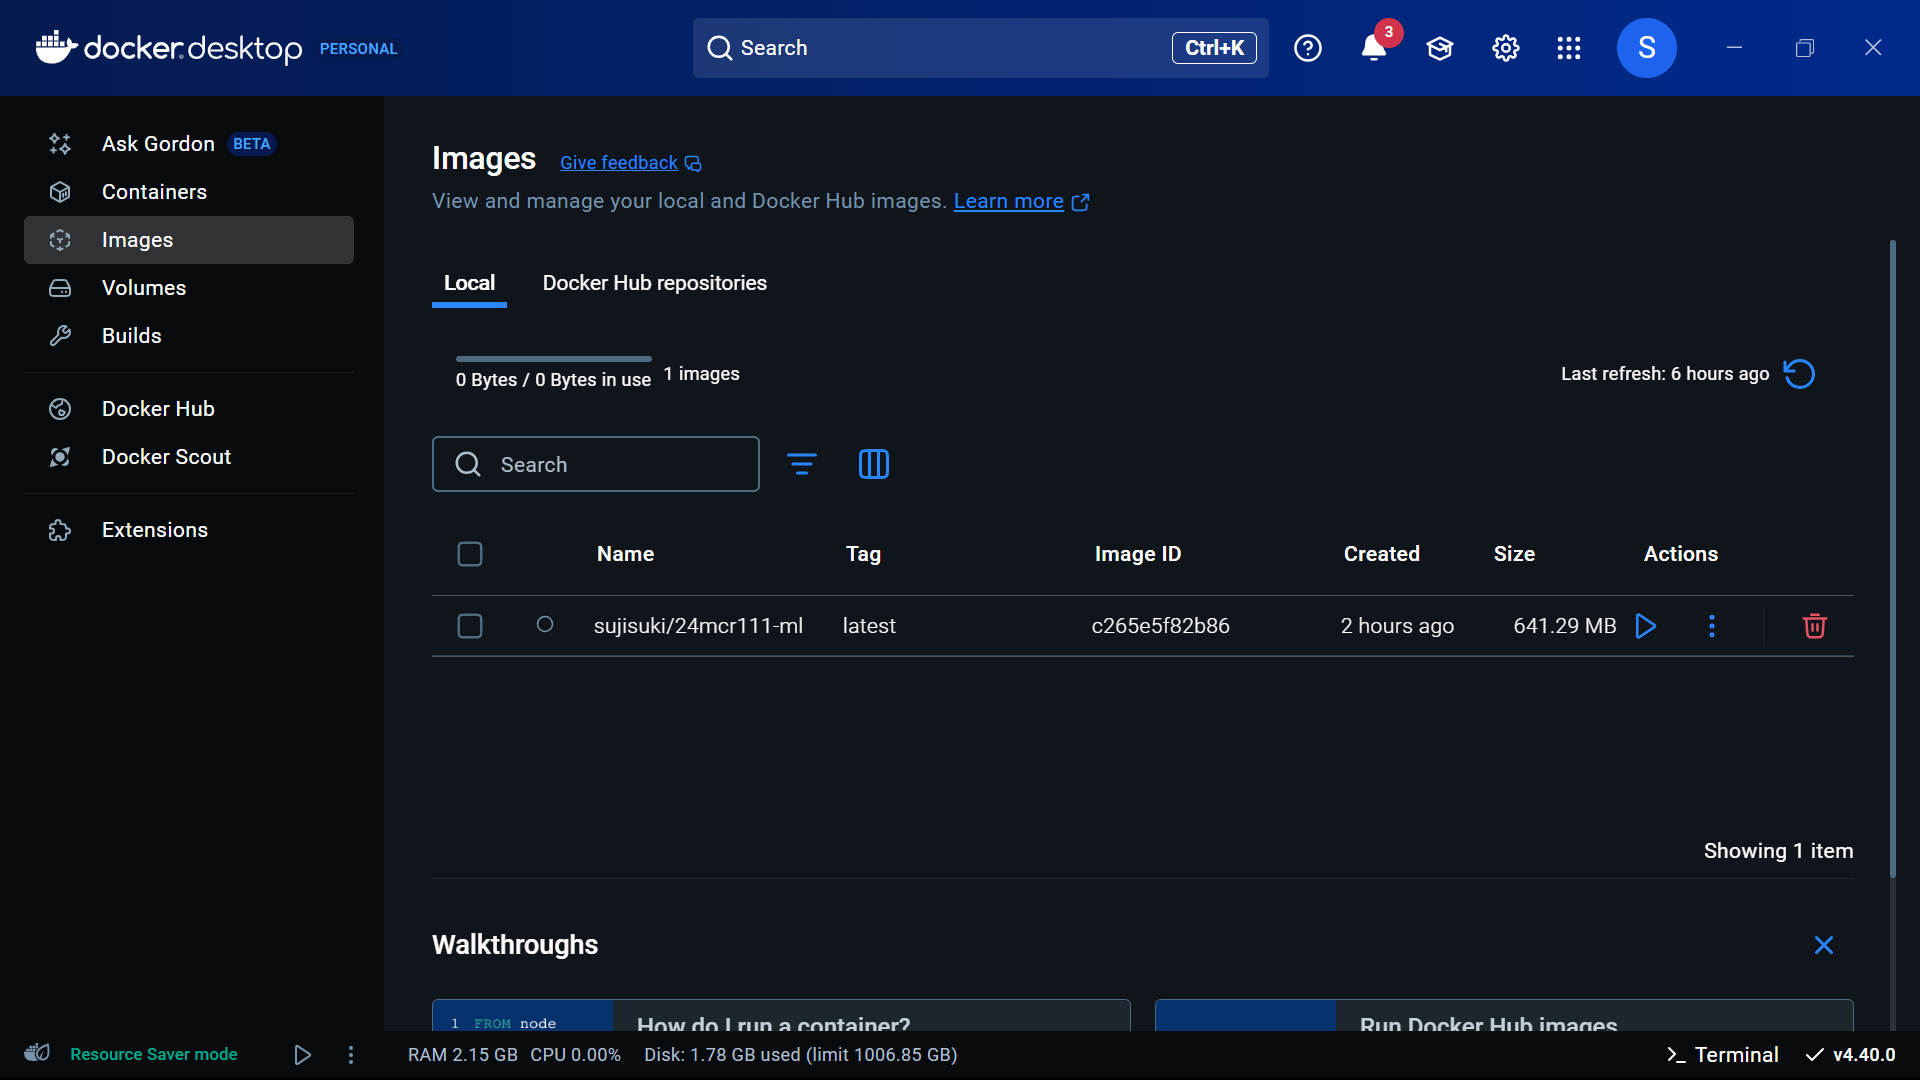
Building the Docker Image
Once the Dockerfile was ready, I opened PowerShell, navigated to the project directory, and ran the following command:
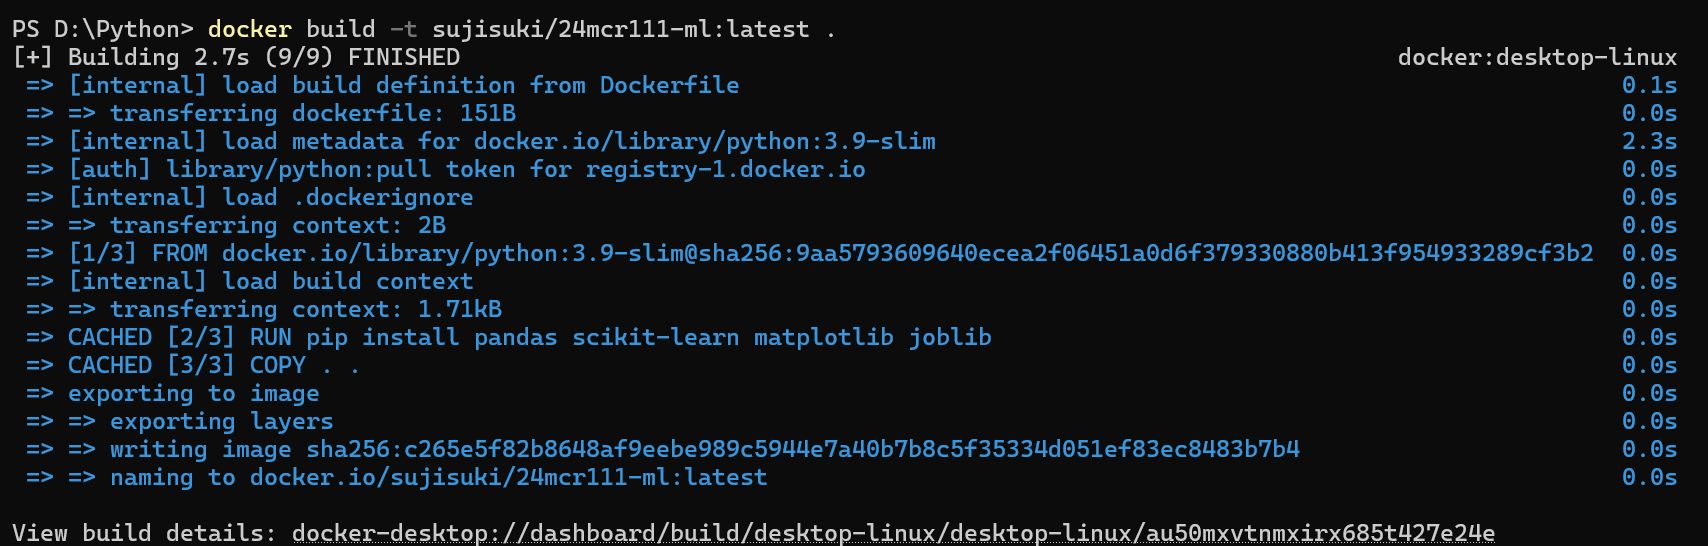 Docker pulled the base image, installed the libraries, copied the code, and built the final image. The build process completed successfully, creating a local image tagged as
 sujisuki/24mcr111-ml:latest.
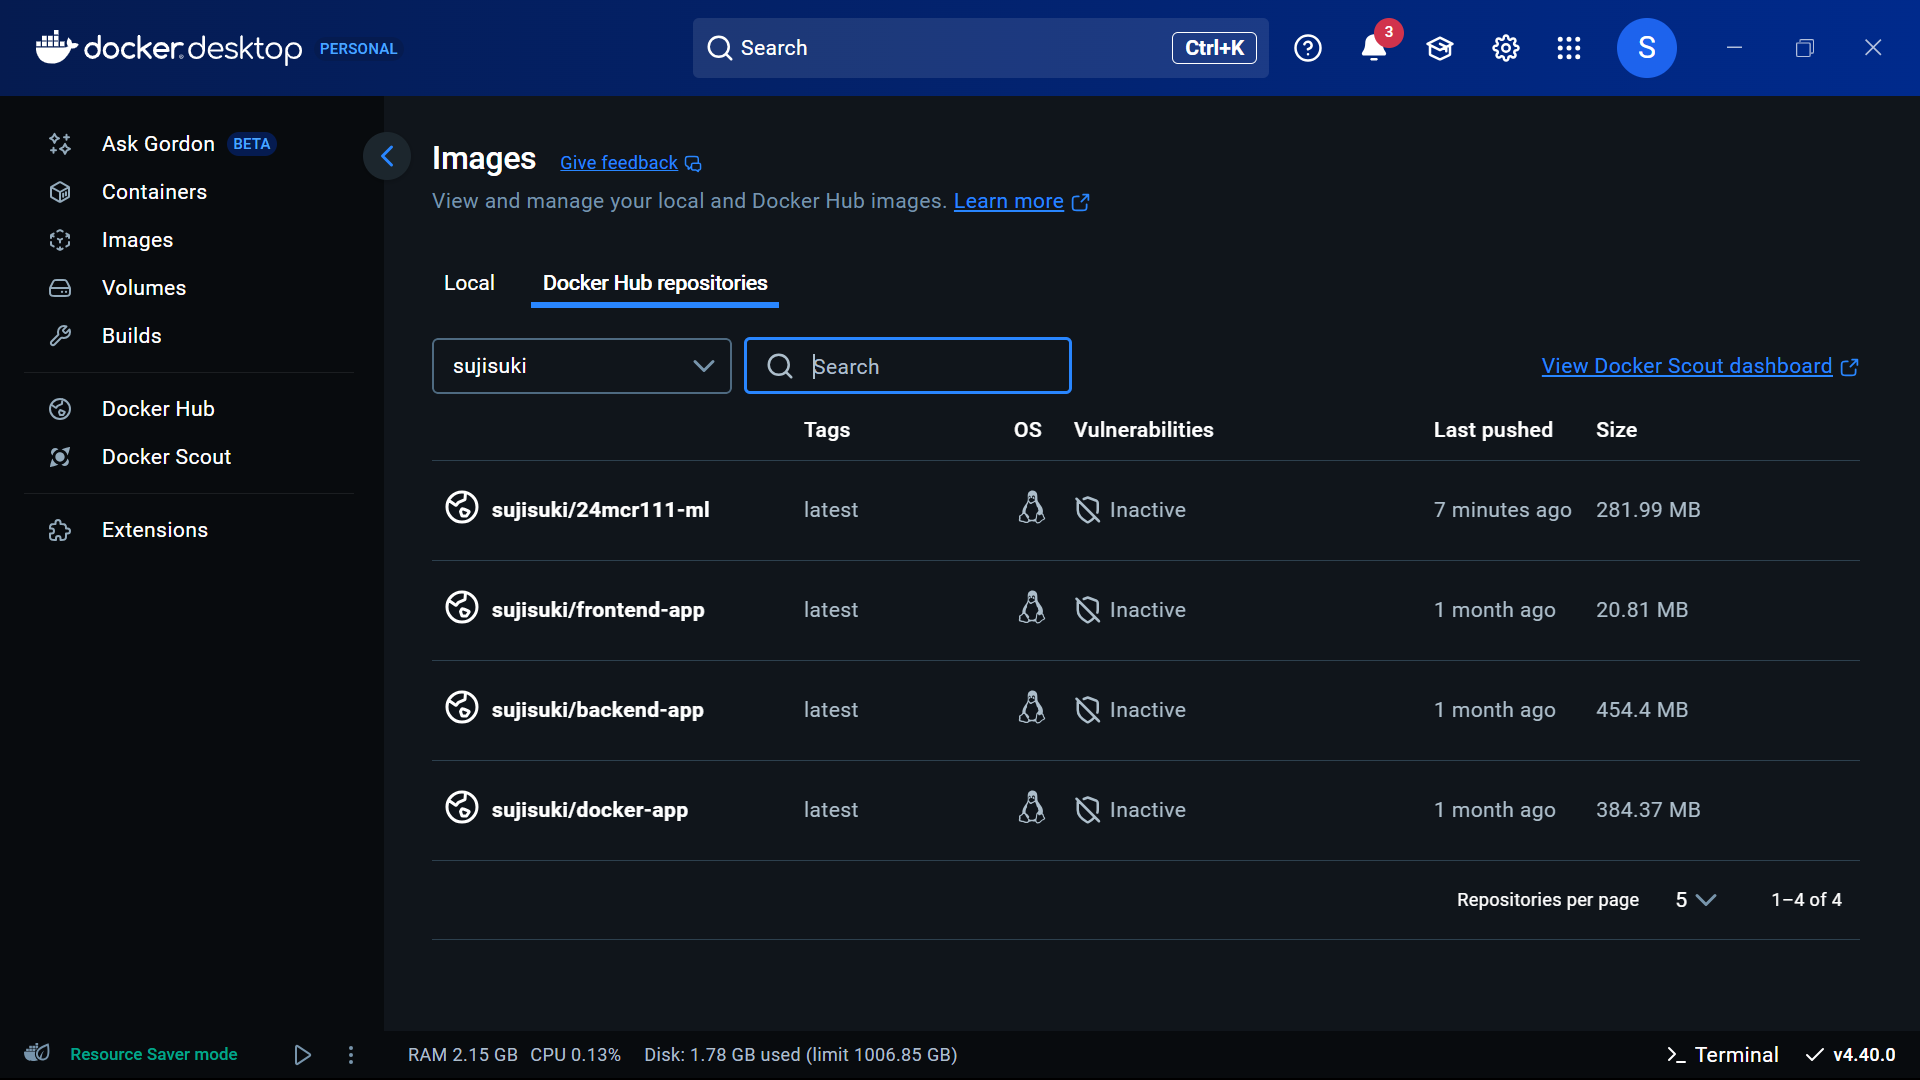
 Pushing the Docker Image to DockerHub
With the image built locally, the next step was to make it available online by pushing it to DockerHub.
First, I logged into DockerHub from the terminal:
 After authentication, I pushed the image to my repository:
 Docker uploaded the image layers to the remote repository, and the image became publicly available at
https://hub.docker.com/r/sujisuki/24mcr111-ml.
Now anyone can pull and run this image on their system using a single command.