
Step-by-Step Guide to Deploying an Index.html Page Using Nginx and AWS CI/CD Tools
💡 Introduction
Hey folks!
Today, we’re diving into an exciting hands-on project where we’ll explore AWS CI/CD services like CodeBuild and CodeDeploy to automate the deployment of a static website.
Since July 2024, AWS CodeCommit is no longer available for new users, so instead, we’ll be using a GitHub repository as our project's source control. This adjustment makes our setup even more versatile, as GitHub is widely used across many organizations.
By the end of this project, you’ll gain practical experience with the AWS CI/CD pipeline, understand how infrastructure automation works inside the AWS ecosystem, and get your hands dirty with setting up and serving your site through an Nginx server on an EC2 instance.
So, without further ado — let’s get started!
💡 Pre-Requisites
Before we jump into the hands-on part, let’s make sure everything is set up properly.
You’ll need an AWS account with an IAM user that has the necessary permissions to access services like CodeBuild, CodeDeploy, EC2, and S3.
Make sure the IAM user has sufficient privileges to create and manage these resources — otherwise, you might run into permission issues during the project.
A basic understanding of AWS services would be very helpful. If you’re new to AWS, don’t worry — I’ll try to keep things beginner-friendly and explain important steps along the way!
Once you have these ready, you’re all set to move forward.
💡Getting Started
Let’s begin by understanding how the codebase works and how it ties into the AWS CI/CD pipeline.
The project is publicly available on GitHub:
👉 AWS-Code-Service-Blog
Inside this repository, you’ll find two key configuration files: appspec.yaml and buildspec.yml.
🧾 appspec.yaml – For CodeDeploy
This file defines the deployment configuration for AWS CodeDeploy. Here's a quick breakdown:
OS: Ubuntu (our EC2 instance will be Ubuntu-based)
Destination:
/var/www/html— this is the default directory served by Nginx-
Hooks:
- The file contains
BeforeInstallandAfterInstallhooks that run shell scripts to install and start Nginx. These scripts include basic commands tailored for Ubuntu.
- The file contains
🛠 buildspec.yml – For CodeBuild
This file defines the build instructions for AWS CodeBuild. It’s divided into three phases:
Install: Installs Nginx
Build: Moves the
index.htmlfile to/var/www/htmlPost-Build: Uploads the final build artifacts to an S3 bucket
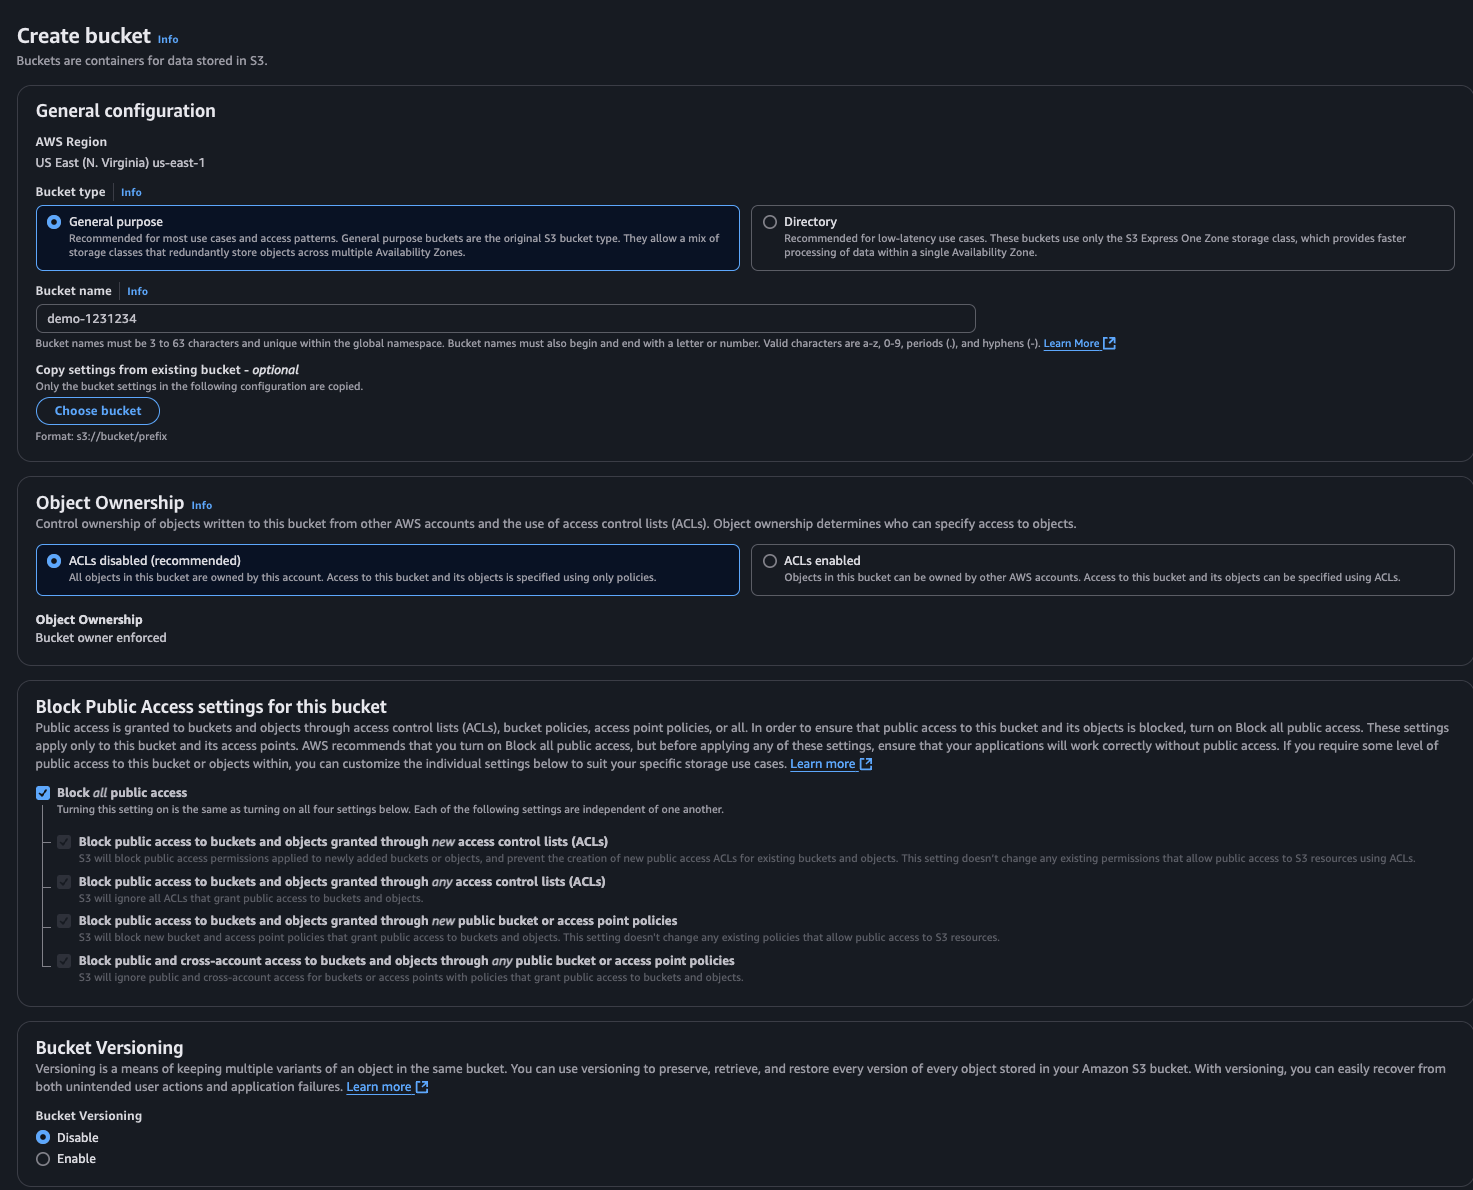
🪣 Step 1: Create an S3 Bucket
We’ll need an S3 bucket to store our build artifacts.
Head over to the S3 console.
Click Create Bucket.
Give your bucket a unique name like
demo-1231234.Leave all other settings as default.
Click Create Bucket.
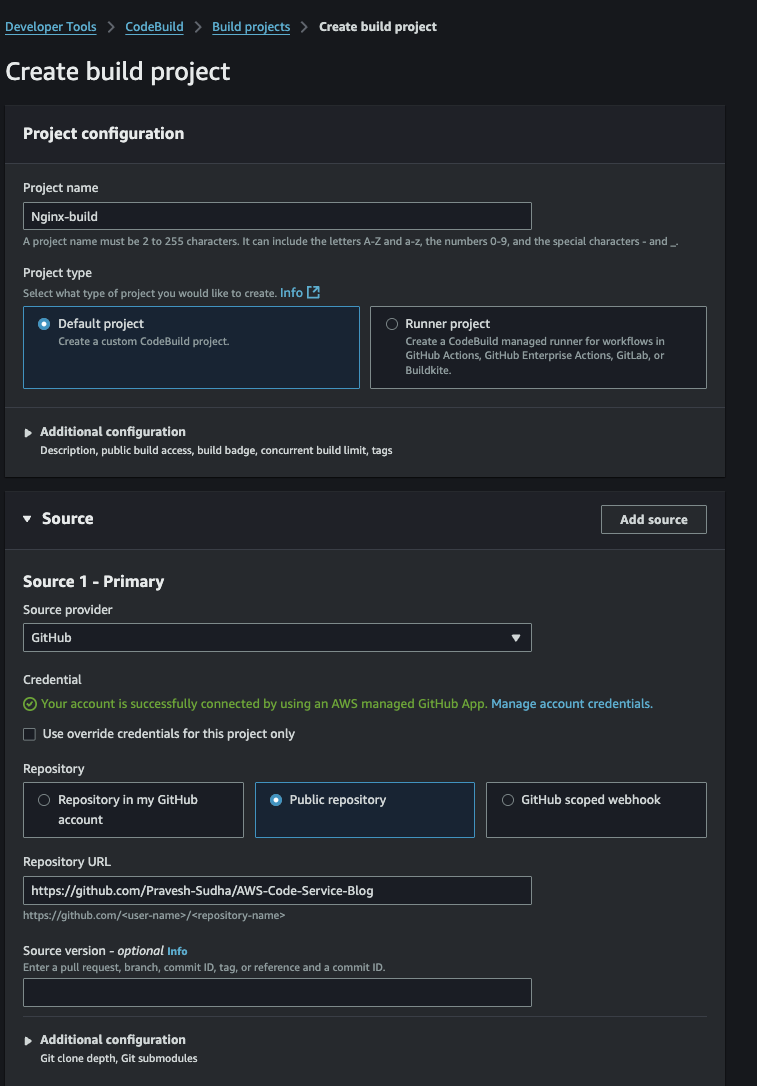
🔧 Step 2: Set Up CodeBuild
Now, let’s configure CodeBuild to build the project:
Open the CodeBuild service from the AWS Console.
Click Create Build Project.
Project Name:
Nginx-BuildProject Type: Default
🧩 Source
Source Provider: GitHub
Repository: Public Repository
Repository URL:
https://github.com/Pravesh-Sudha/AWS-Code-Service-Blog
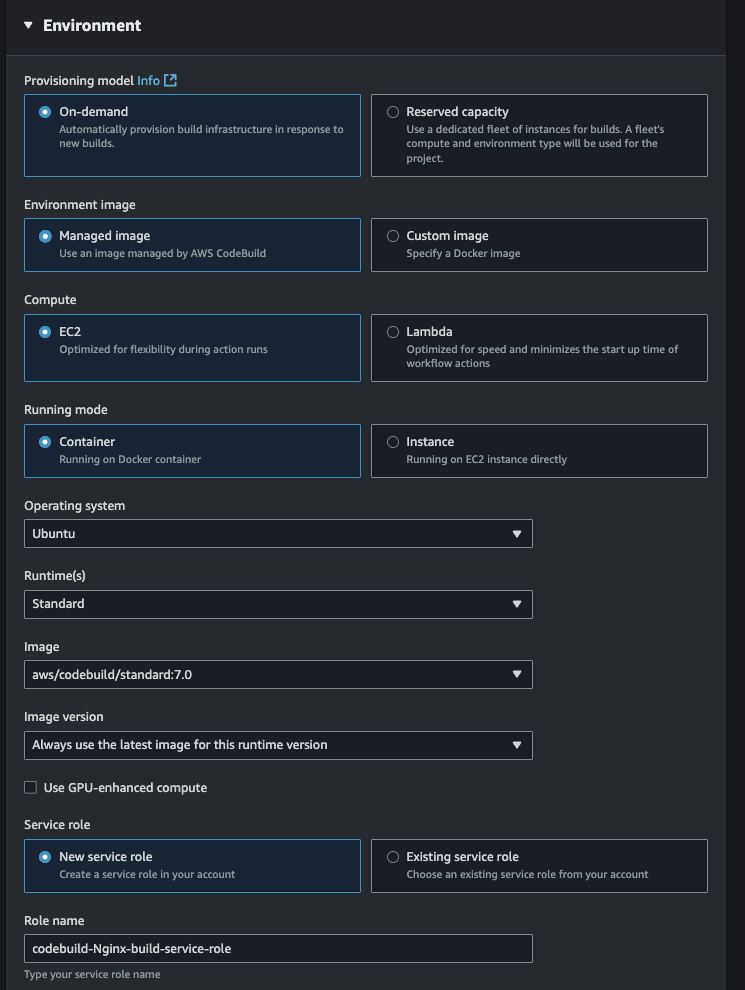
⚙️ Environment
Operating System: Change from Amazon Linux to Ubuntu
Leave the rest of the settings as default
📄 Buildspec
- Choose "Use a buildspec file" (this will use the
buildspec.ymlfrom your repo)
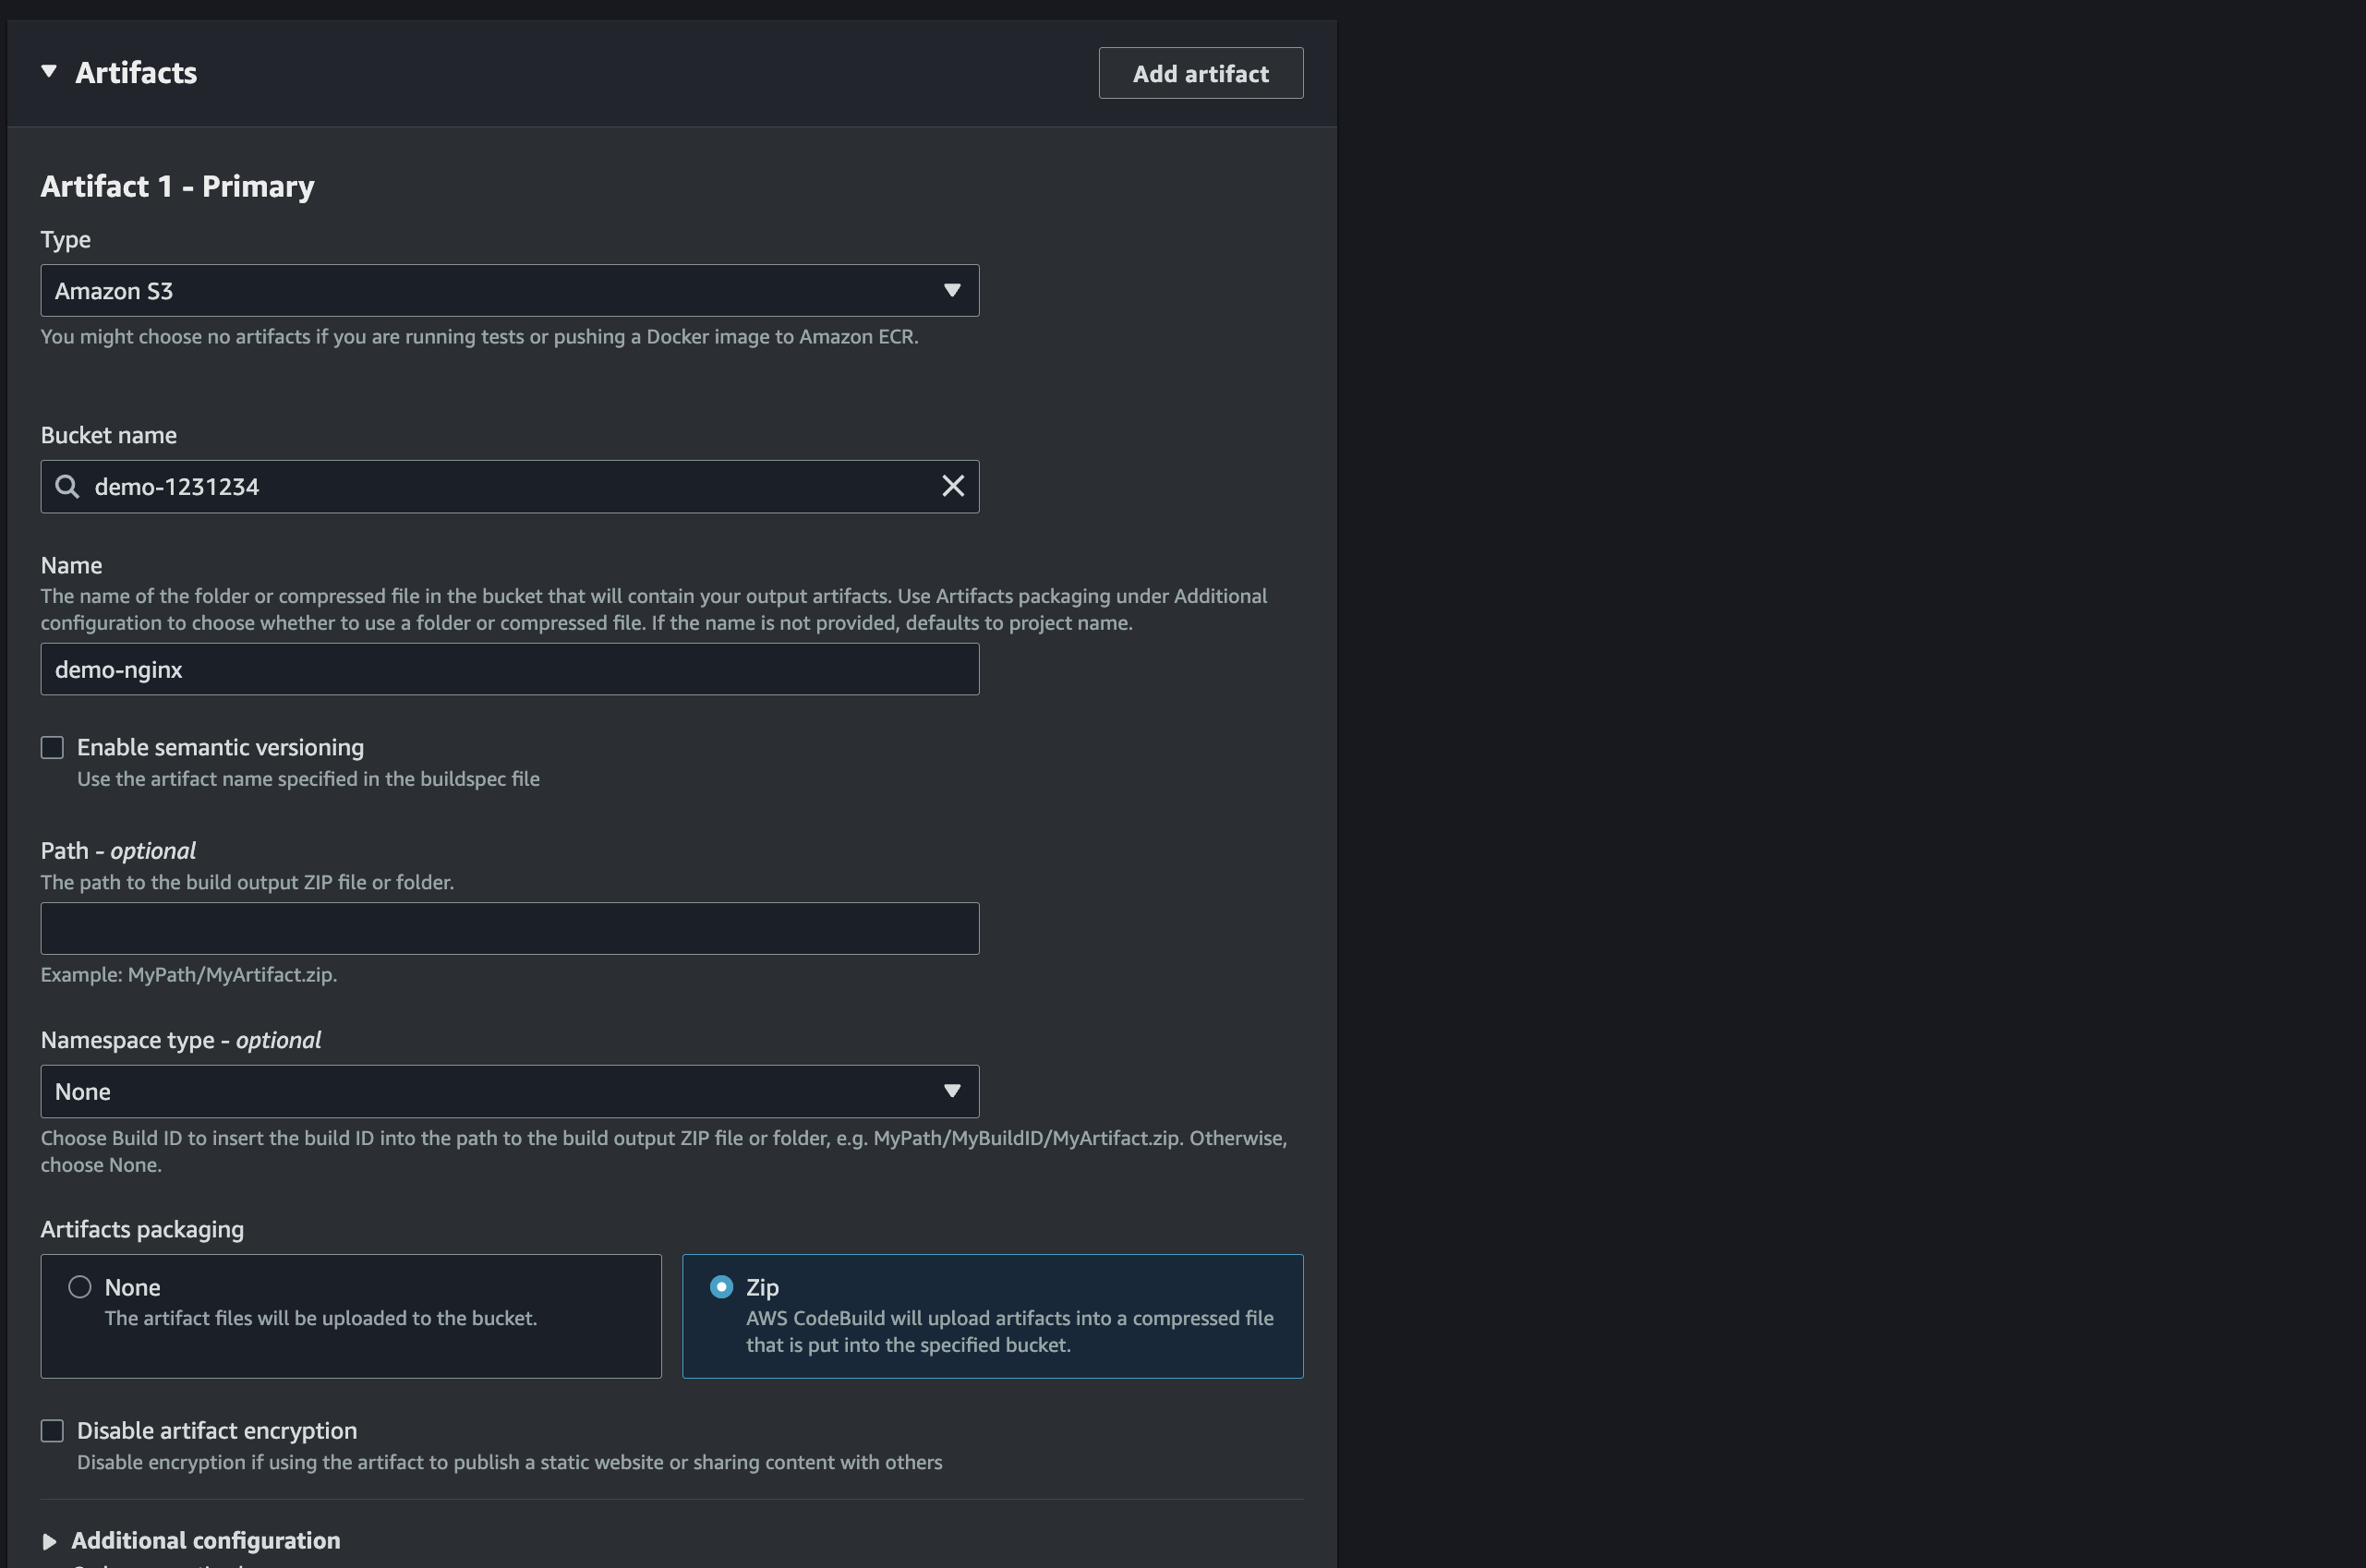
📦 Artifacts
Type: Amazon S3
Bucket name: Select your newly created bucket (
demo-1231234)Name:
demo-nginxSelect Zip as the preferred Artifacts packing method.
Leave everything else as default
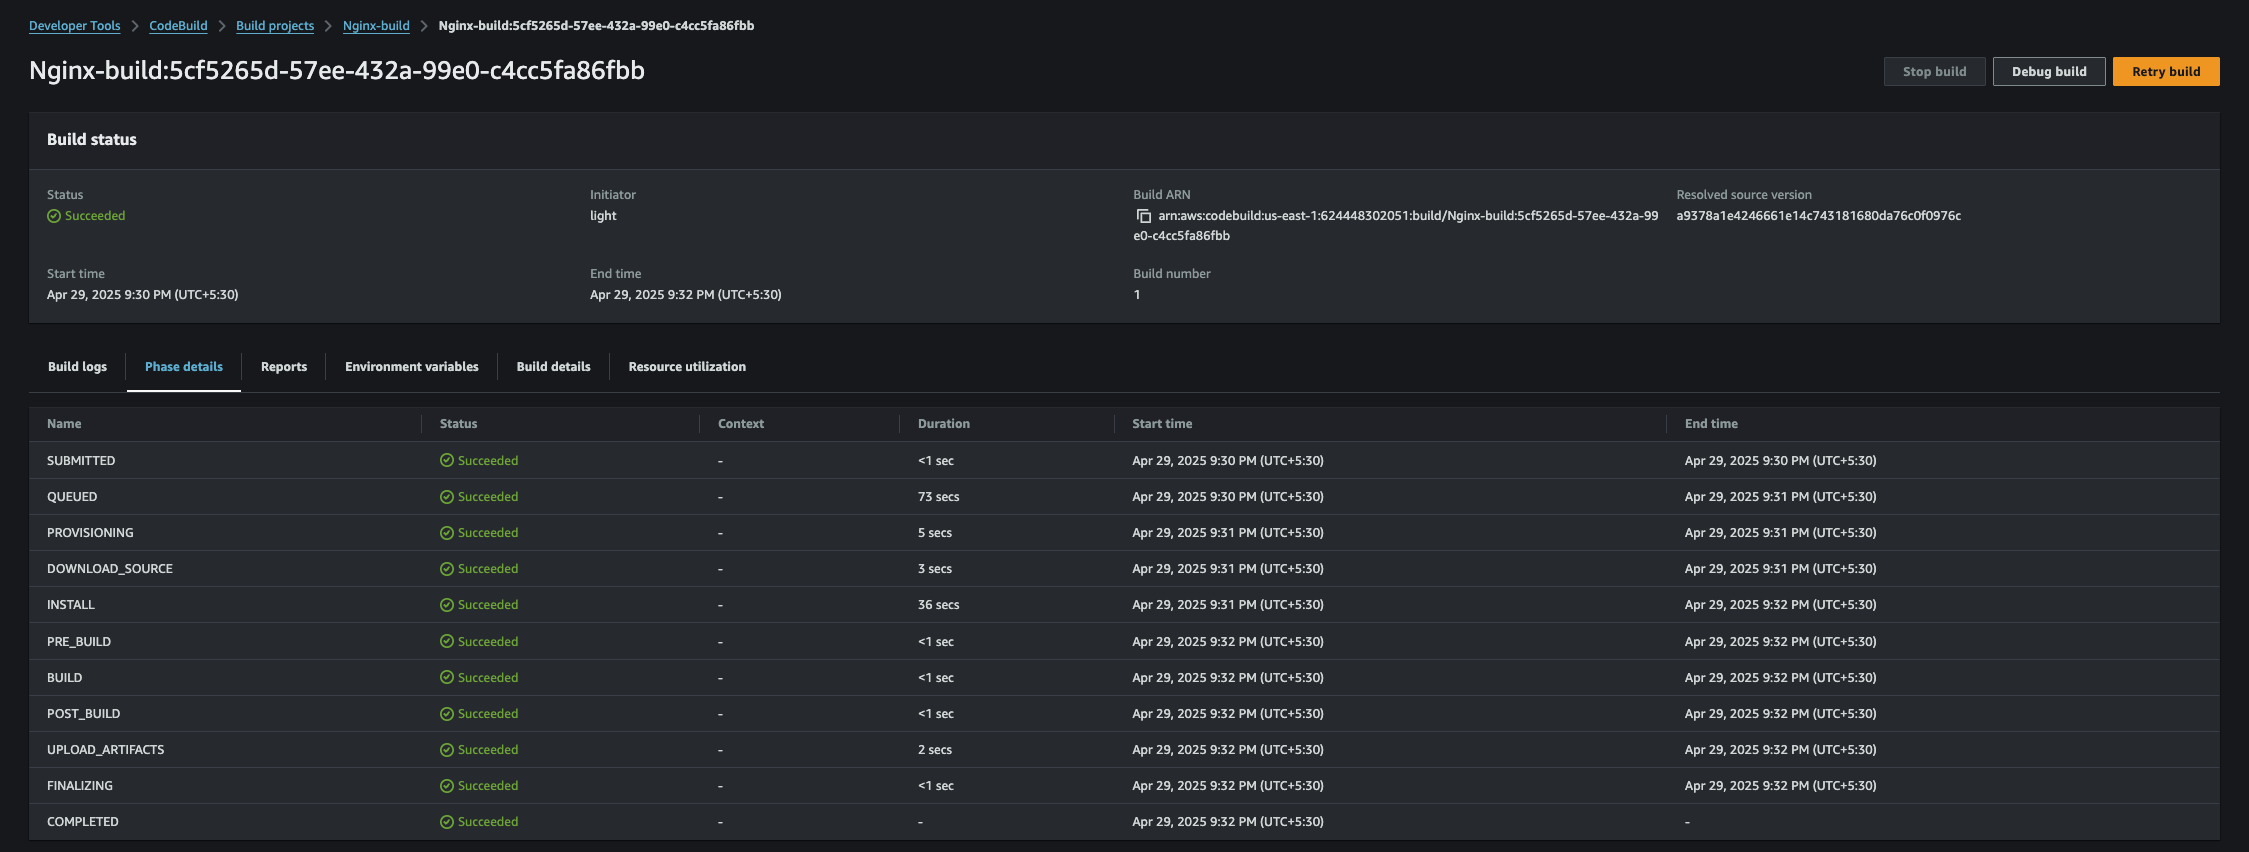
Finally, click Create Build Project. Once the project is created, click on Start Build and wait for it to complete (it usually takes around 4–5 minutes). Once done, your project will be successfully built and your artifacts will be stored in the S3 bucket!
💡 Setting Up IAM Roles and EC2 Instance for Deployment
Now that our build artifacts are ready in S3, let’s prepare the infrastructure for deployment. This involves:
Creating IAM roles for EC2 and CodeDeploy
Launching an EC2 Ubuntu instance
Installing the CodeDeploy agent
Setting up CodeDeploy application and deployment group
🔐 Step 1: Create IAM Roles
We'll need two roles — one for EC2 and another for CodeDeploy.
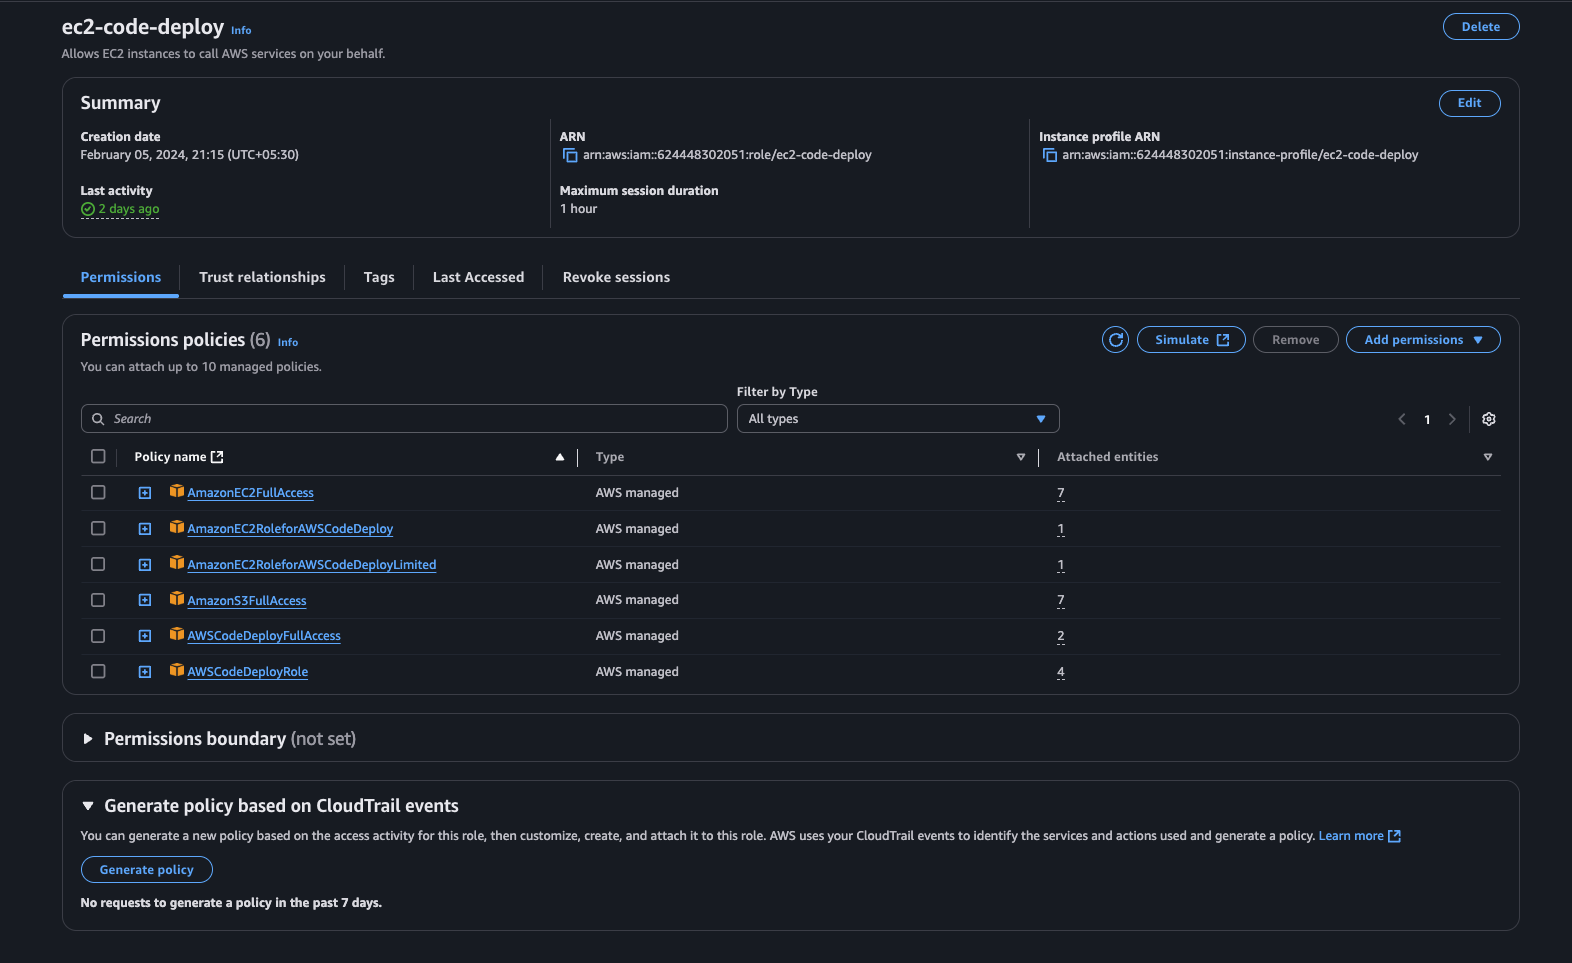
✅ Role 1: ec2-code-deploy (For EC2 Instance)
Go to the IAM Console and click on Roles in the sidebar.
Click Create Role
Choose AWS Service, and select EC2 under the use case.
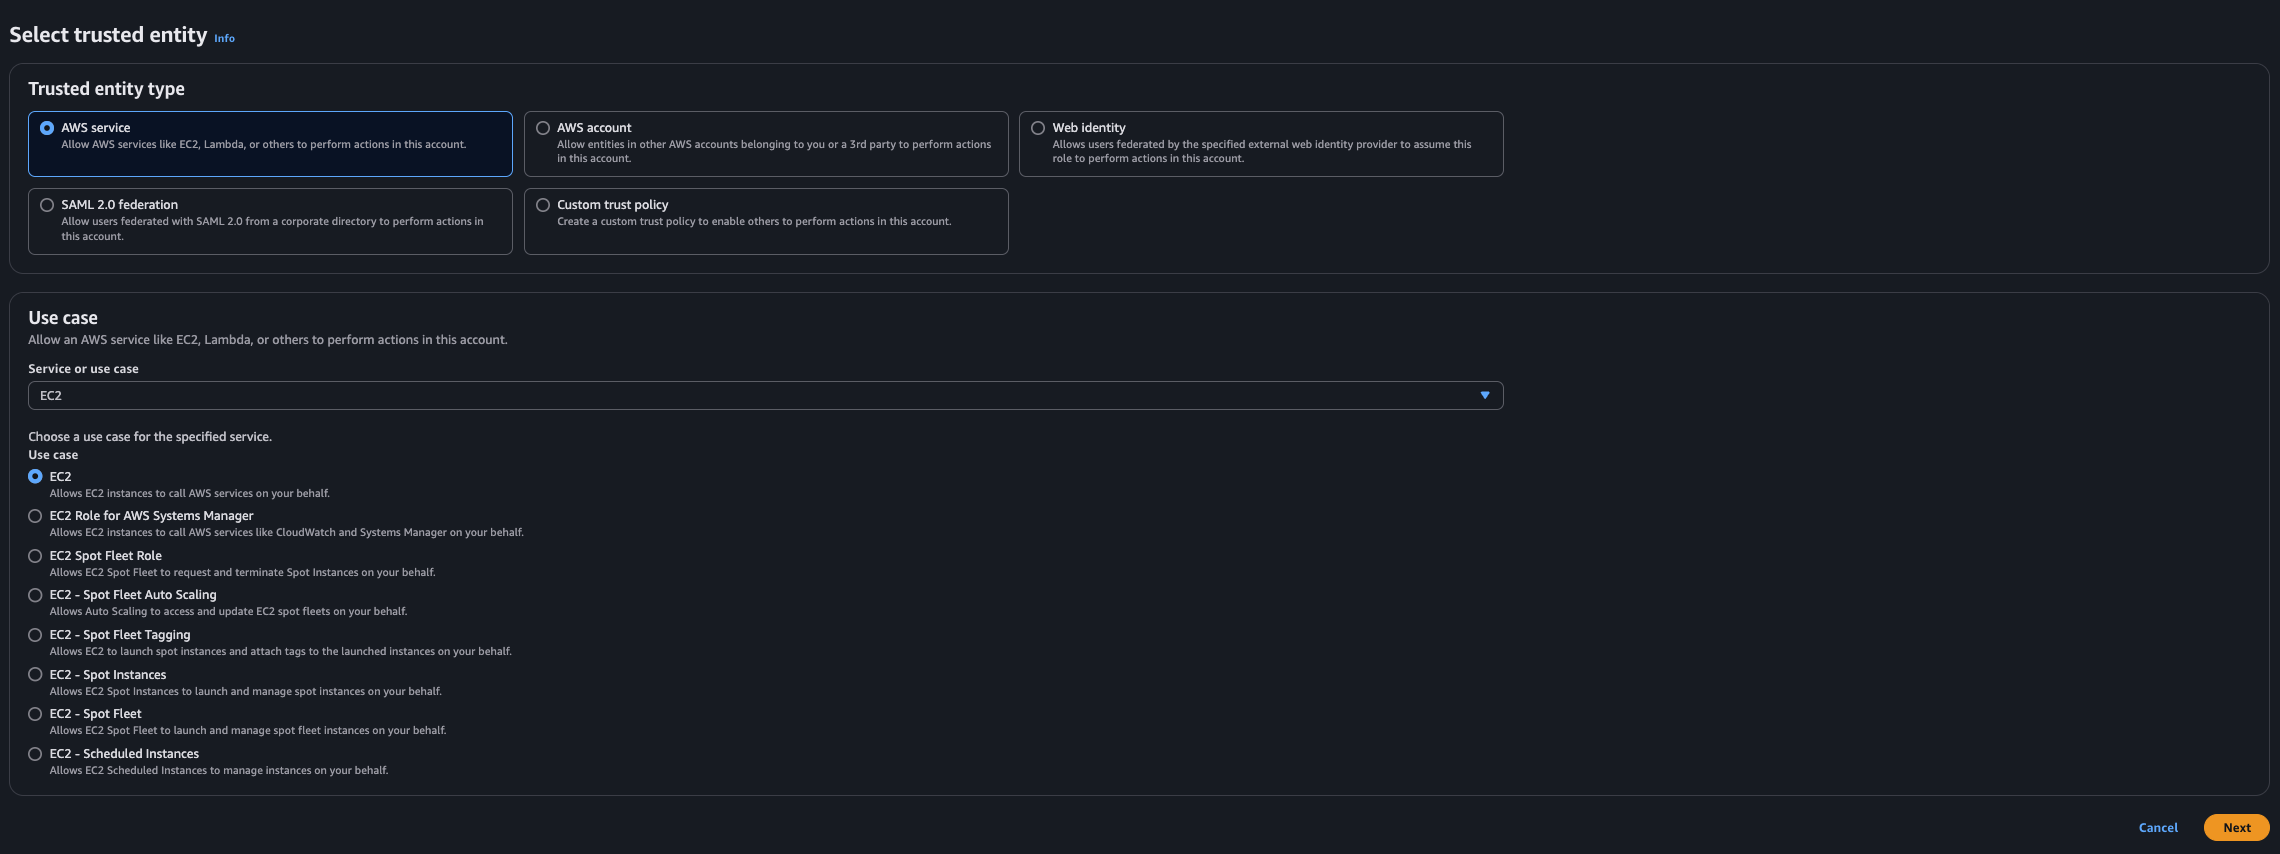
-
Click Next, and attach the following policies:
AmazonEC2FullAccessAmazonEC2RoleforAWSCodeDeployAmazonEC2RoleforAWSCodeDeployLimitedAmazonS3FullAccessAWSCodeDeployFullAccessAWSCodeDeployRole
Click Next, give it a name:
ec2-code-deploy, and Create Role
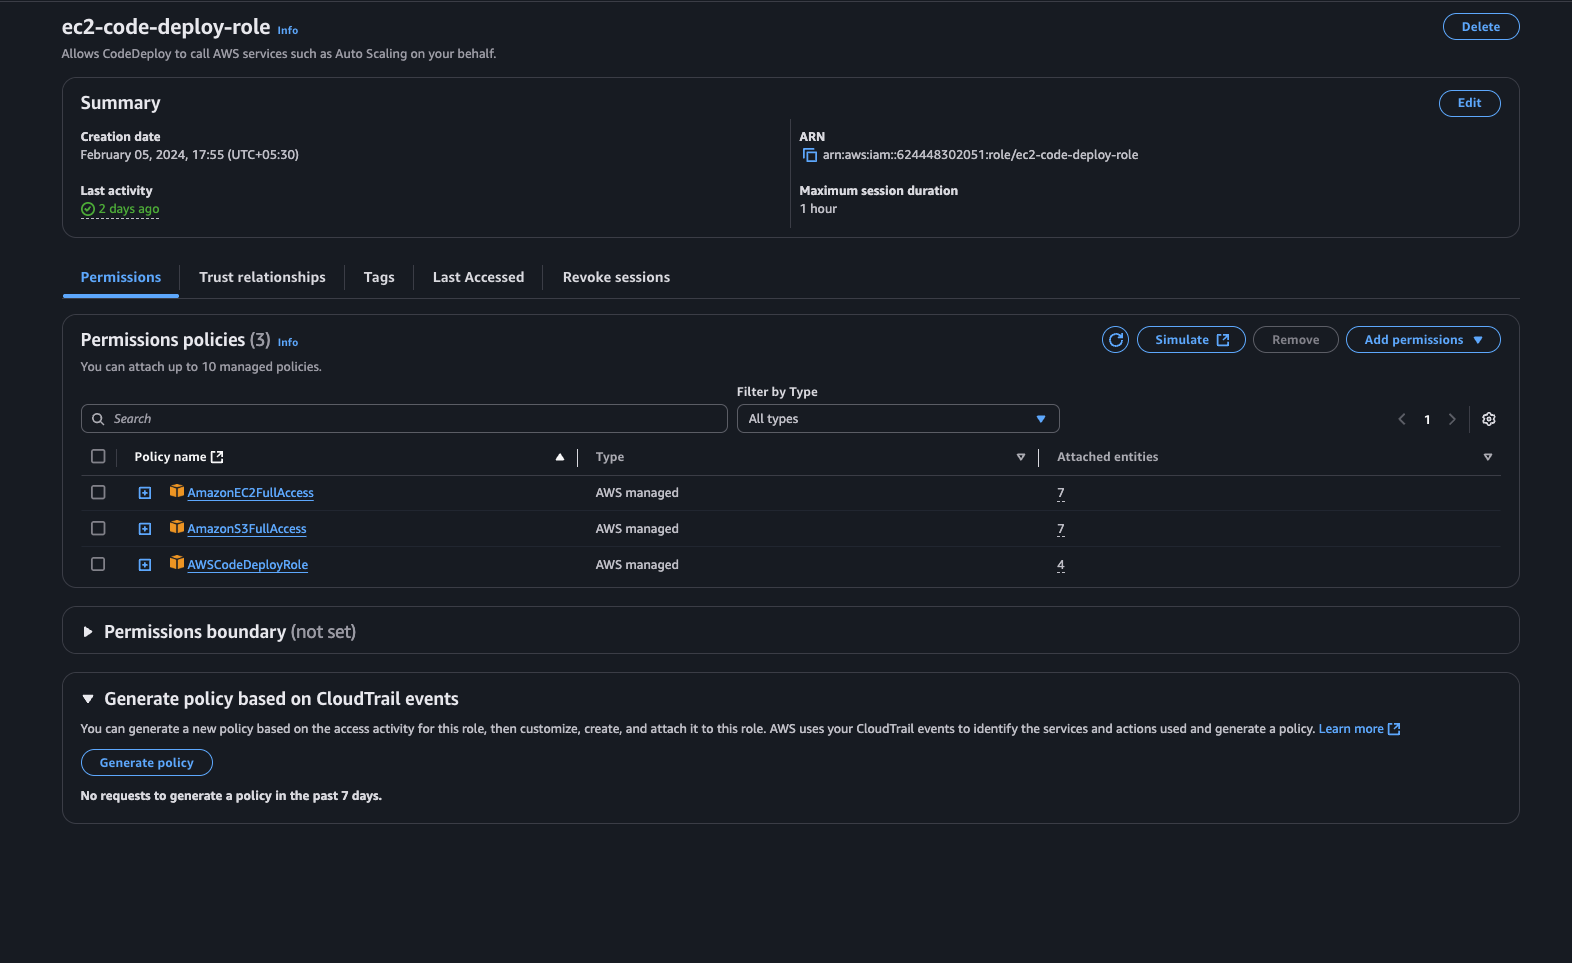
✅ Role 2: ec2-code-deploy-role (For CodeDeploy)
Again, click on Create Role
This time, select CodeDeploy as the use case
Attach these policies:
* `AWSCodeDeployRole`

* `AmazonS3FullAccess`

* `AmazonEC2FullAccess`- Name the role
ec2-code-deploy-roleand create it
🖥 Step 2: Launch EC2 Instance and Install CodeDeploy Agent
Let’s set up the EC2 instance that will serve our static site.
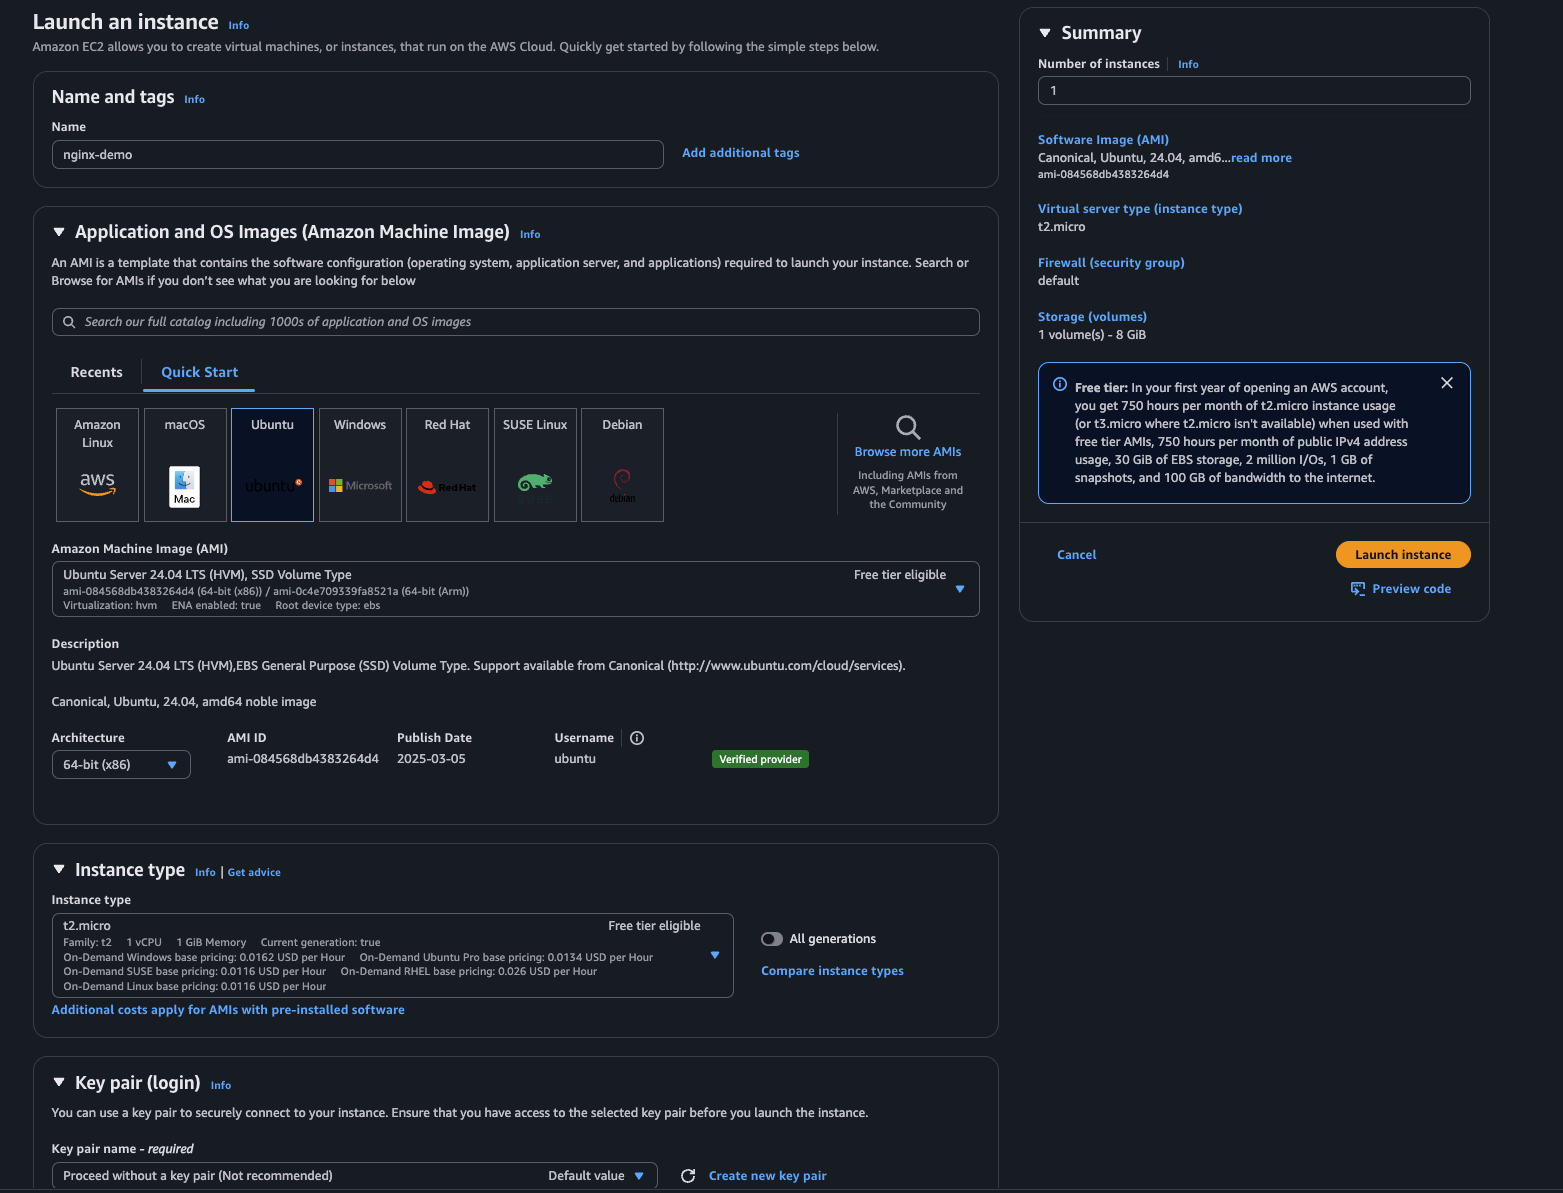
Go to the EC2 Console, click Launch Instance
Instance Name:
nginx-demoAMI: Ubuntu (latest version)
Instance Type:
t2.microKey Pair: No need to create (we’ll use EC2 Connect)
Security Group: Allow HTTP and HTTPS access
Launch the instance
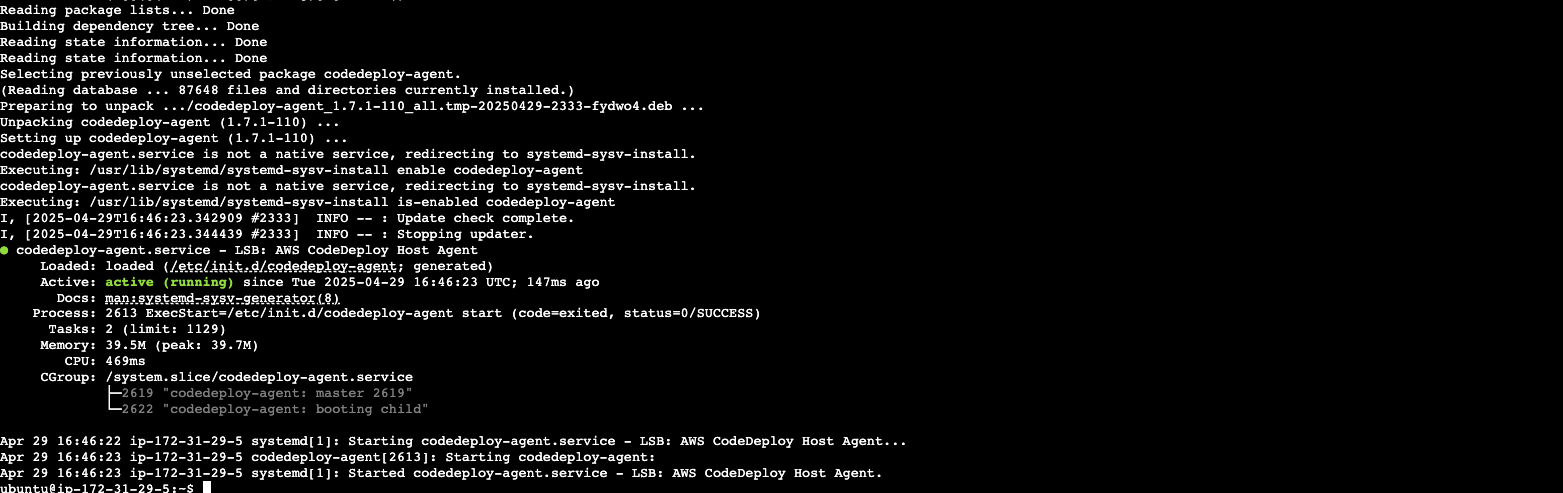
🔌 Connect & Install CodeDeploy Agent
Once the instance is running:
Select the instance and click Connect
Choose EC2 Instance Connect and open the terminal
Run the following commands:
sudo apt update
sudo apt install ruby-full -y
sudo apt install wget -y
cd /home/ubuntu
wget https://aws-codedeploy-us-east-1.s3.us-east-1.amazonaws.com/latest/install # Change Region Accordingly
chmod +x ./install
sudo ./install auto
sudo systemctl status codedeploy-agent
⚠️ If you're using a region other than
us-east-1(N. Virginia), change thewgetURL to match your region.
After installation, you should see that the CodeDeploy agent is active and running.
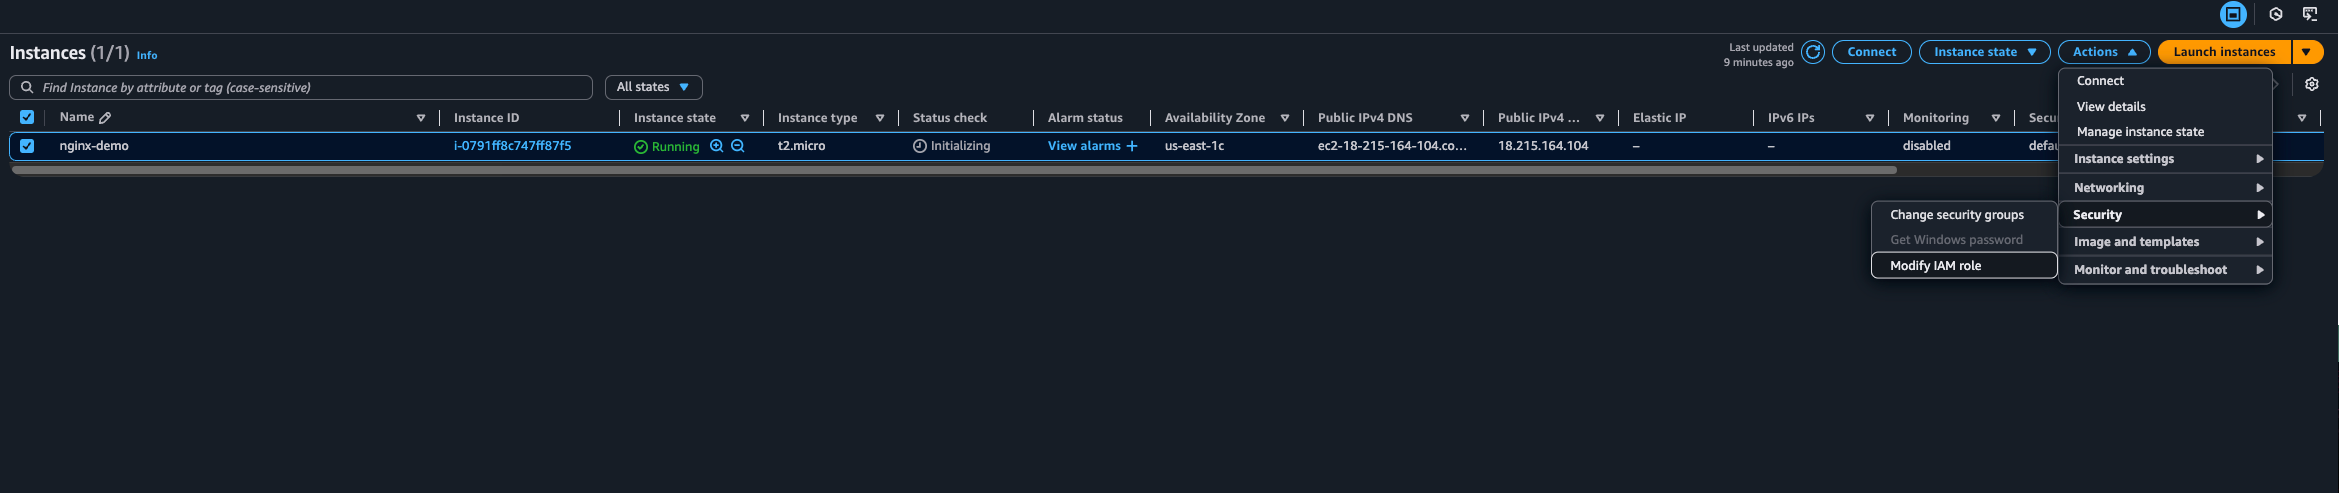
🔗 Step 3: Attach IAM Role to EC2 Instance
To allow your EC2 instance to access S3 and CodeDeploy, we need to attach the ec2-code-deploy role:
Go back to the EC2 Console
Select the
nginx-demoinstanceClick Actions → Security → Modify IAM Role
Choose
ec2-code-deployand click Update IAM Role
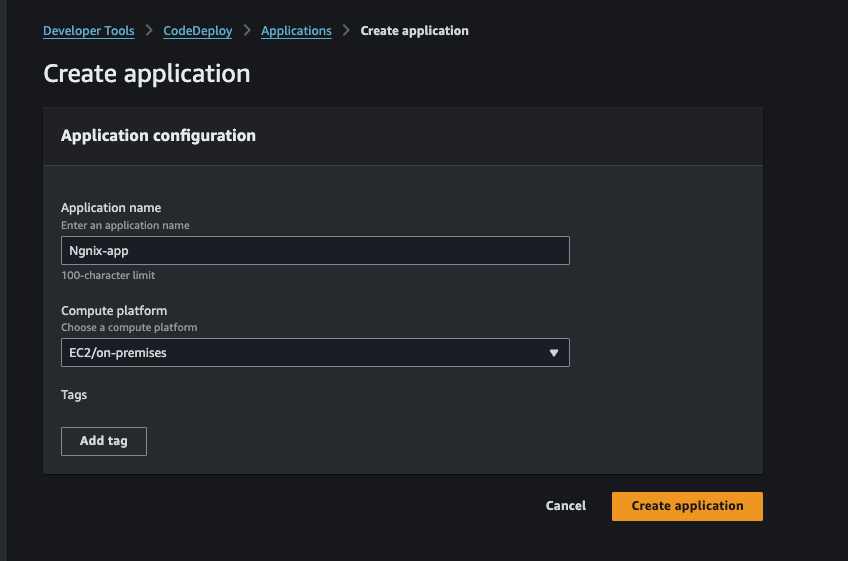
🚀 Step 4: Create CodeDeploy Application and Deployment Group
🛠 Create the Application
Go to the CodeDeploy Console
Click Create Application
Name it:
Nginx-appCompute Platform: EC2/on-premises
Click Create Application
📦 Create Deployment Group
Under your newly created app (
Nginx-app), click Create Deployment GroupName it:
nginx-deploy-grpService Role: Choose
ec2-code-deploy-roleEnvironment Configuration:
* Select **EC2 Instances**

* Under **Tag Key**, enter: `Name`

* Under **Tag Value**, enter: `nginx-demo`
* For **Install CodeDeploy Agent**, select **Never** (we already installed it manually)Load Balancing: Uncheck "Enable Load Balancing"
Click Create Deployment Group
🚀 Final Step: Create Deployment and Launch Your Static Website
We’re in the final stretch! Now that everything is in place — CodeBuild, EC2, IAM Roles, and CodeDeploy setup — it’s time to deploy our Nginx server to the EC2 instance.
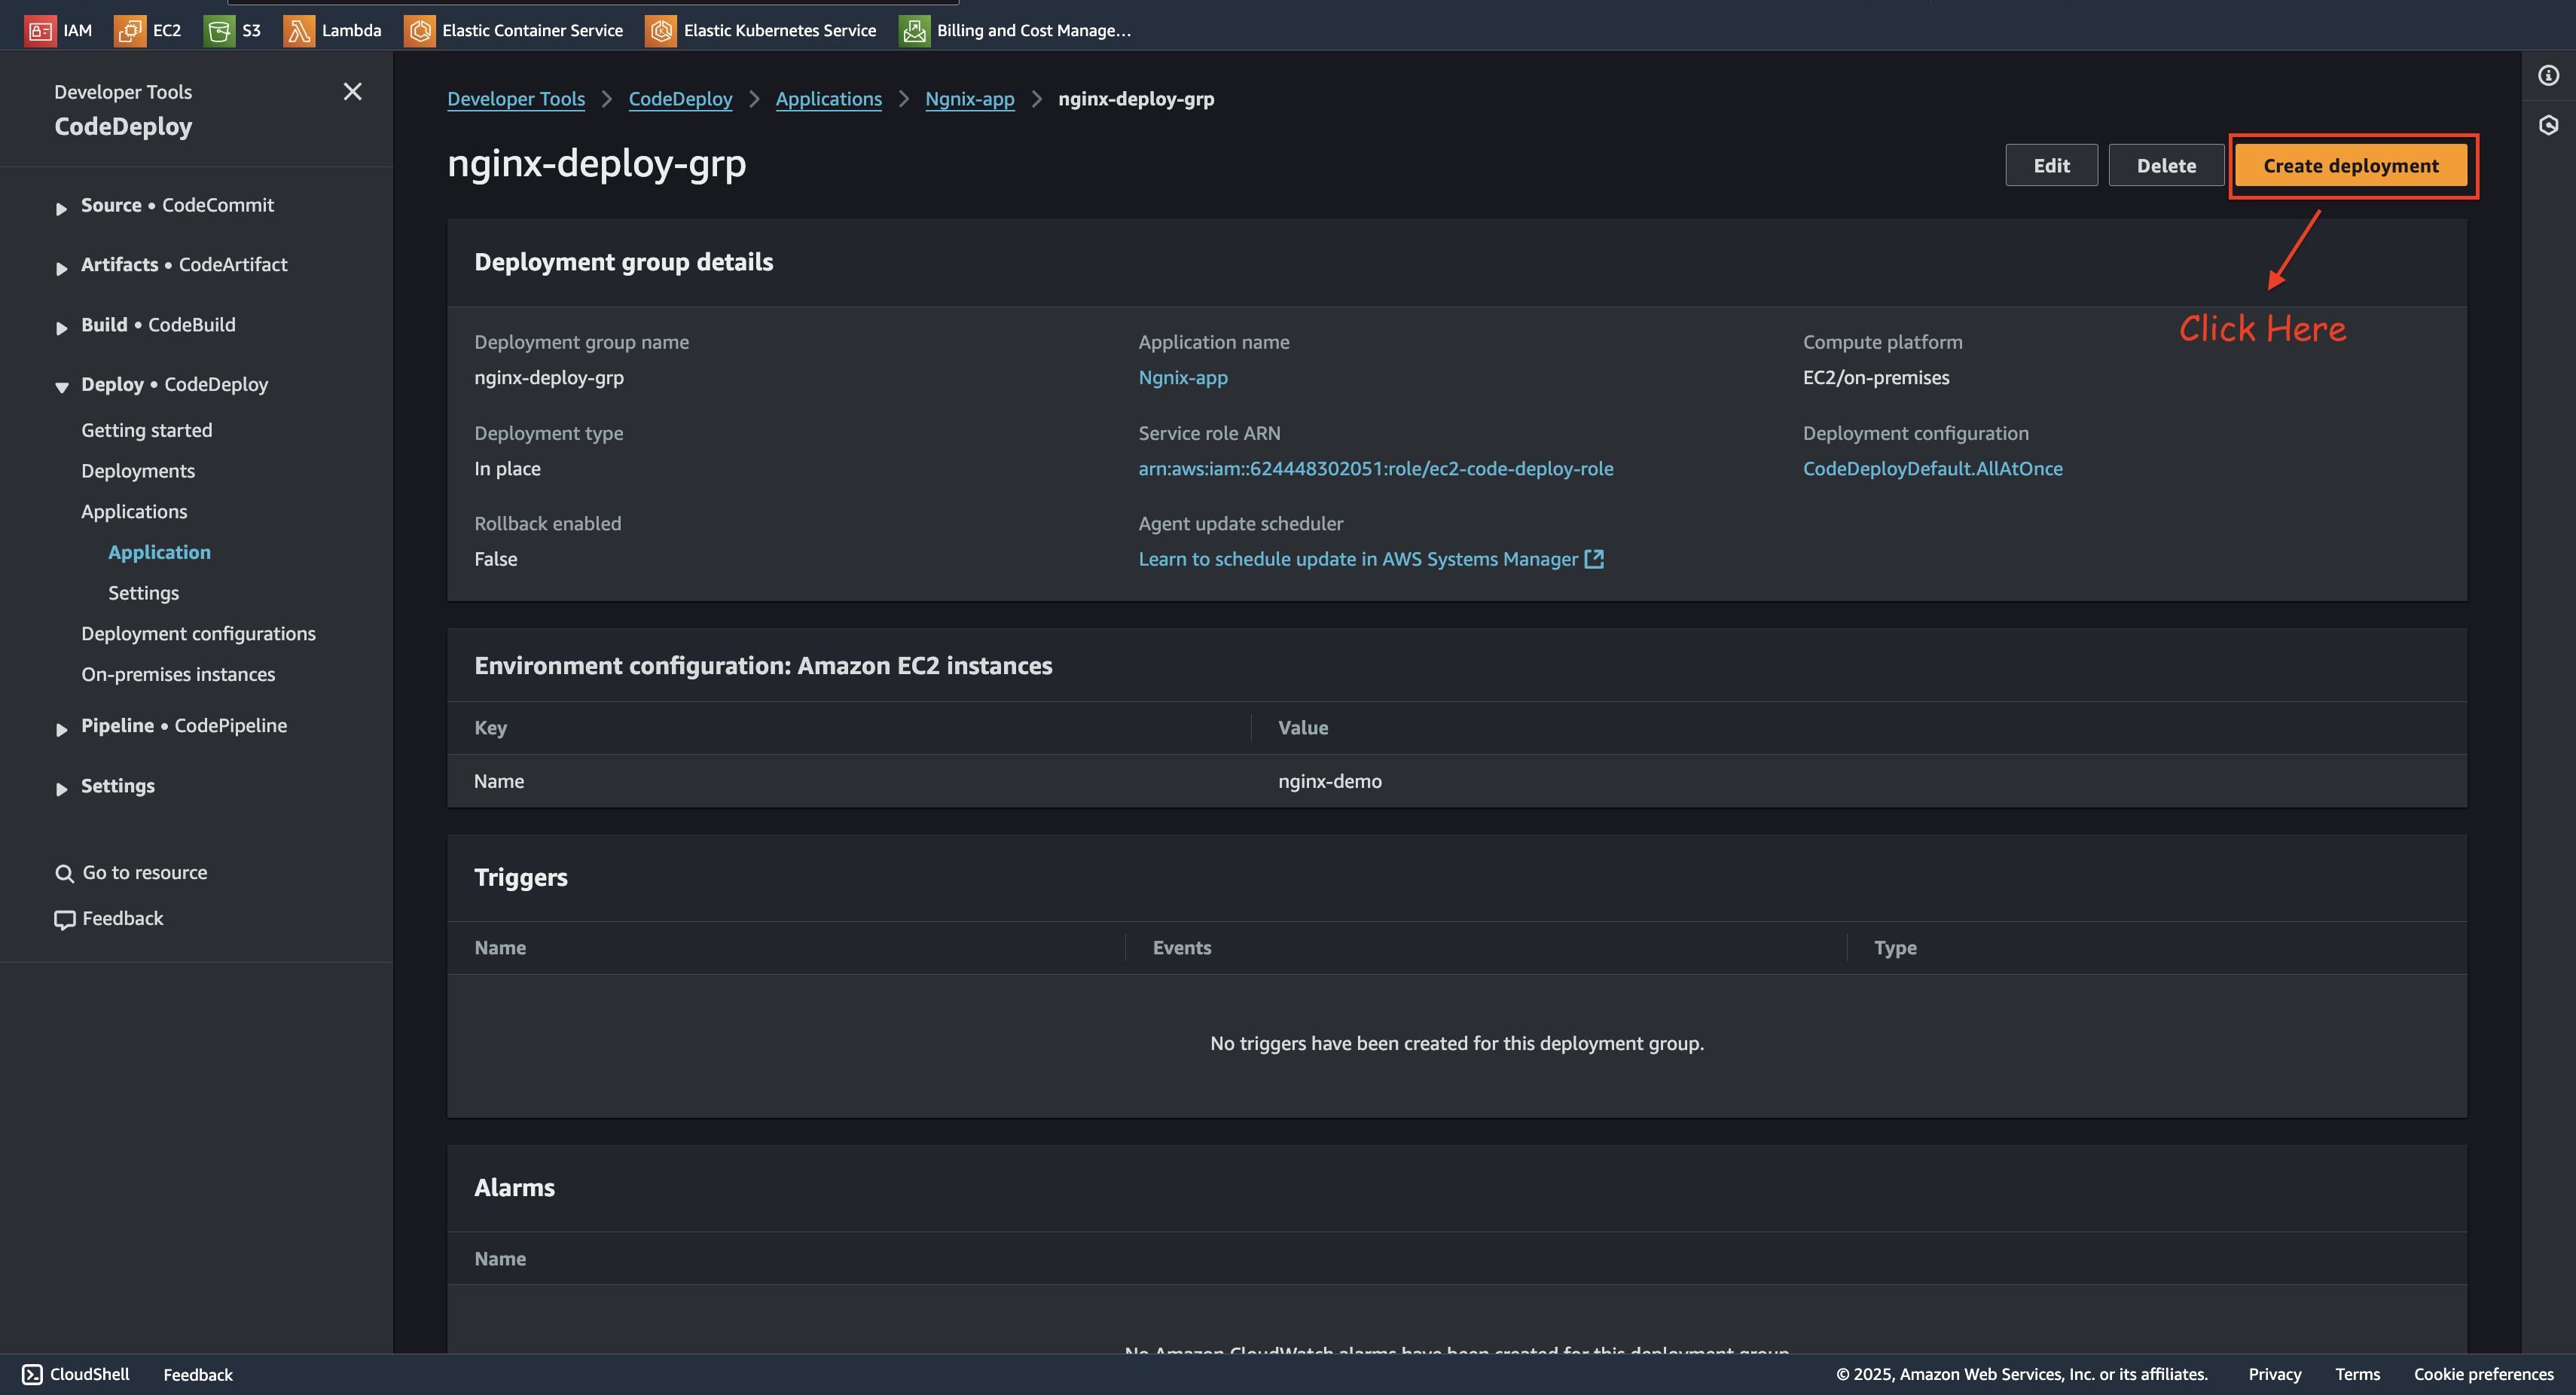
✅ Step 1: Create a Deployment in CodeDeploy
Head over to the CodeDeploy console
Select your application:
Nginx-appUnder Deployment Groups, click on
nginx-deploy-grpClick Create Deployment
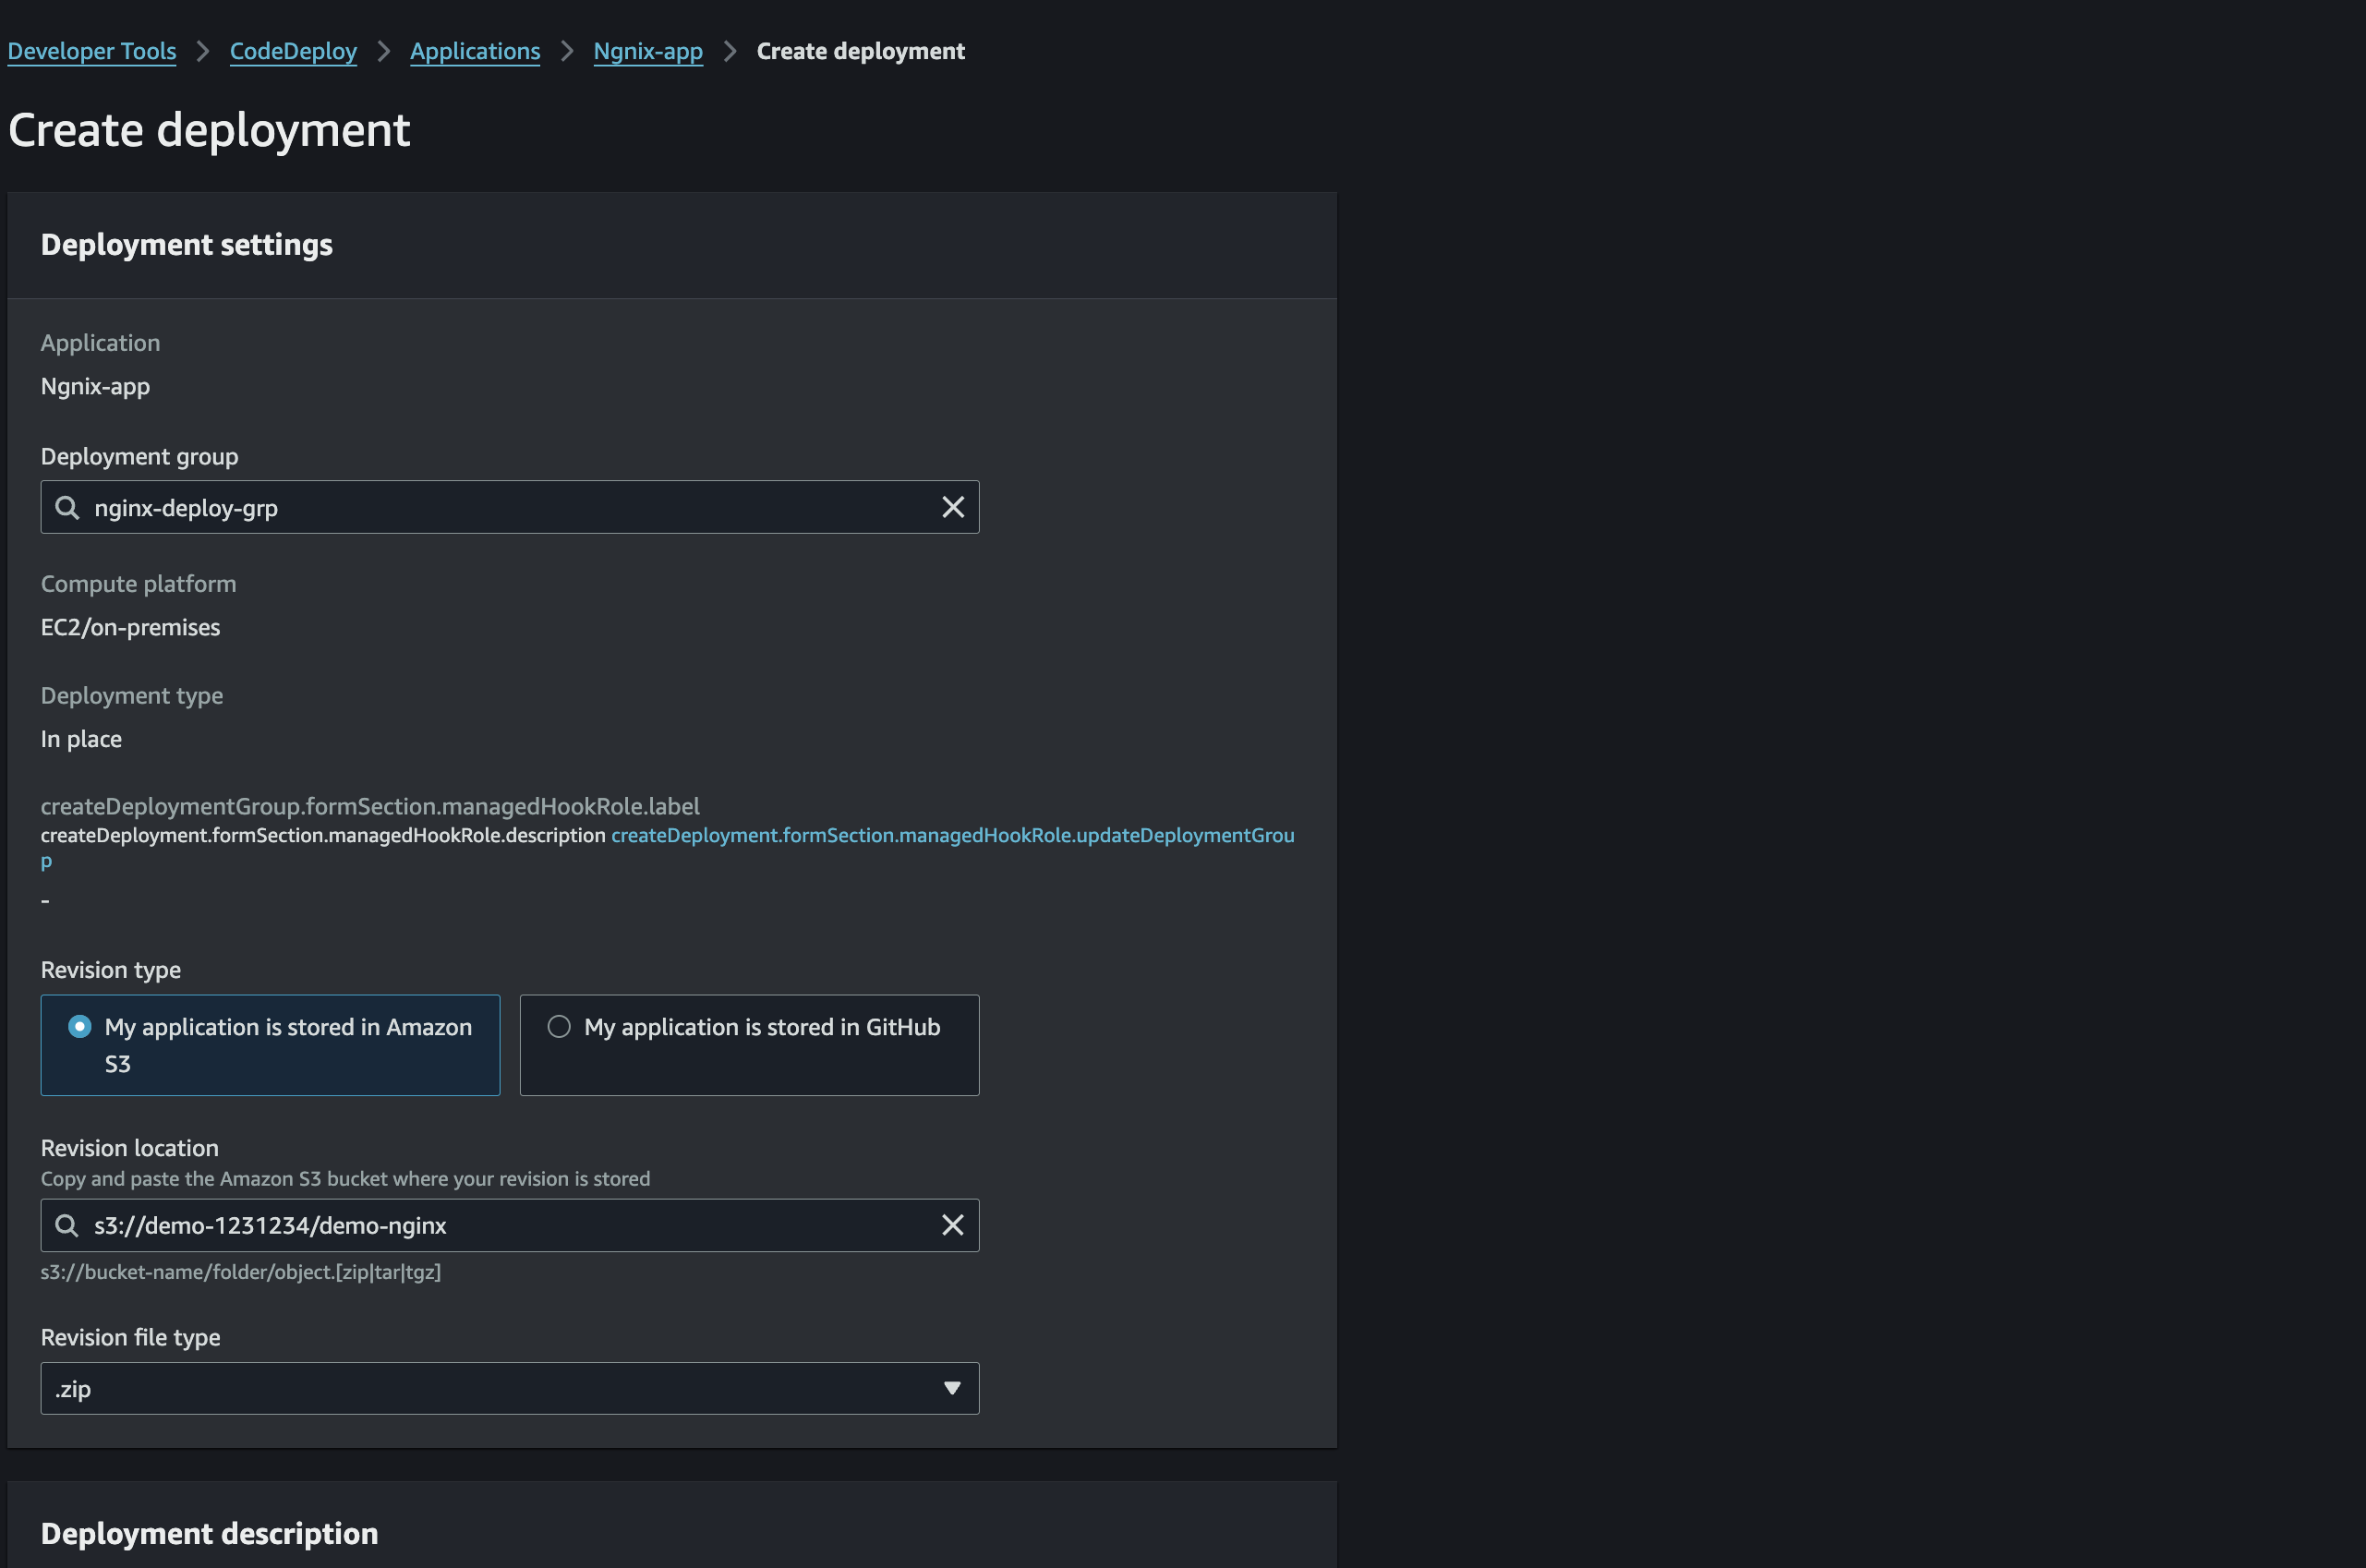
📦 Configure Deployment Details
Revision Location:
Choose Amazon S3
Paste the artifact path from your CodeBuild output — in our case:
s3://demo-1231234/demo-nginxRevision File Type:
zipLeave all other settings as default
Click Create Deployment
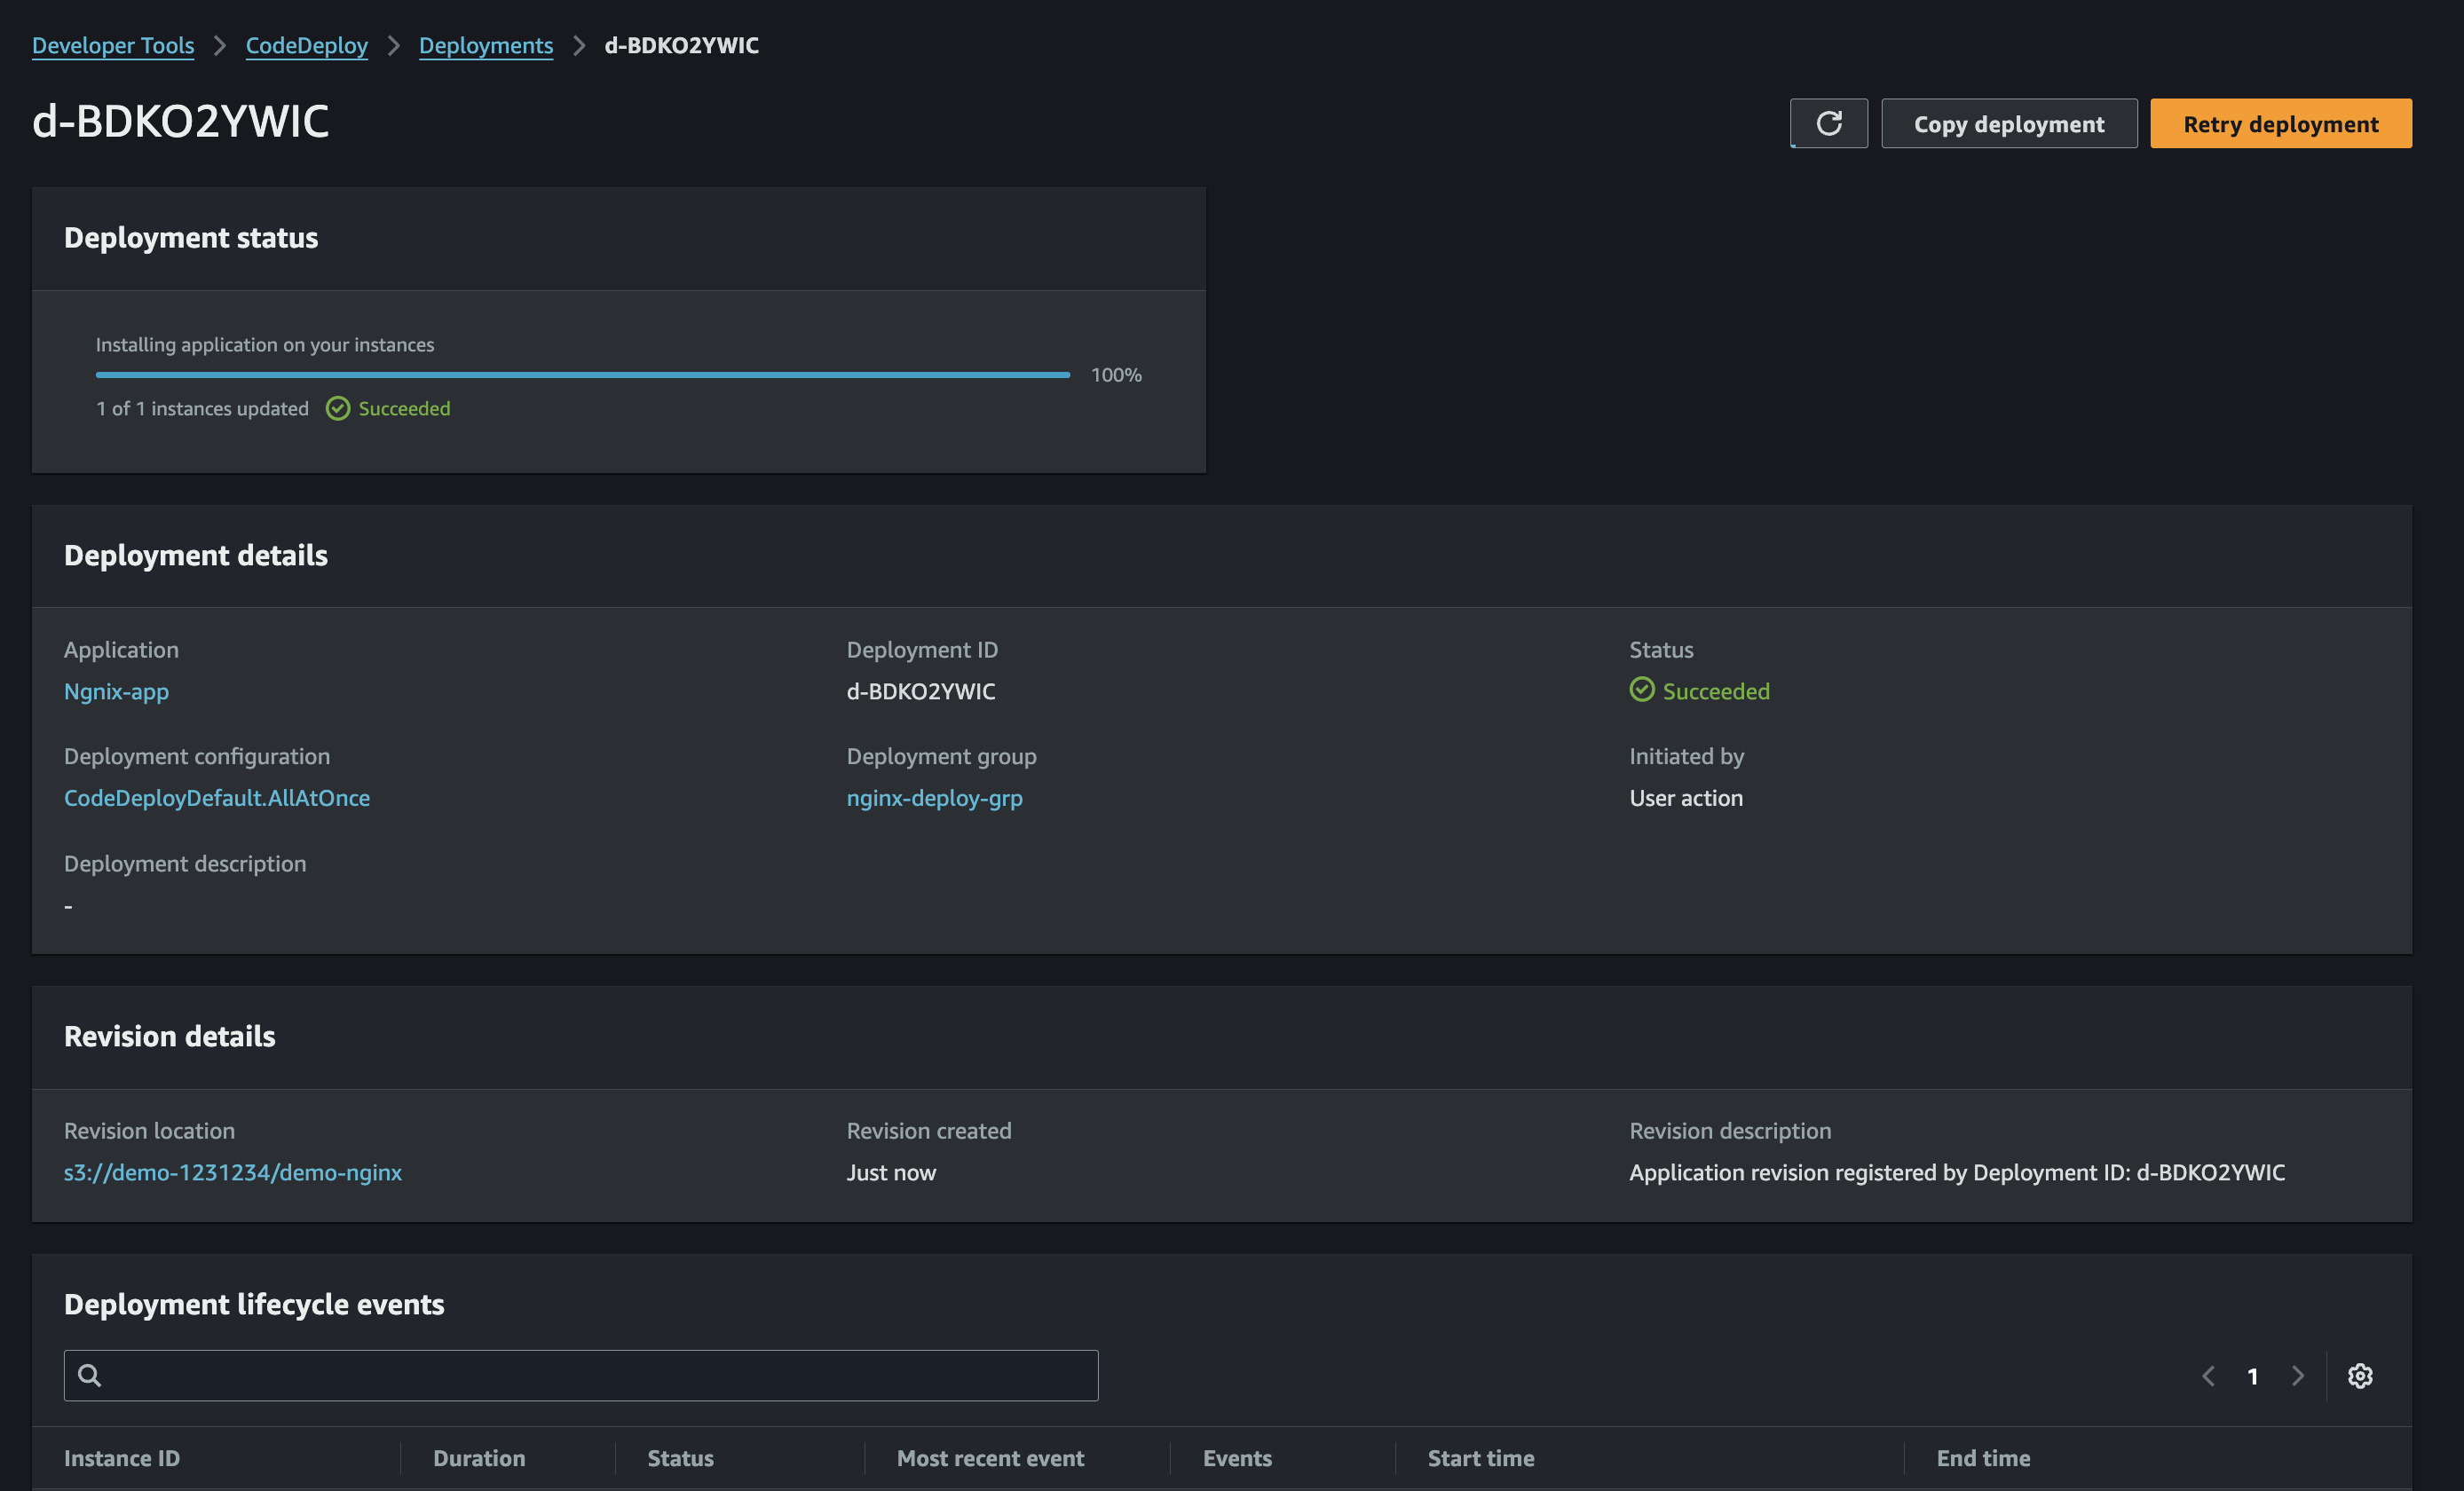
AWS CodeDeploy will now begin deploying your static website to the EC2 instance using the appspec.yaml and Nginx installation scripts.
🌐 Step 2: Access Your Website
Once the deployment shows as "Successful", it's time to test everything!
Go back to the EC2 Console
Copy the Public IP Address of your
nginx-demoinstance
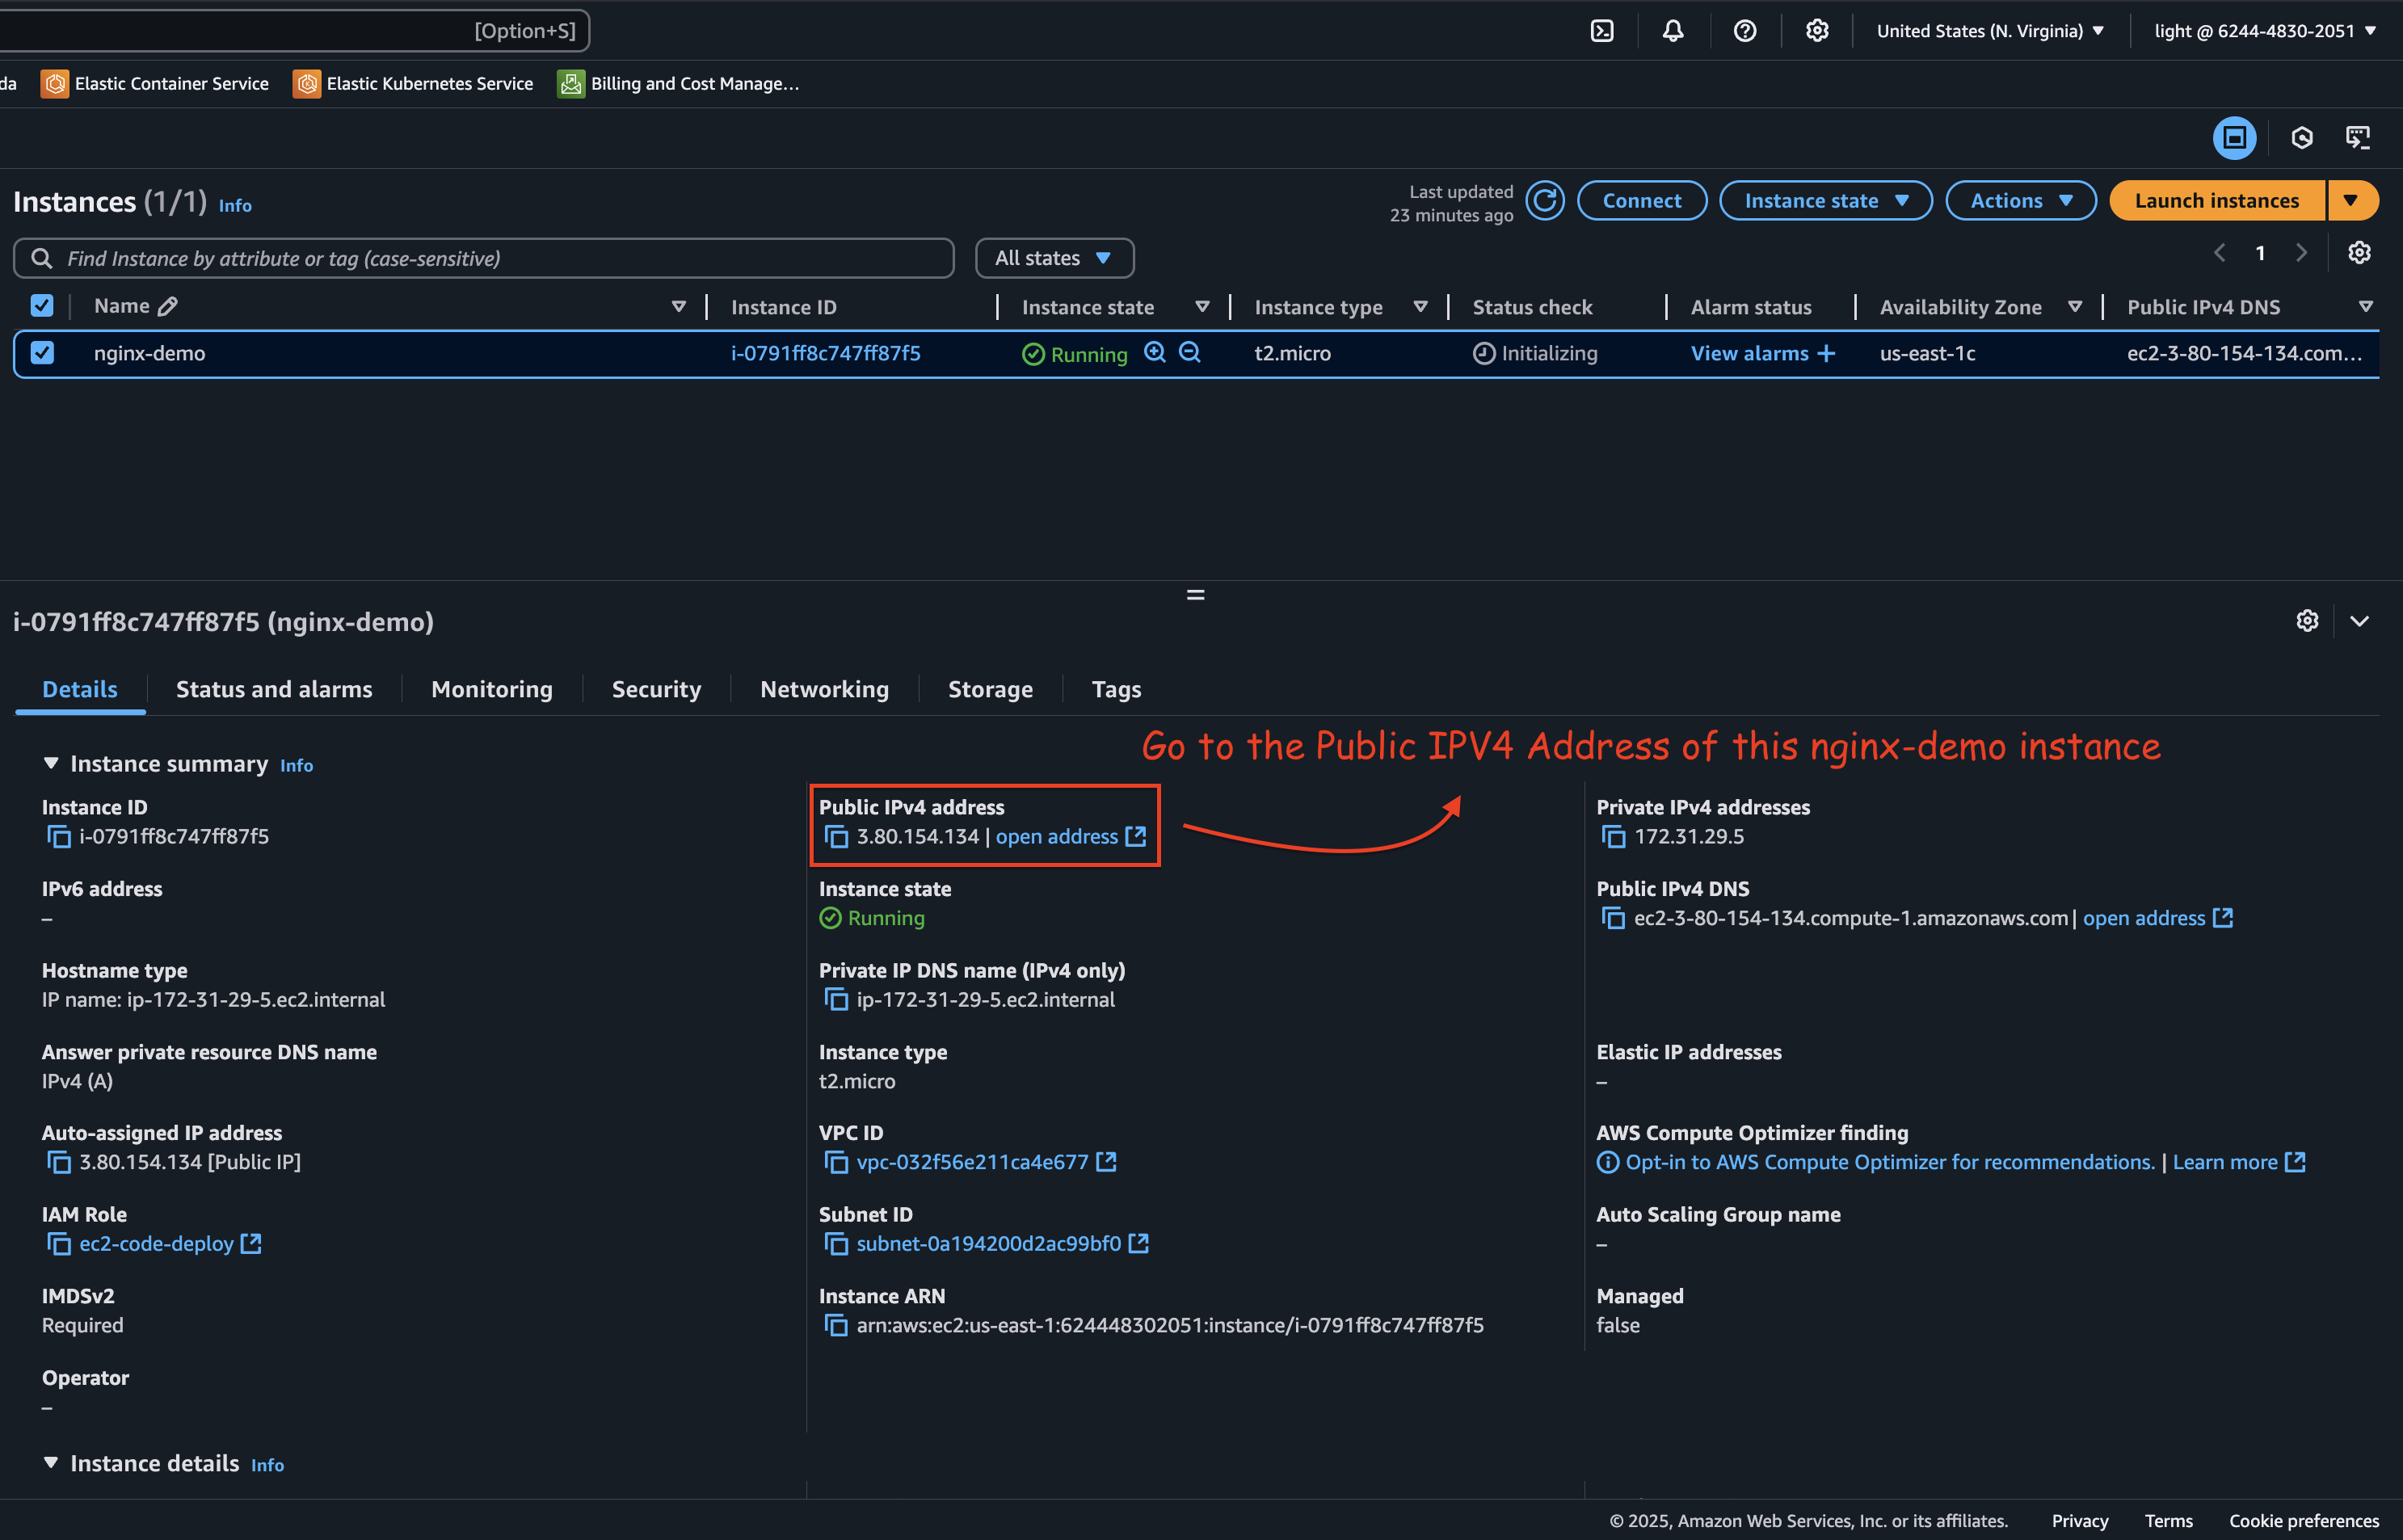
- Open it in your browser
You should now see the index.html page served by your Nginx server on EC2 🎉
🧾 Conclusion
And that’s a wrap! 🎉
Through this blog, you’ve seen how seamless it can be to set up a CI/CD pipeline using AWS services — from pulling source code on GitHub, building it with CodeBuild, storing the artifacts in S3, and deploying it to an EC2 instance using CodeDeploy. You also got hands-on experience working with an Nginx server on Ubuntu, making this a full-stack DevOps learning journey.
These are foundational skills every DevOps engineer or cloud enthusiast should have in their toolkit — and the best part? You did it all using managed AWS services, keeping infrastructure overhead low and automation high.
If you enjoyed this blog, make sure to like it, share it among your network, and follow me on:
Till then,
Happy Learnings! 🚀
~ Pravesh Sudha
