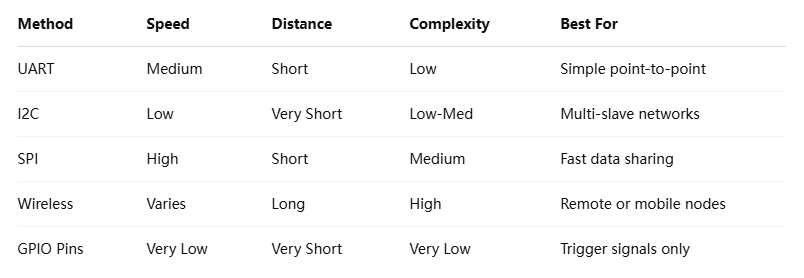
Communicating between two Arduino boards can be done in several ways, depending on your requirements like speed, distance, and data complexity. Here's a summary of the main communication methods:
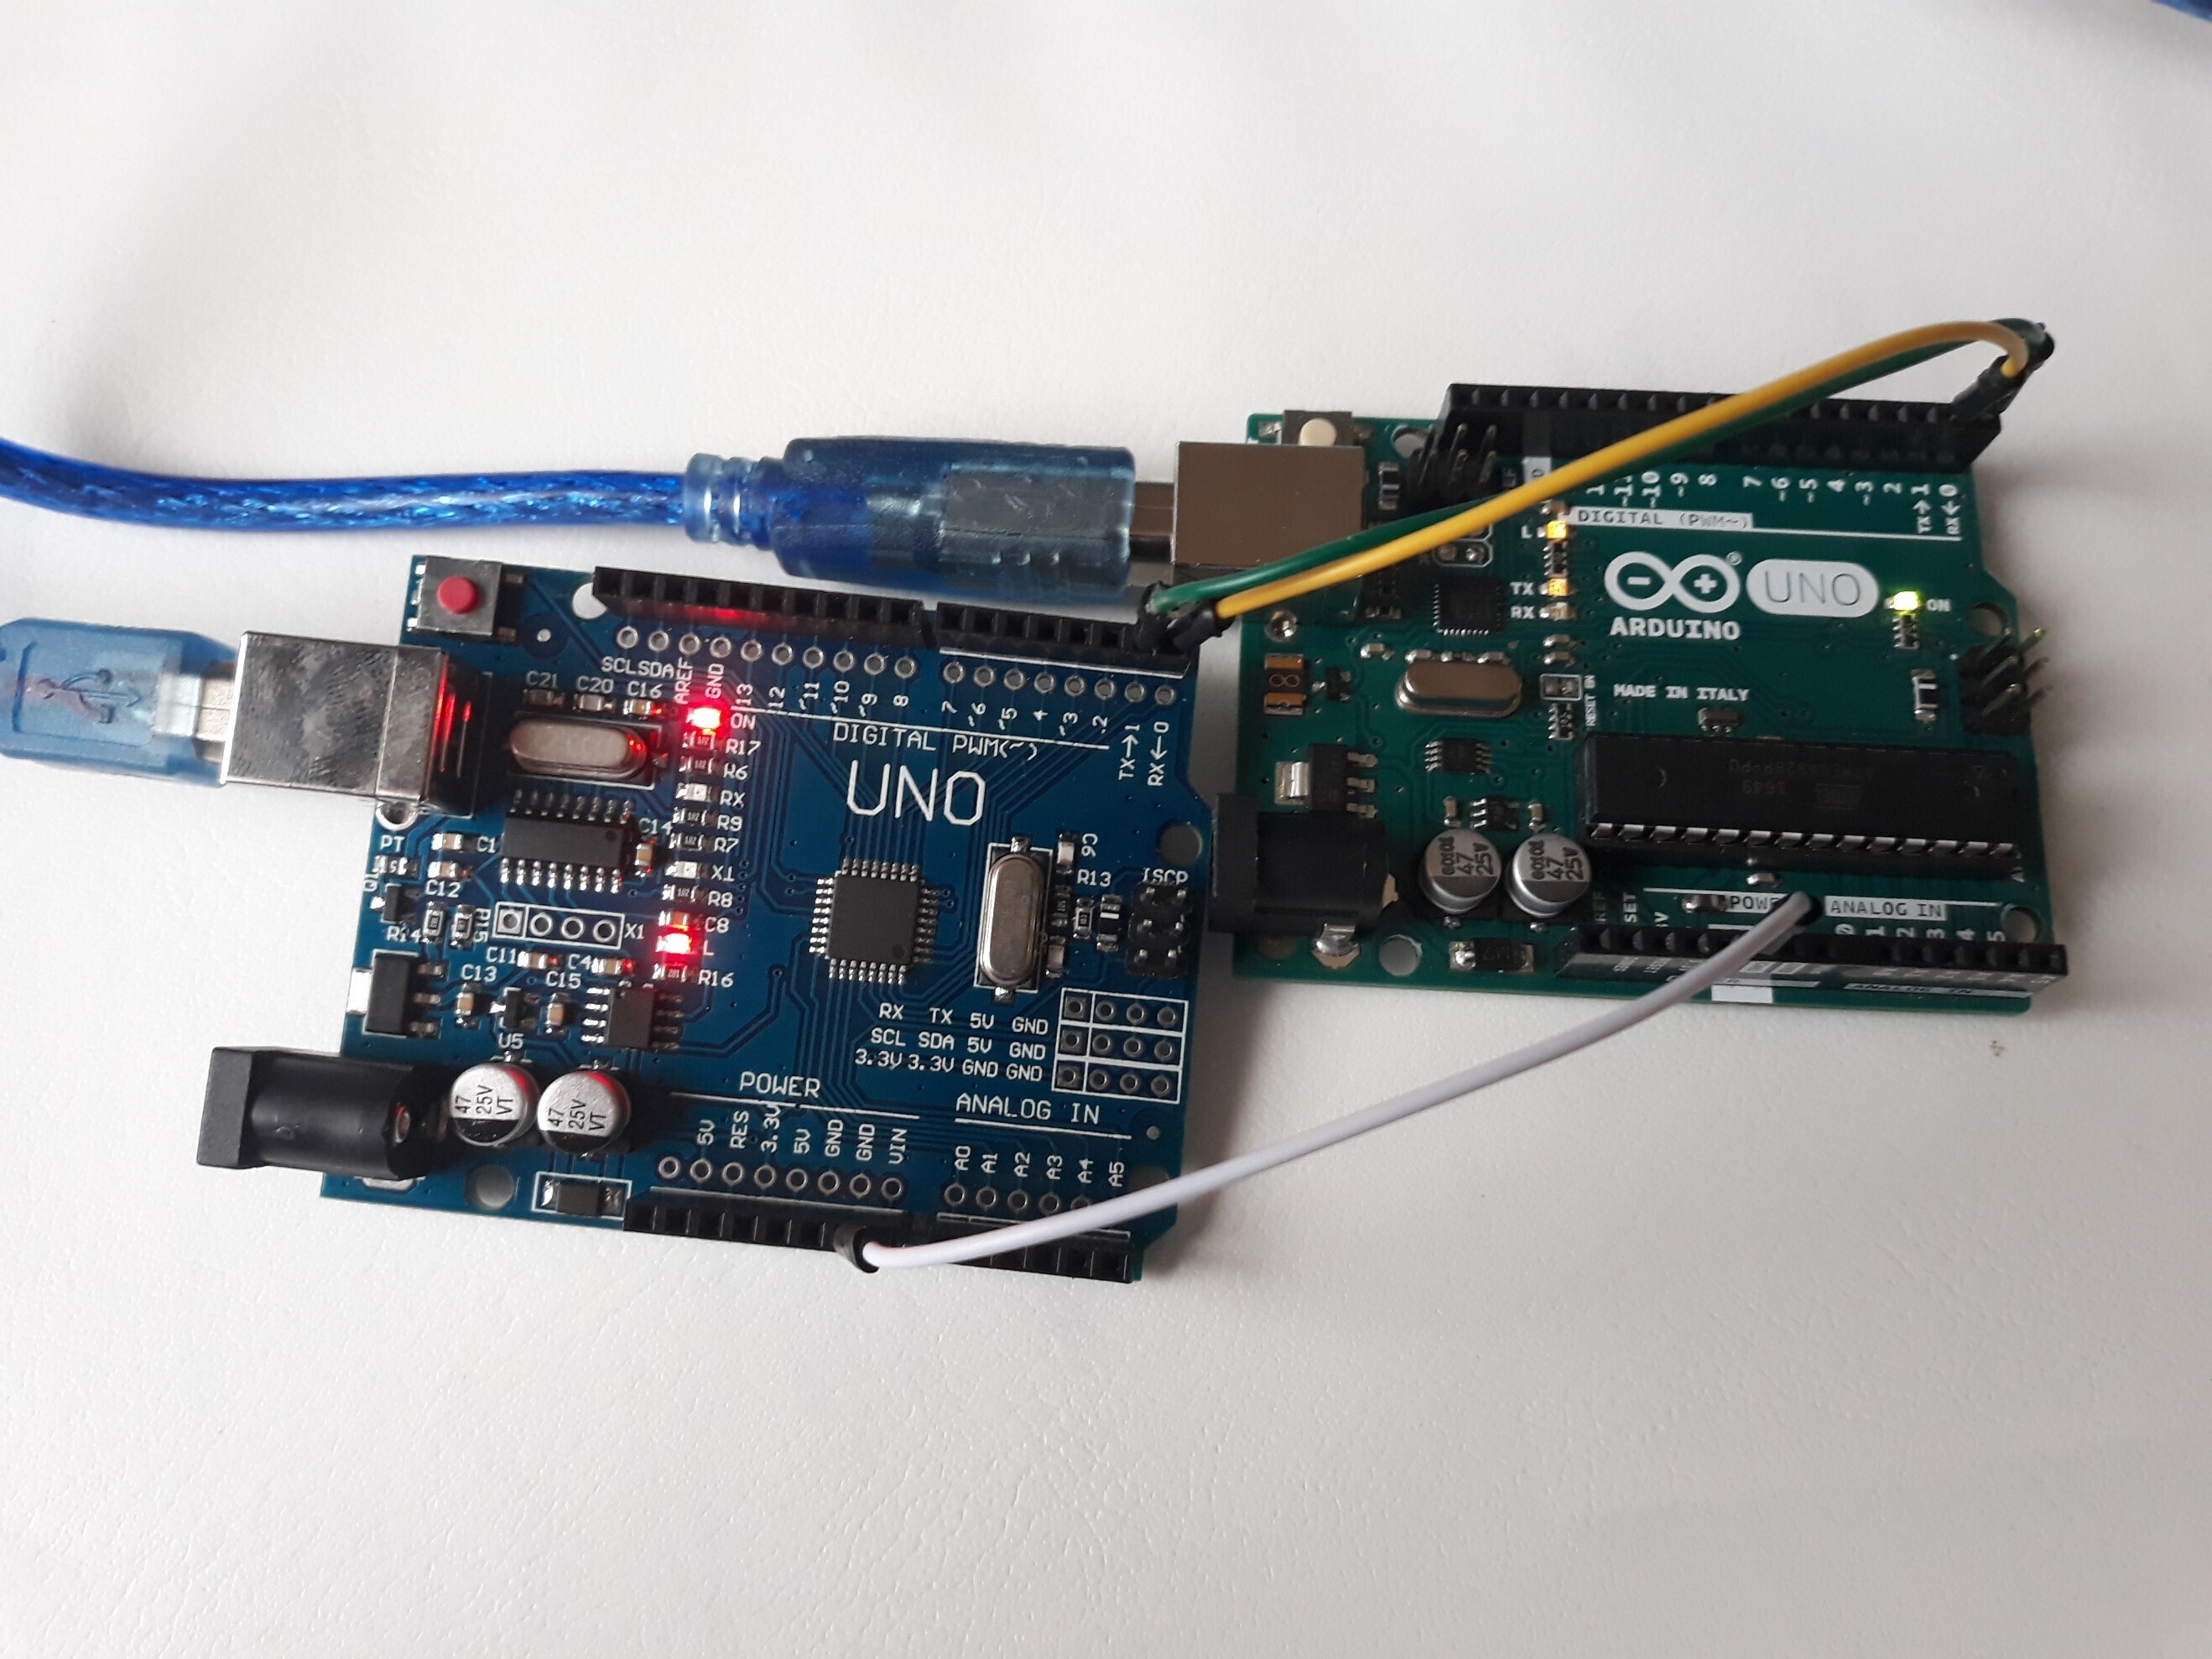
🔌 1. Serial Communication (UART)
- Wiring: Connect TX of one Arduino to RX of the other and vice versa. Also, connect GNDs.
- Library: Serial, SoftwareSerial (for additional ports)
- Pros: Simple, built-in on most boards
- Cons: Only point-to-point, limited distance, uses serial port (shared with USB on some boards)
cpp

// On Sender
Serial.println("Hello Arduino");

// On Receiver
if (Serial.available()) {
  String msg = Serial.readString();
  Serial.println("Received: " + msg);
}
🧠 2. I2C (Inter-Integrated Circuit)
- Wiring: SDA to SDA, SCL to SCL, and GNDs connected
- Library: Wire.h
- Pros: One master can talk to multiple slaves; relatively easy to implement
- Cons: Limited cable length (~1 meter), slower than SPI
cpp

// Master
Wire.beginTransmission(8); // Address of the slave
Wire.write("Hi!");
Wire.endTransmission();

// Slave
Wire.onReceive(receiveEvent);
void receiveEvent(int bytes) {
  while(Wire.available()) {
    char c = Wire.read();
    Serial.print(c);
  }
}
⚡ 3. SPI (Serial Peripheral Interface)
- Wiring: MISO, MOSI, SCK, SS, and GND connected accordingly
- Library: SPI.h
- Pros: Fast and reliable
- Cons: One master only; needs more wires
📡 4. Wireless Communication (e.g., RF, Bluetooth, WiFi)
- Modules: NRF24L01, HC-05 Bluetooth, ESP8266/ESP32 WiFi
- Pros: No wires, longer range, can support multiple nodes
- Cons: Requires external modules, more complex
💡 5. Analog / Digital Pins (Very Basic)
- Use digital pins to send HIGH/LOW or analog voltages.
- Not suitable for data, but OK for triggering events.
✅ Choosing the Right Method