🇧🇷 Para ler em Português: Como criar um repositório para gestão de recursos do GitHub com o Pulumi.
Managing infrastructure as code (IaC) has become an essential practice for modern development teams, and Pulumi has emerged as a powerful tool in this scenario, allowing you to define resources in programming languages you already know - be it Python, JavaScript, TypeScript, Go or C#.
If you already use GitHub for version control and collaboration, you may be wondering how to integrate your existing resources (repositories, organizations, members, etc.) into Pulumi's workflow. The good news is that Pulumi offers mechanisms for importing and managing these resources, allowing you to take advantage of existing infrastructure without having to recreate it from scratch.
In this post, we'll explore the process of creating a repository that allows us to manage GitHub resources, from individual repositories to (almost) complete organizational structures.
Motivation
In my case, my main motivation is my mess. I currently have 126 personal repositories on my GitHub account, as well as being part of 14 organizations, some of which I'm responsible for Ops. Managing access, licenses, workflows, among other things, has become a very onerous task.
In addition, in the last semester I've been working daily with the AWS CDK (Cloud Development Kit), an AWS tool that allows you to define infrastructure in the cloud using programming languages such as TypeScript. Compared to the years I worked with Terraform, which uses HCL (HashiCorp Configuration Language), a specific declarative language for defining infrastructure as code, I can say that I've enjoyed using a conventional programming language to manage infrastructure much more than HCL.
As such, Pulumi presented itself as a great option to use. It allows me to reuse my structure for TypeScript projects (as a linter, CI/CD, etc.), solves my infrastructure management problem and makes it possible to describe scenarios more dynamically than before (I believe one of the main advantages of using a programming language for this).
Considerations
Before we go any further, I'd like to make a few considerations for this article:
- You need to have Pulumi installed on your machine: Download & install Pulumi.
- The programming language I will be using is TypeScript.
- The entire step-by-step will be done in an initially empty directory.
Preparing the project
If you don't want to do the step-by-step in this section, you can use my template:
 alvarofpp
/
template-infra-pulumi
alvarofpp
/
template-infra-pulumi
Template for IaC projects using Pulumi.
Template for IaC using Pulumi
This template comes with a structure for you to manage your personal repositories or organizations on GitHub, as well as making it easy to expand to other contexts.
Migrating GitHub resources to Pulumi
You can use the alvarofpp/import-from-github-to-pulumi repository to perform the migration of an organization or your personal repositories to Pulumi.
Note that for each account there will be a directory with a TypeScript project, with its own package.json files and the like. In my case, it will be a project for my personal repositories and a project for each organization. The step-by-step process for preparing the project is the same in all these cases.
Creating a project in Pulumi
-
Use the local Pulumi login:
pulumi login file:$(pwd)The
pulumi logincommand is used to authenticate your Pulumi CLI with a stateful storage backend. By default, you connect to the backend managed in the Pulumi cloud. When we usefile:$(pwd), you configure Pulumi to use a local file backend instead of the cloud backend. -
Start a Pulumi project
pulumi new typescript --forceWe need to use
--forcebecause thelogincommand will create ahomedirectory and thenewcommand requires to be run in an empty directory. -
Install the GitHub provider:
npm install @pulumi/github -
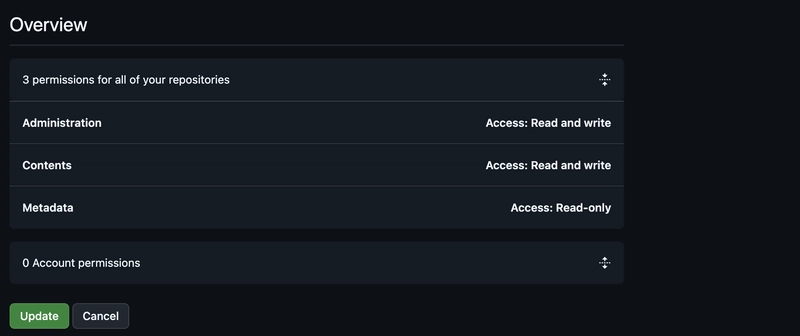
Add the GitHub token:
pulumi config set github:token--secret If you don't know how to create an access token for the GitHub API, consult the official documentation: Managing your personal access tokens.
-
Add the
owner(it can be a user or an organization):
pulumi config set github:owner
By now your directory should be close to this:
.
├── Pulumi.main.yaml
├── Pulumi.yaml
├── index.ts
├── package-lock.json
├── package.json
└── tsconfig.json
Making the project more dynamic
As I'm going to have a lot of resources, it's not interesting to have to use a conventional import scheme, as it would mean always having to import a new repository when I create one, in addition to the more than 120 repositories I already have. Instead, I chose to dynamically import the resources.
The aim is to have directories for each type of resource and a dynamic way of importing these resources.
-
Create a
registry.tsfile with the following content:
import * as fs from "fs";
import * as path from "path";

import * as pulumi from "@pulumi/pulumi";

export interface RegistryBaseConstructor {
  new (): RegistryBase;
}

export class RegistryBase {
  constructor(suffix: string, directory: string) {
    this.init(suffix, directory)
      .then((ResourceRegistry) => {
        ResourceRegistry.forEach((ResourceClass) => {
          new ResourceClass();
        });
      })
      .catch((error) => {
        pulumi.log.error(`Critical error in init method: ${error}`);
        throw error;
      });
  }

  protected async init(suffix: string, directory: string) {
    const anyResourceRegistry = new Map<string, RegistryBaseConstructor>();
    const classesDir = path.join(directory, "./");
    const files = fs.readdirSync(classesDir);

    await Promise.all(
      files.map(async (file) => {
        if (file.endsWith(".ts") && file !== "index.ts") {
          const className = file.replace(".ts", "") + suffix;
          const modulePath = path.join(classesDir, file);

          try {
            const module = await import(modulePath);
            const Class = module[className];
            if (Class) {
              anyResourceRegistry.set(className, Class);
            }
          } catch (error) {
            console.error(`Failed to register ${className} class:`, error);
          }
        }
      }),
    );

    return anyResourceRegistry;
  }
}
The
RegistryBaseclass will be our base class for the classes that will contain each type of resource. Its function is to be a registry of resources. The search for these resources will be dynamic, meeting two criteria:- The resources must have a previously defined suffix.
- The resources must be in the same directory as the registry.
-
Create the
repositoriesdirectory:
mkdir repositories -
Create the file
repositories/index.tswith the following content:
import { RegistryBase } from "../registry";

export class RepositoriesRegistry extends RegistryBase {
  constructor() {
    super("Repository", __dirname);
  }
}
The
RepositoriesRegistryclass will contain all the classes that haveRepositoryas a suffix and are insiderepositories/. -
In the
index.tsfile, import theRepositoriesRegistry:
import { RepositoriesRegistry } from "./repositories";

const repositories = new RepositoriesRegistry();
❗ For the case of organizations, you must repeat steps 2 to 4 for
memberships(suffixMembership) andteams(suffixTeam).
So far your directory should look like this:
.
├── Pulumi.main.yaml
├── Pulumi.yaml
├── index.ts
├── memberships
│ └── index.ts
├── package-lock.json
├── package.json
├── repositories
│ └── index.ts
├── teams
│ └── index.ts
└── tsconfig.json
Collecting data and generating resources in Pulumi
We want the resources to be as faithful as possible to their current state, because if they are not, this could lead to an unwanted state update during import or use. To do this, we can use the GitHub API to collect the data for each resource and declare it in Pulumi.
Manual process
Here you must create a script to collect the data from the GitHub API and assign it to Pulumi resources in the programming language of your choice.
For repositories:
- We have two ways of listing repositories:
- For your personal repositories:
GET /user/repos?affiliation=owner. - For an organization's repositories:
GET /orgs/./repos
- For your personal repositories:
- Iterate over each repository and use the following endpoints to collect more detailed data:
-
GET /repos/: for general data about the repository./ -
GET /repos/: for data about the pages in the repository./pages
-
For members of an organization:
-
GET /orgs/to list the members of the organization./members - Iterate over each member and make a call to the
GET /orgs/endpoint to collect data on that user's association with the organization./memberships/
For teams within an organization:
-
GET /orgs/to list the organization's teams./teams - Iterate over each team and use the following endpoints to collect more detailed data:
-
GET /orgs/for general team data./teams/ -
GET /orgs/to list the team's repositories./teams/ /repos -
GET /orgs/to list the members of that team. Iterate on each member of the team:/teams/ /members GET /orgs//teams/ /memberships/
-
Now that you have all the data you need, just assign it to the respective resources in Pulumi:
- Repository: github.Repository.
- Repository branch: github.Branch.
- Default branch (for unarchived repositories): github.BranchDefault.
- Organization members: github.Membership.
- Teams in the organization: github.Team.
- Team repositories: github.TeamRepository.
- For team members, you have two ways (I prefer the first because it's simpler):
Importing using repository
To abstract all this step-by-step data collection from GitHub and assembly of Pulumi resources that we saw earlier, I created the following repository:
 alvarofpp
/
import-from-github-to-pulumi
alvarofpp
/
import-from-github-to-pulumi
Scripts to import resources from organizations and personal projects on GitHub into Pulumi.
Import from GitHub to Pulumi
This repository contains a configured Docker image with scripts to import your personal repositories or repositories, members and teams of an organization into Pulumi.
After running the import script, two sets of artifacts are generated
and saved in the resources/:
-
import_*.txt: files with commands for importing resources. -
members/*.ts,repositories/*.tsandteams/*.ts: Pulumi resource files.
The alvarofpp/template-infra-pulumi repository has a directory structure that you can use as a basis.
How to use
This repository can be used for two purposes:
- Importing your personal repositories.
- Importing members of an organization's repositories and teams.
For both cases, you first need to run make build to generate the
Docker image that will be used to run the scripts.
The commands using make that will be shown below can be found in the Makefile file
If you choose not to use the Makefile, you can…
In this repository, you will have a Docker image configured and with scripts to generate the resource files for Pulumi based on the data returned by the GitHub API.
For this repository to work, you must have Docker and make installed on your machine. If you use Linux, you probably already have make installed.
⚠️ If you are importing accounts and organizations in sequence, after each import you can use the
make clearcommand to clear the logs and files generated during the previous import.
In another directory, clone the repository:
git clone [email protected]:alvarofpp/import-from-github-to-pulumi.gitGenerating personal repository files
-
Export the access token to GitHub:
export GITHUB_ACCESS_TOKEN=github_pat_... -
Export your user on GitHub:
export GITHUB_USER=... -
Run the command to generate the files for Pulumi:
make import-my-reposIn the
resourcesdirectory you will find the following files:
-import_*.txt: file with the import commands.
-repositories/*.ts: files with the resources for each repository.
Generating the files of repositories, members and teams of an organization
-
Export the access token to GitHub:
export GITHUB_ACCESS_TOKEN=github_pat_... -
Export the name of the organization on GitHub:
export GITHUB_ORG=... -
Run the command to generate the files for Pulumi:
make import-orgIn the
resourcesdirectory you will find the following files:
-import_*.txt: file with the import commands.
-memberships/*.ts: files for each member of the organization.
-repositories/*.ts: files for each repository in the organization.
-teams/*.ts: files for each team in the organization.
Importing resources
If you have collected the data yourself, then you should also set up the import commands:
# Repository
pulumi import github:index/repository:Repository

# Branch of the repository
pulumi import github:index/branch:Branch  :

# Organization member
pulumi import github:index/membership:Membership  :

# Organization team
pulumi import github:index/team:Team

# Team members
pulumi import github:index/teamMembers:TeamMembers

# Team repository
pulumi import github:index/teamRepository:TeamRepository  :
If you have chosen to use the repository I suggested earlier, the step by step is:
- Copy the
*.tsfiles to their respective directories in the Pulumi project. - Execute all the commands in the
import_*.txtfiles. - Now run
pulumi upand apply the updates, if any.
That's it, you now have a project that allows you to manage your GitHub resources using Pulumi. Remember that this structure can be expanded to other types of resources and that you are using a programming language for this, so scripted automations work very well in this context.
Hints and tips
- Note that we use the local Pulumi login, this is just to make it easier to teach. In a real environment, it is preferable that you save the states in S3 or a similar service.
- The indentation of the codes may not be properly aligned, but you can use a formatter/linter to fix this. In my case, I use Deno's (
deno fmt).
Use cases
There are several use cases and it depends on your context or the context of the organization. Here I'll list just a few use cases that are mainly useful for personal accounts.
Updating specific files
With the RepositoryFile feature you can manage specific files in your repositories. Examples of interesting files to use this feature are LICENSE and also workflows. This last type of file (workflows) is very useful for personal accounts, as GitHub allows you to share actions and workflows in organizations, but not in personal accounts.
Updating repositories for special occasions
I have some repositories that participate in Hacktoberfest. So I intend to put a date check so that every beginning of October I add the hacktoberfest topic to the repository and every beginning of November I remove that topic.
Sharing and access management
Now it's easier to define which accounts are part of your organization, their privileges, which teams have access to which repositories, etc.
Management of variables and secrets
If you use GitHub Actions, you should be familiar with the use of variables and secrets in your workflows. A good practice is to put a short expiration time on secrets and renew them whenever possible. Pulumi allows you to store secrets in the stack, the command to insert the GitHub token into the project is an example of this, so you can integrate this functionality with a token renewal script. Every time the script is run, it automatically updates the token in the stack and updates the secret in the repository.