How to Design a Milk Can Using 3D CAD Software
3D modeling has become more accessible thanks to intuitive, web-based platforms like SelfCAD. Designed with both beginners and experienced users in mind, SelfCAD offers a wide range of tools that make digital creation straightforward and enjoyable. One of the best ways to explore these features is by modeling everyday objects, like a traditional milk can. The simplicity of its shape combined with small design details makes it an ideal project for learning the fundamentals of 3D design.
This article will guide you through the complete process of creating a milk can using SelfCAD. Whether you're designing for practice, presentation, or 3D printing, this project will help you build confidence in using SelfCAD’s core features while reinforcing essential modeling techniques.
To access the interactive tutorial to this article, check out; https://www.selfcad.com/tutorials/4ab602vev4v16l3s5i5y3xq3j665254235pu
Once you’ve launched the editor;
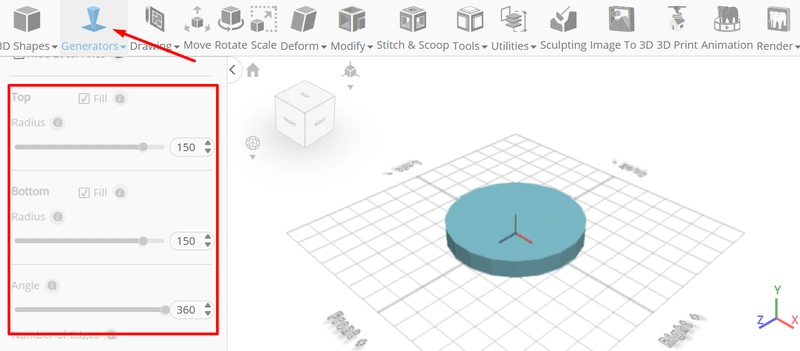
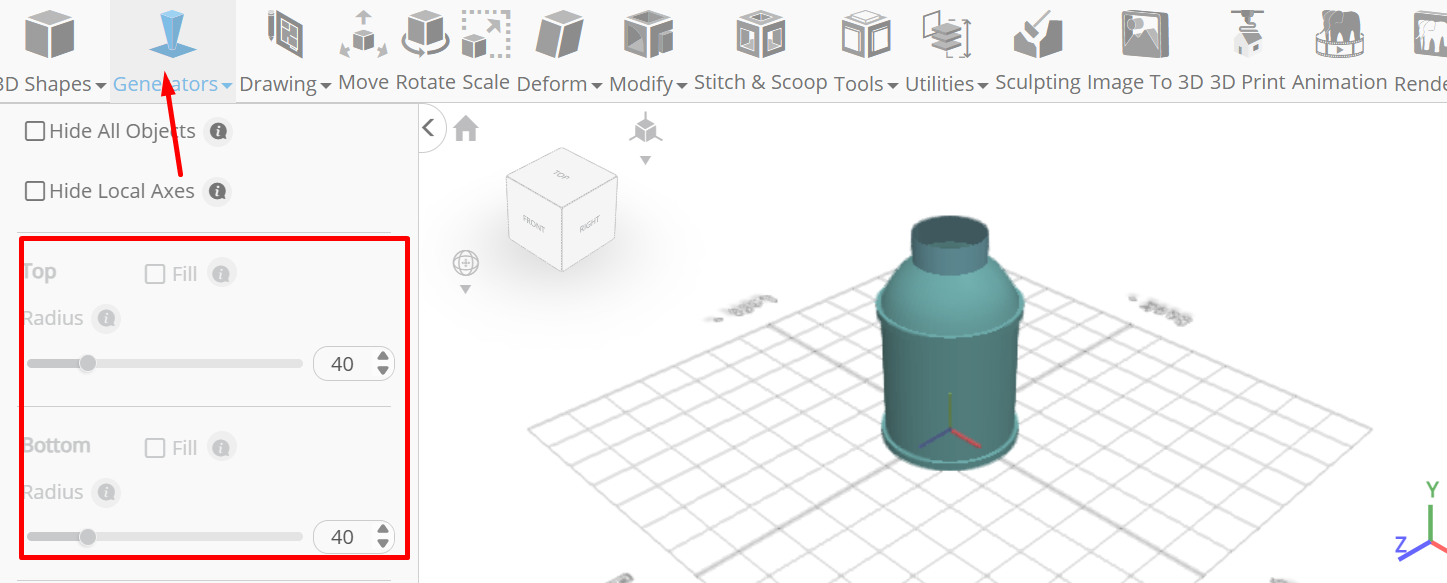
From the generators category on the toolbar choose shape generator; Set number of edges to 64, height to 10,
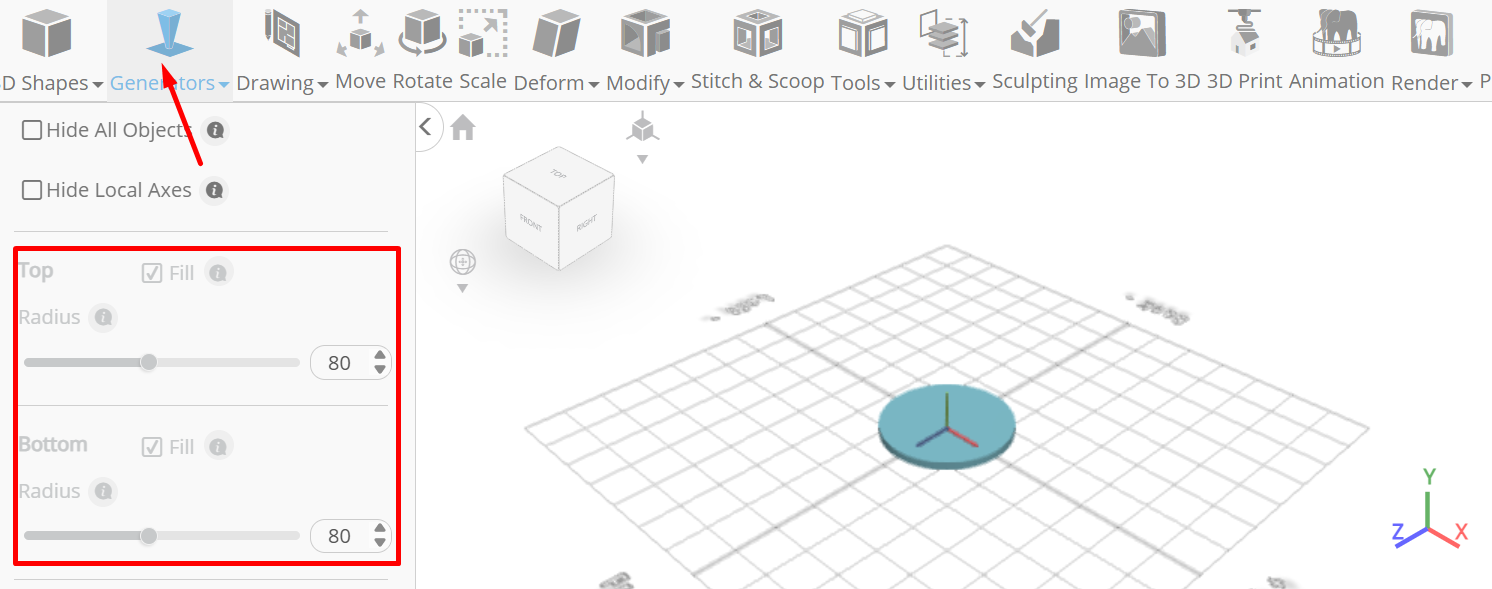
Click + button to add new segment; Set fill top to false, top radius to 75, fill bottom to false, bottom radius to 75, height to 150
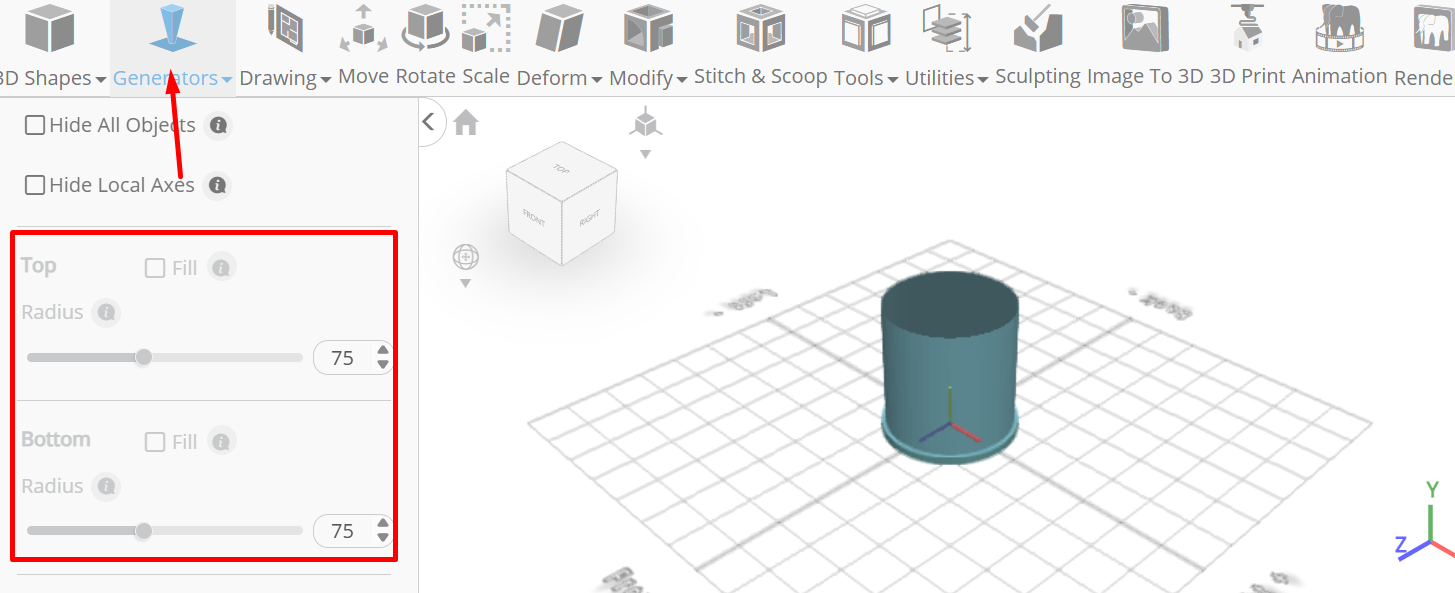
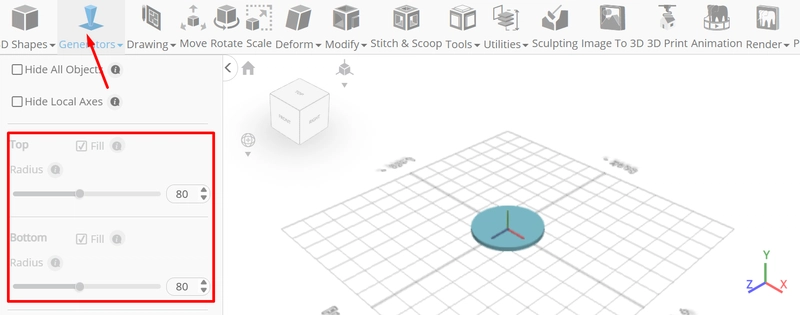
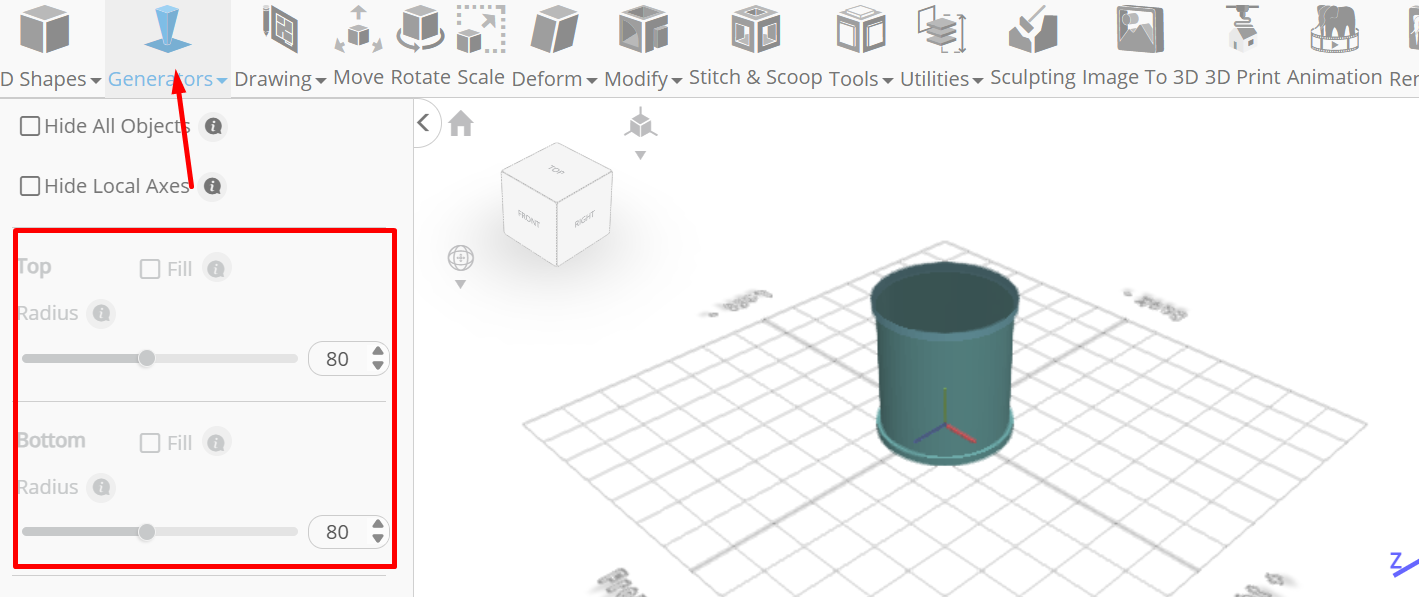
Click + button to add new segment; Set top radius to 80, bottom radius to 80, height to 10
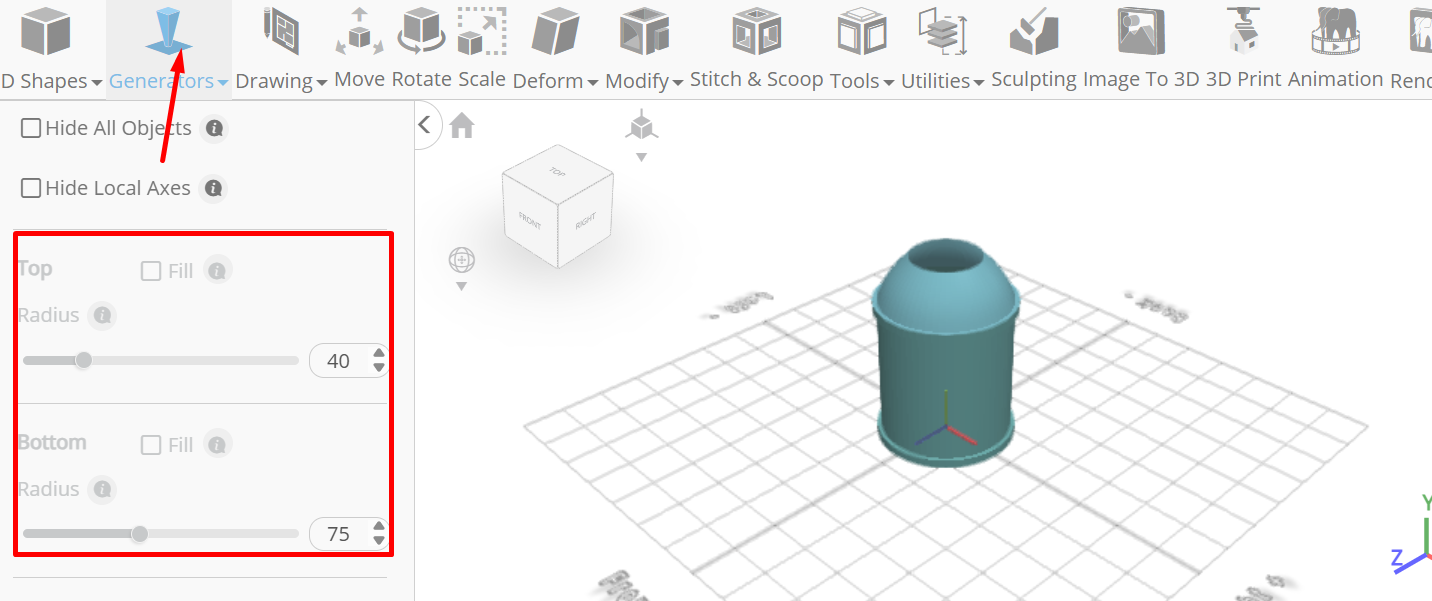
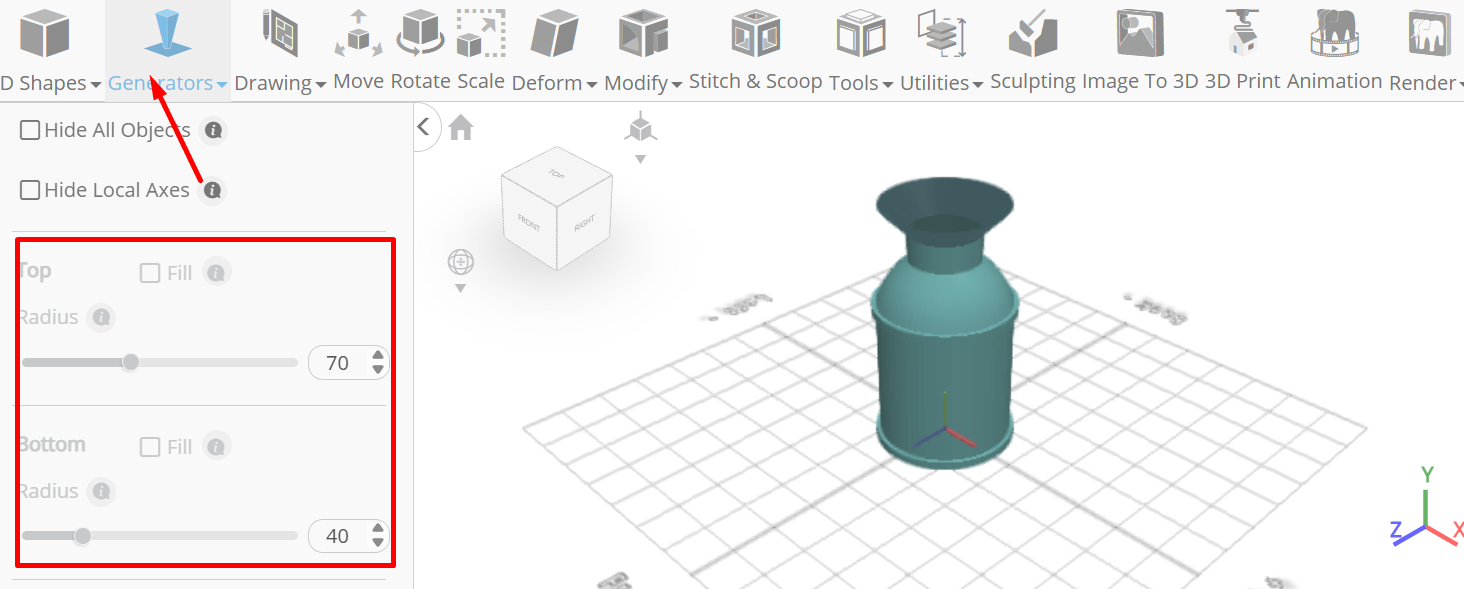
Click + button to add new segment; Set top radius to 40, bottom radius to 75, height to 50, bevel segment to 0.5, bevel level to 20
Click + button to add new segment; Set height to 30, bevel segment to 0
Click + button to add new segment; Set top radius to 70
Click + button to add new segment; Set height to 15
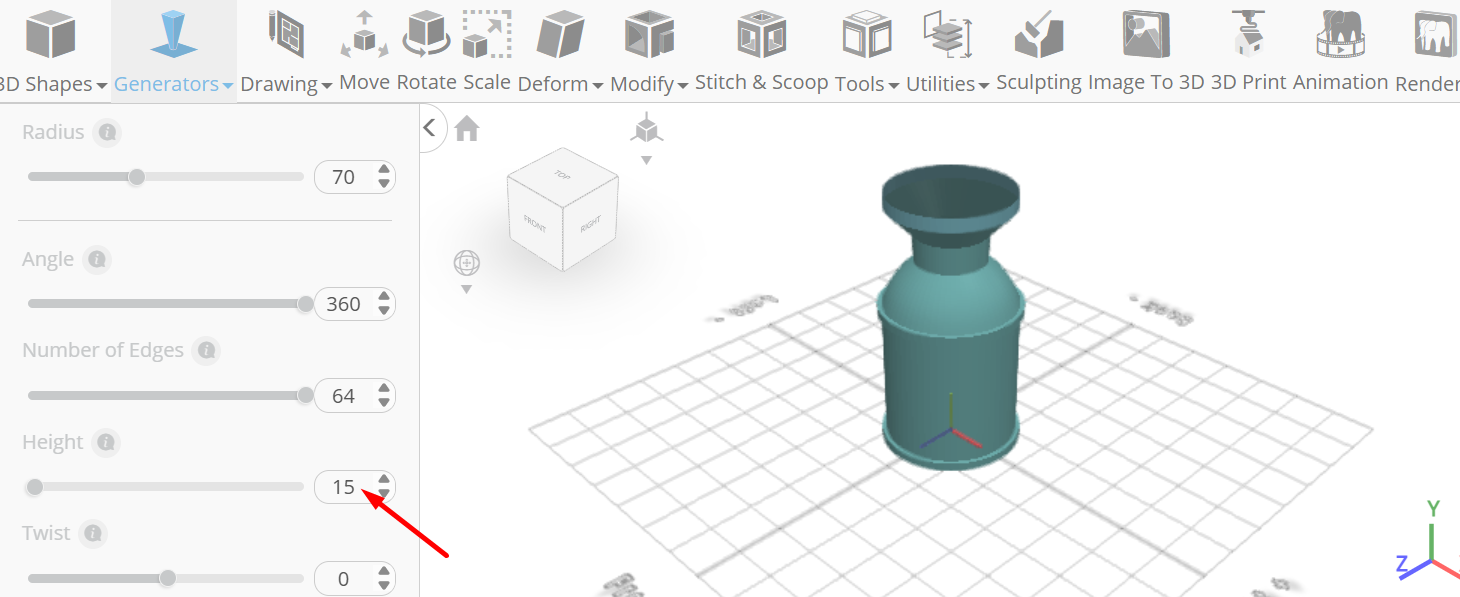
Tick the checkmark to finalize shape generator
From the generators category on the toolbar choose shape generator; Set top radius to 65, fill bottom to false, bottom radius to 65, number of edges to 64, height to 15,

Click + button to add new segment; Set top radius to 30, height to 25, position y to 294
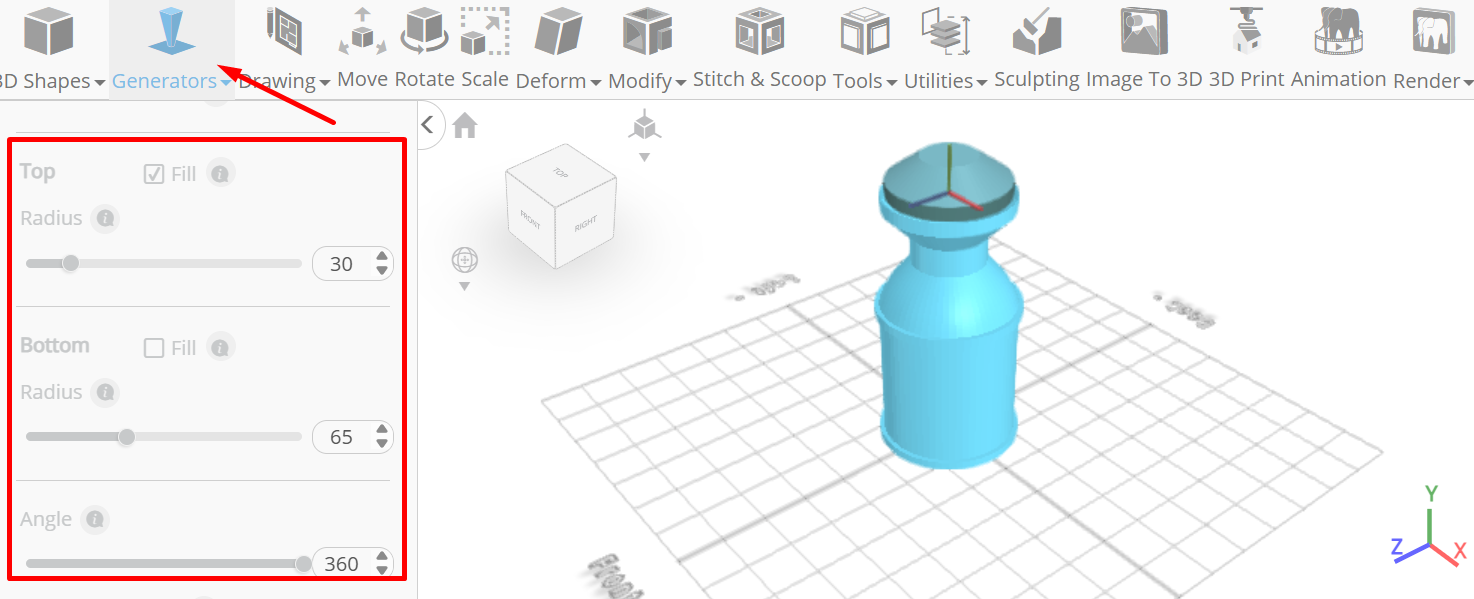
Tick the checkmark to finalize shape generator
Click on shape 1 to select it. Click on shape 2 to deselect
From the modify category on the toolbar choose add thickness; Set thickness to 4
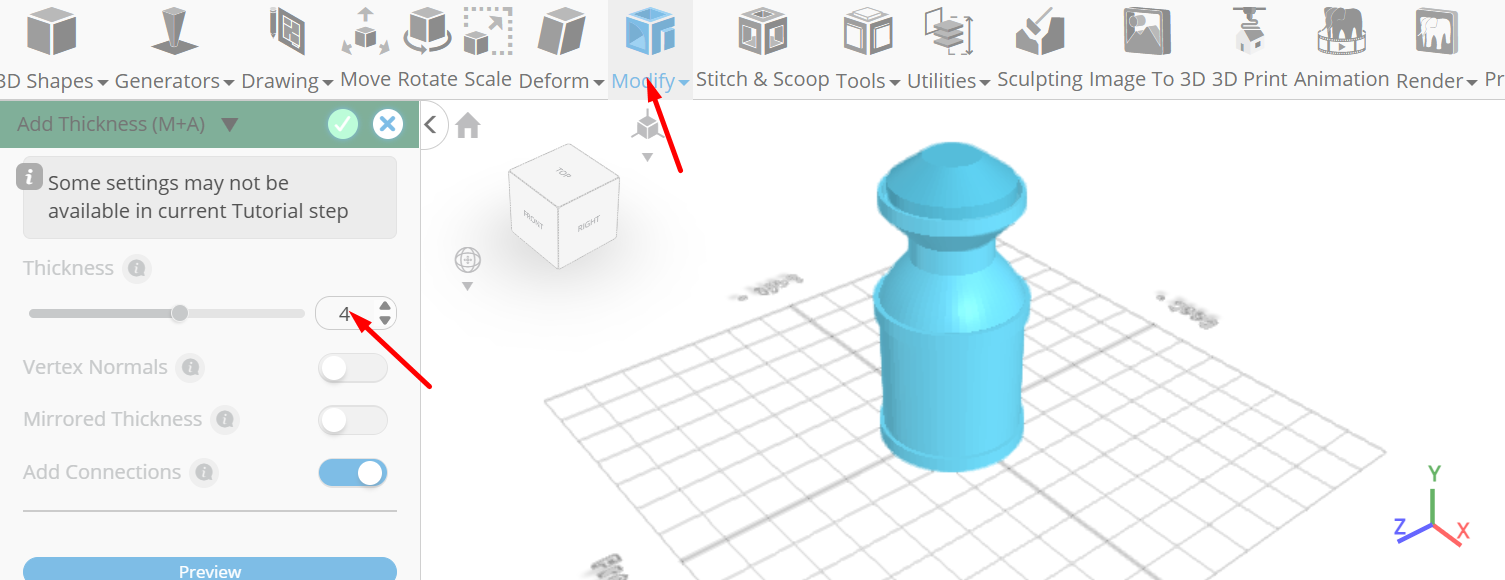
Tick the checkmark to finalize add thickness
Click move on the toolbar; Set y to 283

Click ‘x’ to close transformation panel
From the 3D Shapes category on the toolbar choose torus; Set ring radius to 25, tube radius to 4, tubular segments to 128, radial segments to 128, arc to 180, position y to 328, rotation x to -90.
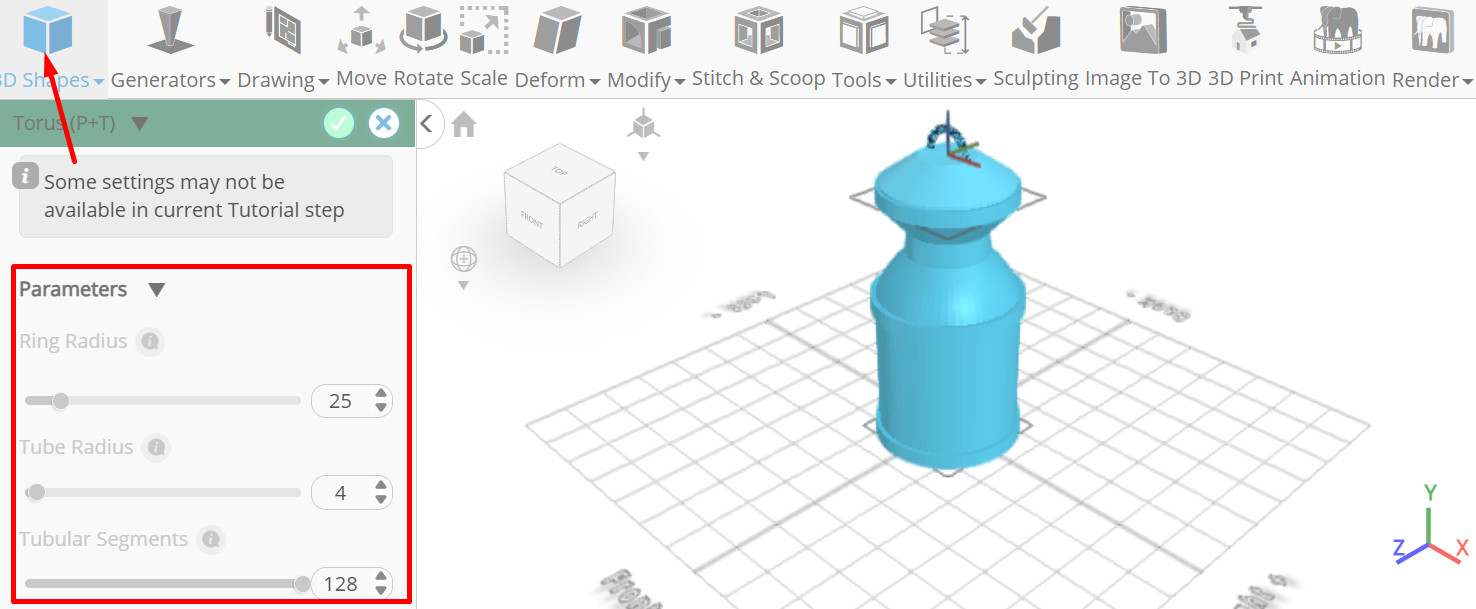
Tick the checkmark to finalize torus
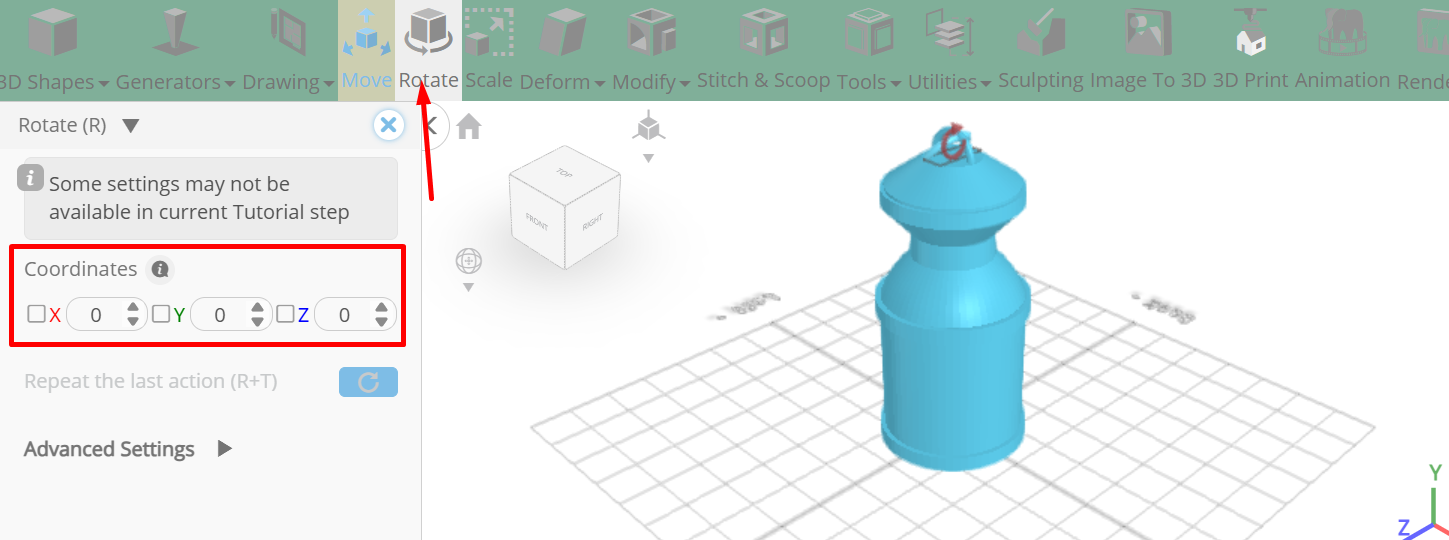
Click copy button to copy selected objects; Click rotate on the toolbar; Set y to 90, z to 45
Click move on the toolbar; Set y to 200, x to 65
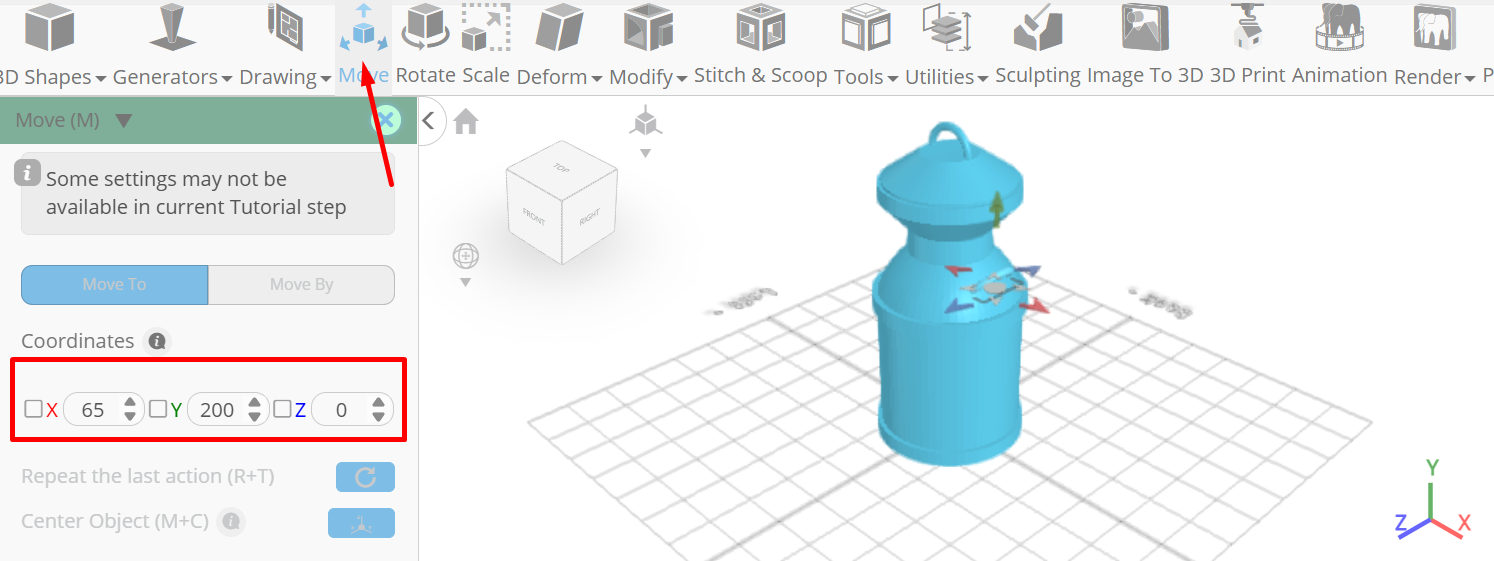
Click ‘x’ to close transformation panel
From the utilities category on the toolbar choose mirror; Set create copy to true, direction to left, offset to 53
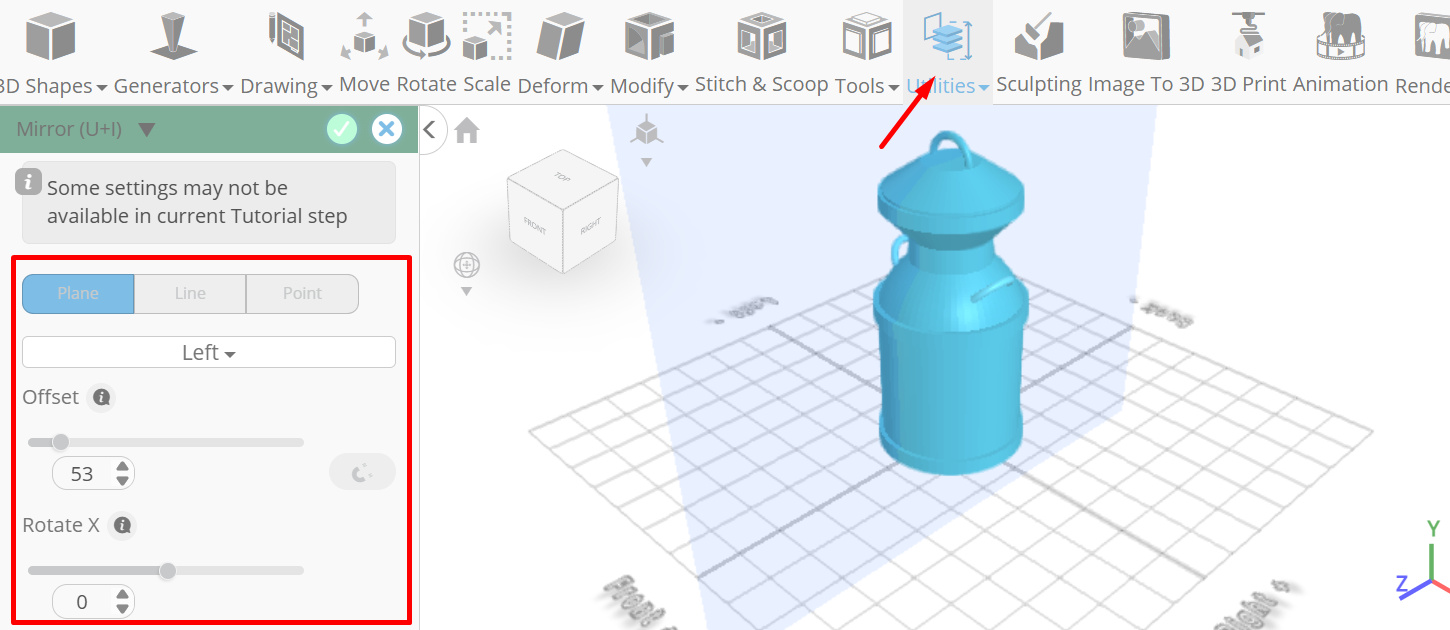
Tick the checkmark to finalize mirror
Click on mesh 4(2), shape 1 to select
Click stitch & scoop on the toolbar; From the tool panel choose union.
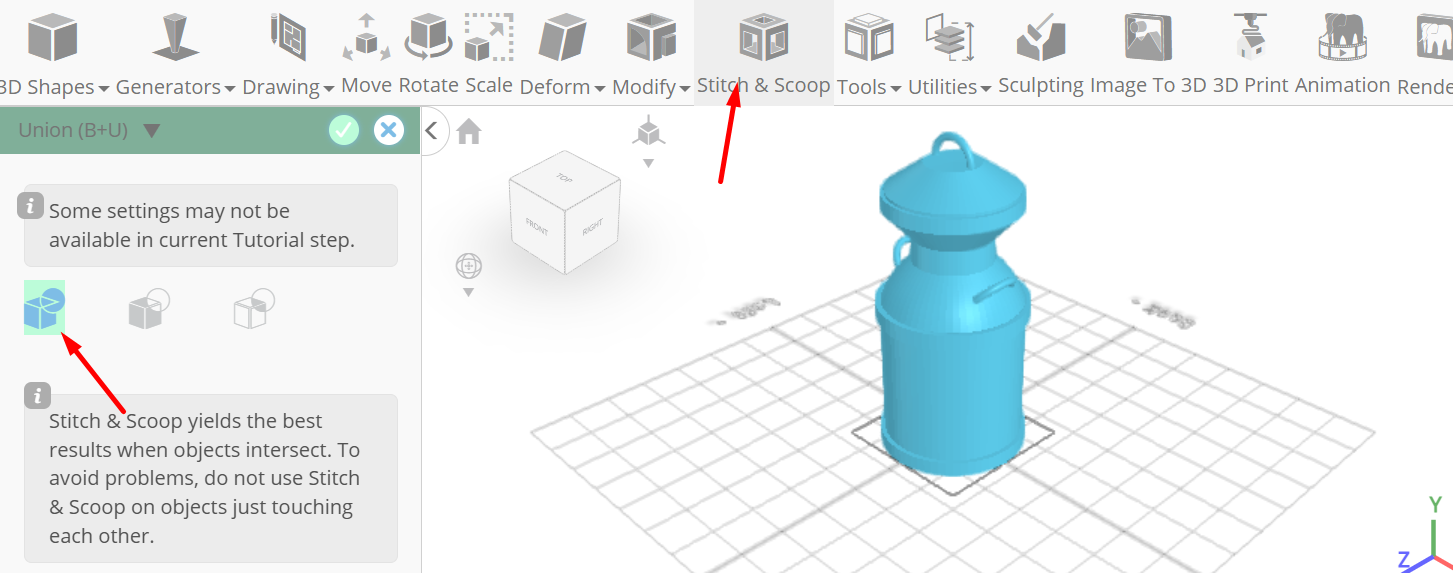
Tick the checkmark to finalize union
Click on mesh 4, shape 2 to select. Click on union 1 to deselect; Click stitch & scoop on the toolbar; From the tool panel choose union.

Tick the checkmark to finalize union
Click on union 1 to select it; Click color picker button to change color of object; Click silver
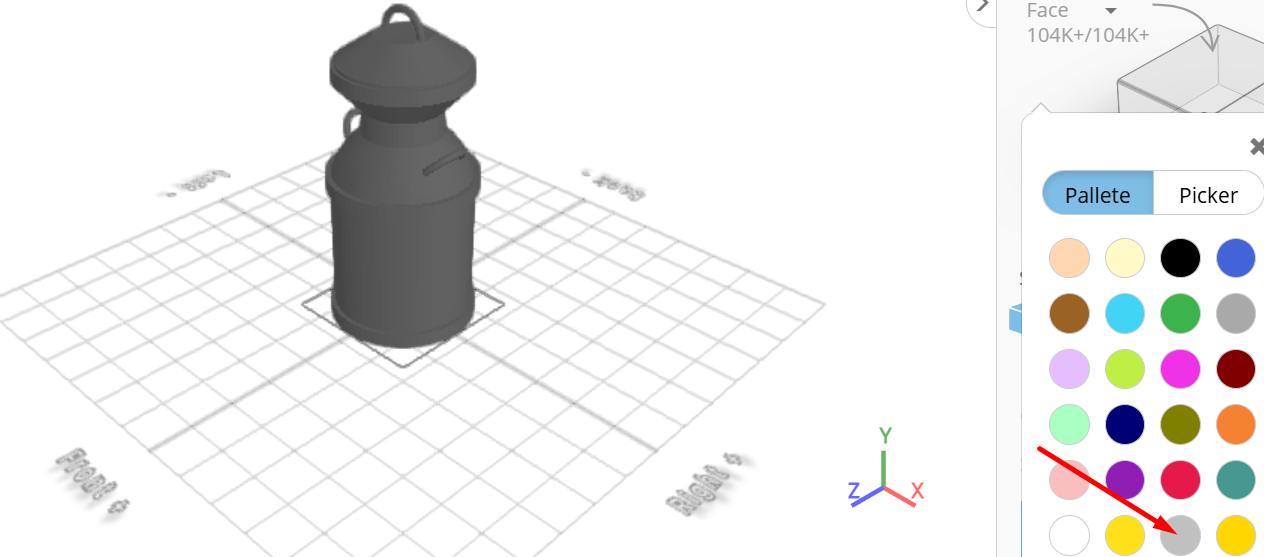
Click ok
From the right panel choose materials; Set shininess to 200
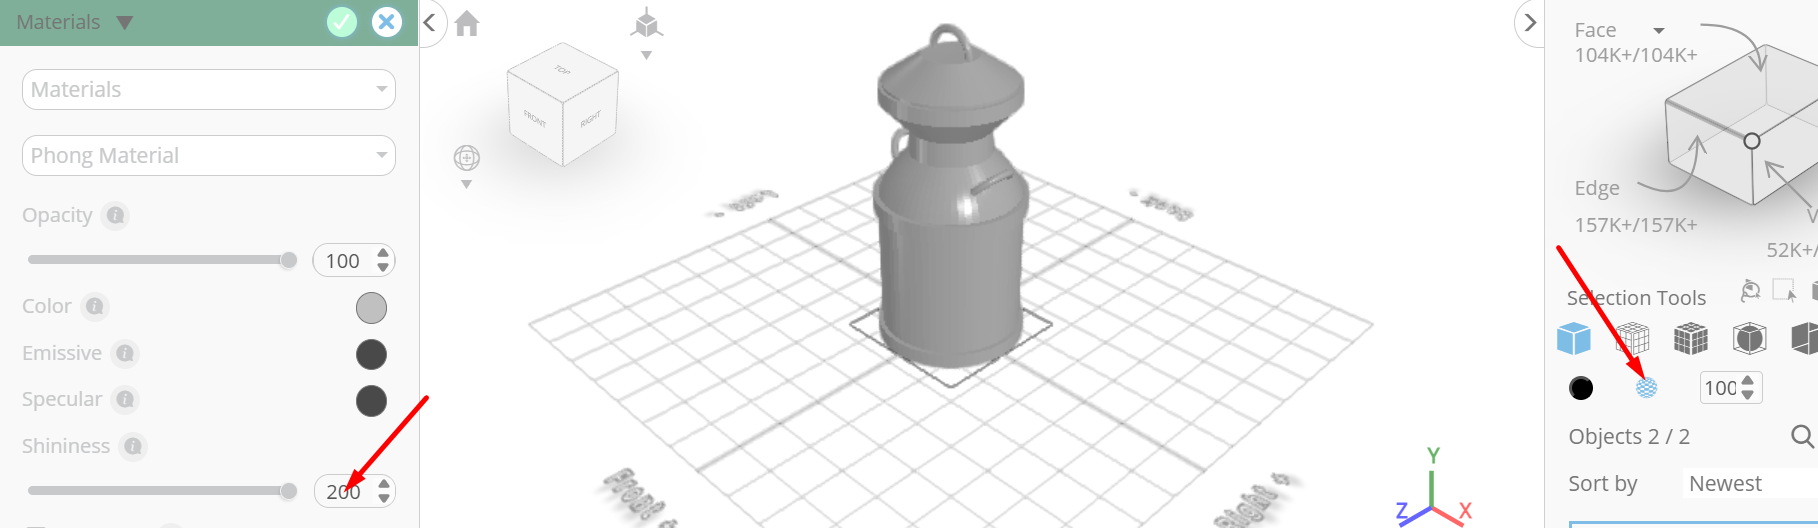
Tick the checkmark to finalize materials
As you continue honing your design skills, remember that SelfCAD offers a wealth of resources to support your learning journey. To deepen your understanding and explore more advanced features, consider checking out the interactive tutorials (https://www.selfcad.com/tutorials) available on the SelfCAD website. The tutorials page provides a treasure trove of guides, tips, and tricks that cater to designers of all levels.
More structured learning experience can also be accessed at the SelfCAD Academy (https://www.selfcad.com/academy/curriculum/), https://www.youtube.com/@3dmodeling101, and 3D Modeling 101 series (https://www.youtube.com/playlist?list=PL74nFNT8yS9DcE1UlUUdiR1wFGv9DDfTB). This comprehensive resource offers in-depth courses taught by industry experts, allowing you to master the intricacies of SelfCAD at your own pace