ในบทความนี้ เราจะมาจำแนกประเภทของภาพ ด้วยการสร้างโมเดล Deep Learning ที่สามารถจำแนกหมากับแมว ที่สร้างจาก TensorFlow โดยใช้เทคนิค Convolutional Neural Network (CNN) ที่นิยมใช้ในงานด้านการจำแนกรูปภาพ ซึ่งสามารถใช้งานได้ง่ายผ่าน Google Colab
ขั้นตอนการทำงานมีดังนี้
- นำเข้าไลบรารีที่จำเป็น
- โหลดและเตรียมข้อมูล
- เตรียมข้อมูลและ Preprocessing
- สร้างโมเดล CNN
- คอมไพล์และฝึกโมเดล
- ทดสอบโมเดลกับภาพจริง
- แสดงผลลัพธ์การทำนาย
1.นำเข้าไลบรารีที่จำเป็น
import tensorflow as tf
import tensorflow_datasets as tfds
import matplotlib.pyplot as plt- ก่อนอื่นเราเรียกใช้ไลบรารีที่จำเป็นในการสร้างโมเดล โดย tensorflow_datasets หรือ tfds มี dataset สำเร็จรูปให้ใช้งาน ไม่ต้องหามาเอง ส่วน matplotlib.pyplot เอาไว้แสดงภาพ
2.โหลดและเตรียมข้อมูล
(train_data, test_data), info = tfds.load(
    'cats_vs_dogs',
    split=['train[:80%]', 'train[80%:]'],
    with_info=True,
    as_supervised=True
)

print("Number of training images:", int(info.splits['train'].num_examples * 0.8))
print("Number of test images:", int(info.splits['train'].num_examples * 0.2))- โหลด dataset (cats_vs_dogs) จาก TensorFlow Datasets
- แบ่งข้อมูลออกเป็น 2 ส่วน คือ training set 80% และ test set 20% และเตรียมข้อมูลให้อยู่ในรูปแบบที่พร้อมใช้งาน (image-label pair ผ่าน as_supervised=True)
- outputนี้จะได้:

3.เตรียมข้อมูลและ Preprocessing
IMG_SIZE = 128
BATCH_SIZE = 32

# ใช้ Data Augmentation เฉพาะกับชุด train
data_augmentation = tf.keras.Sequential([
    tf.keras.layers.RandomFlip('horizontal'),
    tf.keras.layers.RandomRotation(0.1),
    tf.keras.layers.RandomZoom(0.1)
])

def preprocess(image, label, augment=False):
    image = tf.image.resize(image, (IMG_SIZE, IMG_SIZE))
    image = image / 255.0
    if augment:
        image = data_augmentation(image)
    return image, label

# Apply preprocessing
train_data = train_data.map(lambda x, y: preprocess(x, y, augment=True), num_parallel_calls=tf.data.AUTOTUNE)
test_data = test_data.map(lambda x, y: preprocess(x, y), num_parallel_calls=tf.data.AUTOTUNE)

# ทำ batching และ prefetch
train_data = train_data.shuffle(1000).batch(BATCH_SIZE).prefetch(tf.data.AUTOTUNE)
test_data = test_data.batch(BATCH_SIZE).prefetch(tf.data.AUTOTUNE)- ย่อภาพทั้งหมดให้เป็นขนาดเดียวกัน (128x128)พิกเซล จำนวนภาพต่อชุด (BATCH_SIZE) = 32
- ปรับค่า pixel ให้อยู่ในช่วง 0-1
- ใช้ Data Augmentation เฉพาะชุด train เพื่อเพิ่มความหลากหลายของข้อมูล เช่น พลิกภาพ หมุนภาพ
- ใช้ .batch() และ .prefetch() เพื่อให้โมเดล train ได้ไวและมีประสิทธิภาพขึ้น
4. สร้างโมเดล CNN
model = tf.keras.Sequential([
    tf.keras.layers.Conv2D(32, (3,3), activation='relu', input_shape=(IMG_SIZE, IMG_SIZE, 3)),
    tf.keras.layers.MaxPooling2D(2,2),

    tf.keras.layers.Conv2D(64, (3,3), activation='relu'),
    tf.keras.layers.MaxPooling2D(2,2),

    tf.keras.layers.Conv2D(128, (3,3), activation='relu'),
    tf.keras.layers.MaxPooling2D(2,2),

    tf.keras.layers.Dropout(0.3),
    tf.keras.layers.Flatten(),
    tf.keras.layers.Dense(128, activation='relu'),
    tf.keras.layers.Dropout(0.3),
    tf.keras.layers.Dense(1, activation='sigmoid')
])- โมเดลใช้โครงสร้างแบบ CNN (Convolutional Neural Network)
- Conv2D:มี 3 ชั้น Convolutional สำหรับดึงคุณลักษณะจากภาพ และแต่ละชั้นตามด้วย MaxPooling เพื่อย่อขนาดและลดความซับซ้อน
- Flatten แปลงภาพให้กลายเป็นข้อมูลแถวเดียว เพื่อส่งเข้า Dense Layer
- Dropout เพื่อลดการ overfitting
- Dense(128, activation='relu') ใช้ relu ช่วยให้โมเดลเข้าใจข้อมูลซับซ้อน
- Dense(1, activation='sigmoid') สำหรับจำแนก 2 คลาส เช่น หมากับแมว ให้ผลลัพธ์เป็นค่าระหว่าง 0-1
5. คอมไพล์และฝึกโมเดล
# คอมไพล์โมเดล
model.compile(optimizer='adam', loss='binary_crossentropy', metrics=['accuracy'])

# เพิ่ม early stopping
early_stop = tf.keras.callbacks.EarlyStopping(monitor='val_loss', patience=3, restore_best_weights=True)

history = model.fit(
    train_data,
    validation_data=test_data,
    epochs=5,
    callbacks=[early_stop]
)- คอมไพล์ให้โมเดลเรียนรู้
- early stopping แม่นยำไม่เพิ่มใน 3 รอบล่าสุด ก็จะหยุดฝึกเลย
- โมเดล(fit) ฝึกทั้งหมด 5 รอบ (epochs)
outputที่ได้

6. ทดสอบโมเดลกับภาพจริง
for images, labels in test_data.shuffle(100).take(1):
    for i in range(2):
        img = images[i]
        true_label = labels[i].numpy()
        prediction = model.predict(tf.expand_dims(img, axis=0))[0][0]
        predicted_label = 1 if prediction > 0.5 else 0

        print("Prediction:", "Dog" if predicted_label == 1 else "Cat")
        print("Actual label:", "Dog" if true_label == 1 else "Cat")
        print("---")

        plt.imshow(img)
        plt.axis("off")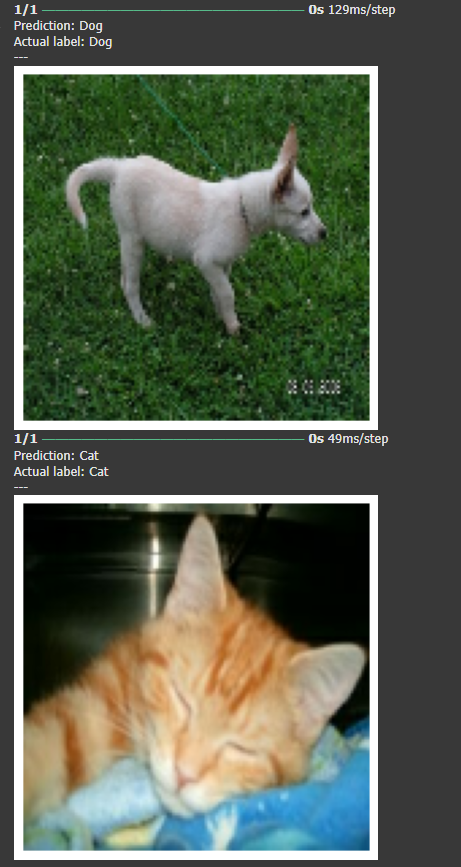
plt.show()- เราจะสุ่มภาพจากชุดทดสอบ (test set) แล้วให้โมเดลลองทายว่าเป็น "หมา" หรือ "แมว"
- ได้ค่ามากกว่า 0.5 ถือว่าเป็น Dog (1), น้อยกว่านั้น Cat(0) จากนั้นจะแสดงภาพ พร้อมบอกว่า:
- โมเดลทำนายว่าอะไร (Prediction)
- คำตอบที่ถูกต้องจริง ๆ (Actual label)
7. แสดงผลลัพธ์การทำนาย
และต่อไปเราจะมาลองทำตัวอย่างใหม่ด้วยการเปลี่ยนประเภทการจำแนก
หลังจากที่เราสร้างโมเดล CNN เพื่อจำแนกประเภทภาพของDogกับCat เราจึงนำความรู้เดิมไปประยุกต์กับหมวดหมู่อื่น คือเราจะจำแนกประเภทภาพของผลไม้ คือ Apple กับ grape โดยcodeจะมีการเปลี่ยนแปลงในบางส่วน ดังนี้
ขั้นตอนการทำงานมีดังนี้
- นำเข้าไลบรารีที่จำเป็น
- เชื่อม Google Drive และตรวจสอบข้อมูล
- โหลด dataset จากโฟลเดอร์
- สร้างโมเดล CNN
- คอมไพล์และฝึกโมเดล
- ทดสอบโมเดลกับภาพจริง
- แสดงผลลัพธ์การทำนาย
1. นำเข้าไลบรารีที่จำเป็น
import tensorflow as tf
import matplotlib.pyplot as plt
from tensorflow.keras.callbacks import EarlyStopping- เรียกใช้ไลบรารีที่จำเป็นในการสร้างโมเดลคล้ายๆเดิมแค่ไม่มีtensorflow_datasets กับเพิ่มEarlyStopping หยุดการฝึกโมเดลเมื่อไม่พัฒนาขึ้น
2. เชื่อม Google Drive และตรวจสอบข้อมูล
2.1
from google.colab import drive
drive.mount('/content/drive')- เชื่อม Google Colab กับ Google Drive ของเรา เพื่อให้เข้าถึงไฟล์ภาพฝึกโมเดลได้
2.2
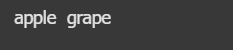
!ls "/content/drive/MyDrive/fruit_images"จากนั้นใช้คำสั่ง !ls เพื่อดูว่ามีโฟลเดอร์และภาพอยู่ในไดรฟ์จริง
outputที่ออกมาแปลว่า มีโฟลเดอร์ชื่อ "apple" กับ "grape" อยู่
3. โหลด dataset จากโฟลเดอร์
# โหลด dataset จากโฟลเดอร์
train_data = tf.keras.utils.image_dataset_from_directory(
    '/content/drive/MyDrive/fruit_images',
    validation_split=0.2,
    subset="training",
    seed=123,
    image_size=(IMG_SIZE, IMG_SIZE),
    batch_size=BATCH_SIZE
)

test_data = tf.keras.utils.image_dataset_from_directory(
    '/content/drive/MyDrive/fruit_images',
    validation_split=0.2,
    subset="validation",
    seed=123,
    image_size=(IMG_SIZE, IMG_SIZE),
    batch_size=BATCH_SIZE
)

# Prefetch ให้เร็วขึ้น
train_data = train_data.prefetch(tf.data.AUTOTUNE)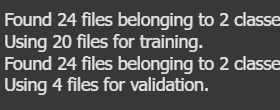
test_data = test_data.prefetch(tf.data.AUTOTUNE)- ดึงข้อมูลภาพผลไม้ที่อยู่ใน Google Drive โดยใช้directoryแล้วแบ่งข้อมูลออกเป็น 2 ชุดคือ
train_data (80%) สำหรับฝึกโมเดล
test_data (20%) สำหรับทดสอบโมเดล
- outputที่ได้
4. สร้างโมเดล CNN
model = tf.keras.Sequential([
    tf.keras.layers.Conv2D(32, (3,3), activation='relu', input_shape=(IMG_SIZE, IMG_SIZE, 3)),
    tf.keras.layers.MaxPooling2D(2,2),

    tf.keras.layers.Conv2D(64, (3,3), activation='relu'),
    tf.keras.layers.MaxPooling2D(2,2),

    tf.keras.layers.Conv2D(128, (3,3), activation='relu'),
    tf.keras.layers.MaxPooling2D(2,2),

    tf.keras.layers.Dropout(0.3),
    tf.keras.layers.Flatten(),
    tf.keras.layers.Dense(128, activation='relu'),
    tf.keras.layers.Dropout(0.3),
    tf.keras.layers.Dense(1, activation='sigmoid')
])
ส่วนนี้เหมือนกับการจำแนกหมากับแมว
- โมเดลใช้โครงสร้างแบบ CNN (Convolutional Neural Network)
5. คอมไพล์และฝึกโมเดล
# คอมไพล์โมเดล
model.compile(optimizer='adam', loss='binary_crossentropy', metrics=['accuracy'])

# เพิ่ม EarlyStopping
early_stop = tf.keras.callbacks.EarlyStopping(monitor='val_loss', patience=3, restore_best_weights=True)

# เทรนโมเดล
history = model.fit(
    train_data,
    validation_data=test_data,
    epochs= 5,
    callbacks=[early_stop]
)
ส่วนนี้เหมือนกับการจำแนกหมากับแมว
- คอมไพล์ให้โมเดลเรียนรู้
- early stopping แม่นยำไม่เพิ่มใน 3 รอบล่าสุด ก็จะหยุดฝึกเลย
- โมเดล(fit) ฝึกทั้งหมด 5 รอบ (epochs)
- outputที่ได้ มีความแม่นยำเพิ่มขึ้นในบางรอบ ยังมีขึ้นๆลงๆบ้างเพราะข้อมูลน้อย

6. ทดสอบโมเดลกับภาพจริง
# ทดสอบโมเดลกับภาพตัวอย่าง
for images, labels in test_data.shuffle(100).take(1):
for i in range(2):
img = images[i]
true_label = labels[i].numpy()
prediction = model.predict(tf.expand_dims(img, axis=0))[0][0]
predicted_label = 1 if prediction > 0.5 else 0
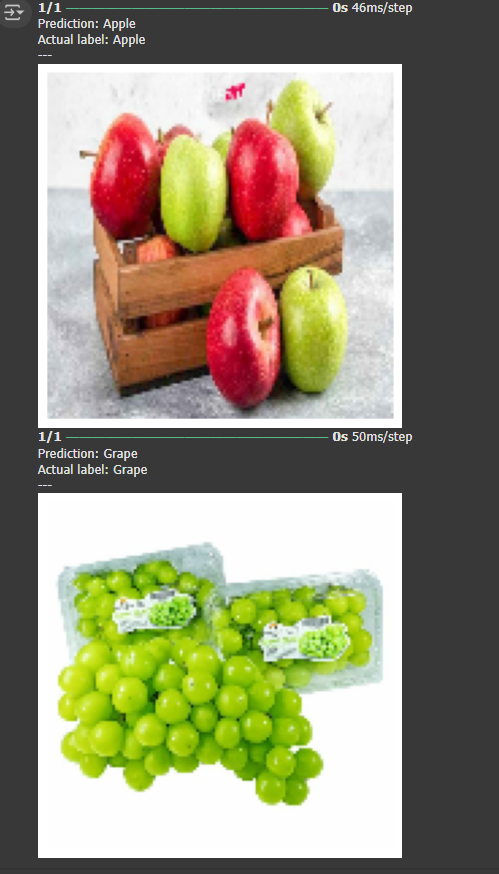
print("Prediction:", "Grape" if predicted_label == 1 else "Apple")
print("Actual label:", "Grape" if true_label == 1 else "Apple")
print("---")
plt.imshow(img / 255.0)
plt.axis("off")
plt.show()- เราจะสุ่มภาพจากชุดทดสอบ (test set) แล้วให้โมเดลลองทายว่าเป็น "แอปเปิ้ล" หรือ "องุ่น"
- ได้ค่ามากกว่า 0.5 ถือว่าเป็น Grape (1), น้อยกว่านั้น Apple (0)
- เนื่องจากจำนวนภาพที่ใช้ทดสอบน้อย ความแม่นยำอาจจะมีความผันผวน
7. แสดงผลลัพธ์การทำนาย
สรุปเนื้อหา
ในบทความนี้เราได้เรียนรู้การสร้างโมเดลจำแนกประเภทรูปภาพด้วย Convolutional Neural Network (CNN) โดยใช้ TensorFlow ทั้งในการจำแนกหมากับแมว และแอปเปิ้ลกับองุ่น ตั้งแต่การเตรียมข้อมูล การสร้างโมเดล การฝึกโมเดล ไปจนถึงการทดสอบกับภาพจริง และจากตัวอย่างใหม่ที่ทดลองทำ จะเห็นได้ยิ่งจำนวนรูปภาพที่นำมาฝึกมีเยอะเท่าไหร่ จะมีความแม่นยำในผลลัพธ์มากขึ้น สุดท้ายการเรียนรู้ทั้งหมดเป็นพื้นฐานสำคัญของการประยุกต์ใช้ Machine Learningสำหรับการต่อยอดอื่นๆในอนาคต