📦 My Scenario
Currently, I have a bucket located in a project called Project 1, which is serving the production environment of my application. As the project has grown, the goal is to move this bucket to Project 2, which contains all other infrastructure resources for my application in a centralized way.
This migration will follow Google's recommended best practices, centralizing all resources into a single project, which will provide:
- Better cost tracking: Keeping all resources in one project allows for more efficient and precise cost control.
- Easier maintenance: Consolidating infrastructure in a single project simplifies management and operations, reducing complexity.
🔍 Summary of limitations and alternatives for bucket migration as recommended by Google
- Some bucket properties are permanent e cannot be changed after creation:
- Bucket name
- Geographic location
- Associated project
The process of "moving" or "renaming" a bucket involves creating a new bucket and migrating the data.
Strategy for empty buckets
- Delete the old bucket.
- Create a new bucket with the desired properties.
# Delete the empty original bucket
gcloud storage buckets delete gs://SOURCE_BUCKET

# Create the new bucket
gcloud storage buckets create gs://DESTINATION_BUCKET \
       --location=REGION \
       --project=PROJECT_ID
Strategy for buckets with data
- Create a new bucket with the desired properties.
- Copy the data from the old bucket to the new one.
- Delete the old bucket and its contents.
# Create the new bucket
gcloud storage buckets create gs://DESTINATION_BUCKET \
  --project=ID_DO_PROJETO \
  --location=LOCALIZACAO

# Recursively copy all objects
gcloud storage cp --recursive gs://SOURCE_BUCKET/* gs://DESTINATION_BUCKET

# Delete the original bucket and its contents
gcloud storage rm --recursive gs://SOURCE_BUCKET
Strategy to reuse the same bucket name
- Create a temporary bucket with a different name.
- Copy the data into this temporary bucket.
- Delete the original bucket.
- Create a new bucket with the same name as the original.
- Copy the data back from the temporary bucket to the new bucket.
# Create temporary bucket
gcloud storage buckets create gs://TEMP_BUCKET \
  --project=ID_DO_PROJETO \
  --location=LOCALIZACAO
# Copy data from original bucket to temporary
gcloud storage cp --recursive gs://SOURCE_BUCKET/* gs://TEMP_BUCKET
# Delete original bucket
gcloud storage rm --recursive gs://SOURCE_BUCKET
# Recreate the original bucket with the same name
gcloud storage buckets create gs://SOURCE_BUCKET \
  --project=ID_DO_PROJETO \
  --location=LOCALIZACAO
# Copy data back from temporary to new bucket
gcloud storage cp --recursive gs://TEMP_BUCKET/* gs://SOURCE_BUCKET
# Delete temporary bucket
gcloud storage rm --recursive gs://TEMP_BUCKET🧪 Evaluation
Both the development and production buckets are in Project 1. I’ll start by applying the migration strategy in the development environment to fail safely before touching production.
I chose the strategy that keeps the same bucket name. Unfortunately, any option involves a tradeoff — in this case, a short downtime.
My application uses a CI/CD pipeline, and the bucket name is stored as an environment variable in GitHub Actions. So, theoretically, after making the changes in the cloud, I can just update the variable, and the application will start using the new bucket.

Before executing anything, always ask yourself: “What could go wrong?” By answering this, you’ll be more prepared to execute.
💡 A fourth custom strategy (no downtime)
While analyzing my scenario and Google's suggestion of preserving the bucket name, I identified the need for a fourth strategy that overcomes the downtime tradeoff with something more acceptable for my case.
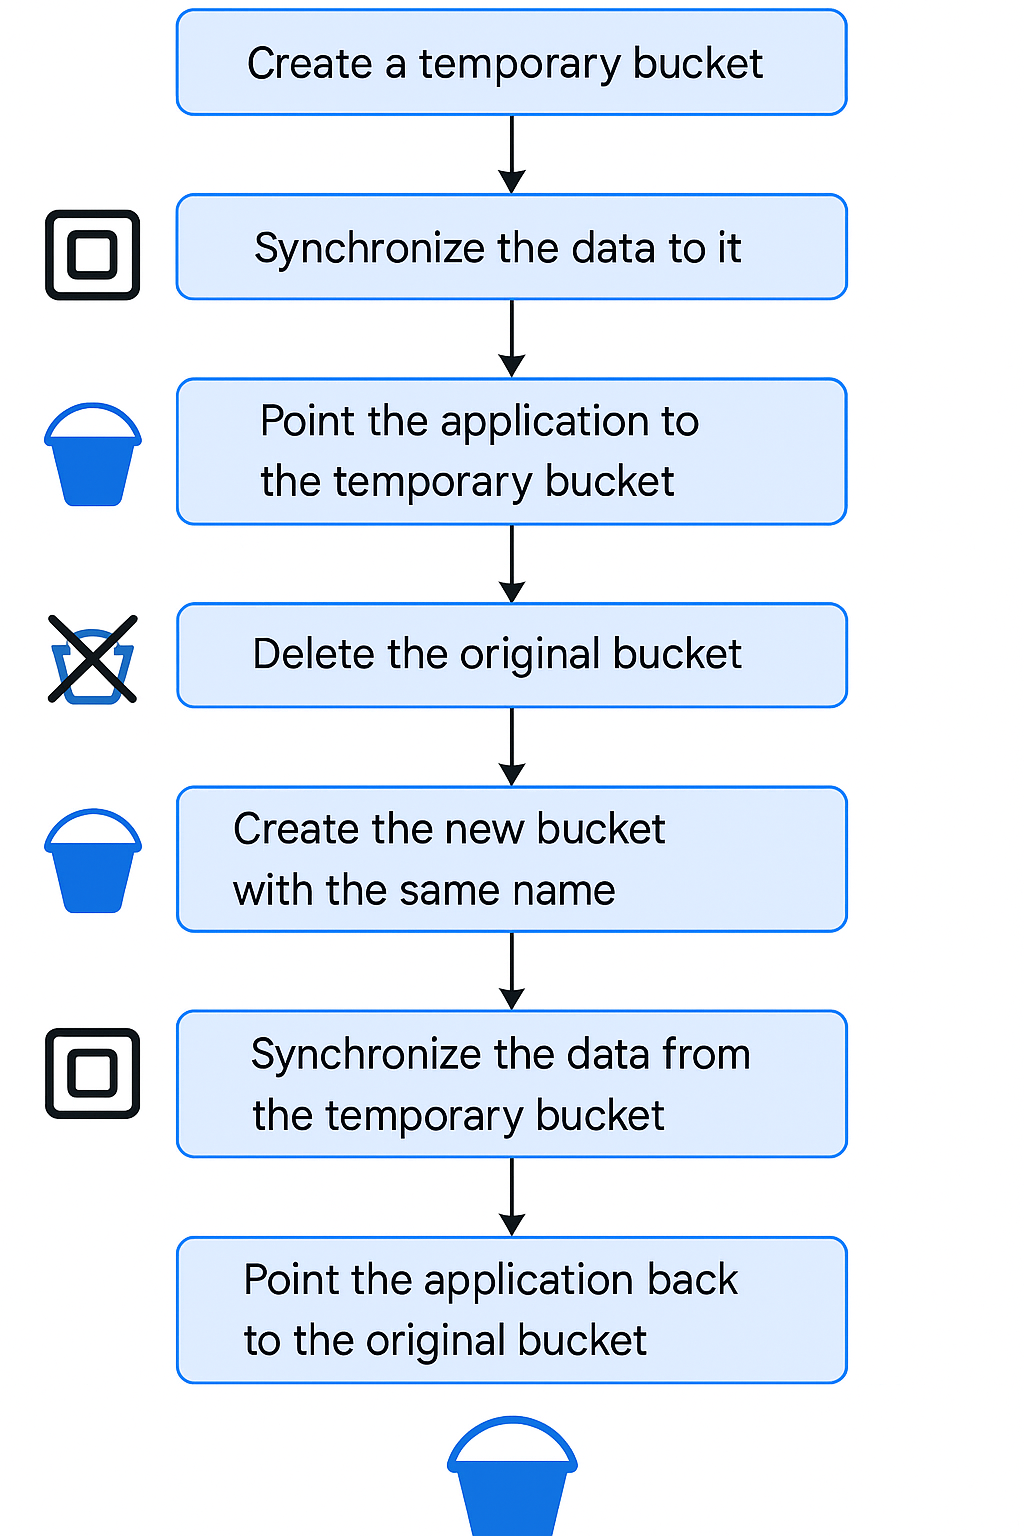
The goal is to move the bucket while keeping the same name and avoiding downtime. Here's the proposed strategy:
- Create a temporary bucket;
- Copy data;
- Point the application to the temporary bucket;
- Delete the original bucket;
- Recreate the bucket with the original name;
- Copy data;
- Point the application back to it;
- Sync any final changes from the temporary bucket.
This avoids downtime while accepting other operational tradeoffs that are easier to manage in my case.
| ✅ Main Advantage | ⚠️ Main Tradeoff |
|---|---|
| Zero Downtime | Higher operational complexity |
🚀 Executing
- Map all points where the bucket is used
I searched the code and found some hardcoded URLs from an old implementation.
Since I’m keeping the bucket name, no changes are needed there.

- Check the current bucket size to estimate the transfer duration and validate completeness
gcloud storage du -s gs://SOURCE_BUCKETReturned:
2064031471
| Unit | Value |
|---|---|
| Bytes | 2.064.031.471 B |
| Megabytes | ~1.968 MB |
| Gigabytes | ~1,92 GB |
This small size indicates that transfer won’t be a bottleneck.
- Make sure to replicate configurations such as lifecycle rules, IAM policies, object visibility, ACLs, etc. Use this to inspect the original bucket:
gcloud storage buckets describe gs://SOURCE_BUCKETClone the repo at repository it contains 2 scripts you’ll need to fill in with your environment variables. Follow the included
README.
Run the first script

The script will:Create a temporary bucket
Copy IAM policies from the original bucket to policies.json
Let you edit policies.json to keep existing permissions and add new ones
Apply all policies to the temporary bucket on confirmation
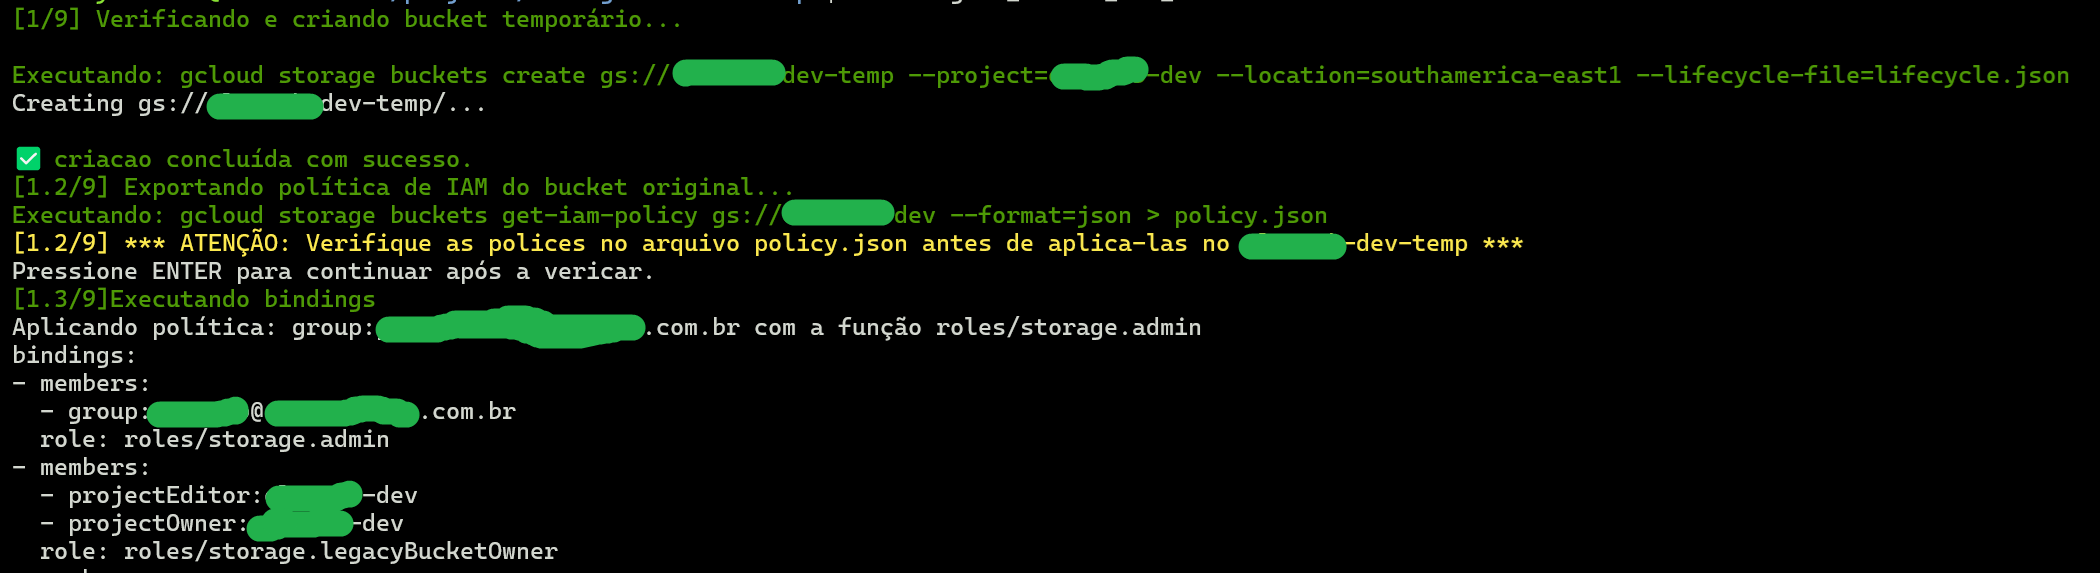
Then it starts copying objects and folders

It was fast!

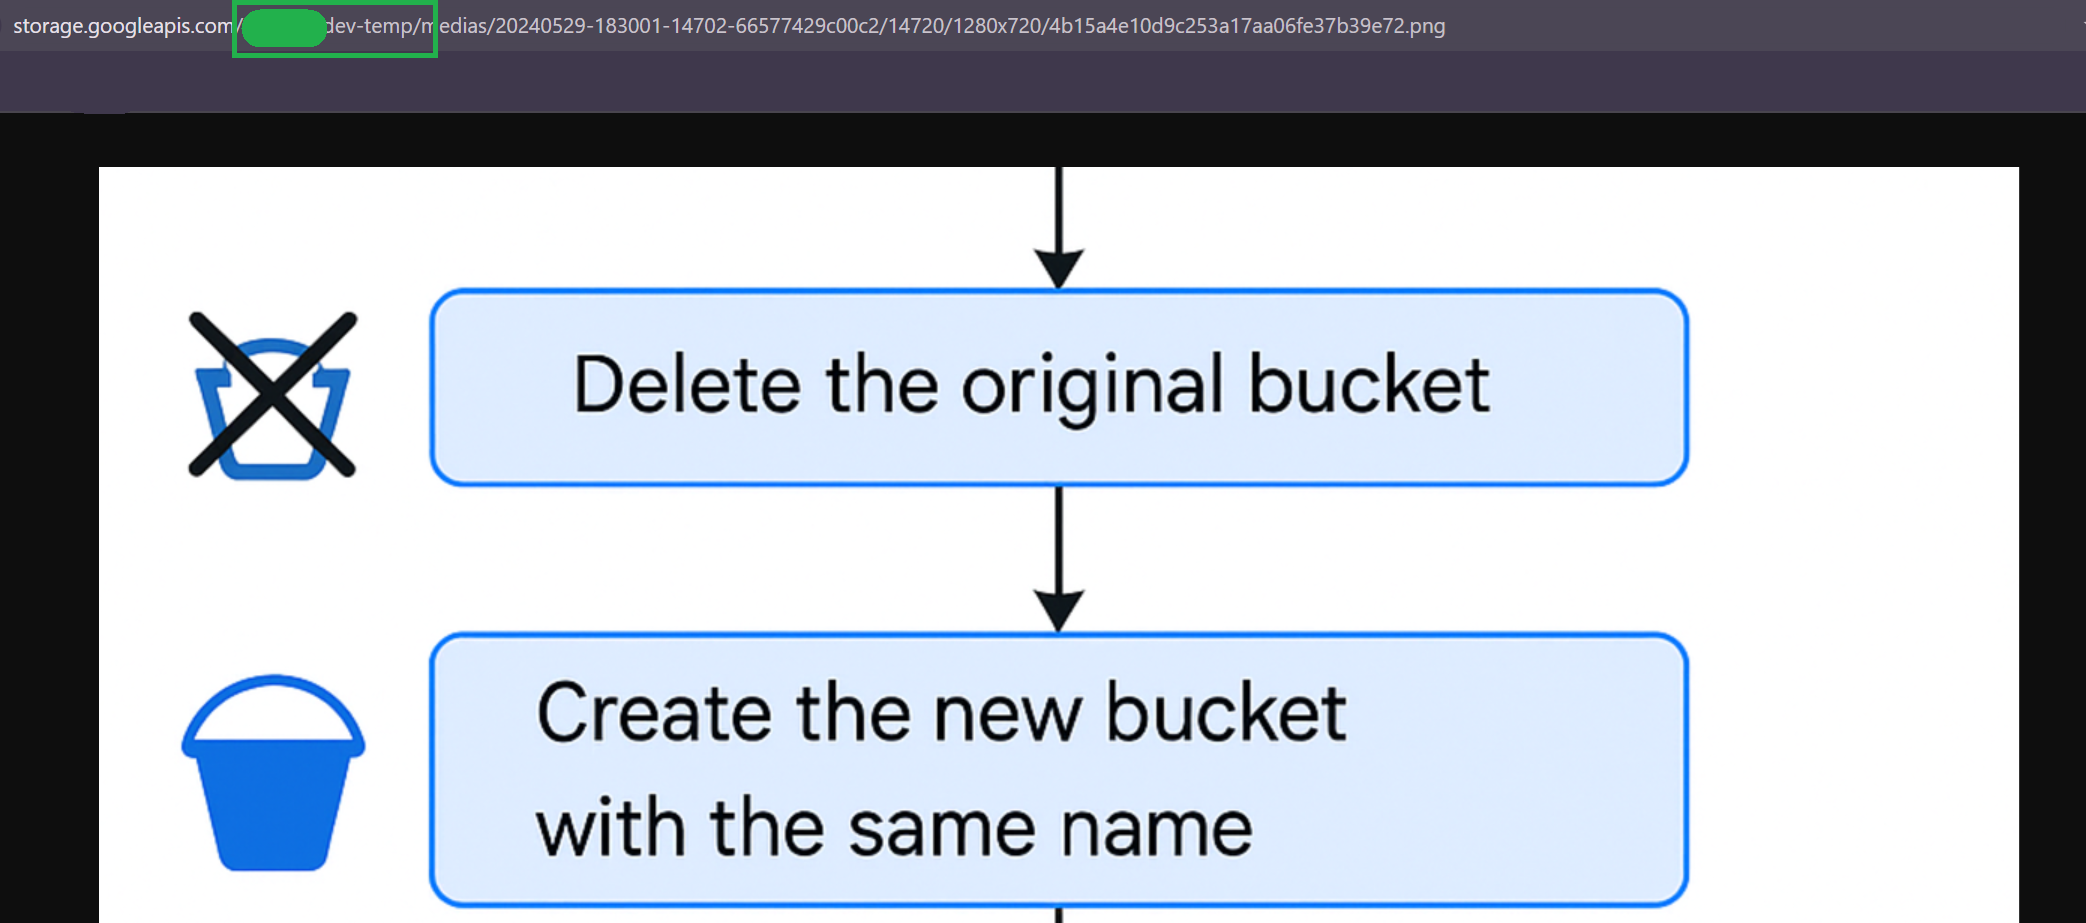
Now, it’s time to point your app to the temporary bucket while the script pauses. This avoids downtime since the temporary bucket is ready.

After updating the variables and redeploying with zero downtime:

I tested the app — the image uploaded successfully to the temporary bucket!
After confirming the application was using the temporary bucket, I resumed the script and it performed a final sync

With that, we conclude Part 1 of the strategy — successfully migrating the app to use a temporary bucket with no downtime. Go to part 2 to finish the transition: delete the old bucket, recreate it with the original name, and sync everything back.