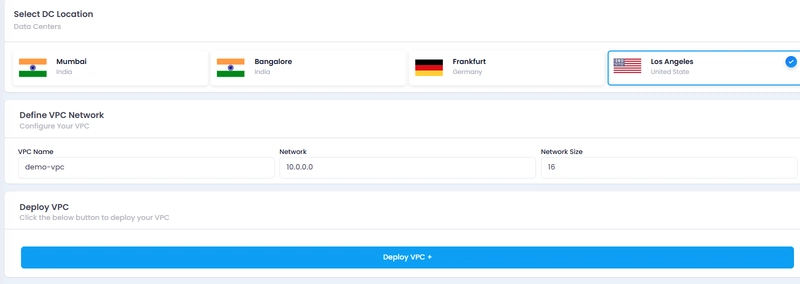
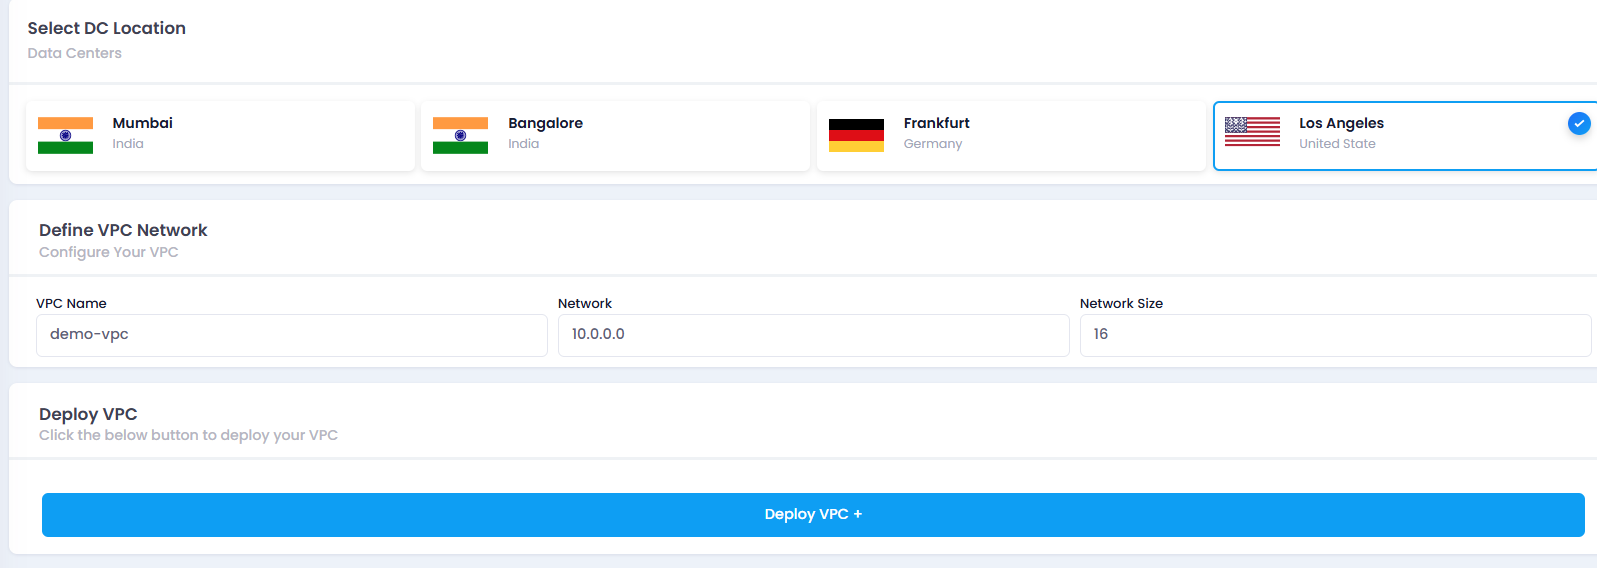
🛠️ Step 1: Create a New VPC
Log in to your Utho Cloud account.
Navigate to the VPC section and click Create VPC.
Select:
✅ Your preferred Region
🏷️ VPC Name
📦 CIDR Block – e.g., 10.0.0.0/16
Once filled, deploy your VPC.
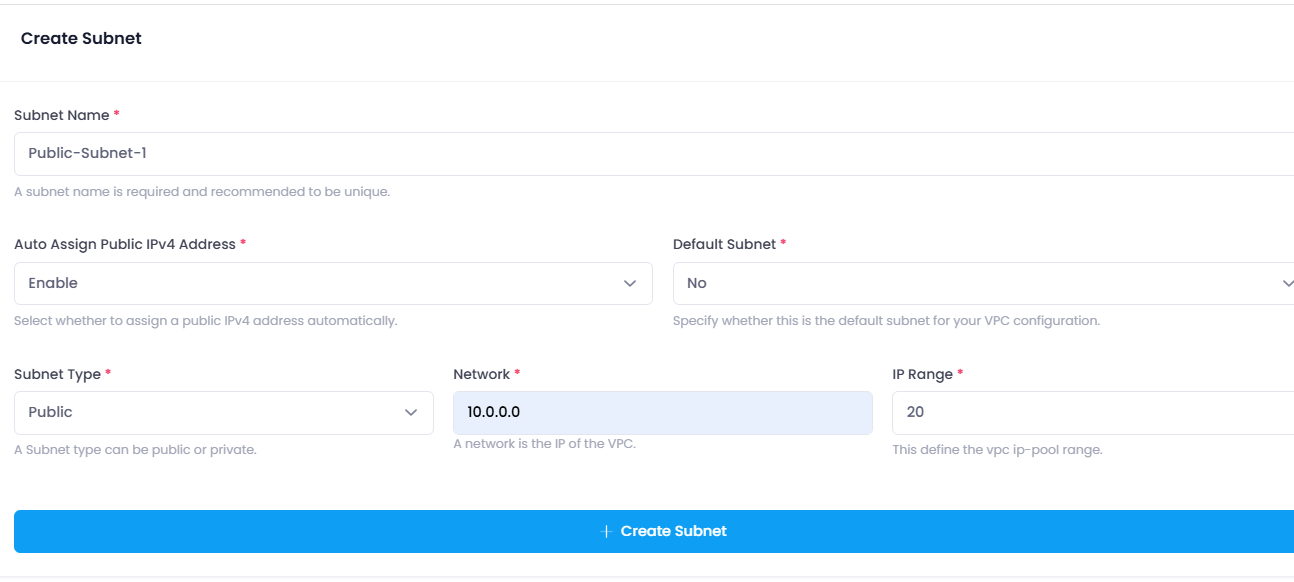
🌐 Step 2: Create Public Subnets
Next, create 3 public subnets within your newly created VPC.
Repeat the following steps for each public subnet:
Subnet Name: Public-Subnet-1 (or 2, 3)
Auto-assign Public IPv4 Address: ENABLE
Default Subnet: No
Subnet Type: Public
Network: 10.0.0.0 (or 10.0.16.0, 10.0.32.0)
IP Range: /20
📌 Note: Use different CIDR blocks for each subnet to avoid overlap.
🔐 Step 3: Create Private Subnets
Similarly, create 3 private subnets with public IP auto-assign disabled.
Repeat the following steps for each private subnet:
Subnet Name: Private-Subnet-1 (or 2, 3)
Auto-assign Public IPv4 Address: DISABLE
Default Subnet: No
Subnet Type: Private
Network: 10.0.48.0 (or 10.0.64.0, 10.0.80.0)
IP Range: /20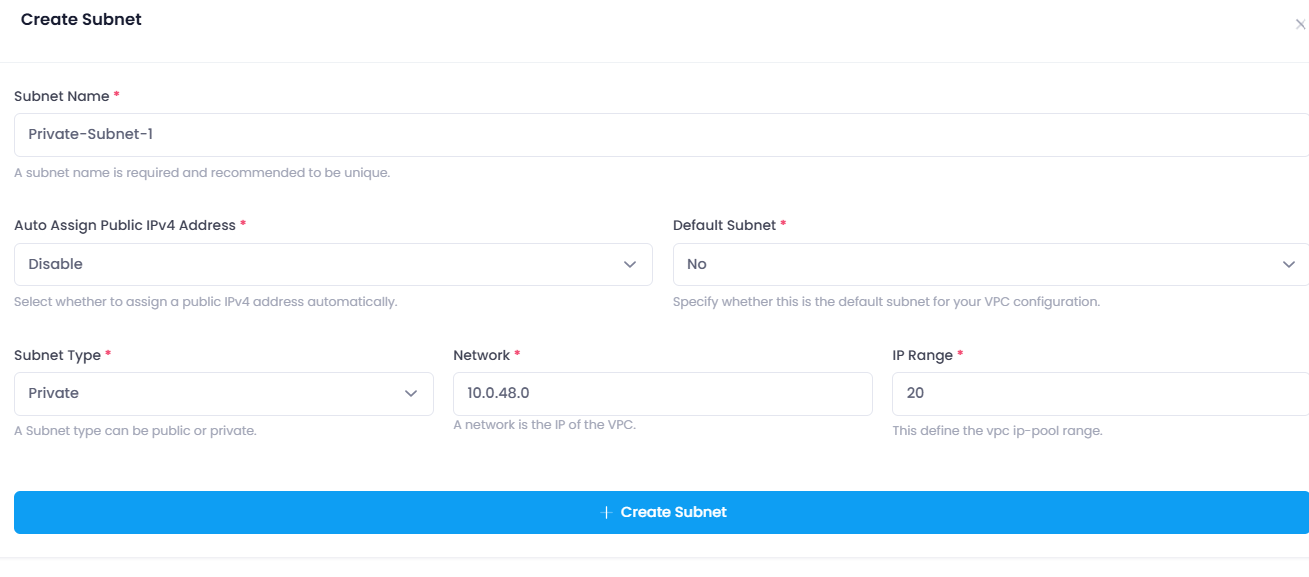
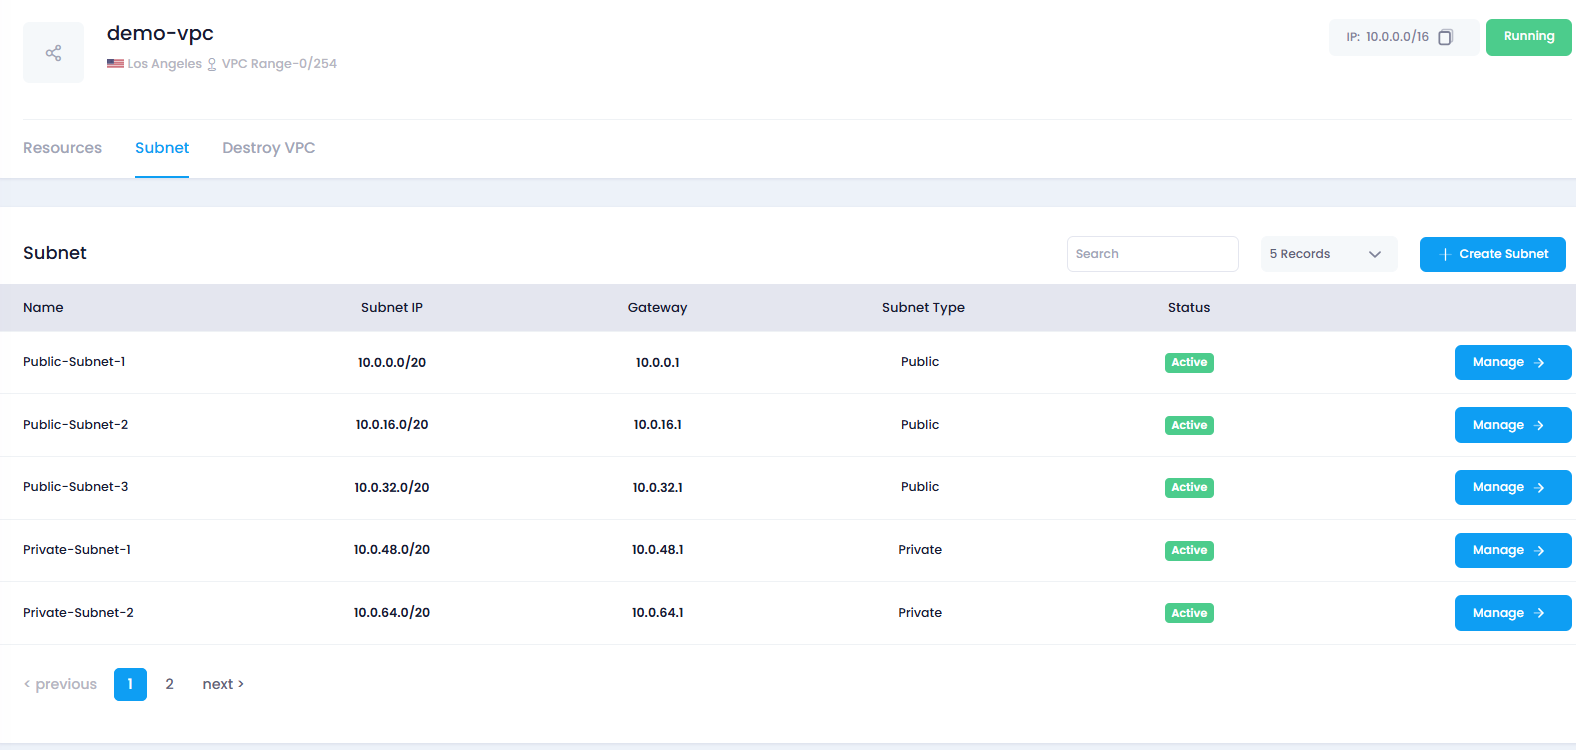
✅ Final Overview
At the end of this setup, you’ll have a total of 6 subnets:
3 Public Subnets for resources that need internet access
3 Private Subnets for internal resources
Here's a visual reference from the Utho dashboard: