
Table of contents.
- Introduction.
- Create and deploy a resource group.
- Create a storage account on the Azure Portal.
- Configure basic settings for security and networking.
- Conclusion.
Introduction.
Providing storage on the Azure portal is critical for empowering IT departments in their testing and training endeavors. This guide offers a streamlined approach to setting up storage solutions tailored to meet the dynamic needs of technical testing environments. Whether managing workflows or preparing for training sessions, this step-by-step guide ensures your Azure storage setup is efficient, secure, and ready to support your IT team's objectives.
First, go to your browserand paste the link https://learn.microsoft.com/en-us/credentials/applied-skills/secure-storage-azure-files-azure-blob-storage/

Click on the guided project
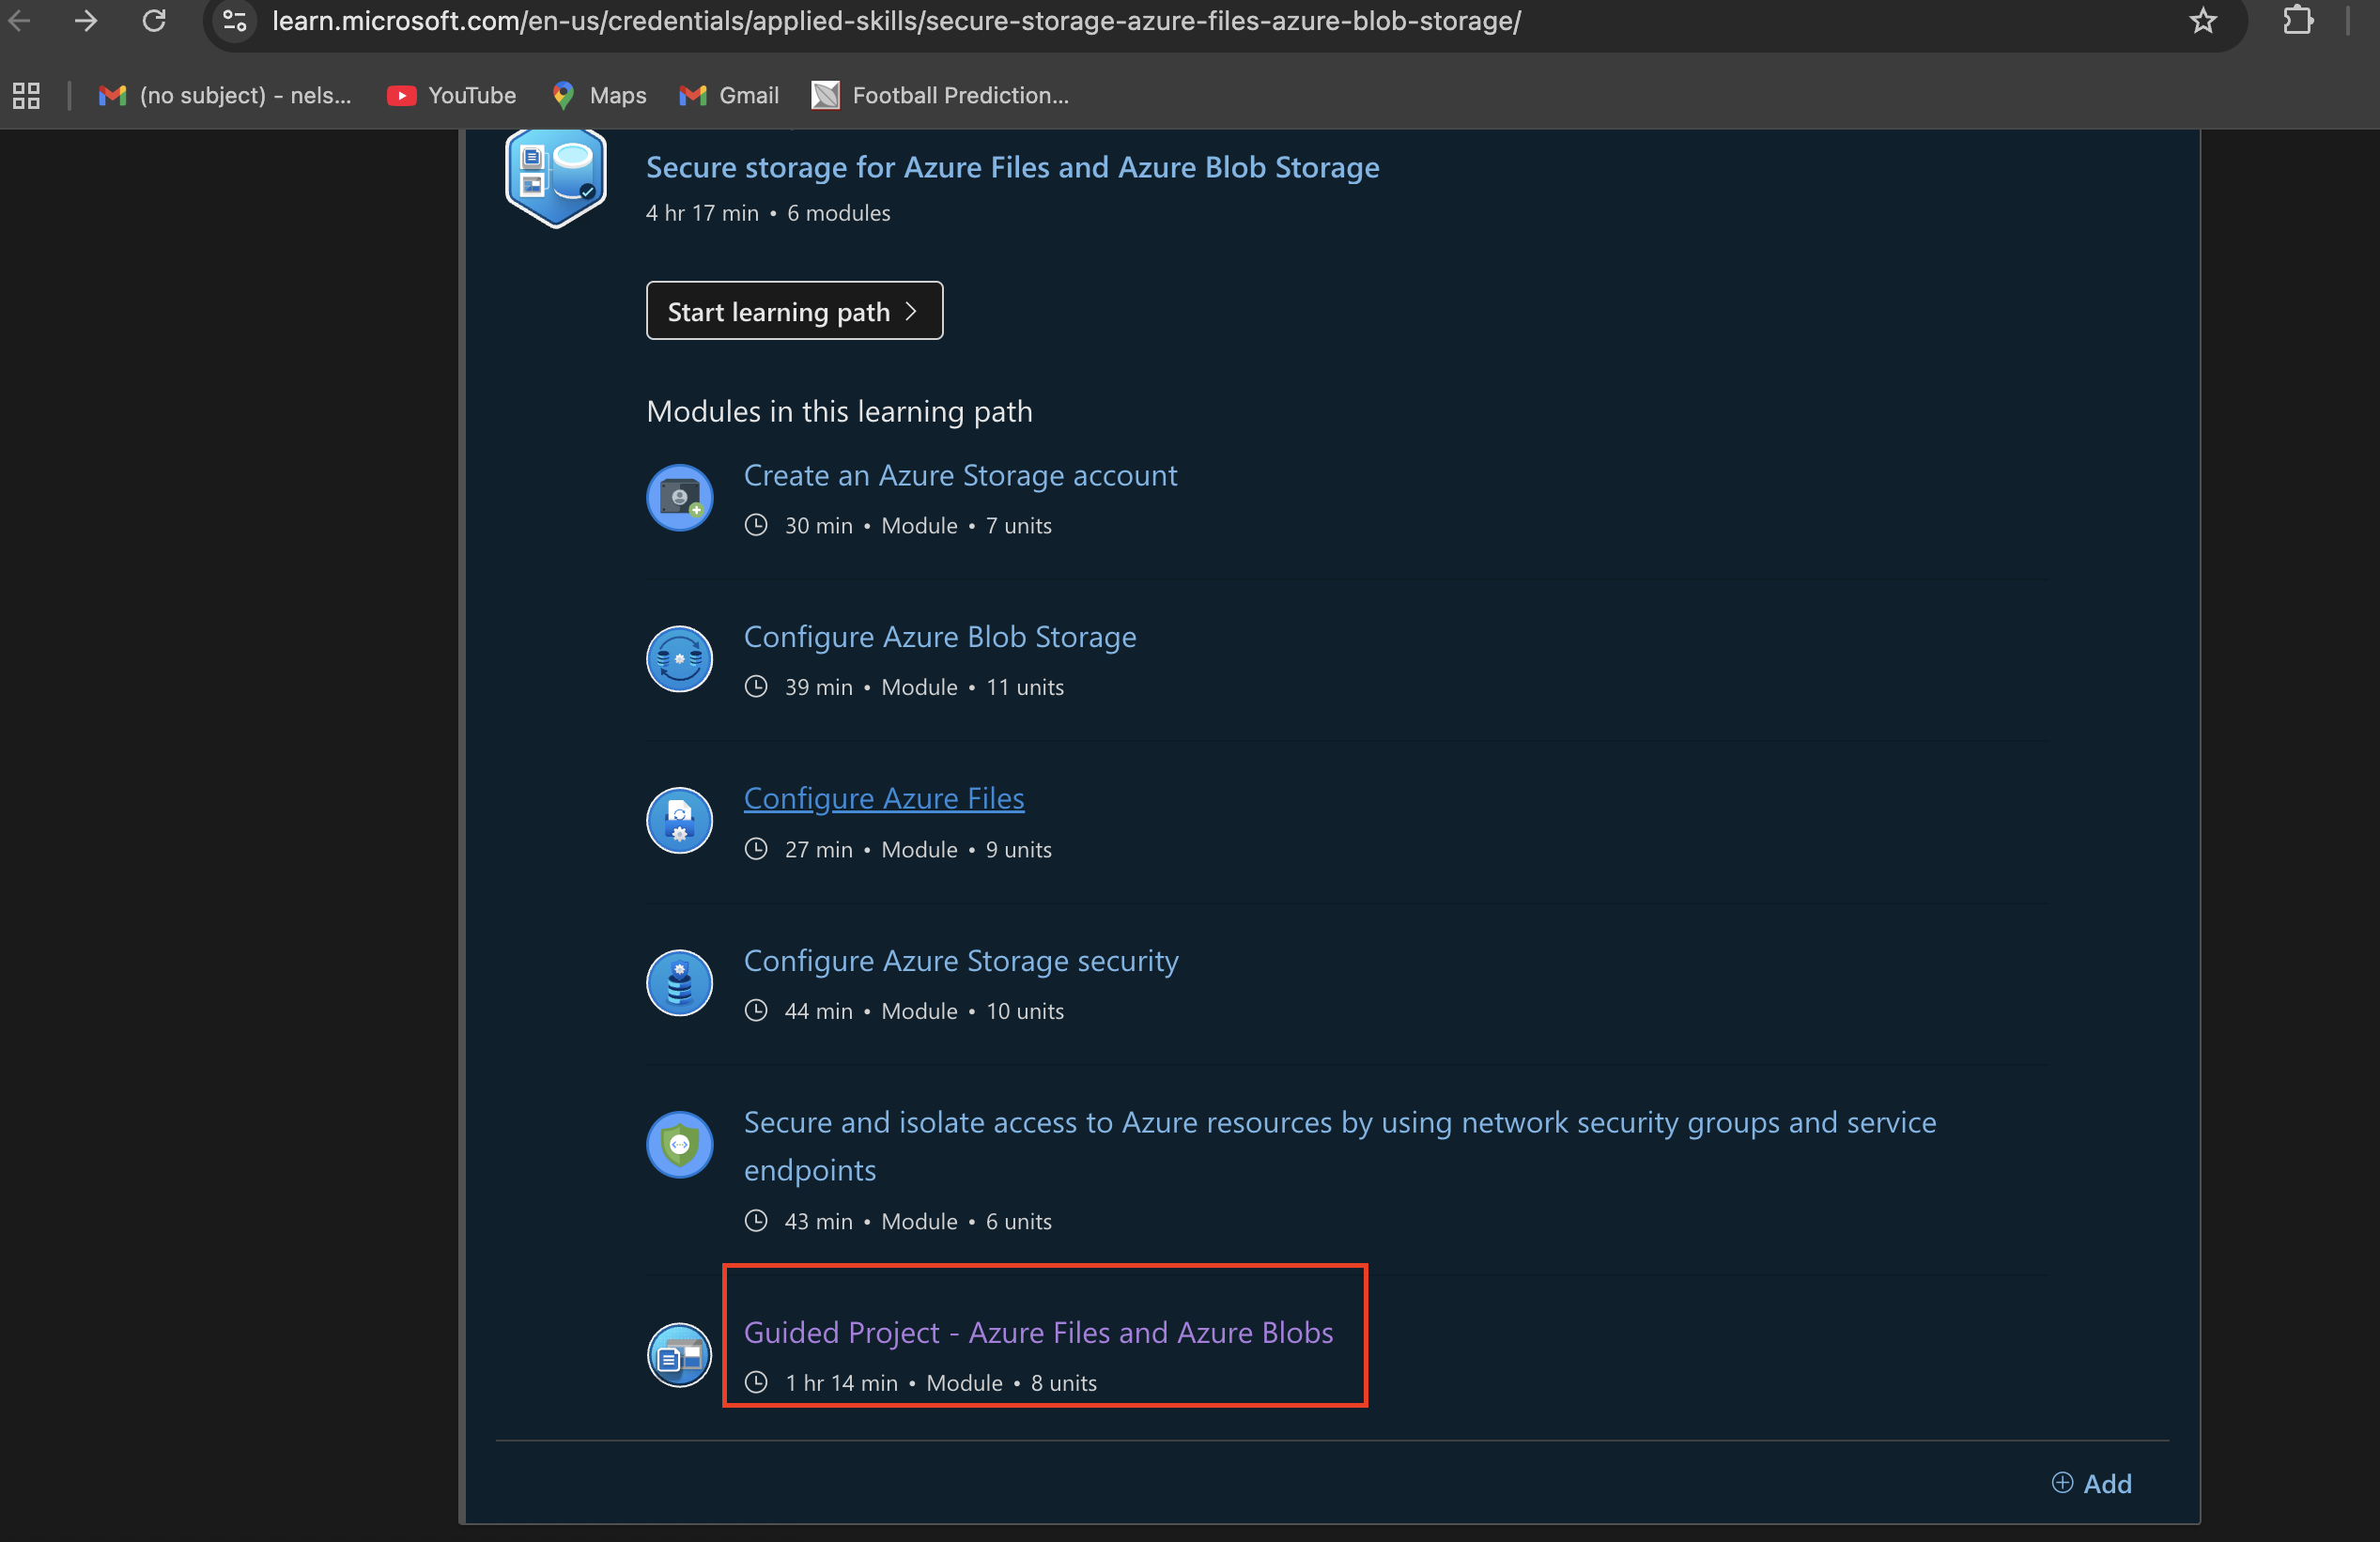
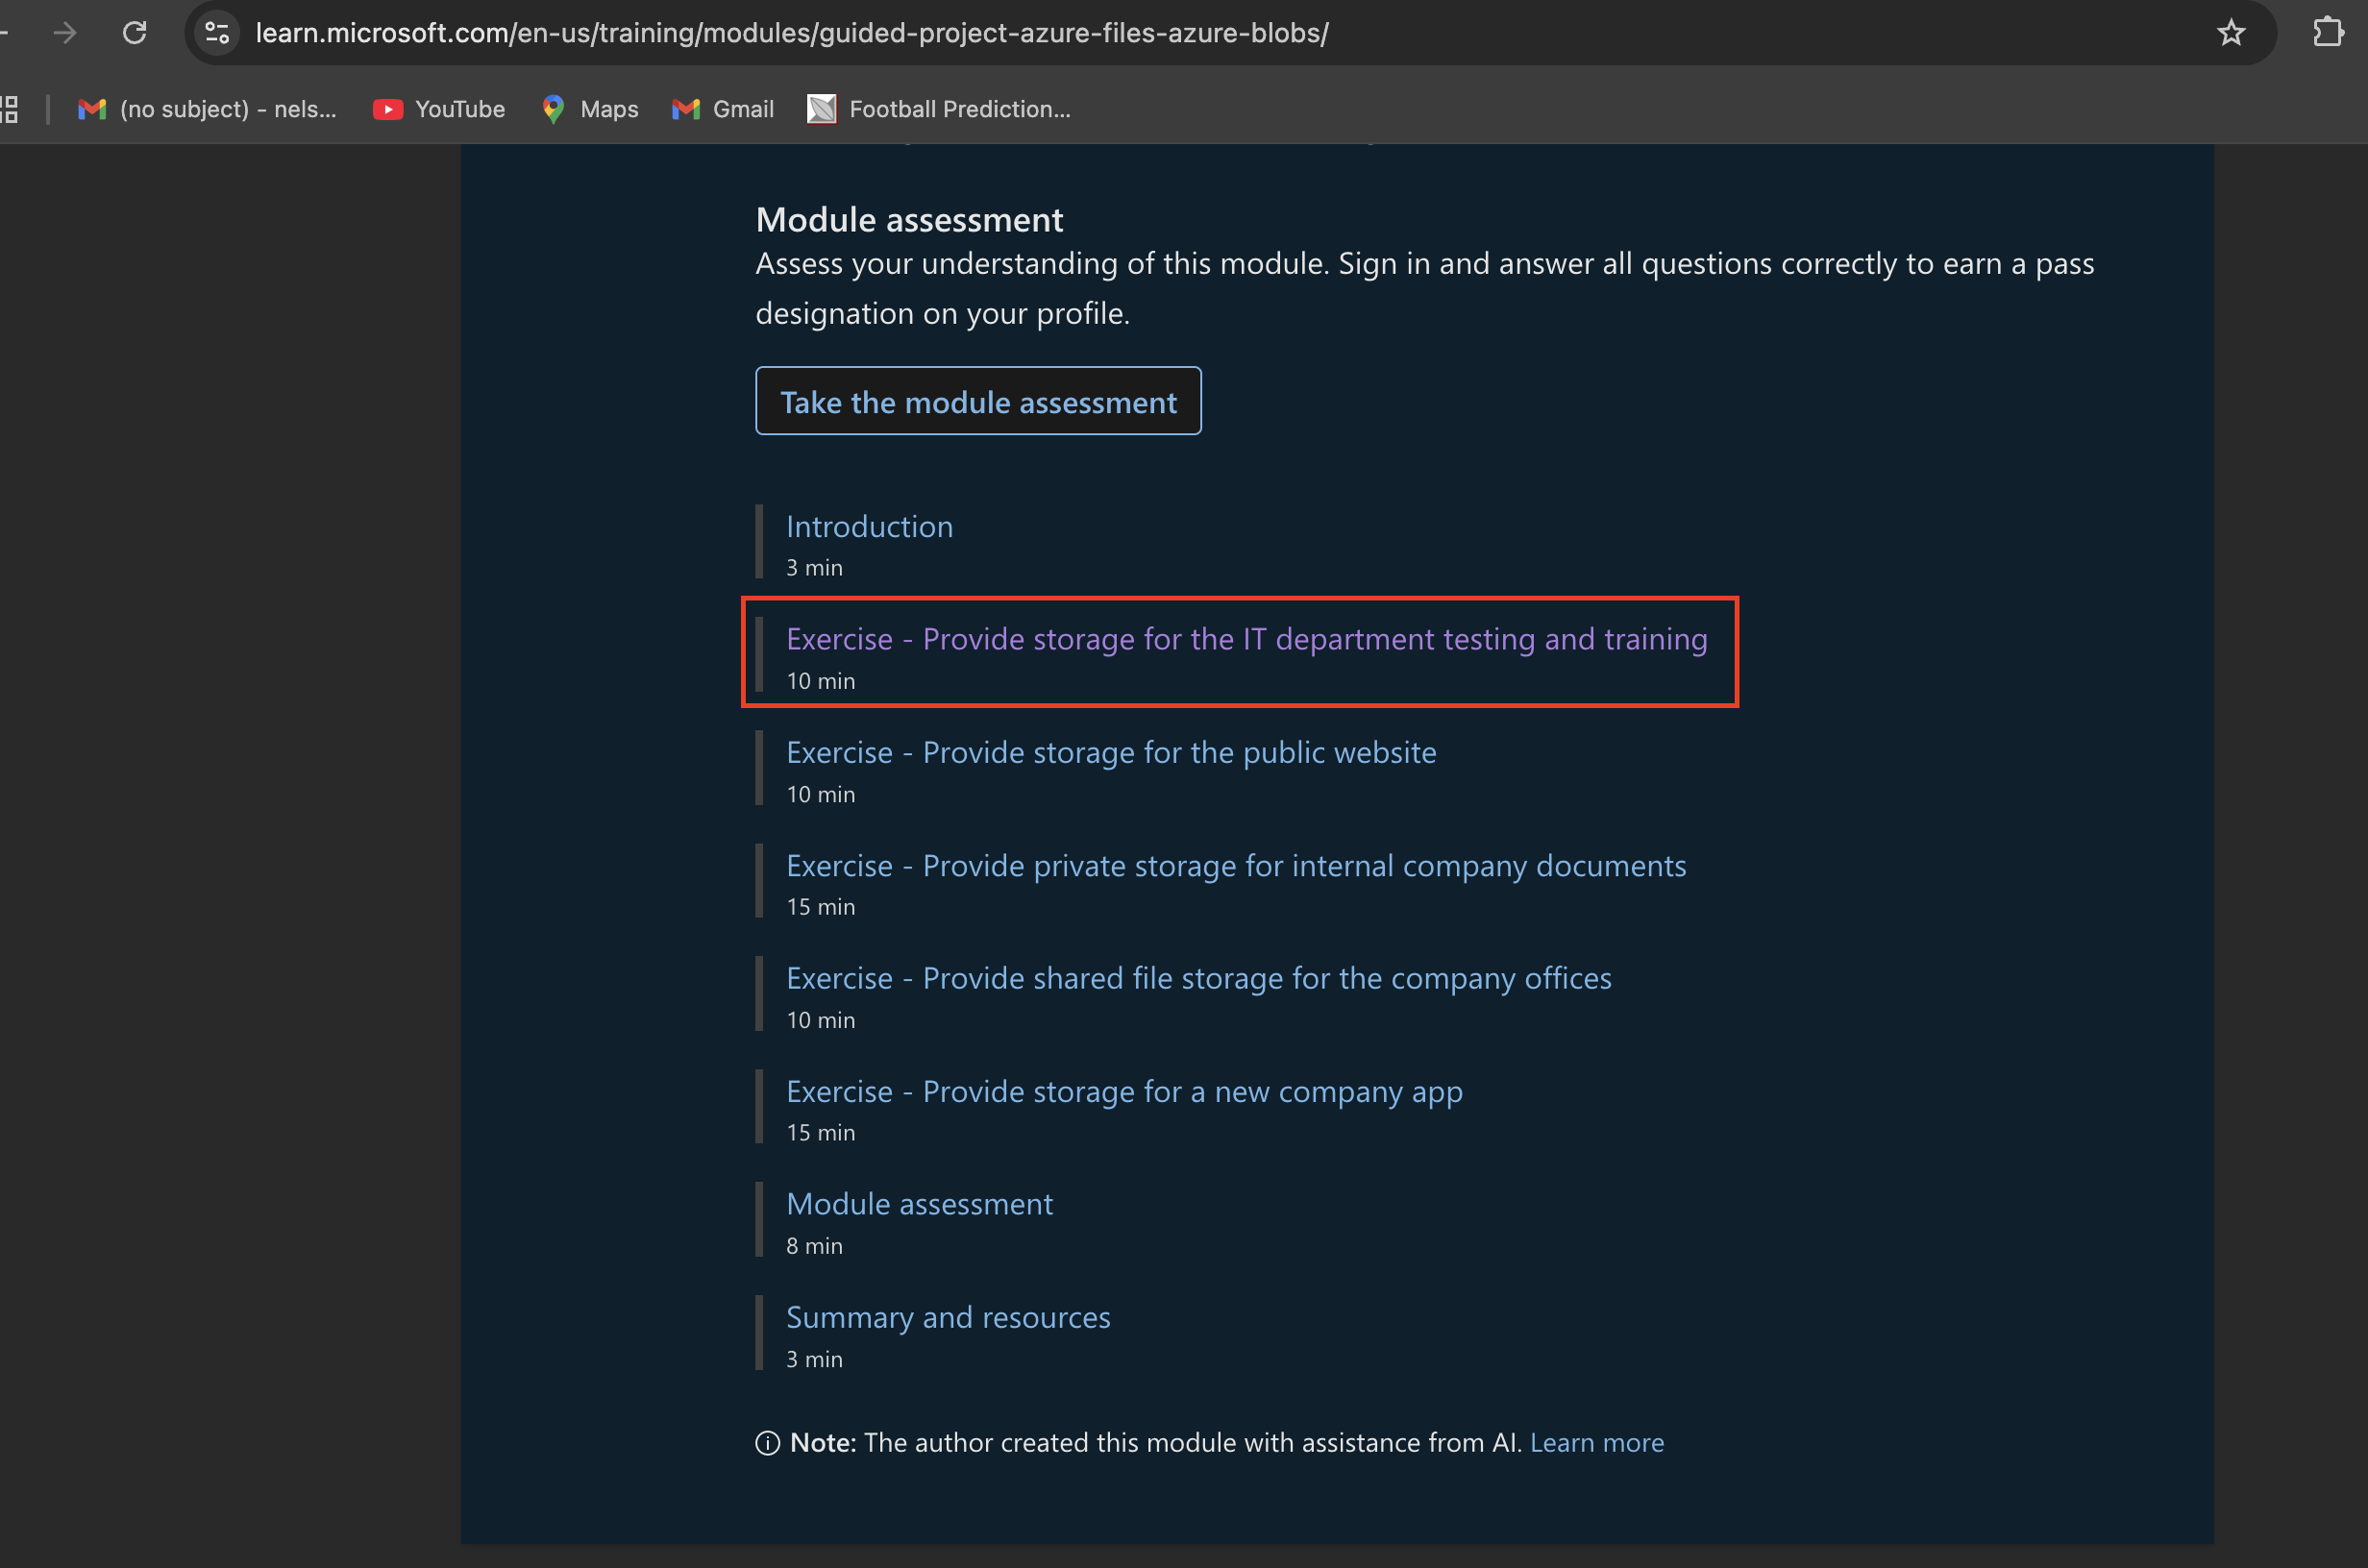
Scroll down, and click on the exercise guides as shown in the image below.
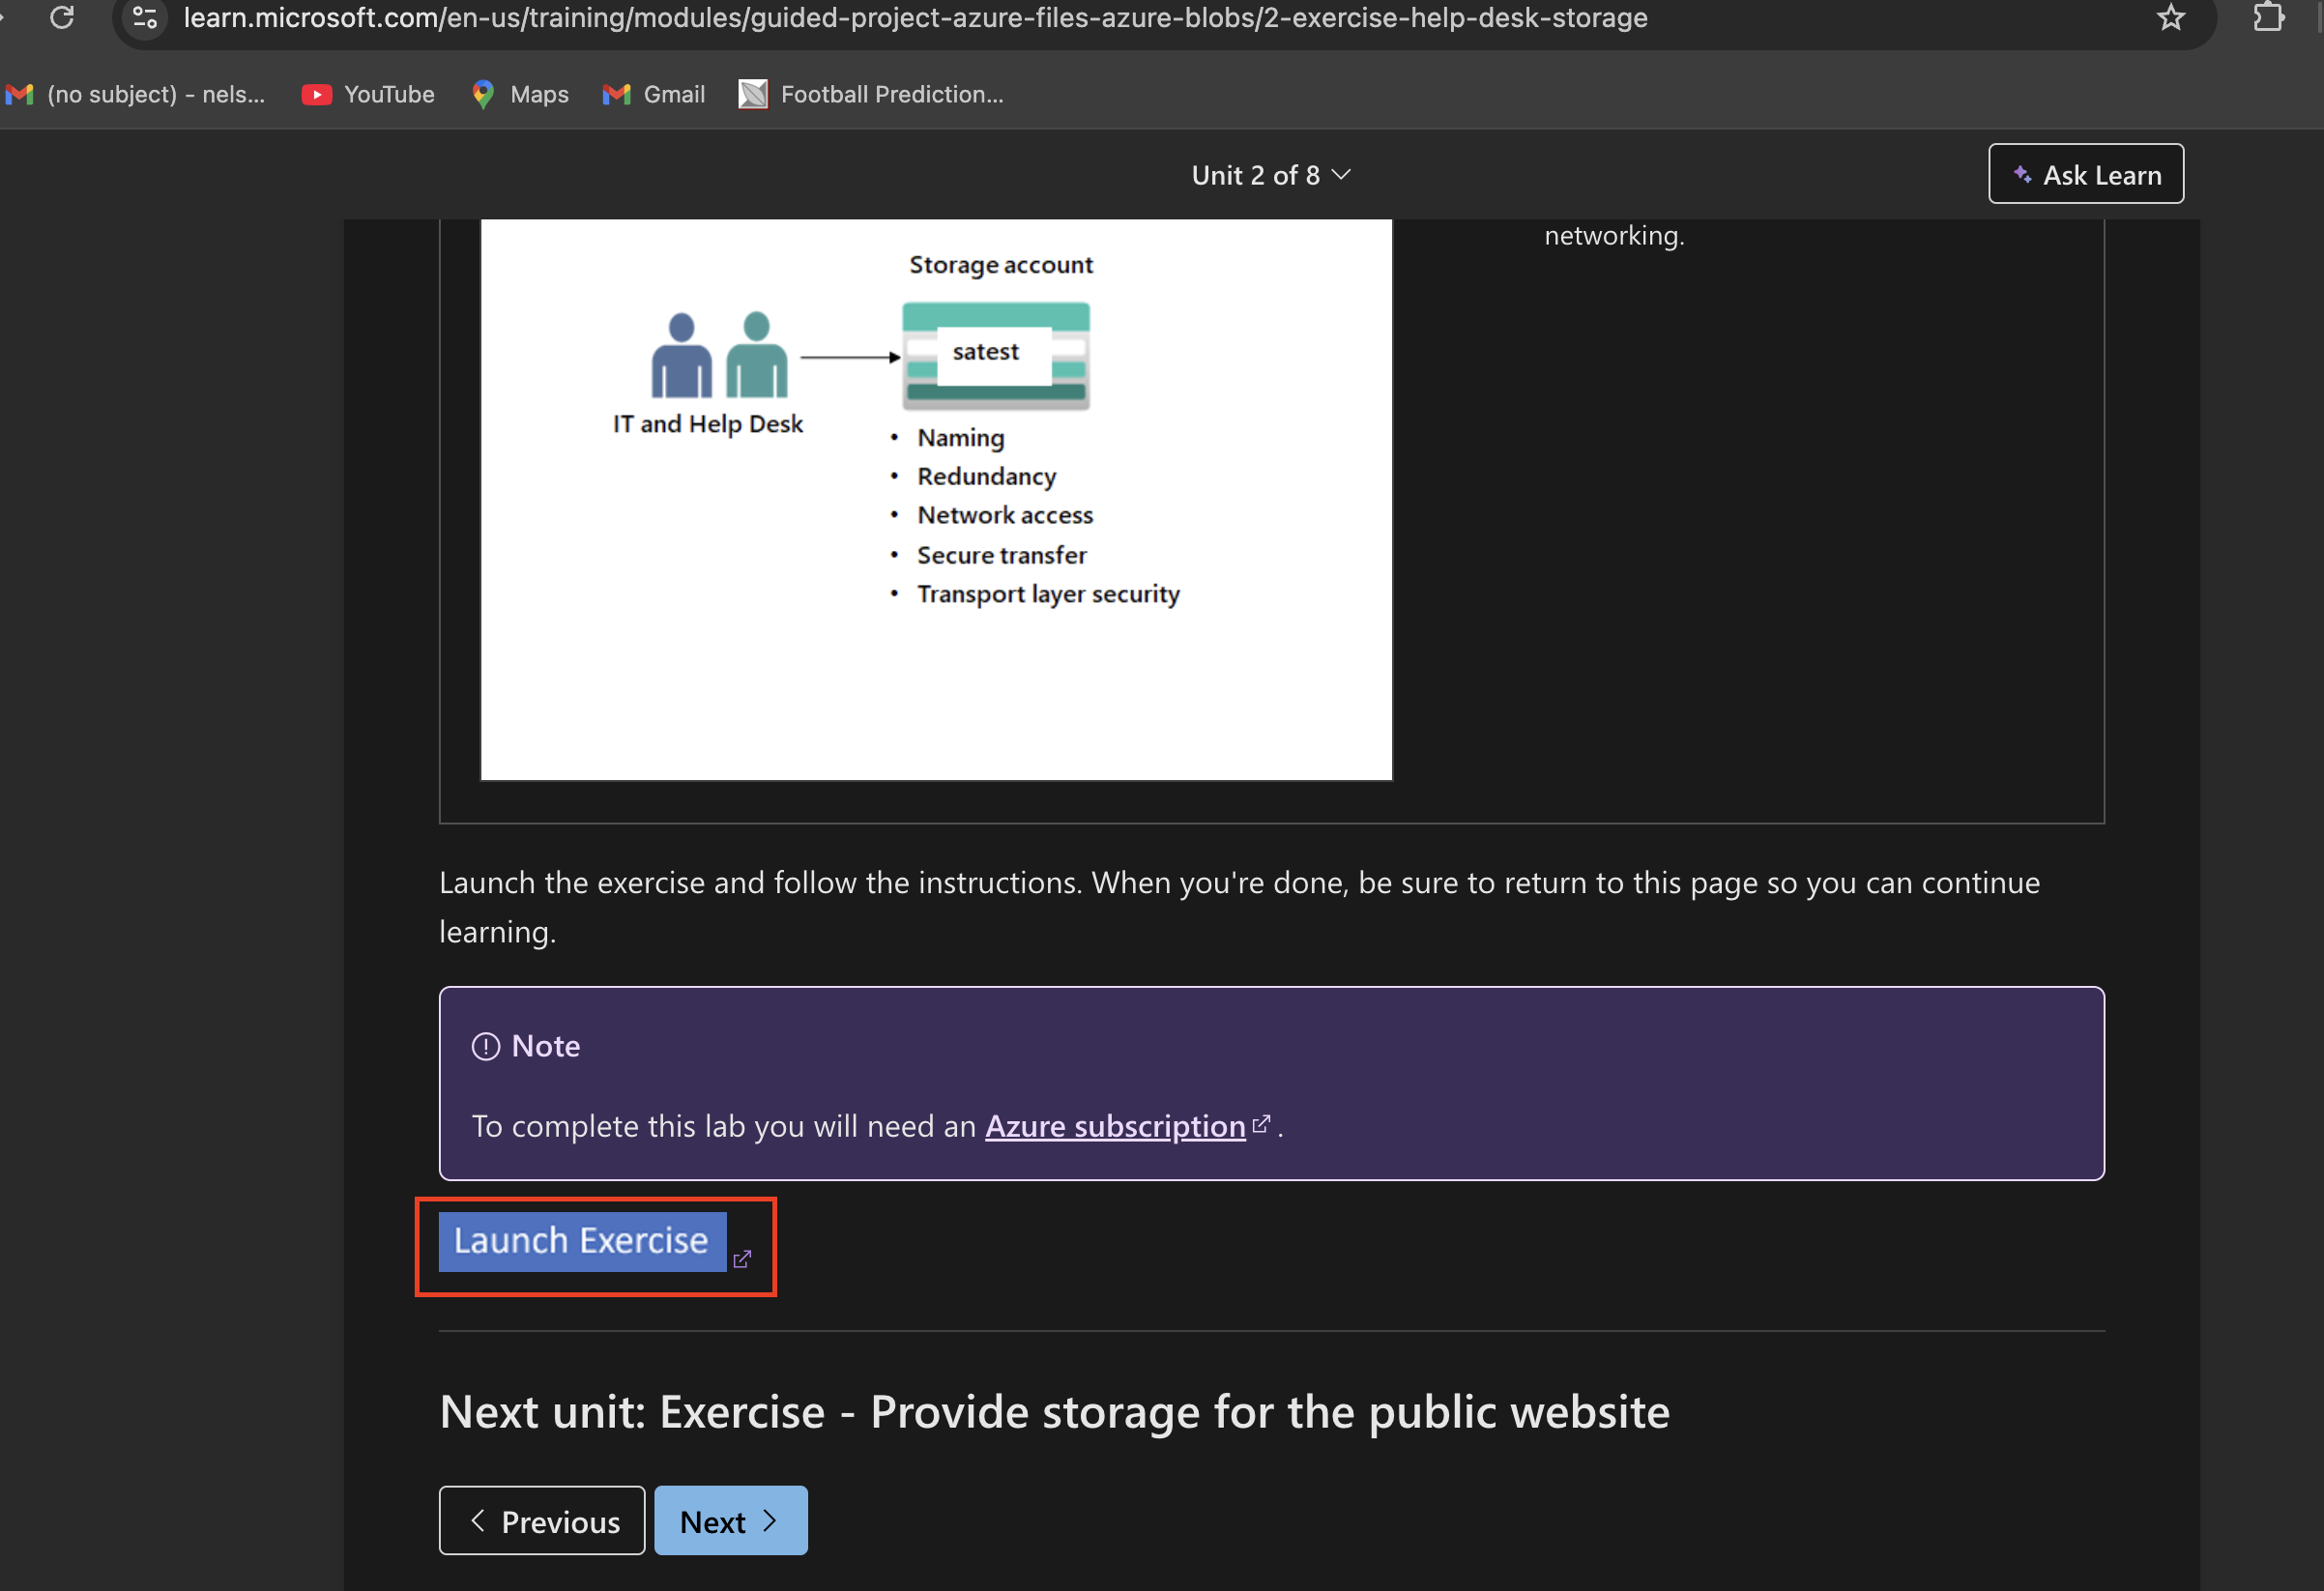
Click on the launch exercise.
Follow the instructions chronologically.
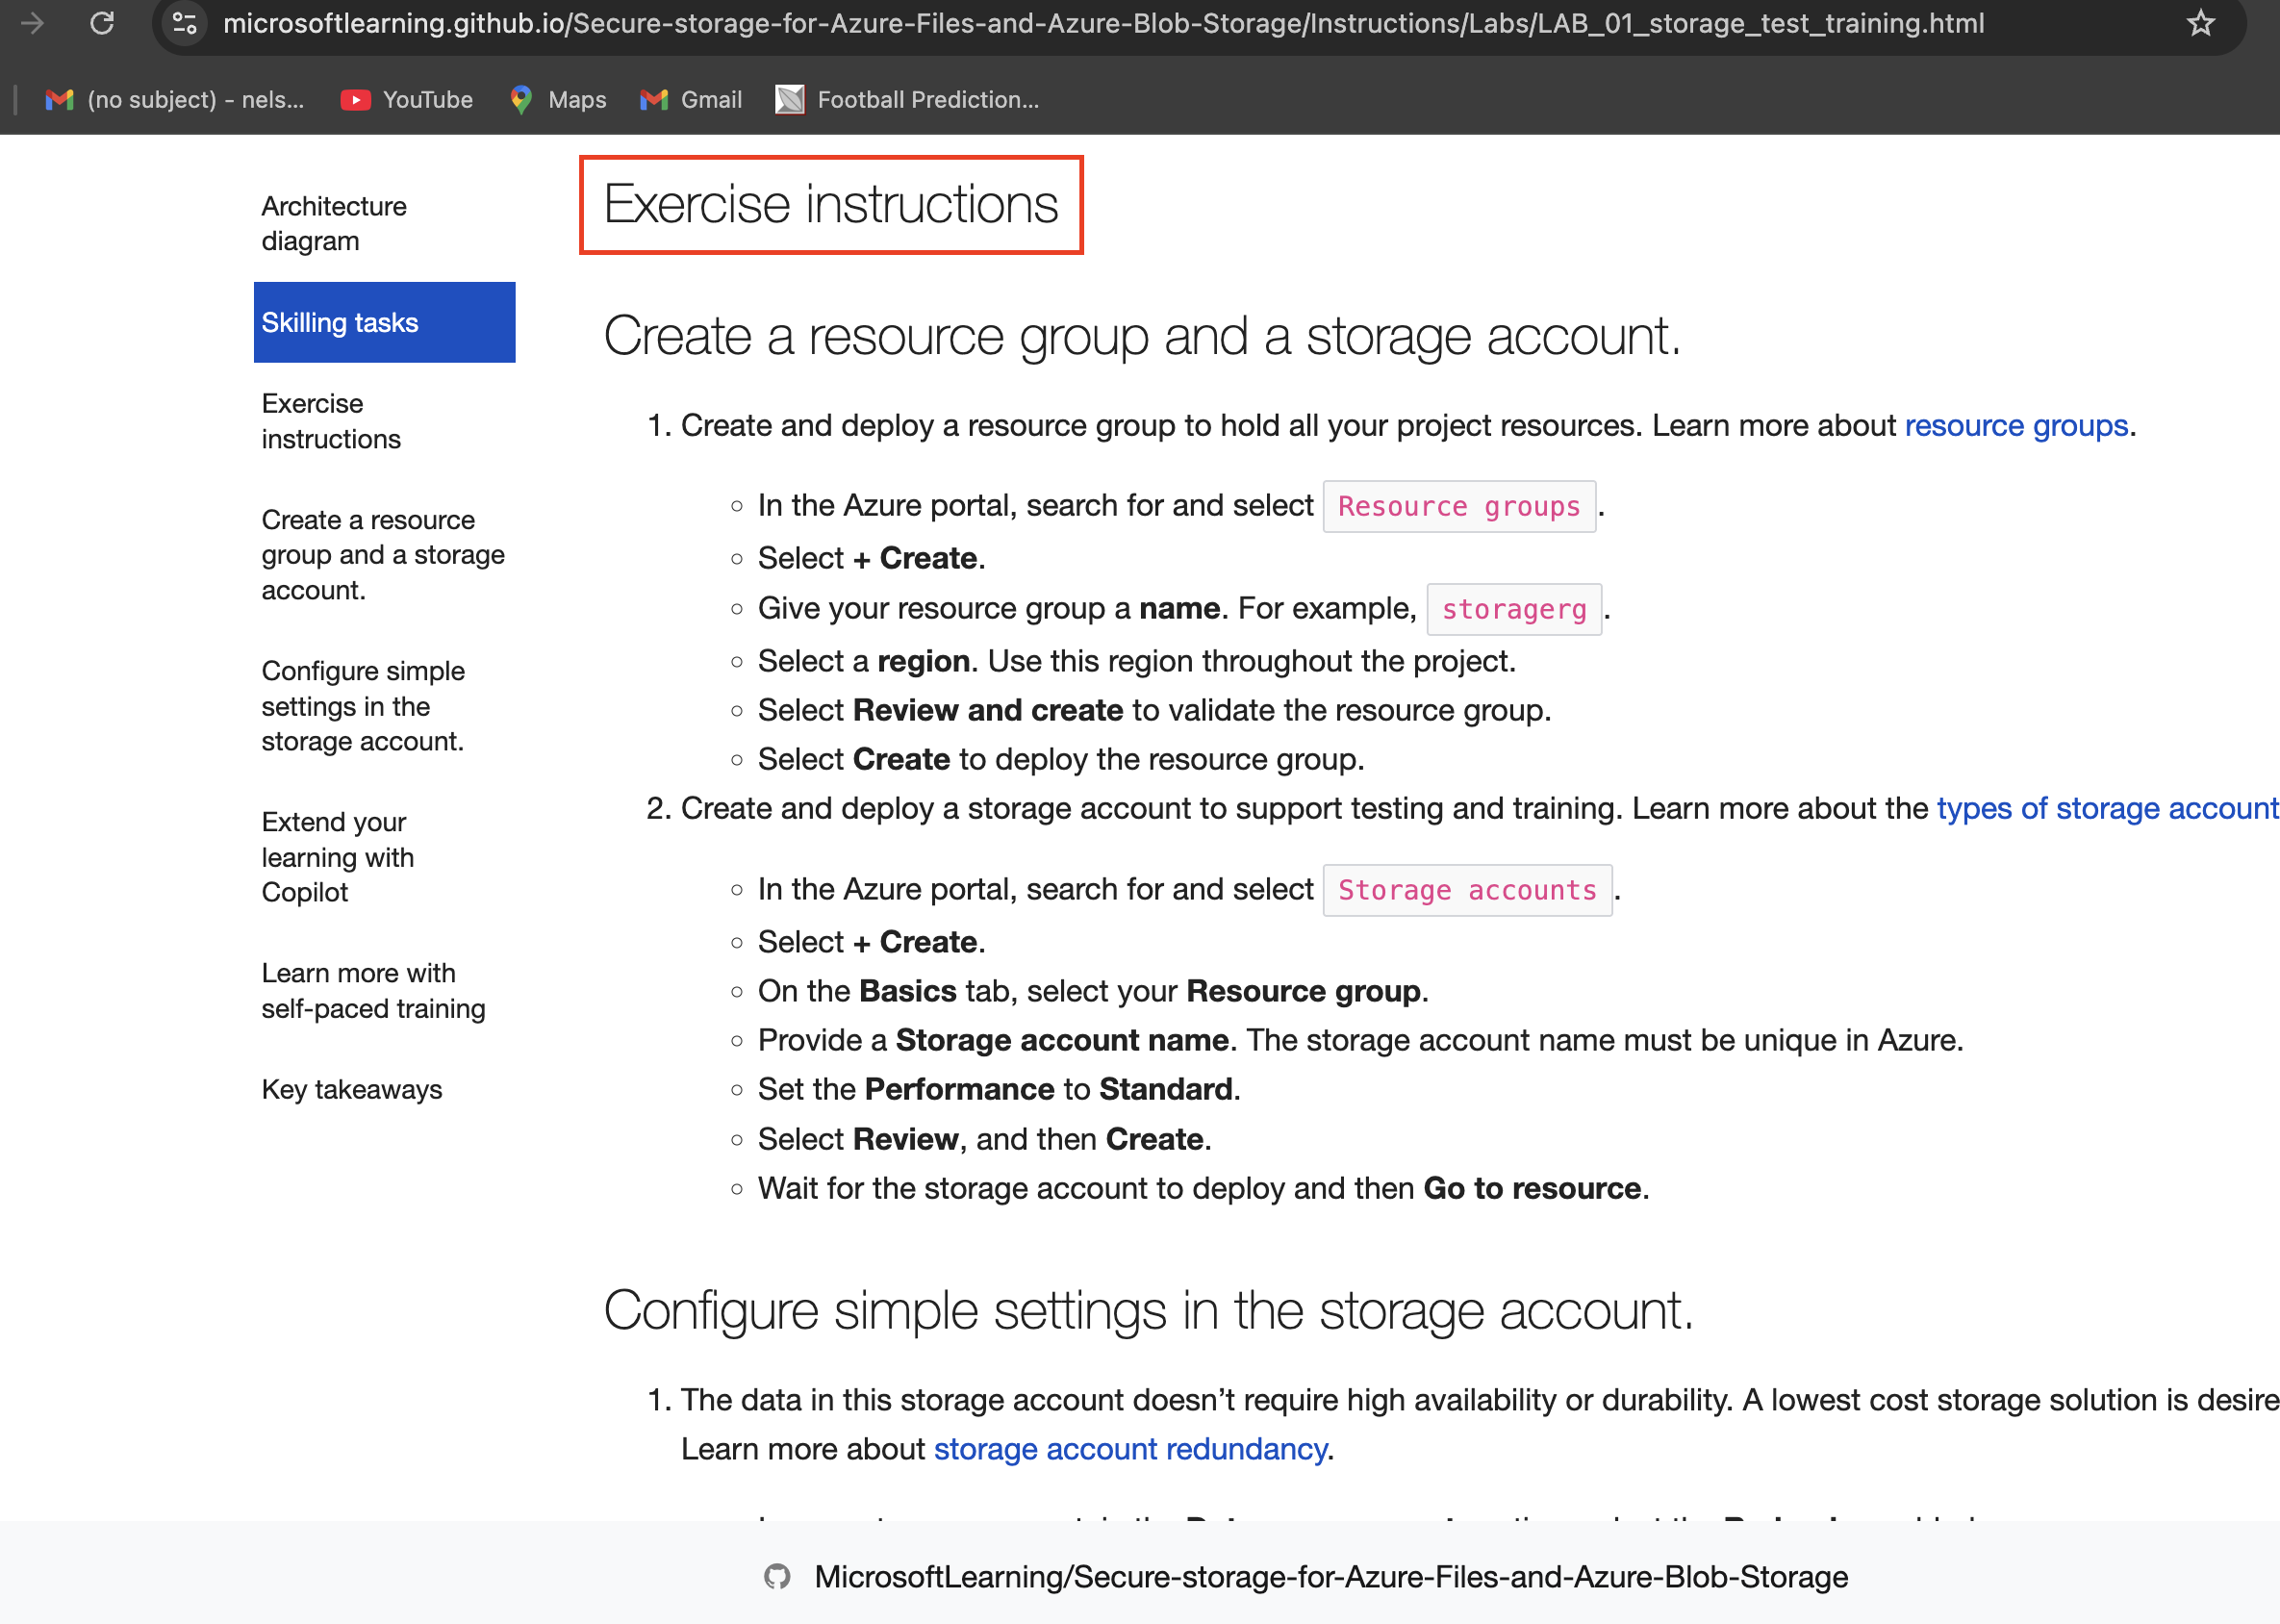
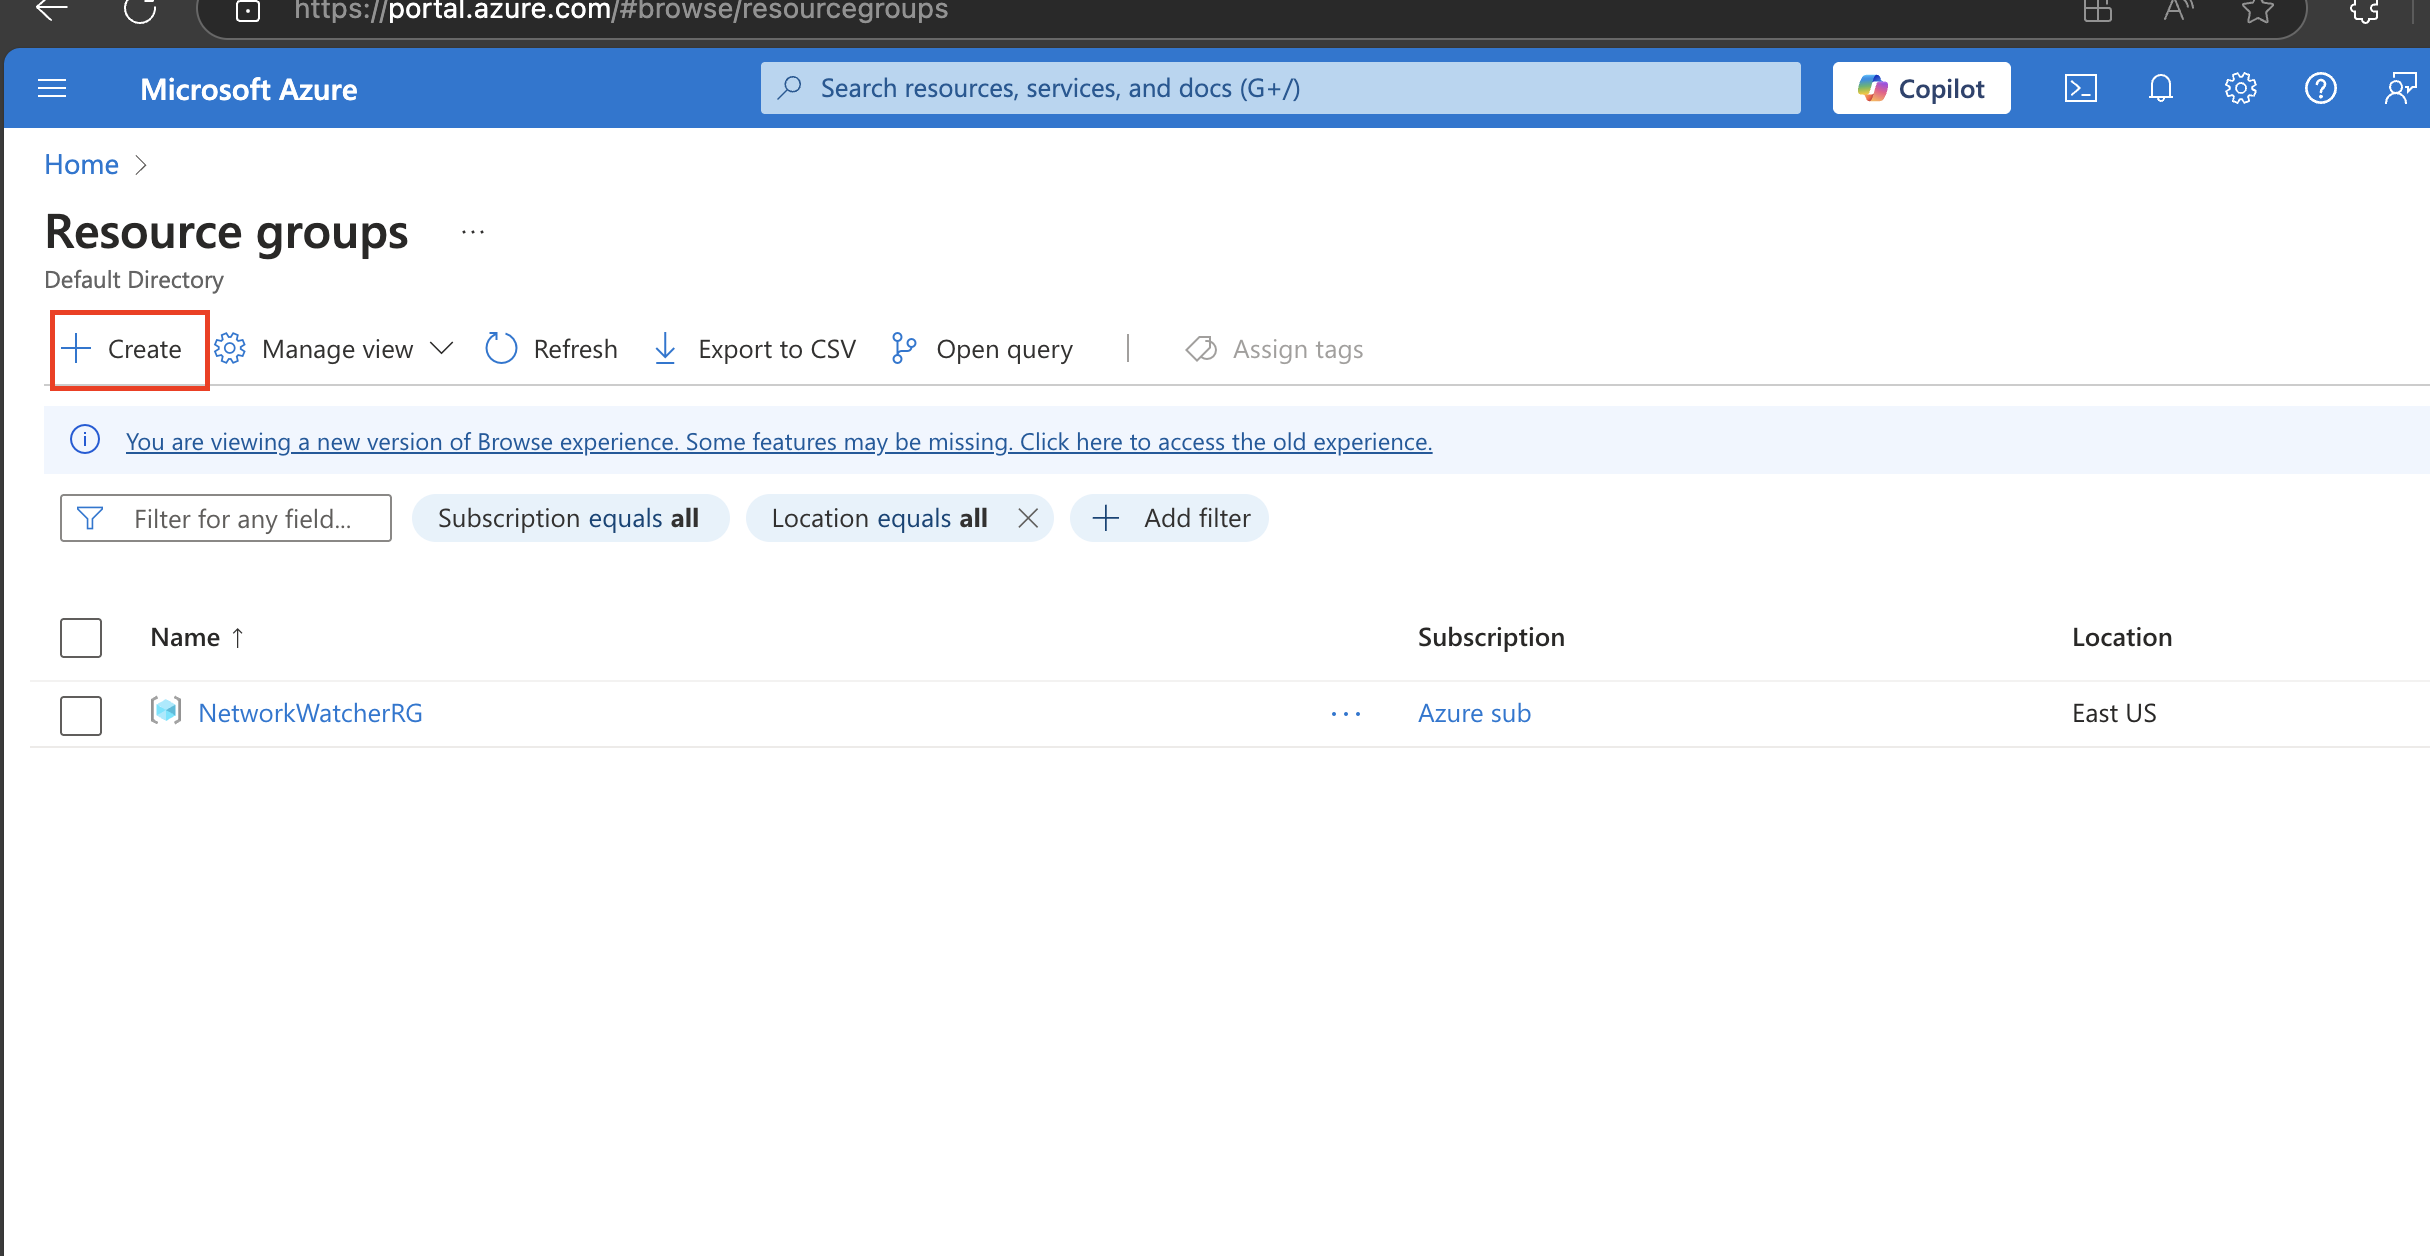
2.0. Login to your Azure portal, create and deploy a resource group to hold all your project resources.
Search for and select Resource group and click on create
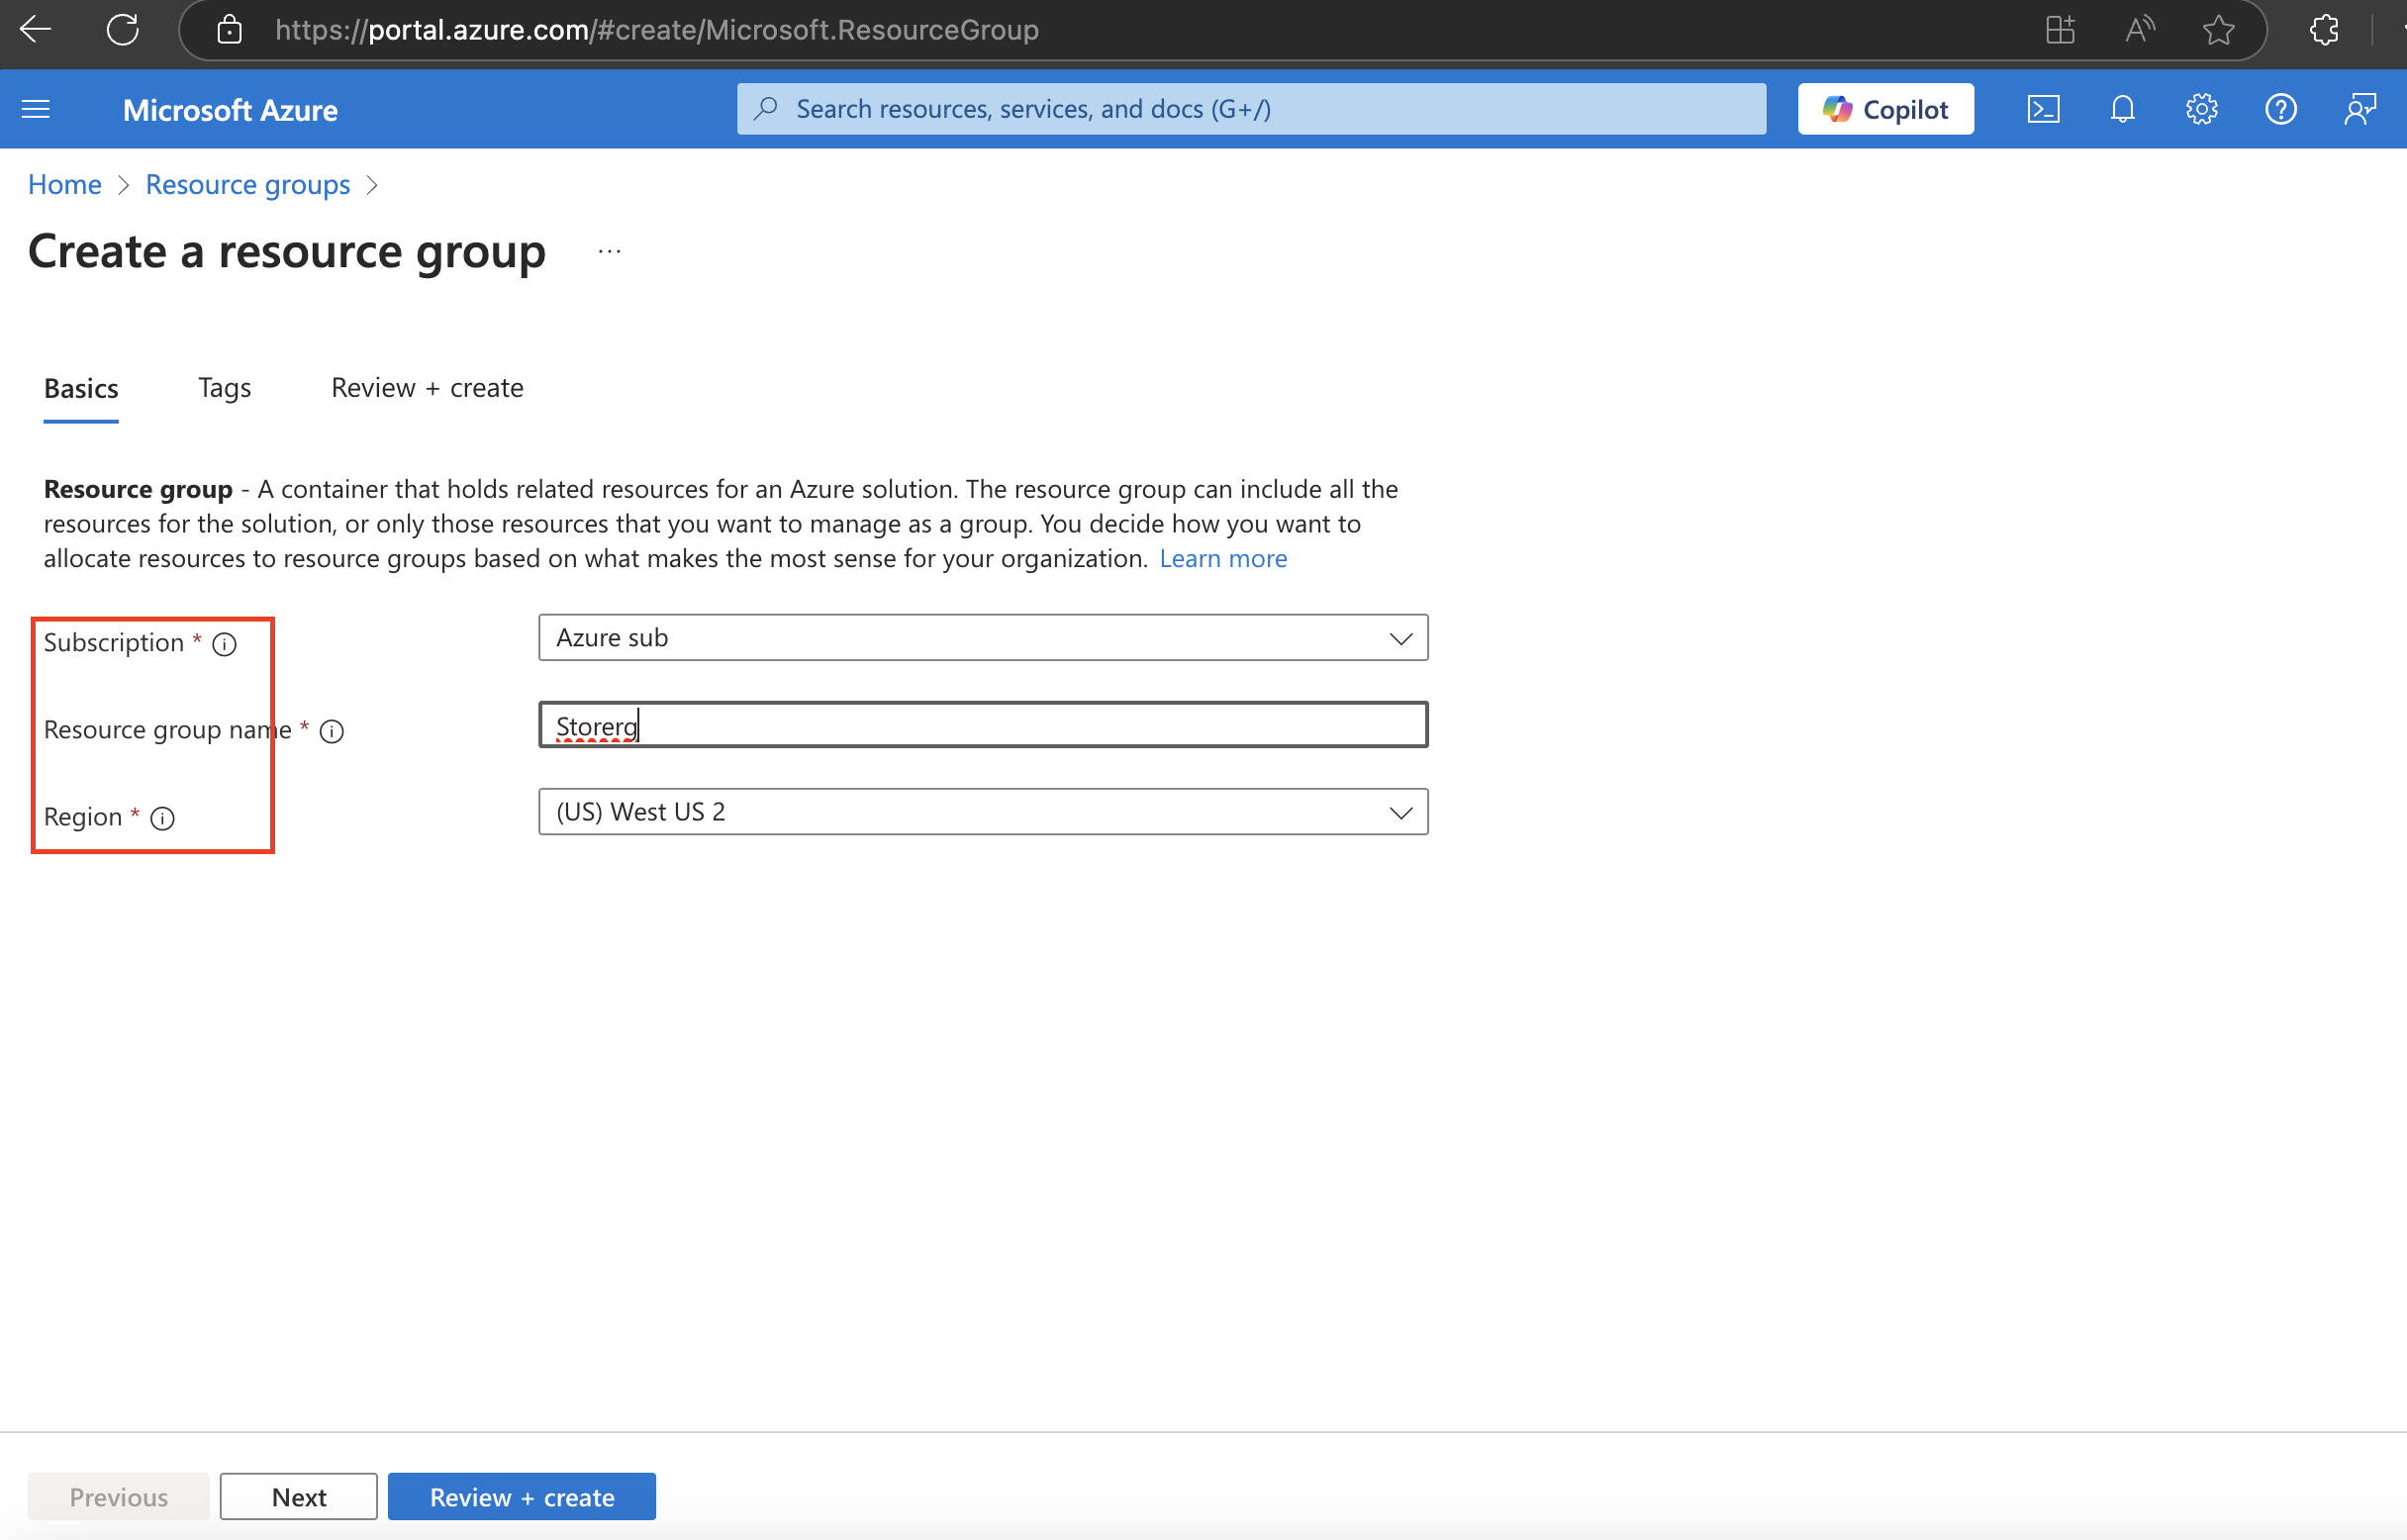
2.1. Choose the Resource group name and select a region(Use this region throughout the project)
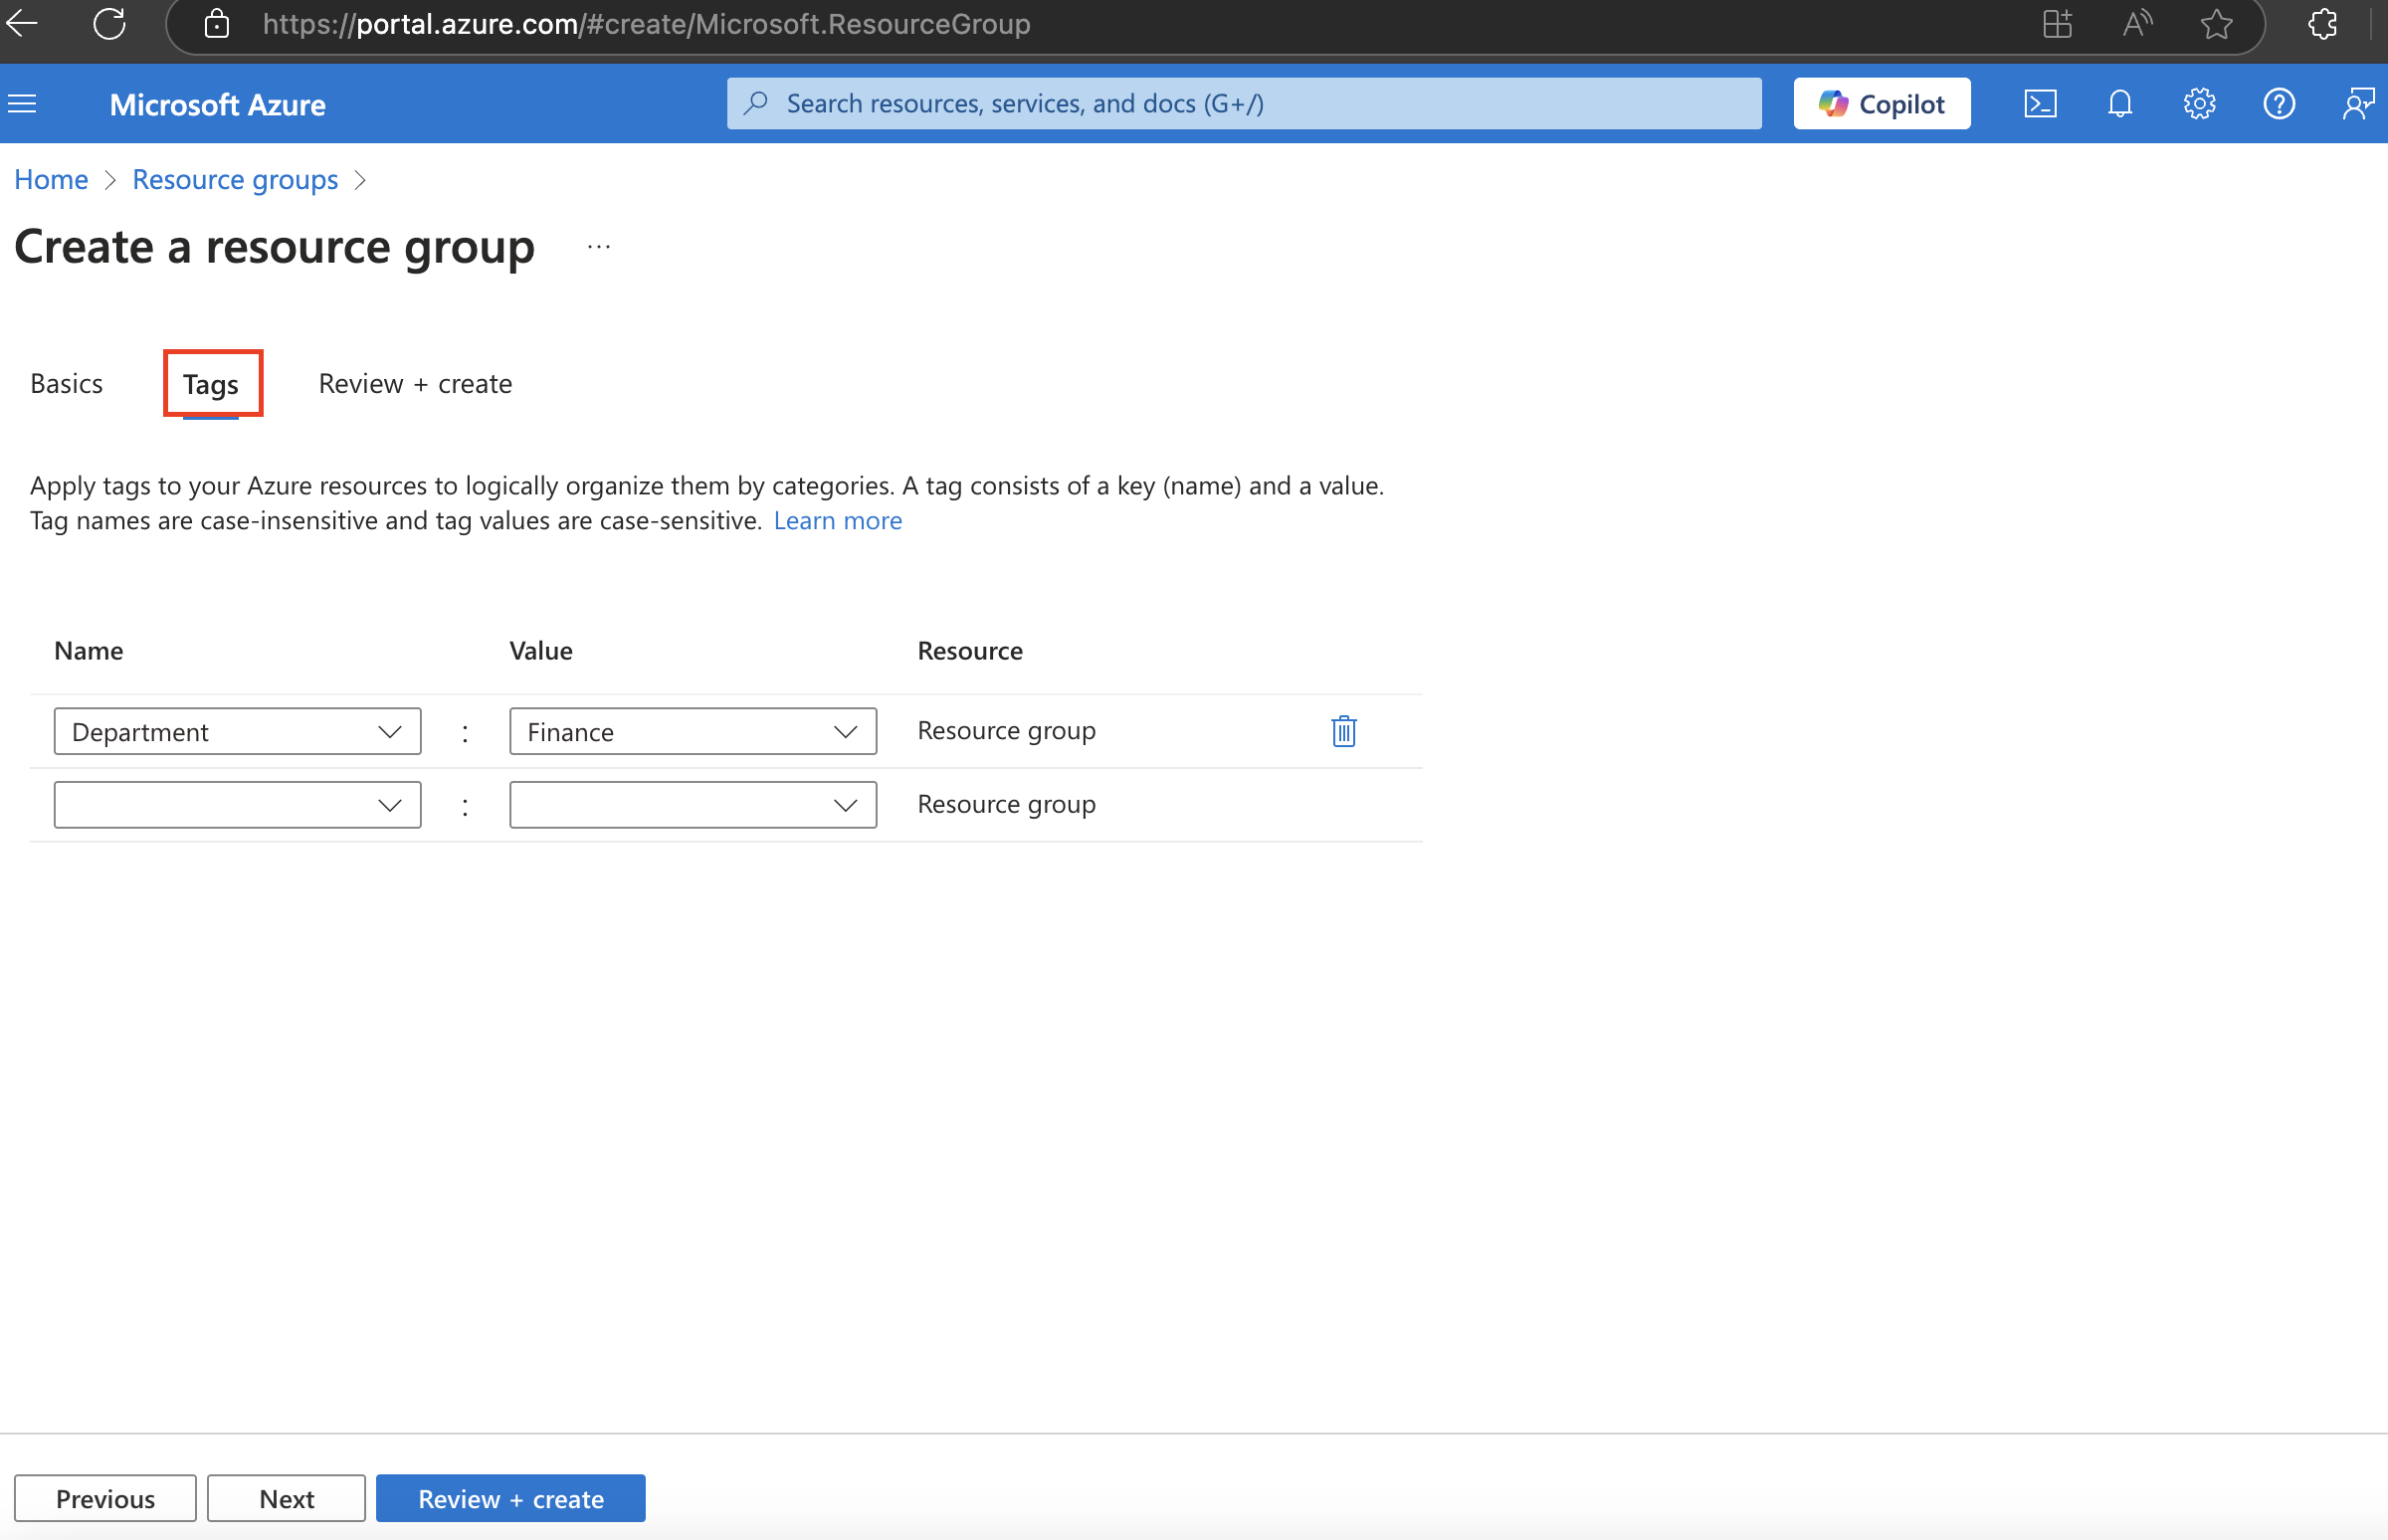
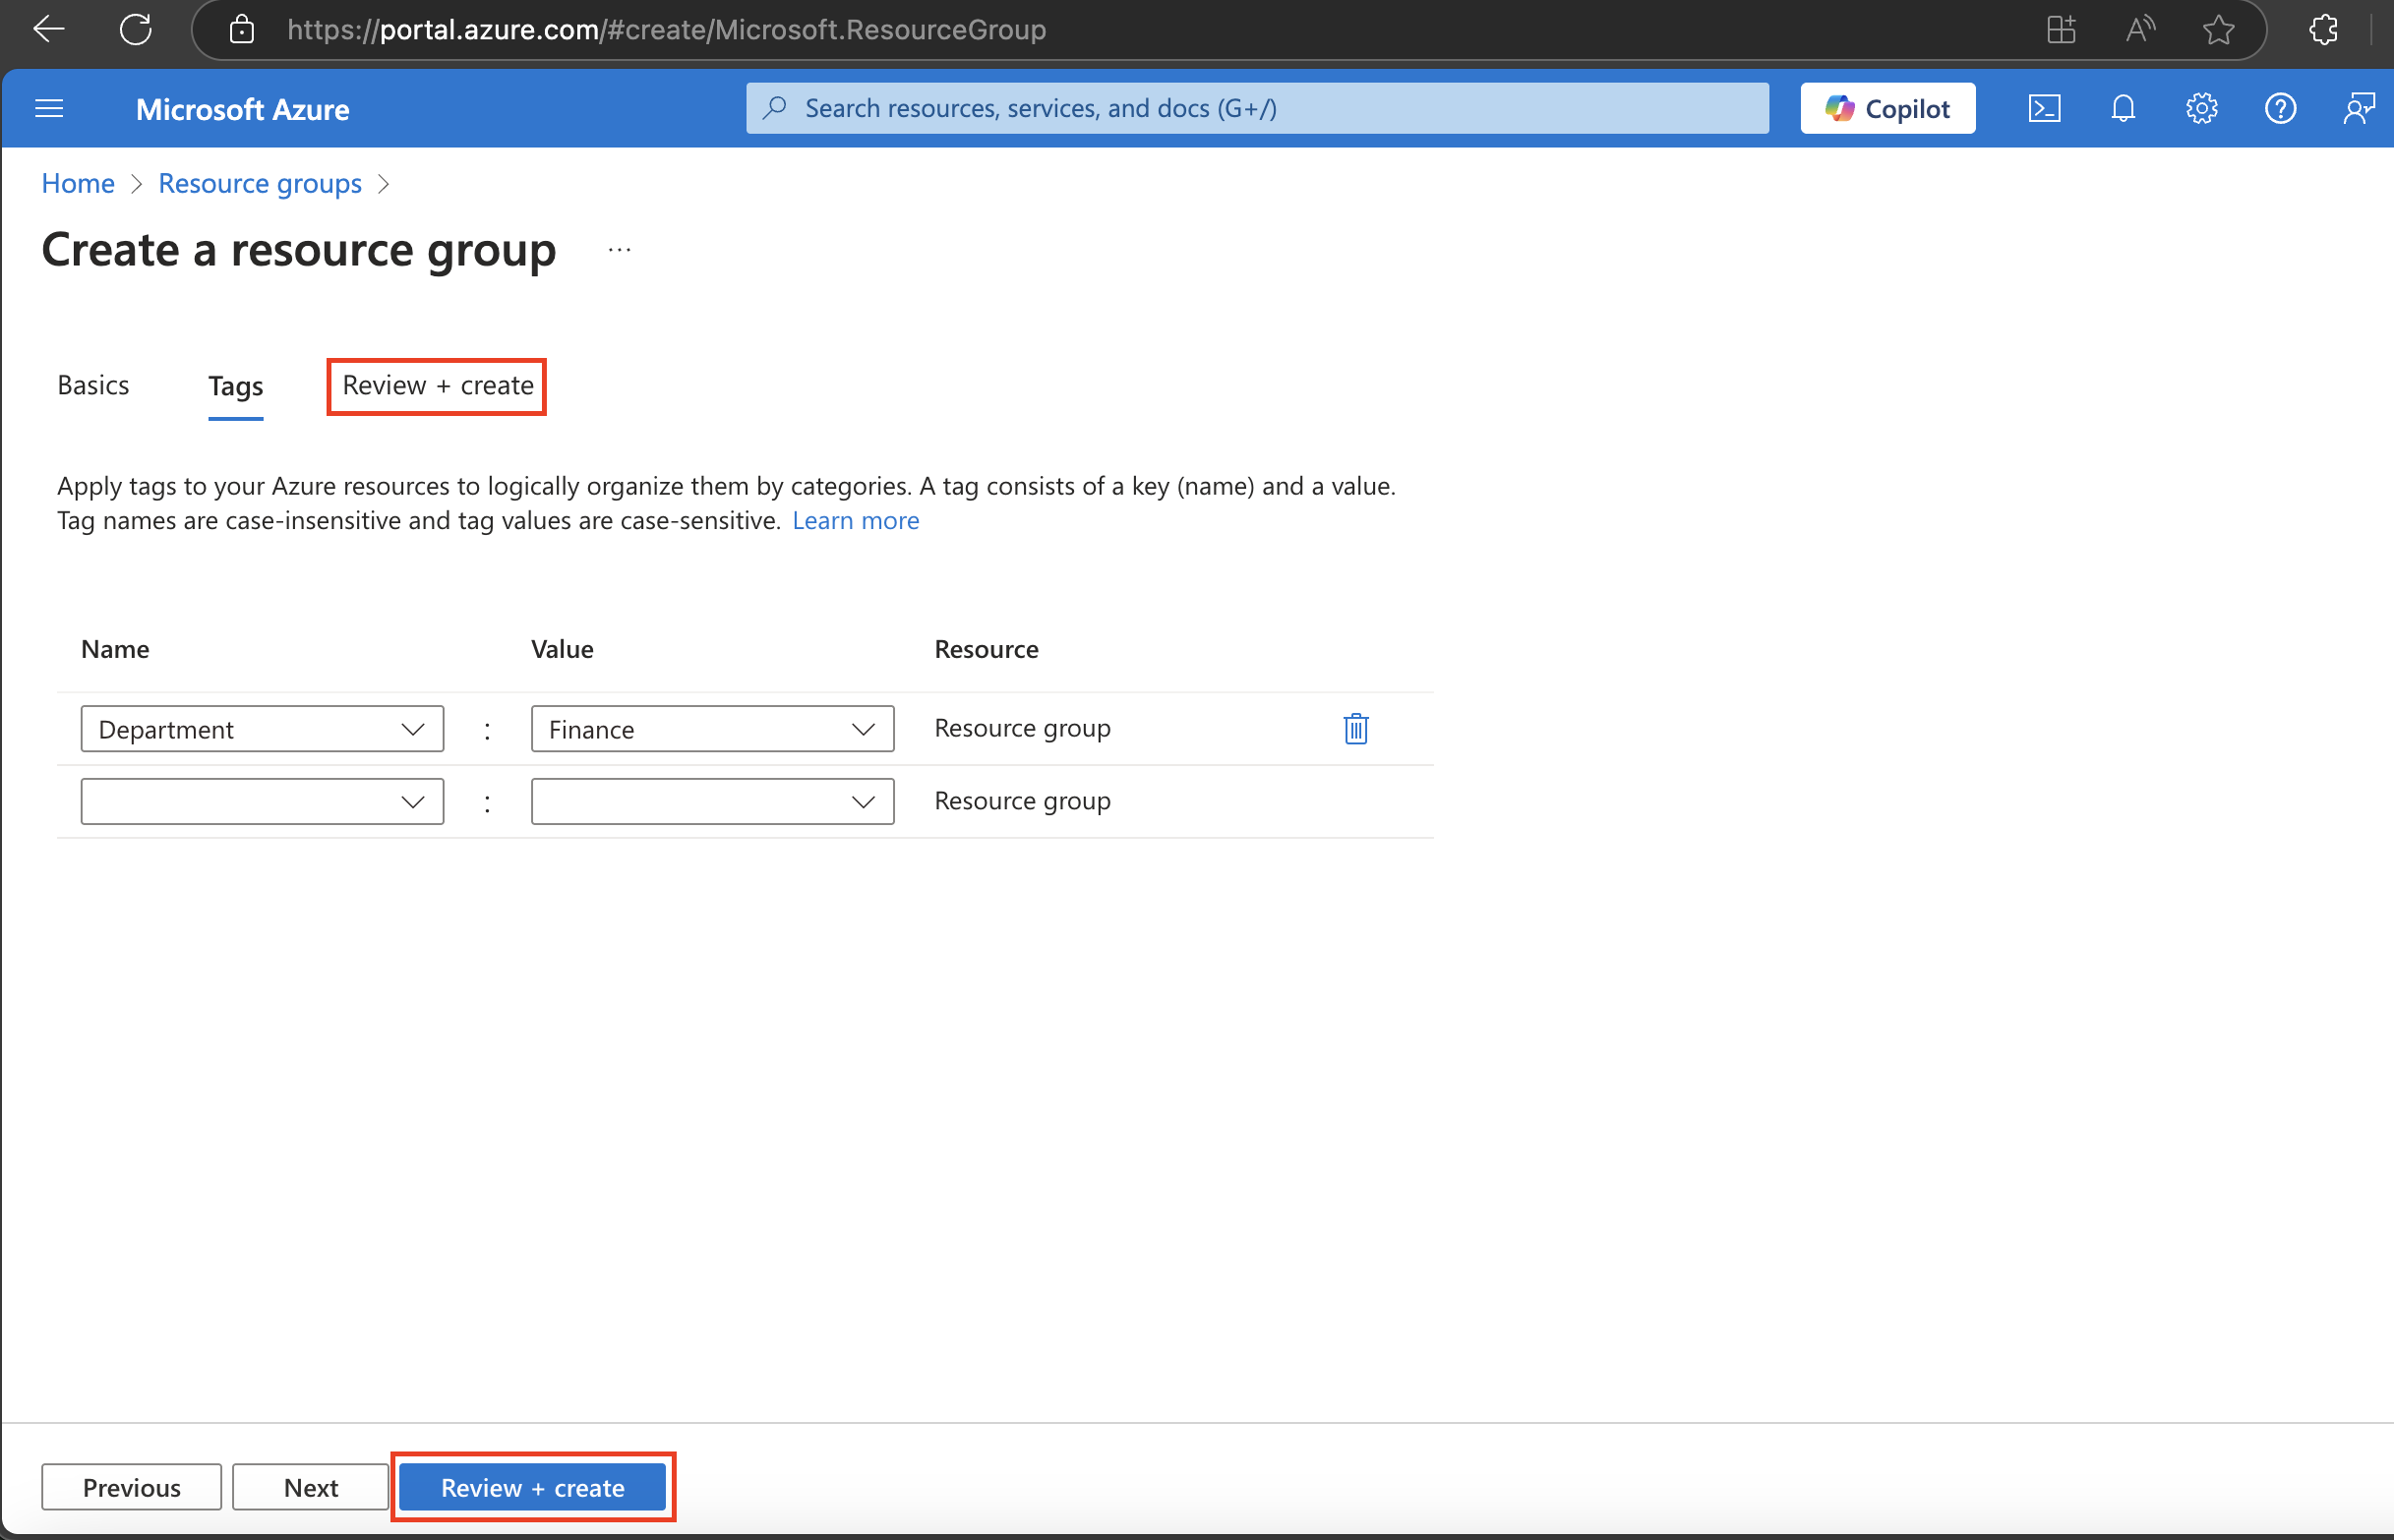
2.2 Add Tags and then, review and create.
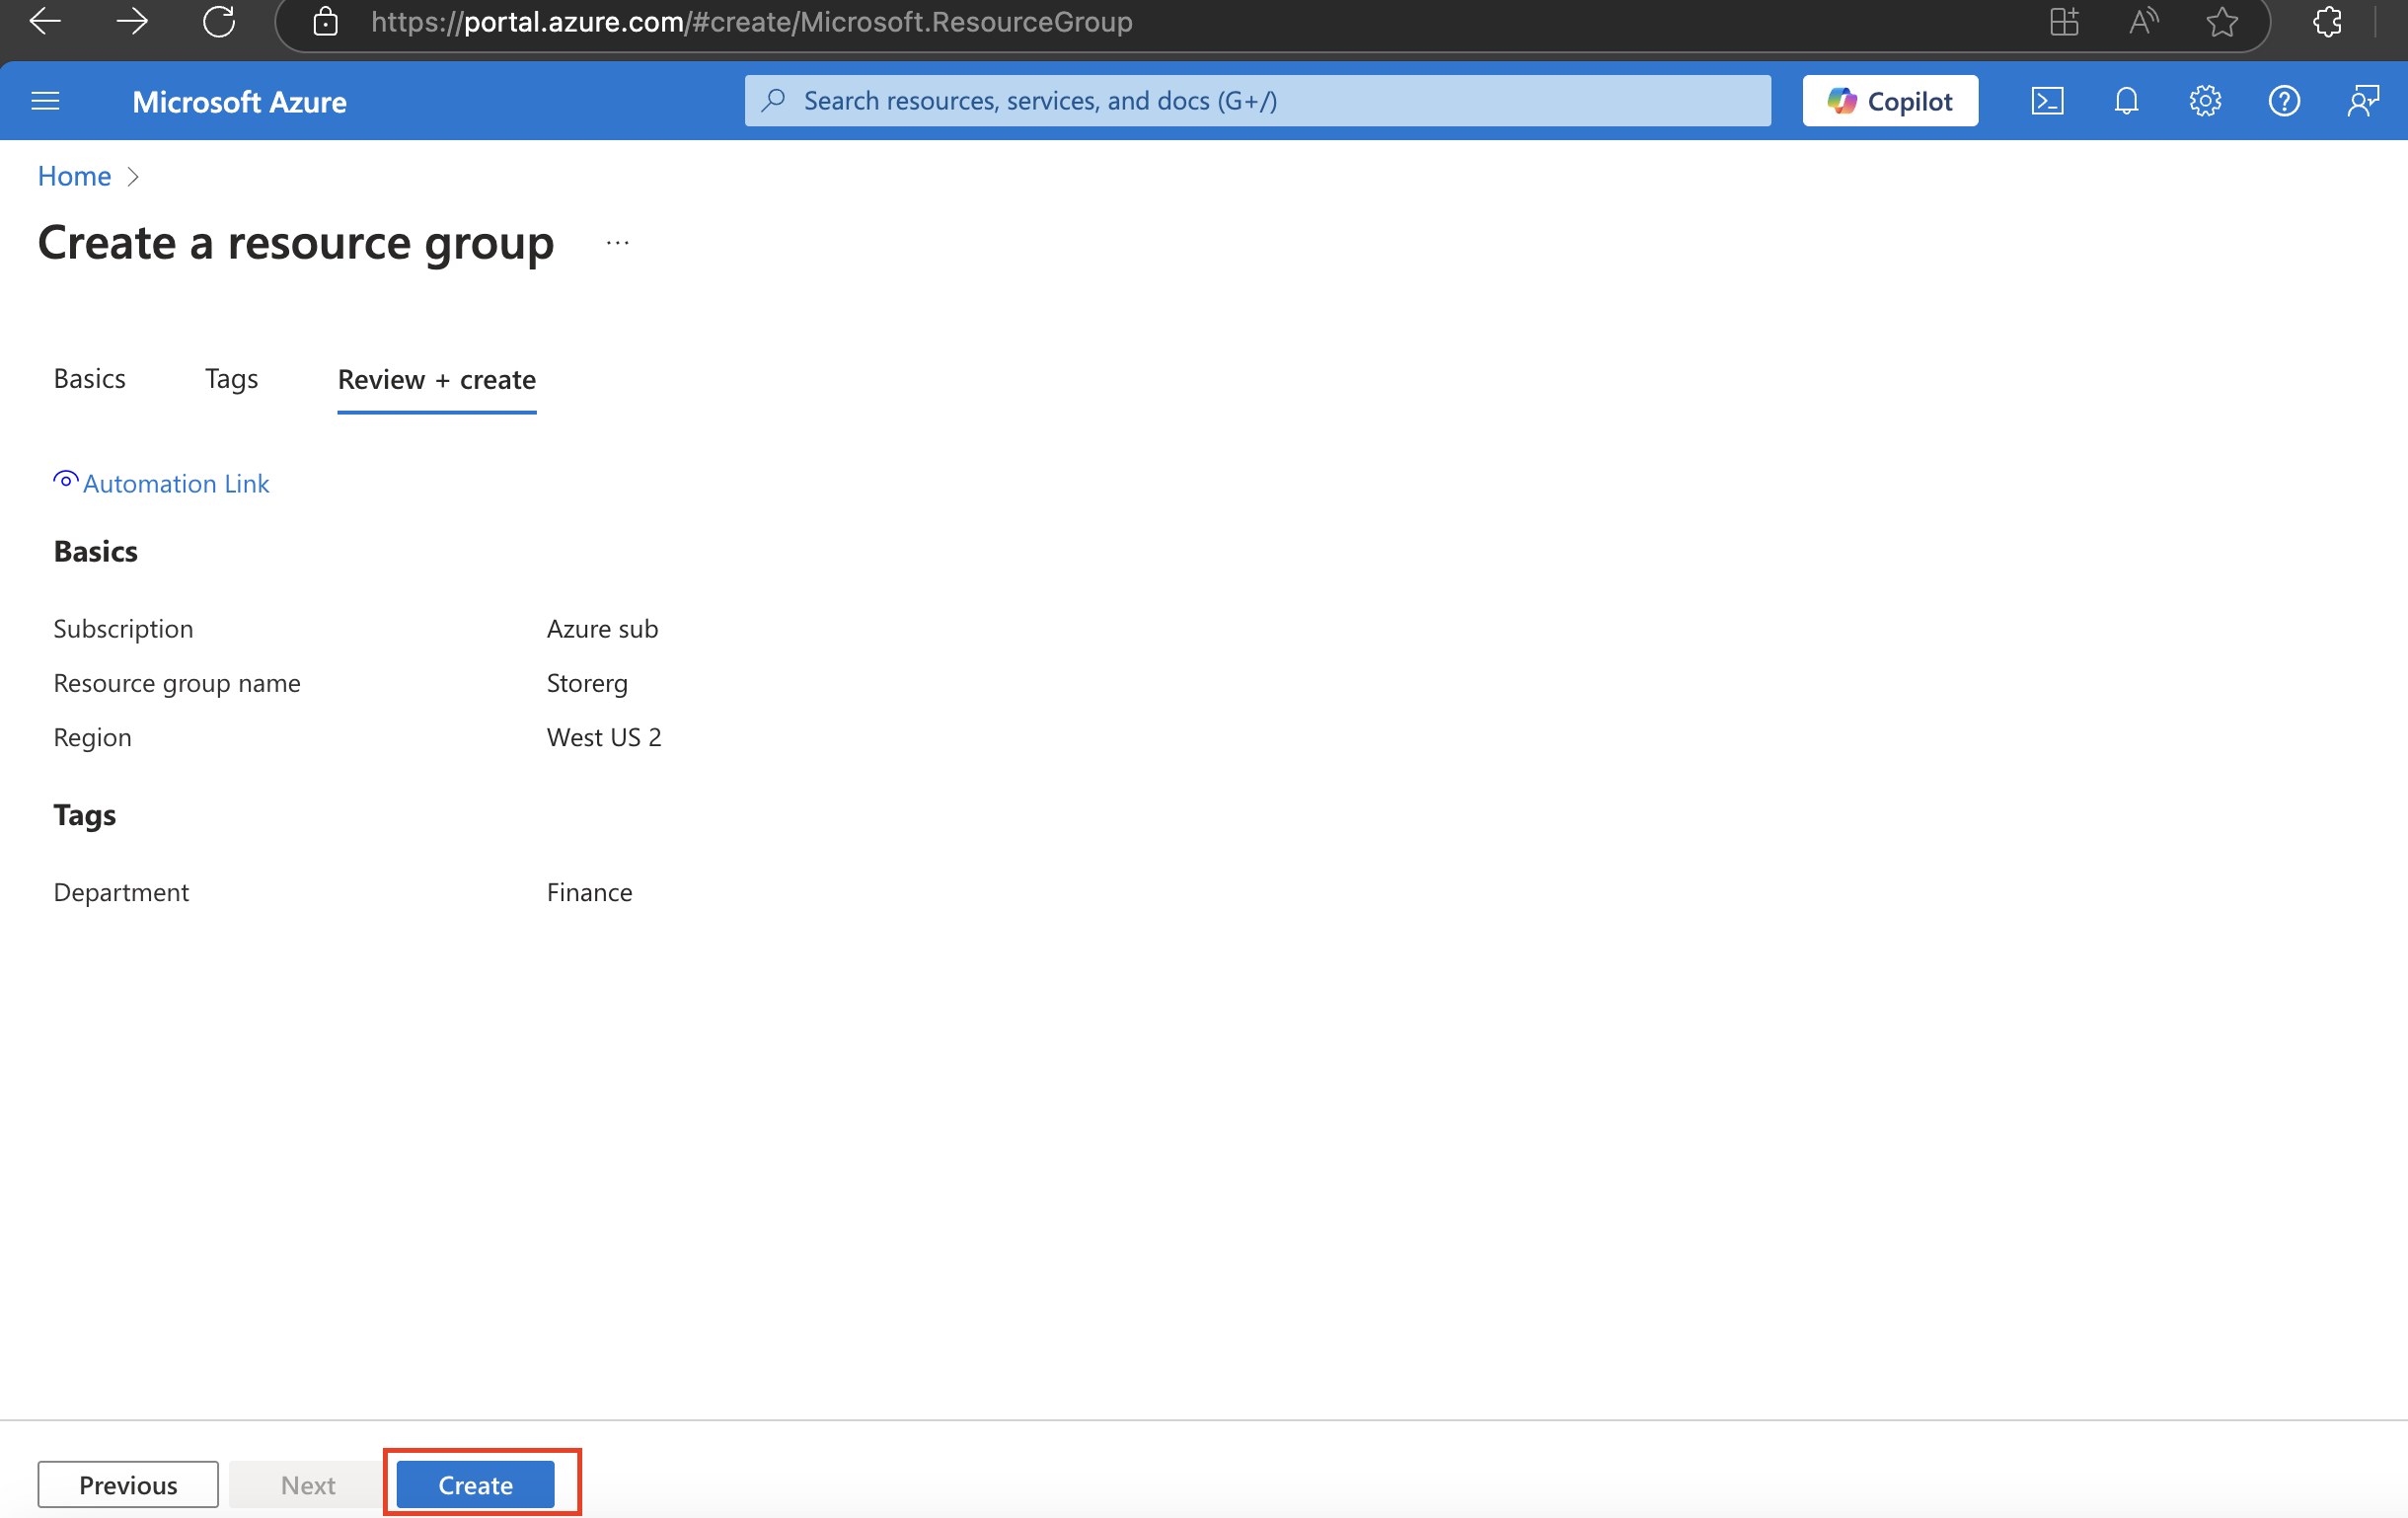
2.3. Click on Go to Resources
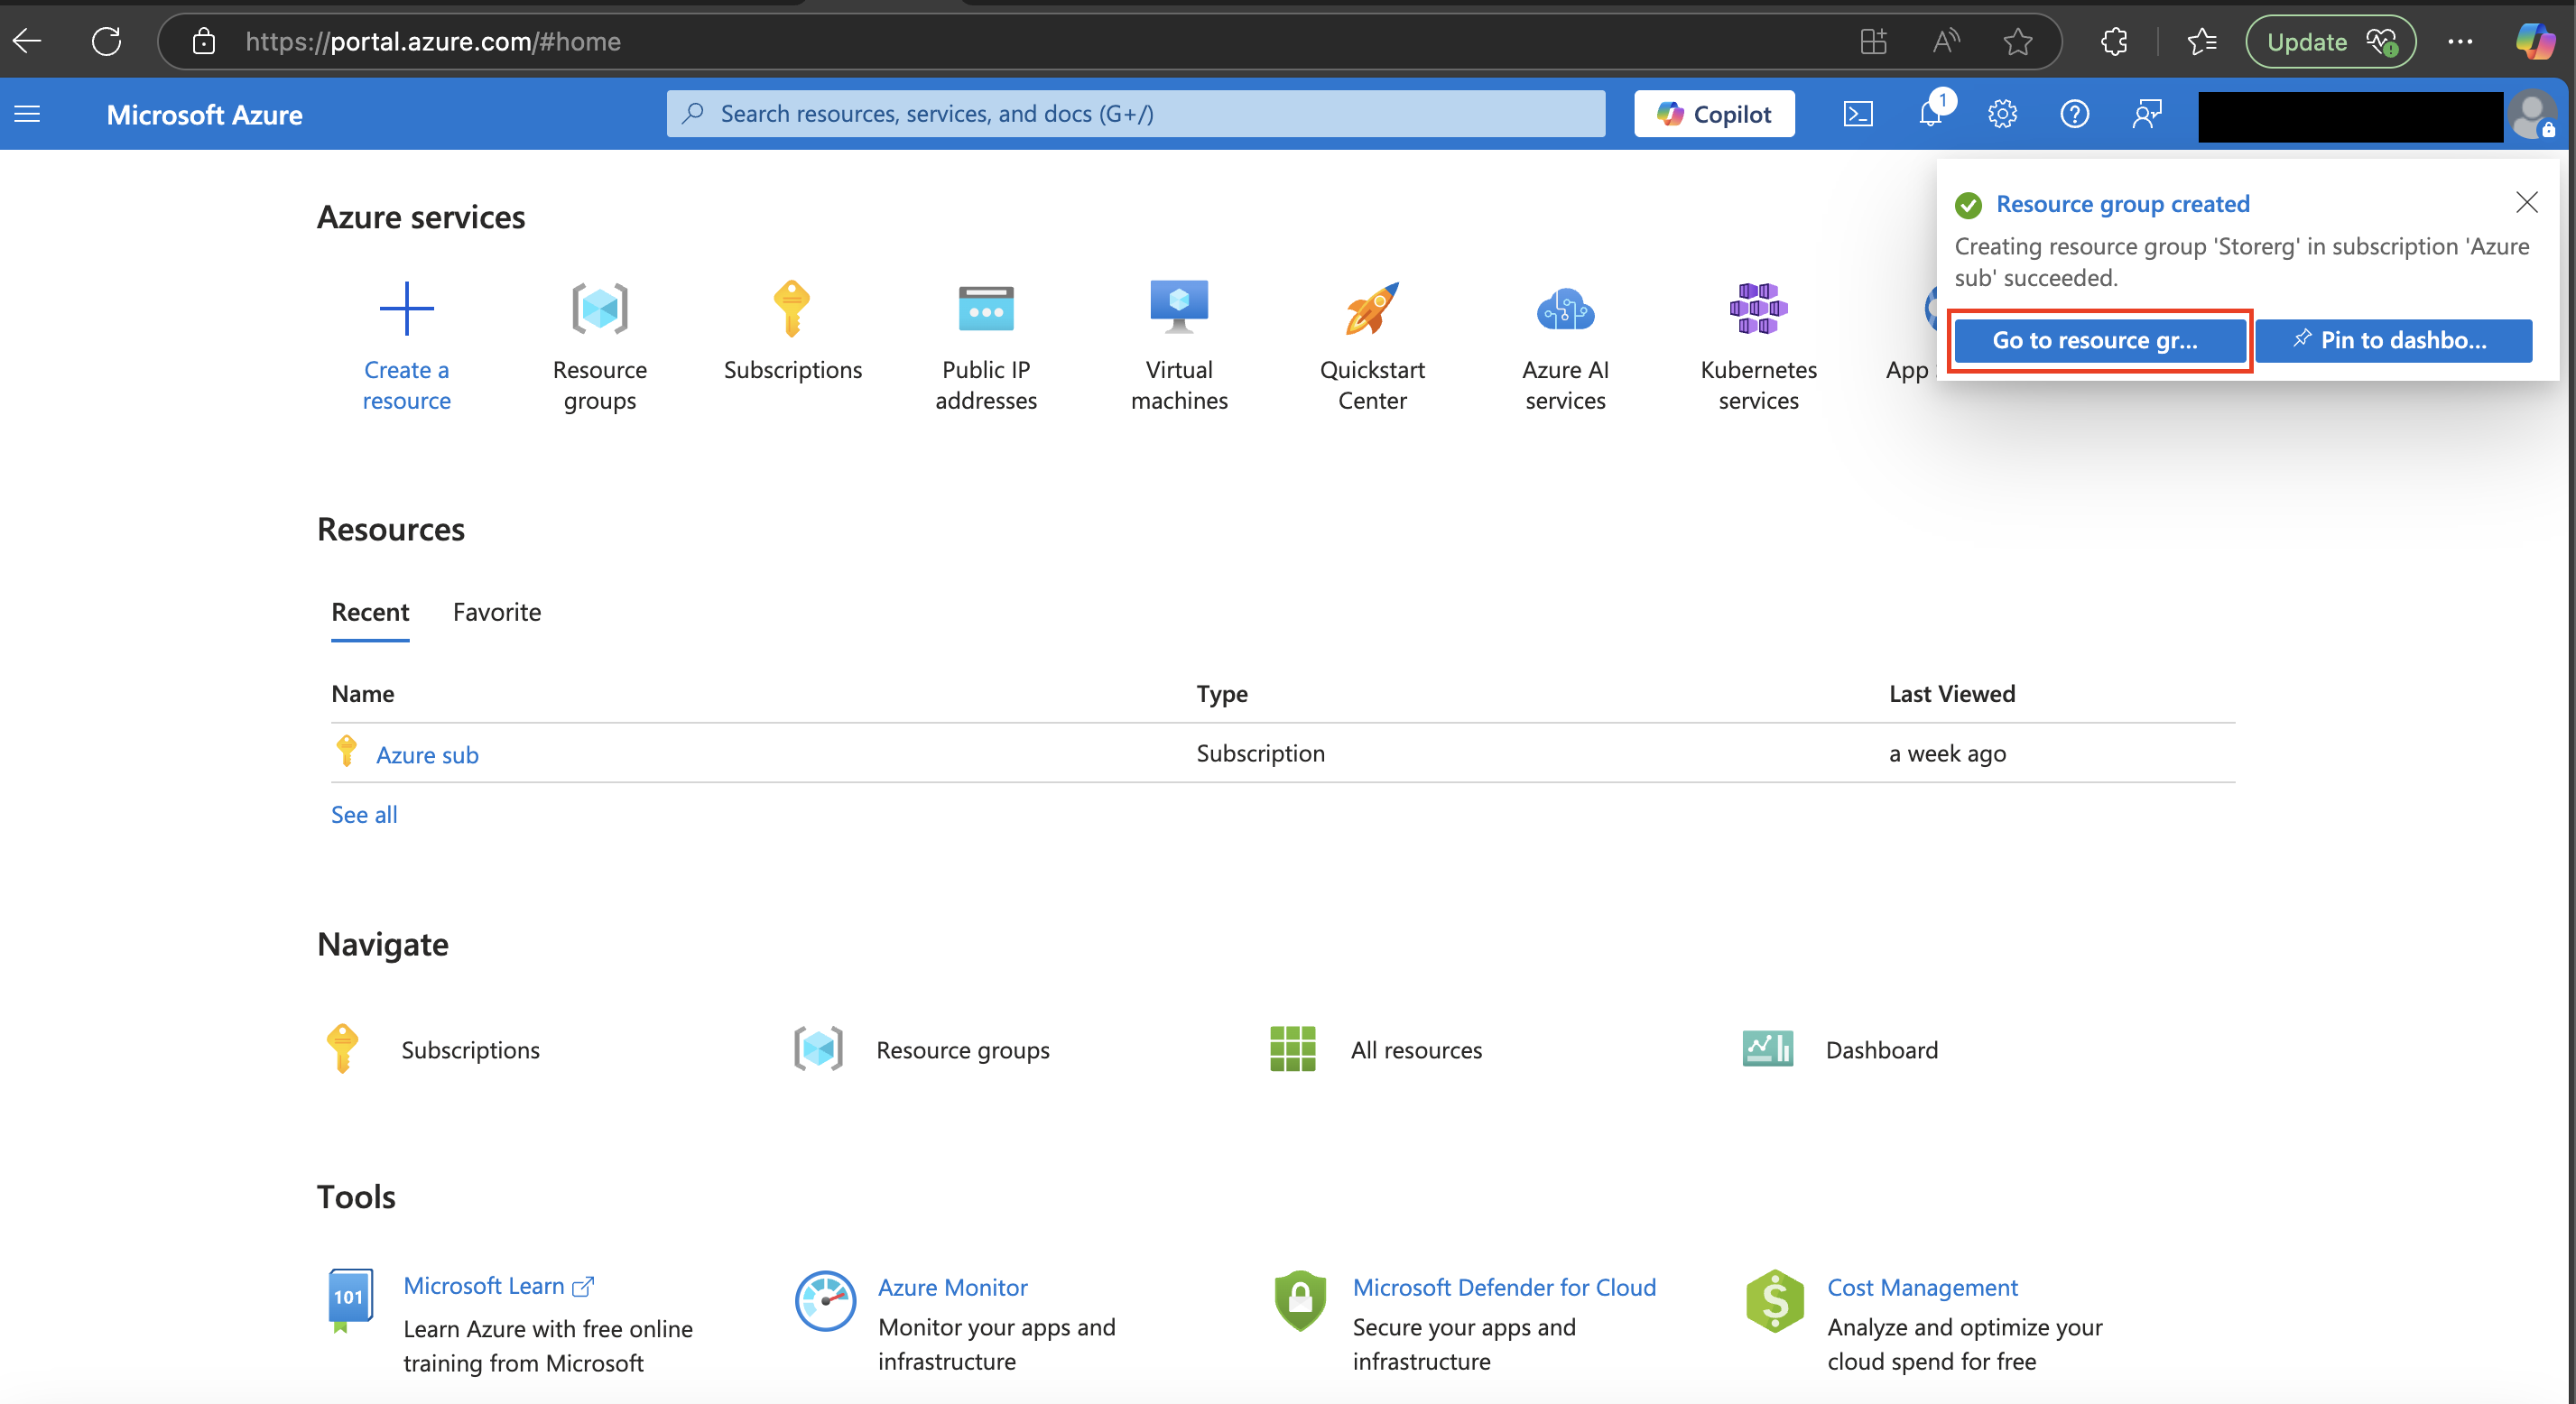
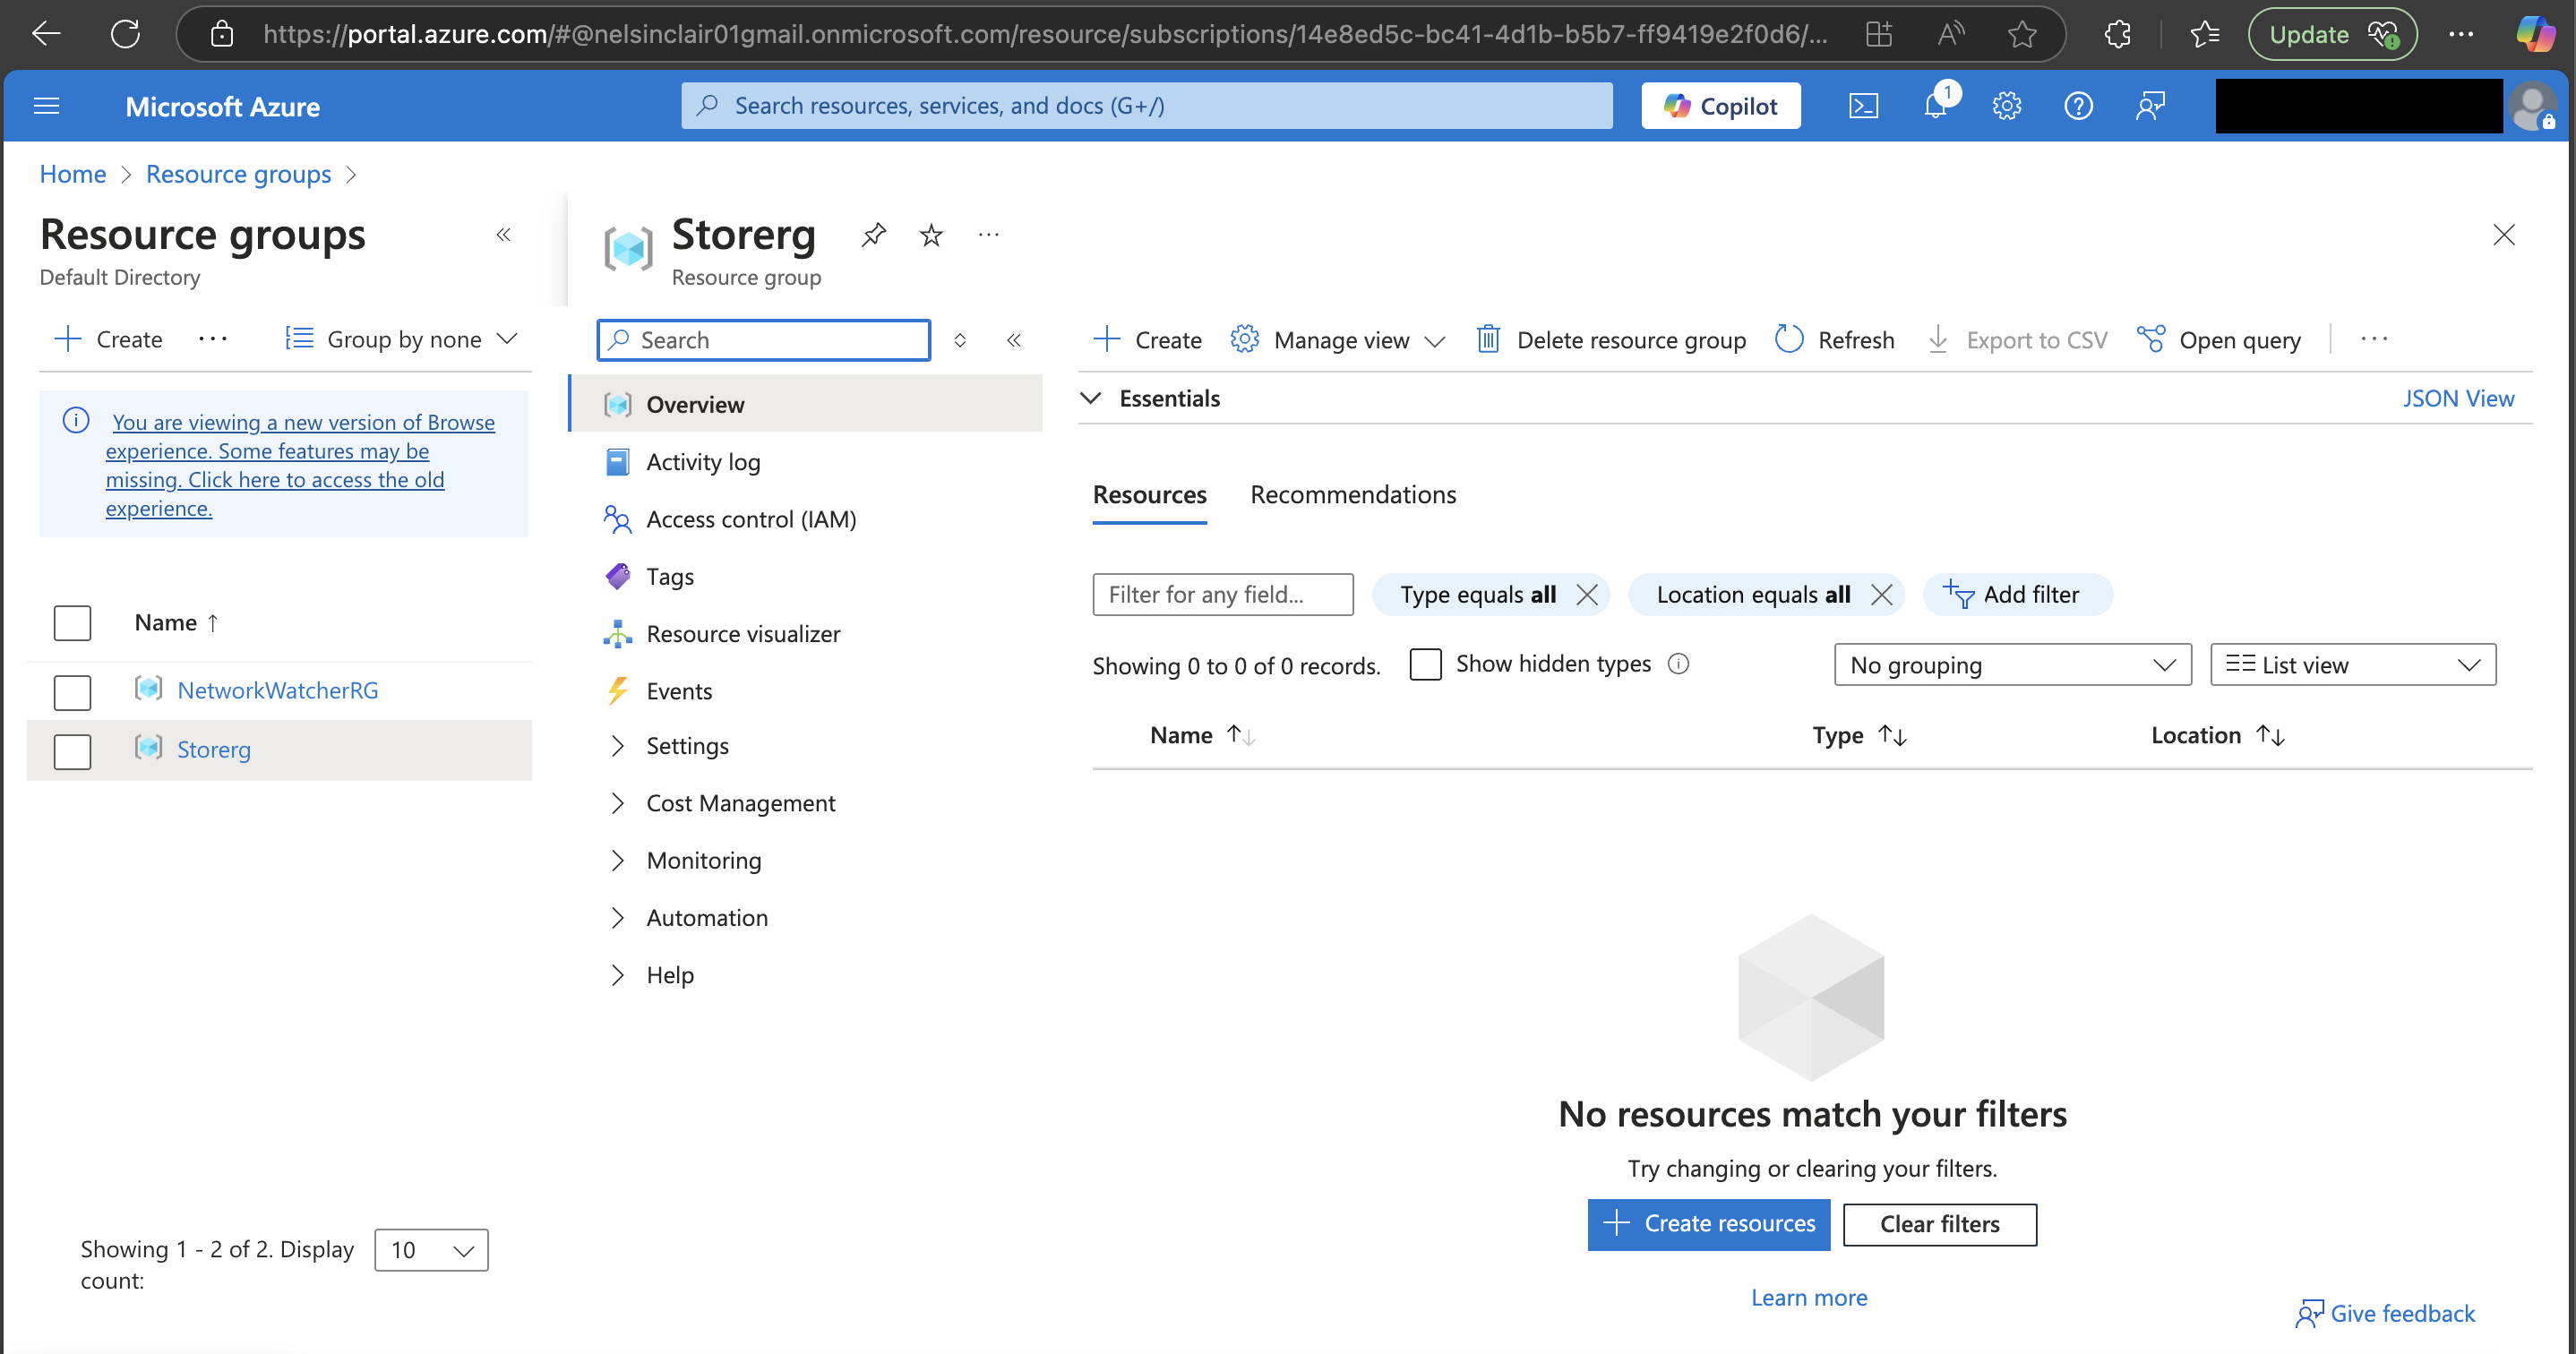
Resource group created successfully.
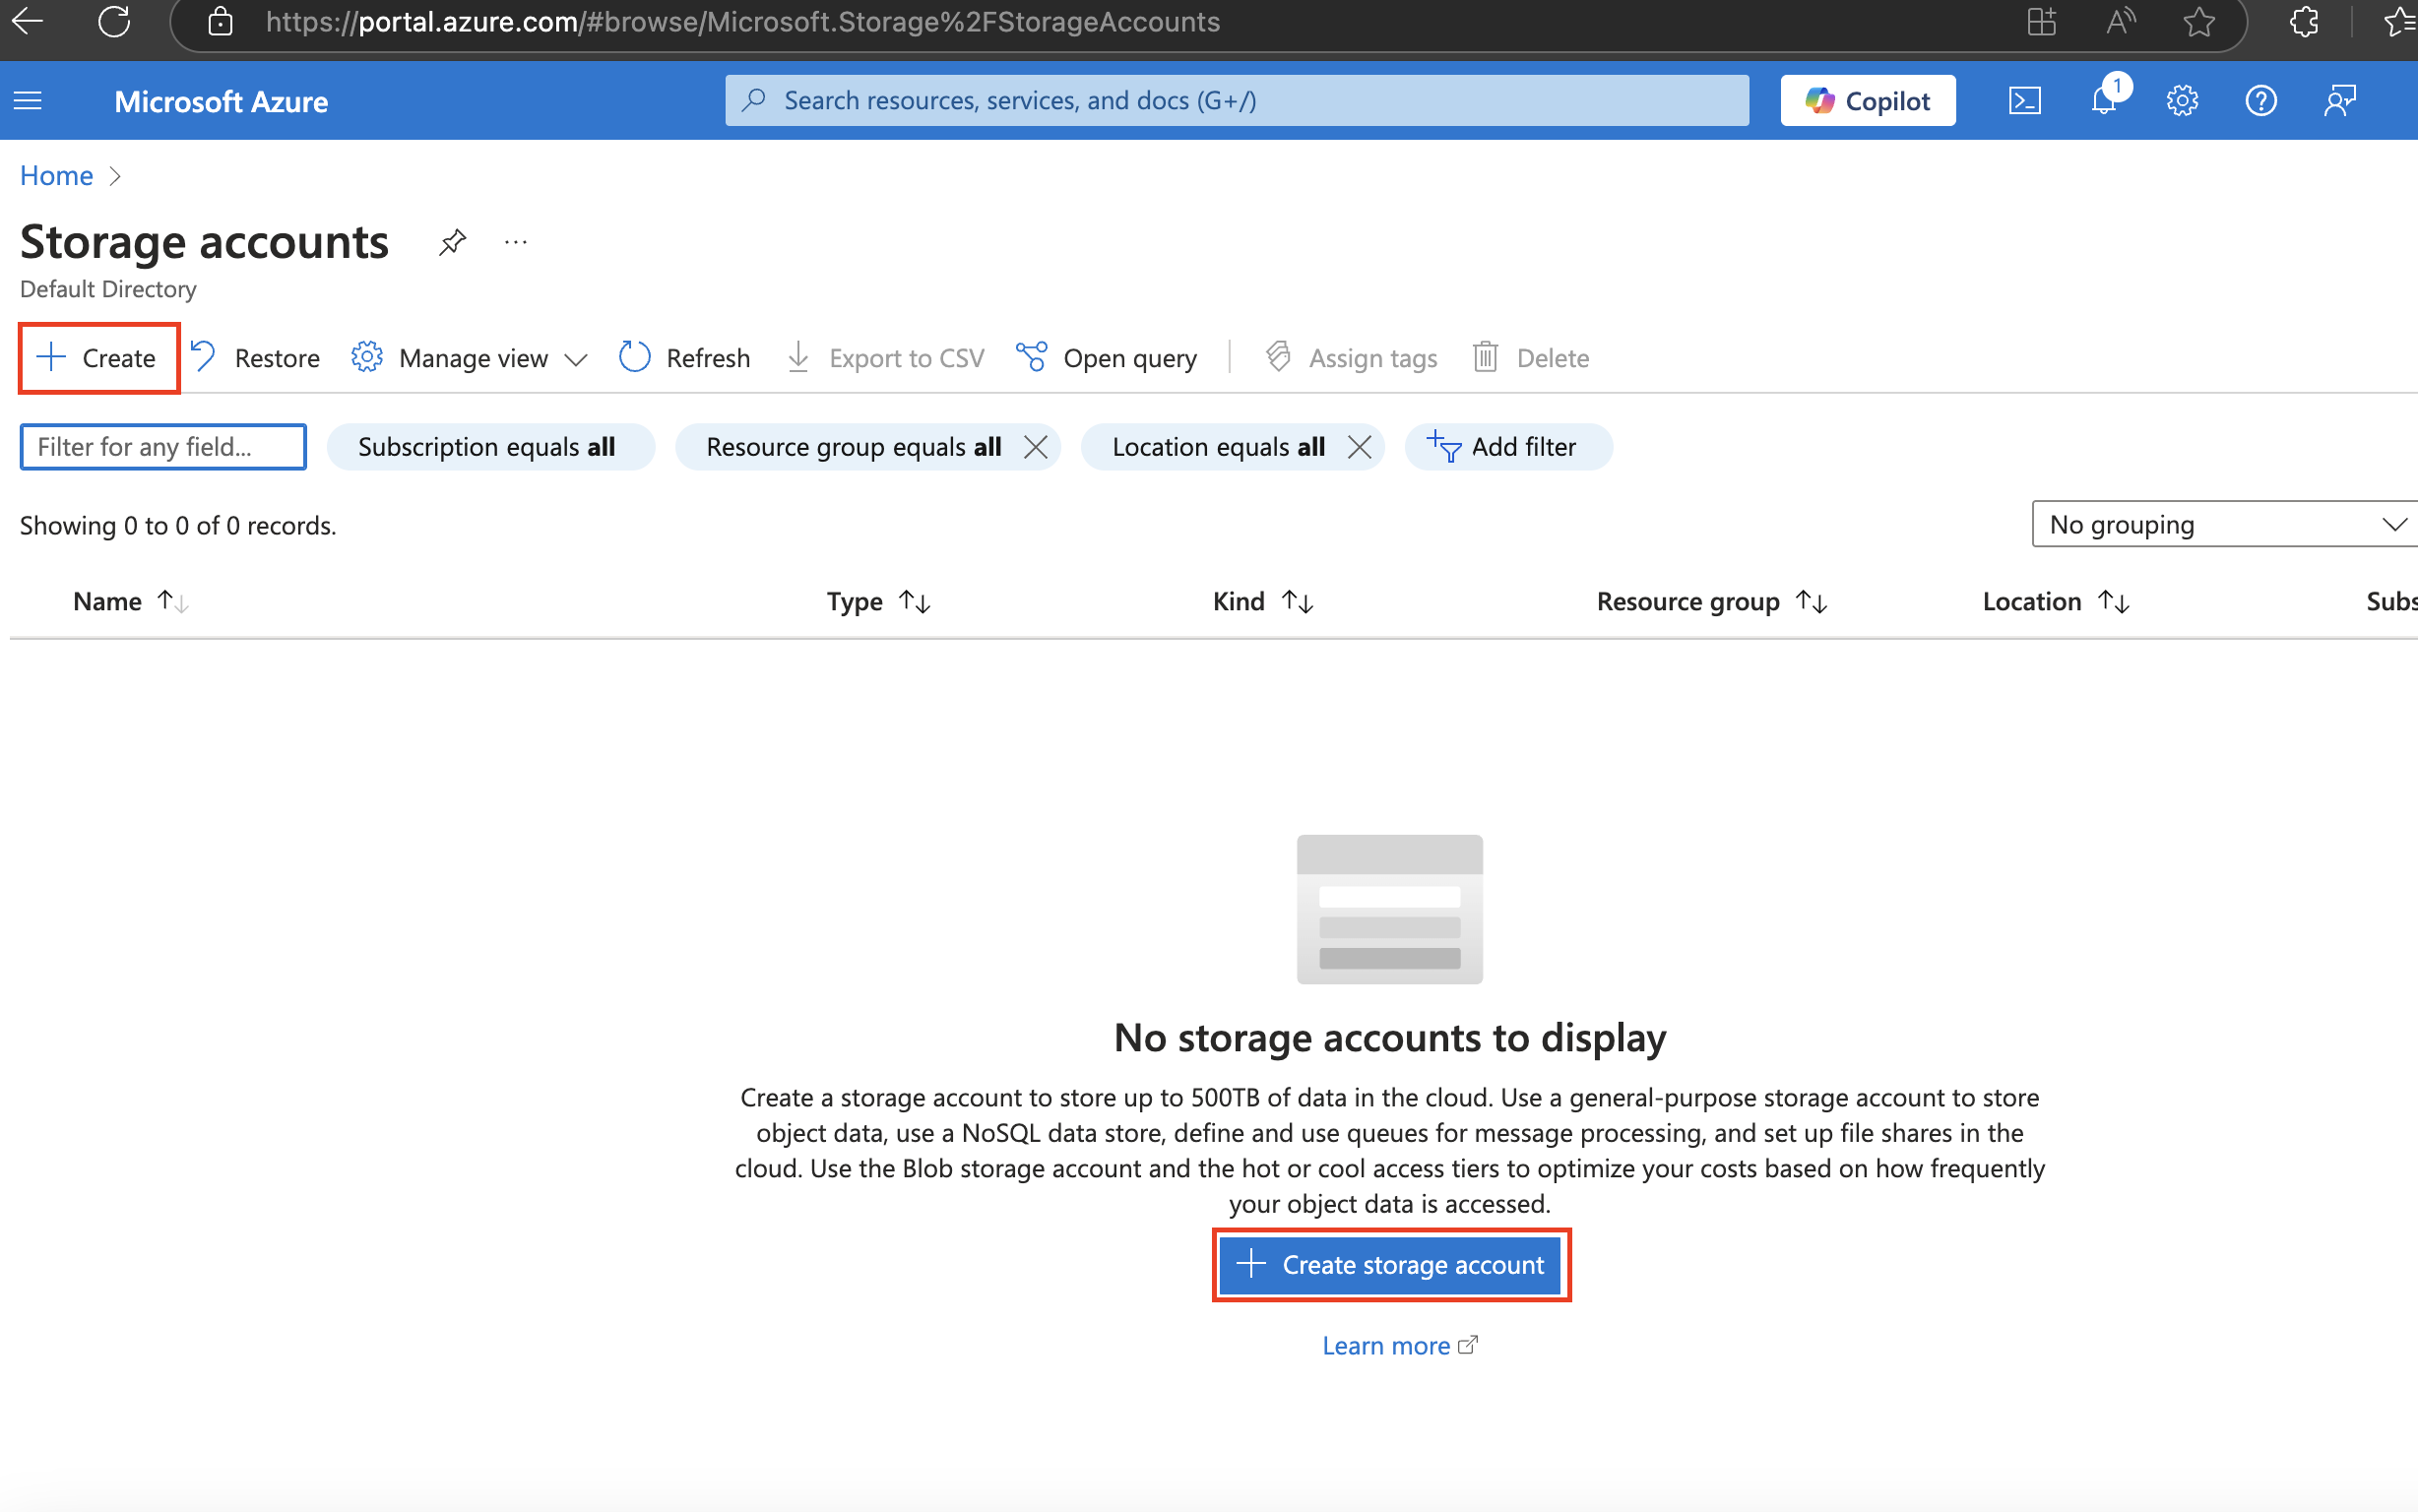
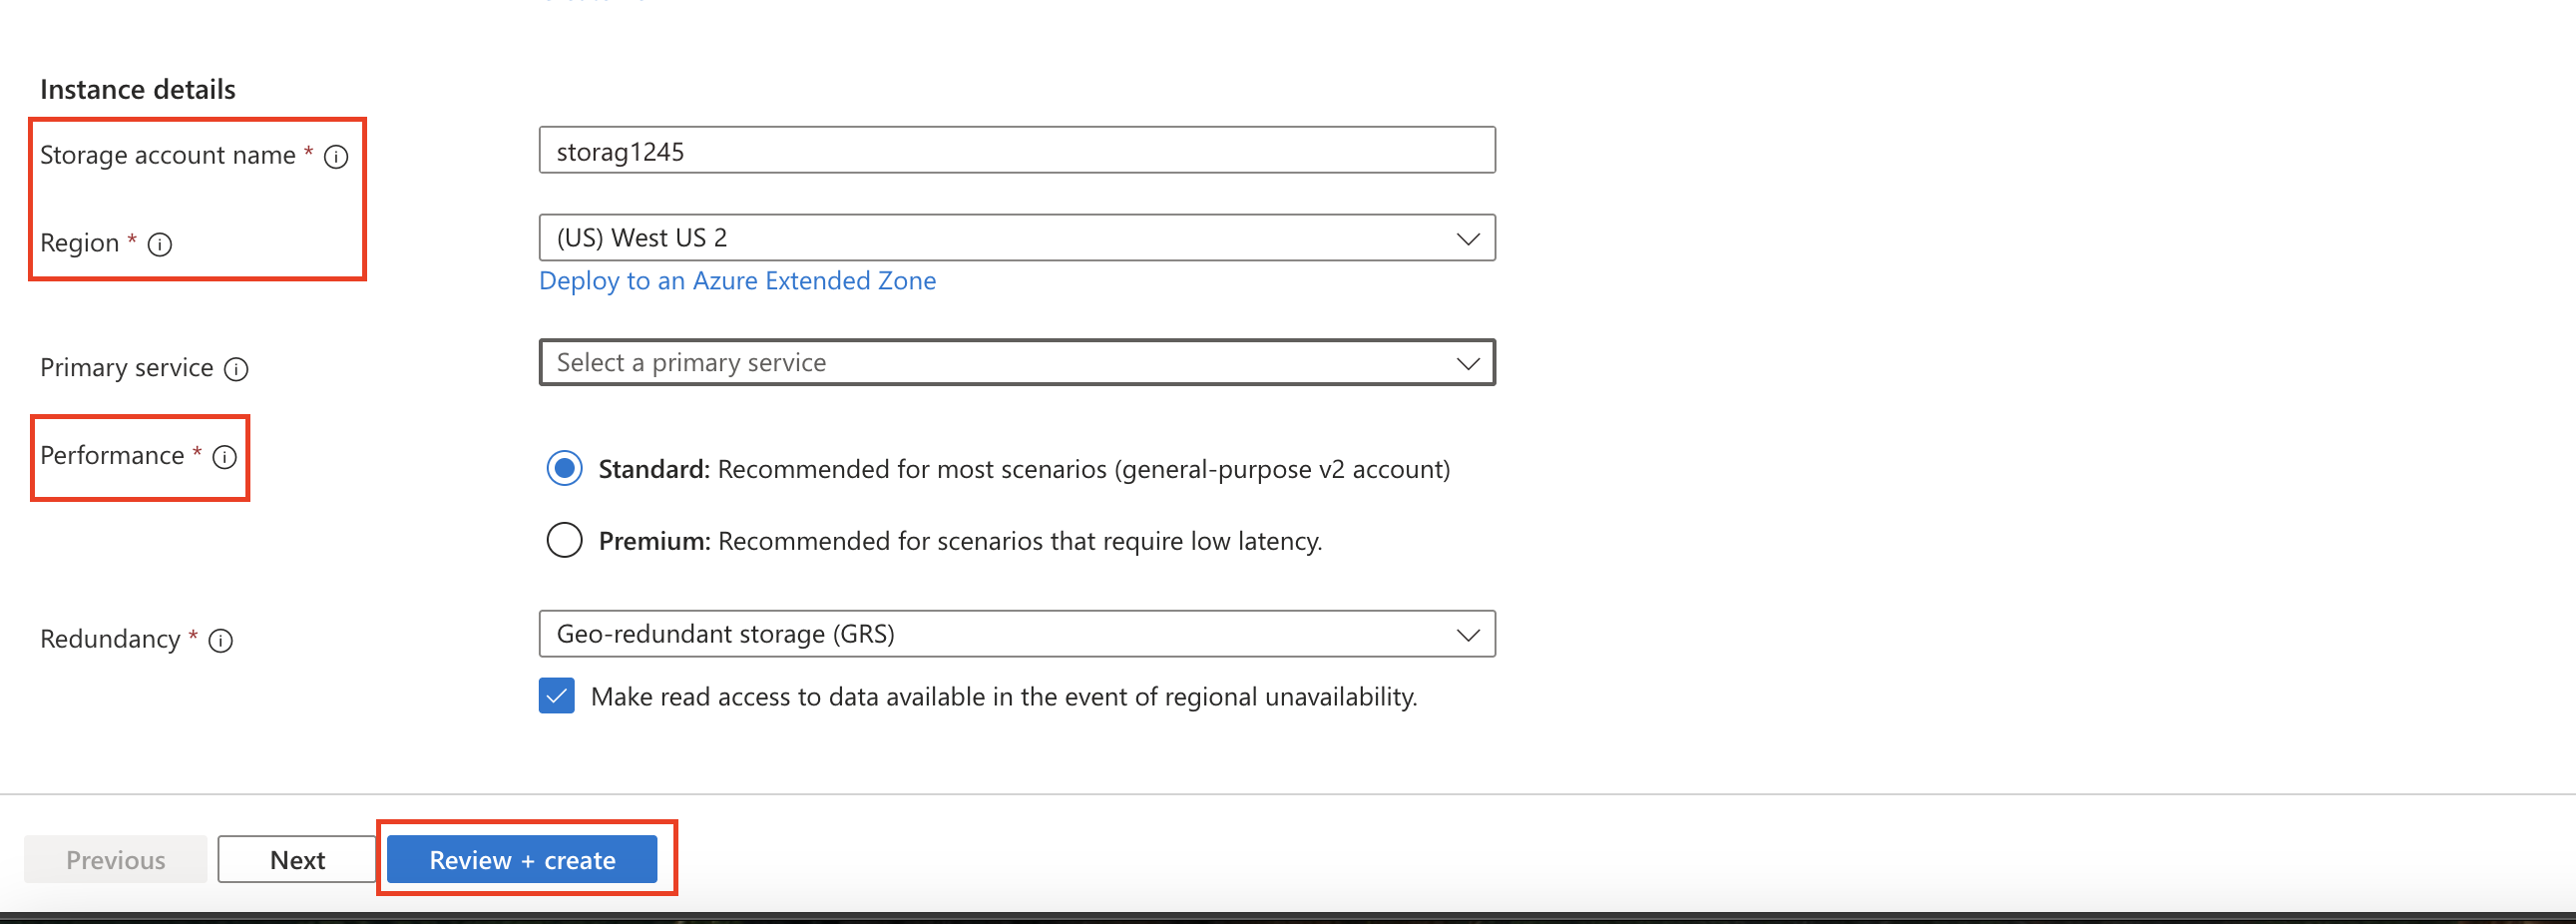
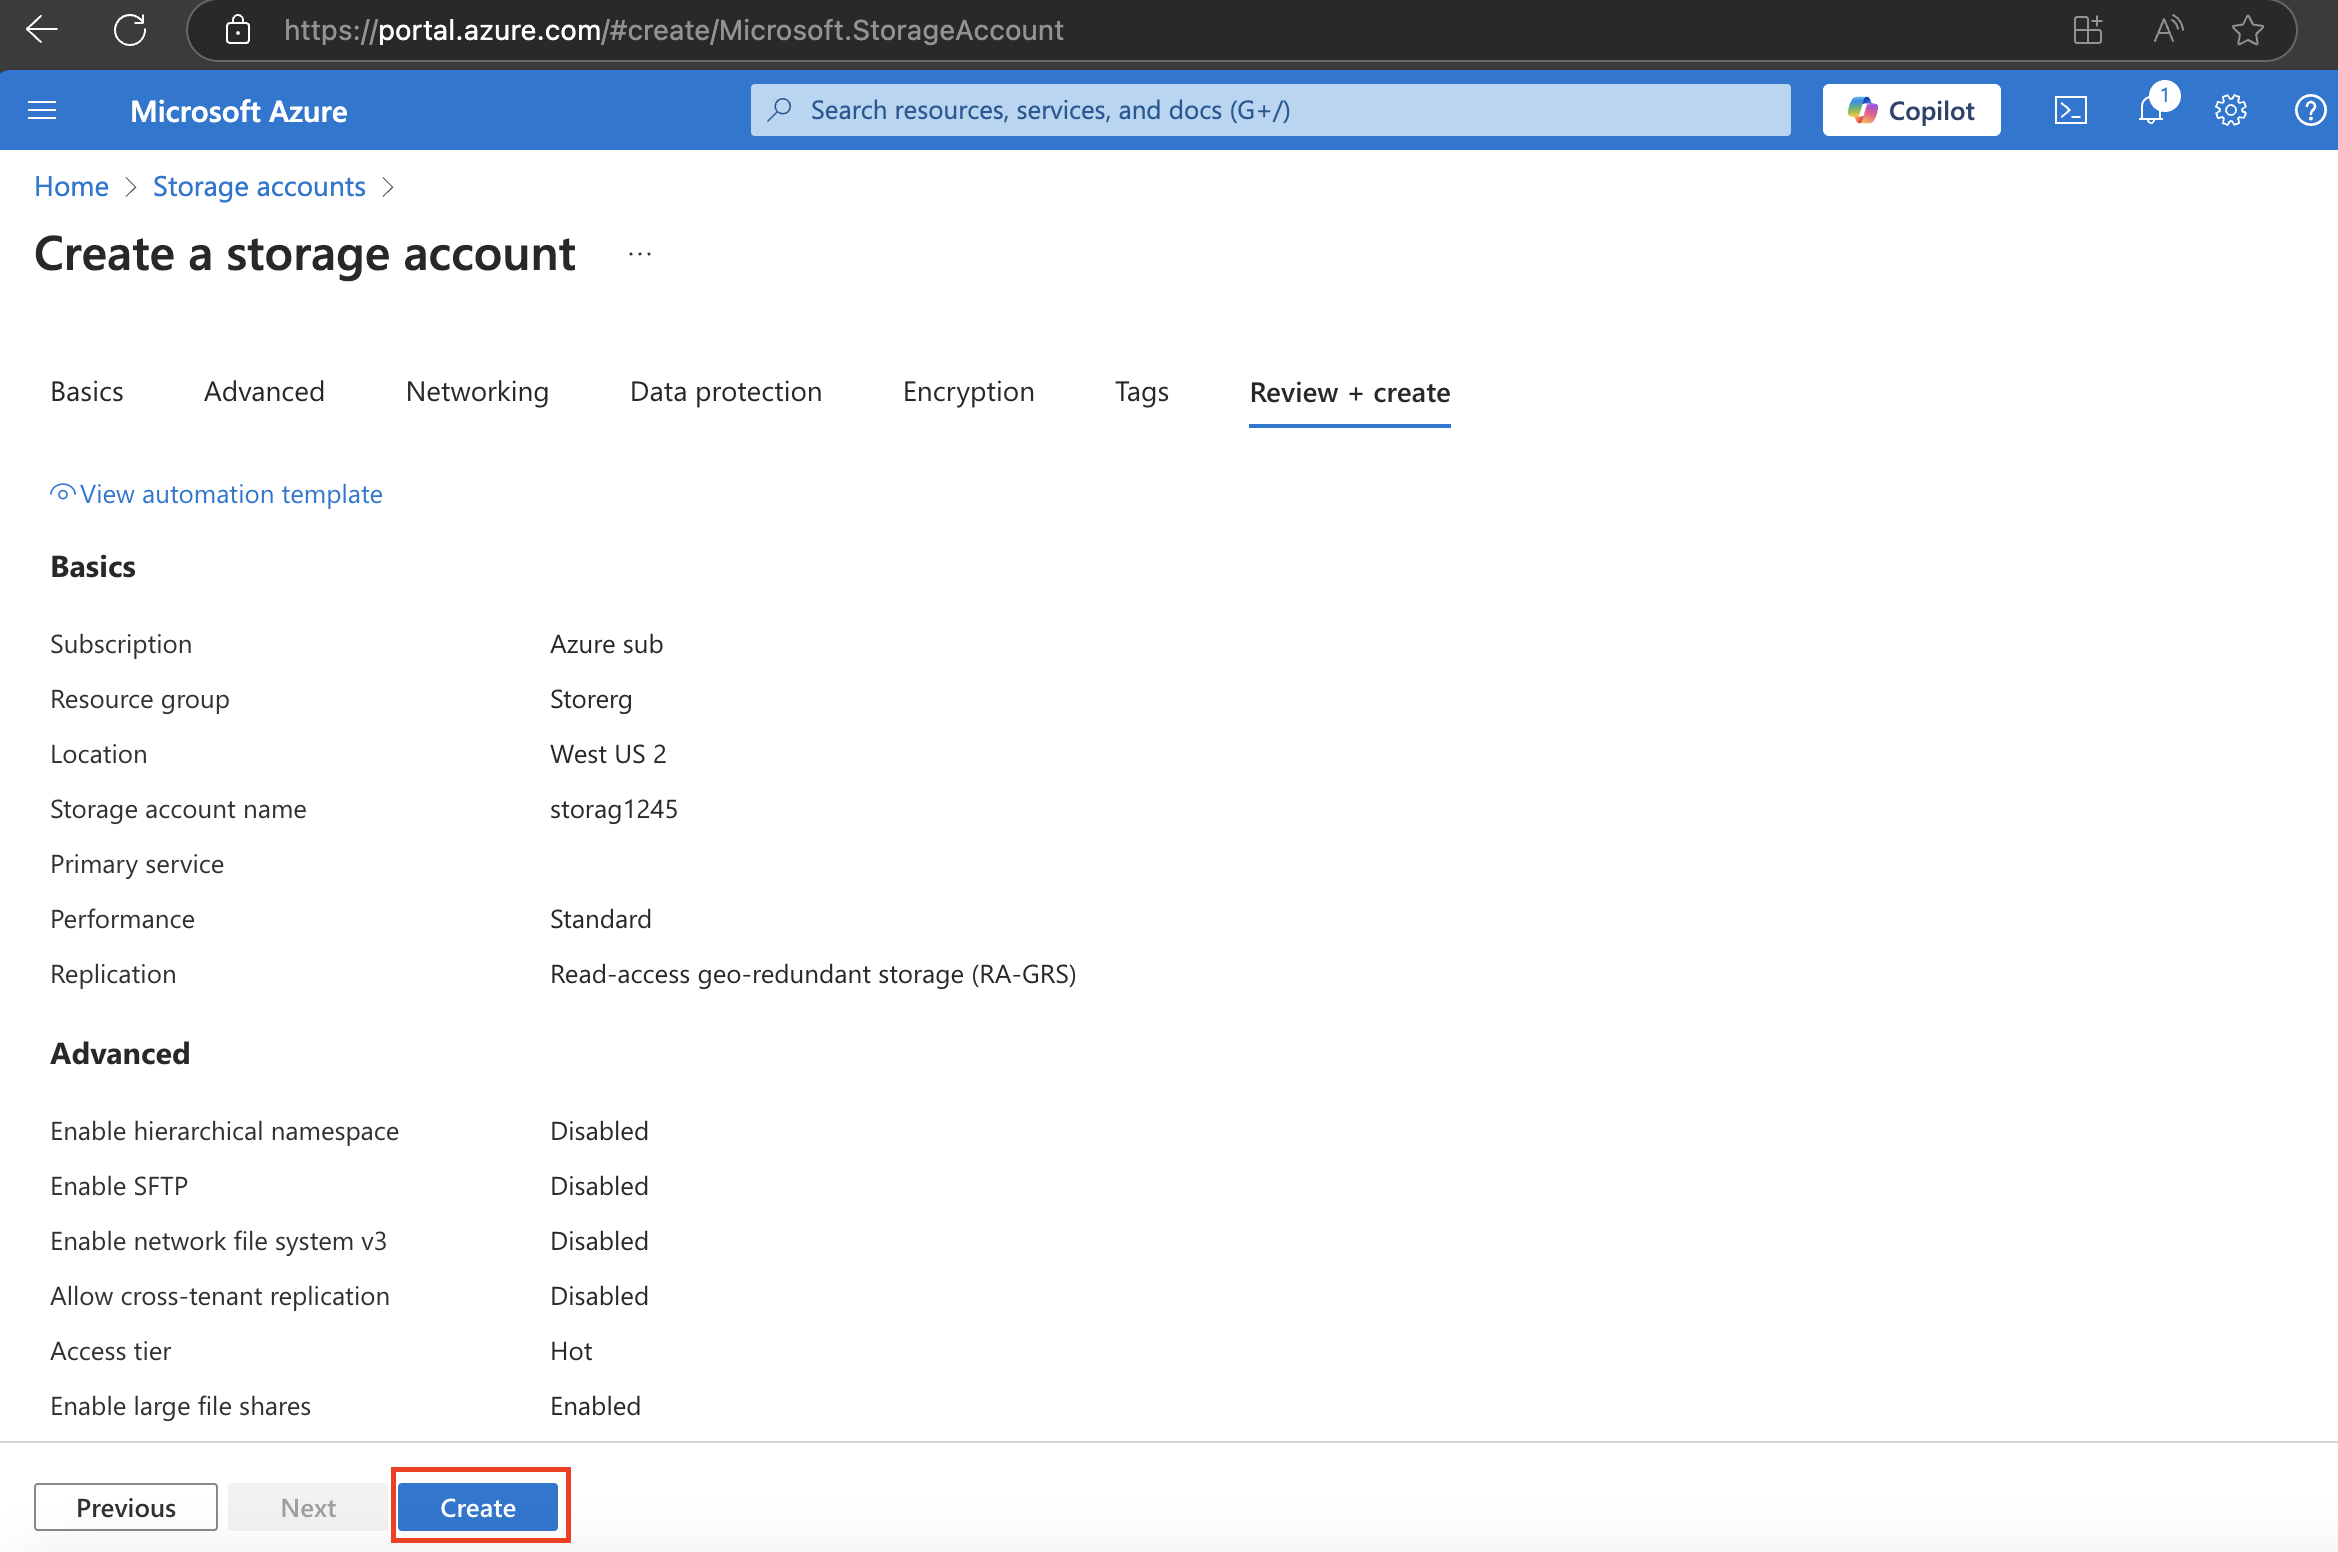
3.0. Create and deploy a storage account to support testing and training.
3.1. Navigate to the storage account session and click on create
3.2. Follow the following procedure
- On the Basics tab, select your Resource group.
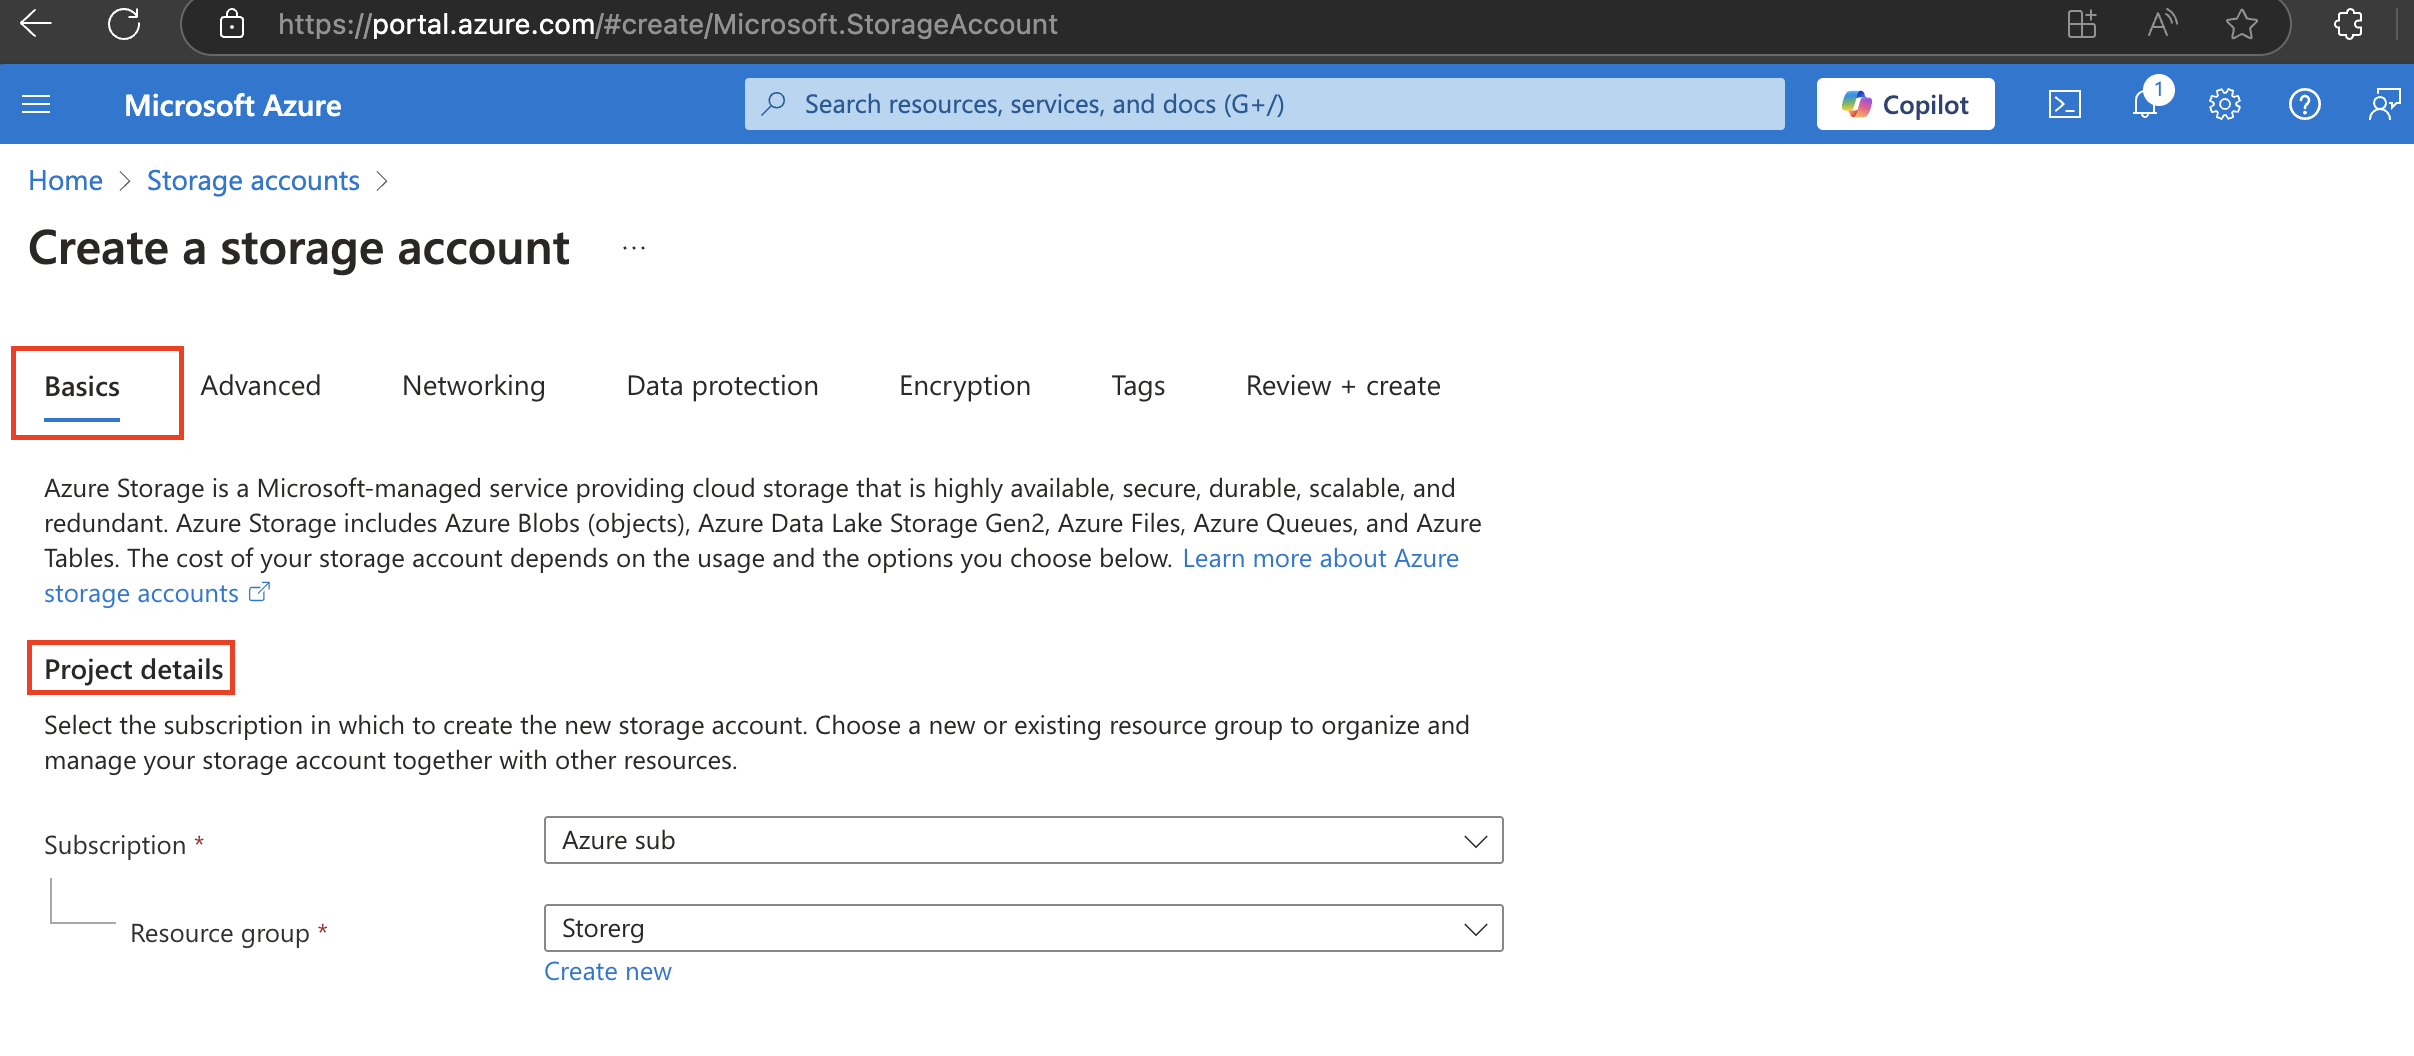
- Provide a Storage account name. The storage account name must be unique in Azure.
- Set the Performance to Standard.
- Select Review, and then Create.
Wait for the storage account to deploy and then Go to the resource
 Click on create
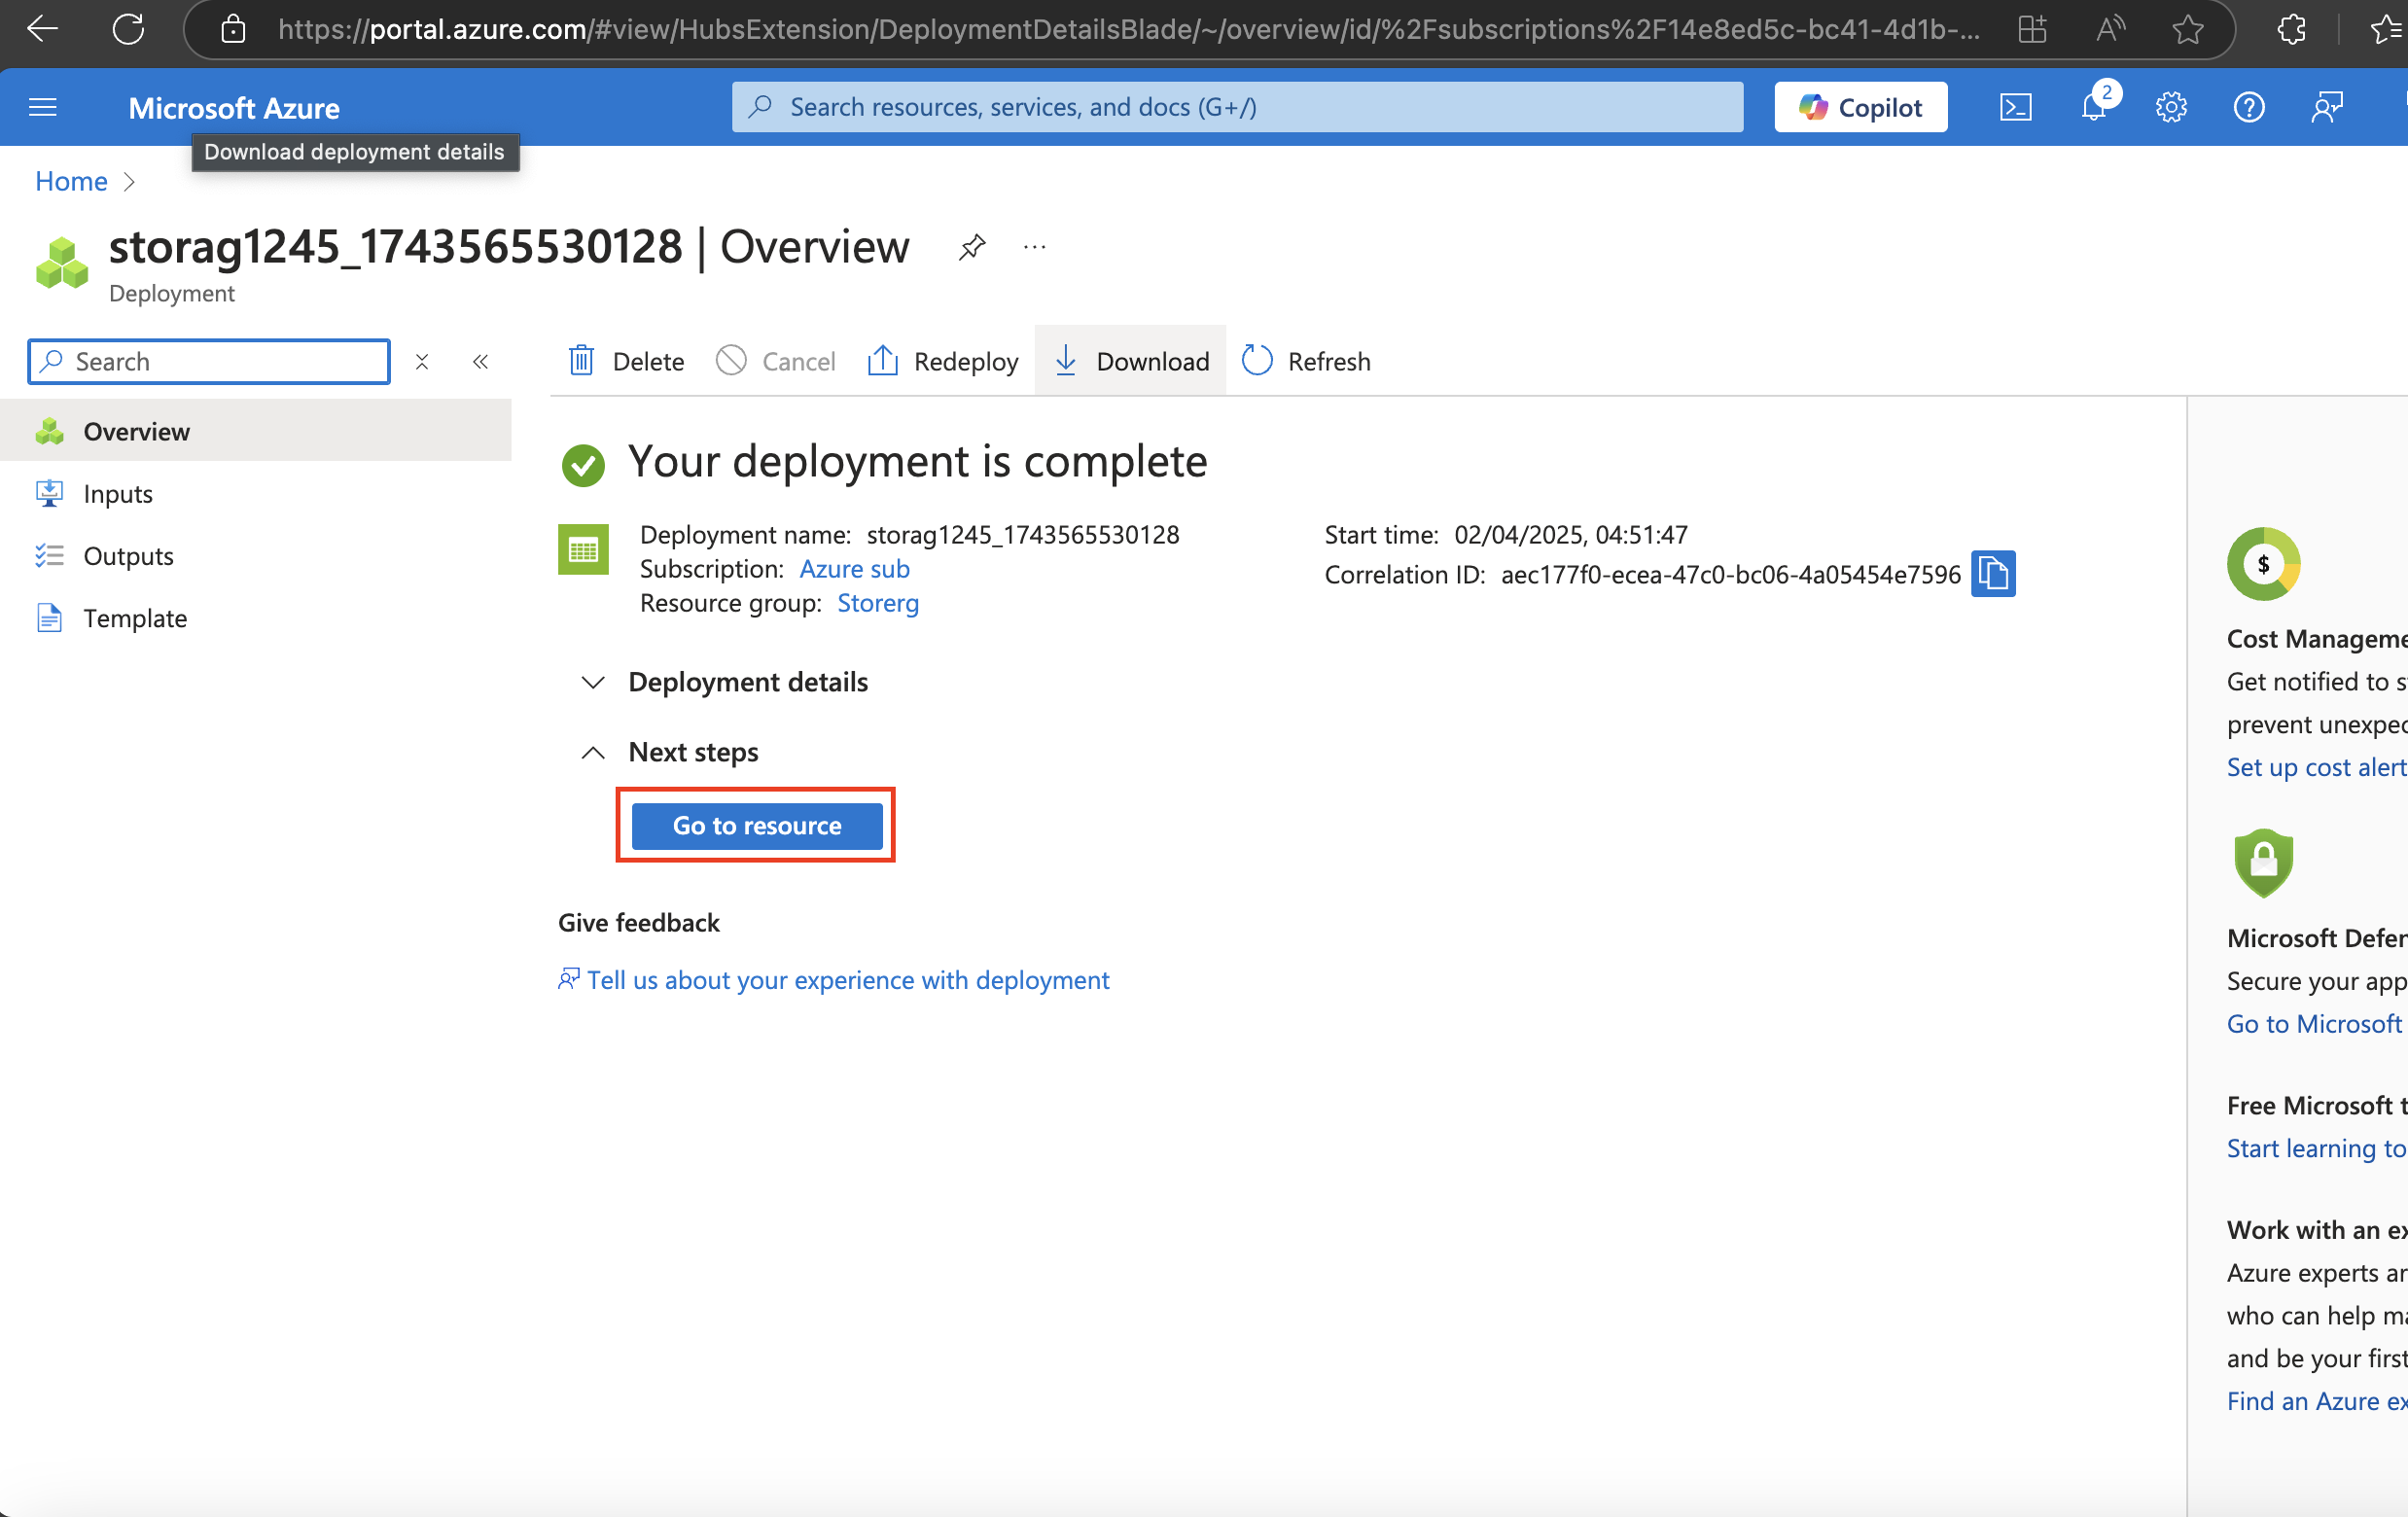 Go to resource once the storage account is deployed.
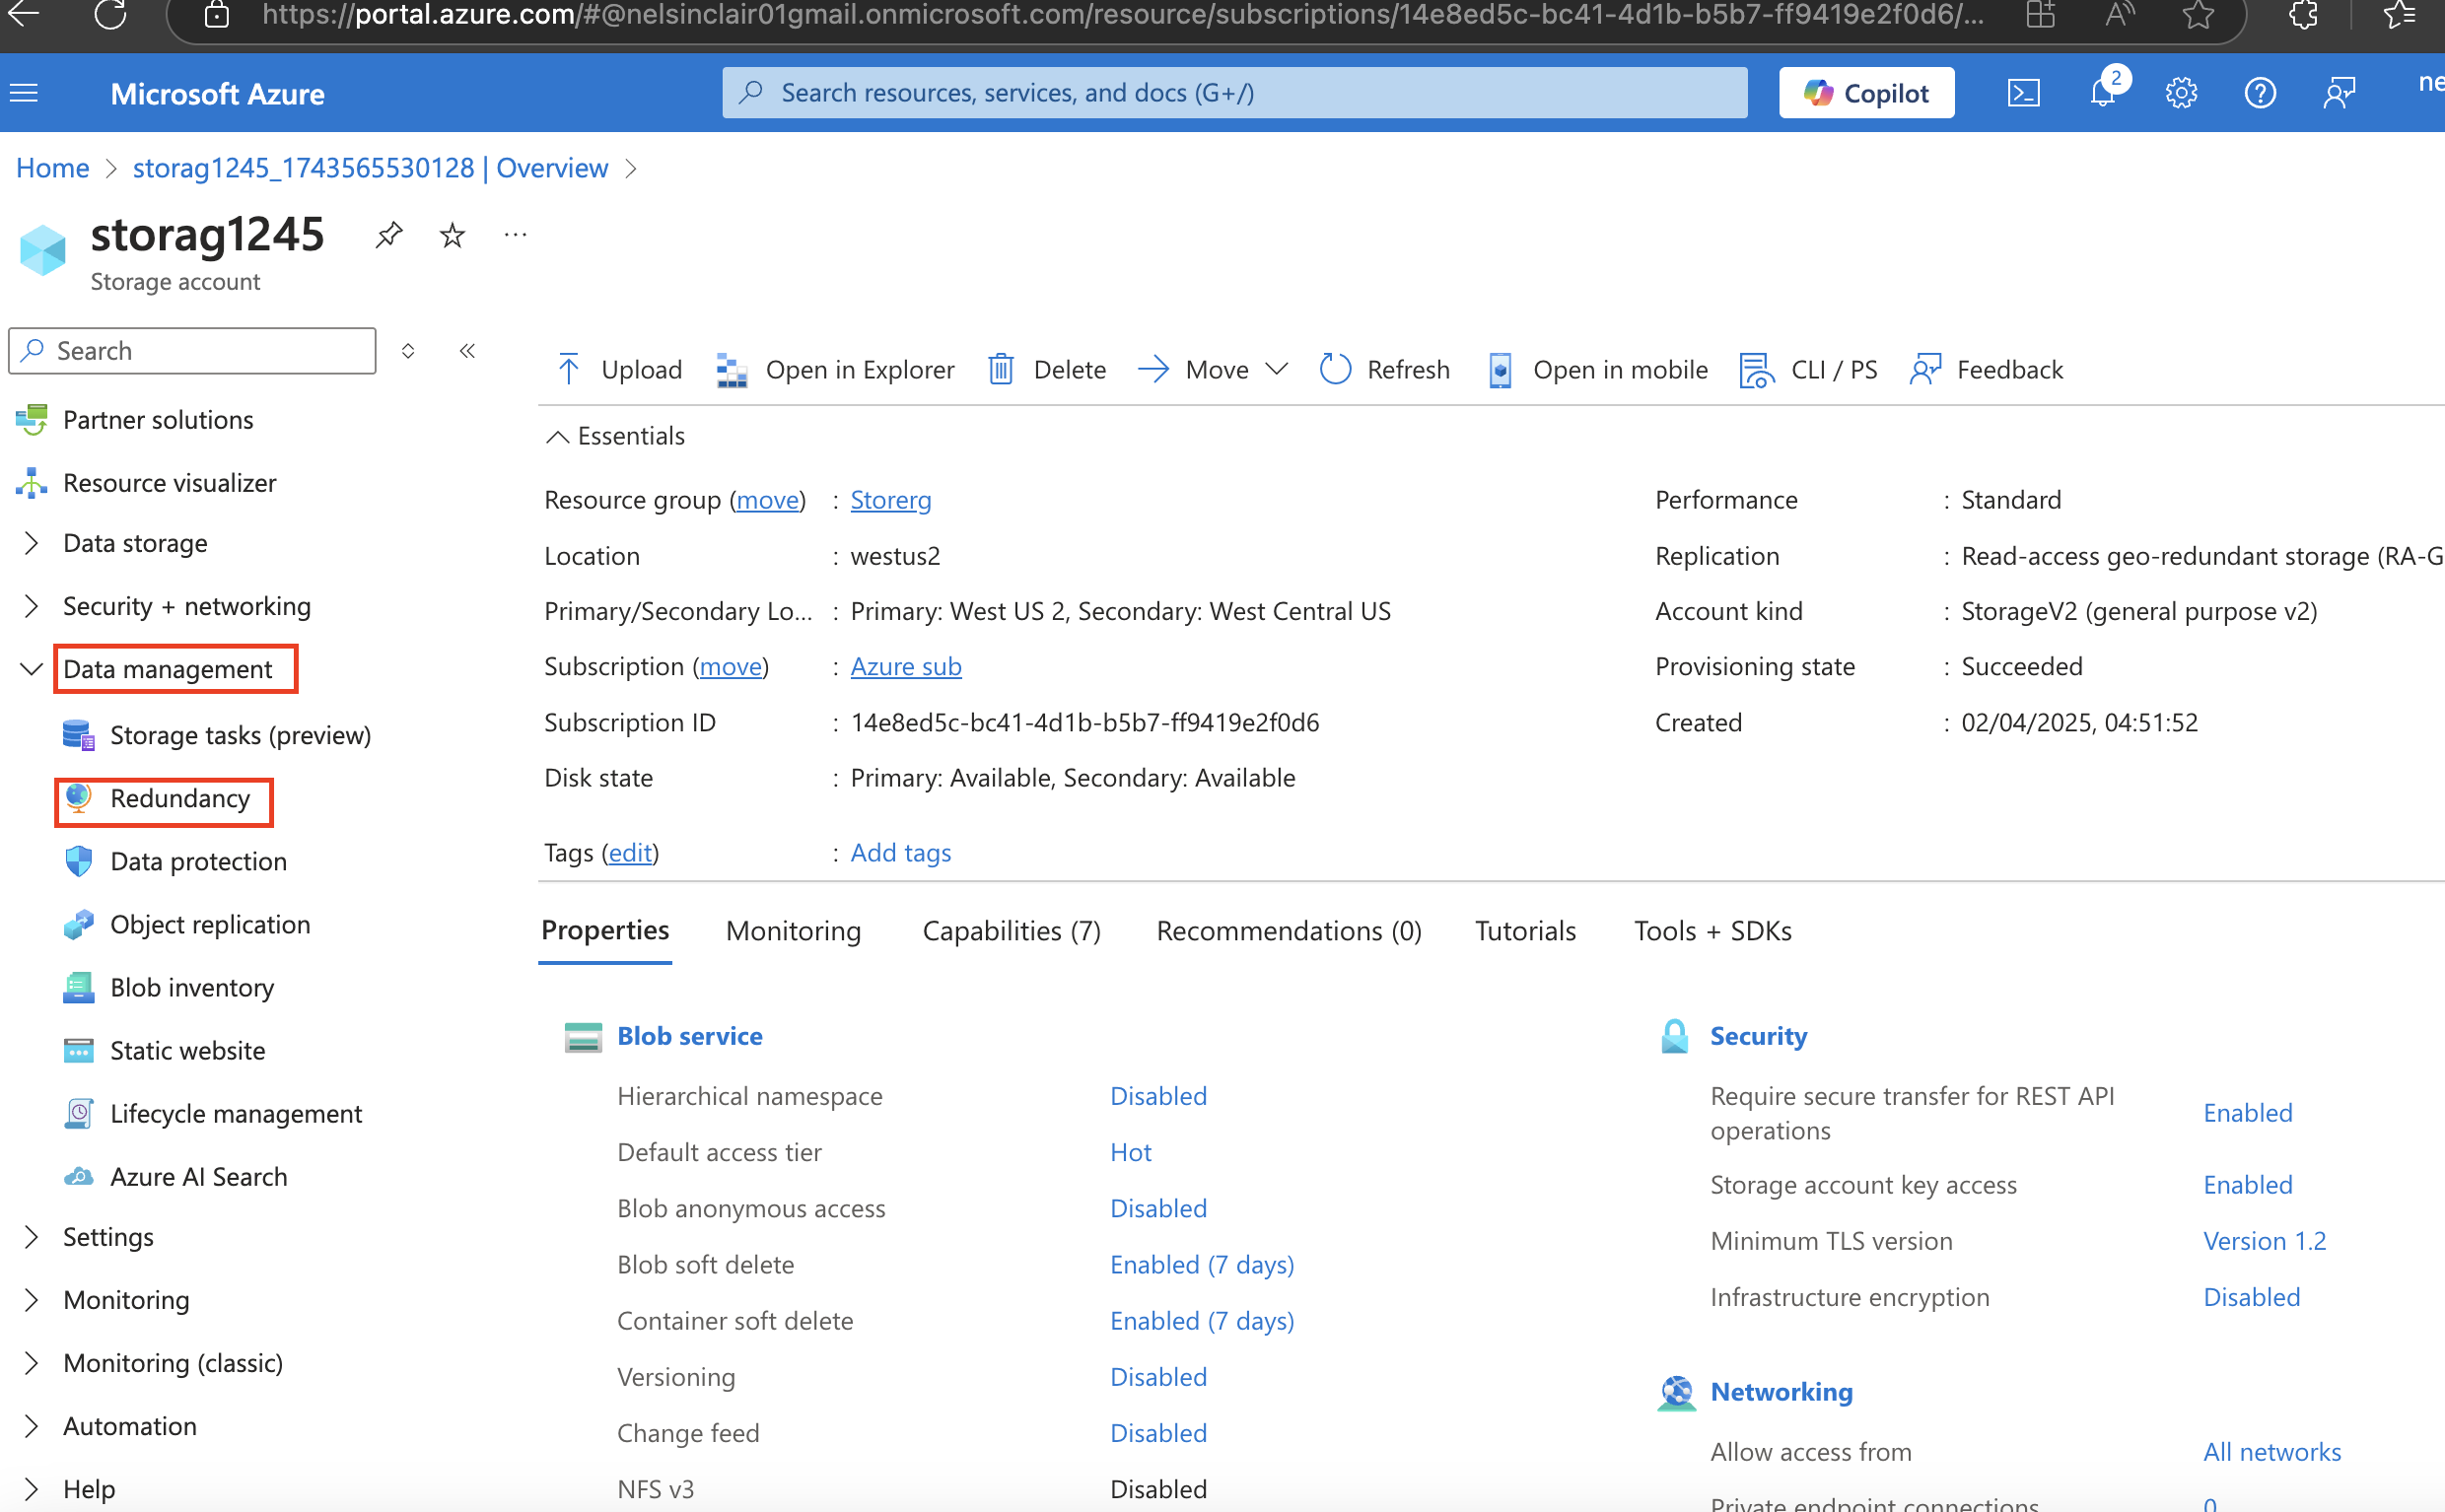
 4.0 Configure simple settings in the storage account.
4.1. In your storage account, in the Data management section, select the Redundancy blade.
4.0 Configure simple settings in the storage account.
4.1. In your storage account, in the Data management section, select the Redundancy blade.
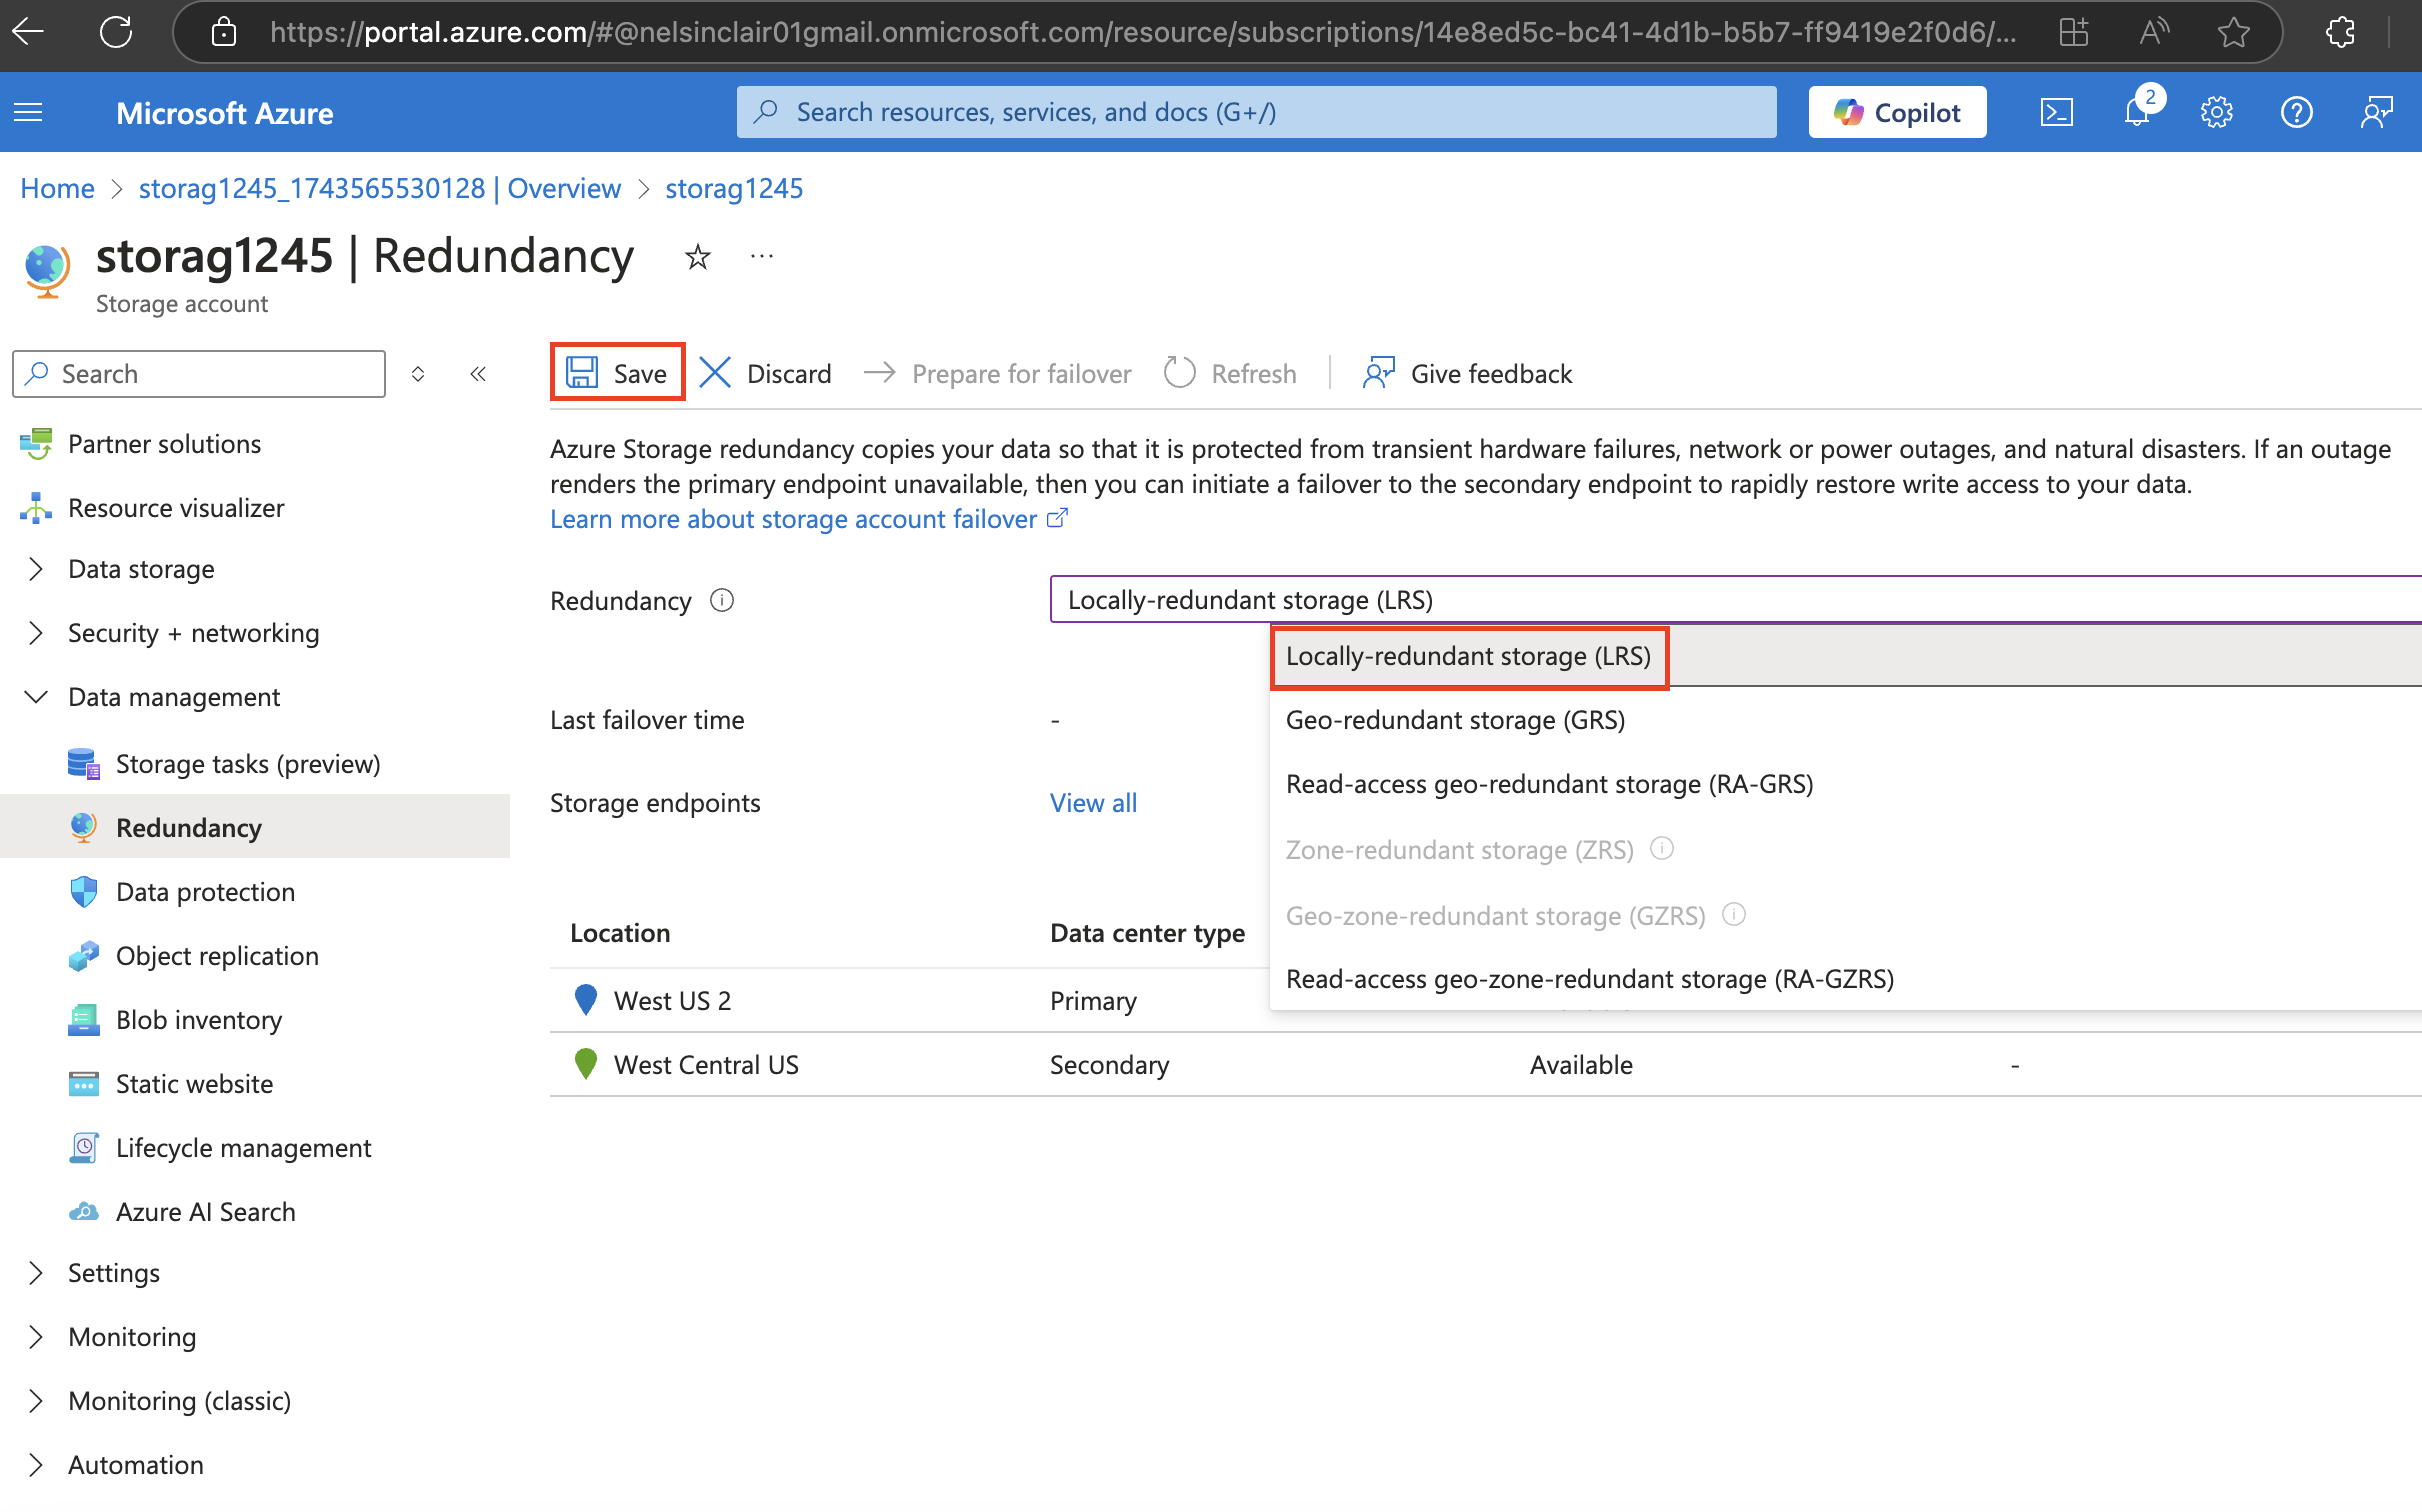
 Select Locally-redundant storage (LRS) in the Redundancy drop-down.
Be sure to Save your changes.
Select Locally-redundant storage (LRS) in the Redundancy drop-down.
Be sure to Save your changes.
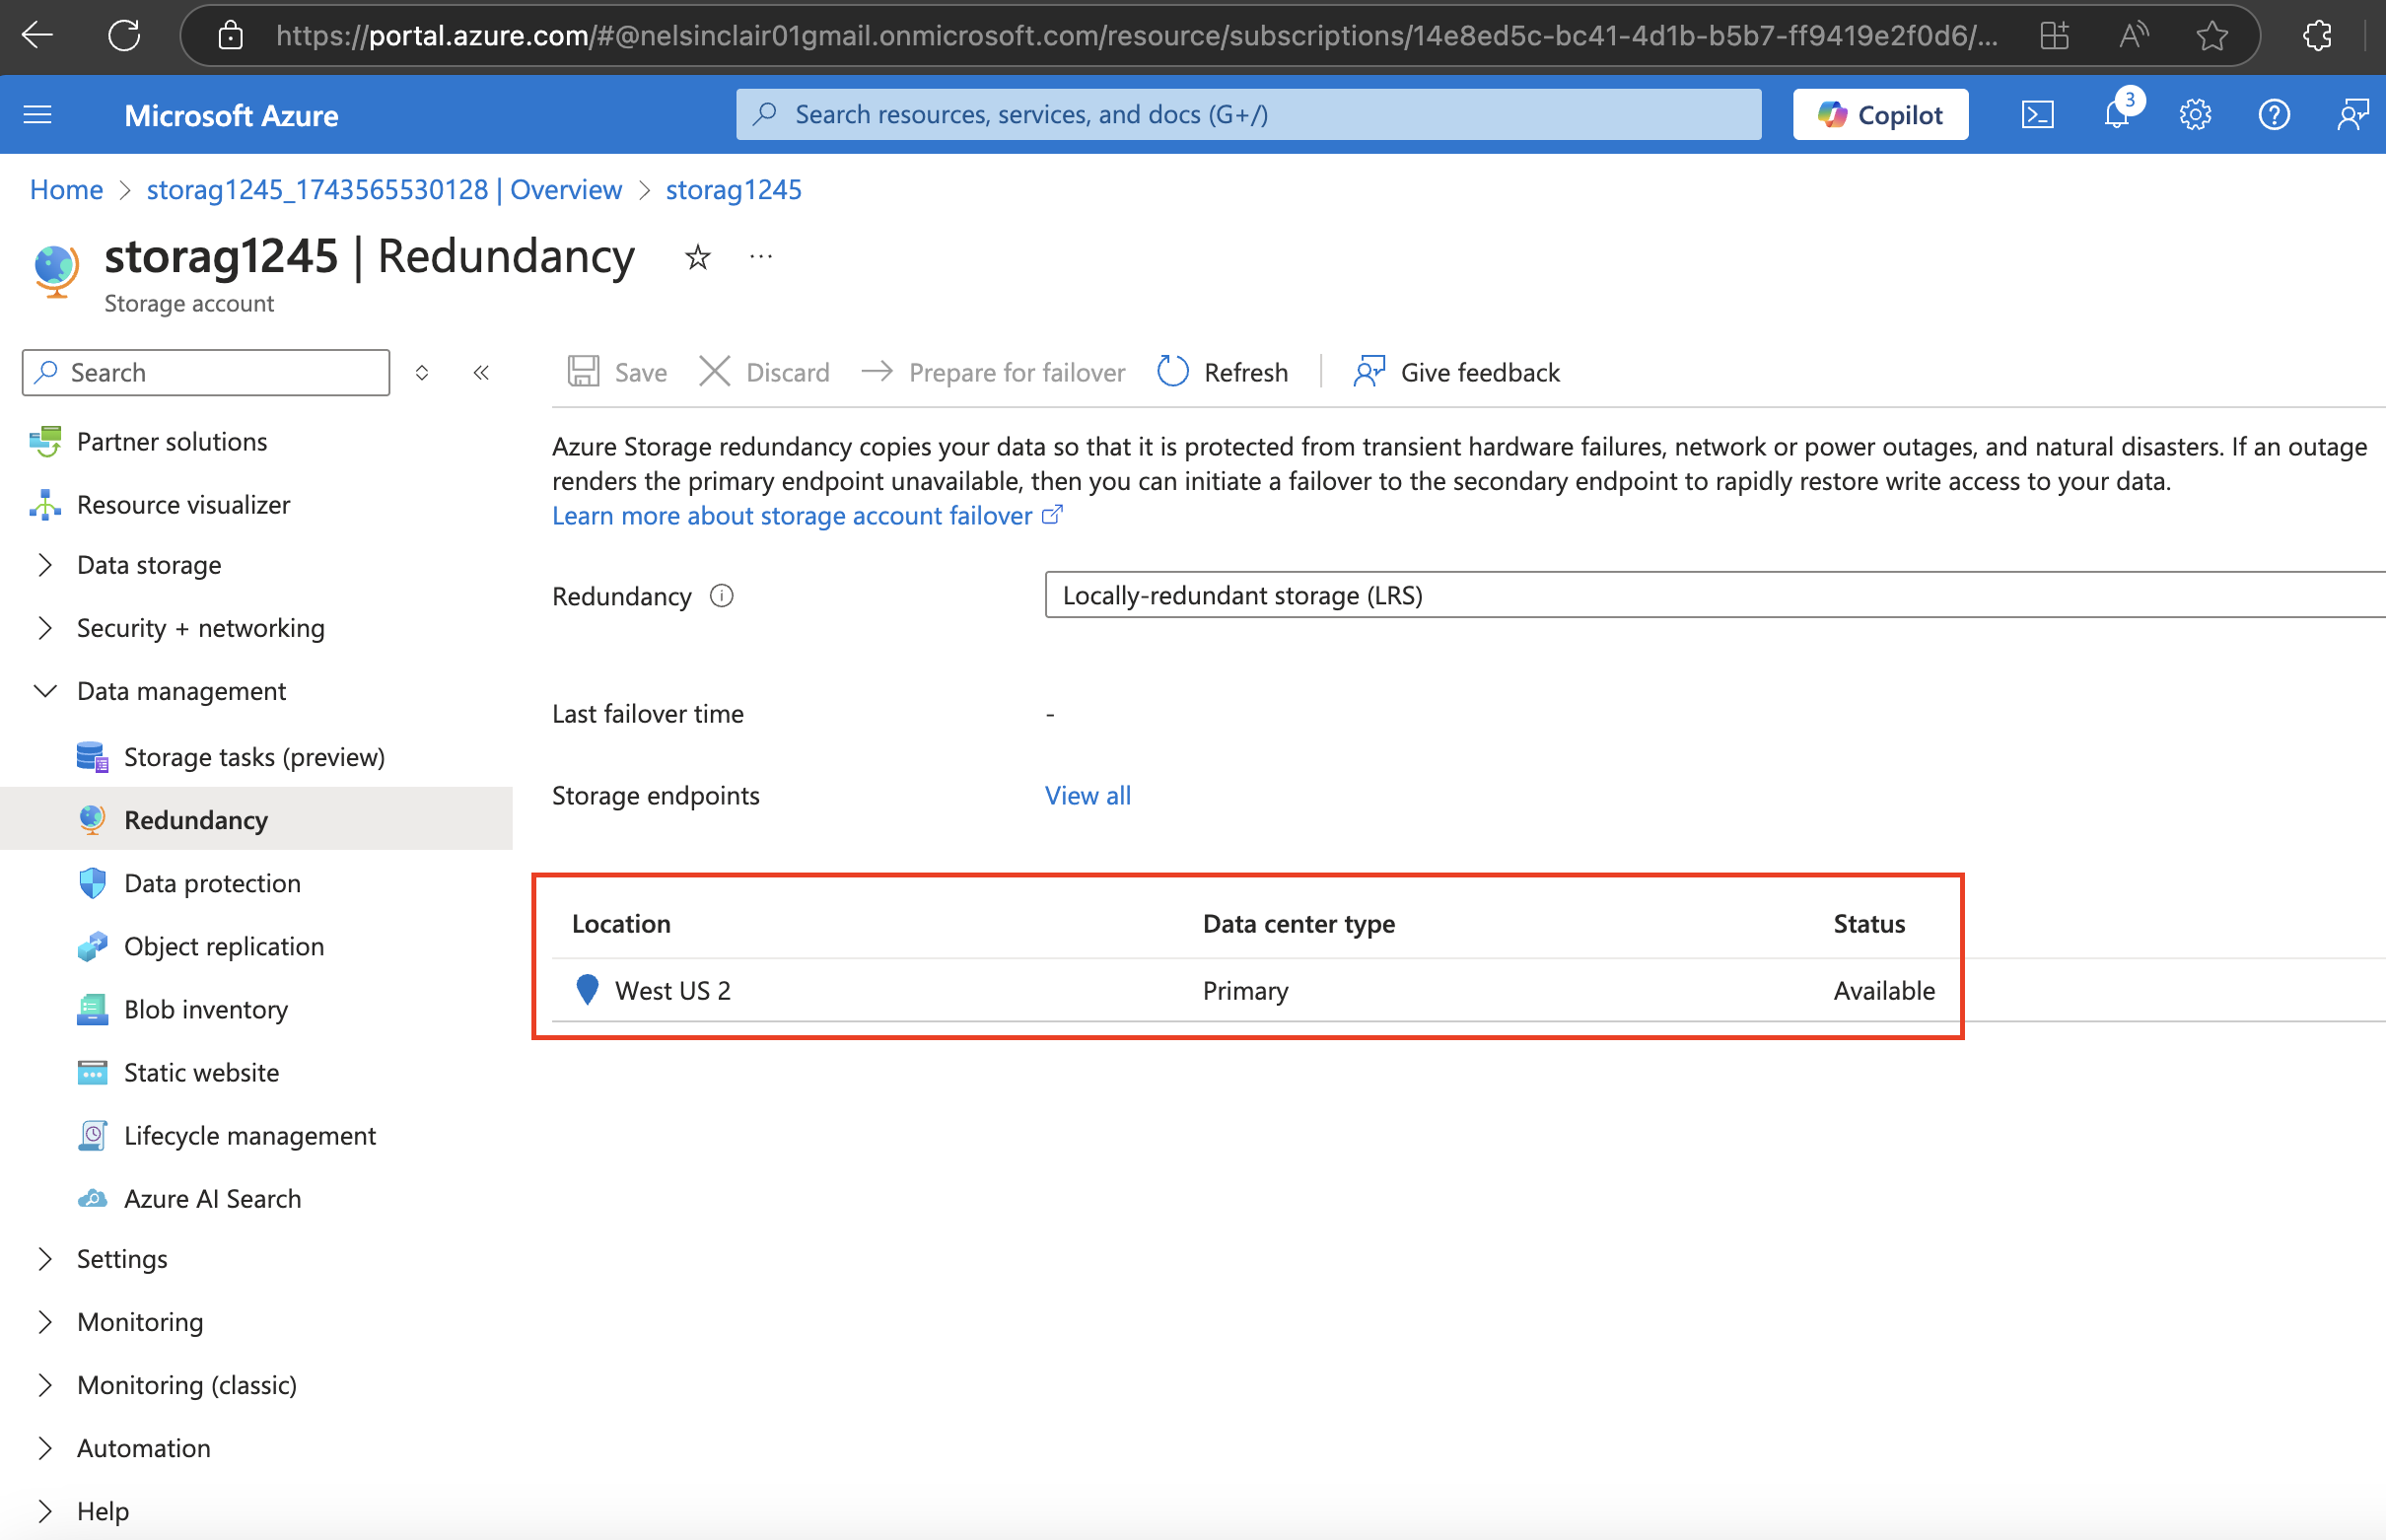
 Refresh the page and notice the content only exists in the primary location.
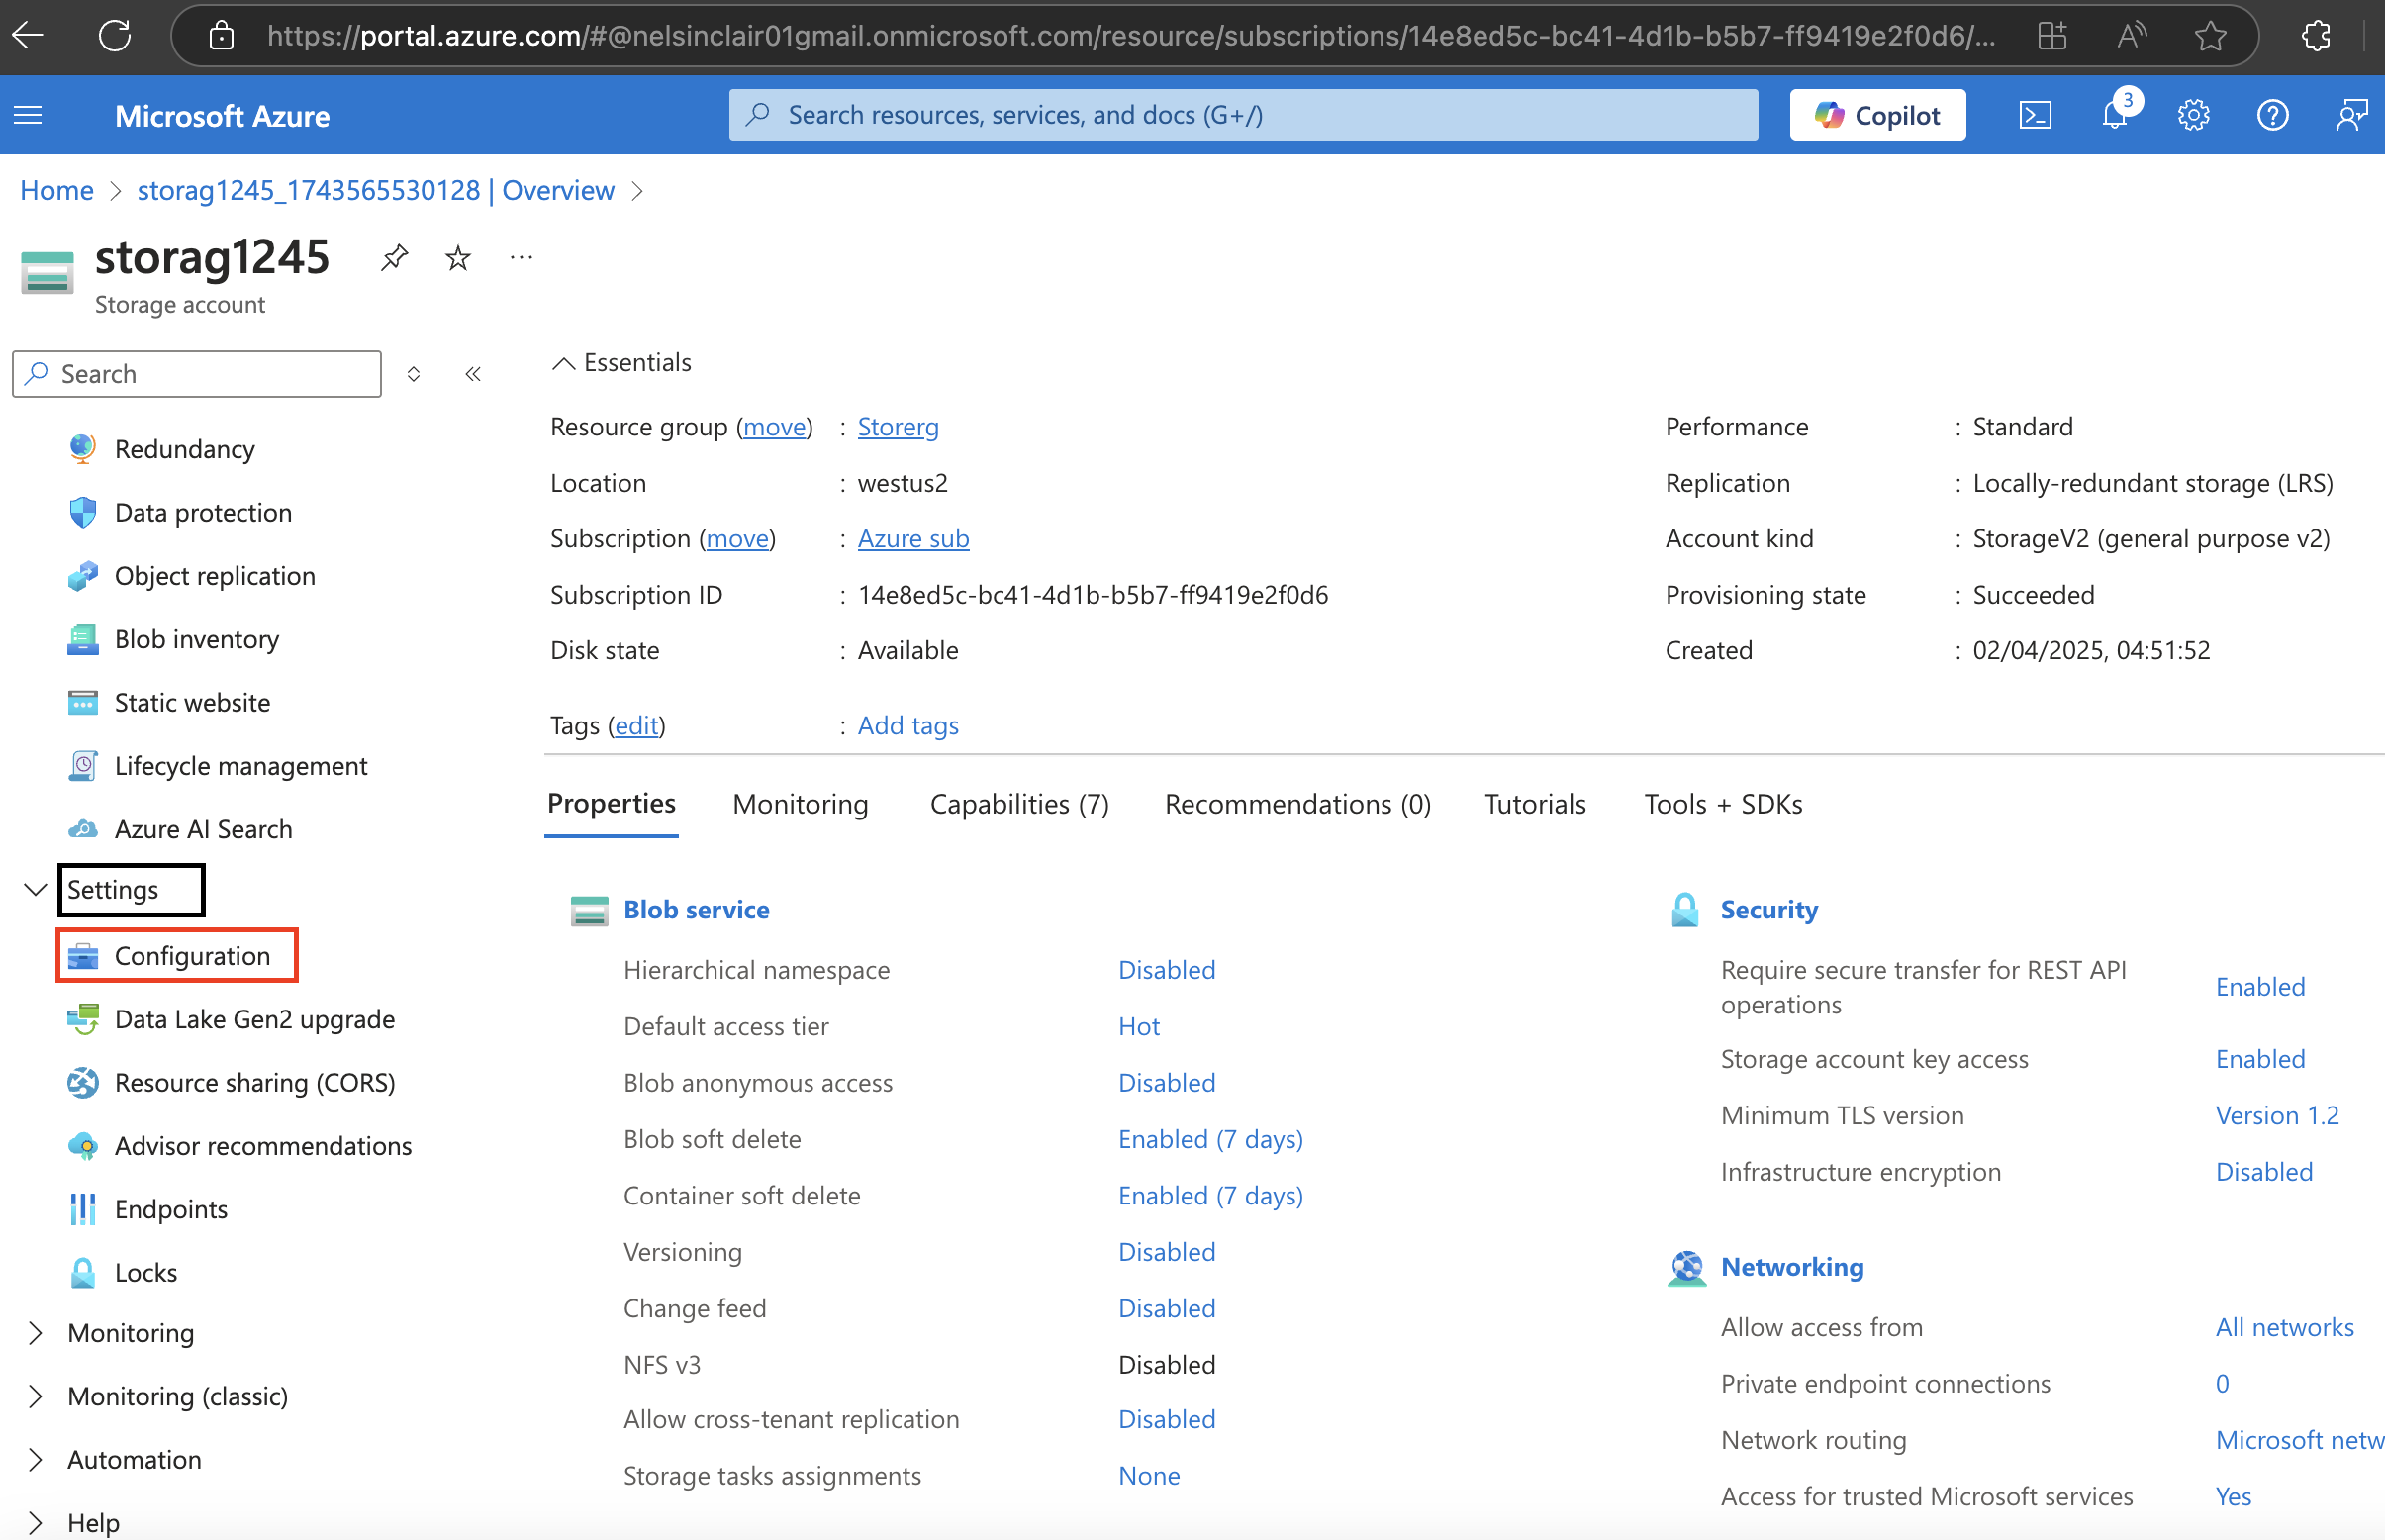
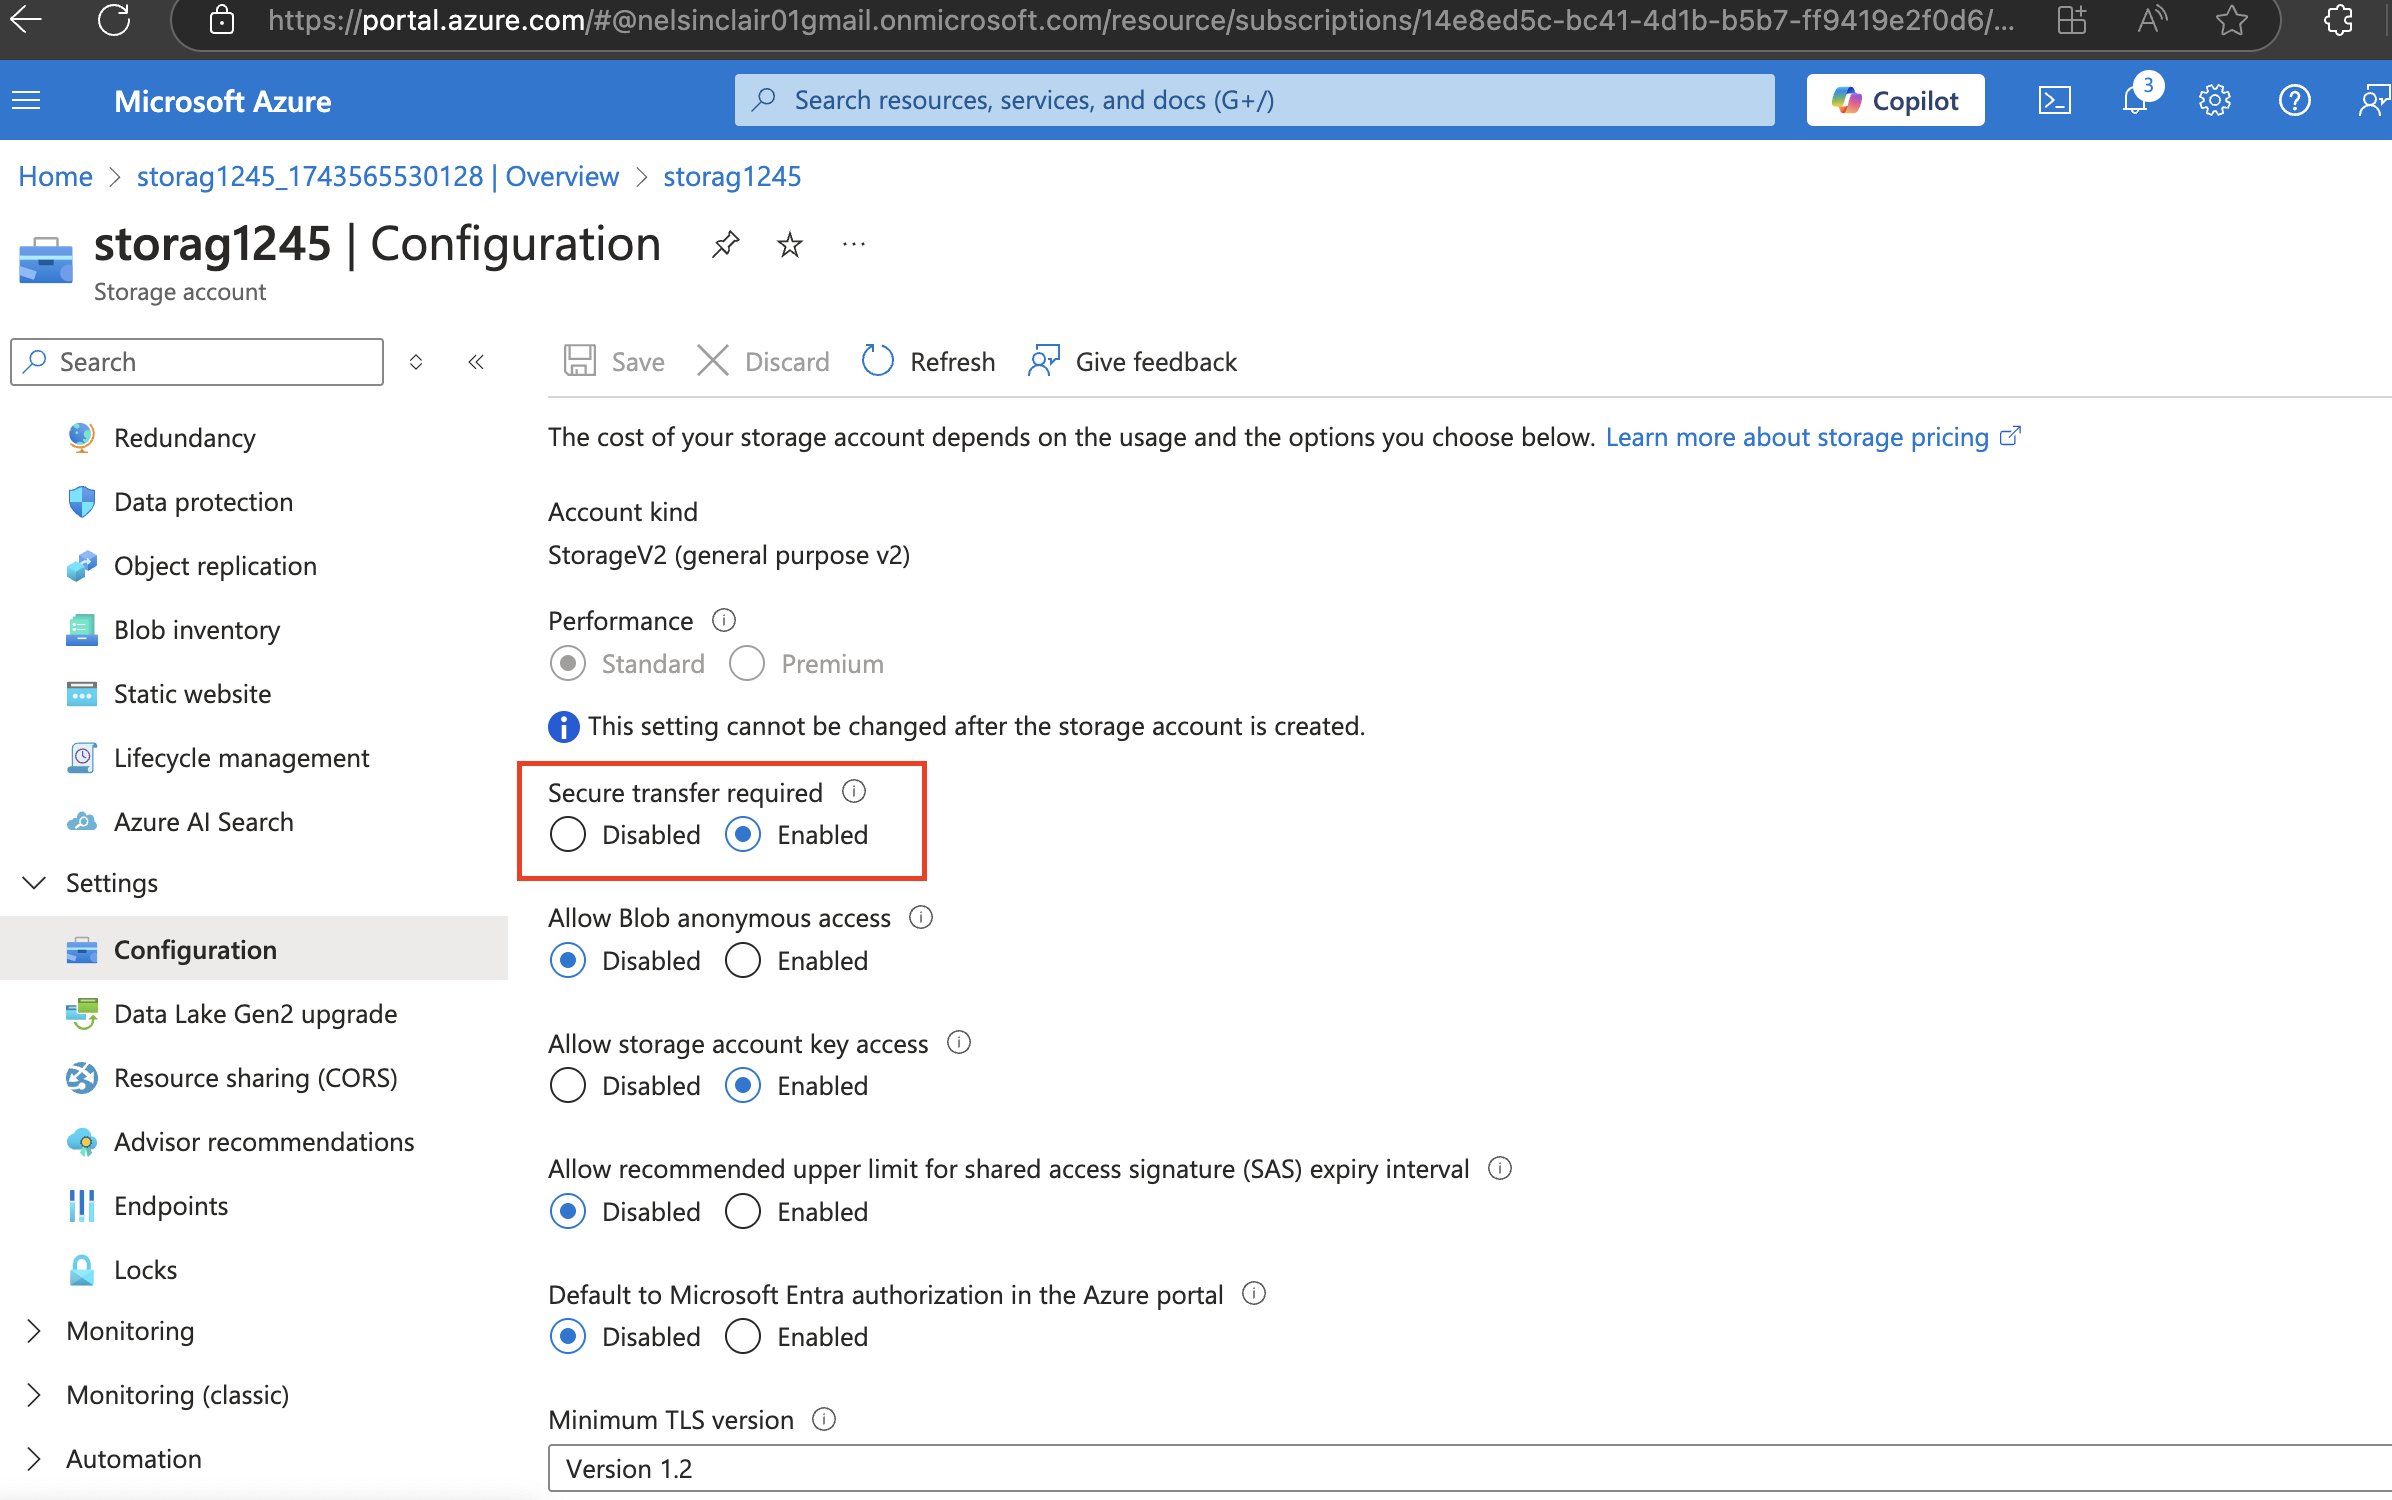
 4.2. The storage account should only accept requests from secure connections.
In the Settings section, select the Configuration blade.
4.2. The storage account should only accept requests from secure connections.
In the Settings section, select the Configuration blade.
 Ensure the Secure transfer required is Enabled.
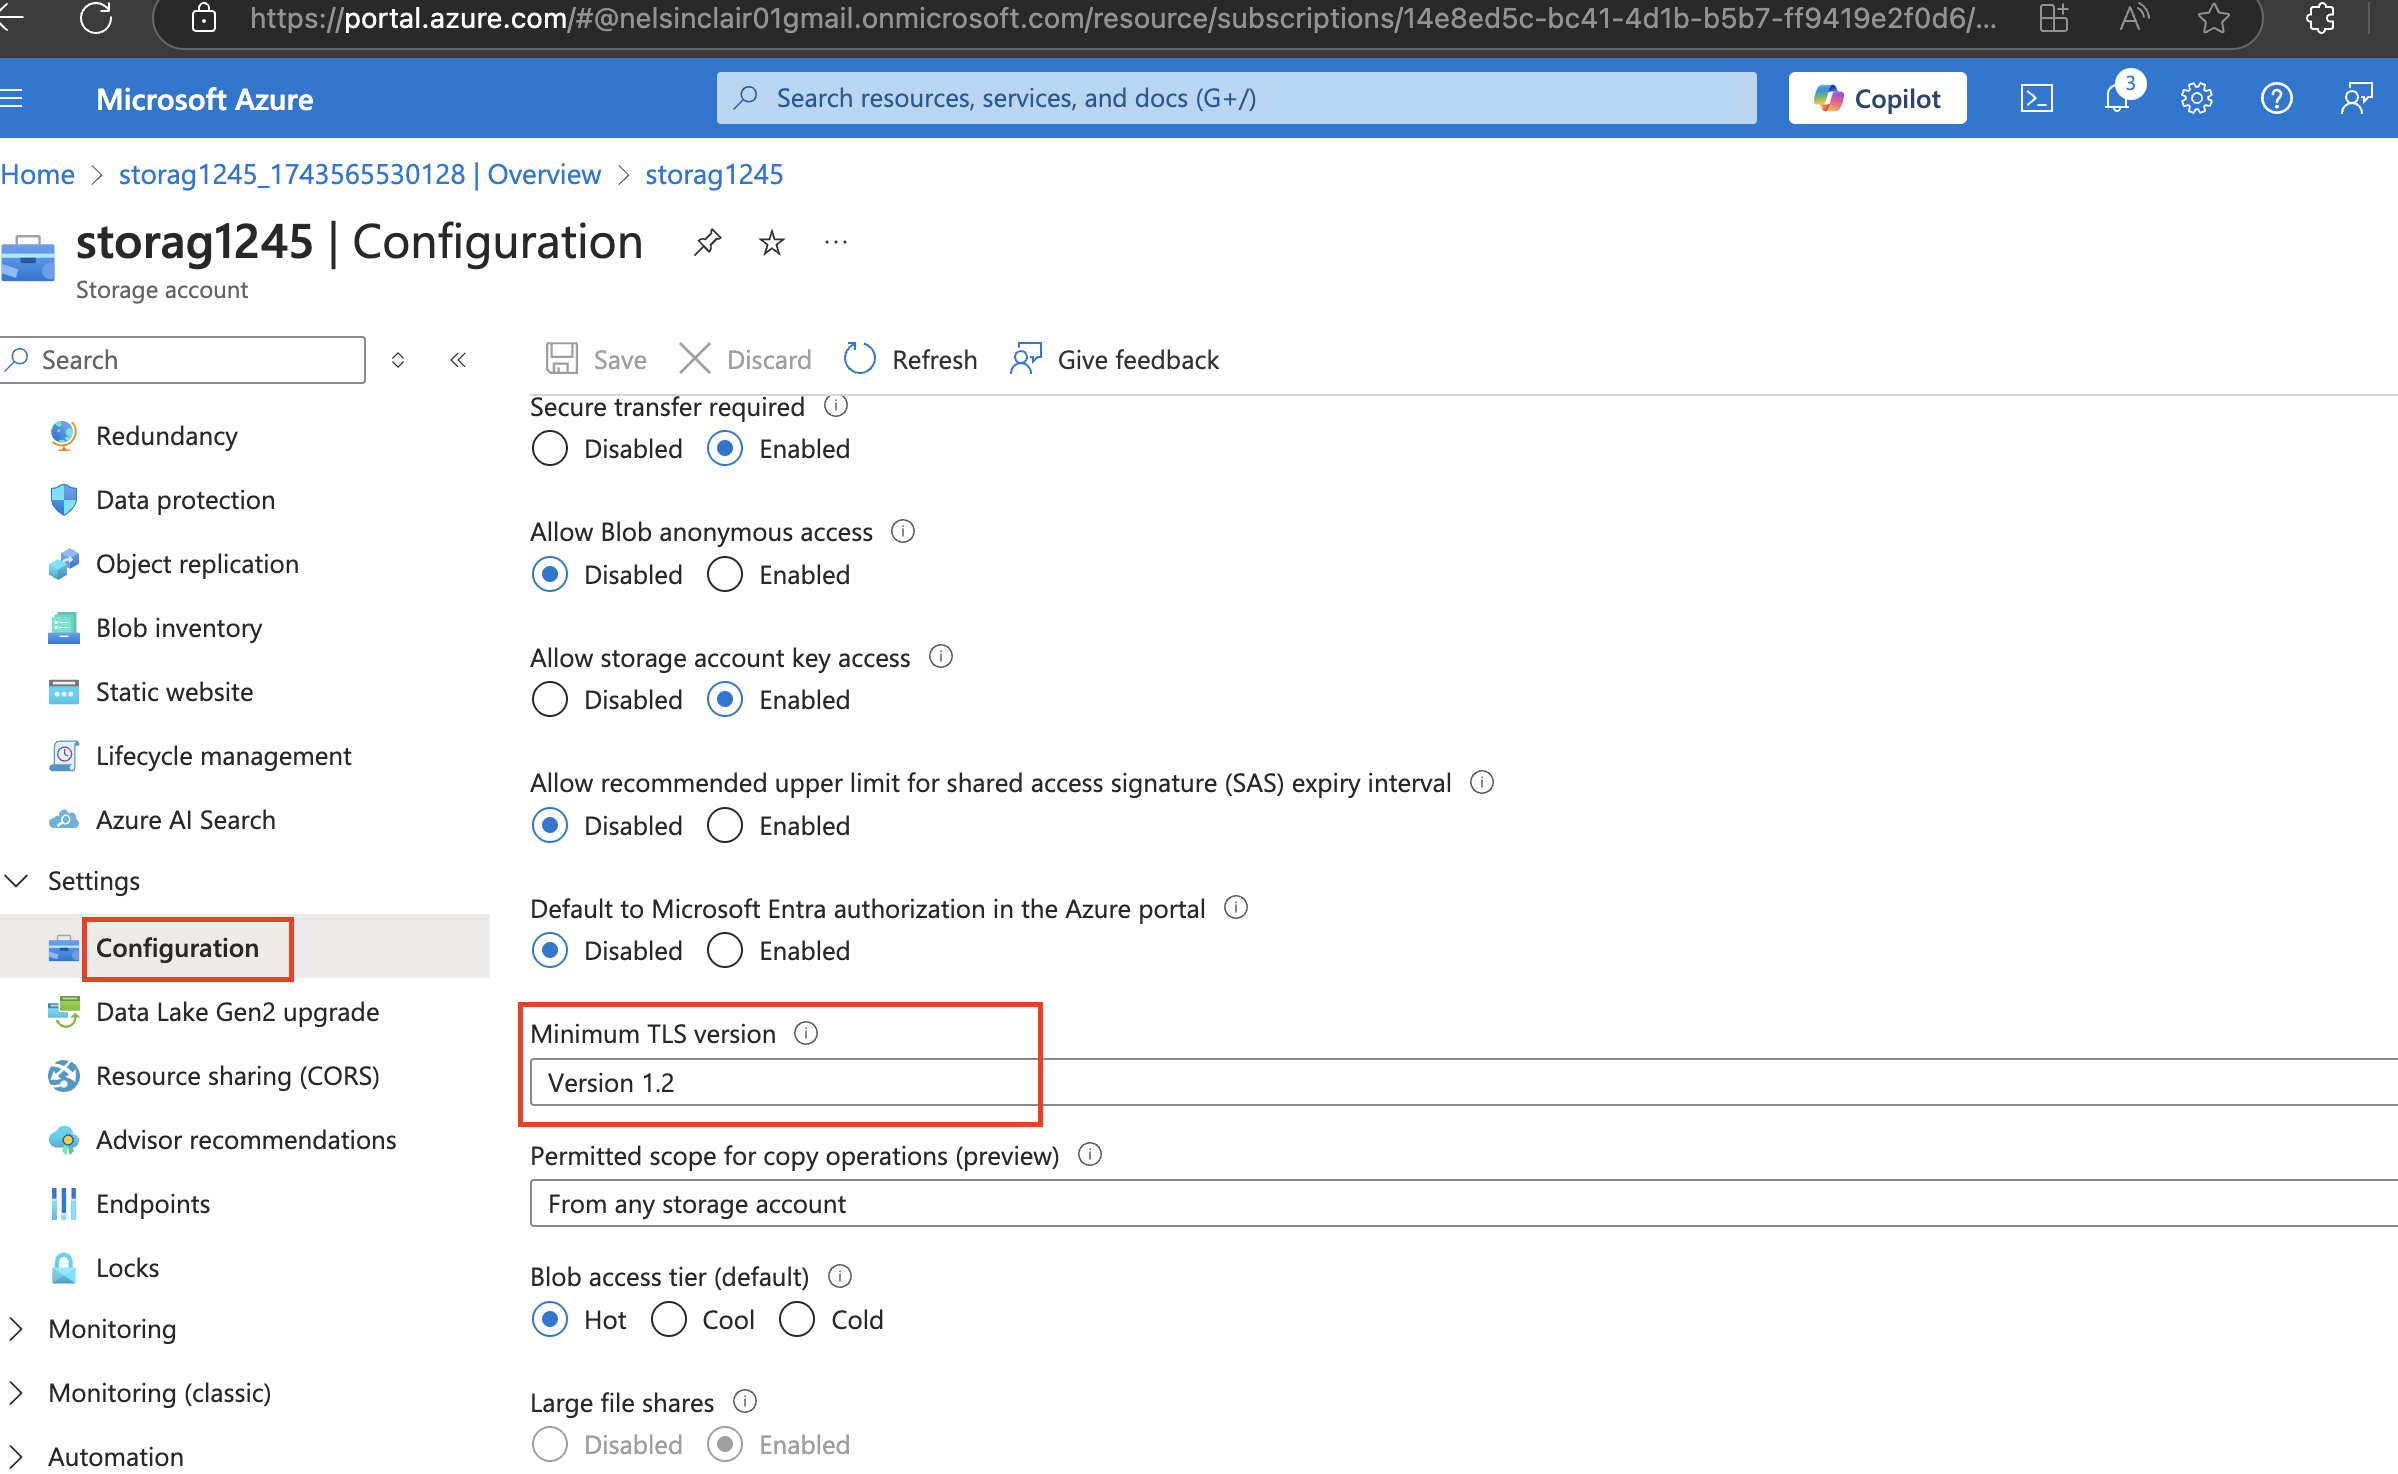
 4.3. Developers would like the storage account to use at least TLS version 1.2.
In the Settings section, select the Configuration Blade.
Ensure the Minimal TLS version is set to Version 1.2.
4.3. Developers would like the storage account to use at least TLS version 1.2.
In the Settings section, select the Configuration Blade.
Ensure the Minimal TLS version is set to Version 1.2.
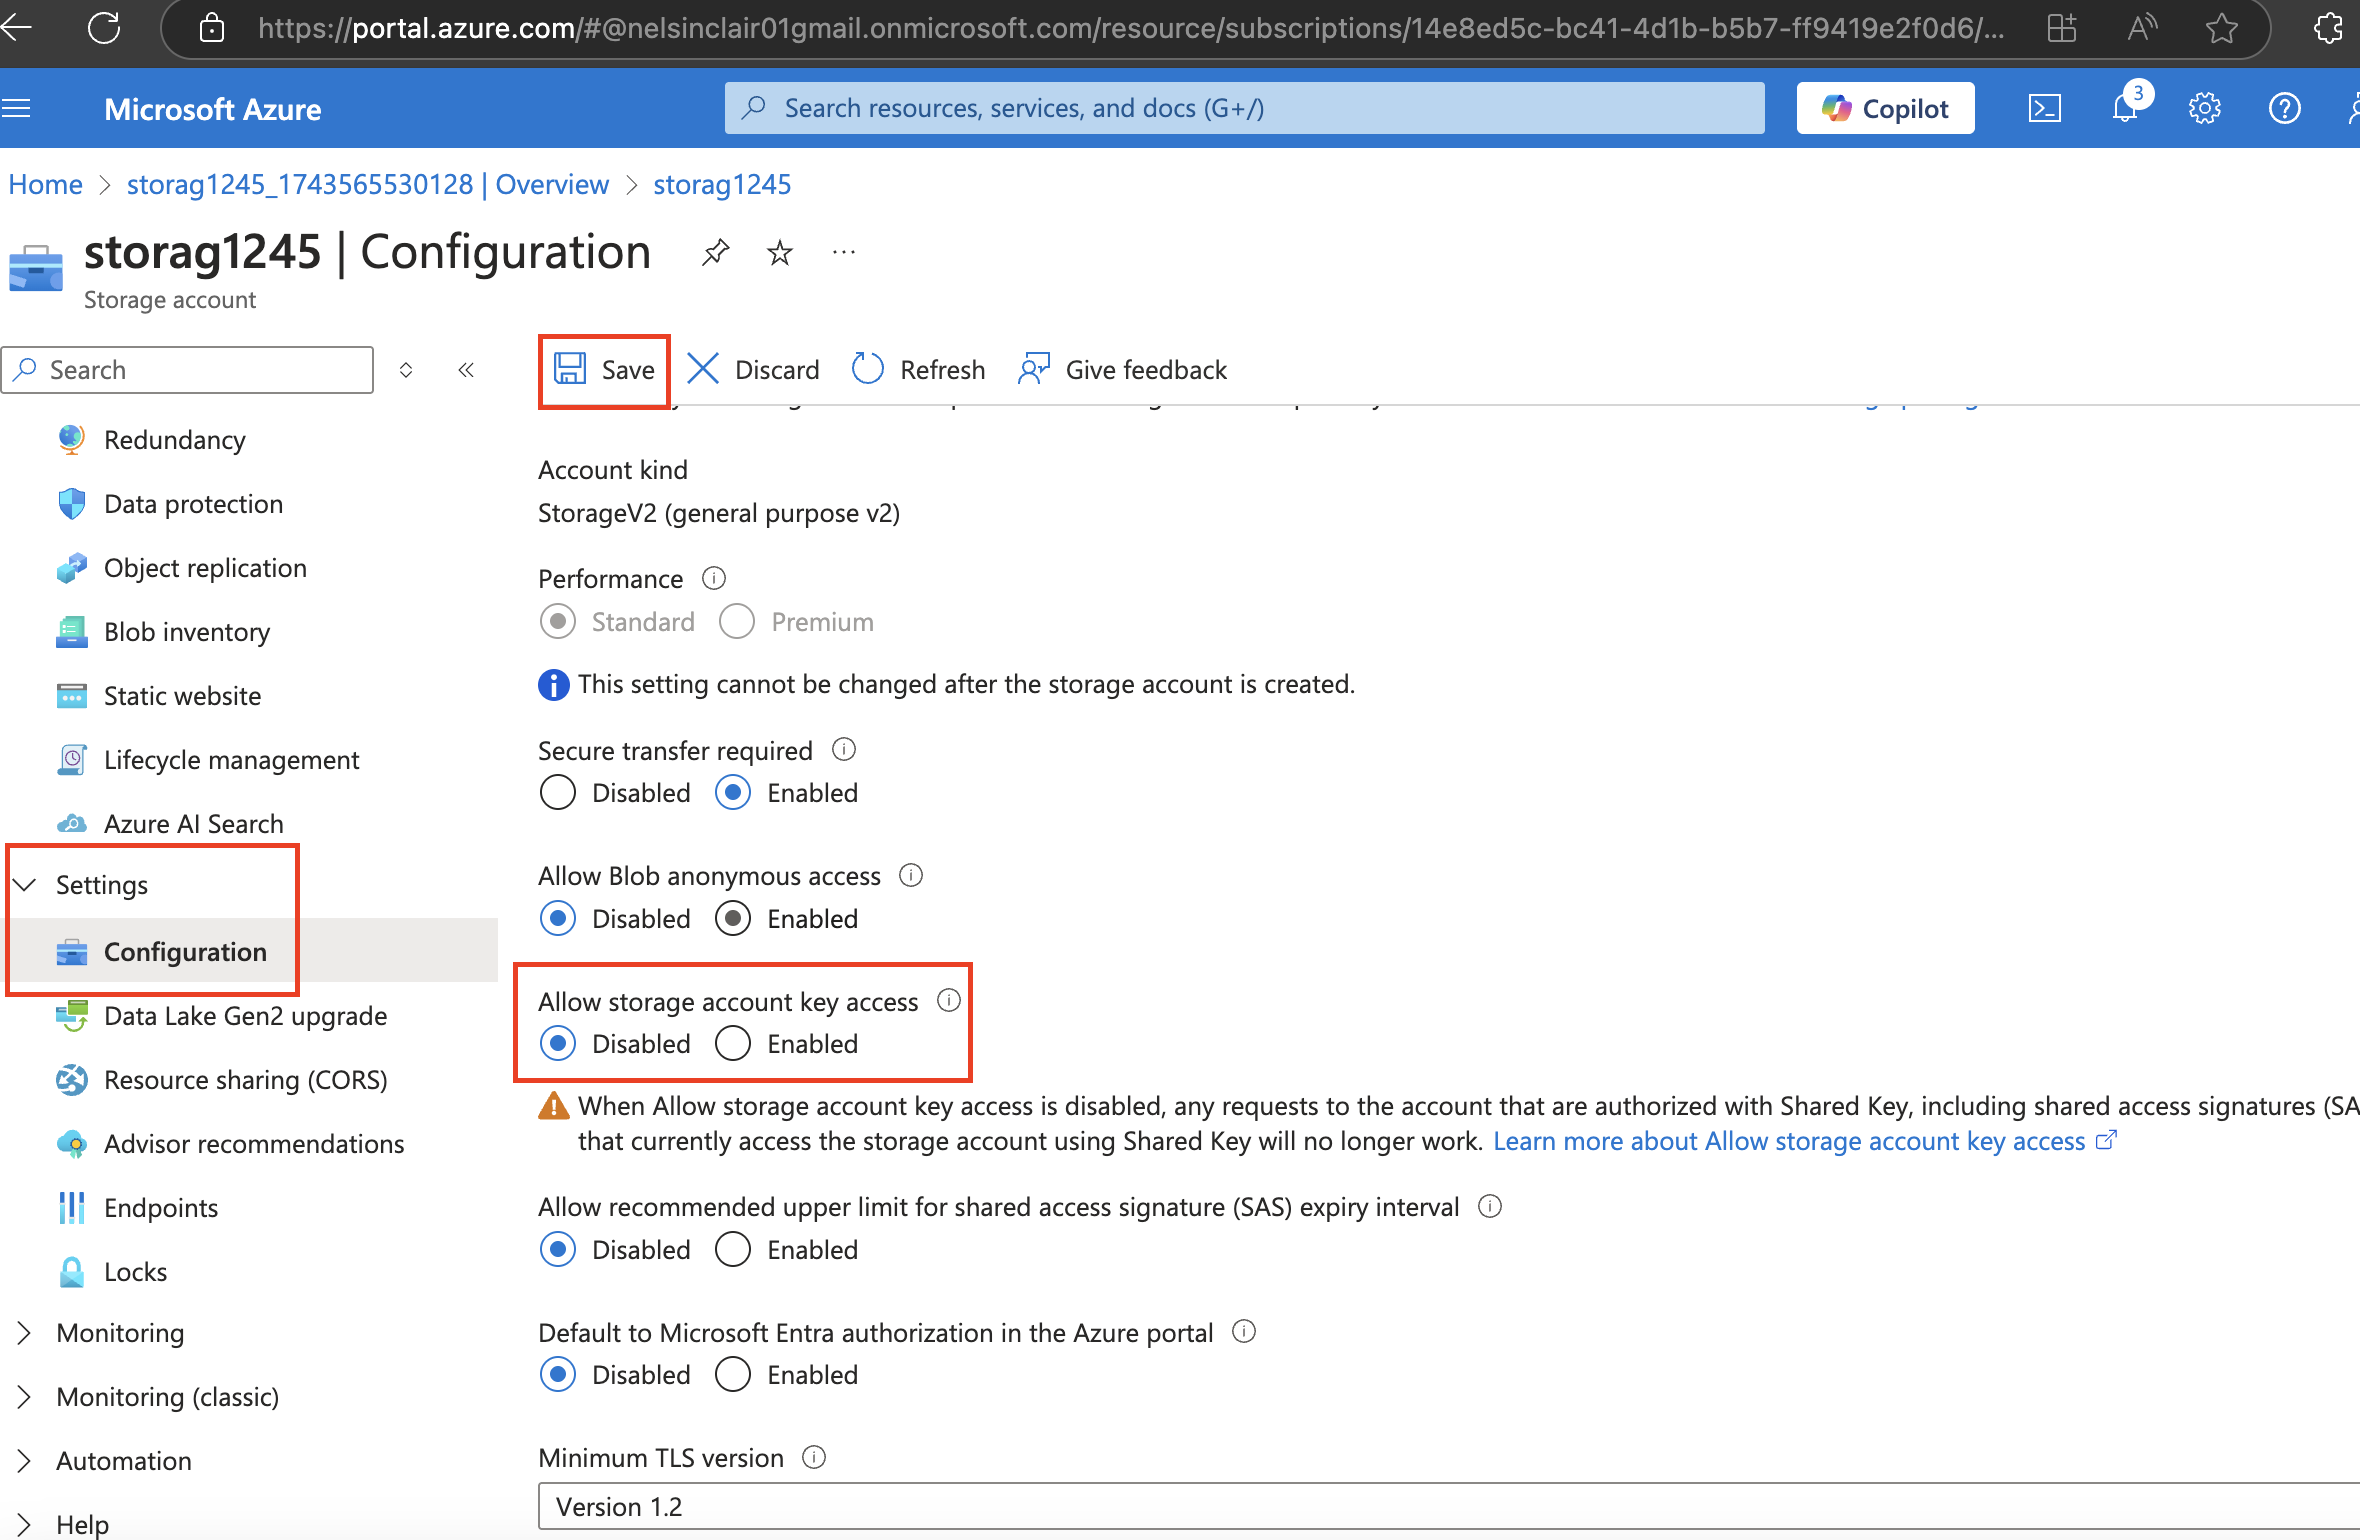
 4.4. Until the storage is needed again, disable requests to the storage account.
In the Settings section, select the Configuration Blade.
Ensure that the Allow storage account key access is Disabled.
Be sure to Save your changes.
4.4. Until the storage is needed again, disable requests to the storage account.
In the Settings section, select the Configuration Blade.
Ensure that the Allow storage account key access is Disabled.
Be sure to Save your changes.
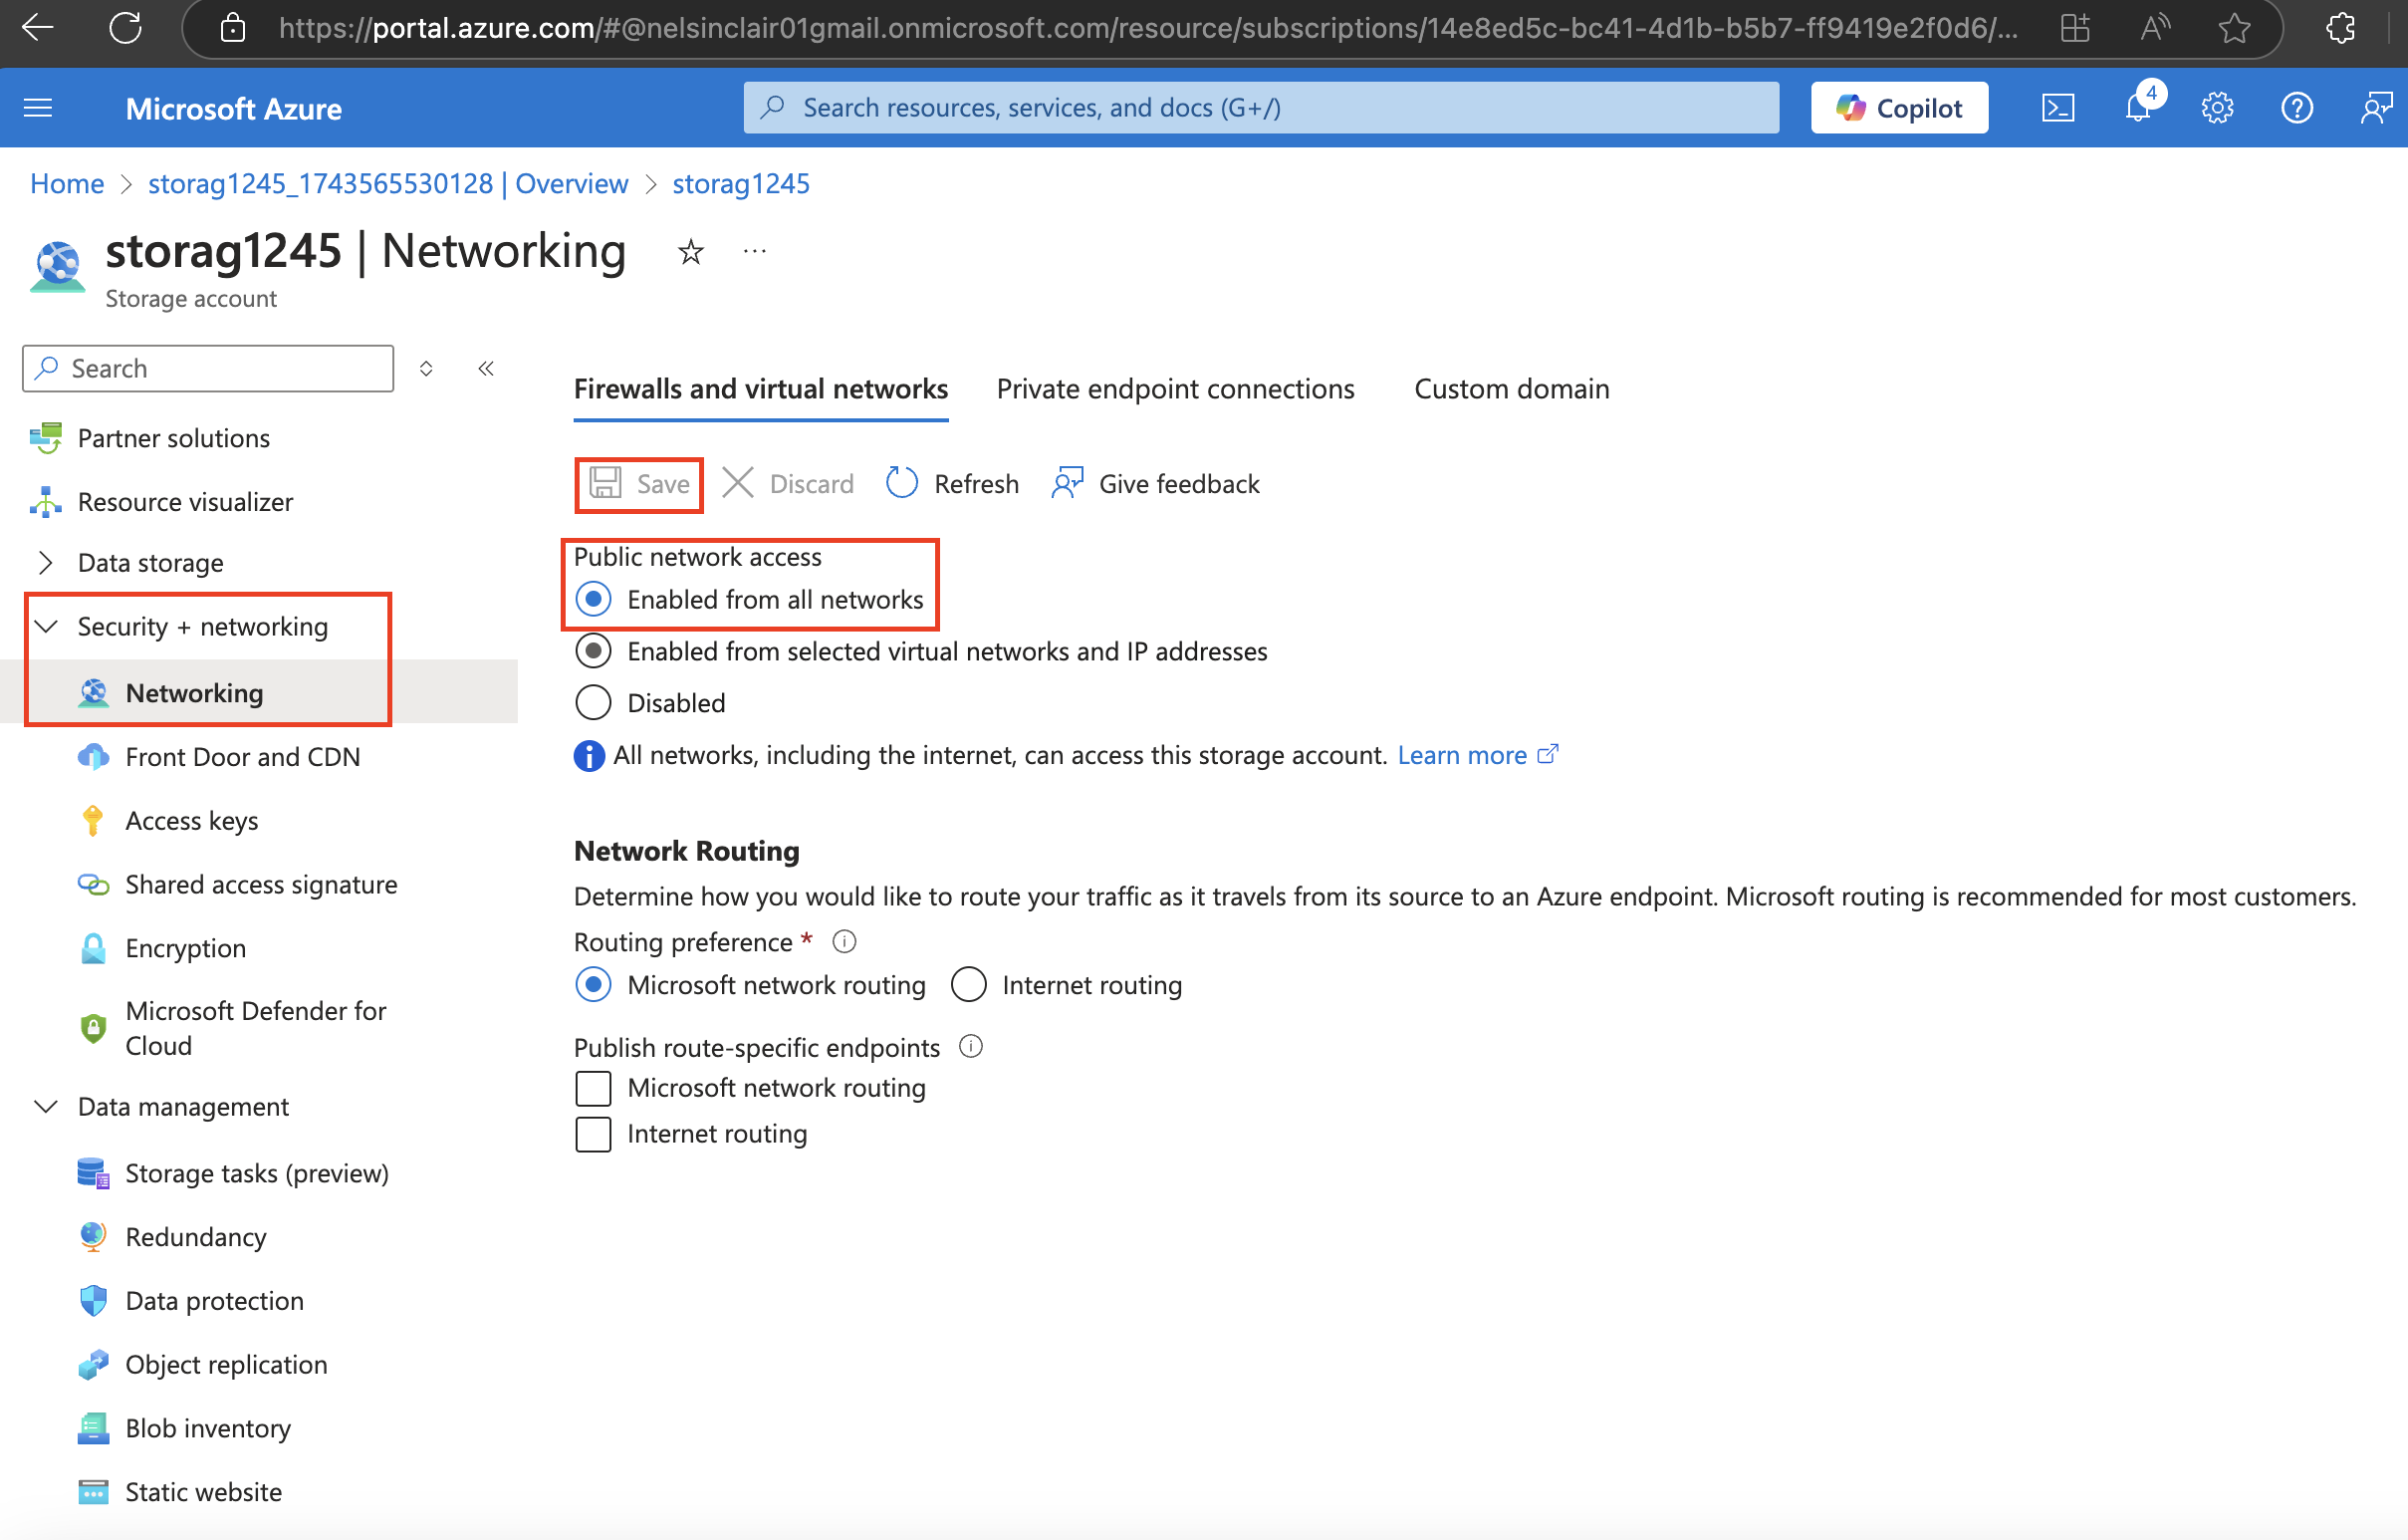
 4.5. Ensure the storage account allows public access from all networks.
In the Security + networking section, select the Networking blade.
Ensure Public network access is set to Enabled from all networks.
Be sure to Save your changes.
4.5. Ensure the storage account allows public access from all networks.
In the Security + networking section, select the Networking blade.
Ensure Public network access is set to Enabled from all networks.
Be sure to Save your changes.
 Conclusion
Following this guide, you've successfully provisioned and configured storage on the Azure portal to support your IT department's testing and training needs. This setup ensures scalability, security, and efficiency, enabling your team to focus on innovation and learning. To align with your organization's evolving requirements, regularly review and optimize your storage solutions.
Conclusion
Following this guide, you've successfully provisioned and configured storage on the Azure portal to support your IT department's testing and training needs. This setup ensures scalability, security, and efficiency, enabling your team to focus on innovation and learning. To align with your organization's evolving requirements, regularly review and optimize your storage solutions.
