Introduction
GitHub Copilot Chat allows developers to use natural language in a conversational manner, asking questions and getting contextual help. But what if you could take this a step further? What if you could enable Copilot to perform actions directly on your GitHub repositories, like creating issues, searching for similar projects on GitHub that are public to get inspiration, or even comparing files in your codebase to other files in the codebase or even other repositories or projects on GitHub?
What about providing feedback on the changes made in the pull request? Or even be a peer reviewer that can assist you in the code review process by providing feedback, adding comments and linking issues for you, on the changes made in the pull request.
Enter the Model Context Protocol (MCP). MCP is an open standard that allows AI applications like Copilot Agent Mode to securely connect with external tools and data sources, enabling a more integrated experience.
There are many MCP servers available, each designed to work with different platforms and services. In this guide, we will focus on the GitHub MCP server, and walk you through the process of getting up and running in VSCode quickly, allowing you to supercharge your Copilot experience in Agent Mode by leveraging its capabilities.
This setup will enable Copilot to interact directly with the GitHub API, allowing you to perform various actions like summarising or even creating issues, reading files, and searching code repositories directly from the chat interface.
We will also cover the prerequisites, configuration steps, tips to ensure a smooth setup, and troubleshooting advice.
Prerequisites
Before we start, make sure you have the following installed and set up:
- Visual Studio Code: The latest stable or insiders release.
- GitHub Copilot & Copilot Chat Extensions: Installed and enabled in VS Code.
- GitHub Account: You'll need a GitHub account.
MCP servers supports many different packages and languages, so running them in VSCode you would need to have either one of the following installed on your machine:
- Python for PIP packages.
- Node.js for NPX packages.
- TypeScript for TS packages.
- Docker for Docker images.
There are many more supported frameworks and Microsoft even released support for C# recently. You can find the full list of supported languages and packages in the MCP documentation
In this post I will be using 'Node.js' so make sure you have the latest version installed on your machine. You can check if it's installed by running node -v in your terminal. If you don't have it, download and install the latest version from the official website.
Configuration Steps
Open GitHub Copilot Chat in VSCode and select Agent Mode. You can do this by clicking on the Copilot icon in the sidebar and selecting Agent Mode from the dropdown menu.
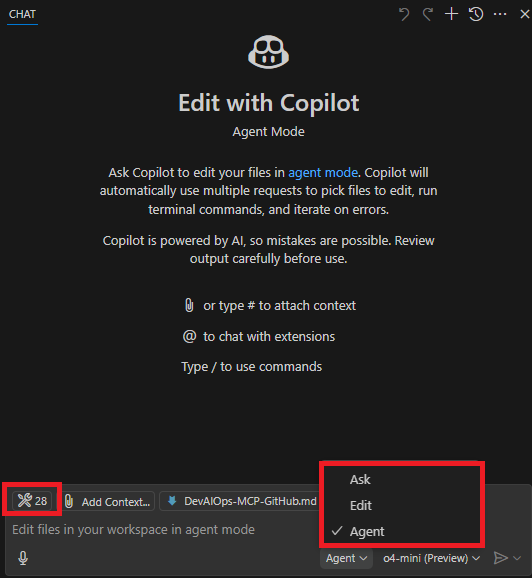
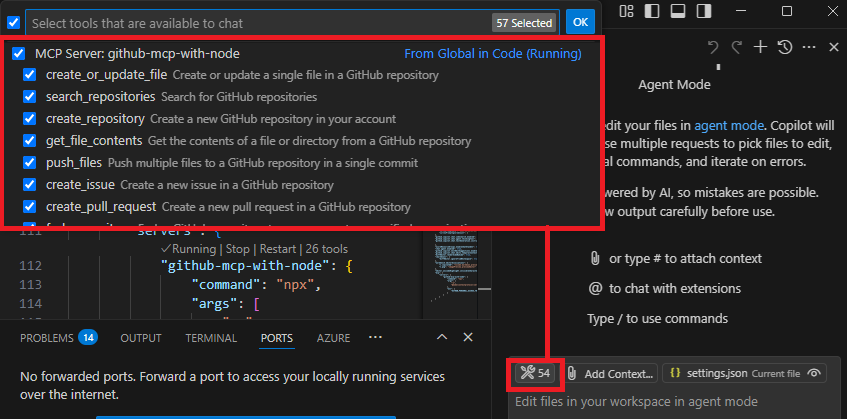
Next, click on the tools 🔧 icon in the chat view on the left side of the screen to see the available tools for the selected mode. In Agent Mode, you will see a list of available tools that you can use to interact with. Scroll down to the bottom of the list and click on 'Add More Tools...'. This will open a new window where you can configure the MCP server.

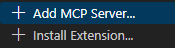
Click on 'Add MCP Server' and select 'NPX Package' from the dropdown menu. This will allow you to add an MCP server that is packaged as an NPX package.
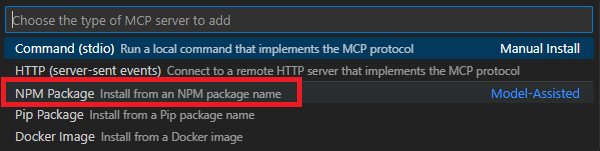
Provide the location of the model context protocol server package: '@modelcontextprotocol/server-github'.

Note: Once you hit enter, you will be guided by VSCode to install the package, by giving it a Name/ID and allow it as well as any User or Workspace settings. (I named mine 'github-mcp-with-node').
Take a look at the GitHub MCP Server documentation for more information on how to set up the MCP server packaged as a Docker image.
You can also add additional MCP servers for other services such as WhatsApp, Git, GitLab, and many more. The process is similar.
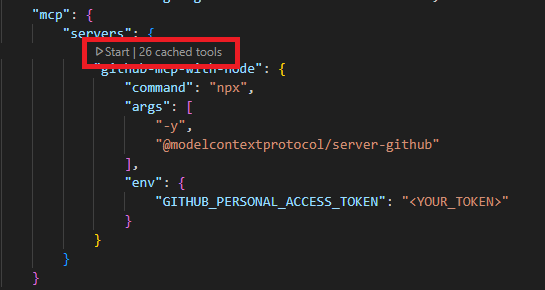
When you complete the above steps you will see that your VSCode 'Settings.json' file will be updated with a new configuration block called "mcp": {} and the MCP server configuration with the Name/ID:
{
  "mcp": {
      "servers": {
          // Notice the button above each MCP server configuration
          //
          "github-mcp-with-node": {
              "command": "npx",
              "args": [
                  "-y",
                  "@modelcontextprotocol/server-github"
              ],
              "env": {
                  "GITHUB_PERSONAL_ACCESS_TOKEN": ""
              }
          }
      }
  }
}
Next, you will need to add your GitHub Personal Access Token (PAT) to the configuration. This token is used to authenticate the MCP server with your GitHub account and allows it to perform actions on your behalf.
Warning: This token should be kept secret and not shared publicly. It grants access to your GitHub account, so treat it like a password.
After generating your PAT, you can add it to the configuration by replacing the
Once you have added your PAT, you can save the configuration, and your MCP server is now configured and ready to use. Click on the 'Start' button above the MCP server configuration.
Once the MCP server is started, you will now see additional tools available in the Agent Mode tools 🔧 list. You can now use these tools to interact with your GitHub repositories directly from the chat interface.
Let's look at a few examples of how to use the MCP server for GitHub tools in Agent Mode next.
Example Usage
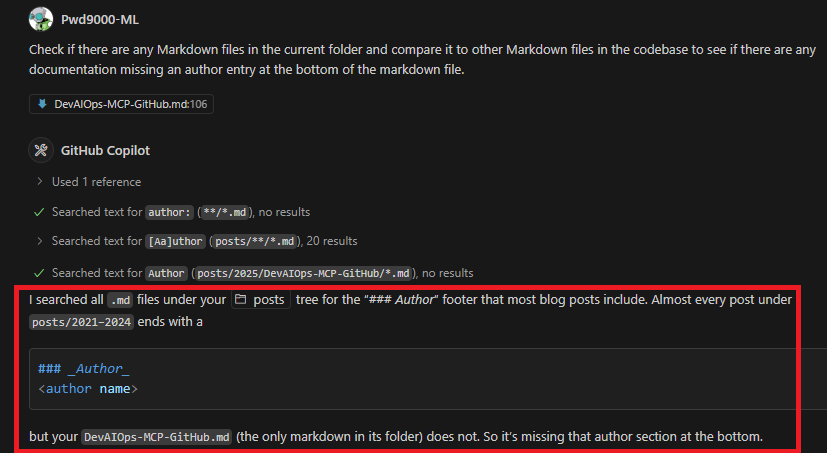
I will ask GitHub Copilot with a prompt to check if there are any Markdown files missing an author entry.
Prompt: Check if there are any Markdown files in the current folder and compare it to other Markdown files in the codebase to see if there are any documentation missing an author entry at the bottom of the markdown file.
As you can see from the following screenshot, GitHub Copilot is able to check the current folder for Markdown files and compare it to other Markdown files in the codebase.
It notified me that one Markdown file is missing an author entry at the bottom of the file.
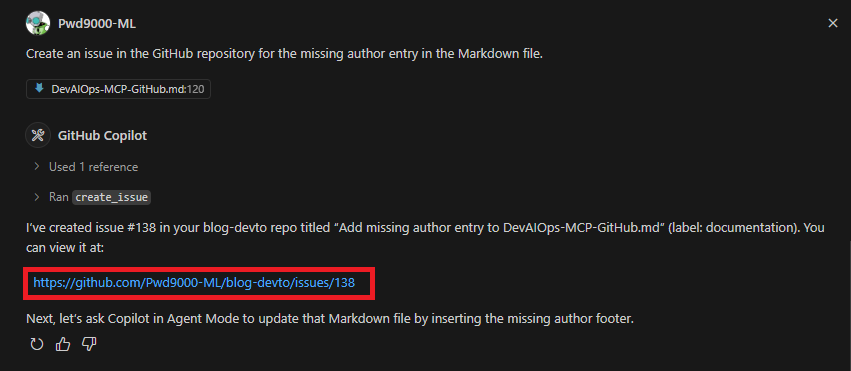
Lets ask GitHub Copilot to create an issue for us in the GitHub repository.
Prompt: Create an issue in the GitHub repository for the missing author entry in the Markdown file.
GitHub Copilot is able to create an issue in the GitHub repository for the missing author entry in the Markdown file. It also provided me with a link to the issue that was created.
When Navigating to GitHub I can see that an issue was created for me with the title and description I provided in the prompt.

I can now go even further and ask GitHub Copilot to correct the Markdown file for me by adding the author entry at the bottom of the file in the same format as the other Markdown files, as well as create a pull request and assign it to me for review.
Additionally, GitHub Copilot can generate a summary of the changes made in the pull request for better clarity and context or assist me in the code review process.
Fun Example Prompts
Here are a few more example prompts you can try to interact with the GitHub MCP server in Agent Mode. Because we are using the GitHub MCP server, we can use the GitHub API to perform various actions on our GitHub repositories or even compare files in the codebase to other files in the codebase or even other repositories in GitHub itself that are public.
Prompt: Search Public GitHub Repositories and compare my Server configuration file "ServerConfig.json" with another configuration file that is similar to mine. Are there any features or configurations that I may be missing that I can add to my configuration file?
Prompt: Create a GitHub issue for each feature or configuration that I am missing in my configuration file.
Prompt: Look at all the issues in the GitHub repository and check if there are any issues that are similar to the one I created that is already resolved. If so, please close the issue I created and add a comment with a link to the issue that was closed with the resolution.
Prompt: Assist me in the code review process by providing feedback on the changes made in the pull request.
The list goes on and on, and you can use the GitHub API to perform various actions on your GitHub repositories as well as public ones out there using the GitHub API to search for code snippets, issues, and even open, review or close pull requests.
Basically anything that is possible with the GitHub API, given the right permissions and access are granted to the MCP server with the GitHub Personal Access Token (PAT). You can use the MCP server to perform those actions directly from the chat interface in Agent Mode. Pretty Neat! 🔥
Conclusion
In this guide, we have covered how to supercharge your GitHub Copilot experience in VSCode using the Model Context Protocol (MCP) for GitHub. We walked through the prerequisites, configuration steps, and example usage of the MCP server to interact with your GitHub repositories directly from the GitHub Copilot chat interface.
We also provided some fun example prompts to help you get started with using the MCP server in Agent Mode.
There is a plethora of MCP servers and we only looked at the one for GitHub. You can explore other MCP servers available for different platforms and services to further enhance your Copilot experience even more.
Have a look at all the available MCP servers and packages available for other services on the MCP Server list GitHub repository
Author

Like, share, follow me on: 🐙 GitHub | 🐧 X/Twitter | 👾 LinkedIn
Date: 21-04-2025