Introduction
AWS CloudFront is widely known for improving web performance, reducing latency for global users, and enhancing security with tight integrations AWS WAF and Shield Advanced. Many AWS Cloud Engineers and DevOps professionals associate it primarily with delivering static content from Amazon S3 websites, but its potential goes far beyond that.
In this guide, I’ll walk you through an innovative use case—leveraging AWS CloudFront to optimize and secure applications running on-premises. If you manage a hybrid environment or entirely on-premise infrastructure and need to enhance performance for global users or further tighten the security of your application by protecting it against DDOS and Vulnerabilities this solution is for you.
The Challenge
If your applications are hosted within your private corporate network, accessing them via HTTPS can be a headache. You might encounter errors like ERR_SSL_VERSION_OR_CIPHER_MISMATCH due to DNS issues and SSL/TLS misconfigurations.
For example, I deployed multiple applications within my private network (192.168.10.0/24) using Nginx as a load balancer. While external users could access the application seamlessly on the secure channel (https), internal users faced SSL-related issues, despite setting up a private DNS.
After extensive research with many read on AWS Whitepapers, I found an efficient solution:
CloudFront with On-Premises Web Servers
By integrating AWS CloudFront with an on-premises web server, we can achieve:
- Enhanced security with CloudFront’s native DDoS protection
- Global performance optimization
- Seamless HTTPS support
- Reduced operational overhead
Prerequisites
Before you proceed with the setup, ensure the following prerequisites are met:
- SSL Certificate in AWS ACM: You must generate an SSL certificate in AWS Certificate Manager (ACM) for your domain in us-east-1.
-
Public DNS Mapping: The origin domain name (
analytics-origin.example.com) should already be mapped and pointing to the public IP ofanalytics.example.comin a DNS manager such as AWS Route 53, GoDaddy, Namecheap etc. - Network Configuration: Ensure that the firewall and security group rules allow inbound connections from CloudFront IP ranges to your on-premise server.
Step-by-Step Implementation
In my case I have already configured NGINX as Load balancer
1. Configure Nginx as a Load Balancer
If you are using Nginx to route traffic to an internal application, set up your configuration as follows:
server {
    listen       443 ssl http2;
    listen       [::]:443 ssl http2;
    server_name  analytics.example.com;

    ssl_certificate "/etc/nginx/ssl/public.example.crt";
    ssl_certificate_key "/etc/nginx/ssl/private.example.com.key";
    ssl_session_cache shared:SSL:5m;
    ssl_session_timeout  10m;
    ssl_protocols TLSv1.2 TLSv1.3;
    ssl_ciphers 'ECDHE-ECDSA-AES128-GCM-SHA256:ECDHE-RSA-AES128-GCM-SHA256:ECDHE-ECDSA-AES256-GCM-SHA384:ECDHE-RSA-AES256-GCM-SHA384:DHE-RSA-AES128-GCM-SHA256:DHE-RSA-AES256-GCM-SHA384';
    ssl_prefer_server_ciphers on;

    add_header Strict-Transport-Security "max-age=31536000; includeSubDomains" always;
    proxy_set_header Host $host;
    proxy_set_header X-Real-IP $remote_addr;
    proxy_set_header X-Forwarded-For $proxy_add_x_forwarded_for;
    proxy_set_header X-Forwarded-Proto $scheme;
    ignore_invalid_headers off;
    client_max_body_size 100m;
    proxy_buffering off;
    proxy_request_buffering off;

    location / {
        proxy_buffer_size          128k;
        proxy_buffers              4 256k;
        proxy_busy_buffers_size    256k;
        client_max_body_size       50M;
        proxy_pass  http://192.168.10.68:3000;
    }
}
2. Configure AWS CloudFront
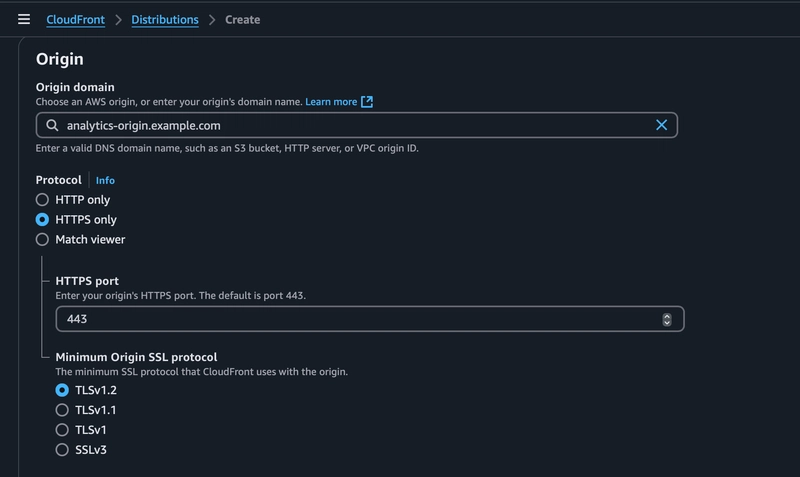
Origin Settings
-
Origin Domain Name:
analytics-origin.example.com(must already be mapped and pointing to the public IP ofanalytics.example.comin a DNS manager like AWS Route 53, GoDaddy, etc.)
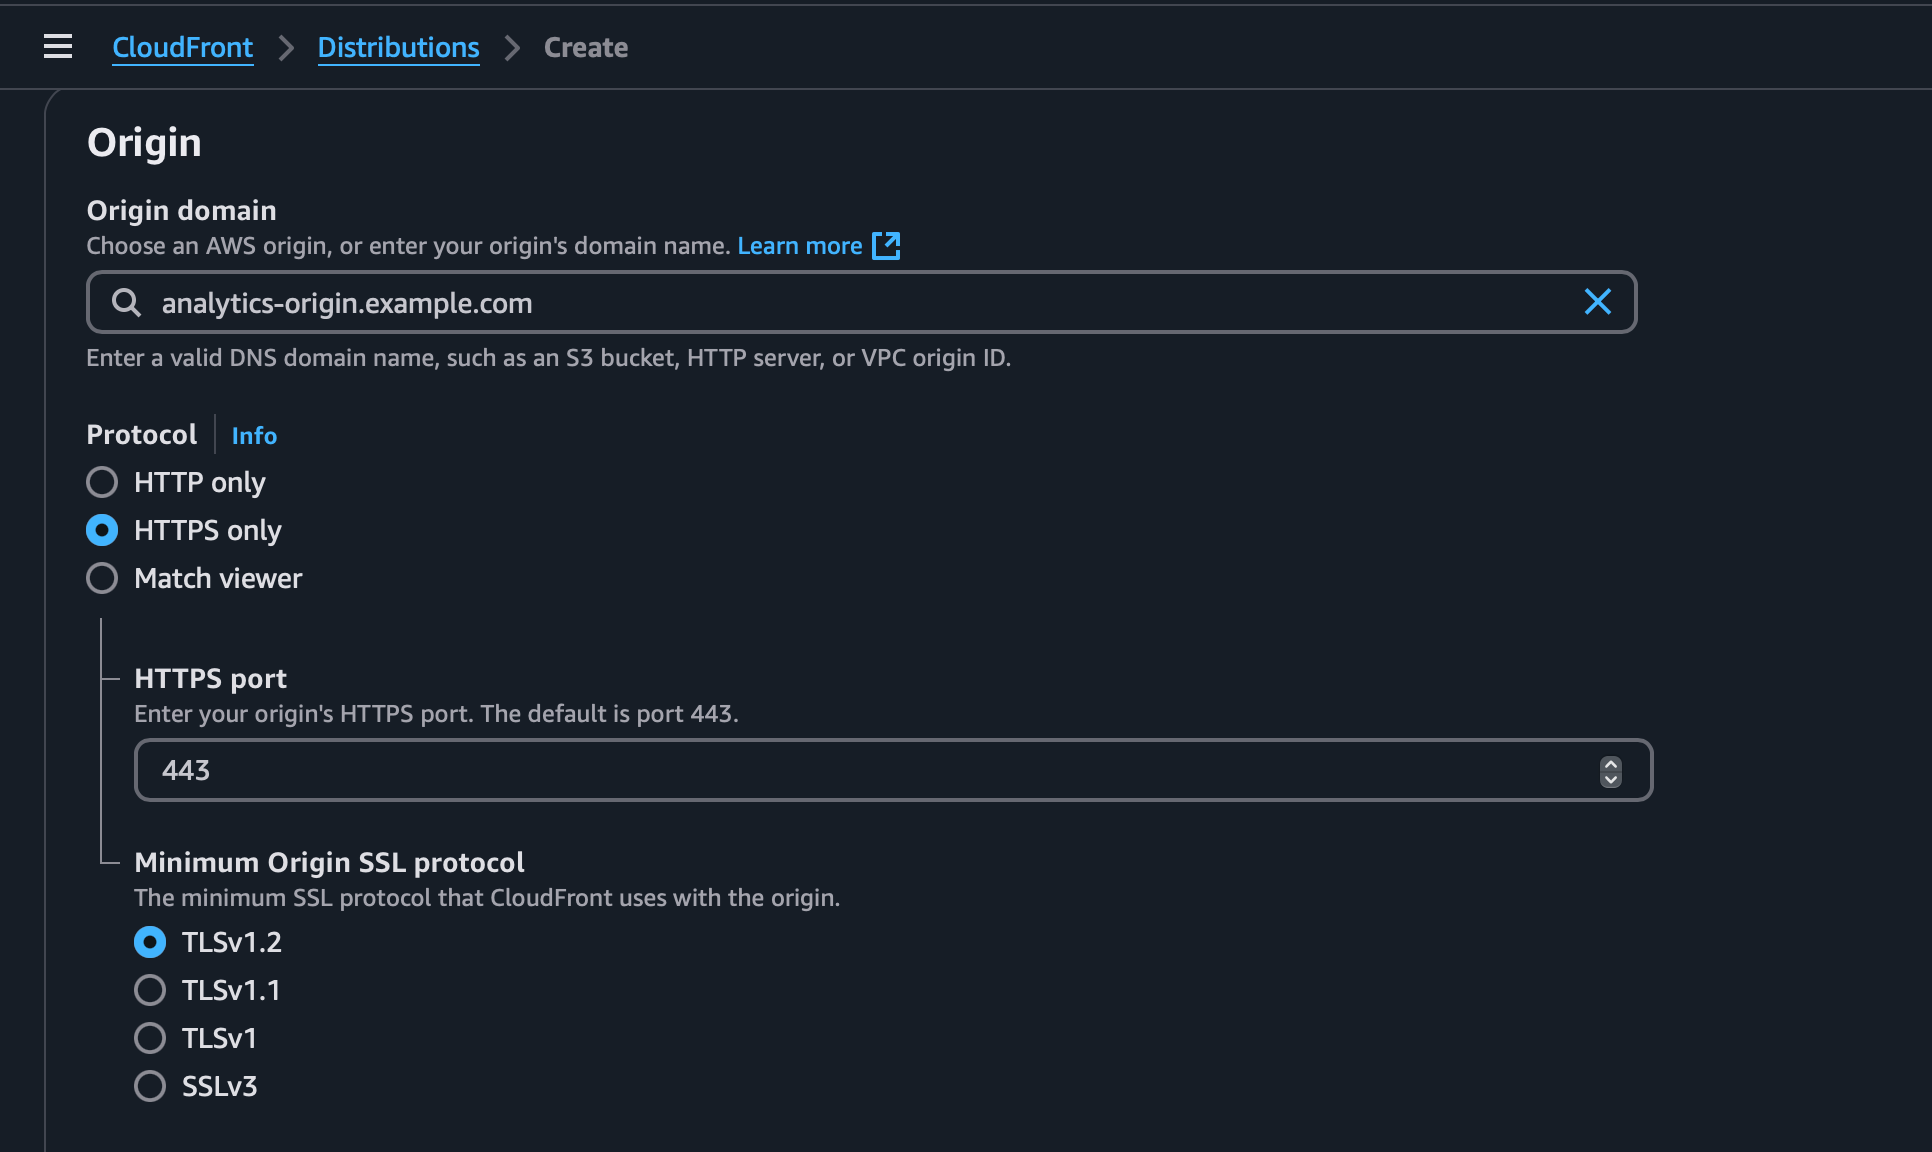
- Origin Protocol Policy: HTTPS Only
- Origin Port: 443
- Origin Path: Leave blank
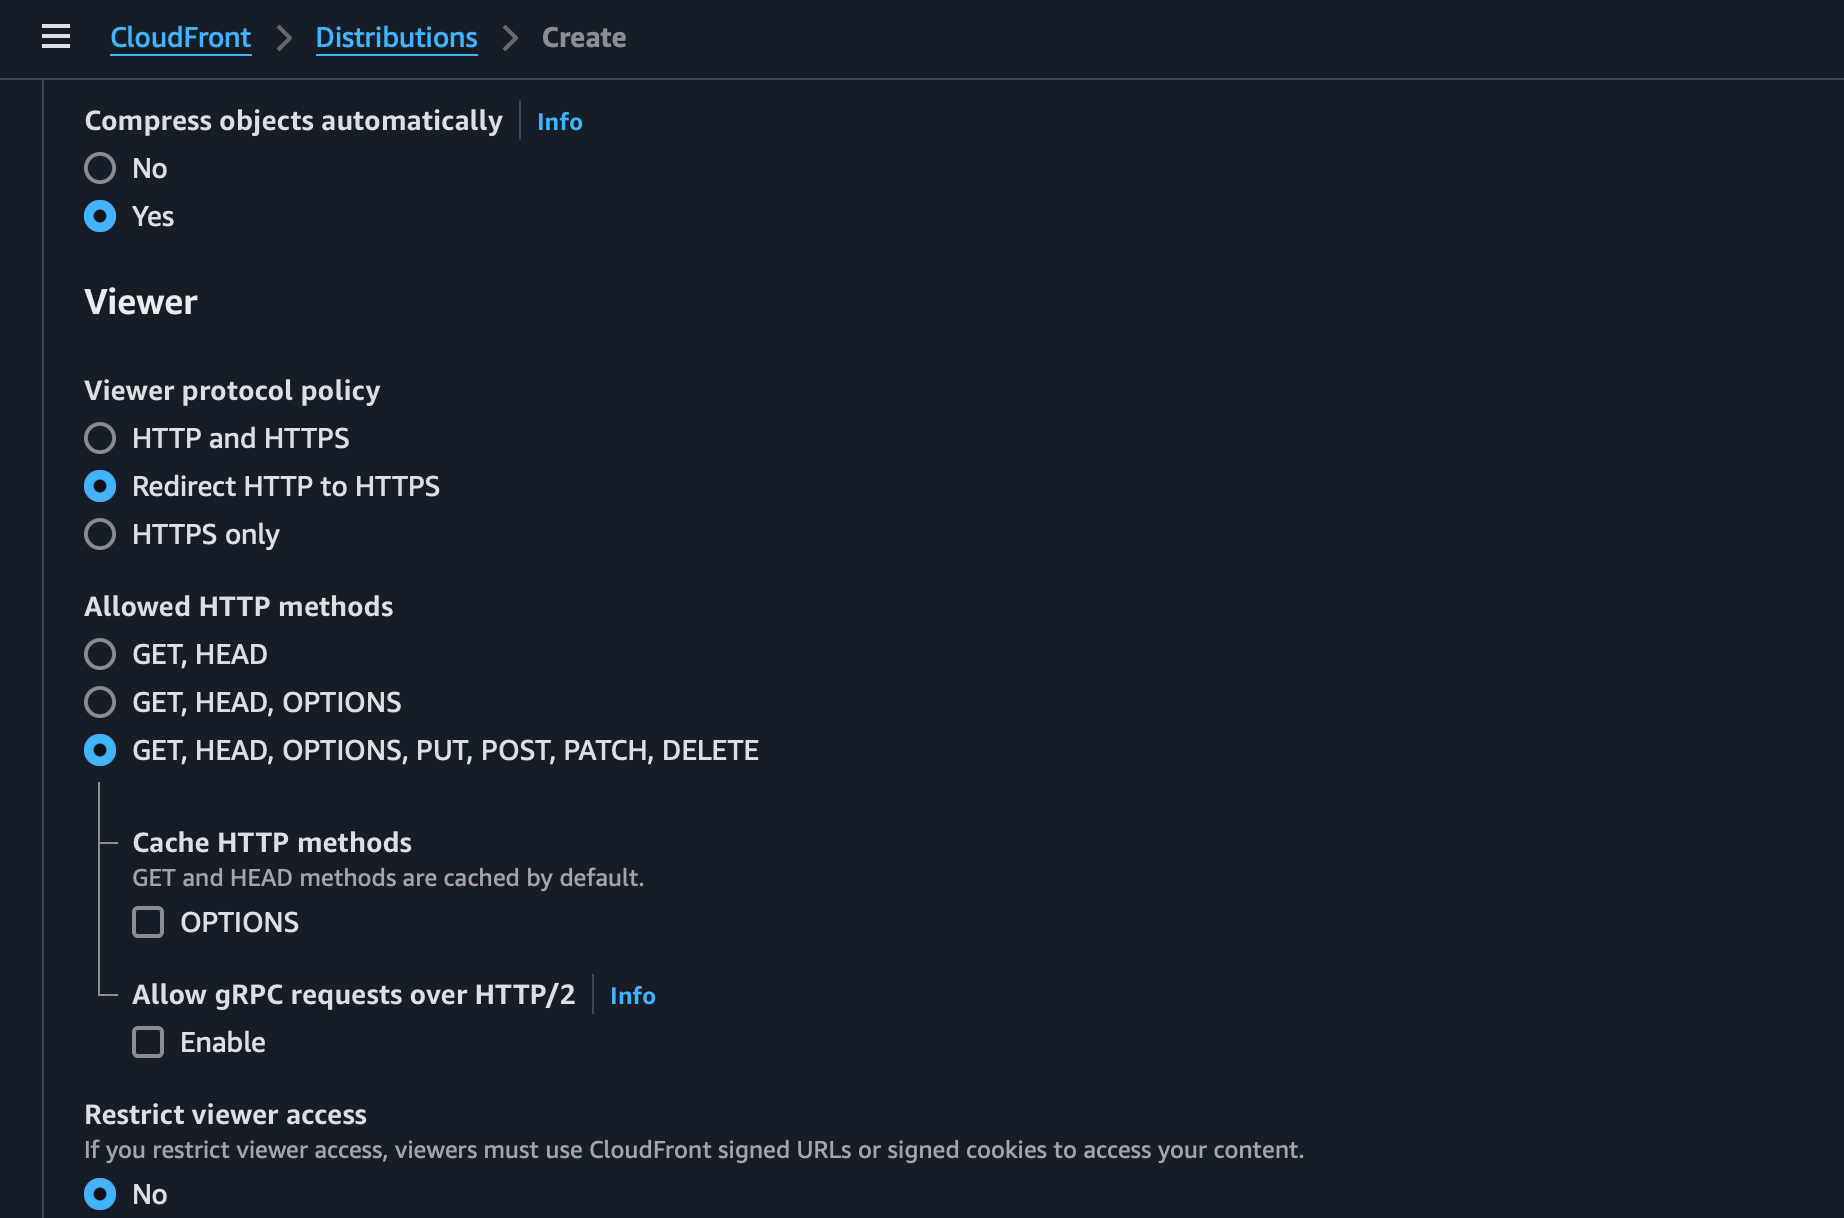
Viewer Settings
- Viewer Protocol Policy: Redirect HTTP to HTTPS
- Allowed HTTP Methods: GET, HEAD, OPTIONS, PUT, POST, PATCH, DELETE
-
Cache Policy: Use
CachingDisabled(recommended for dynamic content)
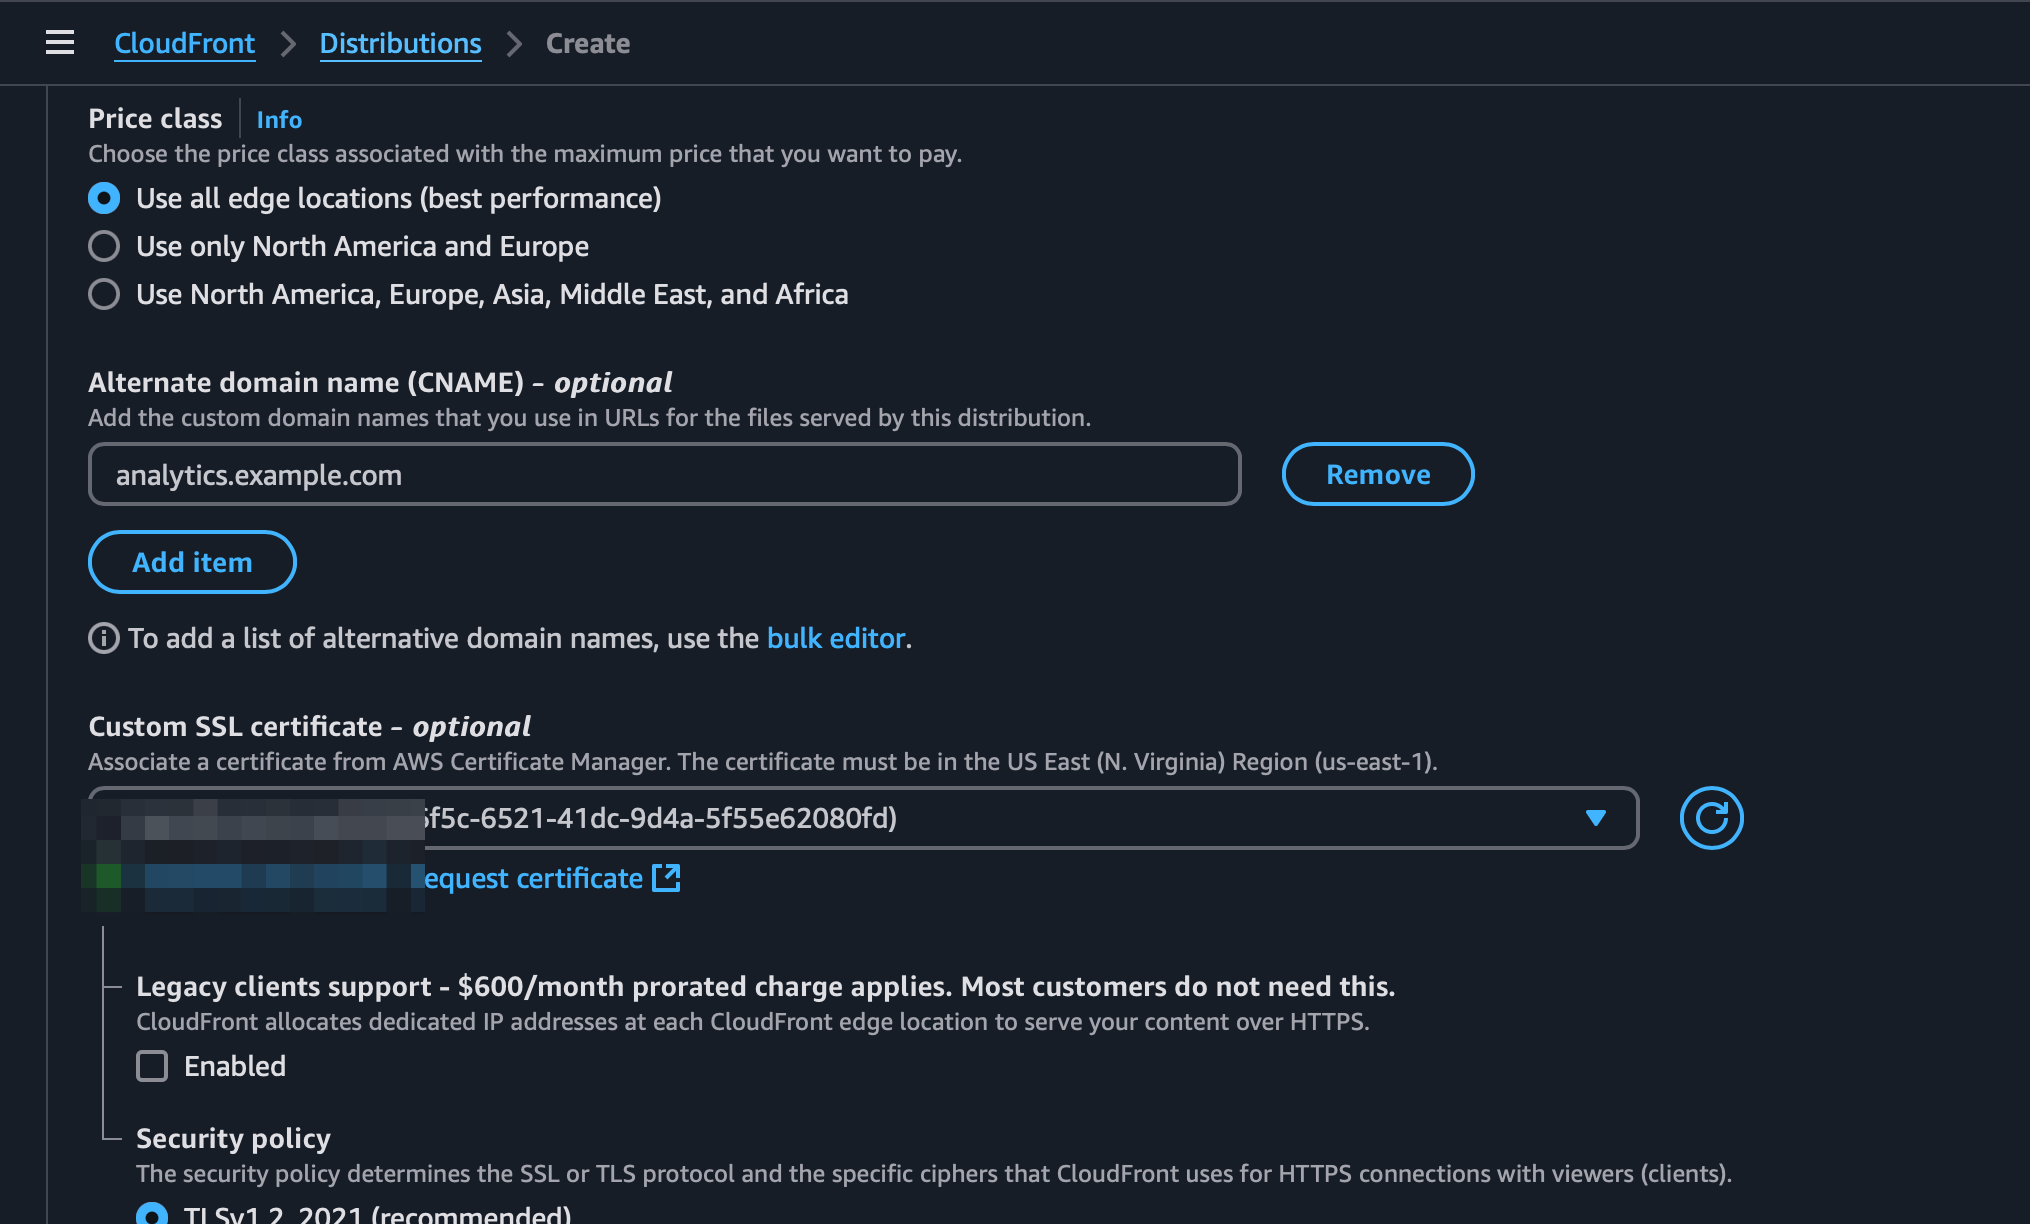
Additional Configuration but Compulsory
-
Alternate Domain Names (CNAMEs):
analytics.example.com - SSL Certificate: Use AWS-managed certificate for your domain
3. Configure DNS Records
Create a CNAME record in your DNS provider or Alias record in Route53:
-
Name:
analytics.example.com -
Value: Your CloudFront distribution domain (
*.cloudfront.net)
4. Network Considerations
- Allow traffic from CloudFront IP ranges in your firewall/security group.
- Restrict direct access to
Your Public IP(your on-prem server's public IP). - Ensure CloudFront can reach
Your Public IP.
5. Testing and Validation
- ✅ Verify DNS resolution for
analytics-origin.example.com - ✅ Check CloudFront distribution status
- ✅ Test application access at
https://analytics.example.com - ✅ Validate functionality
- ✅ Review Nginx and CloudFront logs
Conclusion
CloudFront isn’t just for static content—it’s a powerful tool for accelerating and securing on-prem applications. By following this setup, you can:
- Improve latency for global users
- Secure on-premise applications using AWS-managed SSL/TLS
- Leverage AWS’s DDoS protection and WAF
If you found this guide helpful, drop a comment below or share your experience integrating CloudFront with on-premise servers! 🚀